SlideShare a Scribd company logo
1 of 17
Download to read offline
WORKSHOP MANUAL
For Models
ERP/CI6-2OATF
Copies of this and other publications for this range of lift trucks are available.
For details contact Your Local Dealer.
For Service & Parts-Contact
Authorized Dealer
Part No. 5070385-01 @May 1995
EXPLANATION OF TRUCK MODEL CODE
A - Premium
B - Standard
-POWER
E - Electric
E R P 1 8 A T F E 48 V 2084
R - Sit Down Rider
TYRES
P - Pneumatic
C - Cushion
RATED CAPACITY (in kg x 100)
r 16
L
LMAST CLOSED HEIGHT(mm)
MAST TYPE
V -Two Stage Limited Free Lift
F -Two Stage Full Free Lift
E -Three Stage Full Free Lift
L
-VOLTAGE
48 Volts
-PLANT SOURCE
E - Europe
-SERIES CODE
A, B, C etc.
-MODEL
T - Three Wheel FWD
R - Three Wheel RWD
This Maintenance Manual is divided into major sections which are listed on this
page. Quick referenceto these sections can be made by placingthe rightthumb on
the tab ofthe desired section, bending the book back andthumbing the pages to the
corresponding tab.
1
SECTl0NS
OPERATING INSTRUCTIONS
2 GENERAL TRUCK AND LUBRICATION
3 ELECTRICAL SYSTEM
4 DRIVE UNIT
5 BRAKE SYSTEM
6 TRAIL AXLE AND STEERING SYSTEM
7 HYDRAULIC SYSTEM
a MAST
9 BAlTERY AND CHARGING SYSTEM
10 USER SUPPORT INFORMATION
11 ALPHABETICAL INDEX
e
e
e
e
e
e
e
e
e
e
e
e
e
e
SAFETY PRECAUTIONS
MAINTENANCE AND REPAIR
When lifting parts or assemblies, make sure that
all slings,chains, or cables are correctlyfastened
and that the load being lifted is balanced. Make
sure that the crane, cables, and chains have the
capacity to support the weight of the load.
Do not lift heavy parts by hand. Use a lifting
mechanism.
Wear safety glasses.
DISCONNECT THE BATTERY CONNECTOR
before doing any maintenance or repair on
electric lift trucks.
Always usecorrect blocksto preventthe unitfrom
rollingor falling. See “Howto Putthe LiftTruck on
Blocks” in the OPERATOR’S MANUAL or
SECTION 2, GENERAL TRUCK AND
LUBRICATION.
Keepthe unitandworkingareacleanandinorder.
Use the correct tools for the job.
Keep the tools clean and in good condition
Always use YALE APPROVED parts when
making repairs.Replacementparts must meet or
exceed the specifications of the original
equipment manufacturer.
Make sure that all nuts, bolts, circlips, and other
fasteningdevicesare removedbeforeusingforce
to remove parts.
Always fasten a DO NOT OPERATE sign to the
controls of the unit when making repairs or if the
unit needs repairs.
Make sure you follow the DANGER, WARNING,
and CAUTION notes in the instructions.
Wear a rubberapron,gloves, boots, and goggles
or a face shield when doing maintenance on
batteries.
Batteries generate hydrogen gas when they are
being charged. Keep open fire away from
batteries.Donot checkthe electrolyte levelwith a
match or a lighter. No smoking and do not create
sparks. Make sure the area has ventilation. If the
batteryischargedinthe lifttruck, openthebonnet.
Lift batteries correctly with a crane or equipment
designed for the job. Always use a spreader bar
designed and adjusted for the battery. Move
batteries with a lift truck, or a conveyor or rollers
designedfor that purpose. If the battery does not
have a cover, a rubber mat or insulating material
must be putover the top of the batteryto preventa
short circuit with other equipment. Make sure the
the lifting equipment has enough capacity for the
job. Do not use chain or wire rope slings.
Never put metal materials or tools on a battery.
When maintenance on the battery or the battery
charger is required, disconnect both the AC and
DC power. If new battery connectors must be
installed, make sure the positive and negative
terminals and cables are kept separate and
insulated from each other. Even a momentary
short circuitcan cause an explosionand damage
the battery.
Keep water readily available to flush spilled
electrolyte.Electrolyteinthe eyesmust beflushed
with water immediately and then quickly get
medicalattention. Specialshowers and eye wash
systems are required in areas where battery
maintenanceis done.
If electrolyte is spilled on a work surface or the
floor, flush the area with water, use a solution of
soda (sodium bicarbonate) to make the acid
neutral.
Only trained persons are permitted to do
maintenance on batteries and battery chargers.
Make sure that the regulations by government
safety agencies, government insurers, private
insurers, and private organizations are followed
when doing maintenanceon batteries.
NOTE: The following symbols and words indicate
safety information in this manual:
DANGER: Indicates a condition that will
cause immediatedeath or injury!
WARNING: Indicatesa condition that can
Acause death or injury!
Acause property damage!
CAUTION: Indicates a condition that can
CONTENTS
Section 1 Section 2
GENERAL . . . . . . . . . . . . . . . . . . . . . . . . . HYDRAULICTANK . . . . . . . . . . . . . . . . . . . . . . . . . 2-5
SAFETY AND INFORMATIONALLABELS . . . . . 1-2 Inspection . . . . . . . . . . . . . . . . . . . . . . . . . . . . . . 2-5
Repairs. Small Leaks . . . . . . . . . . . . . . . . . . . . . 2-5OPERATOR PRECAUTIONS . . . . . . . . .
Repairs. Large Leaks . . . . . . . . . . . . . . . . . . . . 2-5OPERATOR PRE-CHECKSAND INSPECTION 1-3
Cleaning . . . . . . . . . . . . . . . . . . . . . . . . . . .OPERATING PROCEDURE . . . . . . . . . . . . . . . . . 1-3
Steam Method of Cleaning . . . . . . . . . . . . . . . .2-6
SHUT DOWN PROCEDURE. . . . . . . . . . . . . . . . .1-4
Chemical Solution Method of Cleaning
FORK ADJUSTMENT ....................... 1-4
Additional Preparationsfor Repair . . . . . . . . . .2-6
SAFETY AND OPERATIONALCHECK LIST . . . 1-5
MODELAND CONTROL INFORMATION 1-7
WELDING REPAIRS . . . . . . . . . . .
. . . . . .
TYRES AND WHEELS 2-6. . . . . . . . . . . . . . . . . . . . . .
instrument PanelA (STANDARD) . . . . . . . . '-lo
HOW TO CHANGE THE WRES . . . . . . . . . . . . . 2-7
. . . . . . . . . General 2-7InstrumentPanel B (OPTIONAL) 1-10
instrument Panel (OPTIONAL) . . . . . . . . '-lo PNEUMATICTYRES . . . . . . . . . . . . . . . . . . . . . . . 2-7
. . . . . . . . . . . . . . . . . . . . . . . . . . . . . . . .
Temperature Indicator Lamp . . . . . . . . . . . . . 1-11
SAFE MAINTENANCEPROCEDURES . . . . . . 1-11
MOVING A DISABLEDLIFT TRUCK . . . . . . . . 1-12
HOW TO TOW THE LIFT TRUCK . . . . . . . . . . 1-12
HOW TO PUT A LIFT TRUCK ON BLOCKS 1-12
HOW TO RAISETHE STEERINGTYRE . . . . 1-13
HOW TO RAISETHE DRIVETYRES . . . . . . . 1-13
PRECAUTIONSFOR TRUCKS IN STORAGE 1-13
.
PRECAUTIONSFOR BATTERIES
IN STORAGE . . . . . . . . . . . . . . . . . . . . . . . . . . . . 1-14
Section 2
GENERAL . . . . . . . . . . . . . . . . . . . . . . . . . . . . . . . . . 2-1
FRAME . . . . . . . . . . . . . . . . . . . . . . . . . . . . . . . . . . . 2-1
FLOOR PLATE . . . . . . . . . . . . . . . . . . . . . . . . . . . . . 2-1
REAR COMPARTMENT COVER . . . . . . . . . . . . . 2-1
FRONT COVER ............................ 2-2
STEERING COLUMN COVER . . . . . . . . . . . . . . . 2-2
Removethe Wheel from the Lift Truck . . . . . . .2.7
Removethe Tyre from the Wheel . . . . . . . . . . 2-8
Installthe Tyre on the Wheel . . . . . . . . . . . . . .2-8
Add Air to the Tyres . . . . . . . . . . . . . . . . . . . . . . 2-9
Removethe Wheel from the Lift Truck . . . . 2-10
Removethe Tyre from the Wheel . . . . . . . . 2-10
. . . . . . . . . . . . .2-11
SOLID TYRES . . . . . . . . . . . . . . . . . . . . . . . . . . . 2-12
PNEUMATIC SHAPED SOLID TYRES . . . . . . 2-10
Installthe Tyre on the Wheel
Removethe One Piece Wheel and Tyre . . 2-12
Installthe Tyre on the One Piece Wheel . . 2-12
Installthe Wheels on the Lift Truck . . . . . . . 2-12
LABEL REPLACEMENT. . . . . . . . . . . . . . . . . . . 2-13
YALE WARRANTY INFORMATION . . . . . . . . . 2-14
RECOMMENDEDSCHEDULE
OF MAINTENANCE ...................... 2-14
LUBRICATIONINSTRUCTIONS . . . . . . . . . . . 2-15
EVERY 8 HOURS ........................ 2-15
EVERY 350 HOURS ...................... 2-15
EVERY 2000 HOURS ..................... 2-15
HYDRAULICOILS ........................ 2-21
GEAR OILS . . . . . . . . . . . . . . . . . . . . . . . . . . . . . 2-22
GREASE . . . . . . . . . . . . . . . . . . . . . . . . . . . . . . . . 2-23
FREEZERAPPLICATIONS . . . . . . . . . . . . . . . . 2-24
HYDRAULICCONTROLVALVE COVERS . . . . . 2-2
BATTERY COVER .......................... 2-2
Open . . . . . . . . . . . . . . . . . . . . . . . . . . . . . . . . . . 2-2
Close . . . . . . . . . . . . . . . . . . . . . . . . . . . . . . . . . . 2-2
Removal . . . . . . . . . . . . . . . . . . . . . . . . . . . . . . . 2-2
Installation . . . . . . . . . . . . . . . . . . . . . . . . . . . . . . 2-2
BATTERY REMOVALAND INSTALLATION 2-3
BATTERY PLATFORM 2-3
Modifications . . . . . . . . . . . . . . . . . . . . . . . . . . 2-24
CompleteTruck 2-24
Control ComDartment 2-24
. . . .
.......................
...................... . . . . . . . . . . . . . . . . . .
.......................OVERHEADGUARD 2-4 Electrical System ...................... 2-24
Removal 2-4 Battery Compartment .................. 2-24
Installation 2-4 Ignition Switch . . . . . . . . . . . . . . . . . . . . . . . . 2-24
Removal . . . . . . . . . . . . . . . . . . . . . . . . . . . . . . . 2-5 Accelerator Pedal ...................... 2-24
Installation . . . . . . . . . . . . . . . . . . . . . . . . . . . . . . 2-5 Drive. Hydraulic and Steering Motors . . . . . 2-24
...............................
. . . . . . . . . . . . . . . . . . . . . . . . . . . . . .
COUNTERWEIGHT ........................ 2-4 Steering Linkage and Pivot Points . . . . . . . . 2-24
Section 2
Brake Lines and Linkage . . . . . . . . . . . . . . . 2-24
Tilt Cylinders . . . . . . . . . . . . . . . . . . . . . . . . . . 2-24
Upright and Carriage . . . . . . . . . . . . . . . . . . . 2-24
MAINTENANCE . . . . . . . . . . . . . . . . . . . . . . . . . . 2-24
CompleteTruck . . . . . . . . . . . . . . . . . . . . . . . 2-24
Electrical System ...................... 2-25
IgnitionSwitch . . . . . . . . . . . . . . . . . . . . . . . . 2-25
Control Compartment . . . . . . . . . . . . . . . . . . 2-24
Battery Compartment . . . . . . . . . . . . . . . . . . 2-25
Steering Linkage and Pivot Points . . . . . . . . 2-25
Accelerator Pedal . . . . . . . . . . . . . . . . . . . . . . 2-25
Drive, Hydraulic and Steering Motors . . . . . 2-25
Brake Lines and Linkage . . . . . . . . . . . . . . . 2-25
Section 3
General . . . . . . . . . . . . . . . . . . . . . . . . . . . . . . 3-20
Connect. Disconnect.and
Check the Hand Set . . . . . . . . . . . . . . . . . . . 3-20
Check and Adjust Functions . . . . . . . . . . . . . 3-20
FUNCTIONDESCRIPTIONS . . . . . . . . . . . . . . 3-21
Traction Control Cards . . . . . . . . . . . . . . . . . 3-21
PUMP CONTROLCARD (LABEL LETTER PX) 3-23
TABLES FOR FUNCTIONVALUE SETTINGS 3-24
TROUBLESHOOTING .................... 3-26
CONTACTORS . . . . . . . . . . . . . . . . . . . . . . . . . . 3-59
TESTING CONTACTORS . . . . . . . . . . . . . . . . . 3-59
Removal . . . . . . . . . . . . . . . . . . . . . . . . . . . . . 3-60
Installation . . . . . . . . . . . . . . . . . . . . . . . . . . . . 3-60
TMM1 CARD . . . . . . . . . . . . . . . . . . . . . . . . . . . . 3-62
Tilt Cylinders . . . . . . . . . . . . . . . . . . . . . . . . . . 2-25
Upright and Carriage . . . . . . . . . . . . . . . . . . . 2-25
Removal . . . . . . . . . . . . . . . . . . . . . . . . . . . . . 3-63
Installation . . . . . . . . . . . . . . . . . . . . . . . . . . . . 3-63
CIRCUIT PROTECTION 3-63
Hydraulic System 2-25
Current Limit 3-63
Thermal Protection 3-63Threads. Nomenclature 2-26
Strength Identification 2-26 Suppressors (Filter Blocks) . . . . . . . . . . . . . 3-63
. . . . . . . . . . . . . . . . . . . . . . . . . . . . . . . . . . . . . . . .
. . . . . . . . . . .FASTENERS - INTR0DUCTI0N 2-26 . . . . . . . . . . . . . . . . . . . . . . . . . .
. . . . . . . . . . . . . . . . . . . . . . . . . . . . . . . . . . . . .
. . . . . . . . . . . . . . . . . .
FUSES . . . . . . . . . . . . . . . . . . . . . . . . . . . . . . . . . 3-64Section 3
ELECTRICAL SYSTEM-G ENERAL . . . . . . . . . . .3-1
EV-1OOLX MOTOR CONTROLLER . . . . . . . . . . . 3-2
EV-100DESCRIPTIONAND OPERATION . . . . . 3-2
The Silicon Controlled Rectifier . . . . . . . . . . . .3-2
A Motor Circuit that Operateswith Pulses . . .3-2
Traction Circuit . . . . . . . . . . . . . . . . . . . . . . . . . . 3-4
Hydraulic Pump Motor . . . . . . . . . . . . . . . . . . . . 3-4
The SCR 1 "OFF" Circuit . . . . . . . . . . . . . . . . . 3-4
INDUCTIONCURRENT FROM THE MOTOR . . 3-6
THE CONTROL CARD ...................... 3-7
Pulse Monitor Trip . . . . . . . . . . . . . . . . . . . . . . . 3-8
SRO Circuit . . . . . . . . . . . . . . . . . . . . . . . . . . . . . 3-8
Control Card Adjustments . . . . . . . . . . . . . . . . . 3-8
Accelerator Control . . . . . . . . . . . . . . . . . . . . . 3-11
CONTROL CARD . . . . . . . . . . . . . . . . . . . . . . . . . 3-11
Status Codes . . . . . . . . . . . . . . . . . . . . . . . . . . 3-11
SEQUENCE OF OPERATION . . . . . . . . . . . . . . 3-12
SCR CONTROL . . . . . . . . . . . . . . . . . . . . . . . . . . 3-14
CONTROL CARD CONNECTIONS . . . . . . . . . 3-14
HAND SET .............................. 3-17
CHECKSAND ADJUSTMENTS,
CONTROL CARD . . . . . . . . . . . . . . . . . . . . . . . . 3-18
Function Codes . . . . . . . . . . . . . . . . . . . . . . . 3-18
Bench Tests .......................... 3-19
Tests-Control Card Installedin a Lift Truck 3-19
FUNCTI0N SETTINGS . . . . . . . . . . . . . . . . . . . 3-20
PRINTED CIRCUIT BOARDS . . . . . . . . . . . . . . 3-64
SteeringAngle Control Board . . . . . . . . . . . . 3-64
Operation . . . . . . . . . . . . . . . . . . . . . . . . . . . . 3-64
Testing . . . . . . . . . . . . . . . . . . . . . . . . . . . . . . . 3-65
Operation . . . . . . . . . . . . . . . . . . . . . . . . . . . . 3-69
Testing . . . . . . . . . . . . . . . . . . . . . . . . . . . . . . . 3-70
Lift Pump Control Board . . . . . . . . . . . . . . . . 3-69
Bypassingthe Lift Pump Control Board . . . 3-71
ACCELERAT0R . . . . . . . . . . . . . . . . . . . . . . . . . 3-72
Removal ............................. 3-72
Installation ............................ 3-72
POWER STEERING . . . . . . . . . . . . . . . . . . . . . . 3-73
KEY SWITCH ............................ 3-73
INSTRUMENTPANEL .................... 3-73
Standard InstrumentPanel . . . . . . . . . . . . . . 3-74
MOTOR MAINTENANCE- GENERAL . . . . . . 3-75
BRUSHAND COMMUTATOR INSPECTION . 3-75
NORMAL COMMUTATOR SERVICE . . . . . . . . 3-77
COMMUTATOR PROBLEMS . . . . . . . . . . . . . . 3-78
BRUSH REPLACEMENT, DRIVE AND
HYDRAULIC PUMP MOTORS . . . . . . . . . . . . . 3-80
Traction Motor Removal . . . . . . . . . . . . . . . . 3-82
Hydraulic Pump Motor Installation . . . . . . . . 3-83
Power Steering Pump Motor . . . . . . . . . . . . 3-83
3-83
Traction Motor ........................ 3-83
Traction Motor Installation. . . . . . . . . . . . . . . 3-83
MOTOR REMOVAL AND INSTALLATION . . . .
Section 3
Lift Pump and Motor Removal . . . . . . . . . . . 3-84
Lift Pump and Motor Installation . . . . . . . . . 3-84
Power Steering Pump and Motor Removal 3-84
Power Steering Pump and Motor Installation3-85
Disassembly . . . . . . . . . . . . . . . . . . . . . . . . . . 3-85
Assembly . . . . . . . . . . . . . . . . . . . . . . . . . . . . . 3-85
TRACTION MOTOR REPAIR . . . . . . . . . . . . . . 3-85
COMMUTATOR REPAIRS . . . . . . . . . . . . . . . . . 3-85
TESTS . . . . . . . . . . . . . . . . . . . . . . . . . . . . . . . . . . 3-87
. Damaged Field and Armature . . . . . . . . . . . 3-87
Short-Circuit in an Armature Winding . . . . . 3-88
Short-Circuitin the Armature . . . . . . . . . . . . 3-88
Open Circuit in a Field Coil . . . . . . . . . . . . . . 3-88
Short-circuit in a Field Coil . . . . . . . . . . . . . . 3-88
Short-circuit Between Field and Motor Case 3-88
Brush Holder . . . . . . . . . . . . . . . . . . . . . . . . . . 3-88
WIRING DIAGRAMSAND SCHEMATICS. . . . 3-90
Section 4
TRANSAXLE-GENERAL . . . . . . . . . . . . . . . . . . . . 4-1
TRANSAXLE SPEC1FlCATlONS . . . . . . . . . . . . $ 4 -1
REMOVAL . . . . . . . . . . . . . . . . . . . . . . . . . . . . . . . . . 4-1
INSTALLATION . . . . . . . . . . . . . . . . . . . . . . . . . . . . 4-3
DISASSEMBLY . . . . . . . . . . . . . . . . . . . . . . . . . . . . 4.3
ASSEMBLY . . . . . . . . . . . . . . . . . . . . . . . . . . . . . . . . 4.3
TROUBLESHOOTING . . . . . . . . . . . . . . . . . . . . . . 4.6
Section 5
GENERAL . . . . . . . . . . . . . . . . . . . . . . . . . . . . . . . . . 5.1
SPECIFICATIONS . . . . . . . . . . . . . . . . . . . . . . . . . . 5-1
PARKING BRAKE ADJUSTMENT . . . . . . . . . . . . 5-1
SERVlCE BRAKE ADJUSTMENT . . . . . . . . . . . . 5-1
REMOVAL-SERVICE BRAKE PADS . . . . . . . . . . 5-1
INSTALLATION-SERVICEBRAKE PADS . . . . . . 5-1
REMOVAL-SERVICE BRAKE CALIPER . . . . . . . 5-2
INSTALLATION-SERVICEBRAKE CALIPER . . 5-3
DISASSEMBLY-SERVICE BRAKE CALIPER . . 5-3
ASSEMBLY-SERVICE BRAKE CALIPER . . . . . . 5-3
REMOVAL-PARKING BRAKE CALIPER . . . . . . 5-3
INSTALLATION-PARKING BRAKE CALIPER . . 5-4
DISASSEMBLY-PARKINGBRAKE CALIPER . . 5-6
ASSEMBLY-PARKING BRAKE CALIPER . . . . . . 5-6
MASTER CYLlNDER- REMOVAL . . . . . . . . . . . . .5-6
MASTER CYLINDER-INSTALLATION . . . . . . . . 5-6
MASTER CYLINDER-DISASSEMBLY . . . . . . . . 5-6
MASTER CYLINDER-ASSEMBLY . . . . . . . . . . . . 5.7
PARKING BRAKE LEVER ASSEMBLY-
REMOVAL................................. 5-7
Section 5
PARKINGBRAKELEVERASSEMBLY-
INSTALLATION . . . . . . . . . . . . . . . . . . . . . . . . . . . . 5-7
TROUBLESHOOTING ...................... 5-9
Section 6
TRAIL AXLE . . . . . . . . . . . . . . . . . . . . . . . . . . . . . . . 6-1
WHEEL ASSEMBLY . . . . . . . . . . . . . . . . . . . . . . . . 6-1
Removal . . . . . . . . . . . . . . . . . . . . . . . . . . . . . . . 6-1
Installation . . . . . . . . . . . . . . . . . . . . . . . . . . . . . . 6-1
Removal . . . . . . . . . . . . . . . . . . . . . . . . . . . . . . . 6-1
Installation . . . . . . . . . . . . . . . . . . . . . . . . . . . . . . 6-1
Removal . . . . . . . . . . . . . . . . . . . . . . . . . . . . . . . 6-3
Installation . . . . . . . . . . . . . . . . . . . . . . . . . . . 6-3
POWER STEERING SYSTEM . . . . . . . . . . . . . . . 6-4
General . . . . . . . . . . 6-4
Description . . . . . . . . . . . . . . . . . . . . . . . . . . . . . 6-4
WHEEL HUB . . . . . . . . . . . . . . . . . . . . . . . . . . . . . . 6-1
STEER AXLE ASSEMBLY . . . . . . . . . . . . . . :. . . . 6-3
. . . . . . . . . . . . . . .
STEERING WHEEL AND COLUMN
ASSEMBLY . . . . . . . . . . . . . . . . . . . . . . . . . . . . . . . . 6-4
. . . . . . . . . . 6-5
Installation .............................. 6-6
Cleaning . . . . . . . . . . . . . . . . . . . . . . . . . . . . . . . 6-8
Disassembly . . . . . . . . . . . . . . . . . . . . . . . . . . . . 6-8
Assembly . . . . . . . . . . . . . . . . . . . . . . . . . . . . . 6-10
Installation . . . . . . . . . . . . . . . . . . . . . . . . . . . . 6-13
Removal . . . . . . . . . . . . . . . . . . . . . . . . . . . . . 6-14
Installation ............................ 6-14
Disassembly .......................... 6-14
Assembly . . . . . . . . . . . . . . . . . . . . . . . . . . . . . 6-14
Remove Air from the System . . . . . . . . . . . . 6-14
Check the Operation . . . . . . . . . . . . . . . . . . . 6-15
Steering Pressure ..................... 6-15
POWER STEERINGCYLINDER . . . . . . . . . . . 6-14
CHECKS AND ADJUSTMENTS . . . . . . . . . . . . 6-14
TROUBLESHOOTING .................... 6-16
Section 7
GENERAL . . . . . . . . . . . . . . . . . . . . . . . . . . . . . . . . . 7-1
HOIST SYSTEM . . . . . . . . . . . . . . . . . . . . . . . . . . . 7-1
TILT SYSTEM . . . . . . . . . . . . . . . . . . . . . . . . . . . . . 7-1
AUXlLlARY FUNCTIONS .................... 7-1
Third Function Location . . . . . . . . . . . . . . . . . . . 7-1
Fourth FunctionLocation . . . . . . . . . . . . . . . . . 7-1
HYDRAULICOIL TANK ..................... 7-1
SPECIFICATIONS .......................... 7-2
HydraulicTank .......................... 7-2
Power Steering Pump .................... 7-2
Hoist Pump ............................. 7-2
Section 7
Strainers . . . . . . . . . . . . . . . . . . . . . . . . . . . . . . . 7-2
Hydraulic Oil Filter . . . . . . . . . . . . . . . . . . . . . . . 7-2
HOIST PUMP . . . . . . . . . . . . . . . . . . . . . . . . . . . . . . 7-3
Removal . . . . . . . . . . . . . . . . . . . . . . . . . . . . . . . 7-3
Installation . . . . . . . . . . . . . . . . . . .
Disassembly-Seal Replacement
. . . . . . . . . . . . . . . . . . . . . . . . . . . . 7-4
POWER STEERING PUMP AND MOTOR . . . . . 7.5
Removal . . . . . . . . . . . . . . . . . . . . . . . . . . . . . . . 7-5
Installation . . . . . . . . . . . . . . . . . . . . . . . . . . . . . . 7-5
Disassembly . . . . . . . . . . . . . . . . . . . . . . . . . . . . 7-6
Assembly . . . . . . . . . . . . . . . . . . . . . . . . . . . . . . . 7-6
CONTROL VALVE . . . . . . . . . . . . . . . . . . . . . . . . . . 7-7
Settings . . . . . . . . . . . . . . . . . . . . . . . . . . . . . . . . 7-7
Removal . . . . . . . . . . . . . . . . . . . . . . . . . . . . . . . 7-7
Installation . . . . . . . . . . . . . . . . . . . . . . . . . . . . . . 7-8
Disassembly . . . . . . . . . . . . . . . . . . . . . . . . . . 7-10
Assembly . . . . . . . . . . . . . . . . . . . . . . . . . . . . . 7-10
MAST TILT ADJUSTMENT . . . . . . 7-12
CONTROL VALVE-EMERGENCY REPAIR . . 7-12
TROUBLESHOOTING . . . . . . . . . . . . . . . . . . . . 7-13
Section 8
MAST . . . . . . . . . . . . . . . . . . . . . . . . . . . . . . . . . . . . . 8-1
DESCRIPTIONAND OPERATION . . . . . . . . . . . .8-1
Carriage . . . . . . . . . . . . . . . . . . . . . . . . . . . . . . . . 8-1
Mast Mounts . . . . . . . . . . . . . . . . . . . . . . . . . . . . 8-1
Descriptionand Operation . . . . . . . . . . . . . . . . 8-3
TWO STAGE MAST WITH FULL FREE LIFT . . . 8-5
Description . . . . . . . . . . . . . . . . . . . . . . . . . . . . . 8-5
Operation . . . . . . . . . . . . . . . . . . . . . . . . . . . . . . 8-5
Description . . . . . . . . . . . . . . . . . . . . . . . . . . . . . 8-7
Operation . . . . . . . . . . . . . . . . . . . . . . . . . . . . . . 8-7
TWO STAGE MAST WITH LIMITED FREE LIFT 8-3
THREE STAGE MAST WITH FULL FREE LIFT . 8-7
SAFETY PROCEDURESWHEN WORKING
NEAR THE MAST . . . . . . . . . . . . . . . . . . . . . . . . . . 8-9
MAST REPLACEMENT ..................... 8-9
MAST REPAIRS . . . . . . . . . . . . . . . . . . . . . . . . . 8-10
FORKS . . . . . . . . . . . . . . . . . . . . . . . . . . . . . . . . . 8-10
Removal . . . . . . . . . . . . . . . . . . . . . . . . . . . . . 8-10
Installation . . . . . . . . . . . . . . . . . . . . . . . . . . . . 8-10
Removal, Standard Carriage . . . . . . . . . . . . 8-10
Removal, Sideshift Carriage . . . . . . . . . . . . . 8-12
Repairs . . . . . . . . . . . . . . . . . . . . . . . . . . . . . . 8-12
Installation,Standard Carriage . . . . . . . . . . . 8-12
CARRIAGES ............................ 8-10
Section 8
Installation.Sideshift Carriage . . . . . . . . . . . 8-12
MASTS . . . . . . . . . . . . . . . . . . . . . . . . . . . . . . . . . 8-13
Removal . . . . . . . . . . . . . . . . . . . . . . . . . . . . . 8-13
Disassembly Procedures for the Two Stage
Mast with Limited or Full Free Lift . . . . . . . . 8-14
Disassembly Procedures for
8-17the Three Stage Mast . . . . . . . . . . . . . . . . . .
Cleaning and Inspection . . . . . . . . . . . . . . . . 8-19
Assembly of the Two Stage Mast
with Limited and Full Free Lift . . . . . . . . . . . 8-20
Assembly of the Three Stage Mast
with Full Free Lift . . . . . . . . . . . . . . . . . . . . . . 8-20
Mast Installation . . . . . . . . . . . . . . . . . . . . . . . 8-21
Removalof the Main Lift Cylinders . . . . . . . 8-21
Removalof the Free Lift Cylinder . . . . . . . . 8-22
Disassembly of a Lift Cylinder . . . . . . . . . . . 8-22
8-22
Installationof the Main Lift Cylinders . . . . . . 8-24
Installationof the Free Lift Cylinder
Installationof Header Hoses for
Two Stage Mast with Limited Free Lift . . . . 8-26
Installationof Header Hoses for
Two Stage Mast with Full Free Lift . . . . . . . 8-27
Installationof Header Hoses for
Three Stage Mast with Full Free Lift . . . . . . 8-30
Removal . . . . . . . . . . . . . . . . . . . . . . . . . . . . . 8-33
Disassembly . . . . . . . . . . . . . . . . . . . . . . . . . . 8-33
Cleaning ............................. 8-34
Assembly . . . . . . . . . . . . . . . . . . . . . . . . . . . . . 8-34
Installation . . . . . . . . . . . . . . . . . . . . . . . . . . . . 8-34
Check the Lift Cylinders for Leaks . . . . . . . . 8-34
Check the Tilt Cylinders for Leaks . . . . . . . . 8-34
Adjust the Tilt Cylinders . . . . . . . . . . . . . . . . . 8-34
Adjust the Lift Chains . . . . . . . . . . . . . . . . . . . 8-35
Adjust the Mast . . . . . . . . . . . . . . . . . . . . . . . . 8-36
Adjust the Carriage .................... 8-36
LIFT CYLINDERS . . . . . . . . . . . . . . . . . . . . . . . . 8-21
Assembly of a Lift Cylinder . . . . . . . . . . . . . .
HEADER HOSE ARRANGEMENTS . . . . . . . . 8-25
TILT CYLINDERS . . . . . . . . . . . . . . . . . . . . . . . . 8-33
CHECKS AND ADJUSTMENTS . . . . . . . . . . . . 8-34
TROUBLESHOOTING .................... 8-38
Section 9
BATTERYAND CHARGING SYSTEM-
GENERAL ................................. 9-1
SAFETYTIPS FOR HANDLING
INDUSTRIALTRUCK BATTERIES . . . . . . . . . . . . 9-1
LEADACID BATTERIES . . . . . . . . . . . . . . . . . . . . 9-2
Specific Gravity . . . . . . . . . . . . . . . . . . . . . . . . . 9-3
Chemical Reaction ....................... 9-3
Section 9
HOW TO SELECT THE BATTERY . . . . . . . . . . . . 9-4
Voltage of a Battery . . . . . . . . . . . . . . . . . . . . . . 9-4
Battery Ratings . . . . . . . . . . . . . . . . . . . . . . . . . . 9-4
Kilowatt Hours . . . . . . . . . . . . . . . . . . . . . . . . . . 9-4
THE BATTERY AS A COUNTERWEIGHT . . . . . 9.5
THE NEW BATTERY . . . . . . . . . . . . . . . . . . . . . . . 9-5
BAlTERY MAINTENANCE . . . . . . . . . . . . . . . . . .9-5
Maintenance Records .................... 9-5
Cleaning the Battery ..................... 9-6
Adding Water . . . . . . . . . . . . . . . . . . . . . . . . . . . 9-6
Hydrometer . . . . . . . . . . . . . . . . . . . . . . . . . . . . . 9-7
Battery Temperature . . . . . . . . . . . . . . . . . . . . . 9-7
Types of Battery Charges . . . . . . . . . . . . . . . . .9-8
Methods of Charging . . . . . . . . . . . . . . . . . . . . . 9-8
CHARGING THE BATTERY . . . . . . . . . . . . . . . . .9-8
Troubleshooting the Charger . . . . . . . . . . . . . .9-9
Section 9
How to Know when the Battery
is Fully Charged . . . . . . . . . . . . . . . . . . . . . . . . . 9-9
Battery Charging Area .................... 9.9
Equipment Needed . . . . . . . . . . . . . . . . . . . . . . 9-9
TROUBLESHOOTING . . . . . . . . . . . . . . . . . . . . 9-10
Section 10
SERVICE PARTS
ORDERING INSTRUCTIONS . . . . . . . . . . . . . . 10-1
HOW TO ORDER SERVICE PARTS . . . . . . . . 10-1
WHEN ORDERING PARTS . . . . . . . . . . . . . . . . 10-1
TECHNICAL PUBLICATIONS . . . . . . . . . . . . . . 10-1
PARTS MANUAL . . . . . . . . . . . . . . . . . . . . . . . . . 10-1
OPERATING MANUAL .................... 10-1
OPERATOR TRAINING . . . . . . . . . . . . . . . . . . . 10-1
SERVICE TRAINING COURSES . . . . . . . . . . . 10-1
SERVICE TRAINING MATERIALS . . . . . . . . . . 10-1
SECTION 1
1 OPERATING INSTRUCTIONS
OPERATING INSTRUCTIONS
CONTENTS
FORKADJUSTMENT ............................................... 1-4
GENERAL ......................................................... 1-1
HOW TOPUTA LIFT TRUCK ON BLOCKS ........................... 1-12
HOW TO RAISE THEDRIVE TYRES ................................. 1-13
HOW TO RAISE THE STEERING TYRE .............................. 1-13
HOW TO TOW THELIFT TRUCK ..................................... 1-12
MODEL AND CONTROL INFORMATION .............................. 1-7
InstrumentPanelA (STANDARD) ................................... 1-10
Instrument Panel B (OPTIONAL) .................................... 1-70
Instrument Panel C (OPTIONAL) .................................... 1-10
1.11
MOVING A DISABLED LIFT TRUCK .................................. 1-12
OPERATOR PRECAUTIONS ......................................... 1-2
OPERATING PROCEDURE .......................................... 1-3
OPERATOR PRE-CHECKSAND INSPECTION ......................... 1-3
PRECAUTIONS FOR BATTERIES IN STORAGE ....................... 1-14
PRECAUTIONS FOR TRUCKS IN STORAGE ......................... 1-13
SAFENAND INFORMATIONALLABELS .............................. 1-2
SAFETYAND OPERATIONALCHECKLIST ............................ 1-5
SAFE MAINTENANCEPROCEDURES ............................... 1-11
SHUT DOWN PROCEDURE ......................................... 1-4
TemperatureIndicator Lamp ........................................
OPERATINGINSTRUCTIONS
GENERAL
Before attempting to operate this truck, carefully read and
understand these operating procedures.
Makesurethetruck is inproper operating condition. Besure
all safety devices such as the overhead guard and the load
backrest extension are in place and properly secured.
Visually inspect the entire truck for any damage that may
have occurred during shipment.
NOTE: Throughout this manual the terms right, left, front
and rear relatetotheviewpoint of an operatorwalking with or
riding on the truck.
Familiarise yourself with the information contained on the
name plate which is located on the cowl to the left of the
steering column. See Figure 1-1 and Figure 1-2. Informa-
tion on this name plate is as follows:
1. Serial Number - This is an identification number
assigned to this particular truck and should be used when
ordering service parts or when requesting any information
from your Yale Industrial Truck Dealer.The serial number is
asix digit number preceded by a letter and isstamped onthe
truck frame and on the name plate.
2.
located on the back of the front cover of this manual.
Model Code - An explanation of the model code is
3. Truck Weight - This is the approximate weight of the
truckwithout a loadonthe forks.This weight plusthe weight
ofthe loadto be moved must be consideredwhen operating
on raised floors, lifts, etc.
4. Capacity Rating -This ratingshows the maximum load
capacity of this truck with relation to load centres and fork
heights (see diagram on name plate). Personal injury and
damage to the truck can occur if the capacity rating is
exceeded.
Safety and informational labels are located in conspicuous
locationsonthistruckandshouldbestrictlyfollowed. Check
the name plateof each truck beforeoperation.These safety
and informational labels must be replaced immediately if
missing or defaced. Labels will vary with type of truck and
equipment installed. Refer to the Parts Manual for part
number and locationfor all labels. The location of the labels
is also shown in Section 2, GENERAL TRUCK AND
LUBRICATI0N.
This truck meetsall applicablemandatory requirementsand
safety standardsfor powered industrial trucks at the time of
manufacture.
No additions, omissions or modifications should be made
that will affect compliance to the previously stated
requirementsor inanyway minimizetheeffectiveness ofthe
safety devices.
I
~~
1 5
I :
I i
NOTICE TO USER
The U S A OccupationalSafety and HealthAct of 1970an
other national safety codes requirea new plate d this unit 03 2equipped other than 8s stated on plate Obtain the correcl
plale from your authoriseddenier
e
If a truck is shipped incomplete
from the factory, the name plate
will be covered by the decal
shown above. Do not operate the
lift truck until you obtain a
complete name plate from your
Yale IndustrialTruck Dealer.
Capacities and Cautions
Contained on the Name
plate Must be Strictly
Followed.
2 3 1
Figure 1-1 - Name Plate
1-1
0PERATING INSTRUCT10NS
Figure 1-2 - Name Plate Location
SAFETY AND INFORMATIONAL LABELS
Safety and informational labels are located in
conspicuous locations on this truck and should be
strictly adhered to. These safety and informational
labels must be replaced immediately if missing or
defaced. Labels will vary with type of truck and
equipment installed. Refer to Parts Manual for part
number of labels.
HAZARD INTENSITY LEVEL
-1
-1
1-1
DANGER: Identified by a Red Label,
immediate hazards which WILL result in
severe personal injury or death.
WARNING: Identified by an Orange Label,
hazards or unsafe practices which MAY result in
personal injury or death.
CAUTION: Identified by a Yellow Label, hazards or
unsafe practices which MAY result in minor personal
injury or product or property damage.
THE READER MAY FIND ANY OR ALL OF THE
FOLLOWING LABELS USED IN THIS PUBLICATION.AN
UNDERSTANDING OF THEIR USE, AS GIVEN BELOW
WILL AID THE READER.
1 I
An advisory procedure, practice, condition, etc., which is
essential to emphasize.
Directs attention to hazards or unsafe practices which may
result in minorpersonal injury,product or propertydamage if
the proper precautions are not taken.
I/r WARNING^
Directs attention to unsafe practices which could result in
personal injury or death if proper precautions are not taken.
Directsattentionto unsafe practices andfor existing hazards
whichWILL resultinsevere personal injuryor death if proper
precautions are not taken.
OPERATOR PRECAUTIONS
The following precautions have been prepared for your
safety and the safety of your fellow workers. Read and
understand this information before operating the lift truck.
WARNING: Use special care when travelling
without a load as THE RISK OF
AOVERTURNING IS GREATER when cornering
and at high speed.
Check all gauges and indicator lights for correct operation.
Frequent reading ofthe instrument panel should be a habit.
Follow the Recommended Schedules of Maintenance.
Maintain your lift truck for dependable and economical
operation.
Reportall accidents involving personnel, building structures
and equipment to the proper authority.
Before each shift, every 8 hours, it is the operator's
responsibility to carry out the following checks and
inspections before beginning truck operation. Do not
operate truck if it is in need of repair, if it is in an unsafe
condition, or might contribute to an unsafe condition.
Remove the key and report the condition to the proper
authority. If the truck becomes unsafe in any way while you
are operating it, STOP operating the truck and report the
matter immediately to the proper authority.
1-2
OPERATING INSTRUCTIONS
Basic maintenance information and the Recommended
Schedule of Maintenance are in the Operating Manual,
located inthe document holder on the compartment cover.
Also refer to Section 2, GENERAL TRUCK AND
LUBRICAT1ON.
1.
and all other protective equipment is attached.
Make sure overhead guard, load backrest extension,
2. Make sure all capacity,safety and informational plates
or labels are attached. This truck is not considered safe to
usewithout a legible, properlyfilled out nameplate.Contact
Yale Materials Handling Corporationor your local dealer for
Yale industrial trucks if the name plate is not present and
legible. See Section 2, GENERAL TRUCK AND
LUBRICATION or the Parts Manual for label and plate
locations.
3.
during the previous shift.
Inspect truck for any damagethat might have occurred
4. Inspecttruck beforeandafteroperating,for anysigns of
external leaking of the battery, steering system, hydraulic
system, etc.
5.
reinforcement showing through the outside of the hose.
Check hydraulic hoses for leaking, chafing, cuts or
6. Check for mistracking of the hoses on the sheaves.
7 .
8.
Make sure chains are not damaged or kinked.
Make sure mast stops and finger guards are in place.
9.
and fastened.
Make sure bonnet latches are adjusted (if equipped)
10. Operate service and parking brakes, all hydraulic
controls, (lift, tilt and auxiliary, if equipped), accelerator,
shifting linkages andsteering. Makesurethey operatefreely
and return to their proper positions. See section on
OPERATING CONTROLSfor detailed descriptions.
11. Inspect condition of wheels and tyres.
12. Inspect forks for any damage. Make sure they are
properly attached and locking clips are in their proper
position.
13. Test horn, lights and all other accessories. Make sure
they are properly mounted and in good working order.
14. Operatetruck andmakesureallgaugesand metersare
functioning properly.
15. Make sure any unusual noises are investigated
immediately.
OPERATOR PRE-CHECKS AND INSPECTION
1. When attachments are used, extra care should be
taken in securing, positioning and transporting the load.
Operate trucks equipped with attachments as partially
loaded trucks.
2. Watch that your load does not exceed the capacity
rating of the truck. The truck capacity is posted on the name
plate which is attached to the truck at the factory.
3. Do not handle unstable or loosely stacked loads.
4. Donotstartoroperatethistruckorany of itsfunctionsor
attachments ifyouare not inthe operator's seat,which isthe
designated operator's position for this Yale lift truck.
5. Never allow anyone to ride on your truck and never
allow anyone other than a qualified professional to operate
your truck.
6. Refertothe Maintenanceand Lubricationsection inthis
manual for the recommended hourly service intervals.
Regular attention at the specified time will pay dividends in
maximum efficiency and longer life of the truck. '
OPERATING PROCEDURE
Apply power to the truck by connecting the battery plug to
the truck receptacle. Be sure the plug is fully inserted and
locked into place so that there is enough pressure at the
contact mating surfaces.
Make sure the direction control levers are in the neutral
position before operating the truck.
The operator must sit on the seat to energise the
electrical circuit.
Place foot on the service brake pedal.
Turn key toward forks (clockwise).
Release the parking brake.
Select desired direction.
Release service brake pedal.
Depress accelerator pedal to travel
CAUTION: Operating the drive control in a
situation where the truck will not move will
Adamage the electric motor.
1. Keephands,feet and other partsofyour body insidethe
operator's compartment. Parts of your body outside the
truck can be injured when passing obstructions.
2. Do not permit passengers to ride on the truck.
3. Observe and comply with instructions concerning floor
loadings. Knowthe weight of your truck and load combined.
Truck weight information is located on the name plate.
4. Travel with the lifting mechanism low and where
possible, tilted back. Do not elevate the load except during
stacking.
1-3
OPERATING INSTRUCTIONS
5. The operator can change the direction of travel while
the lifttruck is movingby movingthe direction control lever in
the opposite direction. This is called plugging.
6.
the path of travel.
7 .
forks trailing and always look in the direction of travel.
8. Start,stop,travel, steer and brakesmoothly. Slowdown
for turns and on uneven or slippery surfaces that could
cause truck to overturn or slide.
Look in the direction of travel and keep a clear view of
Ifvisibility is impairedbythe load, operatetruck with the
9. Beforeentering trucks or trailers, be certain the brakes
on the truck or trailer are applied and wheel chock(s) are in
place. Iftrailers are notcoupled to atractor, supports may be
needed to prevent upending or corner dipping. Check the
flooring of trucks, trailers and railroad cars for breaks and
weakness before driving onto them.
10. Before driving over a dock board or bridge plate, be
certain that it is properlysecured. Drive carefully and slowly
across the dockboard or bridge plate and never exceed its
rated capacity.
11. Maintain a safe distance from the edge of ramps or
platforms.Do not pushfreight cars while on a raised dock or
platform. Do not use this truck for opening or closing'freight
doors.
12. Watch clearances, especially around forks. The driver
must beawarethat the forks can sometimes extend beyond
the load. This may cause the forks to hit an object or lift
another load.
13. Watchoutfor obstructions,especiallyoverhead. Check
clearances.
14. Do not runover objectsonthe roadway surface astruck
stability and steering may be adversely affected.
15. When approaching cross aisles, slow down, sound
horn and keep to the right side of aisle.
16. Operate truck under all conditions at a speed that will
permit it to be brought to a stop in a safe manner.
17. Onslopingsurfaces, higherthan 5 percent (a5ft. riseor
drop in 100ft. of travel), operate loaded truck with the load
facing uphill.Donotturnon an slope. Forstability reasons,a
lift truck must not be driven across a slope.
18. Operate unloaded truck on all grades with the lifting
mechanism downhill.
Q20. Watch out for pedestrians at
all times. Donot drive upto anyone
standing in front of an object.
21. Observe all traffic regulations, including authorised
plant speed limits. Under normal traffic conditions, keep to
the right. Maintain a safe distance from the truck ahead
(approximately three truck lengths), and keep the truck
under control at all times.
22. Yale lifttrucks are not intendedfor use on public roads.
23. When leaving truck unattended, lower the lifting
mechanism, shut off power, remove key and apply parking
brake. Chock wheels if truck is parked on an slope.
24. Do not remove overhead guard or load backrest
extension unless specifically authorised.
25. Always set the forks as far apart as the loadwill permit.
Make sure that fork length is at least 213 of load length.
26. Carry the load flush against the truck.
27. Do not put any part of your body into the mast area or
between the mast and truck. Be aware of pinch points on
attachments, especially reach mechanisms.
28. Allow no one under or near load or lifting mechanism.
29. If a supplementary platform is used, make sure it is
securely fastened to the carriage and forks.
SHUT DOWN PROCEDURE
When leaving the truck, fully lower lifting mechanism,
ensure controls are in neutral, shut off power, apply the
brake, and remove key. If you park the truck on an slope,
chock the wheels.
FORK ADJUSTMENT
Adjust theforks onthefork carriage. Forksshould bespaced
as far apart as the load being moved will allow. Both forks
should always be the same distance from the centre of the
fork carriage.
Checkforthe presence andcondition ofstuds at eachend of
the carriage upper fork clip slide. If studs are damaged or
missingthey should be repaired or replacedbeforetheforks
are adjusted.
19. Do not push extra loads with the truck.
1-4
OPERATINGINSTRUCTIONS
To adjust the forks, raise them a few inches off the floor. Lift
uponthe keeper pinand slidetheforks alongthe carriage by
pushing them away from you. Do not pull the forks toward
you. When the forks are set to the desired position, make
sure the keeper pin is down in a slot on the top of the fork
carriage plate.
SAFETY AND OPERATIONAL CHECK LIST
A “Daily Check List” similar to the one shown on the next
page should be used every day before operating the truck.
The check listsareavailableintabletformwith50sheets per
tablet and can be obtained from your local Yale Industrial
Truck Dealer for a nominal fee.
Both this manual and the Operating Manual contain the
Recommended Schedule of Maintenancewhich should be
used as a guide along with the Lubrication Instructions.
1-5
Thank you very much
for your reading.
Please Click Here
Then Get More
Information.

More Related Content

Recently uploaded

Madiwala Call Girls: 🍓 7737669865 🍓 High Profile Model Escorts | Bangalore Es...
Madiwala Call Girls: 🍓 7737669865 🍓 High Profile Model Escorts | Bangalore Es...Madiwala Call Girls: 🍓 7737669865 🍓 High Profile Model Escorts | Bangalore Es...
Madiwala Call Girls: 🍓 7737669865 🍓 High Profile Model Escorts | Bangalore Es...
amitlee9823
 
Call Girls Kadugodi Just Call 👗 7737669865 👗 Top Class Call Girl Service Bang...
Call Girls Kadugodi Just Call 👗 7737669865 👗 Top Class Call Girl Service Bang...Call Girls Kadugodi Just Call 👗 7737669865 👗 Top Class Call Girl Service Bang...
Call Girls Kadugodi Just Call 👗 7737669865 👗 Top Class Call Girl Service Bang...
amitlee9823
 
FULL NIGHT — 9999894380 Call Girls In Jagat Puri | Delhi
FULL NIGHT — 9999894380 Call Girls In Jagat Puri | DelhiFULL NIGHT — 9999894380 Call Girls In Jagat Puri | Delhi
FULL NIGHT — 9999894380 Call Girls In Jagat Puri | Delhi
SaketCallGirlsCallUs
 
Vip Hot Call Girls 🫤 Mahipalpur ➡️ 9711199171 ➡️ Delhi 🫦 Whatsapp Number
Vip Hot Call Girls 🫤 Mahipalpur ➡️ 9711199171 ➡️ Delhi 🫦 Whatsapp NumberVip Hot Call Girls 🫤 Mahipalpur ➡️ 9711199171 ➡️ Delhi 🫦 Whatsapp Number
Vip Hot Call Girls 🫤 Mahipalpur ➡️ 9711199171 ➡️ Delhi 🫦 Whatsapp Number
kumarajju5765
 
➥🔝 7737669865 🔝▻ narsinghpur Call-girls in Women Seeking Men 🔝narsinghpur🔝 ...
➥🔝 7737669865 🔝▻ narsinghpur Call-girls in Women Seeking Men  🔝narsinghpur🔝  ...➥🔝 7737669865 🔝▻ narsinghpur Call-girls in Women Seeking Men  🔝narsinghpur🔝  ...
➥🔝 7737669865 🔝▻ narsinghpur Call-girls in Women Seeking Men 🔝narsinghpur🔝 ...
nirzagarg
 
一比一原版(UdeM学位证书)蒙特利尔大学毕业证学历认证怎样办
一比一原版(UdeM学位证书)蒙特利尔大学毕业证学历认证怎样办一比一原版(UdeM学位证书)蒙特利尔大学毕业证学历认证怎样办
一比一原版(UdeM学位证书)蒙特利尔大学毕业证学历认证怎样办
ezgenuh
 
如何办理麦考瑞大学毕业证(MQU毕业证书)成绩单原版一比一
如何办理麦考瑞大学毕业证(MQU毕业证书)成绩单原版一比一如何办理麦考瑞大学毕业证(MQU毕业证书)成绩单原版一比一
如何办理麦考瑞大学毕业证(MQU毕业证书)成绩单原版一比一
ozave
 
Sanjay Nagar Call Girls: 🍓 7737669865 🍓 High Profile Model Escorts | Bangalor...
Sanjay Nagar Call Girls: 🍓 7737669865 🍓 High Profile Model Escorts | Bangalor...Sanjay Nagar Call Girls: 🍓 7737669865 🍓 High Profile Model Escorts | Bangalor...
Sanjay Nagar Call Girls: 🍓 7737669865 🍓 High Profile Model Escorts | Bangalor...
amitlee9823
 
Vip Mumbai Call Girls Colaba Call On 9920725232 With Body to body massage wit...
Vip Mumbai Call Girls Colaba Call On 9920725232 With Body to body massage wit...Vip Mumbai Call Girls Colaba Call On 9920725232 With Body to body massage wit...
Vip Mumbai Call Girls Colaba Call On 9920725232 With Body to body massage wit...
amitlee9823
 
Top Rated Call Girls Vashi : 9920725232 We offer Beautiful and sexy Call Girl...
Top Rated Call Girls Vashi : 9920725232 We offer Beautiful and sexy Call Girl...Top Rated Call Girls Vashi : 9920725232 We offer Beautiful and sexy Call Girl...
Top Rated Call Girls Vashi : 9920725232 We offer Beautiful and sexy Call Girl...
amitlee9823
 
Majestic Call Girls: 🍓 7737669865 🍓 High Profile Model Escorts | Bangalore Es...
Majestic Call Girls: 🍓 7737669865 🍓 High Profile Model Escorts | Bangalore Es...Majestic Call Girls: 🍓 7737669865 🍓 High Profile Model Escorts | Bangalore Es...
Majestic Call Girls: 🍓 7737669865 🍓 High Profile Model Escorts | Bangalore Es...
amitlee9823
 

Recently uploaded (20)

Madiwala Call Girls: 🍓 7737669865 🍓 High Profile Model Escorts | Bangalore Es...
Madiwala Call Girls: 🍓 7737669865 🍓 High Profile Model Escorts | Bangalore Es...Madiwala Call Girls: 🍓 7737669865 🍓 High Profile Model Escorts | Bangalore Es...
Madiwala Call Girls: 🍓 7737669865 🍓 High Profile Model Escorts | Bangalore Es...
 
Call Girls Kadugodi Just Call 👗 7737669865 👗 Top Class Call Girl Service Bang...
Call Girls Kadugodi Just Call 👗 7737669865 👗 Top Class Call Girl Service Bang...Call Girls Kadugodi Just Call 👗 7737669865 👗 Top Class Call Girl Service Bang...
Call Girls Kadugodi Just Call 👗 7737669865 👗 Top Class Call Girl Service Bang...
 
Call Girls in Malviya Nagar Delhi 💯 Call Us 🔝9205541914 🔝( Delhi) Escorts Ser...
Call Girls in Malviya Nagar Delhi 💯 Call Us 🔝9205541914 🔝( Delhi) Escorts Ser...Call Girls in Malviya Nagar Delhi 💯 Call Us 🔝9205541914 🔝( Delhi) Escorts Ser...
Call Girls in Malviya Nagar Delhi 💯 Call Us 🔝9205541914 🔝( Delhi) Escorts Ser...
 
FULL NIGHT — 9999894380 Call Girls In Jagat Puri | Delhi
FULL NIGHT — 9999894380 Call Girls In Jagat Puri | DelhiFULL NIGHT — 9999894380 Call Girls In Jagat Puri | Delhi
FULL NIGHT — 9999894380 Call Girls In Jagat Puri | Delhi
 
Vip Hot Call Girls 🫤 Mahipalpur ➡️ 9711199171 ➡️ Delhi 🫦 Whatsapp Number
Vip Hot Call Girls 🫤 Mahipalpur ➡️ 9711199171 ➡️ Delhi 🫦 Whatsapp NumberVip Hot Call Girls 🫤 Mahipalpur ➡️ 9711199171 ➡️ Delhi 🫦 Whatsapp Number
Vip Hot Call Girls 🫤 Mahipalpur ➡️ 9711199171 ➡️ Delhi 🫦 Whatsapp Number
 
➥🔝 7737669865 🔝▻ narsinghpur Call-girls in Women Seeking Men 🔝narsinghpur🔝 ...
➥🔝 7737669865 🔝▻ narsinghpur Call-girls in Women Seeking Men  🔝narsinghpur🔝  ...➥🔝 7737669865 🔝▻ narsinghpur Call-girls in Women Seeking Men  🔝narsinghpur🔝  ...
➥🔝 7737669865 🔝▻ narsinghpur Call-girls in Women Seeking Men 🔝narsinghpur🔝 ...
 
一比一原版(UdeM学位证书)蒙特利尔大学毕业证学历认证怎样办
一比一原版(UdeM学位证书)蒙特利尔大学毕业证学历认证怎样办一比一原版(UdeM学位证书)蒙特利尔大学毕业证学历认证怎样办
一比一原版(UdeM学位证书)蒙特利尔大学毕业证学历认证怎样办
 
Workplace-Hazards TLE EIM 10 QUARTER3 W2
Workplace-Hazards TLE EIM 10 QUARTER3 W2Workplace-Hazards TLE EIM 10 QUARTER3 W2
Workplace-Hazards TLE EIM 10 QUARTER3 W2
 
What Does The Engine Malfunction Reduced Power Message Mean For Your BMW X5
What Does The Engine Malfunction Reduced Power Message Mean For Your BMW X5What Does The Engine Malfunction Reduced Power Message Mean For Your BMW X5
What Does The Engine Malfunction Reduced Power Message Mean For Your BMW X5
 
如何办理麦考瑞大学毕业证(MQU毕业证书)成绩单原版一比一
如何办理麦考瑞大学毕业证(MQU毕业证书)成绩单原版一比一如何办理麦考瑞大学毕业证(MQU毕业证书)成绩单原版一比一
如何办理麦考瑞大学毕业证(MQU毕业证书)成绩单原版一比一
 
Lecture-20 Kleene’s Theorem-1.pptx best for understanding the automata
Lecture-20 Kleene’s Theorem-1.pptx best for understanding the automataLecture-20 Kleene’s Theorem-1.pptx best for understanding the automata
Lecture-20 Kleene’s Theorem-1.pptx best for understanding the automata
 
(ISHITA) Call Girls Service Jammu Call Now 8617697112 Jammu Escorts 24x7
(ISHITA) Call Girls Service Jammu Call Now 8617697112 Jammu Escorts 24x7(ISHITA) Call Girls Service Jammu Call Now 8617697112 Jammu Escorts 24x7
(ISHITA) Call Girls Service Jammu Call Now 8617697112 Jammu Escorts 24x7
 
What Causes BMW Chassis Stabilization Malfunction Warning To Appear
What Causes BMW Chassis Stabilization Malfunction Warning To AppearWhat Causes BMW Chassis Stabilization Malfunction Warning To Appear
What Causes BMW Chassis Stabilization Malfunction Warning To Appear
 
John Deere 7430 7530 Tractors Diagnostic Service Manual W.pdf
John Deere 7430 7530 Tractors Diagnostic Service Manual W.pdfJohn Deere 7430 7530 Tractors Diagnostic Service Manual W.pdf
John Deere 7430 7530 Tractors Diagnostic Service Manual W.pdf
 
ENJOY Call Girls In Okhla Vihar Delhi Call 9654467111
ENJOY Call Girls In Okhla Vihar Delhi Call 9654467111ENJOY Call Girls In Okhla Vihar Delhi Call 9654467111
ENJOY Call Girls In Okhla Vihar Delhi Call 9654467111
 
Sanjay Nagar Call Girls: 🍓 7737669865 🍓 High Profile Model Escorts | Bangalor...
Sanjay Nagar Call Girls: 🍓 7737669865 🍓 High Profile Model Escorts | Bangalor...Sanjay Nagar Call Girls: 🍓 7737669865 🍓 High Profile Model Escorts | Bangalor...
Sanjay Nagar Call Girls: 🍓 7737669865 🍓 High Profile Model Escorts | Bangalor...
 
Vip Mumbai Call Girls Colaba Call On 9920725232 With Body to body massage wit...
Vip Mumbai Call Girls Colaba Call On 9920725232 With Body to body massage wit...Vip Mumbai Call Girls Colaba Call On 9920725232 With Body to body massage wit...
Vip Mumbai Call Girls Colaba Call On 9920725232 With Body to body massage wit...
 
Top Rated Call Girls Vashi : 9920725232 We offer Beautiful and sexy Call Girl...
Top Rated Call Girls Vashi : 9920725232 We offer Beautiful and sexy Call Girl...Top Rated Call Girls Vashi : 9920725232 We offer Beautiful and sexy Call Girl...
Top Rated Call Girls Vashi : 9920725232 We offer Beautiful and sexy Call Girl...
 
BOOK FARIDABAD CALL GIRL(VIP Sunny Leone) @8168257667 BOOK 24/7
BOOK FARIDABAD CALL GIRL(VIP Sunny Leone) @8168257667 BOOK  24/7BOOK FARIDABAD CALL GIRL(VIP Sunny Leone) @8168257667 BOOK  24/7
BOOK FARIDABAD CALL GIRL(VIP Sunny Leone) @8168257667 BOOK 24/7
 
Majestic Call Girls: 🍓 7737669865 🍓 High Profile Model Escorts | Bangalore Es...
Majestic Call Girls: 🍓 7737669865 🍓 High Profile Model Escorts | Bangalore Es...Majestic Call Girls: 🍓 7737669865 🍓 High Profile Model Escorts | Bangalore Es...
Majestic Call Girls: 🍓 7737669865 🍓 High Profile Model Escorts | Bangalore Es...
 

Featured

How Race, Age and Gender Shape Attitudes Towards Mental Health
How Race, Age and Gender Shape Attitudes Towards Mental HealthHow Race, Age and Gender Shape Attitudes Towards Mental Health
How Race, Age and Gender Shape Attitudes Towards Mental Health
ThinkNow
 
Social Media Marketing Trends 2024 // The Global Indie Insights
Social Media Marketing Trends 2024 // The Global Indie InsightsSocial Media Marketing Trends 2024 // The Global Indie Insights
Social Media Marketing Trends 2024 // The Global Indie Insights
Kurio // The Social Media Age(ncy)
 

Featured (20)

2024 State of Marketing Report – by Hubspot
2024 State of Marketing Report – by Hubspot2024 State of Marketing Report – by Hubspot
2024 State of Marketing Report – by Hubspot
 
Everything You Need To Know About ChatGPT
Everything You Need To Know About ChatGPTEverything You Need To Know About ChatGPT
Everything You Need To Know About ChatGPT
 
Product Design Trends in 2024 | Teenage Engineerings
Product Design Trends in 2024 | Teenage EngineeringsProduct Design Trends in 2024 | Teenage Engineerings
Product Design Trends in 2024 | Teenage Engineerings
 
How Race, Age and Gender Shape Attitudes Towards Mental Health
How Race, Age and Gender Shape Attitudes Towards Mental HealthHow Race, Age and Gender Shape Attitudes Towards Mental Health
How Race, Age and Gender Shape Attitudes Towards Mental Health
 
AI Trends in Creative Operations 2024 by Artwork Flow.pdf
AI Trends in Creative Operations 2024 by Artwork Flow.pdfAI Trends in Creative Operations 2024 by Artwork Flow.pdf
AI Trends in Creative Operations 2024 by Artwork Flow.pdf
 
Skeleton Culture Code
Skeleton Culture CodeSkeleton Culture Code
Skeleton Culture Code
 
PEPSICO Presentation to CAGNY Conference Feb 2024
PEPSICO Presentation to CAGNY Conference Feb 2024PEPSICO Presentation to CAGNY Conference Feb 2024
PEPSICO Presentation to CAGNY Conference Feb 2024
 
Content Methodology: A Best Practices Report (Webinar)
Content Methodology: A Best Practices Report (Webinar)Content Methodology: A Best Practices Report (Webinar)
Content Methodology: A Best Practices Report (Webinar)
 
How to Prepare For a Successful Job Search for 2024
How to Prepare For a Successful Job Search for 2024How to Prepare For a Successful Job Search for 2024
How to Prepare For a Successful Job Search for 2024
 
Social Media Marketing Trends 2024 // The Global Indie Insights
Social Media Marketing Trends 2024 // The Global Indie InsightsSocial Media Marketing Trends 2024 // The Global Indie Insights
Social Media Marketing Trends 2024 // The Global Indie Insights
 
Trends In Paid Search: Navigating The Digital Landscape In 2024
Trends In Paid Search: Navigating The Digital Landscape In 2024Trends In Paid Search: Navigating The Digital Landscape In 2024
Trends In Paid Search: Navigating The Digital Landscape In 2024
 
5 Public speaking tips from TED - Visualized summary
5 Public speaking tips from TED - Visualized summary5 Public speaking tips from TED - Visualized summary
5 Public speaking tips from TED - Visualized summary
 
ChatGPT and the Future of Work - Clark Boyd
ChatGPT and the Future of Work - Clark Boyd ChatGPT and the Future of Work - Clark Boyd
ChatGPT and the Future of Work - Clark Boyd
 
Getting into the tech field. what next
Getting into the tech field. what next Getting into the tech field. what next
Getting into the tech field. what next
 
Google's Just Not That Into You: Understanding Core Updates & Search Intent
Google's Just Not That Into You: Understanding Core Updates & Search IntentGoogle's Just Not That Into You: Understanding Core Updates & Search Intent
Google's Just Not That Into You: Understanding Core Updates & Search Intent
 
How to have difficult conversations
How to have difficult conversations How to have difficult conversations
How to have difficult conversations
 
Introduction to Data Science
Introduction to Data ScienceIntroduction to Data Science
Introduction to Data Science
 
Time Management & Productivity - Best Practices
Time Management & Productivity -  Best PracticesTime Management & Productivity -  Best Practices
Time Management & Productivity - Best Practices
 
The six step guide to practical project management
The six step guide to practical project managementThe six step guide to practical project management
The six step guide to practical project management
 
Beginners Guide to TikTok for Search - Rachel Pearson - We are Tilt __ Bright...
Beginners Guide to TikTok for Search - Rachel Pearson - We are Tilt __ Bright...Beginners Guide to TikTok for Search - Rachel Pearson - We are Tilt __ Bright...
Beginners Guide to TikTok for Search - Rachel Pearson - We are Tilt __ Bright...
 

YALE (A807) ERP16-20ATF FORKLIFT Service Repair Manual
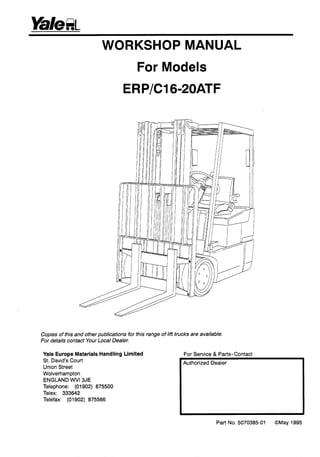
  • 1. WORKSHOP MANUAL For Models ERP/CI6-2OATF Copies of this and other publications for this range of lift trucks are available. For details contact Your Local Dealer. For Service & Parts-Contact Authorized Dealer Part No. 5070385-01 @May 1995
  • 2. EXPLANATION OF TRUCK MODEL CODE A - Premium B - Standard -POWER E - Electric E R P 1 8 A T F E 48 V 2084 R - Sit Down Rider TYRES P - Pneumatic C - Cushion RATED CAPACITY (in kg x 100) r 16 L LMAST CLOSED HEIGHT(mm) MAST TYPE V -Two Stage Limited Free Lift F -Two Stage Full Free Lift E -Three Stage Full Free Lift L -VOLTAGE 48 Volts -PLANT SOURCE E - Europe -SERIES CODE A, B, C etc. -MODEL T - Three Wheel FWD R - Three Wheel RWD
  • 3. This Maintenance Manual is divided into major sections which are listed on this page. Quick referenceto these sections can be made by placingthe rightthumb on the tab ofthe desired section, bending the book back andthumbing the pages to the corresponding tab. 1 SECTl0NS OPERATING INSTRUCTIONS 2 GENERAL TRUCK AND LUBRICATION 3 ELECTRICAL SYSTEM 4 DRIVE UNIT 5 BRAKE SYSTEM 6 TRAIL AXLE AND STEERING SYSTEM 7 HYDRAULIC SYSTEM a MAST 9 BAlTERY AND CHARGING SYSTEM 10 USER SUPPORT INFORMATION 11 ALPHABETICAL INDEX
  • 4. e e e e e e e e e e e e e e SAFETY PRECAUTIONS MAINTENANCE AND REPAIR When lifting parts or assemblies, make sure that all slings,chains, or cables are correctlyfastened and that the load being lifted is balanced. Make sure that the crane, cables, and chains have the capacity to support the weight of the load. Do not lift heavy parts by hand. Use a lifting mechanism. Wear safety glasses. DISCONNECT THE BATTERY CONNECTOR before doing any maintenance or repair on electric lift trucks. Always usecorrect blocksto preventthe unitfrom rollingor falling. See “Howto Putthe LiftTruck on Blocks” in the OPERATOR’S MANUAL or SECTION 2, GENERAL TRUCK AND LUBRICATION. Keepthe unitandworkingareacleanandinorder. Use the correct tools for the job. Keep the tools clean and in good condition Always use YALE APPROVED parts when making repairs.Replacementparts must meet or exceed the specifications of the original equipment manufacturer. Make sure that all nuts, bolts, circlips, and other fasteningdevicesare removedbeforeusingforce to remove parts. Always fasten a DO NOT OPERATE sign to the controls of the unit when making repairs or if the unit needs repairs. Make sure you follow the DANGER, WARNING, and CAUTION notes in the instructions. Wear a rubberapron,gloves, boots, and goggles or a face shield when doing maintenance on batteries. Batteries generate hydrogen gas when they are being charged. Keep open fire away from batteries.Donot checkthe electrolyte levelwith a match or a lighter. No smoking and do not create sparks. Make sure the area has ventilation. If the batteryischargedinthe lifttruck, openthebonnet. Lift batteries correctly with a crane or equipment designed for the job. Always use a spreader bar designed and adjusted for the battery. Move batteries with a lift truck, or a conveyor or rollers designedfor that purpose. If the battery does not have a cover, a rubber mat or insulating material must be putover the top of the batteryto preventa short circuit with other equipment. Make sure the the lifting equipment has enough capacity for the job. Do not use chain or wire rope slings. Never put metal materials or tools on a battery. When maintenance on the battery or the battery charger is required, disconnect both the AC and DC power. If new battery connectors must be installed, make sure the positive and negative terminals and cables are kept separate and insulated from each other. Even a momentary short circuitcan cause an explosionand damage the battery. Keep water readily available to flush spilled electrolyte.Electrolyteinthe eyesmust beflushed with water immediately and then quickly get medicalattention. Specialshowers and eye wash systems are required in areas where battery maintenanceis done. If electrolyte is spilled on a work surface or the floor, flush the area with water, use a solution of soda (sodium bicarbonate) to make the acid neutral. Only trained persons are permitted to do maintenance on batteries and battery chargers. Make sure that the regulations by government safety agencies, government insurers, private insurers, and private organizations are followed when doing maintenanceon batteries. NOTE: The following symbols and words indicate safety information in this manual: DANGER: Indicates a condition that will cause immediatedeath or injury! WARNING: Indicatesa condition that can Acause death or injury! Acause property damage! CAUTION: Indicates a condition that can
  • 5. CONTENTS Section 1 Section 2 GENERAL . . . . . . . . . . . . . . . . . . . . . . . . . HYDRAULICTANK . . . . . . . . . . . . . . . . . . . . . . . . . 2-5 SAFETY AND INFORMATIONALLABELS . . . . . 1-2 Inspection . . . . . . . . . . . . . . . . . . . . . . . . . . . . . . 2-5 Repairs. Small Leaks . . . . . . . . . . . . . . . . . . . . . 2-5OPERATOR PRECAUTIONS . . . . . . . . . Repairs. Large Leaks . . . . . . . . . . . . . . . . . . . . 2-5OPERATOR PRE-CHECKSAND INSPECTION 1-3 Cleaning . . . . . . . . . . . . . . . . . . . . . . . . . . .OPERATING PROCEDURE . . . . . . . . . . . . . . . . . 1-3 Steam Method of Cleaning . . . . . . . . . . . . . . . .2-6 SHUT DOWN PROCEDURE. . . . . . . . . . . . . . . . .1-4 Chemical Solution Method of Cleaning FORK ADJUSTMENT ....................... 1-4 Additional Preparationsfor Repair . . . . . . . . . .2-6 SAFETY AND OPERATIONALCHECK LIST . . . 1-5 MODELAND CONTROL INFORMATION 1-7 WELDING REPAIRS . . . . . . . . . . . . . . . . . TYRES AND WHEELS 2-6. . . . . . . . . . . . . . . . . . . . . . instrument PanelA (STANDARD) . . . . . . . . '-lo HOW TO CHANGE THE WRES . . . . . . . . . . . . . 2-7 . . . . . . . . . General 2-7InstrumentPanel B (OPTIONAL) 1-10 instrument Panel (OPTIONAL) . . . . . . . . '-lo PNEUMATICTYRES . . . . . . . . . . . . . . . . . . . . . . . 2-7 . . . . . . . . . . . . . . . . . . . . . . . . . . . . . . . . Temperature Indicator Lamp . . . . . . . . . . . . . 1-11 SAFE MAINTENANCEPROCEDURES . . . . . . 1-11 MOVING A DISABLEDLIFT TRUCK . . . . . . . . 1-12 HOW TO TOW THE LIFT TRUCK . . . . . . . . . . 1-12 HOW TO PUT A LIFT TRUCK ON BLOCKS 1-12 HOW TO RAISETHE STEERINGTYRE . . . . 1-13 HOW TO RAISETHE DRIVETYRES . . . . . . . 1-13 PRECAUTIONSFOR TRUCKS IN STORAGE 1-13 . PRECAUTIONSFOR BATTERIES IN STORAGE . . . . . . . . . . . . . . . . . . . . . . . . . . . . 1-14 Section 2 GENERAL . . . . . . . . . . . . . . . . . . . . . . . . . . . . . . . . . 2-1 FRAME . . . . . . . . . . . . . . . . . . . . . . . . . . . . . . . . . . . 2-1 FLOOR PLATE . . . . . . . . . . . . . . . . . . . . . . . . . . . . . 2-1 REAR COMPARTMENT COVER . . . . . . . . . . . . . 2-1 FRONT COVER ............................ 2-2 STEERING COLUMN COVER . . . . . . . . . . . . . . . 2-2 Removethe Wheel from the Lift Truck . . . . . . .2.7 Removethe Tyre from the Wheel . . . . . . . . . . 2-8 Installthe Tyre on the Wheel . . . . . . . . . . . . . .2-8 Add Air to the Tyres . . . . . . . . . . . . . . . . . . . . . . 2-9 Removethe Wheel from the Lift Truck . . . . 2-10 Removethe Tyre from the Wheel . . . . . . . . 2-10 . . . . . . . . . . . . .2-11 SOLID TYRES . . . . . . . . . . . . . . . . . . . . . . . . . . . 2-12 PNEUMATIC SHAPED SOLID TYRES . . . . . . 2-10 Installthe Tyre on the Wheel Removethe One Piece Wheel and Tyre . . 2-12 Installthe Tyre on the One Piece Wheel . . 2-12 Installthe Wheels on the Lift Truck . . . . . . . 2-12 LABEL REPLACEMENT. . . . . . . . . . . . . . . . . . . 2-13 YALE WARRANTY INFORMATION . . . . . . . . . 2-14 RECOMMENDEDSCHEDULE OF MAINTENANCE ...................... 2-14 LUBRICATIONINSTRUCTIONS . . . . . . . . . . . 2-15 EVERY 8 HOURS ........................ 2-15 EVERY 350 HOURS ...................... 2-15 EVERY 2000 HOURS ..................... 2-15 HYDRAULICOILS ........................ 2-21 GEAR OILS . . . . . . . . . . . . . . . . . . . . . . . . . . . . . 2-22 GREASE . . . . . . . . . . . . . . . . . . . . . . . . . . . . . . . . 2-23 FREEZERAPPLICATIONS . . . . . . . . . . . . . . . . 2-24 HYDRAULICCONTROLVALVE COVERS . . . . . 2-2 BATTERY COVER .......................... 2-2 Open . . . . . . . . . . . . . . . . . . . . . . . . . . . . . . . . . . 2-2 Close . . . . . . . . . . . . . . . . . . . . . . . . . . . . . . . . . . 2-2 Removal . . . . . . . . . . . . . . . . . . . . . . . . . . . . . . . 2-2 Installation . . . . . . . . . . . . . . . . . . . . . . . . . . . . . . 2-2 BATTERY REMOVALAND INSTALLATION 2-3 BATTERY PLATFORM 2-3 Modifications . . . . . . . . . . . . . . . . . . . . . . . . . . 2-24 CompleteTruck 2-24 Control ComDartment 2-24 . . . . ....................... ...................... . . . . . . . . . . . . . . . . . . .......................OVERHEADGUARD 2-4 Electrical System ...................... 2-24 Removal 2-4 Battery Compartment .................. 2-24 Installation 2-4 Ignition Switch . . . . . . . . . . . . . . . . . . . . . . . . 2-24 Removal . . . . . . . . . . . . . . . . . . . . . . . . . . . . . . . 2-5 Accelerator Pedal ...................... 2-24 Installation . . . . . . . . . . . . . . . . . . . . . . . . . . . . . . 2-5 Drive. Hydraulic and Steering Motors . . . . . 2-24 ............................... . . . . . . . . . . . . . . . . . . . . . . . . . . . . . . COUNTERWEIGHT ........................ 2-4 Steering Linkage and Pivot Points . . . . . . . . 2-24
  • 6. Section 2 Brake Lines and Linkage . . . . . . . . . . . . . . . 2-24 Tilt Cylinders . . . . . . . . . . . . . . . . . . . . . . . . . . 2-24 Upright and Carriage . . . . . . . . . . . . . . . . . . . 2-24 MAINTENANCE . . . . . . . . . . . . . . . . . . . . . . . . . . 2-24 CompleteTruck . . . . . . . . . . . . . . . . . . . . . . . 2-24 Electrical System ...................... 2-25 IgnitionSwitch . . . . . . . . . . . . . . . . . . . . . . . . 2-25 Control Compartment . . . . . . . . . . . . . . . . . . 2-24 Battery Compartment . . . . . . . . . . . . . . . . . . 2-25 Steering Linkage and Pivot Points . . . . . . . . 2-25 Accelerator Pedal . . . . . . . . . . . . . . . . . . . . . . 2-25 Drive, Hydraulic and Steering Motors . . . . . 2-25 Brake Lines and Linkage . . . . . . . . . . . . . . . 2-25 Section 3 General . . . . . . . . . . . . . . . . . . . . . . . . . . . . . . 3-20 Connect. Disconnect.and Check the Hand Set . . . . . . . . . . . . . . . . . . . 3-20 Check and Adjust Functions . . . . . . . . . . . . . 3-20 FUNCTIONDESCRIPTIONS . . . . . . . . . . . . . . 3-21 Traction Control Cards . . . . . . . . . . . . . . . . . 3-21 PUMP CONTROLCARD (LABEL LETTER PX) 3-23 TABLES FOR FUNCTIONVALUE SETTINGS 3-24 TROUBLESHOOTING .................... 3-26 CONTACTORS . . . . . . . . . . . . . . . . . . . . . . . . . . 3-59 TESTING CONTACTORS . . . . . . . . . . . . . . . . . 3-59 Removal . . . . . . . . . . . . . . . . . . . . . . . . . . . . . 3-60 Installation . . . . . . . . . . . . . . . . . . . . . . . . . . . . 3-60 TMM1 CARD . . . . . . . . . . . . . . . . . . . . . . . . . . . . 3-62 Tilt Cylinders . . . . . . . . . . . . . . . . . . . . . . . . . . 2-25 Upright and Carriage . . . . . . . . . . . . . . . . . . . 2-25 Removal . . . . . . . . . . . . . . . . . . . . . . . . . . . . . 3-63 Installation . . . . . . . . . . . . . . . . . . . . . . . . . . . . 3-63 CIRCUIT PROTECTION 3-63 Hydraulic System 2-25 Current Limit 3-63 Thermal Protection 3-63Threads. Nomenclature 2-26 Strength Identification 2-26 Suppressors (Filter Blocks) . . . . . . . . . . . . . 3-63 . . . . . . . . . . . . . . . . . . . . . . . . . . . . . . . . . . . . . . . . . . . . . . . . . . .FASTENERS - INTR0DUCTI0N 2-26 . . . . . . . . . . . . . . . . . . . . . . . . . . . . . . . . . . . . . . . . . . . . . . . . . . . . . . . . . . . . . . . . . . . . . . . . . . . . . . . . . FUSES . . . . . . . . . . . . . . . . . . . . . . . . . . . . . . . . . 3-64Section 3 ELECTRICAL SYSTEM-G ENERAL . . . . . . . . . . .3-1 EV-1OOLX MOTOR CONTROLLER . . . . . . . . . . . 3-2 EV-100DESCRIPTIONAND OPERATION . . . . . 3-2 The Silicon Controlled Rectifier . . . . . . . . . . . .3-2 A Motor Circuit that Operateswith Pulses . . .3-2 Traction Circuit . . . . . . . . . . . . . . . . . . . . . . . . . . 3-4 Hydraulic Pump Motor . . . . . . . . . . . . . . . . . . . . 3-4 The SCR 1 "OFF" Circuit . . . . . . . . . . . . . . . . . 3-4 INDUCTIONCURRENT FROM THE MOTOR . . 3-6 THE CONTROL CARD ...................... 3-7 Pulse Monitor Trip . . . . . . . . . . . . . . . . . . . . . . . 3-8 SRO Circuit . . . . . . . . . . . . . . . . . . . . . . . . . . . . . 3-8 Control Card Adjustments . . . . . . . . . . . . . . . . . 3-8 Accelerator Control . . . . . . . . . . . . . . . . . . . . . 3-11 CONTROL CARD . . . . . . . . . . . . . . . . . . . . . . . . . 3-11 Status Codes . . . . . . . . . . . . . . . . . . . . . . . . . . 3-11 SEQUENCE OF OPERATION . . . . . . . . . . . . . . 3-12 SCR CONTROL . . . . . . . . . . . . . . . . . . . . . . . . . . 3-14 CONTROL CARD CONNECTIONS . . . . . . . . . 3-14 HAND SET .............................. 3-17 CHECKSAND ADJUSTMENTS, CONTROL CARD . . . . . . . . . . . . . . . . . . . . . . . . 3-18 Function Codes . . . . . . . . . . . . . . . . . . . . . . . 3-18 Bench Tests .......................... 3-19 Tests-Control Card Installedin a Lift Truck 3-19 FUNCTI0N SETTINGS . . . . . . . . . . . . . . . . . . . 3-20 PRINTED CIRCUIT BOARDS . . . . . . . . . . . . . . 3-64 SteeringAngle Control Board . . . . . . . . . . . . 3-64 Operation . . . . . . . . . . . . . . . . . . . . . . . . . . . . 3-64 Testing . . . . . . . . . . . . . . . . . . . . . . . . . . . . . . . 3-65 Operation . . . . . . . . . . . . . . . . . . . . . . . . . . . . 3-69 Testing . . . . . . . . . . . . . . . . . . . . . . . . . . . . . . . 3-70 Lift Pump Control Board . . . . . . . . . . . . . . . . 3-69 Bypassingthe Lift Pump Control Board . . . 3-71 ACCELERAT0R . . . . . . . . . . . . . . . . . . . . . . . . . 3-72 Removal ............................. 3-72 Installation ............................ 3-72 POWER STEERING . . . . . . . . . . . . . . . . . . . . . . 3-73 KEY SWITCH ............................ 3-73 INSTRUMENTPANEL .................... 3-73 Standard InstrumentPanel . . . . . . . . . . . . . . 3-74 MOTOR MAINTENANCE- GENERAL . . . . . . 3-75 BRUSHAND COMMUTATOR INSPECTION . 3-75 NORMAL COMMUTATOR SERVICE . . . . . . . . 3-77 COMMUTATOR PROBLEMS . . . . . . . . . . . . . . 3-78 BRUSH REPLACEMENT, DRIVE AND HYDRAULIC PUMP MOTORS . . . . . . . . . . . . . 3-80 Traction Motor Removal . . . . . . . . . . . . . . . . 3-82 Hydraulic Pump Motor Installation . . . . . . . . 3-83 Power Steering Pump Motor . . . . . . . . . . . . 3-83 3-83 Traction Motor ........................ 3-83 Traction Motor Installation. . . . . . . . . . . . . . . 3-83 MOTOR REMOVAL AND INSTALLATION . . . .
  • 7. Section 3 Lift Pump and Motor Removal . . . . . . . . . . . 3-84 Lift Pump and Motor Installation . . . . . . . . . 3-84 Power Steering Pump and Motor Removal 3-84 Power Steering Pump and Motor Installation3-85 Disassembly . . . . . . . . . . . . . . . . . . . . . . . . . . 3-85 Assembly . . . . . . . . . . . . . . . . . . . . . . . . . . . . . 3-85 TRACTION MOTOR REPAIR . . . . . . . . . . . . . . 3-85 COMMUTATOR REPAIRS . . . . . . . . . . . . . . . . . 3-85 TESTS . . . . . . . . . . . . . . . . . . . . . . . . . . . . . . . . . . 3-87 . Damaged Field and Armature . . . . . . . . . . . 3-87 Short-Circuit in an Armature Winding . . . . . 3-88 Short-Circuitin the Armature . . . . . . . . . . . . 3-88 Open Circuit in a Field Coil . . . . . . . . . . . . . . 3-88 Short-circuit in a Field Coil . . . . . . . . . . . . . . 3-88 Short-circuit Between Field and Motor Case 3-88 Brush Holder . . . . . . . . . . . . . . . . . . . . . . . . . . 3-88 WIRING DIAGRAMSAND SCHEMATICS. . . . 3-90 Section 4 TRANSAXLE-GENERAL . . . . . . . . . . . . . . . . . . . . 4-1 TRANSAXLE SPEC1FlCATlONS . . . . . . . . . . . . $ 4 -1 REMOVAL . . . . . . . . . . . . . . . . . . . . . . . . . . . . . . . . . 4-1 INSTALLATION . . . . . . . . . . . . . . . . . . . . . . . . . . . . 4-3 DISASSEMBLY . . . . . . . . . . . . . . . . . . . . . . . . . . . . 4.3 ASSEMBLY . . . . . . . . . . . . . . . . . . . . . . . . . . . . . . . . 4.3 TROUBLESHOOTING . . . . . . . . . . . . . . . . . . . . . . 4.6 Section 5 GENERAL . . . . . . . . . . . . . . . . . . . . . . . . . . . . . . . . . 5.1 SPECIFICATIONS . . . . . . . . . . . . . . . . . . . . . . . . . . 5-1 PARKING BRAKE ADJUSTMENT . . . . . . . . . . . . 5-1 SERVlCE BRAKE ADJUSTMENT . . . . . . . . . . . . 5-1 REMOVAL-SERVICE BRAKE PADS . . . . . . . . . . 5-1 INSTALLATION-SERVICEBRAKE PADS . . . . . . 5-1 REMOVAL-SERVICE BRAKE CALIPER . . . . . . . 5-2 INSTALLATION-SERVICEBRAKE CALIPER . . 5-3 DISASSEMBLY-SERVICE BRAKE CALIPER . . 5-3 ASSEMBLY-SERVICE BRAKE CALIPER . . . . . . 5-3 REMOVAL-PARKING BRAKE CALIPER . . . . . . 5-3 INSTALLATION-PARKING BRAKE CALIPER . . 5-4 DISASSEMBLY-PARKINGBRAKE CALIPER . . 5-6 ASSEMBLY-PARKING BRAKE CALIPER . . . . . . 5-6 MASTER CYLlNDER- REMOVAL . . . . . . . . . . . . .5-6 MASTER CYLINDER-INSTALLATION . . . . . . . . 5-6 MASTER CYLINDER-DISASSEMBLY . . . . . . . . 5-6 MASTER CYLINDER-ASSEMBLY . . . . . . . . . . . . 5.7 PARKING BRAKE LEVER ASSEMBLY- REMOVAL................................. 5-7 Section 5 PARKINGBRAKELEVERASSEMBLY- INSTALLATION . . . . . . . . . . . . . . . . . . . . . . . . . . . . 5-7 TROUBLESHOOTING ...................... 5-9 Section 6 TRAIL AXLE . . . . . . . . . . . . . . . . . . . . . . . . . . . . . . . 6-1 WHEEL ASSEMBLY . . . . . . . . . . . . . . . . . . . . . . . . 6-1 Removal . . . . . . . . . . . . . . . . . . . . . . . . . . . . . . . 6-1 Installation . . . . . . . . . . . . . . . . . . . . . . . . . . . . . . 6-1 Removal . . . . . . . . . . . . . . . . . . . . . . . . . . . . . . . 6-1 Installation . . . . . . . . . . . . . . . . . . . . . . . . . . . . . . 6-1 Removal . . . . . . . . . . . . . . . . . . . . . . . . . . . . . . . 6-3 Installation . . . . . . . . . . . . . . . . . . . . . . . . . . . 6-3 POWER STEERING SYSTEM . . . . . . . . . . . . . . . 6-4 General . . . . . . . . . . 6-4 Description . . . . . . . . . . . . . . . . . . . . . . . . . . . . . 6-4 WHEEL HUB . . . . . . . . . . . . . . . . . . . . . . . . . . . . . . 6-1 STEER AXLE ASSEMBLY . . . . . . . . . . . . . . :. . . . 6-3 . . . . . . . . . . . . . . . STEERING WHEEL AND COLUMN ASSEMBLY . . . . . . . . . . . . . . . . . . . . . . . . . . . . . . . . 6-4 . . . . . . . . . . 6-5 Installation .............................. 6-6 Cleaning . . . . . . . . . . . . . . . . . . . . . . . . . . . . . . . 6-8 Disassembly . . . . . . . . . . . . . . . . . . . . . . . . . . . . 6-8 Assembly . . . . . . . . . . . . . . . . . . . . . . . . . . . . . 6-10 Installation . . . . . . . . . . . . . . . . . . . . . . . . . . . . 6-13 Removal . . . . . . . . . . . . . . . . . . . . . . . . . . . . . 6-14 Installation ............................ 6-14 Disassembly .......................... 6-14 Assembly . . . . . . . . . . . . . . . . . . . . . . . . . . . . . 6-14 Remove Air from the System . . . . . . . . . . . . 6-14 Check the Operation . . . . . . . . . . . . . . . . . . . 6-15 Steering Pressure ..................... 6-15 POWER STEERINGCYLINDER . . . . . . . . . . . 6-14 CHECKS AND ADJUSTMENTS . . . . . . . . . . . . 6-14 TROUBLESHOOTING .................... 6-16 Section 7 GENERAL . . . . . . . . . . . . . . . . . . . . . . . . . . . . . . . . . 7-1 HOIST SYSTEM . . . . . . . . . . . . . . . . . . . . . . . . . . . 7-1 TILT SYSTEM . . . . . . . . . . . . . . . . . . . . . . . . . . . . . 7-1 AUXlLlARY FUNCTIONS .................... 7-1 Third Function Location . . . . . . . . . . . . . . . . . . . 7-1 Fourth FunctionLocation . . . . . . . . . . . . . . . . . 7-1 HYDRAULICOIL TANK ..................... 7-1 SPECIFICATIONS .......................... 7-2 HydraulicTank .......................... 7-2 Power Steering Pump .................... 7-2 Hoist Pump ............................. 7-2
  • 8. Section 7 Strainers . . . . . . . . . . . . . . . . . . . . . . . . . . . . . . . 7-2 Hydraulic Oil Filter . . . . . . . . . . . . . . . . . . . . . . . 7-2 HOIST PUMP . . . . . . . . . . . . . . . . . . . . . . . . . . . . . . 7-3 Removal . . . . . . . . . . . . . . . . . . . . . . . . . . . . . . . 7-3 Installation . . . . . . . . . . . . . . . . . . . Disassembly-Seal Replacement . . . . . . . . . . . . . . . . . . . . . . . . . . . . 7-4 POWER STEERING PUMP AND MOTOR . . . . . 7.5 Removal . . . . . . . . . . . . . . . . . . . . . . . . . . . . . . . 7-5 Installation . . . . . . . . . . . . . . . . . . . . . . . . . . . . . . 7-5 Disassembly . . . . . . . . . . . . . . . . . . . . . . . . . . . . 7-6 Assembly . . . . . . . . . . . . . . . . . . . . . . . . . . . . . . . 7-6 CONTROL VALVE . . . . . . . . . . . . . . . . . . . . . . . . . . 7-7 Settings . . . . . . . . . . . . . . . . . . . . . . . . . . . . . . . . 7-7 Removal . . . . . . . . . . . . . . . . . . . . . . . . . . . . . . . 7-7 Installation . . . . . . . . . . . . . . . . . . . . . . . . . . . . . . 7-8 Disassembly . . . . . . . . . . . . . . . . . . . . . . . . . . 7-10 Assembly . . . . . . . . . . . . . . . . . . . . . . . . . . . . . 7-10 MAST TILT ADJUSTMENT . . . . . . 7-12 CONTROL VALVE-EMERGENCY REPAIR . . 7-12 TROUBLESHOOTING . . . . . . . . . . . . . . . . . . . . 7-13 Section 8 MAST . . . . . . . . . . . . . . . . . . . . . . . . . . . . . . . . . . . . . 8-1 DESCRIPTIONAND OPERATION . . . . . . . . . . . .8-1 Carriage . . . . . . . . . . . . . . . . . . . . . . . . . . . . . . . . 8-1 Mast Mounts . . . . . . . . . . . . . . . . . . . . . . . . . . . . 8-1 Descriptionand Operation . . . . . . . . . . . . . . . . 8-3 TWO STAGE MAST WITH FULL FREE LIFT . . . 8-5 Description . . . . . . . . . . . . . . . . . . . . . . . . . . . . . 8-5 Operation . . . . . . . . . . . . . . . . . . . . . . . . . . . . . . 8-5 Description . . . . . . . . . . . . . . . . . . . . . . . . . . . . . 8-7 Operation . . . . . . . . . . . . . . . . . . . . . . . . . . . . . . 8-7 TWO STAGE MAST WITH LIMITED FREE LIFT 8-3 THREE STAGE MAST WITH FULL FREE LIFT . 8-7 SAFETY PROCEDURESWHEN WORKING NEAR THE MAST . . . . . . . . . . . . . . . . . . . . . . . . . . 8-9 MAST REPLACEMENT ..................... 8-9 MAST REPAIRS . . . . . . . . . . . . . . . . . . . . . . . . . 8-10 FORKS . . . . . . . . . . . . . . . . . . . . . . . . . . . . . . . . . 8-10 Removal . . . . . . . . . . . . . . . . . . . . . . . . . . . . . 8-10 Installation . . . . . . . . . . . . . . . . . . . . . . . . . . . . 8-10 Removal, Standard Carriage . . . . . . . . . . . . 8-10 Removal, Sideshift Carriage . . . . . . . . . . . . . 8-12 Repairs . . . . . . . . . . . . . . . . . . . . . . . . . . . . . . 8-12 Installation,Standard Carriage . . . . . . . . . . . 8-12 CARRIAGES ............................ 8-10 Section 8 Installation.Sideshift Carriage . . . . . . . . . . . 8-12 MASTS . . . . . . . . . . . . . . . . . . . . . . . . . . . . . . . . . 8-13 Removal . . . . . . . . . . . . . . . . . . . . . . . . . . . . . 8-13 Disassembly Procedures for the Two Stage Mast with Limited or Full Free Lift . . . . . . . . 8-14 Disassembly Procedures for 8-17the Three Stage Mast . . . . . . . . . . . . . . . . . . Cleaning and Inspection . . . . . . . . . . . . . . . . 8-19 Assembly of the Two Stage Mast with Limited and Full Free Lift . . . . . . . . . . . 8-20 Assembly of the Three Stage Mast with Full Free Lift . . . . . . . . . . . . . . . . . . . . . . 8-20 Mast Installation . . . . . . . . . . . . . . . . . . . . . . . 8-21 Removalof the Main Lift Cylinders . . . . . . . 8-21 Removalof the Free Lift Cylinder . . . . . . . . 8-22 Disassembly of a Lift Cylinder . . . . . . . . . . . 8-22 8-22 Installationof the Main Lift Cylinders . . . . . . 8-24 Installationof the Free Lift Cylinder Installationof Header Hoses for Two Stage Mast with Limited Free Lift . . . . 8-26 Installationof Header Hoses for Two Stage Mast with Full Free Lift . . . . . . . 8-27 Installationof Header Hoses for Three Stage Mast with Full Free Lift . . . . . . 8-30 Removal . . . . . . . . . . . . . . . . . . . . . . . . . . . . . 8-33 Disassembly . . . . . . . . . . . . . . . . . . . . . . . . . . 8-33 Cleaning ............................. 8-34 Assembly . . . . . . . . . . . . . . . . . . . . . . . . . . . . . 8-34 Installation . . . . . . . . . . . . . . . . . . . . . . . . . . . . 8-34 Check the Lift Cylinders for Leaks . . . . . . . . 8-34 Check the Tilt Cylinders for Leaks . . . . . . . . 8-34 Adjust the Tilt Cylinders . . . . . . . . . . . . . . . . . 8-34 Adjust the Lift Chains . . . . . . . . . . . . . . . . . . . 8-35 Adjust the Mast . . . . . . . . . . . . . . . . . . . . . . . . 8-36 Adjust the Carriage .................... 8-36 LIFT CYLINDERS . . . . . . . . . . . . . . . . . . . . . . . . 8-21 Assembly of a Lift Cylinder . . . . . . . . . . . . . . HEADER HOSE ARRANGEMENTS . . . . . . . . 8-25 TILT CYLINDERS . . . . . . . . . . . . . . . . . . . . . . . . 8-33 CHECKS AND ADJUSTMENTS . . . . . . . . . . . . 8-34 TROUBLESHOOTING .................... 8-38 Section 9 BATTERYAND CHARGING SYSTEM- GENERAL ................................. 9-1 SAFETYTIPS FOR HANDLING INDUSTRIALTRUCK BATTERIES . . . . . . . . . . . . 9-1 LEADACID BATTERIES . . . . . . . . . . . . . . . . . . . . 9-2 Specific Gravity . . . . . . . . . . . . . . . . . . . . . . . . . 9-3 Chemical Reaction ....................... 9-3
  • 9. Section 9 HOW TO SELECT THE BATTERY . . . . . . . . . . . . 9-4 Voltage of a Battery . . . . . . . . . . . . . . . . . . . . . . 9-4 Battery Ratings . . . . . . . . . . . . . . . . . . . . . . . . . . 9-4 Kilowatt Hours . . . . . . . . . . . . . . . . . . . . . . . . . . 9-4 THE BATTERY AS A COUNTERWEIGHT . . . . . 9.5 THE NEW BATTERY . . . . . . . . . . . . . . . . . . . . . . . 9-5 BAlTERY MAINTENANCE . . . . . . . . . . . . . . . . . .9-5 Maintenance Records .................... 9-5 Cleaning the Battery ..................... 9-6 Adding Water . . . . . . . . . . . . . . . . . . . . . . . . . . . 9-6 Hydrometer . . . . . . . . . . . . . . . . . . . . . . . . . . . . . 9-7 Battery Temperature . . . . . . . . . . . . . . . . . . . . . 9-7 Types of Battery Charges . . . . . . . . . . . . . . . . .9-8 Methods of Charging . . . . . . . . . . . . . . . . . . . . . 9-8 CHARGING THE BATTERY . . . . . . . . . . . . . . . . .9-8 Troubleshooting the Charger . . . . . . . . . . . . . .9-9 Section 9 How to Know when the Battery is Fully Charged . . . . . . . . . . . . . . . . . . . . . . . . . 9-9 Battery Charging Area .................... 9.9 Equipment Needed . . . . . . . . . . . . . . . . . . . . . . 9-9 TROUBLESHOOTING . . . . . . . . . . . . . . . . . . . . 9-10 Section 10 SERVICE PARTS ORDERING INSTRUCTIONS . . . . . . . . . . . . . . 10-1 HOW TO ORDER SERVICE PARTS . . . . . . . . 10-1 WHEN ORDERING PARTS . . . . . . . . . . . . . . . . 10-1 TECHNICAL PUBLICATIONS . . . . . . . . . . . . . . 10-1 PARTS MANUAL . . . . . . . . . . . . . . . . . . . . . . . . . 10-1 OPERATING MANUAL .................... 10-1 OPERATOR TRAINING . . . . . . . . . . . . . . . . . . . 10-1 SERVICE TRAINING COURSES . . . . . . . . . . . 10-1 SERVICE TRAINING MATERIALS . . . . . . . . . . 10-1
  • 10. SECTION 1 1 OPERATING INSTRUCTIONS
  • 11. OPERATING INSTRUCTIONS CONTENTS FORKADJUSTMENT ............................................... 1-4 GENERAL ......................................................... 1-1 HOW TOPUTA LIFT TRUCK ON BLOCKS ........................... 1-12 HOW TO RAISE THEDRIVE TYRES ................................. 1-13 HOW TO RAISE THE STEERING TYRE .............................. 1-13 HOW TO TOW THELIFT TRUCK ..................................... 1-12 MODEL AND CONTROL INFORMATION .............................. 1-7 InstrumentPanelA (STANDARD) ................................... 1-10 Instrument Panel B (OPTIONAL) .................................... 1-70 Instrument Panel C (OPTIONAL) .................................... 1-10 1.11 MOVING A DISABLED LIFT TRUCK .................................. 1-12 OPERATOR PRECAUTIONS ......................................... 1-2 OPERATING PROCEDURE .......................................... 1-3 OPERATOR PRE-CHECKSAND INSPECTION ......................... 1-3 PRECAUTIONS FOR BATTERIES IN STORAGE ....................... 1-14 PRECAUTIONS FOR TRUCKS IN STORAGE ......................... 1-13 SAFENAND INFORMATIONALLABELS .............................. 1-2 SAFETYAND OPERATIONALCHECKLIST ............................ 1-5 SAFE MAINTENANCEPROCEDURES ............................... 1-11 SHUT DOWN PROCEDURE ......................................... 1-4 TemperatureIndicator Lamp ........................................
  • 12. OPERATINGINSTRUCTIONS GENERAL Before attempting to operate this truck, carefully read and understand these operating procedures. Makesurethetruck is inproper operating condition. Besure all safety devices such as the overhead guard and the load backrest extension are in place and properly secured. Visually inspect the entire truck for any damage that may have occurred during shipment. NOTE: Throughout this manual the terms right, left, front and rear relatetotheviewpoint of an operatorwalking with or riding on the truck. Familiarise yourself with the information contained on the name plate which is located on the cowl to the left of the steering column. See Figure 1-1 and Figure 1-2. Informa- tion on this name plate is as follows: 1. Serial Number - This is an identification number assigned to this particular truck and should be used when ordering service parts or when requesting any information from your Yale Industrial Truck Dealer.The serial number is asix digit number preceded by a letter and isstamped onthe truck frame and on the name plate. 2. located on the back of the front cover of this manual. Model Code - An explanation of the model code is 3. Truck Weight - This is the approximate weight of the truckwithout a loadonthe forks.This weight plusthe weight ofthe loadto be moved must be consideredwhen operating on raised floors, lifts, etc. 4. Capacity Rating -This ratingshows the maximum load capacity of this truck with relation to load centres and fork heights (see diagram on name plate). Personal injury and damage to the truck can occur if the capacity rating is exceeded. Safety and informational labels are located in conspicuous locationsonthistruckandshouldbestrictlyfollowed. Check the name plateof each truck beforeoperation.These safety and informational labels must be replaced immediately if missing or defaced. Labels will vary with type of truck and equipment installed. Refer to the Parts Manual for part number and locationfor all labels. The location of the labels is also shown in Section 2, GENERAL TRUCK AND LUBRICATI0N. This truck meetsall applicablemandatory requirementsand safety standardsfor powered industrial trucks at the time of manufacture. No additions, omissions or modifications should be made that will affect compliance to the previously stated requirementsor inanyway minimizetheeffectiveness ofthe safety devices. I ~~ 1 5 I : I i NOTICE TO USER The U S A OccupationalSafety and HealthAct of 1970an other national safety codes requirea new plate d this unit 03 2equipped other than 8s stated on plate Obtain the correcl plale from your authoriseddenier e If a truck is shipped incomplete from the factory, the name plate will be covered by the decal shown above. Do not operate the lift truck until you obtain a complete name plate from your Yale IndustrialTruck Dealer. Capacities and Cautions Contained on the Name plate Must be Strictly Followed. 2 3 1 Figure 1-1 - Name Plate 1-1
  • 13. 0PERATING INSTRUCT10NS Figure 1-2 - Name Plate Location SAFETY AND INFORMATIONAL LABELS Safety and informational labels are located in conspicuous locations on this truck and should be strictly adhered to. These safety and informational labels must be replaced immediately if missing or defaced. Labels will vary with type of truck and equipment installed. Refer to Parts Manual for part number of labels. HAZARD INTENSITY LEVEL -1 -1 1-1 DANGER: Identified by a Red Label, immediate hazards which WILL result in severe personal injury or death. WARNING: Identified by an Orange Label, hazards or unsafe practices which MAY result in personal injury or death. CAUTION: Identified by a Yellow Label, hazards or unsafe practices which MAY result in minor personal injury or product or property damage. THE READER MAY FIND ANY OR ALL OF THE FOLLOWING LABELS USED IN THIS PUBLICATION.AN UNDERSTANDING OF THEIR USE, AS GIVEN BELOW WILL AID THE READER. 1 I An advisory procedure, practice, condition, etc., which is essential to emphasize. Directs attention to hazards or unsafe practices which may result in minorpersonal injury,product or propertydamage if the proper precautions are not taken. I/r WARNING^ Directs attention to unsafe practices which could result in personal injury or death if proper precautions are not taken. Directsattentionto unsafe practices andfor existing hazards whichWILL resultinsevere personal injuryor death if proper precautions are not taken. OPERATOR PRECAUTIONS The following precautions have been prepared for your safety and the safety of your fellow workers. Read and understand this information before operating the lift truck. WARNING: Use special care when travelling without a load as THE RISK OF AOVERTURNING IS GREATER when cornering and at high speed. Check all gauges and indicator lights for correct operation. Frequent reading ofthe instrument panel should be a habit. Follow the Recommended Schedules of Maintenance. Maintain your lift truck for dependable and economical operation. Reportall accidents involving personnel, building structures and equipment to the proper authority. Before each shift, every 8 hours, it is the operator's responsibility to carry out the following checks and inspections before beginning truck operation. Do not operate truck if it is in need of repair, if it is in an unsafe condition, or might contribute to an unsafe condition. Remove the key and report the condition to the proper authority. If the truck becomes unsafe in any way while you are operating it, STOP operating the truck and report the matter immediately to the proper authority. 1-2
  • 14. OPERATING INSTRUCTIONS Basic maintenance information and the Recommended Schedule of Maintenance are in the Operating Manual, located inthe document holder on the compartment cover. Also refer to Section 2, GENERAL TRUCK AND LUBRICAT1ON. 1. and all other protective equipment is attached. Make sure overhead guard, load backrest extension, 2. Make sure all capacity,safety and informational plates or labels are attached. This truck is not considered safe to usewithout a legible, properlyfilled out nameplate.Contact Yale Materials Handling Corporationor your local dealer for Yale industrial trucks if the name plate is not present and legible. See Section 2, GENERAL TRUCK AND LUBRICATION or the Parts Manual for label and plate locations. 3. during the previous shift. Inspect truck for any damagethat might have occurred 4. Inspecttruck beforeandafteroperating,for anysigns of external leaking of the battery, steering system, hydraulic system, etc. 5. reinforcement showing through the outside of the hose. Check hydraulic hoses for leaking, chafing, cuts or 6. Check for mistracking of the hoses on the sheaves. 7 . 8. Make sure chains are not damaged or kinked. Make sure mast stops and finger guards are in place. 9. and fastened. Make sure bonnet latches are adjusted (if equipped) 10. Operate service and parking brakes, all hydraulic controls, (lift, tilt and auxiliary, if equipped), accelerator, shifting linkages andsteering. Makesurethey operatefreely and return to their proper positions. See section on OPERATING CONTROLSfor detailed descriptions. 11. Inspect condition of wheels and tyres. 12. Inspect forks for any damage. Make sure they are properly attached and locking clips are in their proper position. 13. Test horn, lights and all other accessories. Make sure they are properly mounted and in good working order. 14. Operatetruck andmakesureallgaugesand metersare functioning properly. 15. Make sure any unusual noises are investigated immediately. OPERATOR PRE-CHECKS AND INSPECTION 1. When attachments are used, extra care should be taken in securing, positioning and transporting the load. Operate trucks equipped with attachments as partially loaded trucks. 2. Watch that your load does not exceed the capacity rating of the truck. The truck capacity is posted on the name plate which is attached to the truck at the factory. 3. Do not handle unstable or loosely stacked loads. 4. Donotstartoroperatethistruckorany of itsfunctionsor attachments ifyouare not inthe operator's seat,which isthe designated operator's position for this Yale lift truck. 5. Never allow anyone to ride on your truck and never allow anyone other than a qualified professional to operate your truck. 6. Refertothe Maintenanceand Lubricationsection inthis manual for the recommended hourly service intervals. Regular attention at the specified time will pay dividends in maximum efficiency and longer life of the truck. ' OPERATING PROCEDURE Apply power to the truck by connecting the battery plug to the truck receptacle. Be sure the plug is fully inserted and locked into place so that there is enough pressure at the contact mating surfaces. Make sure the direction control levers are in the neutral position before operating the truck. The operator must sit on the seat to energise the electrical circuit. Place foot on the service brake pedal. Turn key toward forks (clockwise). Release the parking brake. Select desired direction. Release service brake pedal. Depress accelerator pedal to travel CAUTION: Operating the drive control in a situation where the truck will not move will Adamage the electric motor. 1. Keephands,feet and other partsofyour body insidethe operator's compartment. Parts of your body outside the truck can be injured when passing obstructions. 2. Do not permit passengers to ride on the truck. 3. Observe and comply with instructions concerning floor loadings. Knowthe weight of your truck and load combined. Truck weight information is located on the name plate. 4. Travel with the lifting mechanism low and where possible, tilted back. Do not elevate the load except during stacking. 1-3
  • 15. OPERATING INSTRUCTIONS 5. The operator can change the direction of travel while the lifttruck is movingby movingthe direction control lever in the opposite direction. This is called plugging. 6. the path of travel. 7 . forks trailing and always look in the direction of travel. 8. Start,stop,travel, steer and brakesmoothly. Slowdown for turns and on uneven or slippery surfaces that could cause truck to overturn or slide. Look in the direction of travel and keep a clear view of Ifvisibility is impairedbythe load, operatetruck with the 9. Beforeentering trucks or trailers, be certain the brakes on the truck or trailer are applied and wheel chock(s) are in place. Iftrailers are notcoupled to atractor, supports may be needed to prevent upending or corner dipping. Check the flooring of trucks, trailers and railroad cars for breaks and weakness before driving onto them. 10. Before driving over a dock board or bridge plate, be certain that it is properlysecured. Drive carefully and slowly across the dockboard or bridge plate and never exceed its rated capacity. 11. Maintain a safe distance from the edge of ramps or platforms.Do not pushfreight cars while on a raised dock or platform. Do not use this truck for opening or closing'freight doors. 12. Watch clearances, especially around forks. The driver must beawarethat the forks can sometimes extend beyond the load. This may cause the forks to hit an object or lift another load. 13. Watchoutfor obstructions,especiallyoverhead. Check clearances. 14. Do not runover objectsonthe roadway surface astruck stability and steering may be adversely affected. 15. When approaching cross aisles, slow down, sound horn and keep to the right side of aisle. 16. Operate truck under all conditions at a speed that will permit it to be brought to a stop in a safe manner. 17. Onslopingsurfaces, higherthan 5 percent (a5ft. riseor drop in 100ft. of travel), operate loaded truck with the load facing uphill.Donotturnon an slope. Forstability reasons,a lift truck must not be driven across a slope. 18. Operate unloaded truck on all grades with the lifting mechanism downhill. Q20. Watch out for pedestrians at all times. Donot drive upto anyone standing in front of an object. 21. Observe all traffic regulations, including authorised plant speed limits. Under normal traffic conditions, keep to the right. Maintain a safe distance from the truck ahead (approximately three truck lengths), and keep the truck under control at all times. 22. Yale lifttrucks are not intendedfor use on public roads. 23. When leaving truck unattended, lower the lifting mechanism, shut off power, remove key and apply parking brake. Chock wheels if truck is parked on an slope. 24. Do not remove overhead guard or load backrest extension unless specifically authorised. 25. Always set the forks as far apart as the loadwill permit. Make sure that fork length is at least 213 of load length. 26. Carry the load flush against the truck. 27. Do not put any part of your body into the mast area or between the mast and truck. Be aware of pinch points on attachments, especially reach mechanisms. 28. Allow no one under or near load or lifting mechanism. 29. If a supplementary platform is used, make sure it is securely fastened to the carriage and forks. SHUT DOWN PROCEDURE When leaving the truck, fully lower lifting mechanism, ensure controls are in neutral, shut off power, apply the brake, and remove key. If you park the truck on an slope, chock the wheels. FORK ADJUSTMENT Adjust theforks onthefork carriage. Forksshould bespaced as far apart as the load being moved will allow. Both forks should always be the same distance from the centre of the fork carriage. Checkforthe presence andcondition ofstuds at eachend of the carriage upper fork clip slide. If studs are damaged or missingthey should be repaired or replacedbeforetheforks are adjusted. 19. Do not push extra loads with the truck. 1-4
  • 16. OPERATINGINSTRUCTIONS To adjust the forks, raise them a few inches off the floor. Lift uponthe keeper pinand slidetheforks alongthe carriage by pushing them away from you. Do not pull the forks toward you. When the forks are set to the desired position, make sure the keeper pin is down in a slot on the top of the fork carriage plate. SAFETY AND OPERATIONAL CHECK LIST A “Daily Check List” similar to the one shown on the next page should be used every day before operating the truck. The check listsareavailableintabletformwith50sheets per tablet and can be obtained from your local Yale Industrial Truck Dealer for a nominal fee. Both this manual and the Operating Manual contain the Recommended Schedule of Maintenancewhich should be used as a guide along with the Lubrication Instructions. 1-5
  • 17. Thank you very much for your reading. Please Click Here Then Get More Information.