1) To use SlideShare component, the user must install the SlideShare module and component through the Joomla administration panel extensions menu.
2) The user can then upload slides into categories. They can add, edit, publish, unpublish slides.
3) The user can add SlideShare links to menus to display slides on pages. They can configure link options and parameters to customize the slide display.
Magento Mobile App Builder, Mobile App For Magento Ecommerce Store - AppJettyAppJetty
Mobile app builder for Magento is a mobile app extension which helps you to build a native Android app and native iOS app for your Magento store easily and quickly.
Know More: https://www.appjetty.com/magento-magemob-app-builder.htm
UiPath Test Automation using UiPath Test Suite series, part 4DianaGray10
Welcome to UiPath Test Automation using UiPath Test Suite series part 4. In this session, we will cover Test Manager overview along with SAP heatmap.
The UiPath Test Manager overview with SAP heatmap webinar offers a concise yet comprehensive exploration of the role of a Test Manager within SAP environments, coupled with the utilization of heatmaps for effective testing strategies.
Participants will gain insights into the responsibilities, challenges, and best practices associated with test management in SAP projects. Additionally, the webinar delves into the significance of heatmaps as a visual aid for identifying testing priorities, areas of risk, and resource allocation within SAP landscapes. Through this session, attendees can expect to enhance their understanding of test management principles while learning practical approaches to optimize testing processes in SAP environments using heatmap visualization techniques
What will you get from this session?
1. Insights into SAP testing best practices
2. Heatmap utilization for testing
3. Optimization of testing processes
4. Demo
Topics covered:
Execution from the test manager
Orchestrator execution result
Defect reporting
SAP heatmap example with demo
Speaker:
Deepak Rai, Automation Practice Lead, Boundaryless Group and UiPath MVP
State of ICS and IoT Cyber Threat Landscape Report 2024 previewPrayukth K V
The IoT and OT threat landscape report has been prepared by the Threat Research Team at Sectrio using data from Sectrio, cyber threat intelligence farming facilities spread across over 85 cities around the world. In addition, Sectrio also runs AI-based advanced threat and payload engagement facilities that serve as sinks to attract and engage sophisticated threat actors, and newer malware including new variants and latent threats that are at an earlier stage of development.
The latest edition of the OT/ICS and IoT security Threat Landscape Report 2024 also covers:
State of global ICS asset and network exposure
Sectoral targets and attacks as well as the cost of ransom
Global APT activity, AI usage, actor and tactic profiles, and implications
Rise in volumes of AI-powered cyberattacks
Major cyber events in 2024
Malware and malicious payload trends
Cyberattack types and targets
Vulnerability exploit attempts on CVEs
Attacks on counties – USA
Expansion of bot farms – how, where, and why
In-depth analysis of the cyber threat landscape across North America, South America, Europe, APAC, and the Middle East
Why are attacks on smart factories rising?
Cyber risk predictions
Axis of attacks – Europe
Systemic attacks in the Middle East
Download the full report from here:
https://sectrio.com/resources/ot-threat-landscape-reports/sectrio-releases-ot-ics-and-iot-security-threat-landscape-report-2024/
Builder.ai Founder Sachin Dev Duggal's Strategic Approach to Create an Innova...Ramesh Iyer
In today's fast-changing business world, Companies that adapt and embrace new ideas often need help to keep up with the competition. However, fostering a culture of innovation takes much work. It takes vision, leadership and willingness to take risks in the right proportion. Sachin Dev Duggal, co-founder of Builder.ai, has perfected the art of this balance, creating a company culture where creativity and growth are nurtured at each stage.
Accelerate your Kubernetes clusters with Varnish CachingThijs Feryn
A presentation about the usage and availability of Varnish on Kubernetes. This talk explores the capabilities of Varnish caching and shows how to use the Varnish Helm chart to deploy it to Kubernetes.
This presentation was delivered at K8SUG Singapore. See https://feryn.eu/presentations/accelerate-your-kubernetes-clusters-with-varnish-caching-k8sug-singapore-28-2024 for more details.
Slack (or Teams) Automation for Bonterra Impact Management (fka Social Soluti...Jeffrey Haguewood
Sidekick Solutions uses Bonterra Impact Management (fka Social Solutions Apricot) and automation solutions to integrate data for business workflows.
We believe integration and automation are essential to user experience and the promise of efficient work through technology. Automation is the critical ingredient to realizing that full vision. We develop integration products and services for Bonterra Case Management software to support the deployment of automations for a variety of use cases.
This video focuses on the notifications, alerts, and approval requests using Slack for Bonterra Impact Management. The solutions covered in this webinar can also be deployed for Microsoft Teams.
Interested in deploying notification automations for Bonterra Impact Management? Contact us at sales@sidekicksolutionsllc.com to discuss next steps.
PHP Frameworks: I want to break free (IPC Berlin 2024)Ralf Eggert
In this presentation, we examine the challenges and limitations of relying too heavily on PHP frameworks in web development. We discuss the history of PHP and its frameworks to understand how this dependence has evolved. The focus will be on providing concrete tips and strategies to reduce reliance on these frameworks, based on real-world examples and practical considerations. The goal is to equip developers with the skills and knowledge to create more flexible and future-proof web applications. We'll explore the importance of maintaining autonomy in a rapidly changing tech landscape and how to make informed decisions in PHP development.
This talk is aimed at encouraging a more independent approach to using PHP frameworks, moving towards a more flexible and future-proof approach to PHP development.
Epistemic Interaction - tuning interfaces to provide information for AI supportAlan Dix
Paper presented at SYNERGY workshop at AVI 2024, Genoa, Italy. 3rd June 2024
https://alandix.com/academic/papers/synergy2024-epistemic/
As machine learning integrates deeper into human-computer interactions, the concept of epistemic interaction emerges, aiming to refine these interactions to enhance system adaptability. This approach encourages minor, intentional adjustments in user behaviour to enrich the data available for system learning. This paper introduces epistemic interaction within the context of human-system communication, illustrating how deliberate interaction design can improve system understanding and adaptation. Through concrete examples, we demonstrate the potential of epistemic interaction to significantly advance human-computer interaction by leveraging intuitive human communication strategies to inform system design and functionality, offering a novel pathway for enriching user-system engagements.
GDG Cloud Southlake #33: Boule & Rebala: Effective AppSec in SDLC using Deplo...James Anderson
Effective Application Security in Software Delivery lifecycle using Deployment Firewall and DBOM
The modern software delivery process (or the CI/CD process) includes many tools, distributed teams, open-source code, and cloud platforms. Constant focus on speed to release software to market, along with the traditional slow and manual security checks has caused gaps in continuous security as an important piece in the software supply chain. Today organizations feel more susceptible to external and internal cyber threats due to the vast attack surface in their applications supply chain and the lack of end-to-end governance and risk management.
The software team must secure its software delivery process to avoid vulnerability and security breaches. This needs to be achieved with existing tool chains and without extensive rework of the delivery processes. This talk will present strategies and techniques for providing visibility into the true risk of the existing vulnerabilities, preventing the introduction of security issues in the software, resolving vulnerabilities in production environments quickly, and capturing the deployment bill of materials (DBOM).
Speakers:
Bob Boule
Robert Boule is a technology enthusiast with PASSION for technology and making things work along with a knack for helping others understand how things work. He comes with around 20 years of solution engineering experience in application security, software continuous delivery, and SaaS platforms. He is known for his dynamic presentations in CI/CD and application security integrated in software delivery lifecycle.
Gopinath Rebala
Gopinath Rebala is the CTO of OpsMx, where he has overall responsibility for the machine learning and data processing architectures for Secure Software Delivery. Gopi also has a strong connection with our customers, leading design and architecture for strategic implementations. Gopi is a frequent speaker and well-known leader in continuous delivery and integrating security into software delivery.
Software Delivery At the Speed of AI: Inflectra Invests In AI-Powered QualityInflectra
In this insightful webinar, Inflectra explores how artificial intelligence (AI) is transforming software development and testing. Discover how AI-powered tools are revolutionizing every stage of the software development lifecycle (SDLC), from design and prototyping to testing, deployment, and monitoring.
Learn about:
• The Future of Testing: How AI is shifting testing towards verification, analysis, and higher-level skills, while reducing repetitive tasks.
• Test Automation: How AI-powered test case generation, optimization, and self-healing tests are making testing more efficient and effective.
• Visual Testing: Explore the emerging capabilities of AI in visual testing and how it's set to revolutionize UI verification.
• Inflectra's AI Solutions: See demonstrations of Inflectra's cutting-edge AI tools like the ChatGPT plugin and Azure Open AI platform, designed to streamline your testing process.
Whether you're a developer, tester, or QA professional, this webinar will give you valuable insights into how AI is shaping the future of software delivery.
Let's dive deeper into the world of ODC! Ricardo Alves (OutSystems) will join us to tell all about the new Data Fabric. After that, Sezen de Bruijn (OutSystems) will get into the details on how to best design a sturdy architecture within ODC.
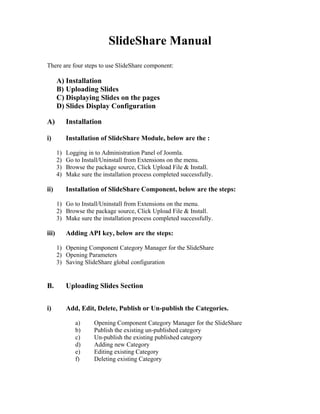
1. SlideShare Manual
There are four steps to use SlideShare component:
A) Installation
B) Uploading Slides
C) Displaying Slides on the pages
D) Slides Display Configuration
A) Installation
i) Installation of SlideShare Module, below are the :
1) Logging in to Administration Panel of Joomla.
2) Go to Install/Uninstall from Extensions on the menu.
3) Browse the package source, Click Upload File & Install.
4) Make sure the installation process completed successfully.
ii) Installation of SlideShare Component, below are the steps:
1) Go to Install/Uninstall from Extensions on the menu.
2) Browse the package source, Click Upload File & Install.
3) Make sure the installation process completed successfully.
iii) Adding API key, below are the steps:
1) Opening Component Category Manager for the SlideShare
2) Opening Parameters
3) Saving SlideShare global configuration
B. Uploading Slides Section
i) Add, Edit, Delete, Publish or Un-publish the Categories.
a) Opening Component Category Manager for the SlideShare
b) Publish the existing un-published category
c) Un-publish the existing published category
d) Adding new Category
e) Editing existing Category
f) Deleting existing Category
2. ii) Add, Edit, Delete, Publish or Un-publish the Slides.
a) Opening Presentation Manager for the SlideShare
b) Publish the existing un-published Slide
c) Un-publish the existing published Slide
d) Adding new Slide
e) Editing the existing Slide
f) Deleting the existing Slide
C. Displaying Slides on the pages
a) Adding the link to the menu
b) Working with Link Menu Items details
c) Editing the link
d) Making the link the default page
e) Deleting the link
f) Moving the link to other menu
g) Publishing or Unpulishing
h) Editing the link
D. Slides Display Configuration
a) Configuring the display parameters
b) Editing display parameters
3. A. Installation
i) Installation of SlideShare Module
1) Logging in to Administration Panel of Joomla:
User must logged in to administration panel of Joomla
2) Go to Install/Uninstall from Extensions on the menu:
From the main menu go to Extensions
Select Install/Uninstall
4. 3) Browse the package source, Click Upload File & Install:
Please browse the package from Upload Package File section, select the SlideShare
module package source files and click Upload file & Install button so that package can be
installed.
4) Make sure the installation process completed successfully:
If the installation process successfully done then you will have Message displayed
“Install Module Success“.
5. ii) Installation of SlideShare Component, below are the steps:
After the successful installation of the SlideShare module, you should do these steps
again for the installation of the SlideShare component installation.
1) Go to Install/Uninstall from Extensions on the menu:
From the main menu go to Extensions
Select Install/Uninstall
6. 2) Browse the package source, Click Upload File & Install:
Please browse the package from Upload Package File section, select the SlideShare
component package source files and click Upload file & Install button so that package
can be installed.
3) Make sure the installation process completed successfully:
If the installation process successfully done then you will have Message displayed
“Install Module Success“.
iii) Adding API key:
7. To use the SlideShare component user must ask for the API key at
http://www.SlideShare.net/developers.
a) Opening Component Category Manager for the SlideShare
To open Category Manager select SlideShare under the Components and select
Categories.
b) Opening Parameters
Click on the parameters from right corner of the category manager menu
c) Saving SlideShare global configuration
Clicking on parameters will take you to another page where you should fill out the form
as follows:
8. Field1:Auto-approve Frontend Submission; user should select ‘yes’ to use SlideShare
Field2:Key for SlideShare; Enter SlideShare key provided by SlideShare Team
Field3:Shared SecredKey; Enter SlideShare SecredKey provided by SlideShare Team
Field4:Username; Enter Username on SlideShare.net
Field5:Password; Enter Password on SlideShare.net
9. B. Uploading Slides Section
i) Add, Edit, Delete, Publish or Un-publish the Categories.
To use SlideShare, user must Add the category, by default there is only one category
which is “General”. To add, edit, delete, publish or un-publishing the categories user
should go to Components from the main menu.
i. Opening Component Category Manager for the SlideShare
To open Category Manager select SlideShare under the Components and select
Categories.
ii. Publish the existing un-published category
10. From the Published Column click on the “cross icon” to make the category published.
iii. Un-publish the existing published category
From the Published Column click on the “right icon” to make the category un-published.
iv. Adding new Category
To add the new category, click on the New button, you will then taken to the next page
type the name you want to make the category name and click the save button from the
right corner to save the changes you made.
11. v. Editing existing Category
Click the check box of he category and then click on edit button to edit the name of the
category you selected, it will take you to next page where you can edit the name make
changes as needed click on the save button to exit editing, to discard the changes you
made click on cancel button.
Click on the check box
Click on edit button
12. Make the changes to name of the category and then save for the changes you made or just
cancel to discard the changes.
vi. Deleting existing Category
Click the check box of the category you want to delete.
After making selection by clicking to the checkbox click on the delete button to delete the
category.
13. ii) Add, Edit, Delete, Publish or Un-publish the Slides.
User can upload your own presentations in different formats e.g. ppt, pdf, odp, pps.
a) Opening Presentation Manager for the SlideShare:
To open Presentation Manager select SlideShare under the Components and select Slides.
b) Publish the existing un-published category:
From the Published Column click on the “cross icon” to make the slide published
14. c) Un-publish the existing published category:
From the Published Column click on the “right icon” to make the slide un-published
d) Adding new Slide:
To add the new slide, click on the New button
You will then taken to the next page browse to select the slide you want to upload, type
the title you want to make the slide title, select the category you want you slide to show
in that category, type the description you want to show with the slide, type the tags you
want to the slide to be searched by those and then click the save button from the right
corner to save the changes you made.
15. e) Editing the existing Slide:
Click the check box of the slide and then click on edit button.
Clicking on edit button will take you to another page where you can edit the title,
category, description and the tags of the slide you selected.
Click on the save button to save the editing you made otherwise to discard the changes
you made click on cancel button.
16. f) Deleting the existing Slide:
Click the check box of the slide you want to delete.
After making selection click on the delete button to delete the slide.
17. B) Displaying Slides on the pages
a) Adding the link to the menu:
After making sure logged in to Administration panel, Go to Menus from the main menu,
click on Menu Manager.
You will be taken to Menu Manager page, select the menu where you want to put the link
for SlideShare then click to on according from the Menu Item(s) column.
You will be taken to Menu Item Manager page, click the new button from the menu item
manager’s menu.
18. A page will display with Menu Item: (New), select the menu item type where as you are
going to make link for SlideShare so click on SlideShare
You will be taken to expanded sub menu select the appropriate item to make link.
For SlideShare overview: Click on Slides
For SlideShare view: Click on Slide
For All uploaded slides: Click on Myslides
For Importing Slides: Click on Importslide
For Adding Slides: Click on Editslide
For Deleting the slides: Click on Delslide
19. b) Working with Link Menu Items details:
Type the title, you want it to be make an alias, confirm the link, making sure of display in
selected menu is the one you want the link to be displayed in. Select the parent menu
item, if Top selected means the link will be shown on the main of the menu. And if top
not selected the other selected menu item will be parent then the link will be shown under
parent item.
Make sure you want the link to be published on saving or not. Be sure with the Access
levels if you want the link to be shown to registered users select Registered, if you want it
to show for everyone, select the public.
20. Click save to save the changes you made, or just cancel to discard changes.
The link will be displayed as configured.
c) Editing the link:
Go to Menu Item Manager, select the item you want to edit by simply clicking on the
appropriate check box and then click on edit.
21. d) Making the link the default page:
Select the appropriate item you want it to be default and then click on default button.
e) Deleting the link:
Select the link you want to be delete and click on Trash button.
f) Moving the link to other menu:
22. Select the appropriate item you want to move it to other menu and click on Move button.
It will take to another page where you can select the menu you want the link to show in
that. Select the menu from Move to Menu drop down and click move button to make
changes otherwise click cancel to discard changes.
g) Publishing or Unpulishing:
Select the link you want to publish or unpublish and click publish if the link already
unpublished and vise versa.
23. h) Editing the link:
Select the link you want to edit and working with Menu Items Details.
Click to save changes you made otherwise click cancel to discard changes.
24. D. Slides Display Configuration
a) Configuring new display parameters
When adding a link to the menu, from the main menu section go to Menu Manager
The select the Menu Item(s) from the menu where you want to make link for SlideShare
Click on the new button from the right corner of the Menu Manager
Click on the SlideShare
25. Click on the SlideShare Overview presentation ( Slides ) link it will take you the next
page
Make the title, alias, select parent item
26. Right side panel of Parameters (Basic) you can select the Amount of Presentation for this
page. Select what if you want to show the title as yes or no.
Presentation in one row can be set by selecting one of the option from the dropdown
menu of Presentation in one row field.
27. Click the save button to save the changes, or cancel to discard changes.
b) Editing display parameters
To edit display parameters, from the main menu section go to Menu Manager
The select the Menu Item(s) from the menu where you want to make link for SlideShare
28. Click to edit on the already created link for the SlideShare
So then you will have the page where you can edit the parameters of the SlideShare from
the right side panel.
Open the drop down menu for changing the amount of Presentation to be displayed on a
page.
29. And click the drop down to edit the presentation in a row if required.
Click the save to button to save the changes or simply click cancel to discard changes.