1. 52n WPS OpenLayers Client Tutorial
Requirements:
• Java SDK
• Apache Tomcat (5.5.28 tested)
• Apache Maven
o Important: The current maven version 2.2.1 will not work with the POM.xml.
Instead you have to use the maven 2.0.11 version.
• Firebug Plugin for Firefox (optional but recommended)
1. Checkout the SVN client and proxy repository
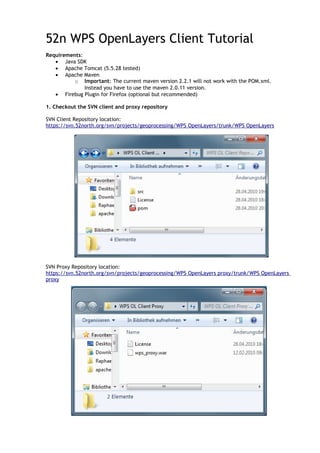
SVN Client Repository location:
https://svn.52north.org/svn/projects/geoprocessing/WPS OpenLayers/trunk/WPS OpenLayers
SVN Proxy Repository location:
https://svn.52north.org/svn/projects/geoprocessing/WPS OpenLayers proxy/trunk/WPS OpenLayers
proxy
2. 2. Deploy the Proxy Host
Add the "wps_proxy.war" to your [TOMACAT_HOME]/webapps folder. This is the location where the
WpsClient.html expects the proxy host to be, when the application starts. The proxy is needed,
when a remote server, like a Web Feature Service, is requested.
Edit the proxy properties (if required)
If nessesary, change the list of allowed host addresses and ports. This can be done by editing the
proxy.properties, which is part of the wps_proxy.war. The path is wps_proxy.war/WEB-INF/classes/
fi/fgi/wps/proxy.
The default ports include 80,8080 and 9090, as well as "localhost" and some more. In case you changed
somewhat, you must restart your tomcat.
3. Deploy the wps OL client
Execute the „mvn compile“ command in the root of the client repository. Als result you got a new
folder named „OL“ in this directory. If you work with eclipse you have to refresh the project to see the
change.
Now copy the OL folder from the client repository into the [TOMCAT_HOME]/webapps folder.
Check/Set the initial Web Processing Services
The initial service list can be found in the wps-ol-client.js located in the OL/lib folder. As you can see
in the picture below, the standard "http:localhost:8080/wps/WebProcessingService" adress is already
registered. The other services are disabled but remain in the list, just to make clear that it's an array.
Edit the proxy host (if required)
As already mentioned, the proxy host is declared in the Javascript code of the WpsClient.html.
For changing the default settings, open the WpsClient.html in the OL folder and search the
ProxyHost variable inside the init() method.
Edit the WFS used in the client (if required)
By default, the client should request the giv-wps geoserver WFS. Edit the WpsClient.html to adress
other services and layers. Visit geoserver.org to lern how to set up your own local WFS. Read the
„Namespace issue“ at the end of this tutorial if you encounter process failures.
3. 4. Test the client
Start your tomcat. Open your browser and call the client. If the tomcat runs under "localhost:8080" and
you followed the instructions carefully, the client location is "localhost:8080/OL/WpsClient.html".
Open the WPS controls with the "WPS" button on the left side. Now select a process in the "Processes"
select box, set the input parameters in the generated HTML input elements and press the "Execute"
button below.
As known from OpenLayers, the layer switcher is on the right side. It will include the process output
layers which have ComplexData as result.
A literal data result will be displayed in a centered message box.
5. Client development
The wps-ol-client.js file contains the WPS client. This file is merged out of the class structure by
executing the "mvn compile" command in the WPS client root, which contains the POM.xml. You can
work with the merged file, or perhaps for a better understanding, keep on developing the client in
"class-structure".
Go to the repository root and change directory to "src/main/javascript" to find the class-structure of
the client (single Javascript files representing each «class»).
After finishing your work, open the command line and run the "mvn compile" as mentioned before.
This will update the OL folder, so you'll find your client changes merged into the wps-ol-client.js.
Overwride the copy in the tomcat and you're done.
By activating the compressor in the POM.xml, you can speed up your client a little bit. The compressed
version is free of comments and spaces.
4. Known Issues:
• Access to restricted URI denied code: 1012
o Most likely the proxy settings are incorrect. Check if the adressed server are listed in
the proxy.properties file, inside the wps_proxy.war.
• The namespace issue:
The WPS cannot handle different process inputs with the same namespace. Using the Geoserver
WFS can lead to this problem, because the stores contain more than one layer and each store
can only be accociated with one workspace. For example topp:tasmania_roads and
topp:tasmania_state_boundaries layer can cause exceptions, when they are used one after the
other. The solution is to seperate this layers in single stores an give them individual workspaces
in the geoserver.
![2. Deploy the Proxy Host
Add the "wps_proxy.war" to your [TOMACAT_HOME]/webapps folder. This is the location where the
WpsClient.html expects the proxy host to be, when the application starts. The proxy is needed,
when a remote server, like a Web Feature Service, is requested.
Edit the proxy properties (if required)
If nessesary, change the list of allowed host addresses and ports. This can be done by editing the
proxy.properties, which is part of the wps_proxy.war. The path is wps_proxy.war/WEB-INF/classes/
fi/fgi/wps/proxy.
The default ports include 80,8080 and 9090, as well as "localhost" and some more. In case you changed
somewhat, you must restart your tomcat.
3. Deploy the wps OL client
Execute the „mvn compile“ command in the root of the client repository. Als result you got a new
folder named „OL“ in this directory. If you work with eclipse you have to refresh the project to see the
change.
Now copy the OL folder from the client repository into the [TOMCAT_HOME]/webapps folder.
Check/Set the initial Web Processing Services
The initial service list can be found in the wps-ol-client.js located in the OL/lib folder. As you can see
in the picture below, the standard "http:localhost:8080/wps/WebProcessingService" adress is already
registered. The other services are disabled but remain in the list, just to make clear that it's an array.
Edit the proxy host (if required)
As already mentioned, the proxy host is declared in the Javascript code of the WpsClient.html.
For changing the default settings, open the WpsClient.html in the OL folder and search the
ProxyHost variable inside the init() method.
Edit the WFS used in the client (if required)
By default, the client should request the giv-wps geoserver WFS. Edit the WpsClient.html to adress
other services and layers. Visit geoserver.org to lern how to set up your own local WFS. Read the
„Namespace issue“ at the end of this tutorial if you encounter process failures.](data:image/gif;base64,R0lGODlhAQABAIAAAAAAAP///yH5BAEAAAAALAAAAAABAAEAAAIBRAA7)