This document is a service manual that covers Toyota forklifts models 5FBC13-30. It provides an overview of the manual's contents and guidelines for servicing the vehicles. The manual includes sections on the battery, control circuit, electrical system troubleshooting, and other components. Technicians are instructed to use this manual for quick and correct servicing of the specified forklift models. The document also provides details on exterior vehicle views, frame numbers, terminology, torque specifications, and maintenance procedures.
Caterpillar cat 336 f excavator (prefix tje) service repair manual (tje00001 ...fhsjekdmme
The document provides instructions for disassembling the travel motor of an excavator model 336F. It lists 27 steps to fully disassemble the travel motor, removing components like the motor head assembly, piston assemblies, barrel assembly, springs, seals, and other internal parts. Detailed illustrations accompany each step to show how to properly remove each component. Safety precautions are provided to warn of potential spring forces and ensure protective equipment is worn during disassembly.
Caterpillar cat 336 f excavator (prefix ljy) service repair manual (ljy00001 ...fhsjekdmme
1. The document provides step-by-step instructions for disassembling and assembling the diesel exhaust fluid module of Caterpillar 336F excavators.
2. The disassembly procedure involves draining the fluid, removing hoses and connectors, and taking apart the various module components like the pump, tank, and control electronics.
3. The assembly procedure lists the parts and tools needed and describes reinstalling the components in reverse order and ensuring proper tightening of connections.
Caterpillar cat 336 f excavator (prefix kcs) service repair manual (kcs00001 ...fhsjekdmme
This document provides instructions for removing and installing various components of a Caterpillar C9.3 engine, including the combustion head, ARD nozzle heater relay, ARD fuel solenoid valve, exhaust manifold, and exhaust elbow. The procedures describe disconnecting electrical connections and fluid lines, removing mounting hardware, and installing replacement parts in the reverse order of removal, taking care to clean parts and apply thread sealant or anti-seize as specified. Safety precautions are provided regarding working on hot or high-voltage components and using isopropyl alcohol.
Caterpillar cat 336 e lnh excavator (prefix ssl) service repair manual (ssl00...fhsjekdmme
The document provides instructions for disassembling and assembling components of a 336E excavator final drive and travel motor. It describes in detail how to remove and install the travel motor and final drive assembly, including removing hoses, bolts, seals and other parts. Precautions are given regarding weight of components and proper torque specifications for reinstallation. Detailed illustrations accompany each step of disassembly and assembly.
Caterpillar cat 336 e lnh excavator (prefix rza) service repair manual (rza00...fhsjekdmme
This document provides instructions for disassembling and assembling the travel motor on 336E LH and 336E LNH excavator models. The disassembly process involves removing 27 components of the travel motor including the head, springs, plates, seals, and housing cover. The assembly process describes installing these 27 components in reverse order and provides notes to ensure proper installation of parts. Tools required include an adapter, nuts, washers, eyebolt, retaining ring pliers, driver group, and bearing puller group.
Caterpillar cat 336 e lnh excavator (prefix gny) service repair manual (gny00...fhsjekdmme
The document provides assembly instructions for a travel motor in 28 steps. It details installing various components like seals, springs, pistons, and plates in the proper sequence. It also describes attaching the travel motor to the excavator and tightening bolts to the specified torques. The removal and installation procedures for a final drive and travel motor are also outlined in 13 steps, including draining oil first and marking components for reinstallation.
Caterpillar cat 336 e lh excavator (prefix ssl) service repair manual (ssl000...fhsjekdmme
The document provides instructions for disassembling and assembling components of a 336E excavator final drive and travel motor. It describes in detail how to remove and install the travel motor, including disconnecting hoses and removing mounting bolts. It also explains how to disassemble the final drive by removing the cover, planetary gears, and other internal components. Precise steps and required tools are listed to correctly take apart and rebuild the final drive and travel motor.
Caterpillar cat 336 e lh excavator (prefix rza) service repair manual (rza000...fhsjekdmme
This document provides instructions for disassembling and assembling the travel motor on 336E LH and 336E LNH excavator models. The disassembly process involves removing 27 components of the travel motor including the head, springs, plates, seals, and housing cover. The assembly process describes installing these 27 components in reverse order and provides notes to ensure proper installation of parts. Tools required include an adapter, nuts, washers, eyebolt, retaining ring pliers, driver group, and bearing puller group.
Caterpillar cat 336 e lh excavator (prefix jea) service repair manual (jea000...fhsjekdmme
The document provides instructions for disassembling and assembling the travel motor of a 336E excavator. It outlines 27 steps for disassembly, including removing the head, springs, brake piston, rotating assembly, and seals. It then outlines 28 steps for assembly, installing components in reverse order and noting proper lubrication and torque specifications. The proper procedure aims to prevent injury from spring forces and ensure correct alignment of parts.
Caterpillar cat 336 e lh excavator (prefix hdw) service repair manual (hdw000...fhsjekdmme
The document provides instructions for disassembling and assembling the travel motor on a 336E excavator model. It outlines 27 steps for disassembly, which includes removing the head, seals, springs, brake piston, plates, and seals from various components. It then outlines 28 steps for assembly, which reverses the disassembly process and includes lubricating parts and ensuring proper alignment of components. Special safety notes are included throughout to warn of spring loads and to wear protective equipment when specified.
Caterpillar cat 336 e lh excavator (prefix gny) service repair manual (gny000...fhsjekdmme
The document provides assembly instructions for a travel motor in 28 steps. It details installing various components like seals, springs, pistons, and plates in the proper order. It also provides disassembly instructions for a final drive in 13 steps, removing components like bolts, gears, and covers. Installation requires cleaning, applying sealant, and torquing bolts to specified values.
Caterpillar cat 336 e h excavator (prefix jea) service repair manual (jea0000...fhsjekdmme
The document provides instructions for disassembling and assembling the travel motor of a 336E excavator. It describes 27 steps to disassemble the motor by removing components like the motor head, springs, brake piston, rotating assembly, bearings and seals. It then describes 28 steps for reassembling the motor components in reverse order, making sure to align parts properly, apply lubricants to seals and mating surfaces, and torque bolts to the specified values. The proper procedure is important to safely release spring forces and prevent damage during removal and installation of parts.
Caterpillar cat 336 e h excavator (prefix hdw) service repair manual (hdw0000...fhsjekdmme
The document provides instructions for disassembling and assembling the travel motor on a 336E excavator model. It outlines 27 steps for disassembly, which includes removing the head, seals, springs, brake piston, plates, and seals from various components. It then outlines 28 steps for assembly, which reverses the disassembly process and includes lubricating parts and ensuring proper alignment of components. Special safety notes are included throughout to warn of spring loads and to wear protective equipment when specified.
This document provides the disassembly and assembly procedures for a travel motor on 336D2 XE and 336D2 LXE excavator models. It outlines 30 steps to disassemble the travel motor down to its core components. It then provides 19 steps to reassemble the travel motor. The document includes illustrations and notes on proper assembly order and tooling required. Safety precautions are provided throughout for tasks involving spring tension or component installation.
This document provides disassembly instructions for a 336D2 excavator travel motor. It outlines 27 steps to fully disassemble the travel motor. These include removing the motor head assembly, piston assemblies, barrel assembly, springs, seals, plates, and other internal components. Tools required include bolting fixtures, pry bars, pullers, and seal removal tools. Precautions are provided to retain component positioning for reassembly and to safely release spring forces during disassembly.
This document provides the disassembly and assembly procedures for a travel motor on 336D2 XE and 336D2 LXE excavator models. It outlines 30 steps to disassemble the travel motor down to its core components. It then provides 19 steps to reassemble the travel motor. The document includes illustrations and notes on proper assembly order and tooling required. Safety precautions are provided throughout for tasks involving spring forces or pressurized components.
Caterpillar cat 336 d2 l excavator (prefix hbk) service repair manual (hbk000...fhsjekdmme
This document provides disassembly instructions for a travel motor on 336D2, 336D2 L, and 336D2 GC excavators. The procedure involves 27 steps to disassemble the various components of the travel motor, including removing the head assembly, piston assemblies, barrel assembly, springs, seals, and other internal parts. Tools and safety precautions are listed. Alignment marks and noting component locations are emphasized to ensure correct reassembly.
Caterpillar cat 336 d2 l excavator (prefix fbt) service repair manual (fbt000...fhsjekdmme
This document provides instructions for removing and installing various engine components on a Caterpillar 336D2 excavator, including:
1) The engine oil filter and oil filter base.
2) The engine oil cooler.
3) The air cleaner assembly.
4) The turbocharger.
5) The water temperature regulator.
Detailed step-by-step instructions are provided for each component, along with illustrations to aid in the process. Safety notices are also included.
Caterpillar cat 336 d2 l excavator (prefix faj) service repair manual (faj000...fhsjekdmme
This document provides disassembly instructions for a travel motor on a 336D2 excavator. It lists 27 steps to fully disassemble the travel motor, including removing components like the motor head assembly, piston assemblies, springs, seals, and plates. Special care must be taken when removing or handling components with stored spring energy to avoid personal injury. Tools required include bolting fixtures, pullers, pry bars, and seal removal tools.
This document provides disassembly instructions for a travel motor on 336D2, 336D2 L, and 336D2 GC excavators. The procedure involves 27 steps to disassemble the various components of the travel motor, including removing the head assembly, piston assemblies, barrel assembly, springs, seals, and other internal parts. Tools and safety precautions are listed. Alignment marks and noting component locations are emphasized to aid reassembly.
This document provides instructions for removing and installing various engine components on a Caterpillar 336D2 excavator, including:
1) The engine oil filter and oil filter base.
2) The engine oil cooler.
3) The air cleaner assembly.
4) The turbocharger.
5) The water temperature regulator.
Detailed step-by-step instructions are provided for each component, along with illustrations to aid in the process. Safety notices are also included.
This document provides disassembly instructions for a travel motor on a 336D2 excavator. It lists 27 steps to fully disassemble the travel motor, including removing components like the motor head assembly, piston assemblies, springs, seals, and plates. Special care must be taken when removing or handling components with stored spring energy to avoid personal injury. Tools required include bolting fixtures, pry bars, pullers, and seal removal tools.
Caterpillar cat 336 d ln excavator (prefix ppn) service repair manual (ppn000...fhsjekdmme
1. The document provides instructions for disassembling and assembling a piston pump used in Caterpillar 336D L and 336D LN excavators.
2. The disassembly procedure includes using various tools to remove over 30 individual parts in a specified sequence.
3. Reassembly requires properly cleaning all parts, heating and cooling certain bearings, and carefully installing over 30 parts in the reverse order of disassembly while precisely following the illustrations and warnings.
Caterpillar cat 336 d ln excavator (prefix myp) service repair manual (myp000...fhsjekdmme
This document provides the disassembly and assembly procedures for a travel motor on a 336D LN excavator. It includes 28 steps for disassembly that remove components like the head, seals, springs, plates, and bearings. The 23 steps for assembly install these components in reverse order, noting that marks must be aligned and seals, rings, and pins must be properly installed. Cleanliness is emphasized and tools are listed that are needed to install and remove retaining rings, seals, and races.
EV Charging at MFH Properties by Whitaker JamiesonForth
Whitaker Jamieson, Senior Specialist at Forth, gave this presentation at the Forth Addressing The Challenges of Charging at Multi-Family Housing webinar on June 11, 2024.
Implementing ELDs or Electronic Logging Devices is slowly but surely becoming the norm in fleet management. Why? Well, integrating ELDs and associated connected vehicle solutions like fleet tracking devices lets businesses and their in-house fleet managers reap several benefits. Check out the post below to learn more.
Understanding Catalytic Converter Theft:
What is a Catalytic Converter?: Learn about the function of catalytic converters in vehicles and why they are targeted by thieves.
Why are They Stolen?: Discover the valuable metals inside catalytic converters (such as platinum, palladium, and rhodium) that make them attractive to criminals.
Steps to Prevent Catalytic Converter Theft:
Parking Strategies: Tips on where and how to park your vehicle to reduce the risk of theft, such as parking in well-lit areas or secure garages.
Protective Devices: Overview of various anti-theft devices available, including catalytic converter locks, shields, and alarms.
Etching and Marking: The benefits of etching your vehicle’s VIN on the catalytic converter or using a catalytic converter marking kit to make it traceable and less appealing to thieves.
Surveillance and Monitoring: Recommendations for using security cameras and motion-sensor lights to deter thieves.
Statistics and Insights:
Theft Rates by Borough: Analysis of data to determine which borough in NYC experiences the highest rate of catalytic converter thefts.
Recent Trends: Current trends and patterns in catalytic converter thefts to help you stay aware of emerging hotspots and tactics used by thieves.
Benefits of This Presentation:
Awareness: Increase your awareness about catalytic converter theft and its impact on vehicle owners.
Practical Tips: Gain actionable insights and tips to effectively prevent catalytic converter theft.
Local Insights: Understand the specific risks in different NYC boroughs, helping you take targeted preventive measures.
This presentation aims to equip you with the knowledge and tools needed to protect your vehicle from catalytic converter theft, ensuring you are prepared and proactive in safeguarding your property.
Expanding Access to Affordable At-Home EV Charging by Vanessa WarheitForth
Vanessa Warheit, Co-Founder of EV Charging for All, gave this presentation at the Forth Addressing The Challenges of Charging at Multi-Family Housing webinar on June 11, 2024.
Welcome to ASP Cranes, your trusted partner for crane solutions in Raipur, Chhattisgarh! With years of experience and a commitment to excellence, we offer a comprehensive range of crane services tailored to meet your lifting and material handling needs.
At ASP Cranes, we understand the importance of reliable and efficient crane operations in various industries, from construction and manufacturing to logistics and infrastructure development. That's why we strive to deliver top-notch solutions that enhance productivity, safety, and cost-effectiveness for our clients.
Our services include:
Crane Rental: Whether you need a crawler crane for heavy lifting or a hydraulic crane for versatile operations, we have a diverse fleet of well-maintained cranes available for rent. Our rental options are flexible and can be customized to suit your project requirements.
Crane Sales: Looking to invest in a crane for your business? We offer a wide selection of new and used cranes from leading manufacturers, ensuring you find the perfect equipment to match your needs and budget.
Crane Maintenance and Repair: To ensure optimal performance and safety, regular maintenance and timely repairs are essential for cranes. Our team of skilled technicians provides comprehensive maintenance and repair services to keep your equipment running smoothly and minimize downtime.
Crane Operator Training: Proper training is crucial for safe and efficient crane operation. We offer specialized training programs conducted by certified instructors to equip operators with the skills and knowledge they need to handle cranes effectively.
Custom Solutions: We understand that every project is unique, which is why we offer custom crane solutions tailored to your specific requirements. Whether you need modifications, attachments, or specialized equipment, we can design and implement solutions that meet your needs.
At ASP Cranes, customer satisfaction is our top priority. We are dedicated to delivering reliable, cost-effective, and innovative crane solutions that exceed expectations. Contact us today to learn more about our services and how we can support your project in Raipur, Chhattisgarh, and beyond. Let ASP Cranes be your trusted partner for all your crane needs!
What Could Be Behind Your Mercedes Sprinter's Power Loss on Uphill RoadsSprinter Gurus
Unlock the secrets behind your Mercedes Sprinter's uphill power loss with our comprehensive presentation. From fuel filter blockages to turbocharger troubles, we uncover the culprits and empower you to reclaim your vehicle's peak performance. Conquer every ascent with confidence and ensure a thrilling journey every time.
Ever been troubled by the blinking sign and didn’t know what to do?
Here’s a handy guide to dashboard symbols so that you’ll never be confused again!
Save them for later and save the trouble!
Toyota 30 5 fbch20 battery forklift service repair manual
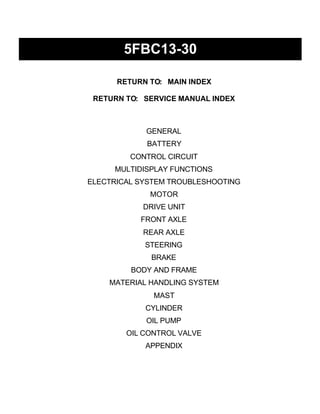
1. RETURN TO: MAIN INDEX
RETURN TO: SERVICE MANUAL INDEX
GENERAL
BATTERY
CONTROL CIRCUIT
MULTIDISPLAY FUNCTIONS
ELECTRICAL SYSTEM TROUBLESHOOTING
MOTOR
DRIVE UNIT
FRONT AXLE
REAR AXLE
STEERING
BRAKE
BODY AND FRAME
MATERIAL HANDLING SYSTEM
MAST
CYLINDER
OIL PUMP
OIL CONTROL VALVE
APPENDIX
5FBC13-30
2. FOREWORD
This manual covers the service procedures of the TOYOTA BATTERY
FORKLIFT 5FBC13 - 30 Series. Please use this manual for providing
quick, correct servicing of the corresponding forklift models.
This manual deals with the above models as of November 1991. Please
understand that disagreement can take place between the descriptions
in the manual and actual vehicles due t o change in design and specifi-
cations. Any change or modifications thereafter will be informed by
Toyota Industrial Vehicles' Parts & Service News.
TOYOTA MOTOR CORPORATION
3. SECTION INDEX
1 NAME 1 SECTION
8
BATTERY
CONTROL CIRCUIT
MULTIDISPLAY FUNCTIONS
ELECTRICAL SYSTEM TROUBLESHOOTING A
DRIVE UNIT
FRONT AXLE
REAR AXLE
STEERING
BRAKE 8
BODY & FRAME
MATERIAL HANDLING SYSTEM
MAST
CYLINDER
OIL PUMP
OIL CONTROL VALVE
APPENDIX
4. GENERAL
Page
..............................................EXTERIOR VIEWS 0-2
VEHICLE MODEL ................................................ 0-3
FRAME NUMBER ................................................ 0-4
.........................HOW TO READ THIS MANUAL 0-5
EXPLANATION METHOD ..................................... 0-5
TERMINOLOGY .................................................. 0-6
ABBREVIATIONS ............................................... 0-6
LIST OF ABBREVIATIONS AND SYMBOLS ............. 0-7
OPERATIONAL TIPS ........................................ 0-8
CIRCUIT TESTER ............................................... 0-9
STANDARD BOLT & NUT TIGHTENING
..........................................................TORQUE 0-11
BOLT STRENGTH TYPE IDENTIFICATION
METHOD ........................................................ 0-11
TIGHTENING TORQUE TABLE ............................... 0-12
PRECOAT BOLTS ............................................... 0-13
HIGH PRESSURE HOSE FITTING
....................................TIGHTENING TORQUE 0-13
WIRE ROPE SUSPENSION ANGLE LIST ............. 0-14
SAFE LOAD FOR EACH WlRE ROPE
......................................SUSPENSION ANGLE 0-14
COMPONENTS WEIGHT .................................... 0-15
RECOMMENDED LUBRICANTS
...........................................AND CAPACITIES 0-16
.......................................LUBRICATION CHART 0-17
.................................PERIODIC MAINTENANCE 0-18
PERIODIC REPLACEMENT OF PARTS
AND LUBRICANTS .......................................... 0-23
6. 0-3
VEHICLE MODEL
Model
Voltage
v
36 or 48
t
T
t
T
t
Control Circu~t
MCS-Ill
t
t
T
t
t
2 ton
series
I ton
series
1.25 ton
1.5 ton
1.75 ton
5FBC13
.
30-5FBC13
5FBC15
30-5FBC 15
5FBC18
30-5FBC18
Standard
Dustproof
Standard
Dustproof
Standard
Dustproof
2.0 ton
2.5 ton
30-5FBC20
5FBCH20
30-5FBCH20
5FBC25
30-5FBC25
5FBCH25
30-5FBCH25
Dustproof
Standard
Dustproof
Standard
Dustproof
Standard
Dustproof
t
t
t
t
t
t
t
t
7
t
t
t
t
t
7. FRAME NUMBER
Vehicle model
5FBC15-10011 5FBC15E10011
5FBC25-10011 5FBC25E10011
3 ton
series
1 ton
series
2 ton
series
3 ton
series
5FBCH20
5FBCH25
5FBC28
5FBC30
30-5FBC13
30-5FBC15
30-5FBCI8
30-5FBC20
30-5FBC25
30-5FBCH20
30-5FBCH25
30-5FBC28
30-5FBC30
5FBCH25-10011
5FBC30-10011
305FBC15-10011
305FBC25-10011
305FBCH25-10011
305FBC30-10011
5FBCH25E10011
5FBC30E10011
305FBC15E10011
305FBC25E10011
305FBCH25E10011
305FBC30E10011
8. HOW TO READ THIS MANUAL
EXPLANATION METHOD
1. Operation procedure
(1) The operation procedure is described in either pattern A or pattern B below.
Pattern A: Explanation of each operation step with a photo or illustration.
Pattern B: Explanation of operation procedure by indicating step numbers in one illustration, fol-
lowed by explanation of cautions and notes summarized as point operations.
Example of description in pattern B
/ DISASSEMBLY-INSPECTION.REASSEMBLY Tightening torque unit T = N.m (kg-cm)[ft-lbl
If a place or part cannot be indi-
cated directly, the part name is
described on the either side of
the illustration.
Example: 1 Piping
I I
Oil Pump Disassembly Procedure
Disassembly Procedure
1 Remove the cover. [Point 11
2 Remove the bush [Point 21- Operation explained on a laterpage
3 Remove the gear.
/ Point operations Explanation of key point for operation with an illustration
I
[Point II 4
Disassembly: Put a match mark when removing the pump cover.
[Point 21
Inspection: Measure the bush inside diameter.
Bush inside diameter limit:19.12 mm (0.7528 in)
9. 2. How t o read components figures (Example)
(1) The components figure use the illustra-
tion in the parts catalog for the vehicle
model. Please refer to the catalog for
checking the part name.
The number at the right shoulder of each
components figure indicates the Fig.
number in the parts catalog.
FIG number in parts catalog
I3. Matters omitted in this manual
(1) This manual omits description of the following jobs, but perform them in actual operation:
@ Cleaning and washing of removed parts as required
@ visual inspection (Partially described)
TERMINOLOGY
Caution:
lmportant matters of which negligence may cause accidents. Be sure to observe them.
Note:
lmportant items of which negligence may cause accidents or matters in operation procedure re-
quiring special attention.
Standard: Values showing allowable range in inspection and adjustment.
Limit: Maximum or minimum allowable value in inspection or adjustment.
10. LIST OF ABBREVIATIONS AND SYMBOLS
Symbol
BATT
Bz
CADIP
CH
CHI,
CHIR
CSDIP
Flasher Lamp, RH RADIP Drivelpump Absorber
Head Lamp, LH Surge Absorber
DcH Charger Diode Head Lamp, RH SDD Drive SIT Driver
DC-SDD DC-DC Converter & Rotaly Forward Lamp SDP Pump SIT Driver
Source Drive (Drive) Rotaly Reverse Lamp Lequid Level Sensor
DC-SDP DC-DC Converter & Snubber No.1
Source Drive (Pump) SSP Speed Sensor
DF112 FLY-WHEEL Diode, Brake Limit Switch Steering Torque Sensor
Tilt Limit Switch
irection Switch
everse Direction Switch Main Transistor
Forward Contactor
Pump Contactor
Name
Battery
Buzzer
Drivelpump Absorber
Capacitor
Charger
Forward Chime
Reverse Chime
Drivelpump Current
Name
Charger Magnet Switch
Field Weakning Contactor
Computer Print Board
SPS Print Board
Working Pilot Lamp
Fan Resistor
Field Weakning Resistor
Regenerative Resistor
Symbol
FRY
H
L,,.,
L,,.,
LC-L
LF-L
L,,,
Name
Flasher Relay
Horn
Back-up Lamp, LH
Back-up Lamp, RH
Clearance Lamp, LH
Clearance Lamp, RH
Flasher Lamp, LH
Flasher Lamp, LH (Rear)
Symbol
MScH
M W
PBcpu
PBsps
PL,
RF
RFW
RG
11. OPERATIONAL TIPS
1. Safe operation
(1 After jacking up, always support with rigid stands.
(2) When hoisting the vehicle or its heavy component, use wire rope(s) with a sufficient reserve in
load capacity.
(3) Always disconnect the battery plugs before the inspection or servicing of electrical parts.
2. Tactful operation
(1 Prepare the mechanic tools, necessary measuring instruments (circuit tester, megger, oil pres-
sure gauge, etc.) and SSTs before starting operation.
(2) Before disconnecting wiring, always check the cable color and wiring state.
(3) When overhauling functional parts, complicated portions or related mechanisms, arrange the
parts neatly to prevent confusion.
(4) When disassembling and inspecting such a precision part as the control valve, use clean tools
and operate in a clean location.
(5) Follow the described procedures for disassembly, inspection and reassembly.
(6) Replace, gaskets, packings and O-rings with new ones each time of disassembly.
(7)Use genuine Toyota parts for replacement.
(8) Use s d bolt and nuts. Observe the specified tightening torque at the time of reassembly.
If no tightening torque is specified, tighten the bolt or nut according to the standard tightening
torque table.
3. Grasping the troule state
When a trouble occurs, do not attempt immediate disassembly or replacement but first check if
the trouble requires disassembly or replacement for remedying.
12. CIRCUIT TESTER
Circuit testers are available in both the analog and digital types. The should be used selectively accord-
ing to the purpose of measurement.
Analog type: This type is convenient for observing movement during operation, but the measured
value should only be used for reference or rough judgement.
Digital type: Fairly accurate reading is possible, but it is difficult to observe the variation or move-
ment.
1. Difference in measurement results with the digital type and analog type
* The result may be different between measurements with the analog type and digital type. Al-
ways use a circuit tester according to its operation manual. Cautions when the polarities are dif-
ferent between the analog type and digital type are described below.
Circuit tester range: Analog type -t kohm range Digital type + 2 Mohm range
Forward direction Reverse direction
Black
robe
Red
probe
Measurement result exampie
As seen from the example above, the measurement results with the analog and digital types are re-
verse. In measurement with a digital type circuit tester, therefore, use the tester probes as shown be-
low.
Forward direction Reverse direction
13. 2. Difference in result of measurement with circuit tester
The circuit tester power supply voltage depends on the tester type. 1.5V, 3.OV or 6.OV is used.
The resistance of a semiconductor such as a diode varies with the circuit tester power supply
voltage.
The diode characteristics are shown in the figure below.
( m ~ ) The resistance values of the same semiconductor mea-
5 sured
with t w o types of circuit testers having different
Current 4 power supply voltages are different.
in
forward 3 This manual describes the results of measurement
direction
with a circuit tester whose power supply voltage is
2
3.0 V.
1
0 0.1 0.2 0.3 0.4 0.5 0.6 0.7 0.8
Voltage in forward direction
3. Difference in measurement result by measurement range (analog type)
In the analog type circuit tester, changing the measurement
range switches over the internal circuit t o vary the circuit
resistance. Even when the same diode is measured, the
measurement result varies with the measurement range.
Always use the range described in the repair manual
for measurement.
t l
Variable resistor
Current
Resistor
Range: x 10
Resistor
Range: x I
Power source: 1.5 V
Red Black
14. STANDARD BOLT & NUT TIGHTENING TORQUE
Standard bolt and tightening torques are not indicated.
Judge the standard tightening torque as shown below.
1. Find out the type of the bolt from the list below and then find the bolt tightening torque from the
table.
2. The nut tightening torque can judged from the mating bolt type.
BOLT STRENGTH TYPE IDENTIFICATION METHOD
1. Identification by bolt shape 2. Identification by part No.
91611-40625
Diameter (mm)
92132-40614
Diameter (mm)
Bolt head No.
Two protruding
Two protruding
Three protruding
Stud bolt
Grooved 6T
16. PRECOAT BOLTS
(Bolts with seal lock agent coating on threads)
1. Do not use the precoat bolt as it is in either of the fol-
lowing cases.
(a) After is removed.
(b) When the precoat bolt is moved (loosened or tight-
ened) by tightness check, etc.
Note:
For torque check, use the lower limit of the allowable tight-
ening torque range. If the bolt moves, retighten it according
to the steps below.
2. Method for reuse of precoat bolts
(1) Wash the bolt and threaded hole. (The threaded hole
must be washed even for replacement of the bolt.)
(2) Parfectly dry the washed parts by air blowing.
(3) Coat the specified seal lock agent to the threaded
portion of the bolt.
HIGH PRESSURE HOSE FITTING TIGHTENING TORQUE
1. When connecting a high pressure hose, wipe the hose fitting and mating nipple contact surfaces
with clean cloth to remove foreign matters and dirt. Also check no dent or other damage on the
contact surfaces before installation.
2. When connecting a high pressure hose, hold the hose to align the fitting with the nipple and
tighten the fitting.
3. The maximum tightening torque must not exceed twice the standard tightening torque.
Hose inside
diameter
mm (in)
6 (0.24)
9 (0.35)
12 (0.47)
12 (0.471, 15 (0.59)
19 (0.75)
25 (0.98)
6 (0.24)
9 (0.35)
12 (0.47)
19 (0.75)
25 10.98)
Nominal diameter
of screw
7116 - 20UNF
9116 - 18UNF
314 - 16UNF
718 - 14UNF
1.1116-12UNF
1.5116 - 12UNF
PF114
PF318
PF112
PF314
PF1
Standard tightening torque N.m (kgf-cm) [ft-lbfl
Standard
25 ( 250) [ 18.11
49 ( 500) [ 36.21
59 ( 600) [ 43.41
59 ( 600) [ 43.41
1 1 8 ( 1 2 0 0 ) [ 86.81
137 (1400) [101.3]
25 ( 250) [ 18.11
49 ( 500) [ 36.21
59 ( 600) [ 43.41
118 (1200) [ 86.81
137 (1400) [101.3]
Tightening range
24 - 26 ( 240 - 270) [17.4 - 19.51
47 - 52 ( 480 - 530) 134.7 - 38.31
56 - 62 ( 570 - 630) [41.2 - 45.61
56 - 62 ( 570 - 630) [41.2 - 45.61
112-123(1140-1250)[82.5- 90.41
130 - 144 (1330 - 1470) I96.2 - 106.41
24 - 26 ( 240 - 270) 117.4 - 19.51
47 - 52 ( 480 - 530) 134.7 - 38.31
56 - 62 ( 570 - 630) [41.2 - 45.61
112 - 123 (1140 - 1250) l82.5 - 90.41
130 - 144 (1330 - 1470) 196.2 - 106.41
18. COMPONENTS WEIGHT
Weight N (kg) [Ibl
Approx. 735 (75)11651
Only dustproof model:
Approx. 834 (85)[I871
Approx. 1079 (110)12431
Approx. 1079 (110) [2431
Approx. 441 (45)[991
Approx. 637 (65)11431
Approx. 637 (65)[I431
Approx. 2746 (280)16171
Approx. 4315 (440)[6701
Balance weight
Mast W / lift bracket
(with lift cylinder, less back rest and fork)
Model
1 ton series
2 ton series
3 ton series
1 ton series
2 ton series
3 ton series
5FBC13
5FBC15
Item
Motor
Drive
Material handling
19. 0-16
RECOMMENDED LUBRICANTS AND CAPACITIES
45s: Refrigerator specification vehicle
*: For 3000 mm (118 in) maximum fork height
**: For 6000 mm (236 in) maximum fork height
Application
Differential & transmission
Hydraulic (total)
Brake line
Chassis part
Type
STD: Hypoid gear oil SAE85W-90
(API GL-4)
45s: Hypoid gear oil w
(API GL-4)
STD: Hydraulic oil IS0 VG32
45s: MIL-H-5606-D
STD: SAE J-1703 DOT-3
45s: Brake fluid artic S
STD: MP grease No.2
45s: Esso beacon 325
Capacity
1 ton series
2 - 3 ton series
1 ton series
2 - 3 ton series
7.0 1
(1.85 US gal.)
7.5 1
(1.98 US gal.)
"16 1
(4.2 US gal.)
" " 211
(5.5 US gal.)
" 201
(5.3 US gal.)
" " 261
(6.9 US gal.)
Proper quantity
Proper quantity
20. LUBRICATION CHART
1. Chain
2. Mast support bushing
3. Tilt cylinder front pin
4. Front wheel bearing
5. Differential & transmission
6. Brake fluid reservoir tank
7. Tilt steering locking mechanism
8. Tilt steering universal joint
9. Oil tank
10. Rear wheel bealing
1 1. Steering knuckle king pin
12. Rear axle beam front
13. Rear axle cylinder rod joint (1 ton series)
14. Rear axle beam rear
* Located on right and left sides
I lnspect every 8 hours (daily)
I1 lnspect every 4 0 hours (weekly)
111 lnspect every 170 hours (monthly)
IV lnspect every 1000 hours (6monthly)
V lnspect every 2000 hours (annually)
0 lnspect and service
Re~lace
1. MP grease
2. Engine oil
3. Hypoid gear oil
4. Hydraulic oil
5. Brake fluid
Lubrication Chart
21. PERIODIC MAINTENANCE
INSPECTION METHOD
I: Inspection. Repair or replacement if required.
M: Measurement. Repair or adjustment if required.
T : Retightening C: Cleaning L: Lubrication
* : For new vehicle * 1: Flaw detector
Inspection Period
Item
Months
Hours
ELECTRICAL SYSTEM
1
170
Motor
3
500
Abnormal sound during revolution
Loose terminal
Insulation resistance
Brush wear and sliding contact status
Commutator fouling and damage
Battery fluid level
Battery fluid specific gravity
Loose terminal
Abnormality at top of battery and
6
1000
I
T
M
I
I
Charger
Magnet
contactor
Microswitch
12
2000
0
0
0
0
0
0
0
0
0
0
Timer operation
Terminal loosening
Operating voltage measurement
Magnet switch function, contact
fouling and roughening
Loose contact, damage and wear
Auxiliary contact function, fouling and
wear
Arc chute installation status
Timing and functioning
Loose coil installation
Loose main circuit lead installation
Timing and operating function
Damage and loose installation
0
0
0
0
0
I
M
I
I
I
I
I
I
I
I
I
0
0
0
0
0
0
0
0
0
0
0
0
0
0
0
0
0
0
0
0
0
0
0
0
0
0
0
0
22. Inspection Period
Item
Months
Hours
I
I
C
M
I
I
I
I
I
Direction lever
Controller
Fuse
Wiring
(including
charging
Accelerator
Operating conditions and damage
Operation
Inside fouling and damage
Overcurrent limit valve
Loosening
Damage of wiring harness and loose
clamp
Loose connection and taping status
Battery connector damage and
connection status
Operating and damage
POWER TRAIN
Oil leak
1
170
0
0
0
0
0
0
0
0
3
500
0
0
0
0
0
0
0
0
6
1000
0
0
0
0
0
0
0
0
I
12
2000
0
0
0
0
0
0
0
0
0
Differential,
Loose rim and hub nuts
Tire groove depth
Metal chips, pebbles and other foreign
matter trapped in tire grooves
Rim and disc wheel damage
Abnormal sound and looseness of
front wheel bearing
0
Rear axle
0
beam
Looseness of axle beam in vehicle
longitudinal direction
0
M
0
0" 0
23. Inspection Period
Item
STEERING SYSTEM
Months
Hours
Steering wheel
Gear box
Power steering
Knuckle
Steering shaft
BRAKING SYSTEM
Rod and cable looseness and damage
Drum wear and damage
Brake drum
Shoe operation condition
and brake shoe
Anchor pin rusting
Return spring fatigue
Backing plate
1
170
Play and looseness
Function
Oil leak
Looseness of mounting
Oil leak
Damage of power steering hose
King pin looseness
Cracks and deformation
Wheel alignment
Left and right turning angle
Automatic adjuster function
Deformation, cracks and damage
Loose mounting
3
500
I
I
I
T
I
I
I
I
M
M
I
I
T
6
1000
0
0
0
0
0
0
0
0
0
12
2000
0
0
0
0
0
0
0
0
0
0
0
0
0
0
0
0
0
0
0
0
0
0
24. Inspection Period
Item
Months
Hours
MATERIAL HANDLING SYSTEM
1
170
Forks
Mast and fork
bracket
3
500
Abnormality of fork and stopper pin
Misalignment between left and right
fork fingers
Cracks at fork root and welded part
Deformation and damage of each part
and crack at welded part
Mast and lift bracket looseness
Wear and damage of mast support
bush
Wear, damage and rotating condition
of rollers
Wear and damage of roller pins
Wear and damage of mast strip
Tension, deformation and damage of
Chain lubrication
Abnormality of chain anchor bolt
Wear, damage and rotating condition
6
1000
I
I
I*'
I
I
I
I
I
I
Cylinder
Cylinder
Oil pump
Hydraulic oil
tank
12
2000
0
0
0
0
0
0
Deformation and damage of rod, rod
screw and rod end
Cylinder operation
Natural drop and natural forward tilt
(hydraulic drift)
Oil leak and damage
Wear and damage of pin and cylinder
bearing
Lifting speed
Uneven movement
Oil leak and abnormal sound
Oil level and contamination
Tank and oil strainer
Oil leak
0
0
0
0
0
0
I
I
I
I
I
M
I
I
I
C
I
0
0
0
0
0
0
0
0
0
0
0
0
0
0
0
0
0
0
0
0
0
0
0
0
0
0
0
0
0
0
0
0
0
0
0
0
0
0
0
0
0
0
0
0
0
0
0
0
0
0
0
0
0
0
0
0
0
25. Thank you very much for
your reading. Please Click
Here. Then Get COMPLETE
MANUAL. NO WAITING
NOTE:
If there is no response to
click on the link above,
please download the PDF
document first and then
click on it.
26. 12
2000
0
0
0
0
0
0
0
0
0
Inspection Period
Item
Months
Hours
I
I
I
M
I
I
I
T
I
Control lever
Oil control
valve
Hydraulic
piping
SAFETY DEVICES, ETC.
Loose linkage
Operation
Oil leak
Relief pressure measurement
Relief valve and tilt lock valve
functions
Oil leak
Deformation and damage
Loose joint
Hoise tension and twisting
1
170
0
0
0
0
0
0
0
0
0
0
Head guard
3
500
0
0
0
0
0
0
0
0
0
0
Loosening of mounting
lnstrunenrs ' Functions I 0 0 $ 0
6
1000
0
0
0
0
0
0
0
0
0
0
Cracks at welded portion
Deformation and damage
Back up buzzer
Rear-view
mirror
Seat
Body
Other
I
I
Function and mounting condition
Dirt, damage
Rear reflection status
Loosening and damage of mounting
Damage and cracks of frame, cross
members, etc.
Bolt looseness
Grease up
0
0
I
I
I
I
I
T
L
0
0
0
0
0
0
0
0
0
0
0
0
0
0
0
0
0
0
0
0
0
0
27. 0-23
PERIODIC REPLACEMENT OF PARTS AND LUBRICANTS
Inspection (operating hours or
months, whichever is earlier)
6
1000
•
•
a
12
2000
•
•
a
•
•
•
Months
Hours
Brake fluid
Hydraulic oil
Hydraulic oil return filter
Differential and transmission oil
Wheel bearing grease
Master cylinder rubber parts
a
(New vehicle)
1
170
3
500