

Recommended
Recommended
More Related Content
Similar to Session 2
Similar to Session 2 (20)
More from Dr. Firdaus Basbeth
Recently uploaded
Recently uploaded (20)
Session 2
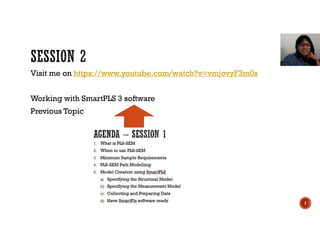
- 1. Visit me on https://www.youtube.com/watch?v=vmjovyF3m0s Working with SmartPLS 3 software Previous Topic 1
- 2. The student software is available free of charge at http://www.smartpls.com The student version offer practically all functionalities of the full version but is restricted to data sets with a maximum of 100 observations. For a data set > 100 observations you should use the professional version SmartPLS, which is available as a 30-day trial version at https://www.smartpls.com/ 2
- 3. Download 30-day free trail at the following URL: https://www.smartpls.com/ 3
- 4. Before you draw a model,you need to have data that serves as the basis for running the model The data we will use with the reputation model can be downloaded in the download section at the following URL: https://www.smartpls.com/documentation/sample- projects/corporate-reputation Click on Save Target as ..to save the data to a folder on your hard drive and then close 4
- 5. 5
- 6. Now run the Smart PLS3 software by clicking on the desktop icon that is available after the software installation on your computer device 6
- 7. To create a new project after running SmartPLS3, click on File Create New Project. 7 First type a name for the project into the Name Box (e.g Corporate Reputation).Then click OK.
- 8. After clicking OK,the new project is created and appears in the PROJECT EXPLORER window that is in the upper left below the menu bar 8 Next, you need to assign a data set to the project, in our case, corporate reputation data.csv you downloaded previously from internet. To do so, click on the information button labelled DoubleClick to import data! Find and highlight your data folder, and click Open.
- 9. 9
- 10. 10
- 11. Next, double click on SIMPLE MODEL in the Project Explorer window and Smart PLS will open the graphical modelling window on the right, where you can create a path model 11
- 12. By clicking on Latent Variable in the menu bar, you can place one new construct into the modelling window. When you click on the modelling window,a new construct represented by a red circle will appear. To leave this mode click on Select in the menu bar To connect the latent variables with each other, click on Connect in the menu bar 12
- 13. 13 COMP LIKE CUSA CUSL The goal of the model is to explain the effects of corporate reputation on customer Satisfaction (CUSA) and Customer Loyalty (CUSL).Corporate reputations is measured using two dimension Company’s competence (COMP) and company’s likeability (LIKE) (Helm, Eggert & Garnefeld, 2010). Comp_1 Comp_2 Comp_3 Like_3 Like_2 Like_1 Cusl_1 Cusl_2 Cusl_3 Cusa
- 14. The next step is to name the construct.To do so right click on the construct to open a menu with different options and click on Rename. Type the name of your construct in the window of the rename box (i.e., COMP) and then click OK. The name will appear under the construct. Next you need to assign indicators to each of the constructs. On the left side of the screen, there is an Indicators window that shows all the indicators that are in your data sheet. 14
- 15. Start with the COMP construct by dragging the first competence indicator comp_1 from the indicators window and dropping it on the construct (click on the mouse and hold the button down, then move it until over a construct,then release). After assigning an indicator to a construct, it appears in the graphical modelling window as a yellow rectangle attached to the construct as reflective. Assigning an indicator to a construct will also turn the color of the construct from red to blue. 15
- 16. You can move the indicators around but it will remain attached to the construct. By right clicking on the construct and choosing one of the options under Align – you can align the indicators. By clicking on the centre of the button, you can hide the indicators of the selected construct, by clicking on the boxes next to the construct. Make sure to save the model by going to File Save 16
- 17. 17
- 19. Variance Based (PLS-SEM) Covariance Based (CB-SEM) 19