Selenium my sql and junit user guide
•Download as DOCX, PDF•
0 likes•667 views

Selenium Webdriver and MY SQL scripts execution in JUNIT

Recommended
More Related Content
What's hot
What's hot (20)
Viewers also liked
Viewers also liked (11)
Similar to Selenium my sql and junit user guide
Similar to Selenium my sql and junit user guide (20)
Recently uploaded
Recently uploaded (20)
Selenium my sql and junit user guide
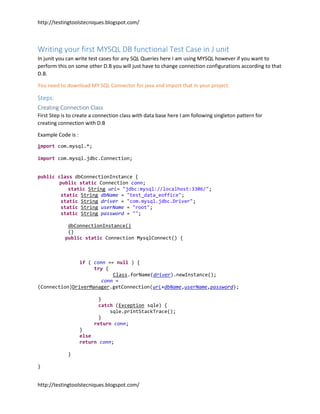
- 1. http://testingtoolstecniques.blogspot.com/ http://testingtoolstecniques.blogspot.com/ Writing your first MYSQL DB functional Test Case in J unit In junit you can write test cases for any SQL Queries here I am using MYSQL however if you want to perform this on some other D.B you will just have to change connection configurations according to that D.B. You need to download MY SQL Connector for java and import that in your project. Steps: Creating Connection Class First Step is to create a connection class with data base here I am following singleton pattern for creating connection with D.B Example Code is : import com.mysql.*; import com.mysql.jdbc.Connection; public class dbConnectionInstance { public static Connection conn; static String url= "jdbc:mysql://localhost:3306/"; static String dbName = "test_data_eoffice"; static String driver = "com.mysql.jdbc.Driver"; static String userName = "root"; static String password = ""; dbConnectionInstance() {} public static Connection MysqlConnect() { if ( conn == null ) { try { Class.forName(driver).newInstance(); conn = (Connection)DriverManager.getConnection(url+dbName,userName,password); } catch (Exception sqle) { sqle.printStackTrace(); } return conn; } else return conn; } }
- 2. http://testingtoolstecniques.blogspot.com/ http://testingtoolstecniques.blogspot.com/ Benefit of using singleton pattern is that you won’t need to created create a connection object ever time you will simply call this instance by dbConnectionInstance. MysqlConnect(); and this method will return you connection. Creating Functionalities Class This class will contain execution of all queries which we want to test First step is to create this class and identify a query here I am writing a test case for query “insert into testdatacreatefile” I created a function public void createFileTestDataGenarator() Then I executed this query with in this function Now my test functionality is ready to be called in a J-Unit Test case Example code is : import java.sql.Connection; import java.sql.SQLException; import java.sql.Statement; public class TestDataGenerator { private Connection connect = dbConnectionInstance.MysqlConnect(); private Statement statement = null; public void createFileTestDataGenarator() { try { statement=connect.createStatement(); for(int i=1000; i<=2000; i++) { String fileRefNum="Test FIle Reference Number"+i; String Subject="Test FIle Subject Number"+i; String Keywords ="keyword"+i+"A,keyword"+i+"B"; String Decscription="Test FIle Description Number"+i; int status=0; statement.executeUpdate("insert into testdatacreatefile(fileSubject,fileReferenceNumber,fileKeyword,fileDescription,testDa taStatus) values ('"+Subject+"','"+fileRefNum+"','"+Keywords+"','"+Decscription+"',"+status+")"); }} catch (SQLException e) { // TODO Auto-generated catch block e.printStackTrace(); }} public void Log(String log) {
- 3. http://testingtoolstecniques.blogspot.com/ http://testingtoolstecniques.blogspot.com/ try { statement=connect.createStatement(); statement.executeUpdate("insert into logger(step) values ('"+log+"')"); } catch (SQLException e) { // TODO Auto-generated catch block e.printStackTrace(); } } public void createDocumentTestDataGenarator() { try { statement=connect.createStatement(); for(int i=1000; i<=2000; i++) { String DocumentRefNum="Test Document Reference Number"+i; String Subject="Test Doucument subject "+i; String Decscription="Test Document Description"+i; String FromMinsitry="Some Test Mionistry"+i; String FromDesigntation="Some Test Mionistry Designation ABC"+i; String FromName="Some Test Misnitry Named ABC:GM"+i; String FromMedium="Some Test Courior Service"+i; int status=0; statement.executeUpdate("insert into testdatacreatedocument( DocumentRef,DocumentDesc,FromMinistry,FromDesignation,FromName,FromMedium,Stat us) values ('"+DocumentRefNum+"','"+Decscription+"','"+FromMinsitry+"','"+FromDesigntation+"','" +FromName+"','"+FromMedium+"',"+status+")"); }} catch (SQLException e) { // TODO Auto-generated catch block e.printStackTrace(); }} }
- 4. http://testingtoolstecniques.blogspot.com/ http://testingtoolstecniques.blogspot.com/ Creating J unit Class Left Click your project and add a J Unit Test Case There are three basic attenuation is Junit @Before: this attenuation is used for initialization @ Test: with this attenuation you call your actual test or execute with in this attenuation @ After: this attenuation is used at the end of test e.g for closing all DB connections Next step is now to call you created functionality in @ test Attenuation Create Object of that class and then call its instance like example below @Test public void testCreateFIle() throws Exception { TestDataGenerator TDG= new TestDataGenarator(); TDG.createDocumentTestDataGenarator(); //FM.addNtoing("fazal.karim", baseUrl, driver, "Abdul Hafeez", "KPO", "abdul.hafeeez"); // Thread.sleep(5000L);
- 5. http://testingtoolstecniques.blogspot.com/ http://testingtoolstecniques.blogspot.com/ } At Last execute your Junit Class as a Junit project not as a Java Application For knowing more about MY SQL and java refer following links http://www.tutorialspoint.com/jdbc/ Writing your first Selenium Web Driver functional Test Case in J unit First of all I scripts all functionalities in a web app in a separate class and I create a separate function for every functionality like signin(string username, string password). Then I call these functions in sequence in my Junit Test case e.g you class contain 3 function sign in (), Register() , View Category(), clickProduct(), addToCart Now in your junit test case if you need add to cart you need following steps 1. Sign in User by calling signin() 2. Open a category by calling View Category() 3. Click some product by calling clickProduct(), 4. Add product to cart by calling addToCart() I this approach e.g you need a test case view product or just sign in you don’t need to rewrite test script you will simply rearrange test steps Example code is mentioned below: In this code I created a separate function for every functionality and we can call this functionality a test step benefit of this approach is reusability but in this approach you have to keep it in mind that every possible parameter must be kept dynamic import java.awt.AWTException; import java.util.ArrayList; import java.util.List; import static org.junit.Assert.*; import org.openqa.selenium.chrome.ChromeDriver; import org.openqa.selenium.*; import org.openqa.selenium.support.ui.Select; public class FileManagment { loginManager LM= new loginManager(); TestDataGenerator TDG=new TestDataGenerator(); testDataProvider TP=new testDataProvider(); String subject; String FileRefNumber; String Description; String Keywords; String fileName; // private StringBuffer verificationErrors = new StringBuffer(); public void createDocument(WebDriver wd, String uID, String baseUrl) throws ClassNotFoundException, InterruptedException
- 6. http://testingtoolstecniques.blogspot.com/ http://testingtoolstecniques.blogspot.com/ { LM.loginAsAppUser(uID, baseUrl, wd); List<String> list= new ArrayList<String>(); testDataProvider TDP=new testDataProvider(); list=TDP.getCreateDocumentData(); String DocRef=list.get(0); String DocumentDesc=list.get(1); wd.get(baseUrl+"faces/ic/AddDocument.jsp?init=true"); wd.findElement(By.id("form1:referenceNo")).sendKeys(DocRef); wd.findElement(By.id("form1:subject")).click(); wd.findElement(By.id("form1:subject")).clear(); wd.findElement(By.id("form1:subject")).sendKeys(DocRef); wd.findElement(By.xpath("//html/body")).click(); wd.switchTo().frame("content_ifr"); wd.findElement(By.id("mce_editor_0")).sendKeys(DocumentDesc); wd.switchTo().defaultContent(); new Select(wd.findElement(By.id("fform1:template"))).selectByIndex(2); wd.findElement(By.id("form1:button")).click(); //wd.findElement(By.id("form1:hiddenBtn")).click(); } public void CreateFile(String uID,String baseUrl,WebDriver browser) throws AWTException { try{ List<String> list= new ArrayList<String>(); list=TP.getCreateFileData(); subject=list.get(0); FileRefNumber=list.get(1); Description=list.get(3); Keywords=list.get(2); WebDriver driver; driver=browser; //Step 1 login LM.loginAsAppUser(uID, baseUrl, driver); //Step 2 Create File driver.get(baseUrl+"faces/ic/CreateFile.jsp?isNewFile=true"); // ERROR: Caught exception [ERROR: Unsupported command [selectWindow | null | ]] new Select(driver.findElement(By.id("form1:cboFileHeading"))).selectByIndex(1);; new Select(driver.findElement(By.id("form1:cboFileTypes"))).selectByIndex(1);; driver.findElement(By.id("form1:txtSubject")).clear(); driver.findElement(By.id("form1:txtSubject")).sendKeys(subject); driver.findElement(By.id("form1:txtParaNumber")).clear(); driver.findElement(By.id("form1:txtParaNumber")).sendKeys("1"); driver.findElement(By.id("form1:Description")).clear(); driver.findElement(By.id("form1:Description")).sendKeys(Description); driver.findElement(By.id("form1:Keywords")).clear(); driver.findElement(By.id("form1:Keywords")).sendKeys(Keywords); driver.findElement(By.id("form1:btnSave")).click(); //driver.findElement(By.id("form1:hiddenBtn")).click();
- 7. http://testingtoolstecniques.blogspot.com/ http://testingtoolstecniques.blogspot.com/ //driver.findElement(By.xpath("/html/body/form/table/tbody/tr[2]/td/table/tbody/tr/td [2]/table/tbody/tr/td/table/tbody/tr/td/span")); System.out.print("n"+uID+": Sucessfully Created File"); Thread.sleep(10000L); } catch (NoSuchElementException e) { e.printStackTrace(); } catch (InterruptedException e) { } catch (ClassNotFoundException e) { // TODO Auto-generated catch block e.printStackTrace(); } } public void openTopMostFileOnDesk(String uID,String baseUrl,WebDriver browser) { try { LM.loginAsAppUser(uID, baseUrl, browser); } catch (InterruptedException e) { // TODO Auto-generated catch block e.printStackTrace(); } fileName=browser.findElement(By.xpath("/html/body/form/table/tbody/tr[2]/td/table/tbo dy/tr[2]/td/table/tbody/tr/td[2]/table/tbody/tr/td/table/tbody/tr[2]/td/table/tbody/t r[2]/td/a")).getText(); System.out.print("n"+fileName); buttonController.clickButtonByXPath(browser, "/html/body/form/table/tbody/tr[2]/td/table/tbody/tr[2]/td/table/tbody/tr/td[2]/table /tbody/tr/td/table/tbody/tr[2]/td/table/tbody/tr[2]/td/a"); System.out.print("n"+uID+": Sucessfully Opened File"); ((JavascriptExecutor)browser).executeScript("document.location.reload()"); try { Thread.sleep(2000); } catch (InterruptedException e) { // TODO Auto-generated catch block e.printStackTrace(); } } public void openNotingTabtopMostFile(String uID,String baseUrl,WebDriver browser) { openTopMostFileOnDesk(uID, baseUrl, browser); browser.findElement(By.id("form1:text13")).click(); System.out.print("n"+uID+": Sucessfully Opened Noting Tab");
- 8. http://testingtoolstecniques.blogspot.com/ http://testingtoolstecniques.blogspot.com/ ((JavascriptExecutor)browser).executeScript("document.location.reload()"); try { Thread.sleep(2000); } catch (InterruptedException e) { // TODO Auto-generated catch block e.printStackTrace(); } } public void verifyNoting(String uID,String baseUrl,WebDriver browser, String FileName) { try { LM.loginAsAppUser(uID, baseUrl, browser); } catch (InterruptedException e) { // TODO Auto-generated catch block e.printStackTrace(); } browser.getPageSource().contains(FileName); System.out.print("n"+uID+": recived file Sucessfully "); } public void addNtoing(String uID,String baseUrl,WebDriver browser, String reciverName, String reciverDesignation, String reciverID) throws InterruptedException { openNotingTabtopMostFile(uID, baseUrl, browser); JavascriptExecutor jsx = (JavascriptExecutor)browser; jsx.executeScript("window.scrollBy(0,600)", ""); browser.switchTo().frame("mce_editor_0"); browser.findElement(By.cssSelector("body")).sendKeys("heloo Fahad Testing here"); browser.switchTo().window(browser.getWindowHandle()); Thread.sleep(100L); browser.findElement(By.xpath("/html/body/form[2]/table/tbody/tr[2]/td/table/tb ody/tr/td[2]/table/tbody/tr/td/table/tbody/tr[3]/td/table/tbody/tr[20]/td/a")); Thread.sleep(500L); Select select=new Select(browser.findElement(By.id("form1:markTo"))); select.selectByVisibleText(reciverName+", "+reciverDesignation); browser.findElement(By.xpath("//*[@id="form1:fwdButton"]")).click(); Alert alert = browser.switchTo().alert(); alert.accept(); try { Thread.sleep(10000L); } catch (InterruptedException e) { // TODO Auto-generated catch block e.printStackTrace(); } assertEquals("Internal Communication", browser.getTitle()); System.out.print("n"+uID+": sucessfully added noting and marked File to "+reciverName+" Whose designation is "+reciverDesignation);
- 9. http://testingtoolstecniques.blogspot.com/ http://testingtoolstecniques.blogspot.com/ verifyNoting(reciverID,baseUrl, browser,fileName); } } Now Add a Junit Test Case Left Click your project and add a J Unit Test Case There are three basic attenuation is Junit @Before: this attenuation is used for initialization @ Test: with this attenuation you call your actual test or execute with in this attenuation @ After: this attenuation is used at the end of test e.g for closing all DB connections Next step is now to call you created functionality in @ test Attenuation Now call your web driver script with in @test
- 10. http://testingtoolstecniques.blogspot.com/ http://testingtoolstecniques.blogspot.com/ import static org.junit.Assert.fail; import java.util.concurrent.TimeUnit; import org.junit.After; import org.junit.Before; import org.junit.Test; import org.openqa.selenium.Alert; import org.openqa.selenium.By; import org.openqa.selenium.NoAlertPresentException; import org.openqa.selenium.NoSuchElementException; import org.openqa.selenium.WebDriver; import org.openqa.selenium.chrome.ChromeDriver; import org.openqa.selenium.firefox.FirefoxDriver; import org.openqa.selenium.ie.InternetExplorerDriver; public class mainTestClass { private WebDriver driver; private String baseUrl; private boolean acceptNextAlert = true; private StringBuffer verificationErrors = new StringBuffer(); FileManagment FM= new FileManagment(); @Before public void setUp() throws Exception { System.setProperty("webdriver.chrome.driver","chromedriver.exe"); // System.setProperty("webdriver.ie.driver", "IEDriverServer.exe"); // driver = new InternetExplorerDriver(); Thread.sleep(2000L); driver = new FirefoxDriver(); Thread.sleep(2000L); baseUrl = "http://10.11.11.80:8080/EOffice/"; driver.manage().timeouts().implicitlyWait(20, TimeUnit.SECONDS); } @Test public void testCreateFIle() throws Exception { FM.createDocument(); FM.addNtoing("fazal.karim", baseUrl, driver, "Abdul Hafeez", "KPO", "abdul.hafeeez"); } @After public void tearDown() throws Exception { driver.quit(); System.out.print("Driver Closed Sucessfull");
- 11. http://testingtoolstecniques.blogspot.com/ http://testingtoolstecniques.blogspot.com/ String verificationErrorString = verificationErrors.toString(); if (!"".equals(verificationErrorString)) { fail(verificationErrorString); } } private boolean isElementPresent(By by) { try { driver.findElement(by); return true; } catch (NoSuchElementException e) { return false; } } private boolean isAlertPresent() { try { driver.switchTo().alert(); return true; } catch (NoAlertPresentException e) { return false; } } private String closeAlertAndGetItsText() { try { Alert alert = driver.switchTo().alert(); String alertText = alert.getText(); if (acceptNextAlert) { alert.accept(); } else { alert.dismiss(); } return alertText; } finally { acceptNextAlert = true; } } } In @before I created all objects which were required by script to execute In @ after I teared down Web driver and MY SQL connection For knowing more about JUNIT refer following links http://www.tutorialspoint.com/junit/junit_using_assertion.html http://www.vogella.com/tutorials/JUnit/article.html