SlideShare a Scribd company logo
1 of 43
Download to read offline
R Visualization
Homework Assignment
Vassilis Kapatsoulias, BAPT 1507
November 1st
, 2015
Information Systems & Business Process Management
PhD Candidate Panagiotis Sarantopoulos
Athens University of Economics and Business
1
Contents
Part A: Parole Assignment ......................................................................................................... 2
Part B: Script Assignment .......................................................................................................... 7
WHO Data Frame................................................................................................................... 7
Simple Scatter Plots with GGPLOT2................................................................................... 7
Advanced Scatter Plots with the Use of GGPLOT2............................................................12
MVT Data Frame...................................................................................................................18
Line Plots with GGPLOT2..................................................................................................18
Heatmaps with GGPLOT2 .................................................................................................24
Geographic Heatmaps with GGPLOT2 ..............................................................................27
MURDERS Data Frame ........................................................................................................30
Geographic Heatmaps with GGPLOT2 - Continued...........................................................30
INTLALL Data Frame ............................................................................................................35
Heatmaps on a Global Scale with GGPLOT2.....................................................................35
2
Part A: Parole Assignment
1.1: Around 19.3% of parolees are female. A summary of the the binary variable ā€œmaleā€ shows that 130
parolees are female (zero value), which is about 19.3% of the total.
1.2: B - In Kentucky, the most common crimes are drug-related, as can be seen in the table presented
below. Kentucky is represented by the second row, in which the third column - which represents drug-
related crimes - has the highest value.
2.1: A - Most parolees are 20-24 years old, as can be seen from the graph below.
3
2.2: C - Adding the color argument to geom_histogram changes the outline color of the bars.
3.1: D - According to the graphs below, most female parolees are 35-39 years old. The graph on top
depicts the data when the ā€œmaleā€ variable is zero, and therefore parolees are female.
3.2: B - Changing the facet_grid argument puts the histograms side-by-side.
4
3.3: B - Female parolees are represented by a zero value male variable. By observers where the male
variable is one, i.e. males, the color for female parolees may seem red, though it is strictly considered to
be salmon.
3.4: A, I, K - As can be seen in the following graph, there are no shades indicating female parolees in
areas depicting the age groups 15-19, 55-59, and 65-69.
5
4.1: C - As can be seen in the following graph, the most common time that parolees serve is 4 to 5
months.
4.2: B - Changing the binwidth to a lower value and therefore further splitting the time served, it is
shown that the most common time served by parolees is between 3.0 and 3.1 months.
6
4.3a: C - The bottom graph, which corresponds to data when the ā€œcrimeā€ variable has the value 4, i.e.
driving-related crimes, shows that no such crimes have led to a 0-1 month time served parole penalty.
4.3b: D - When considering crimes which led to 5-6 months in prison, the ā€œcrimeā€ variable with the value
1, i.e. other crimes, appear to be the most common.
7
4.4: A - Overlaying the groups makes it rather difficult to tell them apart. As can be seen in the graph
below, some colors are not easily matched to the index on the right, making this type of overlapping
ineffective.
Part B: Script Assignment
WHO Data Frame
Simple Scatter Plots with GGPLOT2
# We read the data into R, creating a variable named WHO to which we save the data frame
WHO = read.csv("WHO.csv")
# Letā€™s see the structure of the data frame
str(WHO)
8
# We see that we have 194 observations or countries and 13 variables
# Let's first build a scatterplot with the plot function from the Base R library, putting GNI on the X axis
and Fertility Rate on the Y axis
plot(WHO$GNI, WHO$FertilityRate)
# The specific graph shows that a high fertility rate is correlated with low income
# Now letā€™s rebuild the same graph with the help of ggplot2 library
# First we have to install and load the ggplot2 library
install.packages(ā€œggplot2ā€)
library(ggplot2)
# Now, we keep in mind that at least three things are needed to create a graphic visualization with
ggplot:
1. Data
2. Aesthetic mapping of the data frame variables into visual output, and
3. A geometric object
9
# Therefore, we initially create our ggplot object using the ggplot argument
ā— The first argument is the data we will be using (the data frame)
ā— The second argument is the aesthetic mapping
ā—‹ Inside the parenthesis we have to state which variables we want on the X and Y axes
ā—‹ Letā€™s put GNI on the X axis and Fertility Rate on the Y axis
ā— Last, we save the ggplot object to the variable ā€œscatterplotā€
scatterplot = ggplot(WHO, aes(x = GNI, y = FertilityRate))
# At this point we should state the geometric objects that we want to place into the graph. We can use
bars, lines, points, or something else. This is a big difference between ggplot and typical R libraries. We
can also create different types of graphs, using the same ggplot object. We do not have to learn a
different function for a bar chart, a line chart, etc.
# In this case letā€™s add a ā€œpointā€ geometric object
scatterplot + geom_point()
# We see a nice graph that looks like our initial graph, but with some signs of improvement.
ā— We do not see the dollar sign in front of the labels on the aces, but only the variable names
ā— We now have nice gridlines in the background and points that are easily distinguishable
# We can also create a line chart, replacing the geometric object from point to line
scatterplot + geom_line()
10
# This graph does not make much sense so letā€™s go back to points
scatterplot + geom_point()
# As far as the geometric object of a graph is concerned, besides defining that we want points, we could
also add other choices such as:
ā— the color of the points,
ā— the shape of the points, and
ā— the size of the points
# Letā€™s rebuild the graph with blue triangles instead of circles at the points
scatterplot + geom_point(color = ā€œblueā€, size = 3, shape = 17)
11
# A different option:
scatterplot + geom_point(color="darkred",size=3,shape=8)
# There are many different colors and shapes that we can choose
# At this point, letā€™s add a title to our graph
# Now letā€™s save our graph to a file
# We must first save our graph to a variable
12
fertilityGNIplot = scatterplot + geom_point(colour = "blue",size=3,shape=17)+ggtitle("Fertility Rate vs
Gross National Income")
# Then we must create the file to which we want to save our graph
pdf("MyPlot.pdf")
# We print the graph to the file we created
print(fertilityGNIplot)
# We close the file
dev.off()
# Letā€™s say we want to create an image file, e.g. SVG
svg("MyPlot.svg")
# We print the graph to the file
print(fertilityGNIplot)
# We close the file
dev.off()
# If we look at the folder that we have selected as our working directory, we can see two files named
ā€œMyPlot.pdfā€ and ā€œMyPlot.svgā€ which contain our graph.
Advanced Scatter Plots with the Use of GGPLOT2
# Now we will see how we can color our points per Region how to add a regression line to our graph
# We rebuild our graph using dark red color and stars for points (note: the directions mention dark red
and stars whereas the code states blue and triangles)
scatterplot+geom_point(colour="darkred",size=3,shape=8)+ggtitle("Fertility Rate vs Gross National
Income")
13
# Now letā€™s color the points based on the Region each country belongs in
ggplot(WHO,aes(x=GNI,y=FertilityRate,color=Region))+geom_point()
# This allows us to see something we had not seen before. Countries-points from different regions are
actually in different parts of the graph
# Now letā€™s color the points based on the life expectancy of each country
ggplot(WHO, aes(x = GNI, y = FertilityRate, color = LifeExpectancy)) + geom_point()
14
# We notice that before, we colored the points based on a categorical variable - Region. This way we had
exactly seven different colors for seven different regions.
# Now we color based on a numerical variable, LifeExpectancy, and therefore we have a graduation the
coloring, with light blue corresponding to a high life expectancy and dark blue corresponding to a low ife
expectancy.
# Letā€™s now suppose that we are interested in seeing if the fertility rate is a good predictor of the
percentage of population being under 15.
# Intuitively, we would expect these variables to be highly correlated. But before we try any statistic
models letā€™s explore our data with a scatter plot
ggplot(WHO, aes(x = FertilityRate, y = Under15)) + geom_point()
15
# We see something really interesting.
ā— The variables look to be surely correlated, but
ā— As the FertilityRate variable increases, Under15 increases at a lower rate.
ā— The relation between these two variables is not exactly linear.
ā— We therefore suspect that a logarithmic transformation of FertilityRate would give better results
ggplot(WHO,aes(x=log(FertilityRate),y=Under15))+geom_point()
# The result looks more like a linear relation
# Letā€™s build a linear regression model which predicts the percentage of population which is under 15
years old (Under15) using the log value of the fertility rate (FertilityRate)
# Letā€™s name our model mod and use the function lm to predict the variable Under15 by using
log(FertilityRate) as an independent variable. Our data set will be WHO.
mod=lm(Under15~log(FertilityRate),data=WHO)
# Letā€™s see a summary of our model
16
# It shows that the log of FertilityRate is actually a very good predictor of Under15.
# This variable is very important and our R-squared is 0,9391
# Visualization was a good way for us to realize that a log transformation of FertilityRate gives better
predictions than Under15.
# If instead of this only FertilityRate was used, our R-squared would be 0,87.
# This is a significant reduction in terms of R-squared
# At this point, letā€™s add the line of regression to our graph.
# This is very easy in ggplot library, as we just have to add one more layer
ggplot(WHO,aes(x=log(FertilityRate),y=Under15))+geom_point()+stat_smooth(method="lm")
# We see a blue line crossing through our data. This is the line of regression.
# By default, ggplot designs a 95% confidence interval as a shade around the line.
# We can change this default by defining it through the statistics layer
# For a 99% confidence interval
ggplot(WHO,aes(x=log(FertilityRate),y=Under15))+geom_point()+stat_smooth(method="lm",level=0.99)
17
# If we want to completely take out the confidence interval then
ggplot(WHO,aes(x=log(FertilityRate),y=Under15))+geom_point()+stat_smooth(method="lm",se=FALSE)
# If we want to change the color of the line then
ggplot(WHO,aes(x=log(FertilityRate),y=Under15))+geom_point()+stat_smooth(method="lm",colour="or
ange")
18
MVT Data Frame
Line Plots with GGPLOT2
# First we will build a simple line plot to visualize trends at the crime point
# Letā€™s read the data and name them mvt for motor vehicle thefts
# We add the argument stringsAsFactors = FALSE since we have text data and we want R to read them as
such and not Factor Variables
mvt = read.csv("mvt.csv", stringsAsFactors=FALSE)
# Letā€™s look at the data
str(mvt)
# We see that we have 190,000 observations of three different variables. Specifically:
ā— The date a theft was committed
ā— The location where it happened in terms of geographic latitude and longitude
19
# At this point we want to transform the variable Date into a form that R would recognize in order to
export the day of the week and hour of the day
# We can do this using the function striptime
mvt$Date = strptime(mvt$Date, format="%m/%d/%y %H:%M")
# In this form, we can export the hour and day of the week from the variable Date, and we can add
these new variables to our data frame
# We can do this by defining our new variable for the day of the week
mvt$Weekday = weekdays(mvt$Date)
# And defining a new variable for the time of the day
mvt$Hour = mvt$Date$hour
# Letā€™s take a look at what the data frame now looks like
str(mvt)
# At this point we see that we have two new variables, Weekday, which tells us the day of the week,
and Hour, which gives the hour of the day
# Now we can construct some line plots
# Letā€™s start with a graph with a line and a value for each day of the week
# We would like to design the graph so that the price depicts the total number of thefts that were
committed on that day of the week
# We can take this information by creating a table for the variable Weekday
table(mvt$Weekday)
# We must save this table to a data frame so that we can import it as data into a ggplot function
WeekdayCounts = as.data.frame(table(mvt$Weekday))
# Letā€™s see what this data frame contains
str(WeekdayCounts)
# We see that this data frame has seven observations, one for each day pf the week, and two variables
20
# The first variable (Var1) gives the name of the week and the second variable (Freq) shows the total
number of crimes that have been committed on each day of the week
# At this point we are ready to create our graph
# We load ggplot2
library(ggplot2)
# And we build our graph with the ggplot function
ggplot(WeekdayCounts, aes(x=Var1, y=Freq)) + geom_line(aes(group=1))
# We see that the graph is very close to what we want
# We have the total number of crimes per day of the week, but the days are mixed up. We have Friday
first, then Monday, Saturday, Sunday, etc. What ggplot did is put the days in alphabetical order.
# What we want though is to have these days in chronological order
# We can do this by transforming the variable Var1 into an Ordered Factor Variable, using the factor
command
WeekdayCounts$Var1 = factor(WeekdayCounts$Var1, ordered=TRUE, levels=c("Monday", "Tuesday",
"Wednesday", "Thursday", "Friday", "Saturday", "Sunday"))
# Letā€™s see if anything changed:
ggplot(WeekdayCounts, aes(x=Var1, y=Freq)) + geom_line(aes(group=1))
21
# This is the graph we want. We have the total number of thefts per day of week and the days in
chronological order.
# The last thing we want in our graph is to change the labels of the axes since they do not suit us the
way they are.
ggplot(WeekdayCounts, aes(x=Var1, y=Freq)) + geom_line(aes(group=1)) + xlab("Day of the Week") +
ylab("Total Motor Vehicle Thefts")
# At this point we will add the time of day to our graph.
22
# We can do this by creating a line for each day of the week and replacing the day of the week on the x
axis.
# First we must create a table which shows the total number of thefts for each day of the week and each
time of the day
# For this we use the function table and use the variable Weekday from the data frame as the first
variable and the variable Hour from the data frame as the second variable
table(mvt$Weekday, mvt$Hour)
# This table gives the total number of thefts for each day of the week and each hour
# For example, on Friday at 4 oā€™clock in the morning 473 thefts have been committed while on Saturday
midnight there have been 2,050 thefts.
# Letā€™s save this table to a data frame so that we can use it for our graphs
DayHourCounts = as.data.frame(table(mvt$Weekday, mvt$Hour))
# Letā€™s take a look
str(DayHourCounts)
# We see that we have 168 variables, one for each pair of days of the weeks and hour, and three
variables
ā— The first variable, Var1, refers to the day of the week
ā— The second variable, Var2, refers to the hour of the day
ā— The third variable, Freq for frequency, show the number of thefts
# Letā€™s transform the second variable Var2 from a factor to a numerical variable, since it refers to the
time of the day and it should be a numerical value
23
DayHourCounts$Hour = as.numeric(as.character(DayHourCounts$Var2))
# At this point we are ready to create our graph
ggplot(DayHourCounts, aes(x=Hour, y=Freq)) + geom_line(aes(group=Var1))
# We see that our graph has 7 lines, one for each day of the week
# Although interesting, we cannot tell which line refers to which day, so letā€™s change the color of the
lines according to the day of the week. Letā€™s also make the lines a bit thicker.
ggplot(DayHourCounts, aes(x=Hour, y=Freq)) + geom_line(aes(group=Var1, color=Var1), size=2)
24
# We can now see that each line has a different color for each day of the week
# We can also see that on Saturdays and Sundays we have fewer thefts in the morning hours
# Letā€™s make the lines more transparent
ggplot(DayHourCounts, aes(x=Hour, y=Freq)) + geom_line(aes(group=Var1, color=Var1), size=2,
alpha=0.5)
# In any case, we can say that the specific graph is difficult to interpret. Seven lines are too much for a
graph
Heatmaps with GGPLOT2
# Letā€™s visualize the same data with a heatmap
# To create the heatmap, we will need our data from the DayHourCounts data frame
# First we should fix the order of the days so that they are in chronological order and not alphabetical,
like we did before
DayHourCounts$Var1 = factor(DayHourCounts$Var1, ordered=TRUE, levels=c("Monday", "Tuesday",
"Wednesday", "Thursday", "Friday", "Saturday", "Sunday"))
# Now letā€™s create the heatmap:
ggplot(DayHourCounts, aes(x = Hour, y = Var1)) + geom_tile(aes(fill = Freq))
25
# How can we read this? For each hour and day of the week we have a rectangular shape whose color
indicates the frequency, or number of thefts, that happen on that time and day
# The legend shows that lighter colors refer to more thefts.
# This way we can see that a lot of crimes are committed around midnight, especially on weekends.
# We can change the legend and rid ourselves of it or make our graph a little bit better
ggplot(DayHourCounts, aes(x = Hour, y = Var1)) + geom_tile(aes(fill = Freq)) +
scale_fill_gradient(name="Total MV Thefts") + theme(axis.title.y = element_blank())
26
# We can also change the color
ggplot(DayHourCounts, aes(x = Hour, y = Var1)) + geom_tile(aes(fill = Freq)) +
scale_fill_gradient(name="Total MV Thefts", low="white", high="red") + theme(axis.title.y =
element_blank())
# This is a color system commonly used by policing systems. It shows hot spots or places with higher
crime rates with a red color
27
# Now the most frequent thefts are depicted by the red color and the less frequent thefts are shown
with lighter areas
# It appears that Friday night is a common time for motor vehicle thefts
# It is often useful to change the combination of colors depending on whether you want the higher or
lower values to stand out and the feeling you want the graph to give off
Geographic Heatmaps with GGPLOT2
# At this point we will create a graph for motor vehicle thefts on the map of Chicago
# First we must install and load two new packages, maps and ggmap
install.packages("maps")
install.packages("ggmap")
library(maps)
library(ggmap)
# Now we must load Chicagoā€™s map to R
chicago = get_map(location = "chicago", zoom = 11)
# Letā€™s take a look at the map
ggmap(chicago)
# Just for fun
athens = get_map(location = "athens", zoom = 11)
ggmap(athens)
28
chicago = get_map(location = "chicago", zoom = 11)
ggmap(chicago)
# Letā€™s add the first 100 thefts to the map
ggmap(chicago) + geom_point(data = mvt[1:100,], aes(x = Longitude, y = Latitude))
# Now, black dots show the places in town where the first 100 thefts were committed. If we put all
190,000 we would see a big black box.
# What we are mainly interested in is to see if an area has high levels of crime, so letā€™s round the latitude
and longitude variables to the second decimal and letā€™s calculate the number of thefts for each area.
LatLonCounts = as.data.frame(table(round(mvt$Longitude,2), round(mvt$Latitude,2)))
# This command gives us the total number of thefts for each grid point
# Letā€™s take a look at the data
str(LatLonCounts)
# We have 1,683 observations and 3 variables. The first two variables, Var1 and Var2, are the latitude
and longitude coordinates and the third variable is the number of thefts that were committed in them
# Letā€™s transform the longitude and latitude variables and rename them into Lat and Long
LatLonCounts$Long = as.numeric(as.character(LatLonCounts$Var1))
LatLonCounts$Lat = as.numeric(as.character(LatLonCounts$Var2))
29
# Letā€™s put these points on the map, defining the size and color of each point to refer to the number of
thefts
ggmap(chicago) + geom_point(data = LatLonCounts, aes(x = Long, y = Lat, color = Freq, size=Freq))
# Now the points of each area is defined by the latitude and longitude we had previously defined
# Also, the size and color of each point refers to the number of thefts that have been committed in the
specific area. In this way, the lightest and biggest dots depict more motor vehicle thefts
# If we want to change the color
ggmap(chicago) + geom_point(data = LatLonCounts, aes(x = Long, y = Lat, color = Freq, size=Freq)) +
scale_colour_gradient(low="yellow", high="red")
30
# We can also use the argument geom_tile geometry to make it look more like a typical heatmap
ggmap(chicago) + geom_tile(data = LatLonCounts, aes(x = Long, y = Lat, alpha = Freq), fill="red")
MURDERS Data Frame
Geographic Heatmaps with GGPLOT2 - Continued
# We load the data
31
murders = read.csv("murders.csv")
# These data are from the FBI and show the number of homicides for each US state
# Letā€™s take a look at the data Ī‘Ļ‚ ĻĪÆĪ¾ĪæĻ…Ī¼Īµ Ī¼Ī¹Ī± Ī¼Ī±Ļ„Ī¹Ī¬ ĻƒĻ„Ī± Ī“ĪµĪ“ĪæĪ¼Ī­Ī½Ī±
str(murders)
# We have 51 observations for the 50 US states plus the city of Washington, DC, and six variables:
ā— The name of the state
ā— The population of each state
ā— The number of homicides in each state
ā— The number of homicides that are gun related in each state
ā— The percentage of gun ownership in each state
# Letā€™s load the libraries
library(maps)
library(ggmap)
# R contains the map of the United States, so letā€™s load it
statesMap = map_data("state")
# Letā€™s take a look at the map using the str command
str(statesMap)
# It gives us a data frame which contains a summary of how to design a map of the USA
# So letā€™s design the map
ggplot(statesMap, aes(x = long, y = lat, group = group)) + geom_polygon(fill = "white", color = "black") +
coord_map("mercator")
32
# Before we put our data on the map we must first ensure that the names of the states are the same on
the ā€œmurdersā€ data frame and the statesMap
# In the ā€œmurdersā€ data frame, the names of the states start with capital letters, while in the statesMap
data frame they start with lowercase letters
# Letā€™s create a new variable named ā€œregionā€ to make the pairing
murders$region = tolower(murders$State)
# Now we can combine statesMap and murders data frames through the merge command, which pairs
lines based on a common variable
# We previously defined the variable region which exists in both data frames
murderMap = merge(statesMap, murders, by="region")
# Letā€™s take a look at the data frame we created
str(murderMap)
# We have the same number of observations that we had in the statesMap data frame, but now we only
have as many variables as the ones in the statesMap data frame as well as the murders data frame
# Letā€™s add the number of homicides to the map of the USA
33
ggplot(murderMap, aes(x = long, y = lat, group = group, fill = Murders)) + geom_polygon(colour =
"black") + scale_fill_gradient(low = "black", high = "red", guide = "legend")
# Each state is colored based on the numbers of homicides in it
# States with a dark red color have a larger number of homicides
# From the graph we can say that California and Texas have the largest number of homicides. But is this
due to them being the most-populated states?
# Letā€™s make a new map of the USA in which we will depict the population of each state
ggplot(murderMap, aes(x = long, y = lat, group = group, fill = Population)) + geom_polygon(colour =
"black") + scale_fill_gradient(low = "black", high = "red", guide = "legend")
# It looks almost exactly the same as the homicides map
34
# Therefore we must design a map which depicts the percentage instead of the number of homicides
# Letā€™s create a new variable, the number of homicides per 100,000 people
murderMap$MurderRate = murderMap$Murders / murderMap$Population * 100000
# Letā€™s rebuild the map with the variable MurderRate in the fill argument
ggplot(murderMap, aes(x = long, y = lat, group = group, fill = MurderRate)) + geom_polygon(colour =
"black") + scale_fill_gradient(low = "black", high = "red", guide = "legend")
# But again the map is too dark, and no state is colored red (20 according to the legend). Why?
# The reason is that Washington, Dc is an outlier with an unusually high murder rate. But itā€™s so small in
size that we canā€™t see it on the map.
# Letā€™s rebuild the map removing the states-observations with a MurderRate over 10.
ggplot(murderMap, aes(x = long, y = lat, group = group, fill = MurderRate)) + geom_polygon(colour =
"black") + scale_fill_gradient(low = "black", high = "red", guide = "legend", name = "Murder Rate per
100k", limits = c(0.9,10))
35
# Now we see a variety of colors on the map
# As can be seen, the murder rate is unusually high in the state of Louisiana
INTLALL Data Frame
Heatmaps on a Global Scale with GGPLOT2
# In this exercise we shall use data related to where MITā€™s international students come from in order to
create heat maps
# First of all we will need to load ggplot and ggmap
library(ggplot2)
library(ggmap)
# We load the data and again use the argument for text fields
intlall = read.csv("intlall.csv",stringsAsFactors=FALSE)
# Letā€™s look at the first lines of the data frame
head(intlall)
# Each line is a country, and we have
36
ā— one column with the name of the country (Citizenship)
ā— one column with the number of undergraduate students (UG)
ā— one column with the number of graduate students (G)
ā— one column with the number of special undergraduates (SpecialUG)
ā— one column with the number of special graduate students (SpecialG)
ā— one column with the number of exchange students (ExhangeVisiting)
ā— and one column with the total number of students (Total)
# Wherever the value NA exists it corresponds to the number 0
# Letā€™s convert NAs to 0
intlall[is.na(intlall)] = 0
# Letā€™s take another look
head(intlall)
# Letā€™s now load the world map (Atlas)
# Letā€™s name it world map
world_map = map_data("world")
# Letā€™s take a look at the map
str(world_map)
# We see that the data frame variables are
ā— Longitude (long)
ā— Latitude (lat)
ā— The third variable is (group) which in reality is one group for each country, a different number
for each country
ā— The fourth variable is (order), which we will get to later
ā— The fifth variable is (region), which is the name of each country
ā— Last, the sixth variable is (subregion), which is used for some countries in order to describe
islands and other dependant regions
37
# Now we will need to merge the intlall data frame with the world_map data frame in order to use
ggplot
world_map = merge(world_map, intlall, by.x ="region", by.y = "Citizenship")
# Letā€™s see what we did
str(world_map)
# To rebuild the map we will need geom_polygon
ggplot(world_map, aes(x=long, y=lat, group=group)) + geom_polygon(fill="white", color="black") +
coord_map("mercator")
# As we can see, all countries look like black shapeless object. Wondering why?
# Sometimes, when we merge data frames, a reordering of observations may take place
38
# Also, letā€™s not forget that the world map data frame is nothing more than a list of longitudes and
latitudes which define country borders
# So if we mistakenly reorder the observations of the data frame they will not make any sense. Going
from point to point, the points may by in different sides of the polygon that depicts the country.
# What me must do is re-reorder the observations in the right order
# This command may seem a bit complex but if you look carefully itā€™s not so bad
world_map = world_map[order(world_map$group, world_map$order),]
# What we are doing is taking the world map data set and reordering the lines based on the group
variable (which is the country) and then based on the variable order which is the correct order of the
points which define the country borders
# Letā€™s rebuild the map
ggplot(world_map, aes(x=long, y=lat, group=group)) + geom_polygon(fill="white", color="black") +
coord_map("mercator")
# Next problem: some countries are missing
# First, since MIT is in the USA it has no international students from the US
39
# Some African countries are also missing, possibly since MIT has no international students from these
countries.
# But, no one from China?
# The reason this country is missing is that it has a different name on the intlall data frame and a
different name on the world_map data frame
# When we merged these two data frames these observations were not transferred as there was no
pairing
# To see how these countries are named on the intlall data set letā€™s build a table
table(intlall$Citizenship)
# This table shows the names of all the countries
# We see that China is written as "China (People's Republic Of)"
# In the initial world map data frame, though, it is written simply as ā€œChinaā€
# Letā€™s change the intlall data frame
intlall$Citizenship[intlall$Citizenship=="China (People's Republic Of)"] = "China"
# Letā€™s check
table(intlall$Citizenship)
40
# Letā€™s redo the data frame merge
# Letā€™s say that the world map data frame is a new merge of the map data and intlall data frame with
the new value (China) for China
world_map = merge(map_data("world"), intlall, by.x ="region", by.y = "Citizenship")
# Letā€™s redo the reordering after the merge
world_map = world_map[order(world_map$group, world_map$order),]
# Letā€™s rebuild the map
ggplot(world_map, aes(x=long, y=lat, group=group)) + geom_polygon(fill="white", color="black") +
coord_map("mercator")
# Now letā€™s rebuild the map filling in the countries with the corresponding percentage of students
ggplot(world_map, aes(x=long, y=lat, group=group)) + geom_polygon(aes(fill=Total), color="black") +
coord_map("mercator")
41
# The UK is missing for the exact same reason but we will not fix it now
# Letā€™s see what the map looks like from a map view different than Mercator. Letā€™s use the
orthographic view.
ggplot(world_map, aes(x=long, y=lat, group=group)) + geom_polygon(aes(fill=Total),
color="black") + coord_map("ortho", orientation=c(20, 30, 0))
42
# Aaand from another view
ggplot(world_map, aes(x=long, y=lat, group=group)) + geom_polygon(aes(fill=Total),
color="black") + coord_map("ortho", orientation=c(-37, 175, 0))

More Related Content

Similar to R Visualization Assignment

Unraveling The Meaning From COVID-19 Dataset Using Python ā€“ A Tutorial for be...
Unraveling The Meaning From COVID-19 Dataset Using Python ā€“ A Tutorial for be...Unraveling The Meaning From COVID-19 Dataset Using Python ā€“ A Tutorial for be...
Unraveling The Meaning From COVID-19 Dataset Using Python ā€“ A Tutorial for be...Kavika Roy
Ā 
Basic statistics by_david_solomon_hadi_-_split_and_reviewed
Basic statistics by_david_solomon_hadi_-_split_and_reviewedBasic statistics by_david_solomon_hadi_-_split_and_reviewed
Basic statistics by_david_solomon_hadi_-_split_and_reviewedbob panic
Ā 
Ggplot2 ch2
Ggplot2 ch2Ggplot2 ch2
Ggplot2 ch2heba_ahmad
Ā 
Ggplot2 work
Ggplot2 workGgplot2 work
Ggplot2 workARUN DN
Ā 
The future is uncertain. Some events do have a very small probabil.docx
The future is uncertain. Some events do have a very small probabil.docxThe future is uncertain. Some events do have a very small probabil.docx
The future is uncertain. Some events do have a very small probabil.docxoreo10
Ā 
Essentials of machine learning algorithms
Essentials of machine learning algorithmsEssentials of machine learning algorithms
Essentials of machine learning algorithmsArunangsu Sahu
Ā 
5 structured programming
5 structured programming 5 structured programming
5 structured programming hccit
Ā 
Predicting US house prices using Multiple Linear Regression in R
Predicting US house prices using Multiple Linear Regression in RPredicting US house prices using Multiple Linear Regression in R
Predicting US house prices using Multiple Linear Regression in RSotiris Baratsas
Ā 
Exploring australian economy and diversity
Exploring australian economy and diversityExploring australian economy and diversity
Exploring australian economy and diversityKrishnendu Das
Ā 
Graphical Presentation of Data - Rangga Masyhuri Nuur LLU 27.pptx
Graphical Presentation of Data - Rangga Masyhuri Nuur LLU 27.pptxGraphical Presentation of Data - Rangga Masyhuri Nuur LLU 27.pptx
Graphical Presentation of Data - Rangga Masyhuri Nuur LLU 27.pptxRanggaMasyhuriNuur
Ā 
From data to diagrams: an introduction to basic graphs and charts
From data to diagrams: an introduction to basic graphs and chartsFrom data to diagrams: an introduction to basic graphs and charts
From data to diagrams: an introduction to basic graphs and chartsSchool of Data
Ā 
Comparing R vs. Python for data visualization
Comparing R vs. Python for data visualizationComparing R vs. Python for data visualization
Comparing R vs. Python for data visualizationGaetan Lion
Ā 
Case Study of Petroleum Consumption With R Code
Case Study of Petroleum Consumption With R CodeCase Study of Petroleum Consumption With R Code
Case Study of Petroleum Consumption With R CodeRaymond Christopher Peralta
Ā 
Linear logisticregression
Linear logisticregressionLinear logisticregression
Linear logisticregressionkongara
Ā 
Data Visualization by David Kretch
Data Visualization by David KretchData Visualization by David Kretch
Data Visualization by David KretchSummit Consulting, LLC
Ā 

Similar to R Visualization Assignment (20)

R Programming
R ProgrammingR Programming
R Programming
Ā 
Unraveling The Meaning From COVID-19 Dataset Using Python ā€“ A Tutorial for be...
Unraveling The Meaning From COVID-19 Dataset Using Python ā€“ A Tutorial for be...Unraveling The Meaning From COVID-19 Dataset Using Python ā€“ A Tutorial for be...
Unraveling The Meaning From COVID-19 Dataset Using Python ā€“ A Tutorial for be...
Ā 
Basic statistics by_david_solomon_hadi_-_split_and_reviewed
Basic statistics by_david_solomon_hadi_-_split_and_reviewedBasic statistics by_david_solomon_hadi_-_split_and_reviewed
Basic statistics by_david_solomon_hadi_-_split_and_reviewed
Ā 
Ggplot2 ch2
Ggplot2 ch2Ggplot2 ch2
Ggplot2 ch2
Ā 
Ggplot2 work
Ggplot2 workGgplot2 work
Ggplot2 work
Ā 
The future is uncertain. Some events do have a very small probabil.docx
The future is uncertain. Some events do have a very small probabil.docxThe future is uncertain. Some events do have a very small probabil.docx
The future is uncertain. Some events do have a very small probabil.docx
Ā 
Essentials of machine learning algorithms
Essentials of machine learning algorithmsEssentials of machine learning algorithms
Essentials of machine learning algorithms
Ā 
Data visualization
Data visualizationData visualization
Data visualization
Ā 
Data Types
Data TypesData Types
Data Types
Ā 
5 structured programming
5 structured programming 5 structured programming
5 structured programming
Ā 
Predicting US house prices using Multiple Linear Regression in R
Predicting US house prices using Multiple Linear Regression in RPredicting US house prices using Multiple Linear Regression in R
Predicting US house prices using Multiple Linear Regression in R
Ā 
Exploring australian economy and diversity
Exploring australian economy and diversityExploring australian economy and diversity
Exploring australian economy and diversity
Ā 
Graphical Presentation of Data - Rangga Masyhuri Nuur LLU 27.pptx
Graphical Presentation of Data - Rangga Masyhuri Nuur LLU 27.pptxGraphical Presentation of Data - Rangga Masyhuri Nuur LLU 27.pptx
Graphical Presentation of Data - Rangga Masyhuri Nuur LLU 27.pptx
Ā 
From data to diagrams: an introduction to basic graphs and charts
From data to diagrams: an introduction to basic graphs and chartsFrom data to diagrams: an introduction to basic graphs and charts
From data to diagrams: an introduction to basic graphs and charts
Ā 
Comparing R vs. Python for data visualization
Comparing R vs. Python for data visualizationComparing R vs. Python for data visualization
Comparing R vs. Python for data visualization
Ā 
Case Study of Petroleum Consumption With R Code
Case Study of Petroleum Consumption With R CodeCase Study of Petroleum Consumption With R Code
Case Study of Petroleum Consumption With R Code
Ā 
Iowa_Report_2
Iowa_Report_2Iowa_Report_2
Iowa_Report_2
Ā 
Linear logisticregression
Linear logisticregressionLinear logisticregression
Linear logisticregression
Ā 
Data Visualization by David Kretch
Data Visualization by David KretchData Visualization by David Kretch
Data Visualization by David Kretch
Ā 
Facial Expression Recognition
Facial Expression RecognitionFacial Expression Recognition
Facial Expression Recognition
Ā 

Recently uploaded

20240419 - Measurecamp Amsterdam - SAM.pdf
20240419 - Measurecamp Amsterdam - SAM.pdf20240419 - Measurecamp Amsterdam - SAM.pdf
20240419 - Measurecamp Amsterdam - SAM.pdfHuman37
Ā 
High Class Call Girls Noida Sector 39 Aarushi šŸ”8264348440šŸ” Independent Escort...
High Class Call Girls Noida Sector 39 Aarushi šŸ”8264348440šŸ” Independent Escort...High Class Call Girls Noida Sector 39 Aarushi šŸ”8264348440šŸ” Independent Escort...
High Class Call Girls Noida Sector 39 Aarushi šŸ”8264348440šŸ” Independent Escort...soniya singh
Ā 
Call Girls In Mahipalpur O9654467111 Escorts Service
Call Girls In Mahipalpur O9654467111  Escorts ServiceCall Girls In Mahipalpur O9654467111  Escorts Service
Call Girls In Mahipalpur O9654467111 Escorts ServiceSapana Sha
Ā 
GA4 Without Cookies [Measure Camp AMS]
GA4 Without Cookies [Measure Camp AMS]GA4 Without Cookies [Measure Camp AMS]
GA4 Without Cookies [Measure Camp AMS]šŸ“Š Markus Baersch
Ā 
Data Science Jobs and Salaries Analysis.pptx
Data Science Jobs and Salaries Analysis.pptxData Science Jobs and Salaries Analysis.pptx
Data Science Jobs and Salaries Analysis.pptxFurkanTasci3
Ā 
vip Sarai Rohilla Call Girls 9999965857 Call or WhatsApp Now Book
vip Sarai Rohilla Call Girls 9999965857 Call or WhatsApp Now Bookvip Sarai Rohilla Call Girls 9999965857 Call or WhatsApp Now Book
vip Sarai Rohilla Call Girls 9999965857 Call or WhatsApp Now Bookmanojkuma9823
Ā 
RS 9000 Call In girls Dwarka Mor (DELHI)ā‡›9711147426šŸ”Delhi
RS 9000 Call In girls Dwarka Mor (DELHI)ā‡›9711147426šŸ”DelhiRS 9000 Call In girls Dwarka Mor (DELHI)ā‡›9711147426šŸ”Delhi
RS 9000 Call In girls Dwarka Mor (DELHI)ā‡›9711147426šŸ”Delhijennyeacort
Ā 
Industrialised data - the key to AI success.pdf
Industrialised data - the key to AI success.pdfIndustrialised data - the key to AI success.pdf
Industrialised data - the key to AI success.pdfLars Albertsson
Ā 
VIP High Class Call Girls Jamshedpur Anushka 8250192130 Independent Escort Se...
VIP High Class Call Girls Jamshedpur Anushka 8250192130 Independent Escort Se...VIP High Class Call Girls Jamshedpur Anushka 8250192130 Independent Escort Se...
VIP High Class Call Girls Jamshedpur Anushka 8250192130 Independent Escort Se...Suhani Kapoor
Ā 
INTERNSHIP ON PURBASHA COMPOSITE TEX LTD
INTERNSHIP ON PURBASHA COMPOSITE TEX LTDINTERNSHIP ON PURBASHA COMPOSITE TEX LTD
INTERNSHIP ON PURBASHA COMPOSITE TEX LTDRafezzaman
Ā 
VIP Call Girls Service Miyapur Hyderabad Call +91-8250192130
VIP Call Girls Service Miyapur Hyderabad Call +91-8250192130VIP Call Girls Service Miyapur Hyderabad Call +91-8250192130
VIP Call Girls Service Miyapur Hyderabad Call +91-8250192130Suhani Kapoor
Ā 
B2 Creative Industry Response Evaluation.docx
B2 Creative Industry Response Evaluation.docxB2 Creative Industry Response Evaluation.docx
B2 Creative Industry Response Evaluation.docxStephen266013
Ā 
办ē†(VancouveręƕäøščƁ书)加ę‹æ大ęø©å“„华岛大学ęƕäøščÆęˆē»©å•åŽŸē‰ˆäø€ęƔäø€
办ē†(VancouveręƕäøščƁ书)加ę‹æ大ęø©å“„华岛大学ęƕäøščÆęˆē»©å•åŽŸē‰ˆäø€ęƔäø€åŠžē†(VancouveręƕäøščƁ书)加ę‹æ大ęø©å“„华岛大学ęƕäøščÆęˆē»©å•åŽŸē‰ˆäø€ęƔäø€
办ē†(VancouveręƕäøščƁ书)加ę‹æ大ęø©å“„华岛大学ęƕäøščÆęˆē»©å•åŽŸē‰ˆäø€ęƔäø€F La
Ā 
RadioAdProWritingCinderellabyButleri.pdf
RadioAdProWritingCinderellabyButleri.pdfRadioAdProWritingCinderellabyButleri.pdf
RadioAdProWritingCinderellabyButleri.pdfgstagge
Ā 
04242024_CCC TUG_Joins and Relationships
04242024_CCC TUG_Joins and Relationships04242024_CCC TUG_Joins and Relationships
04242024_CCC TUG_Joins and Relationshipsccctableauusergroup
Ā 
äø“äøšäø€ęƔäø€ē¾Žå›½äæ„äŗ„äæ„大学ęƕäøščÆęˆē»©å•pdfē”µå­ē‰ˆåˆ¶ä½œäæ®ę”¹
äø“äøšäø€ęƔäø€ē¾Žå›½äæ„äŗ„äæ„大学ęƕäøščÆęˆē»©å•pdfē”µå­ē‰ˆåˆ¶ä½œäæ®ę”¹äø“äøšäø€ęƔäø€ē¾Žå›½äæ„äŗ„äæ„大学ęƕäøščÆęˆē»©å•pdfē”µå­ē‰ˆåˆ¶ä½œäæ®ę”¹
äø“äøšäø€ęƔäø€ē¾Žå›½äæ„äŗ„äæ„大学ęƕäøščÆęˆē»©å•pdfē”µå­ē‰ˆåˆ¶ä½œäæ®ę”¹yuu sss
Ā 
Call Us āž„97111āˆš47426šŸ¤³Call Girls in Aerocity (Delhi NCR)
Call Us āž„97111āˆš47426šŸ¤³Call Girls in Aerocity (Delhi NCR)Call Us āž„97111āˆš47426šŸ¤³Call Girls in Aerocity (Delhi NCR)
Call Us āž„97111āˆš47426šŸ¤³Call Girls in Aerocity (Delhi NCR)jennyeacort
Ā 
9654467111 Call Girls In Munirka Hotel And Home Service
9654467111 Call Girls In Munirka Hotel And Home Service9654467111 Call Girls In Munirka Hotel And Home Service
9654467111 Call Girls In Munirka Hotel And Home ServiceSapana Sha
Ā 
EMERCE - 2024 - AMSTERDAM - CROSS-PLATFORM TRACKING WITH GOOGLE ANALYTICS.pptx
EMERCE - 2024 - AMSTERDAM - CROSS-PLATFORM  TRACKING WITH GOOGLE ANALYTICS.pptxEMERCE - 2024 - AMSTERDAM - CROSS-PLATFORM  TRACKING WITH GOOGLE ANALYTICS.pptx
EMERCE - 2024 - AMSTERDAM - CROSS-PLATFORM TRACKING WITH GOOGLE ANALYTICS.pptxthyngster
Ā 
Call Girls In Dwarka 9654467111 Escorts Service
Call Girls In Dwarka 9654467111 Escorts ServiceCall Girls In Dwarka 9654467111 Escorts Service
Call Girls In Dwarka 9654467111 Escorts ServiceSapana Sha
Ā 

Recently uploaded (20)

20240419 - Measurecamp Amsterdam - SAM.pdf
20240419 - Measurecamp Amsterdam - SAM.pdf20240419 - Measurecamp Amsterdam - SAM.pdf
20240419 - Measurecamp Amsterdam - SAM.pdf
Ā 
High Class Call Girls Noida Sector 39 Aarushi šŸ”8264348440šŸ” Independent Escort...
High Class Call Girls Noida Sector 39 Aarushi šŸ”8264348440šŸ” Independent Escort...High Class Call Girls Noida Sector 39 Aarushi šŸ”8264348440šŸ” Independent Escort...
High Class Call Girls Noida Sector 39 Aarushi šŸ”8264348440šŸ” Independent Escort...
Ā 
Call Girls In Mahipalpur O9654467111 Escorts Service
Call Girls In Mahipalpur O9654467111  Escorts ServiceCall Girls In Mahipalpur O9654467111  Escorts Service
Call Girls In Mahipalpur O9654467111 Escorts Service
Ā 
GA4 Without Cookies [Measure Camp AMS]
GA4 Without Cookies [Measure Camp AMS]GA4 Without Cookies [Measure Camp AMS]
GA4 Without Cookies [Measure Camp AMS]
Ā 
Data Science Jobs and Salaries Analysis.pptx
Data Science Jobs and Salaries Analysis.pptxData Science Jobs and Salaries Analysis.pptx
Data Science Jobs and Salaries Analysis.pptx
Ā 
vip Sarai Rohilla Call Girls 9999965857 Call or WhatsApp Now Book
vip Sarai Rohilla Call Girls 9999965857 Call or WhatsApp Now Bookvip Sarai Rohilla Call Girls 9999965857 Call or WhatsApp Now Book
vip Sarai Rohilla Call Girls 9999965857 Call or WhatsApp Now Book
Ā 
RS 9000 Call In girls Dwarka Mor (DELHI)ā‡›9711147426šŸ”Delhi
RS 9000 Call In girls Dwarka Mor (DELHI)ā‡›9711147426šŸ”DelhiRS 9000 Call In girls Dwarka Mor (DELHI)ā‡›9711147426šŸ”Delhi
RS 9000 Call In girls Dwarka Mor (DELHI)ā‡›9711147426šŸ”Delhi
Ā 
Industrialised data - the key to AI success.pdf
Industrialised data - the key to AI success.pdfIndustrialised data - the key to AI success.pdf
Industrialised data - the key to AI success.pdf
Ā 
VIP High Class Call Girls Jamshedpur Anushka 8250192130 Independent Escort Se...
VIP High Class Call Girls Jamshedpur Anushka 8250192130 Independent Escort Se...VIP High Class Call Girls Jamshedpur Anushka 8250192130 Independent Escort Se...
VIP High Class Call Girls Jamshedpur Anushka 8250192130 Independent Escort Se...
Ā 
INTERNSHIP ON PURBASHA COMPOSITE TEX LTD
INTERNSHIP ON PURBASHA COMPOSITE TEX LTDINTERNSHIP ON PURBASHA COMPOSITE TEX LTD
INTERNSHIP ON PURBASHA COMPOSITE TEX LTD
Ā 
VIP Call Girls Service Miyapur Hyderabad Call +91-8250192130
VIP Call Girls Service Miyapur Hyderabad Call +91-8250192130VIP Call Girls Service Miyapur Hyderabad Call +91-8250192130
VIP Call Girls Service Miyapur Hyderabad Call +91-8250192130
Ā 
B2 Creative Industry Response Evaluation.docx
B2 Creative Industry Response Evaluation.docxB2 Creative Industry Response Evaluation.docx
B2 Creative Industry Response Evaluation.docx
Ā 
办ē†(VancouveręƕäøščƁ书)加ę‹æ大ęø©å“„华岛大学ęƕäøščÆęˆē»©å•åŽŸē‰ˆäø€ęƔäø€
办ē†(VancouveręƕäøščƁ书)加ę‹æ大ęø©å“„华岛大学ęƕäøščÆęˆē»©å•åŽŸē‰ˆäø€ęƔäø€åŠžē†(VancouveręƕäøščƁ书)加ę‹æ大ęø©å“„华岛大学ęƕäøščÆęˆē»©å•åŽŸē‰ˆäø€ęƔäø€
办ē†(VancouveręƕäøščƁ书)加ę‹æ大ęø©å“„华岛大学ęƕäøščÆęˆē»©å•åŽŸē‰ˆäø€ęƔäø€
Ā 
RadioAdProWritingCinderellabyButleri.pdf
RadioAdProWritingCinderellabyButleri.pdfRadioAdProWritingCinderellabyButleri.pdf
RadioAdProWritingCinderellabyButleri.pdf
Ā 
04242024_CCC TUG_Joins and Relationships
04242024_CCC TUG_Joins and Relationships04242024_CCC TUG_Joins and Relationships
04242024_CCC TUG_Joins and Relationships
Ā 
äø“äøšäø€ęƔäø€ē¾Žå›½äæ„äŗ„äæ„大学ęƕäøščÆęˆē»©å•pdfē”µå­ē‰ˆåˆ¶ä½œäæ®ę”¹
äø“äøšäø€ęƔäø€ē¾Žå›½äæ„äŗ„äæ„大学ęƕäøščÆęˆē»©å•pdfē”µå­ē‰ˆåˆ¶ä½œäæ®ę”¹äø“äøšäø€ęƔäø€ē¾Žå›½äæ„äŗ„äæ„大学ęƕäøščÆęˆē»©å•pdfē”µå­ē‰ˆåˆ¶ä½œäæ®ę”¹
äø“äøšäø€ęƔäø€ē¾Žå›½äæ„äŗ„äæ„大学ęƕäøščÆęˆē»©å•pdfē”µå­ē‰ˆåˆ¶ä½œäæ®ę”¹
Ā 
Call Us āž„97111āˆš47426šŸ¤³Call Girls in Aerocity (Delhi NCR)
Call Us āž„97111āˆš47426šŸ¤³Call Girls in Aerocity (Delhi NCR)Call Us āž„97111āˆš47426šŸ¤³Call Girls in Aerocity (Delhi NCR)
Call Us āž„97111āˆš47426šŸ¤³Call Girls in Aerocity (Delhi NCR)
Ā 
9654467111 Call Girls In Munirka Hotel And Home Service
9654467111 Call Girls In Munirka Hotel And Home Service9654467111 Call Girls In Munirka Hotel And Home Service
9654467111 Call Girls In Munirka Hotel And Home Service
Ā 
EMERCE - 2024 - AMSTERDAM - CROSS-PLATFORM TRACKING WITH GOOGLE ANALYTICS.pptx
EMERCE - 2024 - AMSTERDAM - CROSS-PLATFORM  TRACKING WITH GOOGLE ANALYTICS.pptxEMERCE - 2024 - AMSTERDAM - CROSS-PLATFORM  TRACKING WITH GOOGLE ANALYTICS.pptx
EMERCE - 2024 - AMSTERDAM - CROSS-PLATFORM TRACKING WITH GOOGLE ANALYTICS.pptx
Ā 
Call Girls In Dwarka 9654467111 Escorts Service
Call Girls In Dwarka 9654467111 Escorts ServiceCall Girls In Dwarka 9654467111 Escorts Service
Call Girls In Dwarka 9654467111 Escorts Service
Ā 

R Visualization Assignment

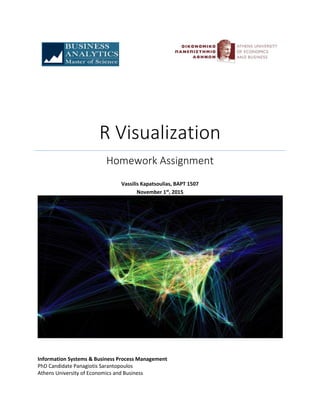
  • 1. R Visualization Homework Assignment Vassilis Kapatsoulias, BAPT 1507 November 1st , 2015 Information Systems & Business Process Management PhD Candidate Panagiotis Sarantopoulos Athens University of Economics and Business
  • 2. 1 Contents Part A: Parole Assignment ......................................................................................................... 2 Part B: Script Assignment .......................................................................................................... 7 WHO Data Frame................................................................................................................... 7 Simple Scatter Plots with GGPLOT2................................................................................... 7 Advanced Scatter Plots with the Use of GGPLOT2............................................................12 MVT Data Frame...................................................................................................................18 Line Plots with GGPLOT2..................................................................................................18 Heatmaps with GGPLOT2 .................................................................................................24 Geographic Heatmaps with GGPLOT2 ..............................................................................27 MURDERS Data Frame ........................................................................................................30 Geographic Heatmaps with GGPLOT2 - Continued...........................................................30 INTLALL Data Frame ............................................................................................................35 Heatmaps on a Global Scale with GGPLOT2.....................................................................35
  • 3. 2 Part A: Parole Assignment 1.1: Around 19.3% of parolees are female. A summary of the the binary variable ā€œmaleā€ shows that 130 parolees are female (zero value), which is about 19.3% of the total. 1.2: B - In Kentucky, the most common crimes are drug-related, as can be seen in the table presented below. Kentucky is represented by the second row, in which the third column - which represents drug- related crimes - has the highest value. 2.1: A - Most parolees are 20-24 years old, as can be seen from the graph below.
  • 4. 3 2.2: C - Adding the color argument to geom_histogram changes the outline color of the bars. 3.1: D - According to the graphs below, most female parolees are 35-39 years old. The graph on top depicts the data when the ā€œmaleā€ variable is zero, and therefore parolees are female. 3.2: B - Changing the facet_grid argument puts the histograms side-by-side.
  • 5. 4 3.3: B - Female parolees are represented by a zero value male variable. By observers where the male variable is one, i.e. males, the color for female parolees may seem red, though it is strictly considered to be salmon. 3.4: A, I, K - As can be seen in the following graph, there are no shades indicating female parolees in areas depicting the age groups 15-19, 55-59, and 65-69.
  • 6. 5 4.1: C - As can be seen in the following graph, the most common time that parolees serve is 4 to 5 months. 4.2: B - Changing the binwidth to a lower value and therefore further splitting the time served, it is shown that the most common time served by parolees is between 3.0 and 3.1 months.
  • 7. 6 4.3a: C - The bottom graph, which corresponds to data when the ā€œcrimeā€ variable has the value 4, i.e. driving-related crimes, shows that no such crimes have led to a 0-1 month time served parole penalty. 4.3b: D - When considering crimes which led to 5-6 months in prison, the ā€œcrimeā€ variable with the value 1, i.e. other crimes, appear to be the most common.
  • 8. 7 4.4: A - Overlaying the groups makes it rather difficult to tell them apart. As can be seen in the graph below, some colors are not easily matched to the index on the right, making this type of overlapping ineffective. Part B: Script Assignment WHO Data Frame Simple Scatter Plots with GGPLOT2 # We read the data into R, creating a variable named WHO to which we save the data frame WHO = read.csv("WHO.csv") # Letā€™s see the structure of the data frame str(WHO)
  • 9. 8 # We see that we have 194 observations or countries and 13 variables # Let's first build a scatterplot with the plot function from the Base R library, putting GNI on the X axis and Fertility Rate on the Y axis plot(WHO$GNI, WHO$FertilityRate) # The specific graph shows that a high fertility rate is correlated with low income # Now letā€™s rebuild the same graph with the help of ggplot2 library # First we have to install and load the ggplot2 library install.packages(ā€œggplot2ā€) library(ggplot2) # Now, we keep in mind that at least three things are needed to create a graphic visualization with ggplot: 1. Data 2. Aesthetic mapping of the data frame variables into visual output, and 3. A geometric object
  • 10. 9 # Therefore, we initially create our ggplot object using the ggplot argument ā— The first argument is the data we will be using (the data frame) ā— The second argument is the aesthetic mapping ā—‹ Inside the parenthesis we have to state which variables we want on the X and Y axes ā—‹ Letā€™s put GNI on the X axis and Fertility Rate on the Y axis ā— Last, we save the ggplot object to the variable ā€œscatterplotā€ scatterplot = ggplot(WHO, aes(x = GNI, y = FertilityRate)) # At this point we should state the geometric objects that we want to place into the graph. We can use bars, lines, points, or something else. This is a big difference between ggplot and typical R libraries. We can also create different types of graphs, using the same ggplot object. We do not have to learn a different function for a bar chart, a line chart, etc. # In this case letā€™s add a ā€œpointā€ geometric object scatterplot + geom_point() # We see a nice graph that looks like our initial graph, but with some signs of improvement. ā— We do not see the dollar sign in front of the labels on the aces, but only the variable names ā— We now have nice gridlines in the background and points that are easily distinguishable # We can also create a line chart, replacing the geometric object from point to line scatterplot + geom_line()
  • 11. 10 # This graph does not make much sense so letā€™s go back to points scatterplot + geom_point() # As far as the geometric object of a graph is concerned, besides defining that we want points, we could also add other choices such as: ā— the color of the points, ā— the shape of the points, and ā— the size of the points # Letā€™s rebuild the graph with blue triangles instead of circles at the points scatterplot + geom_point(color = ā€œblueā€, size = 3, shape = 17)
  • 12. 11 # A different option: scatterplot + geom_point(color="darkred",size=3,shape=8) # There are many different colors and shapes that we can choose # At this point, letā€™s add a title to our graph # Now letā€™s save our graph to a file # We must first save our graph to a variable
  • 13. 12 fertilityGNIplot = scatterplot + geom_point(colour = "blue",size=3,shape=17)+ggtitle("Fertility Rate vs Gross National Income") # Then we must create the file to which we want to save our graph pdf("MyPlot.pdf") # We print the graph to the file we created print(fertilityGNIplot) # We close the file dev.off() # Letā€™s say we want to create an image file, e.g. SVG svg("MyPlot.svg") # We print the graph to the file print(fertilityGNIplot) # We close the file dev.off() # If we look at the folder that we have selected as our working directory, we can see two files named ā€œMyPlot.pdfā€ and ā€œMyPlot.svgā€ which contain our graph. Advanced Scatter Plots with the Use of GGPLOT2 # Now we will see how we can color our points per Region how to add a regression line to our graph # We rebuild our graph using dark red color and stars for points (note: the directions mention dark red and stars whereas the code states blue and triangles) scatterplot+geom_point(colour="darkred",size=3,shape=8)+ggtitle("Fertility Rate vs Gross National Income")
  • 14. 13 # Now letā€™s color the points based on the Region each country belongs in ggplot(WHO,aes(x=GNI,y=FertilityRate,color=Region))+geom_point() # This allows us to see something we had not seen before. Countries-points from different regions are actually in different parts of the graph # Now letā€™s color the points based on the life expectancy of each country ggplot(WHO, aes(x = GNI, y = FertilityRate, color = LifeExpectancy)) + geom_point()
  • 15. 14 # We notice that before, we colored the points based on a categorical variable - Region. This way we had exactly seven different colors for seven different regions. # Now we color based on a numerical variable, LifeExpectancy, and therefore we have a graduation the coloring, with light blue corresponding to a high life expectancy and dark blue corresponding to a low ife expectancy. # Letā€™s now suppose that we are interested in seeing if the fertility rate is a good predictor of the percentage of population being under 15. # Intuitively, we would expect these variables to be highly correlated. But before we try any statistic models letā€™s explore our data with a scatter plot ggplot(WHO, aes(x = FertilityRate, y = Under15)) + geom_point()
  • 16. 15 # We see something really interesting. ā— The variables look to be surely correlated, but ā— As the FertilityRate variable increases, Under15 increases at a lower rate. ā— The relation between these two variables is not exactly linear. ā— We therefore suspect that a logarithmic transformation of FertilityRate would give better results ggplot(WHO,aes(x=log(FertilityRate),y=Under15))+geom_point() # The result looks more like a linear relation # Letā€™s build a linear regression model which predicts the percentage of population which is under 15 years old (Under15) using the log value of the fertility rate (FertilityRate) # Letā€™s name our model mod and use the function lm to predict the variable Under15 by using log(FertilityRate) as an independent variable. Our data set will be WHO. mod=lm(Under15~log(FertilityRate),data=WHO) # Letā€™s see a summary of our model
  • 17. 16 # It shows that the log of FertilityRate is actually a very good predictor of Under15. # This variable is very important and our R-squared is 0,9391 # Visualization was a good way for us to realize that a log transformation of FertilityRate gives better predictions than Under15. # If instead of this only FertilityRate was used, our R-squared would be 0,87. # This is a significant reduction in terms of R-squared # At this point, letā€™s add the line of regression to our graph. # This is very easy in ggplot library, as we just have to add one more layer ggplot(WHO,aes(x=log(FertilityRate),y=Under15))+geom_point()+stat_smooth(method="lm") # We see a blue line crossing through our data. This is the line of regression. # By default, ggplot designs a 95% confidence interval as a shade around the line. # We can change this default by defining it through the statistics layer # For a 99% confidence interval ggplot(WHO,aes(x=log(FertilityRate),y=Under15))+geom_point()+stat_smooth(method="lm",level=0.99)
  • 18. 17 # If we want to completely take out the confidence interval then ggplot(WHO,aes(x=log(FertilityRate),y=Under15))+geom_point()+stat_smooth(method="lm",se=FALSE) # If we want to change the color of the line then ggplot(WHO,aes(x=log(FertilityRate),y=Under15))+geom_point()+stat_smooth(method="lm",colour="or ange")
  • 19. 18 MVT Data Frame Line Plots with GGPLOT2 # First we will build a simple line plot to visualize trends at the crime point # Letā€™s read the data and name them mvt for motor vehicle thefts # We add the argument stringsAsFactors = FALSE since we have text data and we want R to read them as such and not Factor Variables mvt = read.csv("mvt.csv", stringsAsFactors=FALSE) # Letā€™s look at the data str(mvt) # We see that we have 190,000 observations of three different variables. Specifically: ā— The date a theft was committed ā— The location where it happened in terms of geographic latitude and longitude
  • 20. 19 # At this point we want to transform the variable Date into a form that R would recognize in order to export the day of the week and hour of the day # We can do this using the function striptime mvt$Date = strptime(mvt$Date, format="%m/%d/%y %H:%M") # In this form, we can export the hour and day of the week from the variable Date, and we can add these new variables to our data frame # We can do this by defining our new variable for the day of the week mvt$Weekday = weekdays(mvt$Date) # And defining a new variable for the time of the day mvt$Hour = mvt$Date$hour # Letā€™s take a look at what the data frame now looks like str(mvt) # At this point we see that we have two new variables, Weekday, which tells us the day of the week, and Hour, which gives the hour of the day # Now we can construct some line plots # Letā€™s start with a graph with a line and a value for each day of the week # We would like to design the graph so that the price depicts the total number of thefts that were committed on that day of the week # We can take this information by creating a table for the variable Weekday table(mvt$Weekday) # We must save this table to a data frame so that we can import it as data into a ggplot function WeekdayCounts = as.data.frame(table(mvt$Weekday)) # Letā€™s see what this data frame contains str(WeekdayCounts) # We see that this data frame has seven observations, one for each day pf the week, and two variables
  • 21. 20 # The first variable (Var1) gives the name of the week and the second variable (Freq) shows the total number of crimes that have been committed on each day of the week # At this point we are ready to create our graph # We load ggplot2 library(ggplot2) # And we build our graph with the ggplot function ggplot(WeekdayCounts, aes(x=Var1, y=Freq)) + geom_line(aes(group=1)) # We see that the graph is very close to what we want # We have the total number of crimes per day of the week, but the days are mixed up. We have Friday first, then Monday, Saturday, Sunday, etc. What ggplot did is put the days in alphabetical order. # What we want though is to have these days in chronological order # We can do this by transforming the variable Var1 into an Ordered Factor Variable, using the factor command WeekdayCounts$Var1 = factor(WeekdayCounts$Var1, ordered=TRUE, levels=c("Monday", "Tuesday", "Wednesday", "Thursday", "Friday", "Saturday", "Sunday")) # Letā€™s see if anything changed: ggplot(WeekdayCounts, aes(x=Var1, y=Freq)) + geom_line(aes(group=1))
  • 22. 21 # This is the graph we want. We have the total number of thefts per day of week and the days in chronological order. # The last thing we want in our graph is to change the labels of the axes since they do not suit us the way they are. ggplot(WeekdayCounts, aes(x=Var1, y=Freq)) + geom_line(aes(group=1)) + xlab("Day of the Week") + ylab("Total Motor Vehicle Thefts") # At this point we will add the time of day to our graph.
  • 23. 22 # We can do this by creating a line for each day of the week and replacing the day of the week on the x axis. # First we must create a table which shows the total number of thefts for each day of the week and each time of the day # For this we use the function table and use the variable Weekday from the data frame as the first variable and the variable Hour from the data frame as the second variable table(mvt$Weekday, mvt$Hour) # This table gives the total number of thefts for each day of the week and each hour # For example, on Friday at 4 oā€™clock in the morning 473 thefts have been committed while on Saturday midnight there have been 2,050 thefts. # Letā€™s save this table to a data frame so that we can use it for our graphs DayHourCounts = as.data.frame(table(mvt$Weekday, mvt$Hour)) # Letā€™s take a look str(DayHourCounts) # We see that we have 168 variables, one for each pair of days of the weeks and hour, and three variables ā— The first variable, Var1, refers to the day of the week ā— The second variable, Var2, refers to the hour of the day ā— The third variable, Freq for frequency, show the number of thefts # Letā€™s transform the second variable Var2 from a factor to a numerical variable, since it refers to the time of the day and it should be a numerical value
  • 24. 23 DayHourCounts$Hour = as.numeric(as.character(DayHourCounts$Var2)) # At this point we are ready to create our graph ggplot(DayHourCounts, aes(x=Hour, y=Freq)) + geom_line(aes(group=Var1)) # We see that our graph has 7 lines, one for each day of the week # Although interesting, we cannot tell which line refers to which day, so letā€™s change the color of the lines according to the day of the week. Letā€™s also make the lines a bit thicker. ggplot(DayHourCounts, aes(x=Hour, y=Freq)) + geom_line(aes(group=Var1, color=Var1), size=2)
  • 25. 24 # We can now see that each line has a different color for each day of the week # We can also see that on Saturdays and Sundays we have fewer thefts in the morning hours # Letā€™s make the lines more transparent ggplot(DayHourCounts, aes(x=Hour, y=Freq)) + geom_line(aes(group=Var1, color=Var1), size=2, alpha=0.5) # In any case, we can say that the specific graph is difficult to interpret. Seven lines are too much for a graph Heatmaps with GGPLOT2 # Letā€™s visualize the same data with a heatmap # To create the heatmap, we will need our data from the DayHourCounts data frame # First we should fix the order of the days so that they are in chronological order and not alphabetical, like we did before DayHourCounts$Var1 = factor(DayHourCounts$Var1, ordered=TRUE, levels=c("Monday", "Tuesday", "Wednesday", "Thursday", "Friday", "Saturday", "Sunday")) # Now letā€™s create the heatmap: ggplot(DayHourCounts, aes(x = Hour, y = Var1)) + geom_tile(aes(fill = Freq))
  • 26. 25 # How can we read this? For each hour and day of the week we have a rectangular shape whose color indicates the frequency, or number of thefts, that happen on that time and day # The legend shows that lighter colors refer to more thefts. # This way we can see that a lot of crimes are committed around midnight, especially on weekends. # We can change the legend and rid ourselves of it or make our graph a little bit better ggplot(DayHourCounts, aes(x = Hour, y = Var1)) + geom_tile(aes(fill = Freq)) + scale_fill_gradient(name="Total MV Thefts") + theme(axis.title.y = element_blank())
  • 27. 26 # We can also change the color ggplot(DayHourCounts, aes(x = Hour, y = Var1)) + geom_tile(aes(fill = Freq)) + scale_fill_gradient(name="Total MV Thefts", low="white", high="red") + theme(axis.title.y = element_blank()) # This is a color system commonly used by policing systems. It shows hot spots or places with higher crime rates with a red color
  • 28. 27 # Now the most frequent thefts are depicted by the red color and the less frequent thefts are shown with lighter areas # It appears that Friday night is a common time for motor vehicle thefts # It is often useful to change the combination of colors depending on whether you want the higher or lower values to stand out and the feeling you want the graph to give off Geographic Heatmaps with GGPLOT2 # At this point we will create a graph for motor vehicle thefts on the map of Chicago # First we must install and load two new packages, maps and ggmap install.packages("maps") install.packages("ggmap") library(maps) library(ggmap) # Now we must load Chicagoā€™s map to R chicago = get_map(location = "chicago", zoom = 11) # Letā€™s take a look at the map ggmap(chicago) # Just for fun athens = get_map(location = "athens", zoom = 11) ggmap(athens)
  • 29. 28 chicago = get_map(location = "chicago", zoom = 11) ggmap(chicago) # Letā€™s add the first 100 thefts to the map ggmap(chicago) + geom_point(data = mvt[1:100,], aes(x = Longitude, y = Latitude)) # Now, black dots show the places in town where the first 100 thefts were committed. If we put all 190,000 we would see a big black box. # What we are mainly interested in is to see if an area has high levels of crime, so letā€™s round the latitude and longitude variables to the second decimal and letā€™s calculate the number of thefts for each area. LatLonCounts = as.data.frame(table(round(mvt$Longitude,2), round(mvt$Latitude,2))) # This command gives us the total number of thefts for each grid point # Letā€™s take a look at the data str(LatLonCounts) # We have 1,683 observations and 3 variables. The first two variables, Var1 and Var2, are the latitude and longitude coordinates and the third variable is the number of thefts that were committed in them # Letā€™s transform the longitude and latitude variables and rename them into Lat and Long LatLonCounts$Long = as.numeric(as.character(LatLonCounts$Var1)) LatLonCounts$Lat = as.numeric(as.character(LatLonCounts$Var2))
  • 30. 29 # Letā€™s put these points on the map, defining the size and color of each point to refer to the number of thefts ggmap(chicago) + geom_point(data = LatLonCounts, aes(x = Long, y = Lat, color = Freq, size=Freq)) # Now the points of each area is defined by the latitude and longitude we had previously defined # Also, the size and color of each point refers to the number of thefts that have been committed in the specific area. In this way, the lightest and biggest dots depict more motor vehicle thefts # If we want to change the color ggmap(chicago) + geom_point(data = LatLonCounts, aes(x = Long, y = Lat, color = Freq, size=Freq)) + scale_colour_gradient(low="yellow", high="red")
  • 31. 30 # We can also use the argument geom_tile geometry to make it look more like a typical heatmap ggmap(chicago) + geom_tile(data = LatLonCounts, aes(x = Long, y = Lat, alpha = Freq), fill="red") MURDERS Data Frame Geographic Heatmaps with GGPLOT2 - Continued # We load the data
  • 32. 31 murders = read.csv("murders.csv") # These data are from the FBI and show the number of homicides for each US state # Letā€™s take a look at the data Ī‘Ļ‚ ĻĪÆĪ¾ĪæĻ…Ī¼Īµ Ī¼Ī¹Ī± Ī¼Ī±Ļ„Ī¹Ī¬ ĻƒĻ„Ī± Ī“ĪµĪ“ĪæĪ¼Ī­Ī½Ī± str(murders) # We have 51 observations for the 50 US states plus the city of Washington, DC, and six variables: ā— The name of the state ā— The population of each state ā— The number of homicides in each state ā— The number of homicides that are gun related in each state ā— The percentage of gun ownership in each state # Letā€™s load the libraries library(maps) library(ggmap) # R contains the map of the United States, so letā€™s load it statesMap = map_data("state") # Letā€™s take a look at the map using the str command str(statesMap) # It gives us a data frame which contains a summary of how to design a map of the USA # So letā€™s design the map ggplot(statesMap, aes(x = long, y = lat, group = group)) + geom_polygon(fill = "white", color = "black") + coord_map("mercator")
  • 33. 32 # Before we put our data on the map we must first ensure that the names of the states are the same on the ā€œmurdersā€ data frame and the statesMap # In the ā€œmurdersā€ data frame, the names of the states start with capital letters, while in the statesMap data frame they start with lowercase letters # Letā€™s create a new variable named ā€œregionā€ to make the pairing murders$region = tolower(murders$State) # Now we can combine statesMap and murders data frames through the merge command, which pairs lines based on a common variable # We previously defined the variable region which exists in both data frames murderMap = merge(statesMap, murders, by="region") # Letā€™s take a look at the data frame we created str(murderMap) # We have the same number of observations that we had in the statesMap data frame, but now we only have as many variables as the ones in the statesMap data frame as well as the murders data frame # Letā€™s add the number of homicides to the map of the USA
  • 34. 33 ggplot(murderMap, aes(x = long, y = lat, group = group, fill = Murders)) + geom_polygon(colour = "black") + scale_fill_gradient(low = "black", high = "red", guide = "legend") # Each state is colored based on the numbers of homicides in it # States with a dark red color have a larger number of homicides # From the graph we can say that California and Texas have the largest number of homicides. But is this due to them being the most-populated states? # Letā€™s make a new map of the USA in which we will depict the population of each state ggplot(murderMap, aes(x = long, y = lat, group = group, fill = Population)) + geom_polygon(colour = "black") + scale_fill_gradient(low = "black", high = "red", guide = "legend") # It looks almost exactly the same as the homicides map
  • 35. 34 # Therefore we must design a map which depicts the percentage instead of the number of homicides # Letā€™s create a new variable, the number of homicides per 100,000 people murderMap$MurderRate = murderMap$Murders / murderMap$Population * 100000 # Letā€™s rebuild the map with the variable MurderRate in the fill argument ggplot(murderMap, aes(x = long, y = lat, group = group, fill = MurderRate)) + geom_polygon(colour = "black") + scale_fill_gradient(low = "black", high = "red", guide = "legend") # But again the map is too dark, and no state is colored red (20 according to the legend). Why? # The reason is that Washington, Dc is an outlier with an unusually high murder rate. But itā€™s so small in size that we canā€™t see it on the map. # Letā€™s rebuild the map removing the states-observations with a MurderRate over 10. ggplot(murderMap, aes(x = long, y = lat, group = group, fill = MurderRate)) + geom_polygon(colour = "black") + scale_fill_gradient(low = "black", high = "red", guide = "legend", name = "Murder Rate per 100k", limits = c(0.9,10))
  • 36. 35 # Now we see a variety of colors on the map # As can be seen, the murder rate is unusually high in the state of Louisiana INTLALL Data Frame Heatmaps on a Global Scale with GGPLOT2 # In this exercise we shall use data related to where MITā€™s international students come from in order to create heat maps # First of all we will need to load ggplot and ggmap library(ggplot2) library(ggmap) # We load the data and again use the argument for text fields intlall = read.csv("intlall.csv",stringsAsFactors=FALSE) # Letā€™s look at the first lines of the data frame head(intlall) # Each line is a country, and we have
  • 37. 36 ā— one column with the name of the country (Citizenship) ā— one column with the number of undergraduate students (UG) ā— one column with the number of graduate students (G) ā— one column with the number of special undergraduates (SpecialUG) ā— one column with the number of special graduate students (SpecialG) ā— one column with the number of exchange students (ExhangeVisiting) ā— and one column with the total number of students (Total) # Wherever the value NA exists it corresponds to the number 0 # Letā€™s convert NAs to 0 intlall[is.na(intlall)] = 0 # Letā€™s take another look head(intlall) # Letā€™s now load the world map (Atlas) # Letā€™s name it world map world_map = map_data("world") # Letā€™s take a look at the map str(world_map) # We see that the data frame variables are ā— Longitude (long) ā— Latitude (lat) ā— The third variable is (group) which in reality is one group for each country, a different number for each country ā— The fourth variable is (order), which we will get to later ā— The fifth variable is (region), which is the name of each country ā— Last, the sixth variable is (subregion), which is used for some countries in order to describe islands and other dependant regions
  • 38. 37 # Now we will need to merge the intlall data frame with the world_map data frame in order to use ggplot world_map = merge(world_map, intlall, by.x ="region", by.y = "Citizenship") # Letā€™s see what we did str(world_map) # To rebuild the map we will need geom_polygon ggplot(world_map, aes(x=long, y=lat, group=group)) + geom_polygon(fill="white", color="black") + coord_map("mercator") # As we can see, all countries look like black shapeless object. Wondering why? # Sometimes, when we merge data frames, a reordering of observations may take place
  • 39. 38 # Also, letā€™s not forget that the world map data frame is nothing more than a list of longitudes and latitudes which define country borders # So if we mistakenly reorder the observations of the data frame they will not make any sense. Going from point to point, the points may by in different sides of the polygon that depicts the country. # What me must do is re-reorder the observations in the right order # This command may seem a bit complex but if you look carefully itā€™s not so bad world_map = world_map[order(world_map$group, world_map$order),] # What we are doing is taking the world map data set and reordering the lines based on the group variable (which is the country) and then based on the variable order which is the correct order of the points which define the country borders # Letā€™s rebuild the map ggplot(world_map, aes(x=long, y=lat, group=group)) + geom_polygon(fill="white", color="black") + coord_map("mercator") # Next problem: some countries are missing # First, since MIT is in the USA it has no international students from the US
  • 40. 39 # Some African countries are also missing, possibly since MIT has no international students from these countries. # But, no one from China? # The reason this country is missing is that it has a different name on the intlall data frame and a different name on the world_map data frame # When we merged these two data frames these observations were not transferred as there was no pairing # To see how these countries are named on the intlall data set letā€™s build a table table(intlall$Citizenship) # This table shows the names of all the countries # We see that China is written as "China (People's Republic Of)" # In the initial world map data frame, though, it is written simply as ā€œChinaā€ # Letā€™s change the intlall data frame intlall$Citizenship[intlall$Citizenship=="China (People's Republic Of)"] = "China" # Letā€™s check table(intlall$Citizenship)
  • 41. 40 # Letā€™s redo the data frame merge # Letā€™s say that the world map data frame is a new merge of the map data and intlall data frame with the new value (China) for China world_map = merge(map_data("world"), intlall, by.x ="region", by.y = "Citizenship") # Letā€™s redo the reordering after the merge world_map = world_map[order(world_map$group, world_map$order),] # Letā€™s rebuild the map ggplot(world_map, aes(x=long, y=lat, group=group)) + geom_polygon(fill="white", color="black") + coord_map("mercator") # Now letā€™s rebuild the map filling in the countries with the corresponding percentage of students ggplot(world_map, aes(x=long, y=lat, group=group)) + geom_polygon(aes(fill=Total), color="black") + coord_map("mercator")
  • 42. 41 # The UK is missing for the exact same reason but we will not fix it now # Letā€™s see what the map looks like from a map view different than Mercator. Letā€™s use the orthographic view. ggplot(world_map, aes(x=long, y=lat, group=group)) + geom_polygon(aes(fill=Total), color="black") + coord_map("ortho", orientation=c(20, 30, 0))
  • 43. 42 # Aaand from another view ggplot(world_map, aes(x=long, y=lat, group=group)) + geom_polygon(aes(fill=Total), color="black") + coord_map("ortho", orientation=c(-37, 175, 0))