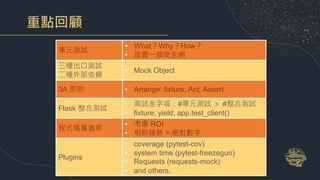
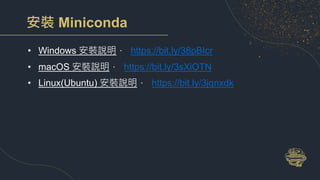
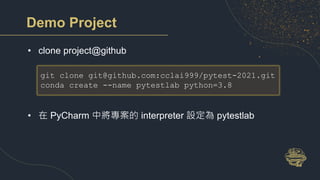
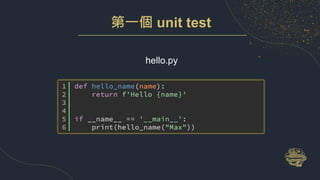
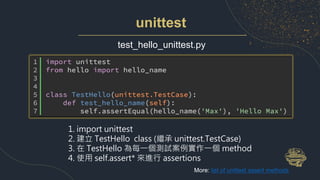
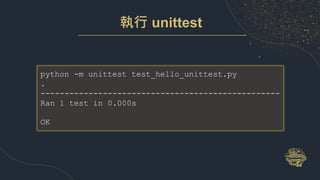
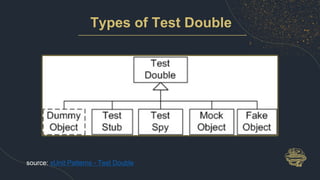
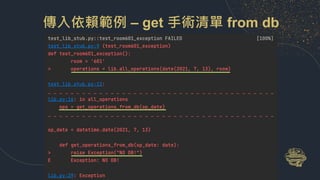
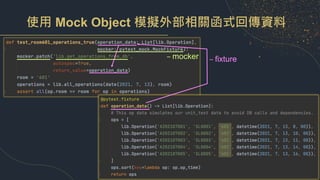
本文介绍了 Max Lai 使用 pytest 进行单元测试的经验,强调了编写测试的重要性以确保代码的正确性和可维护性。文章详细讲解了pytest的安装步骤、基本用法以及单元测试的最佳实践,包括如何创建测试文件、验证结果,并探讨了mock和fixture的使用场景。最终,文章还提到了一些pytest插件和代码覆盖率工具,以帮助提升测试质量和效果。
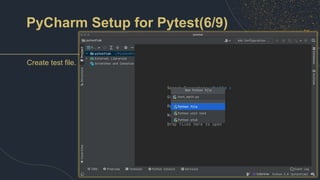
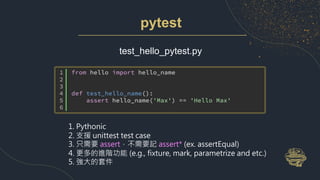
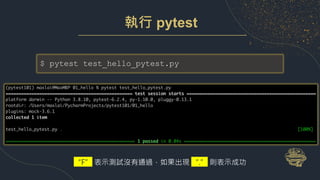
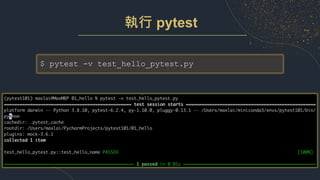
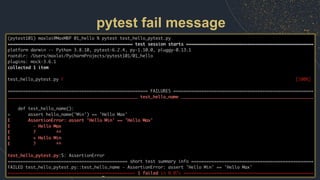
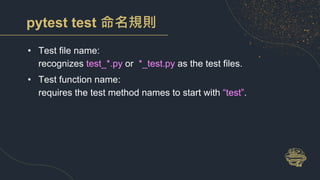
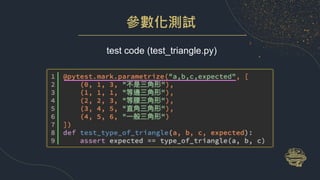
pytest test 命名規則
•Test file name:
recognizes test_*.py or *_test.py as the test files.
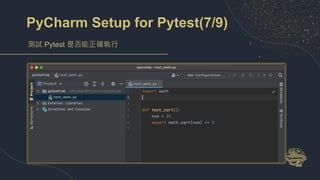
• Test function name:
requires the test method names to start with “test”.
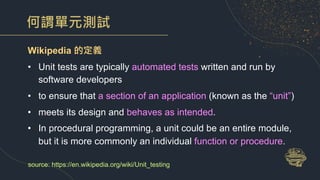
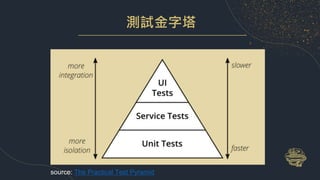
何謂單元測試
Wikipedia 的定義
• Unittests are typically automated tests written and run by
software developers
• to ensure that a section of an application (known as the “unit”)
• meets its design and behaves as intended.
• In procedural programming, a unit could be an entire module,
but it is more commonly an individual function or procedure.
source: https://en.wikipedia.org/wiki/Unit_testing
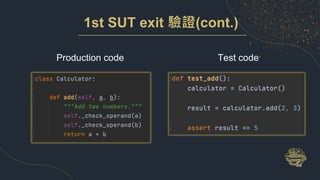
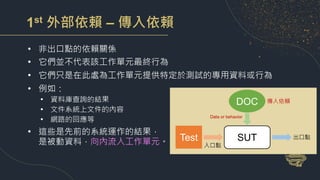
1st SUT 出口驗證
•進入點(entry point): sum(a,b)
• 出口點(exit point): return value
SUT
sum(a, b)
return value
• SUT: Sytem Under Test, 被測試系統
• 有些人會稱為 CUT (Class Under Test or Code Under Test)
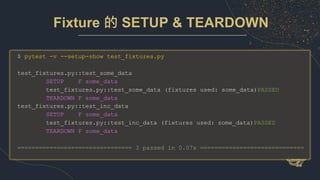
$ pytest -v--setup-show test_fixtures.py
test_fixtures.py::test_some_data
SETUP F some_data
test_fixtures.py::test_some_data (fixtures used: some_data)PASSED
TEARDOWN F some_data
test_fixtures.py::test_inc_data
SETUP F some_data
test_fixtures.py::test_inc_data (fixtures used: some_data)PASSED
TEARDOWN F some_data
================================ 3 passed in 0.07s =============================
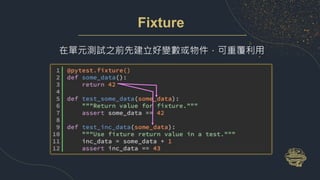
Fixture 的 SETUP & TEARDOWN
47.
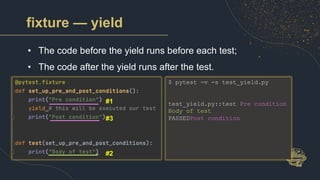
fixture — yield
•The code before the yield runs before each test;
• The code after the yield runs after the test.
$ pytest -v -s test_yield.py
test_yield.py::test Pre condition
Body of test
PASSEDPost condition
#1
#2
#3
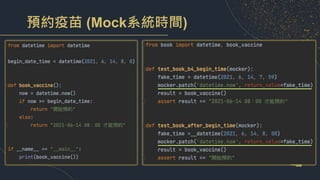
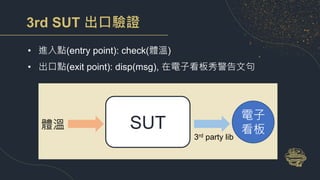
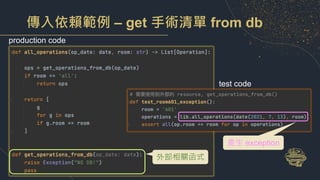
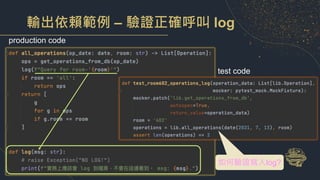
系統時間無法簡單地使用 mock object
EAttributeError: <module 'datetime' from
'/Users/maxlai/miniconda3/envs/pytestlab/lib/python3.8/datetime.py’>
does not have the attribute 'now'


![2nd SUT 出口驗證
• 進入點(entry point): M+(a)
• 出口點(exit point): MR(有時並沒有外部可存取的 getter)
SUT
M+
Calculator
[total]
MR](https://image.slidesharecdn.com/pycontw2021-pytest-211001194912/85/Pytest-PyCon-TW-2021-33-320.jpg)


![使用 Mock Object 確認是否傳入正確參數
– mocker:驗證傳入參數是否正確以及僅呼叫一次
• assert_called()
• assert_called_with()
• assert_any_call()
• …
source: python doc
test_lib_mock.py::test_room602_operations_log PASSED [100%]
======================== 1 passed in 0.03s =========================](https://image.slidesharecdn.com/pycontw2021-pytest-211001194912/85/Pytest-PyCon-TW-2021-66-320.jpg)
![使用 mocker.spy 記錄互動並且呼叫DOC
– mocker:驗證傳入參數是否正確以及僅呼叫一次
test_lib_mock.py::test_room602_operations_log_with_spy PASSED [100%]
實務上應該會 log 到檔案,不會在這邊看到。 msg: Query for room-'602'.
============================ 1 passed in 0.03s ==============================](https://image.slidesharecdn.com/pycontw2021-pytest-211001194912/85/Pytest-PyCon-TW-2021-67-320.jpg)


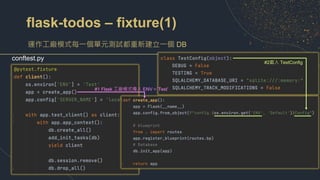
![flask-todos
Flask demo for RESTful API for Todo demo
flask-dodos
├── app
│ ├── __init__.py
│ ├── models.py
│ └── routes.py
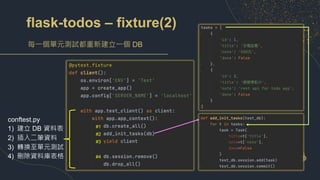
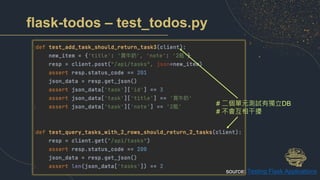
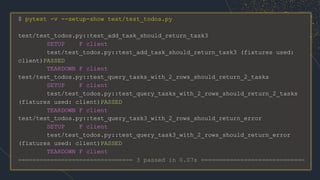
├── test
│ ├── conftest.py
│ └── test_todos.py
├── config.py
├── main.py
└── requirements.txt
HTTP
Method
Action Examples
GET 取得資源的所有資料
http://[hostname]/api/tasks
取得待辦事項清單
GET 取得資源的特定資料
http://[hostname]/api/tasks/1
取得編號-1的待辦事項
POST 新增一筆資料
http://[hostname]/api/tasks
提供細節資料以新增待辦事項
PUT 更新某一待辦事項資料
http://[hostname]/api/tasks/1
更新編號-1待辦事項的資料
DELETE 刪除某一待辦事項
http://[hostname]/api/tasks/1
刪除更新編號-1待辦事項](https://image.slidesharecdn.com/pycontw2021-pytest-211001194912/85/Pytest-PyCon-TW-2021-73-320.jpg)