This document outlines standard drafting and document control procedures used by drafters, engineers, project leads and document control team members at 1601 Bryan Street, Dallas, TX 75201. It describes processes for submitting and processing document requests, searching ProjectWise, creating drawings, revising existing drawings, reviewing and approving drawings, and distributing completed drawings. The document simplifies and standardizes current procedures to ensure compliance.
![Drafting Procedures Rev # 0 Page 2 of 36
Rev Date: 05/01/2015
Drafting Procedures Rev# 0 Document # 1
Use: Reference
Prepared by: Arc Light 4/25/2015
Reviewed by: Drawings and Records Coordinator [Type name and date]
Approved by: Document Control Supervisor [Type name and date]
Effective Date: [Type effective date]
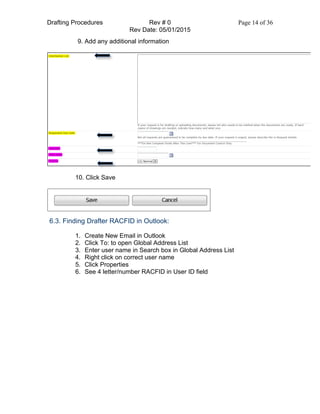
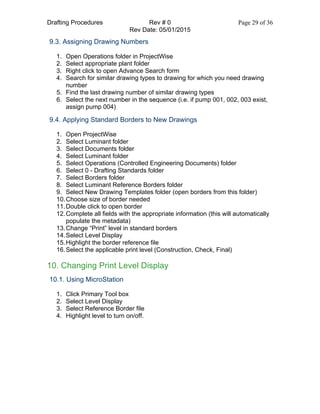
Required Review Frequency: 6 months or as needed
Table of Contents
1. Introduction......................................................................................................4
1.1. Using this document...................................................................................................4
1.2. Using this document: Who should use it ....................................................................4
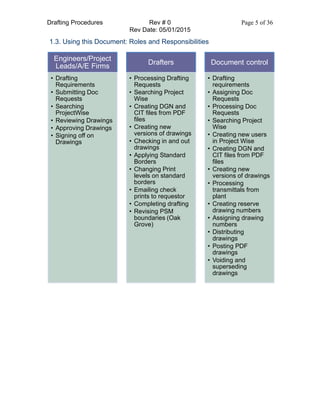
1.3. Using this Document: Roles and Responsibilities ......................................................5
2. Change Management ......................................................................................6
2.1. Section Description ....................................................................................................6
2.2. Revising the Document ..............................................................................................6
3. Drafting and Document Control Workflow....................................................7
3.1. Section Description ....................................................................................................7
4. Tools.................................................................................................................8
5. Drafting Requirements....................................................................................8
5.1. Section Description ....................................................................................................8
5.2. Drafting Requirements for A/E firms...........................................................................8
5.3. Drafting Requirements for Project Leads ...................................................................8
5.4. Redline/Field Markup Requirements ..........................................................................9
5.5. Drafting Requirements for FES Document Control ....................................................9
6. Requesting Drafting ........................................................................................9
6.1. Section Description ....................................................................................................9
6.2. Submitting Doc Requests.........................................................................................10
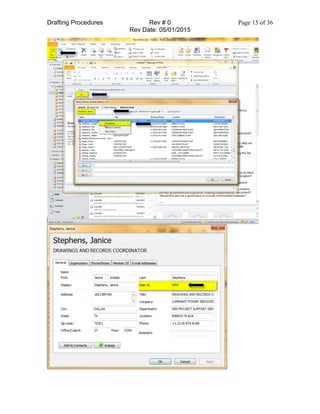
6.3. Finding Drafter RACFID in Outlook: .........................................................................14
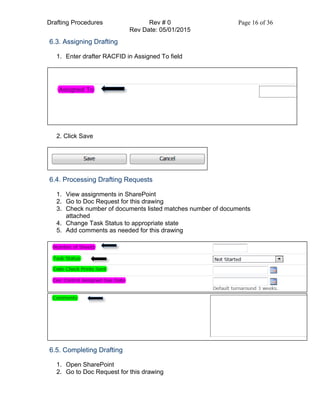
6.3. Assigning Drafting ....................................................................................................16
6.4. Processing Drafting Requests..................................................................................16
6.5. Completing Drafting..................................................................................................16
7. ProjectWise....................................................................................................18
7.1. Searching ProjectWise for documents .....................................................................18
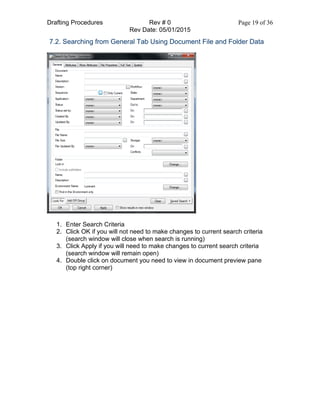
7.2. Searching from General Tab Using Document File and Folder Data.......................19
7.3. Searching from Attributes Tab Using Additional Metadata.......................................20
7.4. Searching ProjectWise Tips and Tricks....................................................................20
7.5. Adding Hardcopy Drawings to ProjectWise..............................................................21
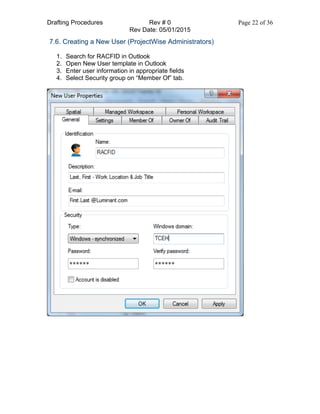
7.6. Creating a New User (ProjectWise Administrators) .................................................22
8. Existing Drawings .........................................................................................23
8.1. Section Description ..................................................................................................23
8.2. Processing Transmittals from Plants........................................................................23
8.3. Creating a DGN and CIT from a PDF.......................................................................23](https://image.slidesharecdn.com/38311162-1d4b-4256-a21b-612c0999a408-160407015815/85/ProcessGuide-2-320.jpg)


![Drafting Procedures Rev # 0 Page 21 of 36
Rev Date: 05/01/2015
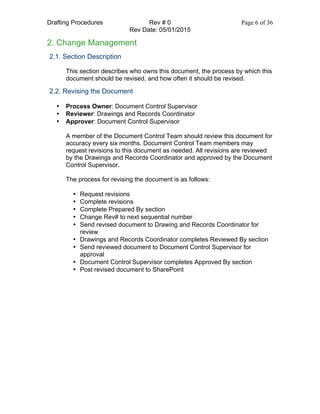
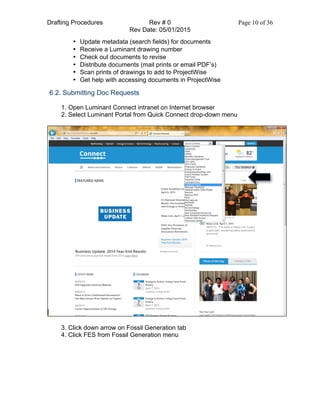
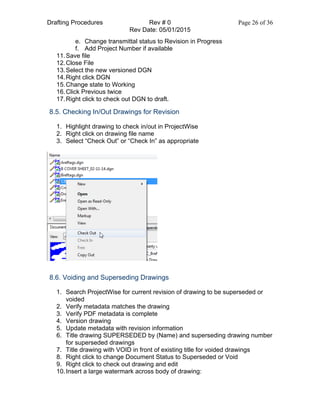
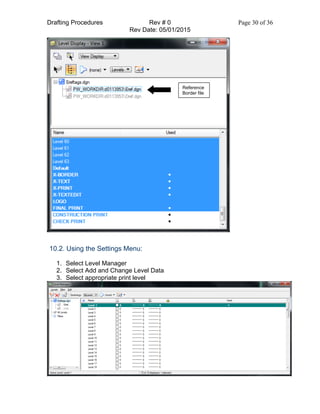
§ Document Number: enter “2925-1-510190” or use * for a
partial number such as *2925*5101*
§ Title: enter key words such as “Boiler Feed Pump” or *BFP*
or *Boiler*Pump*
§ Project Number: enter *131N023* or 131*023*
• Leave off “4” to capture project numbers from older systems
• Type “NULL” in attribute field to search for blank attribute field
• Use “clear” button to clear all fields of data entered for search,
including selected folder purposes
7.5. Adding Hardcopy Drawings to ProjectWise
[Section reserved for future process]](https://image.slidesharecdn.com/38311162-1d4b-4256-a21b-612c0999a408-160407015815/85/ProcessGuide-21-320.jpg)
![Drafting Procedures Rev # 0 Page 23 of 36
Rev Date: 05/01/2015
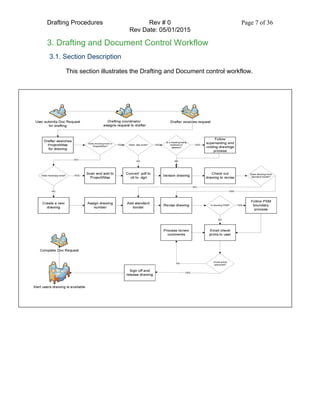
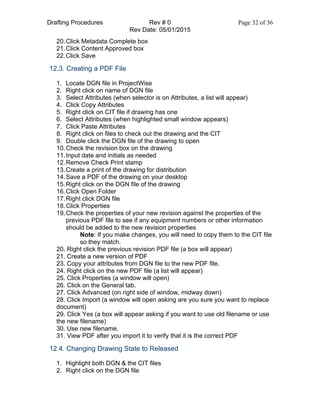
8. Existing Drawings
8.1. Section Description
This section describes how to process transmittals from plants, create
DGN and CIT files from a PDF, check out drawings for drafting, version
drawings and correctly void/supersede drawings.
8.2. Processing Transmittals from Plants
1. Double check markups against drawings listed on transmittal
2. Prepare drawings for drafting
a. Search for drawing in ProjectWise
b. Verify that the metadata matches info on drawing file
c. Check for additional information on PDF metadata
d. Input missing information
e. Change revision to next highest number or to one (1) if previous
revision was a letter)
f. Remove issue date
g. Add transmittal number and engineer or requestor name
[transmittal number, dash, first initial, last name (no spaces)]
h. Change revision status to Revision in Progress
i. Input Project number and/or MOC Request number
j. Change state now or on all at the end
3. Assign a job number and fill out Job Tracking sheet
8.3. Creating a DGN and CIT from a PDF
1. Change PDF to TIFF:
a. Search ProjectWise to find appropriate PDF file
b. Open PDF
c. Click File
d. Select Export
e. Select Image
f. Select TIFF
g. Save TIFF using assigned drawing number
2. Change TIFF to CIT:
a. Open Microstation v8i
b. Click File
c. Select Raster Manager
d. Click File
e. Select Batch Convert
f. Click Add
g. Browse for TIFF files to convert (created above)](https://image.slidesharecdn.com/38311162-1d4b-4256-a21b-612c0999a408-160407015815/85/ProcessGuide-23-320.jpg)
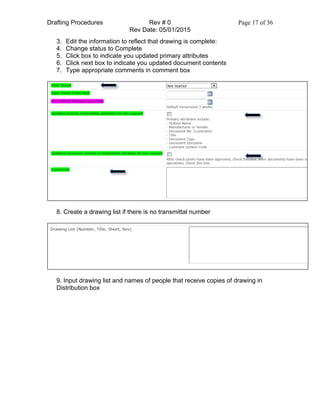
![Drafting Procedures Rev # 0 Page 31 of 36
Rev Date: 05/01/2015
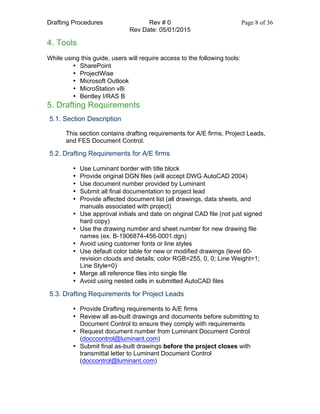
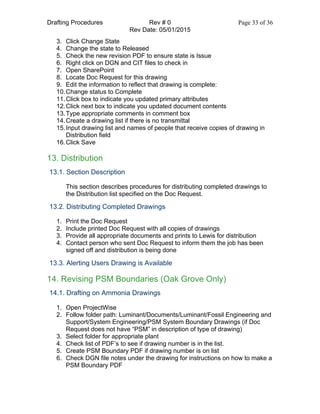
11. Review and Approval
11.1. Section Description
This section describes the procedures for reviewing revised drawings,
adding comments to drawings for further revisions, and approving
completed drawings.
11.2. Emailing Check Prints to Requestors
[Section reserved for future process]
11.3. Processing Review Comments
[Section reserved for future process]
12. Signing and Releasing Approved Drawings
12.1. Section Description
This section describes how to change drawing state, create a PDF of the
approved drawing, release drawings and complete Doc Requests on
SharePoint.
12.2. Changing Drawing State
1. Receive notice that drawing has been approved and the date of approval.
2. Check sign off list for requestors name and initials
3. If not on list, contact requestor and get their 3 initials for sign off
4. Give new name and initials to Janice Stephens to add to the initial list
5. Open ProjectWise
6. Select Operations folder.
7. Right click on appropriate plant folder
8. Click Advanced Search
9. Search by transmittal or Doc Request number in the transmittal number
box with *Wild Card before and after the number
10.Click Apply at bottom of window (drawings will appear behind window)
11.Close window or move it out of the way
12.Right click on DGN file of the drawing you want to sign off
13.Click Properties (window will open)
14.Change transmittal status to Closed
15.Change document status to appropriate state
16.Input Revision Number in appropriate upper and lower boxes
17.Input Revision Date, Revision Description, Initials of Drafter, Checker and
Approver fields with appropriate information
18.Add any other information in the primary and secondary fields
19.Update More Attributes page with additional information](https://image.slidesharecdn.com/38311162-1d4b-4256-a21b-612c0999a408-160407015815/85/ProcessGuide-31-320.jpg)


![S2-FGJV-TEC-PRO-0016 [C] AS BUILT DRAWINGS PROCEDURE.pdf](https://cdn.slidesharecdn.com/ss_thumbnails/s2-fgjv-tec-pro-0016casbuiltdrawingsprocedure-251116225905-60e6ae1d-thumbnail.jpg?width=640&height=640&fit=bounds)
![S2-FGJV-TEC-PRO-0016 [C] AS BUILT DRAWINGS PROCEDURE.pdf](https://cdn.slidesharecdn.com/ss_thumbnails/s2-fgjv-tec-pro-0016casbuiltdrawingsprocedure-251116225739-f7c2955b-thumbnail.jpg?width=640&height=640&fit=bounds)


