Downloaded 45 times
![INSTALL OWNCLOUD DAN NGINX DENGAN PHP-FPM
OwnCloud adalah software suite yang berfokus pada layanan penyimpanan data berbasis
lokasi yang independen (cloud storage) dan termasuk kategori Infrastructur as a Services
(IaaS) Cloud Computing, berbasis CMS (Content Management System ). ownCloud dibangun
berbasis PHP, SQLite/MySQL dan PostgreSQL serta dapat diberjalan disemua platform
windows, linux dan mac.
Nginx adalah salah satu server web yang ringan, cepat dan efiesien. Nginx juga merupakan
web reverse proxy dan email (IMAP/POP3) proxy.
Konfigurasi Sistem Centos 6.4
Konfigurasi centos dan tambahkan repository, disini menggunakan fedora epel untuk
repository dan remi. Sebenarnya repository ini tidak didukung secara resmi oleh Centos tapi
repository ini memberikan versi terbaru dari aplikasi yang nantinya akan digunakan.
[root@dl ~]# rpm -Uvh
http://download.fedoraproject.org/pub/epel/6/x86_64/epel-release-6-8.noarch.rpm
[root@dl ~]# rpm -Uvh http://rpms.famillecollet.com/eterprise/remi-release-6.rpm
[root@dl ~]#yum update -y
Pastikan SELINUX dalam keadaan disable, perintah dibawah ini untuk memeriksa
konfigurasi selinux.
root@dl ~]# grep SELINUX /etc/selinux/config
# SELINUX= can take one of these three values:
SELINUX=disabled
# SELINUXTYPE= can take one of these two values:
SELINUXTYPE=targeted
[root@dl ~]#vi /etc/selinux/config
# This file controls the state of SELinux on the system.
# SELINUX= can take one of these three values:
# enforcing - SELinux security policy is enforced.
# permissive - SELinux prints warnings instead of enforcing.
# disabled - No SELinux policy is loaded.](https://image.slidesharecdn.com/nginxowncloud-130325014301-phpapp02/85/Nginx-owncloud-1-320.jpg)
![INSTALL OWNCLOUD DAN NGINX DENGAN PHP-FPM
OwnCloud adalah software suite yang berfokus pada layanan penyimpanan data berbasis
lokasi yang independen (cloud storage) dan termasuk kategori Infrastructur as a Services
(IaaS) Cloud Computing, berbasis CMS (Content Management System ). ownCloud dibangun
berbasis PHP, SQLite/MySQL dan PostgreSQL serta dapat diberjalan disemua platform
windows, linux dan mac.
Nginx adalah salah satu server web yang ringan, cepat dan efiesien. Nginx juga merupakan
web reverse proxy dan email (IMAP/POP3) proxy.
Konfigurasi Sistem Centos 6.4
Konfigurasi centos dan tambahkan repository, disini menggunakan fedora epel untuk
repository dan remi. Sebenarnya repository ini tidak didukung secara resmi oleh Centos tapi
repository ini memberikan versi terbaru dari aplikasi yang nantinya akan digunakan.
[root@dl ~]# rpm -Uvh
http://download.fedoraproject.org/pub/epel/6/x86_64/epel-release-6-8.noarch.rpm
[root@dl ~]# rpm -Uvh http://rpms.famillecollet.com/eterprise/remi-release-6.rpm
[root@dl ~]#yum update -y
Pastikan SELINUX dalam keadaan disable, perintah dibawah ini untuk memeriksa
konfigurasi selinux.
root@dl ~]# grep SELINUX /etc/selinux/config
# SELINUX= can take one of these three values:
SELINUX=disabled
# SELINUXTYPE= can take one of these two values:
SELINUXTYPE=targeted
[root@dl ~]#vi /etc/selinux/config
# This file controls the state of SELinux on the system.
# SELINUX= can take one of these three values:
# enforcing - SELinux security policy is enforced.
# permissive - SELinux prints warnings instead of enforcing.
# disabled - No SELinux policy is loaded.](https://image.slidesharecdn.com/nginxowncloud-130325014301-phpapp02/75/Nginx-owncloud-1-2048.jpg)
![SELINUX=disabled # pastikan SELINUX = disabled
# SELINUXTYPE= can take one of these two values:
# targeted - Targeted processes are protected,
# mls - Multi Level Security protection.
SELINUXTYPE=targeted
[root@dl ~]#reboot
Install Nginx, PHP-FPM dan Mysql Server
Untuk menjalankan Owncloud, dibawah ini daftar paket yang harus di install
[root@dl ~]#yum install nginx mysql-server php-fpm php-gd php-ldap php-pear php-xml
php-xmlrpc php-eaccelerator php-magickwand php-magpierss php-mbstring php-mcrypt
php-shout php-snmp php-soap php-tidy
Salah satu dari packet php-sqlite atau php-mysql harus di install tergantung database yang
digunakan, jika owncloud nantinya terintegrasi dengan samba install packet smbclient.
Konfigurasi Nginx dan PHP-FPM untuk OwnCloud
Buat file konfigurasi owncloud.conf dan simpan pada direktori conf.d pada direktori utama
nginx.
[root@dl ~]#cd /etc/nginx/conf.d
[root@dl conf.d]# vi owncloud.conf
---- isi file owncloud.conf ---
konfigurasi ini merupakan contoh lengkap untuk owncloud versi 5 dan berjalan untuk ipv4
dan ipv4, jika ingin berjalan ipv4 gunakan 80, bukan [::]:80.
Pertama, konfigurasi agar direct ke HTTPS ( contoh dl.sampel.com, disesuikan dengan
domain yang ada)
server {
listen 80;
server_name dl.sampel.com;
rewrite ^ https://$server_name$request_uri? permanent;
}](https://image.slidesharecdn.com/nginxowncloud-130325014301-phpapp02/85/Nginx-owncloud-2-320.jpg)
![rewrite ^/owncloud/.well-known/host-meta.json /public.php?service=host-meta-json last;
rewrite ^/owncloud/.well-known/carddav /remote.php/carddav/ redirect;
rewrite ^/owncloud/.well-known/caldav /remote.php/caldav/ redirect;
rewrite ^/owncloud/apps/calendar/caldav.php /remote.php/caldav/ last;
rewrite ^/owncloud/apps/contacts/carddav.php /remote.php/carddav/ last;
rewrite ^/owncloud/apps/([^/]*)/(.*.(css|php))$ /index.php?app=$1&getfile=$2 last;
rewrite ^(/owncloud/core/doc[^/]+/)$ $1/index.html;
index index.php;
try_files $uri $uri/ index.php;
}
# Konfigurasi PHP-FPM
location ~ ^(?<script_name>.+?.php)(?<path_info>/.*)?$ {
try_files $script_name = 404;
# sesuaikan dengan host atau port yang digunakan pada direktori php-fpm.d
fastcgi_pass 127.0.0.1:9000;
fastcgi_param PATH_INFO $path_info;
fastcgi_param HTTPS on;
fastcgi_param PHP_VALUE "upload_max_filesize = 100M n post_max_size = 100M";
fastcgi_param SCRIPT_FILENAME /var/www/owncloud$fastcgi_script_name;
include fastcgi_params;
}
location ~* ^.+.(jpg|jpeg|gif|bmp|ico|png|css|js|swf)$ {
expires 30d;
access_log off;
}
}
Simpan file konfigurasi ini.
Membuat file sertifikat ssl.
Penjelasan lebih lanjut tentang module ssl seritkat baca di
http://wiki.nginx.org/HttpSslModule](https://image.slidesharecdn.com/nginxowncloud-130325014301-phpapp02/85/Nginx-owncloud-4-320.jpg)
![[root@dl ~]# mkdir -p /etc/nginx/certs
[root@dl ~]# cd /etc/nginx/certs
[root@dl certs]# openssl genrsa -des3 -out server.key 1024
Generating RSA private key, 1024 bit long modulus
....................++++++
..............++++++
e is 65537 (0x10001)
Enter pass phrase for server.key:
Verifying - Enter pass phrase for server.key:
[root@dl certs]# openssl req -new -key server.key -out server.csr
Enter pass phrase for server.key:
You are about to be asked to enter information that will be incorporated
into your certificate request.
What you are about to enter is what is called a Distinguished Name or a DN.
There are quite a few fields but you can leave some blank
For some fields there will be a default value,
If you enter '.', the field will be left blank.
-----
Country Name (2 letter code) [XX]:IN
State or Province Name (full name) []:Jawa Timur
Locality Name (eg, city) [Default City]:Malang
Organization Name (eg, company) [Default Company Ltd]:My Company
Organizational Unit Name (eg, section) []:My Section
Common Name (eg, your name or your server's hostname) []:dl.sample.com
Email Address []:ruslan@sample.com
Please enter the following 'extra' attributes
to be sent with your certificate request
A challenge password []:
An optional company name []:
[root@dl certs]# cp server.key server.key.orig
[root@dl certs]# openssl rsa -in server.key.orig -out server.key
Enter pass phrase for server.key.orig:
writing RSA key](https://image.slidesharecdn.com/nginxowncloud-130325014301-phpapp02/85/Nginx-owncloud-5-320.jpg)
![[root@dl certs]# openssl x509 -req -days 365 -in server.csr -signkey server.key -out
server.crt
Signature ok
subject=/C=IN/ST=Jawa Timur/L=Malang/O=My Company/OU=My
Section/CN=dl.sample.com/emailAddress=ruslan@sample.com
Getting Private key
[root@dl certs]# ls
server.crt server.csr server.key server.key.orig
[root@dl certs]#
Membuat database OwnCloud di Mysql
sebelum membuat database owncloud jalankan terlebih dahulu mysql, berikut ini langkah
untuk membuat database dan hak akses user ke database yang dibuat.
[root@dl ~]# /etc/init.d/mysqld start
[root@dl ~]# chkconfig mysqld on
[root@dl ~]# mysql -u root -p
Enter password:
Welcome to the MySQL monitor. Commands end with ; or g.
Your MySQL connection id is 1652
Server version: 5.1.67 Source distribution
Copyright (c) 2000, 2012, Oracle and/or its affiliates. All rights reserved.
Oracle is a registered trademark of Oracle Corporation and/or its
affiliates. Other names may be trademarks of their respective
owners.
Type 'help;' or 'h' for help. Type 'c' to clear the current input statement.
mysql> create database owncloud;
mysql> GRANT ALL ON owncloud.* TO owncloud@localhost IDENTIFIED BY
'mypasscloud';
mysql> flush privileges;](https://image.slidesharecdn.com/nginxowncloud-130325014301-phpapp02/85/Nginx-owncloud-6-320.jpg)
![mysql> quit
Bye
[root@dl ~]#
Konfigurasi PHP-FPM
Edi file php.ini, naikkan nilai post_max_size dan upload_max_filesize sesuai dengan nilai
yang telah didefinisakan sebelumnya pada file owncloud.conf nginx.
[root@dl ~]#vi /etc/php.ini
cari bagian ini dan sesuikan
post_max_size = 100M
upload_max_file_size = 100M
simpan file konfigurasi ini.
[root@dl ~]#
Sesuaikan user,group dan port php-fpm sesuai yang telah didefinisikan sebelumnya pada file
owncloud.conf nginx.
[root@dl ~]#vi /etc/php-fpm.d/www.conf
cari bagian ini dan sesuaikan
listen = 127.0.0.1:9000
user = nginx
group = nginx
simpan file konfigurasi ini.
[root@dl ~]#
Menjalankan php-fpm dan nginx
[root@dl ~]# /etc/init.d/nginx start
[root@dl ~]# chkconfig nginx on
[root@dl ~]# /etc/init.d/php-fpm on
[root@dl ~]# chkconfig php-fpm on
Membangun OwnCloud
Download versi terbaru dari owncloud, ekstrak file ini dan pindahkan ke direktori utama yang
telah didefinisikan sebelumnya pada file owncloud.conf nginx.
[root@dl ~]# wget http://download.owncloud.org/community/owncloud-5.0.0.tar.bz2
[root@dl ~]#tar -jxvf owncloud-5.0.0.tar.bz2](https://image.slidesharecdn.com/nginxowncloud-130325014301-phpapp02/85/Nginx-owncloud-7-320.jpg)
![[root@dl ~]# ls
owncloud owncloud-5.0.0.tar.bz2
[root@dl ~]# mv owncloud /var/www
chown dan chmod direcktori owncloud agar bisa di akses dan terproteksi hanya untuk user
dan group yang didefinisikan.
[root@dl ]~#cd /var/www
[root@dl ~]#chown -R nginx.nginx owncloud
[root@dl ~]#chmod -R 770 owncloud
Jika nanti direktori data user dibuat di partisi tersendiri, definisikan juga user dan hak akses
untuk diretkri tersebut
[root@dl ~]#mkdir /data/users
[root@dl ~]#chown -R nginx.nginx /data/users
[root@dl ~]#chmod -R 770 /data/users
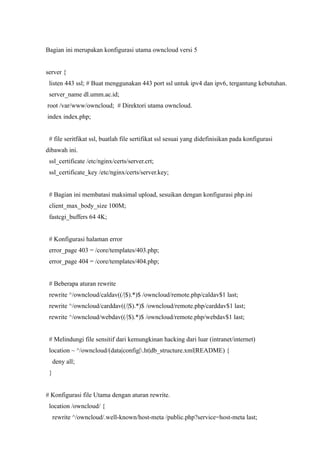
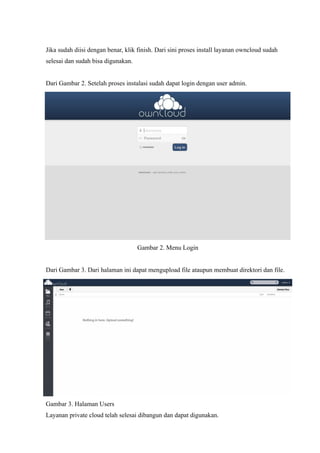
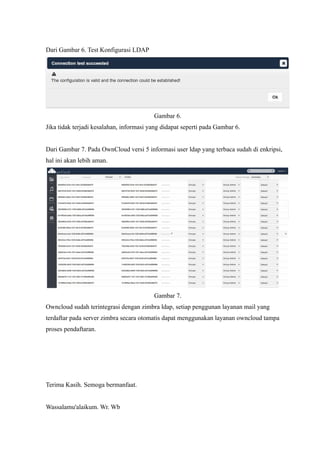
Terakhir buka browser dan lakukan instalasi web interface owncloud, sesuai dengan alamat
yang telah didefinisikan sebelumnya pada file owncloud.conf nginx.
Gambar 1. Proses Instalasi](https://image.slidesharecdn.com/nginxowncloud-130325014301-phpapp02/85/Nginx-owncloud-8-320.jpg)


Dokumen ini menjelaskan langkah-langkah untuk menginstal OwnCloud dan Nginx dengan PHP-FPM, termasuk konfigurasi sistem, instalasi paket yang diperlukan, dan pengaturan basis data di MySQL. Selain itu, dokumen ini menjelaskan cara membuat sertifikat SSL dan mengintegrasikan OwnCloud dengan Zimbra LDAP untuk autentikasi terintegrasi. Proses diakhiri dengan penjelasan mengenai antarmuka web untuk menyelesaikan instalasi OwnCloud.


