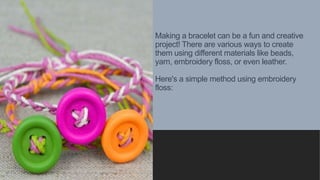
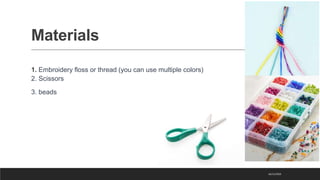
Making a
brachelet
Making a bracelet can be a fun and creative
project! There are various ways to create
them using different materials like beads,
yarn, embroidery floss, or even leather.
Here's a simple method using embroidery
floss:
Materials
1. Embroidery floss or thread (you can use multiple colors)
2. Scissors
3. beads
16/11/2023
Steps
1.Measure and Cut:
2. Tie a Knot: Gather all the strands together and tie a knot at one end, leaving a few
inches of extra space.
3.Start Braiding: Separate the strands into three sections and start braiding. Cross the
right section over the middle, then the left section over the new middle section. Repeat
this process, keeping the braid tight and consistent.
16/11/2023
4. Add Beads : If you want to add beads, thread them on to the strands before tying the initial
knot. You can intersperse them throughout the bracelet as you braid.
5.Finish with a Knot: Once you've reached the desired length, tie a knot at the end to secure the
braid. You can braid it right down to the end or leave some space for tying it around your wrist.
6.Tie It Off: To wear the bracelet, tie the ends around your wrist. You can use another knot or a
clasp to secure it. Cut any excess thread.
16/11/2023
Remember
the design possibilities are endless! You can experiment with different colors, beads, or
patterns to create unique bracelets. If you're using different materials, like beads or
leather, the process might vary slightly, but it's all about exploring and finding what works
best for you!
16/11/2023
Thank you
16/11/2023

Making a brachelet.pptx

  • 1.
  • 2.
    Making a braceletcan be a fun and creative project! There are various ways to create them using different materials like beads, yarn, embroidery floss, or even leather. Here's a simple method using embroidery floss:
  • 3.
    Materials 1. Embroidery flossor thread (you can use multiple colors) 2. Scissors 3. beads 16/11/2023
  • 4.
    Steps 1.Measure and Cut: 2.Tie a Knot: Gather all the strands together and tie a knot at one end, leaving a few inches of extra space. 3.Start Braiding: Separate the strands into three sections and start braiding. Cross the right section over the middle, then the left section over the new middle section. Repeat this process, keeping the braid tight and consistent. 16/11/2023
  • 5.
    4. Add Beads: If you want to add beads, thread them on to the strands before tying the initial knot. You can intersperse them throughout the bracelet as you braid. 5.Finish with a Knot: Once you've reached the desired length, tie a knot at the end to secure the braid. You can braid it right down to the end or leave some space for tying it around your wrist. 6.Tie It Off: To wear the bracelet, tie the ends around your wrist. You can use another knot or a clasp to secure it. Cut any excess thread. 16/11/2023
  • 6.
    Remember the design possibilitiesare endless! You can experiment with different colors, beads, or patterns to create unique bracelets. If you're using different materials, like beads or leather, the process might vary slightly, but it's all about exploring and finding what works best for you! 16/11/2023
  • 7.