Download to read offline
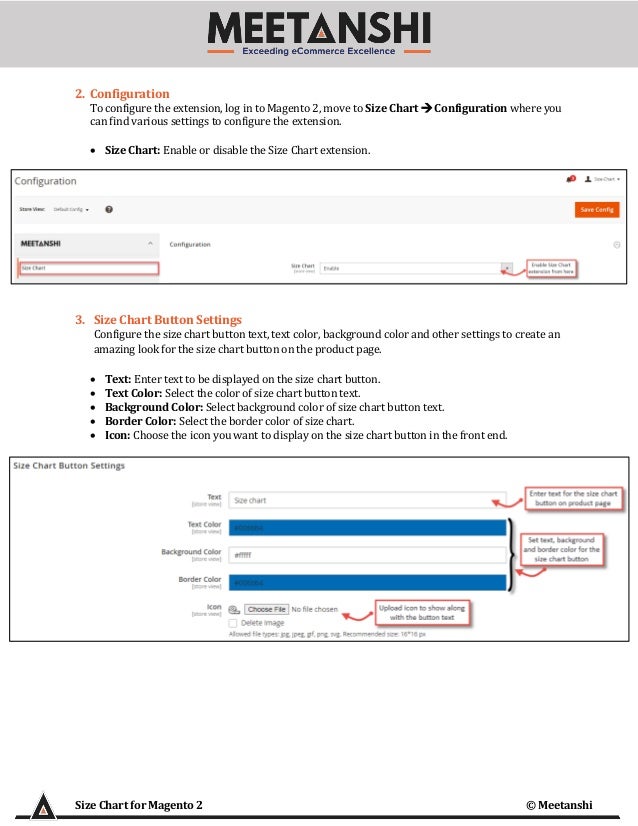
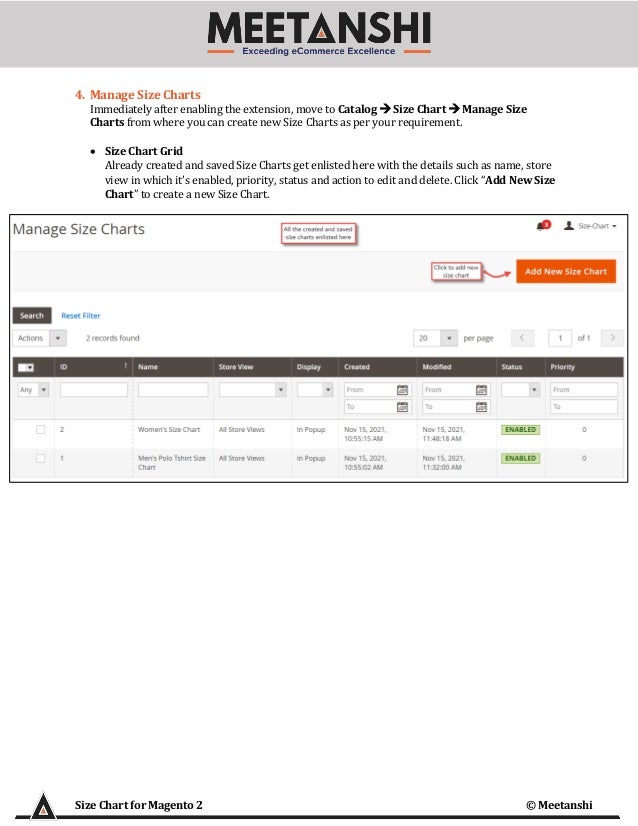
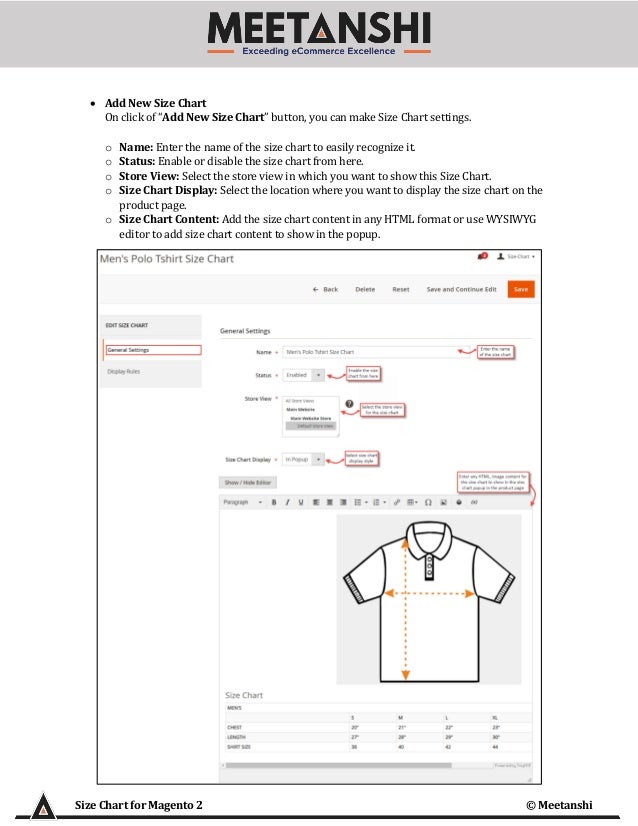
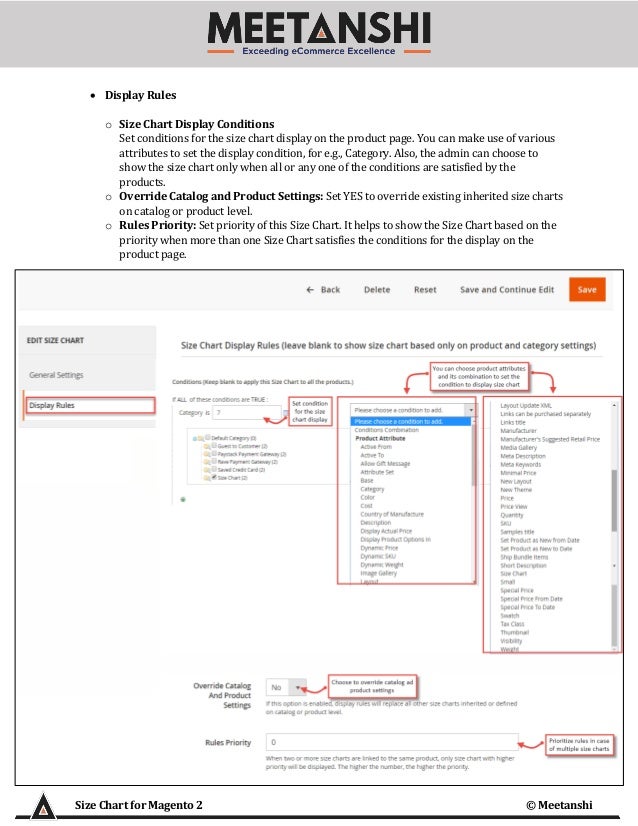
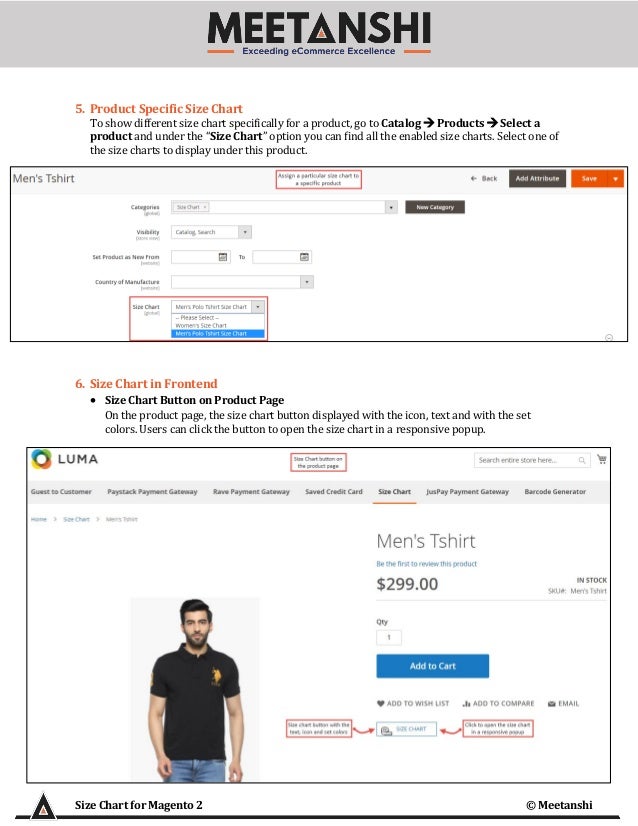
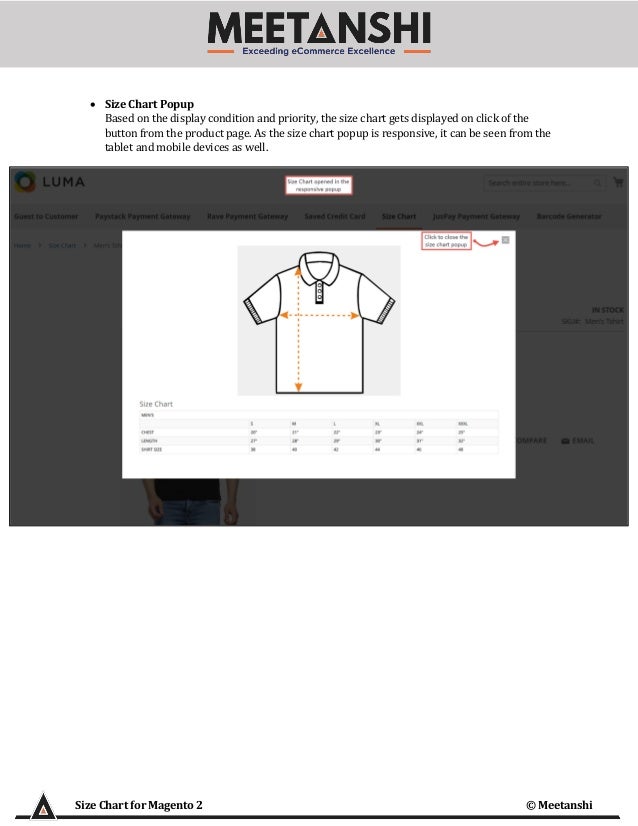

The document is a user guide for the 'Size Chart for Magento 2' extension by Meetanshi, detailing installation, configuration, and management of size charts. It includes instructions for both Magento Marketplace and Meetanshi customers, covering how to enable the extension, customize settings, and manage size charts for products. Additionally, it explains how the size chart is displayed on the frontend, including button settings and responsive popups.


