Download to read offline
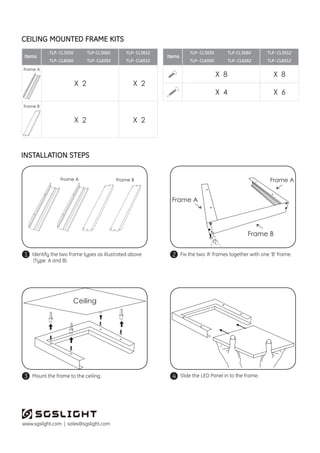
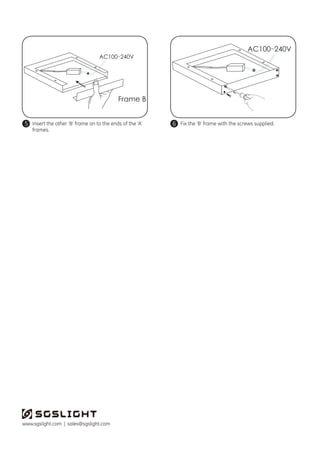

This document provides installation instructions for ceiling mounted frames for TLP LED panel series. It includes the following key details: - Identifies two frame types, A and B, that are used to assemble the frame and insert the LED panel. - Lists the parts included for different sized frames. - Provides 6 step instructions for assembling the frame, inserting the LED panel, and mounting it to the ceiling. - Notes the operating temperature range and dry location rating for the TLP LED panel series.


