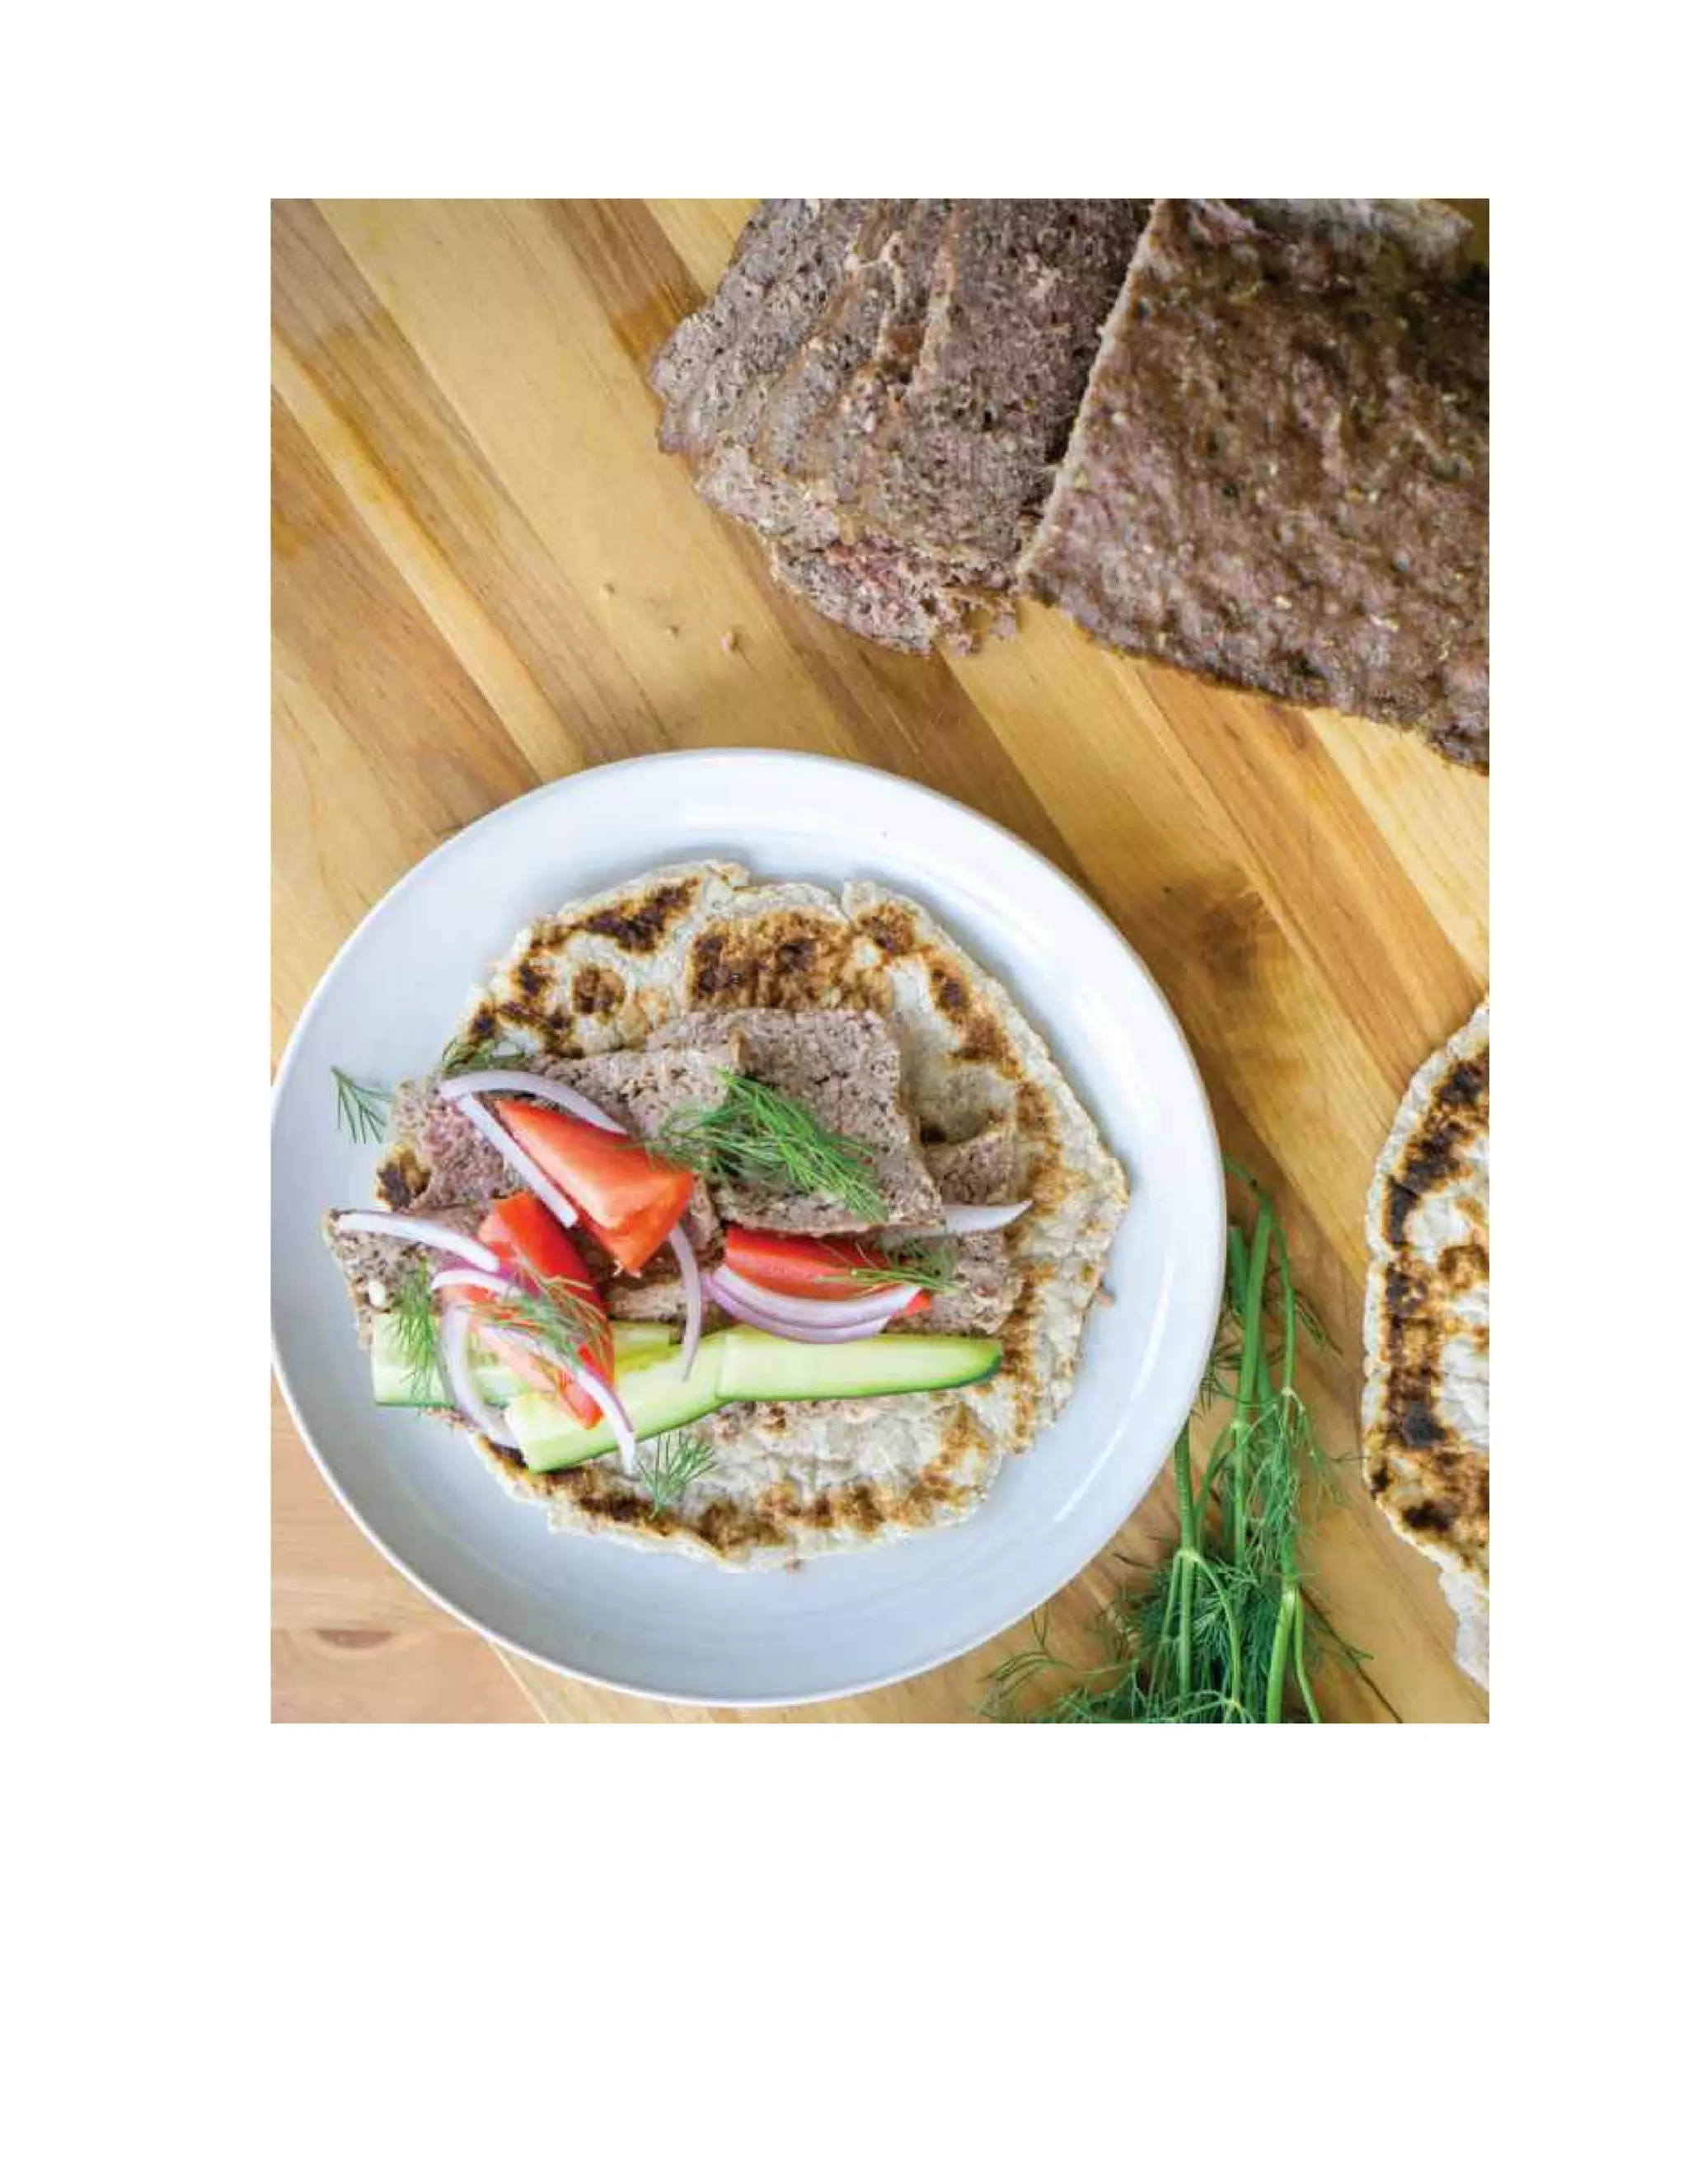
From Matt:
To my parents, Margaret and Richard, and my
friends, Tarik, Adam, and Lou—You're the average of
the five people you spend the most time with.
From Megha:
To my dad, Ashok, and my best friend, Kelsey—You
have helped me realize that we never have life
figured out, and that's okay. Eat good food, and be
happy.
learn how to lose 10 pounds in a week fast results
First Published in 2018 by Victory Belt Publishing Inc.
Copyright © 2018 by Megha Barot and Matt Gaedke
All rights reserved
No part of this publication may be reproduced or distributed in any form or by
any means, electronic or mechanical, or stored in a database or retrieval
system, without prior written permission from the publisher.
ISBN-13: 978-1-628602-88-3
The authors are not licensed practitioners, physicians, or medical professionals
and offer no medical diagnoses, treatments, suggestions, or counseling. The
information presented herein has not been evaluated by the U.S. Food and Drug
Administration, and it is not intended to diagnose, treat, cure, or prevent any
disease. Full medical clearance from a licensed physician should be obtained
before beginning or modifying any diet, exercise, or lifestyle program, and
physicians should be informed of all nutritional changes.
The authors/owners claim no responsibility to any person or entity for any
liability, loss, or damage caused or alleged to be caused directly or indirectly as
a result of the use, application, or interpretation of the information presented
herein.
Front and Back Cover Photography by Kala Snow
Cover Design by Justin-Aaron Velasco
Interior Design by Yordan Terziev and Boryana Yordanova
Printed in Canada
TC 0118
CONTENTS
PREFACE
HOW TO USE THE RECIPES IN THIS BOOK
INGREDIENTS AND KITCHEN TIPS
FIVE STEPS TO STARTING KETO
KEYS TO SUCCESS
Recipes
Chapter 1: WAKE-UP CALL
Protein Waffles
Three-Cheese Spinach Frittata
Savory Zucchini Cheddar Waffles
Five-Star Breakfast Sandwich
Chorizo Cotija Morning Muffins
Breakfast Cookies
Overnight Protein Oats
Breakfast Roll-ups
Easy Eggs Benedict
Golden Gate Granola
Sausage and Gruyère Breakfast Casserole
Diner Pancakes
Toasted Oatmeal
Iced Bulletproof Coffee Frappé
Mocha Protein Keto Coffee
Chapter 2: FRESH BAKED
English Muffins
Cheddar and Thyme Cornbread
Microwave Bread
The Best Keto Bread
Raspberry Fiber Muffins
Cheddar Jalapeño Bagels
Low-Carb Dinner Rolls
Cinnamon Walnut Scones
Chocolate Chip Zucchini Bread
Cheesy Chicken Breadsticks
Navajo Fry Bread
Coconut Flour Tortillas
Chapter 3: CLASSIC COMFORT FOODS
Chicken Popper Casserole
Loaded Cauliflower
Spicy Cauliflower Bites
learn how to lose 10 pounds in a week fast results
Spaghetti with Meat Sauce
Creamy White Chili
Chicken Tenders
Crispy Chicken Thighs with Pan Sauce
Mexican Chorizo Casserole
Bacon and Crab Mac and Cheese
Chicken Noodle-less Soup
Creamy Chicken Alfredo
Southern Baked Chicken
Mama’s Meatloaf
Chapter 4: TAKEOUT FAVORITES
Spicy Tuna Hand Rolls
Double Bacon Cheeseburger
Saag Paneer
Thai Yellow Chicken Curry
Buffalo Chicken Crust Pizza
Spicy Shrimp Fried Rice
Chocolate Almond Butter Shake
Thin-Crust Skillet Pizza
Steak Quesadillas
Chipotle Dry-Rub Wings
Beef Satay Skewers
Cheese Shell Mini Tacos
Philly Food Cart Gyros
Sticky Sesame Chicken
Chapter 5: FRESH FIXIN’S
Turkey Bacon Club
Caprese Chicken Skillet
Baja Fish Soft Tacos
Curry Chicken Salad
Loaded Cobb Salad
Coconut Shrimp
Fried Red Snapper
California Collard Wrap
Strawberry Coconut Smoothie
Green Power Smoothie
Raspberry Lime Ice Pops
Chapter 6: SIDES & MUNCHIES
Candied Georgia Pecans
Fathead Crackers
Mexican Layer Dip
Buffalo Chicken Dip
Sweet and Spicy Beef Jerky
Charlie’s Energy Balls
Bar Side Mozzarella Sticks
Salami Chips with Pesto
Radical Radish Chips
Cheesy Broccoli and Bacon
Hush Puppies
Asparagus with Goat Cheese and Sunflower Seeds
Chipotle Cauliflower Mash
Cilantro Lime Rice
Chapter 7: DECADENT DESSERTS
Chocolate Protein Truffles
Death by Chocolate Cheesecake
No-Churn Peanut Butter Ice Cream
Snickerdoodle Cream Cheesecake
Giant Skillet Cookie for Two
Flourless Chocolate Cake
Protein Cake with Buttercream Frosting
Chewy Chocolate Chip Cookies
Blackberry Mini Cheesecakes
Extreme Fudge Brownies
learn how to lose 10 pounds in a week fast results
Coconut Chocolate Cookies
Peanut Butter Hemp Heart Cookies
County Fair Cinnamon Donuts
Pistachio Coconut Fudge
Strawberry Shortcakes
Vanilla Egg Custard
Instant Protein Ice Cream
Chapter 8: CONDIMENTS
Peanut Sauce
BBQ Sauce
Homemade Chipotle Mayo
Maple Cinnamon Almond Butter
Strawberry Chia Seed Jam
Keto Meal Plans
Meal Plan 1: TWO-MEAL TONY
Meal Plan 2: SALLY SWEET TOOTH
Meal Plan 3: BASIC BRENDA
Meal Plan 4: MEATLESS MARTY
Meal Plan 5: MATT
Meal Plan 6: MEGHA
SUGGESTED READING
RESOURCE GUIDE
RECIPE INDEX
ALLERGEN INDEX
PREFACE
If you are holding this book and reading this preface, we want to
say thank you. We hope you are excited to enter into this world
of recipes that we have created for you in which you can
indulge, guilt-free! We are Matt and Megha, and we make up
KetoConnect. We run a food blog specific to a low-carb,
ketogenic diet. We also have a YouTube channel that gives a
glimpse into our lives with our pets, Miley and Julius, but, more
importantly, shows you exactly how to make our recipes step by
step, how to be prepared and successful in your keto lifestyle,
and how to adapt as your body does.
Before we even met, we always had a passion for food, both for
cooking it and for eating it. In particular, we loved Asian takeout
and desserts, but we also highly valued our health. So we met
at the crossroads of enjoying sweets and other comfort foods
regularly and staying strict and doing what we knew—or, should
we say, thought—was “good for us.” But why not have both?
Shortly after meeting one another in San Francisco, we
discovered the ketogenic diet and decided to give it a go
together. We quit carbs cold turkey and got hit with the keto flu
—bad! But a short time later, we noticed the exact opposite,
with heightened energy and focus being two of the main
benefits of our newfound lifestyle. (And since then, we’ve
learned that the keto flu can be avoided or lessened through
supplementation with the three major electrolytes—sodium,
magnesium, and potassium—or by tapering down carb
consumption as opposed to going cold turkey like we did.)
Once we started to cook with new ingredients and think a little
differently about the food we put into our bodies, everything
learn how to lose 10 pounds in a week fast results
else in our lives changed as well. We ate out less and were
more careful about what we consumed, but we still indulged in
delicious homemade meals and desserts. Our love for eating
higher-quality food and living a healthier lifestyle turned into
more than just our bonding time; it became our business, too.
We thought, “Hey, what’s stopping us from cooking, taking
pictures, and posting it all on the internet for others to benefit?”
Well, at the time, a lot. We had no means of making this
happen. However, when Matt took the initial step of buying our
first camera and the second step of buying the domain name
KetoConnect.net, things started to become a little clearer.
Although nothing happened overnight, we continued to
research the diet, fight about recipes (Megha preferred simple
recipes, while Matt liked to overdo it with spices and other
ingredients), burn all the desserts we made, and put in
countless hours after coming home from our full-time jobs. Sure
enough, we started to make a little progress. Everything
wonderful in life takes time, and we are big advocates of
enjoying the entire journey. If we hadn’t put our heads down,
focused, and kept working toward our goal of building
KetoConnect, you wouldn’t be holding this cookbook today.
With this book, we want to let you in on the idea that you can
have it both ways: you can value your health and indulge in
delicious foods, too. That is why we made sure to include all the
foods we miss from our high-carb days, as well as the recipes
that help us stay on track and on budget. The recipes in this
book are designed to make the entire process a little easier,
which is why we named the book Keto Made Easy.
Our goal is to provide you with a foundation of recipes from all
categories, ranging from takeout favorites to desserts. We have
found cooking to be an intimate and relaxing experience, and
we want to give you those same feelings. No matter how busy
our days are—and sometimes we are working nonstop—we like
to take at least ten minutes to make a meal worth eating or
drinking! We know many of you are busy, too, or always on the
go, so we have made it a point to include several quick-to-make
recipes and recipes that you can meal prep for the week.
However, we also know that many of you have families and
have found cooking to be an enjoyable part of your keto
journey, so we also give you the option to make more involved
recipes, sure to satisfy even the pickiest kids! Most of our
recipes are a great starting point for adding your own twists,
and we always encourage a little experimentation. That’s where
the magic happens!
A lot of our motivation has come from our viewers and
supporters. We’ve grown not only as individuals and as a
business, but also in our ability to learn from you and then
apply that knowledge as we develop new recipes that you can
easily re-create and enjoy. We want cooking to be fun,
lighthearted, and approachable. We want to inspire the chef
within you to make our Southern Baked Chicken (page 118) and
our Death by Chocolate Cheesecake (page 210), because you
can live your healthiest life and indulge a little, too!
learn how to lose 10 pounds in a week fast results
HOW TO USE THE RECIPES IN THIS
BOOK
More and more people are cutting out carbs in hopes of losing
weight, increasing energy, and performing better mentally and
physically. Just about everyone has tried it at some point, but it
can be hard to stick to for the long haul. There’s always a
holiday or some other special occasion around the corner, and
you know what that means: Mom’s fried chicken, your aunt’s
homemade dinner rolls, or Grandma’s rhubarb crisp. For every
occasion there is a special food that you just can’t pass up; it’s
tradition.
That’s where this book comes in. It’s loaded with keto-friendly
versions of your favorite foods and should be used to
supplement your keto diet in a way that makes it more
sustainable. Rather than stopping to pick up a pint of ice cream
on your way home from work, make one of the delicious
desserts in this book. This book is jammed full of better choices!
Quick Reference Icons
We’ve included quick reference icons in our recipes to designate
whether they meet certain dietary restrictions. We have icons
for recipes that are dairy-free, egg-free, nut-free, and/or
vegetarian. For the sake of labeling, we consider coconut
products, such as coconut flour, coconut milk, and coconut
flakes, to be nut-free. We have found that those who have
allergies to nuts generally do not have issues with coconut.
DAIRY-FREE
EGG-FREE
NUT-FREE
VEGETARIAN
There are a number of foolproof recipes included in this book.
These are the easiest recipes in the book and require very little
experience in the kitchen. Look for this icon:
FOOLPROOF
If you’re unfamiliar with the concept, meal prep is the practice
of making meals in bulk, often on the weekend, so that you’ll
have ready-to-eat meals throughout the week. This happens to
be our number-one tip for success on a keto diet. Be on the
lookout for this icon; you will find it accompanying those recipes
that are particularly well suited to meal prep.
MEAL PREP
Ingredients
In the “Ingredients and Kitchen Tips” section that begins on
page 12, we walk you through the ingredients we use in our
daily cooking. We’ve accumulated quite an assortment of exotic
ingredients since we started our blog, but we like to keep it
simple in most of our recipes. You should be able to find
everything you need to make the recipes in this book at your
local grocery store, except for a couple of items that can easily
be found online.
Twists
learnhowtolose10poundsinaweekfastresults
We’ll be the first ones to tell you that our recipes are
awesome. Each of them has been carefully tested until it’s
perfect. But that doesn’t mean you shouldn’t add your own
signature occasionally! Recipes are best used as a framework
within which to experiment, adding your own touches and
changing ingredients to suit your tastes. In that spirit, we’ve
included some of our favorite twists on classic recipes
throughout the book. You’ll find them at the ends of the recipes,
along with other important notes and helpful tips.
Nutritional Information
For each recipe, we’ve listed the total calories along with the
number of grams of fat, protein, carbohydrate, fiber, and sugar
alcohol, where applicable. Erythritol is a non-nutritive sweetener
that is commonly used in low-carb cooking. Because it does not
impact blood glucose levels in most people, it is subtracted
from the total carb count of the recipe.
It’s important to note that these nutritional values were
calculated based on the brands of ingredients we used; there
may be slight variations if you opt for different products. We did
our best to ensure the accuracy of our calculations, but if you
are using a ketogenic diet to treat a medical condition, it is
important that you calculate the nutritional values of each
recipe for yourself. Also, please keep in mind that optional
ingredients are not included in the nutritional information.
INGREDIENTS AND KITCHEN TIPS
In this section, we highlight the ingredients that are staples in
our cooking, as well as some of the brands we prefer. For a
complete list of our brand recommendations for staple
ingredients, turn to the “Resource Guide” section on pages 280
to 282.
Please note that when shopping for dairy products, you should
always buy the full-fat versions. Also, check to make sure that
any prepared or canned foods you purchase do not contain
added sugars. Always read the labels when buying ingredients,
especially those that are unfamiliar to you.
learn how to lose 10 pounds in a week fast results
Flours and Fibers
This section explores the flours and fibers that we use in our
day-to-day cooking and baking. If you’re unfamiliar with low-
carb baking, this list will serve as a starter course on the
commonly used ingredients.
We use two types of flour:
• Almond flour is one of the most commonly used grain-
free and gluten-free flour substitutes. We always buy finely
ground blanched almond flour as opposed to coarsely
ground almond flour or almond meal. A finer grind yields
the best, most consistent results. Our go-to brand is Bob’s
Red Mill.
• Coconut flour is another great option for low-carb
baking. Our go-to brand is Anthony’s Goods. It is important
to note that coconut flour is dramatically different from
almond flour. Coconut flour is much more absorbent, and for
this reason it is very hard to use one of these flours in place
of the other. A good general rule when substituting one for
the other is to use three-and-a-half parts almond flour for
every one part of coconut flour, but even then, there is no
guarantee that the recipe will turn out well.
We use three different types of fiber for baking. Because each
type has a different absorbency and texture, it is best to use the
specific type of fiber the recipe calls for. Substituting one type
for another is possible, but the results will not be nearly as
good.
• Psyllium husk powder is a high-fiber powder that can
be used in tandem with coconut flour to achieve a fluffy
consistency in keto baked goods. Depending on the brand
you use, it can turn breads gray or purple. We use the NOW
Foods brand, which we’ve found has a great taste and does
not discolor our baked goods.
• Oat fiber lends itself more to cakes, cookies, and other
desserts than to breads. It has a faint oatmeal flavor and
can be delicious when used properly. Our go-to brand is
Anthony’s Goods.
• Flax meal is made from ground flax seeds. It is less
absorbent than the other two fibers and creates a more
wheatlike baked good with a toasted flavor. We use both
golden and regular flax meal in our recipes; the two are
interchangeable. The only difference is flavor. That said, we
often prefer the more assertive and “toasty” flavor of
golden flax meal and specify it in those recipes in which we
think it is best suited. However, feel free to substitute one
type for the other, depending on what you have on hand.
Our go-to brand for both types of flax meal is Bob’s Red Mill.
Sweeteners
There are several keto-friendly sweeteners available. The
main ones we like to use are erythritol and liquid stevia, both of
which have a very low glycemic index and have not been shown
to have a negative impact on ketosis.
• Erythritol is a sugar alcohol that looks just like table
sugar and is 70 percent as sweet. A number of different
sugar alcohols are used in low-carb baking, but erythritol is
our favorite due to its low glycemic index and pleasant
learn how to lose 10 pounds in a week fast results
taste. If you’ve never used it before, know that it can have a
slight cooling effect in your mouth. Erythritol comes in a
granular form but can easily be ground to a powder in a
coffee or spice grinder. We use both granular and powdered
erythritol in our recipes. Certain recipes call for powdered
erythritol because the granular form won’t yield the same
result. For example, the granular form would make sauces
and frostings gritty. Our go-to brand of erythritol is
Anthony’s Goods.
• Liquid stevia is a natural sweetener extracted from the
leaves of the stevia plant. It is our favorite sweetener, and
we use it daily in our morning coffee. A couple drops do the
trick! We prefer the liquid form over the granular form
because granular stevia typically contains bulking agents
that are high in carbohydrates. If you are unaccustomed to
using stevia, you will likely find that it has a slightly bitter
aftertaste. This can be lessened by using a smaller amount
and combining it with some erythritol to achieve your
preferred sweetness level. From our experience, 1 teaspoon
of erythritol is equivalent to about 5 drops of liquid stevia.
Our go-to liquid stevia product is NOW Foods Better Stevia.
• Swerve Confectioners is a convenient option for any
recipe that calls for powdered erythritol. It saves you the
step of powdering erythritol yourself, but it is more
expensive than granular erythritol. To save money, we grind
granular erythritol to a powder ourselves.
• Sugar-free maple syrup is not our favorite ingredient to
use because it tends to contain unsavory artificial
sweeteners, but it does provide a great maple flavor, along
with a thick consistency that lends itself very well to certain
recipes. Unfortunately, it is hard to replicate sugar-free
maple syrup; however, Know Foods makes a great sugar-
free maple-flavored syrup that is free of those unsavory
sweeteners.
We find it advantageous to have one form of powdered
sweetener and one form of liquid sweetener to use for
sweetening foods and drinks. When making smoothies and our
morning coffee, we prefer liquid stevia, and for baking, we
prefer powdered erythritol.
learn how to lose 10 pounds in a week fast results
Fresh and Dried Herbs and Spices
Using fresh herbs sometimes adds a depth of flavor that you
might not be able to achieve by using dried herbs. Soups are a
good example. However, when a recipe calls for fresh herbs,
feel free to substitute dried herbs if those are all you have on
hand. The ratio for subbing dried herbs for fresh ones is one
part dried herbs to three parts fresh.
Here is a list of the herbs and spices that we use most often in
this book.
Dried herbs:
• Oregano leaves
• Parsley
• Rosemary leaves
Fresh herbs:
• Basil
• Chives
• Cilantro
• Sage
Spices:
• Cayenne pepper
• Chili powder
• Curry powder
• Garlic powder
• Ginger powder
• Ground cinnamon
• Ground cumin
• Onion powder
• Paprika
• Red pepper flakes
learn how to lose 10 pounds in a week fast results
Salt
For cooking and baking, our preferred type of salt is finely
ground pink Himalayan salt.
Nut and Peanut Butters
When purchasing nut and peanut butters, we try to go the
natural route. Natural usually means that no sugars are added.
Many popular brands contain added sugars, upping the carb
count per serving, and many almond butters contain palm oil.
Your best bet when buying peanut or nut butter is to read the
ingredient list to ensure that there are no additives. The only
ingredients you want to see listed are the nut (or peanuts,
which are legumes) or, at most, nuts and salt. Our preferred
brand of peanut butter is Crazy Richard’s. We don’t have a
favorite brand of almond butter; we simply check the ingredient
list to make sure that it’s 100 percent almonds (again, salt is
okay).
In all the recipes in this book that call for peanut or nut butter,
we used unsalted; if you use a salted peanut or nut butter, we
recommend that you reduce the amount of salt called for in the
recipe.
Protein Powders
When a recipe calls for protein powder, whatever you have
on hand will likely work just fine. However, some recipes work
best when you use a whey-based protein powder; for those
recipes, we specify whey protein powder. When purchasing
protein powder, we like to find the lowest-carb option, with at
most 3 grams of carbohydrate per scoop.
• Flavored protein powders are a convenient way to add
flavor and sweetness to recipes. Our favorite all-purpose
product is Isopure zero/low-carb protein powder. It is whey-
based and comes in eleven different flavors (our favorite is
Cookies & Cream). For our Instant Protein Ice Cream (page
240), however, we like to use Quest brand flavored protein
powders; the mix of whey and casein protein in Quest’s
powders gives our ice cream a creamier texture. Aside from
that, the flavor of your protein powder is a personal
preference. Just remember that the flavor of the protein
powder you use generally dictates the flavor of the food you
are making.
• Unflavored protein powders are a great way to up the
protein as well as provide bulk when baking. However,
unflavored protein powder does not have any sweetener in
it. When using the unflavored type, it is advisable to add
sweetener, such as liquid stevia. Our favorite unflavored
protein powder is Isopure’s whey protein isolate.
learn how to lose 10 pounds in a week fast
results
Chocolate
We use two main types of chocolate in our recipes:
unsweetened baking chocolate and sugar-free chocolate chips.
While both types can be found in many grocery stores, baking
chocolate is more widely available.
• Unsweetened baking chocolate is 100 percent cacao;
therefore, it has no sweetness. Although it works great as a
substitute for sugar-free chocolate chips when chopped into
chunks, it generally requires the addition of more
sweetener. We like to add some liquid stevia when working
with baking chocolate to ensure that the finished dish has
the right level of sweetness. We use this product more often
because it is more widely available and less expensive than
other chocolate options.
• Sugar-free chocolate chips are great for cookies,
loaves, and anything baked with chocolate. Be aware,
though, that not all sugar-free chocolate chips are
sweetened with quality keto-friendly sweeteners. Avoid
chocolate chips sweetened with cane sugar, coconut sugar,
or maltitol, as well as any product that uses the bulking
agent maltodextrin. Our favorite brand of sugar-free
chocolate chips is Lily’s, which are sweetened with
erythritol and stevia and contain no added sugar. The
downside is that they are pricey.
Nondairy Milk
When a recipe calls for a nondairy milk, such as almond milk,
you can substitute any type of nondairy milk you have on hand.
Some examples we’ve used in our baking and cooking are
cashew milk, coconut milk, and flax milk. We’ve found that flax
milk most closely resembles cow’s milk in flavor. When
purchasing nondairy milk, always buy the unsweetened variety,
which is the lowest in carbs. You can always add your own
sweetener and extract at home when using the milk in baking
recipes.
Oils and Fats
The oil we use most often is refined coconut oil. It can be
replaced with ghee in any recipe. Both refined coconut oil and
ghee have a high smoke point, which is why they are our
preferred fats for cooking and frying. We also like to use
coconut oil spray for greasing a baking dish or skillet without
adding calories. Coconut oil spray can be found in the baking
section of any grocery store.
Here are some other tips about keto-friendly oils and fats:
• Avocado oil is a great substitute for olive oil, particularly
when you want a more neutral flavor.
• Coconut oil is a great substitute for butter.
• Lard is a handy option for frying.
learn how to lose 10 pounds in a week fast results
Kitchen Tips
Here are some various tips to keep in mind as you prepare
the recipes in this book.
Bring ingredients to room temperature where noted.
When a recipe calls for room-temperature ingredients, it is
important to allow them to warm to room temperature prior to
using them. This ensures that everything will come together
uniformly.
Know that different brands of an ingredient can affect
the outcome of a recipe.
On pages 272 to 274, we’ve provided you with our go-to
brands for the products that we’ve found tend to vary from
brand to brand. These brands are the ones we use most often in
our kitchen and have been the most thoroughly tested. If you
use another brand, the consistency and texture of the finished
dish may vary slightly.
Preheat the oven.
Always preheat your oven and allow it to reach temperature
before putting food in it; otherwise, you might see different
results.
Flatten cookies before baking where indicated.
Some cookies, especially those made with coconut flour,
won’t spread in the oven. When a recipe instructs you to do so,
it is important to flatten the cookies using your hands or a fork
prior to baking. If you don’t flatten them, they may not cook
through fully.
learn how to lose 10 pounds in a week fast results
Remember that oven temperatures vary.
Temperatures vary from one oven to another, so it’s
important to take note of the cook time ranges indicated in the
recipes as well as the descriptions of doneness provided. To
prevent foods from burning, keep an eye on anything you put in
the oven and begin checking for doneness at the start of the
cook time range.
Make your own coconut cream.
You can buy cans of unsweetened coconut cream (we prefer
the Thai Kitchen brand), or you can extract coconut cream from
a can of full-fat coconut milk. To do that, place the can of
coconut milk in the fridge for a full 24 hours. After 24 hours,
open the can and, using a spoon, scoop out the cream, which
will be about the top 90 percent of the contents of the can. The
coconut water will have separated from the cream and will be
left at the bottom of the can. If you accidentally get a little of
the water while scooping out the cream, don’t worry; it is
unlikely that a minimal amount will affect the recipe.
Store foods safely.
We store opened flours and fibers in tightly sealed zip-top
plastic bags, with all the air removed, to keep them as fresh as
possible in our pantry. We store fresh herbs in the refrigerator
for up to a week. Oils and fats can be stored in the fridge as
well, if desired, but will do just fine stored on a shelf in a cool,
dry place.
learn how to lose 10 pounds in a week fast results
FIVE STEPS TO STARTING KETO
1. Cut the carbs.
Cutting carbs could mean gradually reducing them over
weeks or months or cutting them all at once. An important step
is to become aware of how many carbs are in different foods
and to become skilled at tracking your carb intake. A good
starting place for keto is 20 grams of net carbs per day. Net
carbs are simply total carbs minus fiber (both of which are listed
on food packaging in the United States). Keeping that number
under 20 grams per day will put your body into a state of
ketosis. Reducing your carb intake is essential to your success
on keto and should definitely be the first line item that you
address.
TIP:
Develop a rotation of five to seven staple meals. Doing so
allows you to easily know the nutrition of those meals; plus, you
get really good at making those dishes after a while.
2. Brace yourself.
The first week on keto is tough. Your body is doing something
completely new and is trying to rewire circuitry that has been in
place for your entire life. Learning to run on fat is worth it, but
the transition is a rough one. Most people feel extremely
fatigued and low on energy for the first three to five days.
These symptoms can be mitigated with supplementation, but
even then you’re going to feel a bit different. We promise that
this feeling will pass! Around the five- to seven-day mark, “keto
clarity” will hit and you will feel like a new person.
TIP:
Supplementing with electrolytes is important on a keto diet and
can help mitigate some of the adaptation symptoms. Make sure
to get sodium in the form of salt; potassium from avocados,
broccoli, spinach, and supplements; and magnesium from nuts,
spinach, dark chocolate, and supplements. Drinking lots of
water also will help.
3. Add some fat.
Eating high-fat is counterintuitive for all of us who were
raised during the low-fat boom. Our underlying fear of fat will
need to be conquered in our quest for health. When starting a
keto diet, most people are good about cutting carbs, but they
fail to add fat. This results in a high-protein diet, which is going
to leave you with low energy and wanting to run back to your
carbs. Actively seeking out fat will result in much better energy
levels, better hunger control, and an overall more sustainable
diet. Fat is your new energy source. Don’t be afraid of energy!
TIP:
Butter coffee and tea are a huge help for adding fat to your
diet. So are fat bombs. Fat bombs can be eaten in place of
dessert or as a side at meals to increase the fat content.
4. Time your meals.
Once you’ve got the first three steps down, it’s time to do
some fine-tuning. Ditching the standard breakfast, snack, lunch,
snack, dinner, dessert paradigm can be liberating! Don’t
confine yourself to the typical eating windows. Experiment with
different schedules that match up with your lifestyle. Skip
breakfast one day. (“But it’s the most important meal of the
day!” said the cereal company.) Eat just one meal a day. Try
eating nothing but fat until 2 or 3 p.m. (that’s what Megha
does). Don’t be afraid to stray from societal norms around meal
timing. After all, early humans didn’t enter starvation mode if
they didn’t get their potato chips every two hours!
learn how to lose 10 pounds in a week fast results
TIP:
Most people are not hungry when they first wake up. Listen to
your body and eat in accordance with what it’s telling you.
5. Continually improve.
Three years into our keto diet, we continue to improve and
change things up almost weekly. We view it as a challenge: add
something new, see how our bodies react, adjust the next week.
View this as a never-ending process, especially if you’re coming
straight from the standard American diet. If the Big Mac
wrapper from last night is still on the passenger seat of your
car, it’s probably not feasible for you to switch to a completely
whole-foods diet today. Baby steps. Maybe switch out the Big
Mac for a Big Mac with no bun. That’s easy, right? Get yourself
some low-carb ice cream from the grocery store. Do the best
you can. Tomorrow you will be able to do a little bit better. Think
of where you’ll be in a year!
TIP:
Perfection is often the enemy of improvement. If you think you
need to be perfect with your diet from day one, chances are
you’ll never even start. The way we started a keto diet was by
subbing out high-carb options for low-carb replacements and
continually improving from there.
KEYS TO SUCCESS
PREP YOUR MEALS AHEAD
One of Matt’s favorite sayings is “if you fail to prepare, you
prepare to fail,” and preparation is something we strongly
believe in, especially when you’re new to a keto lifestyle! It can
be hard to know what to eat and in what proportions. We’ve
found that the best way to beat this is bulk meal prepping.
Planning and preparing your meals over the weekend for the
week ahead gives you the flexibility to create the menu of your
choosing, being sure to hit your ideal macros each day. It also
makes eating a lot less stressful: all your meals are already
made, so all you have to do is heat and eat!
We understand, however, that you or members of your family
may not like to eat the same thing every day. In that case,
another good option is to prep just one item, like a meat. If you
prepped our Crispy Chicken Thighs with Pan Sauce (page 108)
on Sunday, for example, you could chop up the meat to add to
meals throughout the week, such as salads, a stir-fry, or our
Curry Chicken Salad (page 160). You could even prep our
Raspberry Fiber Muffins (page 78) to take to work for breakfast
or a snack each day!
learn how to lose 10 pounds in a week fast results
Another great option for staying on track is to have something
sweet on hand at all times to satisfy your cravings, or if you
know you’re going to want a sweet treat while you watch the
season premiere of The Bachelor. We like to make our Chocolate
Peanut Butter Fat Bombs to have in the freezer for a sweet
nightcap; the recipe is on our blog, KetoConnect.net.
KEEP IT SIMPLE
Trying creative recipes that you find in cookbooks and on the
internet is great, but you also want to have a handful of simple
recipes that you make on a regular basis. Bacon and eggs, cobb
salads, pan-roasted chicken thighs, and lettuce-wrapped
burgers are the meals we make multiple times a week. We
supplement those staples with more innovative recipes for date
nights, movie nights, or on weekends when we have more time
to cook. When you keep things simple, it’s a lot easier to stay
accountable and look at food more as a fuel source in which you
take pleasure than as your reason for existing. We know that
feeling all too well from our pre-keto days, and we’ve found that
a keto diet comprised of simple yet filling meals has changed
our overall relationship with food. Now, we crave the foods that
make us feel the best!
FIND A PARTNER
Find a partner who will hold you accountable, and maybe
even do the keto diet with you! It could be your significant
other, your friend, your neighbor, or even your child. Luckily, we
have each other, and it has proven to be a huge part of our
success. We push each other to improve a little each day on our
diets and in the gym. And if either of us has a slipup, we lend
each other a hand of motivation, because there is always
something to learn from a setback.
If you find that you aren’t getting the support you need at
home, you can look to social media support groups, such as
those on Facebook and Instagram, to fill your needs. These are
great places to share your struggles, stay accountable, and
learn new tips and recipes.
HAVE A STRONG “WHY”
Ask yourself: Why are you doing this? Why are you making a
change to your diet and a commitment to improve your health?
For us, it was because we wanted more out of life. We were
tired of getting home from work with barely enough energy to
make it to the couch and watch TV for the rest of the night.
Now, we’ve not only started a business but have written a
cookbook, too! Figuring out your “why” is sometimes the easy
part; it’s reminding yourself that the “why” continues to exist
and is your personal source of motivation and power, even on
bad days, that is the hard part. We find that taking a moment
each day, right when we wake up or just before bed, to reflect
on our “why” helps us stay present and focused on what is most
important to us. Doing this with your partner or in a support
group is another great way to remember why you started this
journey.
EAT ALL THE FAT
Eating a lot of fat is the trickiest part for most people who
are just starting a keto diet. All our lives we’ve been taught that
dietary fat is bad for us. We’ve been told that fat leads to high
cholesterol, which leads to clogged arteries and ultimately heart
attacks. But with each passing day, more information is
revealed about how fat can play a vital role in our health and
functionality. We know how hard it can be to make the switch to
eating high-fat because we are former high-carb, low-fat eaters
ourselves. We didn’t let fear stop us from making the change,
and neither should you!
Once you’re able to grasp the high-fat concept—and we believe
it’ll become easier once you start eating a keto diet—things will
seem more doable. You can start by switching from lean cuts of
meat to fattier cuts and topping your salads with olive oil
instead of low-fat dressings. Lots of little changes can make it
easy to increase your daily fat intake. And remember, you don’t
have to be perfect. You’re in this for the long haul, so if you find
it hard to get in all your fats today, just try again tomorrow!
learn how to lose 10 pounds in a week fast results
START PAYING ATTENTION
Before starting a keto diet, we never realized how out-of-tune
we were with our bodies. There was such a disconnect between
our food and how it made us feel. Then we started taking out
carbs and, lo and behold, no two o’clock crash! That’s when it
clicked: the foods we eat have a huge impact on the way we
feel.
Just because a food is keto-friendly or fits into your daily macros
doesn’t necessarily mean that it agrees with your body. A lot of
people have dairy and nut intolerances but choose to eat those
foods anyway. This could mean discomfort and bloating
throughout the day, and who wants to live like that? By paying
attention to what you put into your body and maybe even
keeping track of what you’ve eaten in a journal, you could spot
a trend that you never knew existed. To make eating and life a
lot more intuitive, you need to know which situations and foods
make you feel your best. A healthy inside leads to a healthy
outside!
BEND, DON’T BREAK
We’ve all done it before: dived into a super strict diet for a
few weeks before having a bad day, giving up on it, and
indulging in all the foods we’d been deprived of. Let’s take a
different approach this time. Give in to a craving every once in
a while so that you don’t feel too restricted; just keep it keto.
That way, you can make this diet a more sustainable lifestyle.
Craving chocolate cheesecake? Head to page 210. What about
chewy chocolate chip cookies? We’ve got those, too, on page
222. We want you to have options, and we want you to know
that there is always a healthier substitute for whatever you’re
craving. This is why we’ve dedicated a whole chapter of this
cookbook to decadent desserts!
Eating out or at events can be tough at first, too, but it’s
totally doable. Don’t be scared to ask for substitutions, say no,
or, if you feel guilty about saying no, kindly accept something
and then set it down on the table. This is a time when your
“why” comes into play. Why did you start this journey, and why
do you want to stay on track?
DO YOUR RESEARCH
The keto diet is trendy right now, and for good reason. While
it’s tempting to jump in on a hot trend, we think it’s important
to do some research to get an understanding of the
mechanisms behind the efficacy of the keto diet. Having a good
base of knowledge will make it easier to stick to this way of
eating when you’re tempted to stray.
A lot of people ask us what differentiates keto from other low-
carb diets, such as Atkins. Most of the differences are subtle,
but one huge advantage sets keto apart from all the rest: keto
puts your body in a metabolic state in which it uses ketones
rather than glucose for fuel. Some of the benefits of being in
ketosis are heightened energy, reduced appetite, and greater
mental clarity, which is what makes keto more sustainable than
any other low-carb diet. You won’t feel restricted, and you won’t
feel low on energy. Your body will be using an entirely new fuel
source and will begin functioning more efficiently than ever.
If you’ve never tracked your macros before, familiarizing
yourself with the macronutrient makeup of common keto foods,
such as eggs, avocado, butter, and bacon, could be a great
idea. Knowing that nuts can be very calorie dense and can lead
to a higher carb intake could make it easier for you to control
portions, for example. Everyone’s personal version of keto is
going to look a little different, so doing your research and
experimenting to find the foods you enjoy and make you feel
good is the best way to get a head start! The books and
websites that we’ve included in the “Suggested Reading”
section on page 279 are a great place to start.
learn how to lose 10 pounds in a week fast results
DON’T LET THE NUMBERS BOG YOU
DOWN
A lot of people look to keto for weight loss, and justifiably so.
When you deplete your body of carbohydrates, you naturally
hold less water, hence you experience a sudden drop in weight.
Although weight loss is a good reason to get healthy, keto has a
lot of other benefits, such as heightened energy and focus. So
don’t let the numbers bog you down.
We are big proponents of relying on intuition. When you wake
up, ask yourself how you feel. Do you feel great? If the answer
is yes, then we honestly don’t see a need to jump on the scale
or test your blood. Yes, we all look for reassurance, but more
often than not the scale can have a negative impact on mental
health. It is important to know that your weight fluctuates from
day to day, and it is impossible to gain 2 pounds of fat
overnight. That being said, if you step on the scale and your
weight is up a little—or even down, but not as low as you’d
hoped—it may be time to put the scale away. The endgame is to
feel good every day, have control over your eating, and enjoy
life, so doesn’t it seem a bit unfair to let a number on a scale
dictate your happiness? We recommend working on mastering
each day, focusing more on your daily actions than on the
results.
—Chapter 1—
WAKE-UP CALL
Protein Waffles
Three-Cheese Spinach Frittata
Savory Zucchini Cheddar Waffles
Five-Star Breakfast Sandwich
Chorizo Cotija Morning Muffins
Breakfast Cookies
Overnight Protein Oats
Breakfast Roll-ups
Easy Eggs Benedict
Golden Gate Granola
Sausage and Gruyère Breakfast Casserole
Diner Pancakes
Toasted Oatmeal
Iced Bulletproof Coffee Frappé
Mocha Protein Keto Coffee
learn how to lose 10 pounds in a week fast results
PROTEIN WAFFLES
MAKES: 3 medium-sized waffles (1 per serving) PREP TIME:
5 minutes COOK TIME: 13 minutes
As a “bro” in recovery, Matt is always asking me to make him
recipes using protein powder. He loves having these waffles
with a cup of coffee after an early-morning workout.
WAFFLES:
4 large eggs
¼ cup natural peanut butter
¼ cup mascarpone cheese
¼ cup unsweetened almond milk 1 scoop unflavored whey
protein powder
2 tablespoons unsalted butter, melted
TOPPINGS (OPTIONAL):
Sugar-free maple syrup
Natural peanut butter
Whipped cream
1. Preheat a waffle iron on the medium setting.
2. Put all the waffle ingredients in a large mixing bowl and
combine using a whisk or an electric hand mixer.
3. Open the waffle iron and grease the top and bottom with
coconut oil spray.
4. Using a ½-cup measuring cup, scoop up some of the batter
and pour it into the center of the waffle iron. Close the lid and
allow the waffle to cook for 4 to 4½ minutes, until golden
brown.
5. Repeat with the remaining batter, making a total of 3
waffles.
6. Serve the waffles with maple syrup, peanut butter, and/or
whipped cream, if desired.
TWIST
Matt loves to use these waffles to make a breakfast sandwich!
CALORIES: 409 FAT: 32.7 g PROTEIN: 24.3 g CARBS: 5.3 g FIBER: 2 g
THREE-CHEESE SPINACH FRITTATA
MAKES: one 12-inch frittata (4 servings) PREP TIME: 10
minutes COOK TIME: 40 minutes
Two years ago, when we first started the keto diet, we ate a
frittata for breakfast every morning. Needless to say, we got
pretty good at making them. We usually have a few slices as
soon as it comes out of the oven and save the rest for quick
meals throughout the week.
8 large eggs
¼ cup heavy whipping cream
¼ cup water
⅓ cup shredded cheddar cheese, plus extra for the top
(optional)
⅓ cup shredded Gruyère cheese, plus extra for the top
(optional)
⅓ cup shredded fontina cheese, plus extra for the top
(optional)
½ teaspoon garlic powder
¾ teaspoon pink Himalayan salt
¼ teaspoon ground black pepper
1 (10-ounce) package frozen spinach, thawed and drained
1. Preheat the oven to 350°F and grease a 12-inch cast-iron
skillet with coconut oil spray.
learn how to lose 10 pounds in a week fast results
2. Put the eggs, cream, and water in a large mixing bowl and
whisk to combine. Add the three cheeses and seasonings and
whisk together.
3. Pour the egg mixture into the greased skillet. Add the
spinach, distributing it evenly throughout the skillet. Top with
additional shredded cheese, if desired.
4. Bake for 35 to 40 minutes, until set in the center and lightly
browned on the top. Allow to cool slightly before slicing and
serving.
CALORIES: 148 FAT: 10.6 g PROTEIN: 10.4 g CARBS: 1.4 g FIBER: 0 g
SAVORY ZUCCHINI CHEDDAR
WAFFLES
MAKES: 4 medium-sized waffles (2 per serving) PREP TIME:
10 minutes COOK TIME: 18 minutes
Aside from caring for her pets and eating peanut butter straight
from the jar, Megha’s greatest passion is hiding vegetables in
delicious baked goods. These zucchini cheddar waffles are a
testament to that. They are tasty on their own but can also be
used for sandwiches.
WAFFLES:
2 large zucchini
2 large eggs
⅔ cup shredded cheddar cheese (about 2⅔ ounces)
2 tablespoons coconut flour
½ teaspoon garlic powder
½ teaspoon red pepper flakes
¼ teaspoon pink Himalayan salt
FOR GARNISH (OPTIONAL):
Sour cream
Shredded cheddar cheese
Minced fresh chives
1. Preheat a waffle iron on the medium setting.
learn how to lose 10 pounds in a week fast results
2. Using a vegetable or cheese grater, grate the zucchini into a
large colander set inside of a bowl. Squeeze the excess water
out of the grated zucchini using your hands and drain.
3. Add the eggs and cheese to the drained zucchini and
combine with a fork. Add the coconut flour, garlic powder, red
pepper flakes, and salt and use the fork to combine once more.
4. Open the waffle iron and grease the top and bottom with
coconut oil spray.
5. Using a ⅓-cup measuring cup, scoop out some of the batter,
place it in the center of the waffle iron, and close the lid. Cook
the waffle for 4 to 4½ minutes, until golden brown and fully
cooked through. Use a fork to lift it off the iron and set on a
plate.
6. Repeat with the remaining batter, making a total of 4
waffles. Garnish with sour cream, shredded cheddar cheese,
and/or minced chives, if desired.
CALORIES: 292 FAT: 19 g PROTEIN: 20 g CARBS: 14 g FIBER: 5 g
FIVE-STAR BREAKFAST SANDWICH
MAKES: 1 serving PREP TIME: 10 minutes (not including time
to make bread) COOK TIME: 8 minutes
It might sound odd, but Matt’s all-time favorite food is a
breakfast sandwich. What sets this one apart is the Parmesan
cheese–crusted sandwich bread. It’s a little bit of extra work,
but it’s well worth it!
1 large egg
2 slices The Best Keto Bread (page 76)
2 tablespoons grated Parmesan cheese
1 slice cheddar cheese
1 slice fontina cheese
1 slice bacon, cooked until crispy
3 slices avocado
1. Heat a small skillet over medium-high heat and grease the
surface with coconut oil spray.
2. When the skillet is hot, crack in the egg and cover the pan
with a lid. Cook until the white is cooked through and the yolk is
cooked to your liking. Remove the egg from the skillet and set
aside.
3. Preheat the oven broiler to high.
4. Spray one side of each slice of keto bread with coconut oil
spray, then evenly sprinkle the Parmesan on the sides sprayed
with oil. Press the cheese into the bread with your hands, if
needed.
5. Put the bread in the hot skillet, cheese side down. Cook for 2
minutes, or until the cheese has browned and hardened.
Remove from the skillet and set one slice, cheese side down, on
an oven-safe plate.
6. Layer the cheddar and fontina cheeses on the bread. Cut the
bacon in half and layer on top of the cheese. Place in the oven
and broil for 2 to 3 minutes, until the cheese has melted.
7. Remove from the oven and layer with the cooked egg,
avocado slices, and second slice of bread, putting the
Parmesan-crusted side face up.
CALORIES: 585 FAT: 39.8 g PROTEIN: 28.6 g CARBS: 5.4 g FIBER: 3.1 g
learn how to lose 10 pounds in a week fast results
CHORIZO COTIJA MORNING
MUFFINS
MAKES: 1 dozen muffins (1 per serving) PREP TIME: 15
minutes COOK TIME: 27 minutes
Having these flavorful high-fat, high-fiber muffins to keep you
satisfied between meals can be hugely beneficial when first
switching to a ketogenic diet.
6 ounces fresh (raw) chorizo
½ cup (1 stick) unsalted butter, melted (but not hot)
4 large eggs
¼ cup water
1 cup golden flax meal
¼ cup coconut flour
1 cup shredded Cotija cheese (about 4 ounces), plus extra
for garnish (optional)
1 teaspoon baking powder
½ teaspoon pink Himalayan salt
½ teaspoon garlic powder
½ teaspoon dried oregano leaves
¼ teaspoon chili powder
¼ teaspoon paprika
1. Preheat the oven to 350°F and line a standard-size 12-well
muffin tin with paper liners.
2. Heat a medium-sized skillet over medium-high heat. Slice
open the chorizo links and squeeze the sausage into the hot
skillet. Using a spatula, flatten and break apart the sausage.
Cook for 5 to 7 minutes, until cooked through. Remove the
chorizo from the skillet and set aside on a paper towel–lined
plate.
3. Put the melted butter, eggs, and water in a large bowl and
combine using a whisk. Add the flax meal, coconut flour, Cotija
cheese, baking powder, and seasonings and combine with a
rubber spatula.
4. Add the cooked chorizo and stir to combine. Using a cookie
scoop or spoon, scoop the mixture evenly into the 12 cupcake
liners, filling them nearly to the top.
5. Bake for 20 minutes, or until a toothpick inserted in the
center of a muffin comes out clean. Allow to cool in the pan for
at least 10 minutes before removing and serving. Garnish with
extra Cotija, if desired.
6. Store leftovers in a sealed container or zip-top plastic bag for
up to a week. To reheat, microwave for 30 to 45 seconds.
Unfortunately, these muffins do not freeze well.
CALORIES: 246 FAT: 19.6 g PROTEIN: 12.4 g CARBS: 5.4 g FIBER: 3.5 g
learn how to lose 10 pounds in a week fast results
BREAKFAST COOKIES
MAKES: 6 cookies (1 per serving) PREP TIME: 10 minutes
COOK TIME: 15 minutes
We love to have a grab-and-go breakfast ready for busy days.
These high-fat, high-fiber breakfast cookies are the perfect way
to start your morning. The addition of cacao nibs gives them a
nice chocolaty crunch.
⅔ cup flax meal
2 teaspoons ground cinnamon
½ cup natural peanut butter
¼ cup sugar-free maple syrup
¼ cup unsweetened almond milk
¼ cup cacao nibs
Special equipment:
6-cavity, 3½-inch-diameter silicone muffin top pan
1. Preheat the oven to 300°F and grease a 6-cavity, 3½-inch-
diameter silicone muffin top pan.
2. Put the flax meal and cinnamon in a medium-sized mixing
bowl and blend with a fork. Add the peanut butter, maple syrup,
and almond milk and stir to combine.
3. Using a rubber spatula, fold in the cacao nibs. Scoop the
batter evenly into the muffin top pan, filling each cavity to the
brim.
4. Bake for 15 minutes, or until the cookies are firm. Allow to
cool in the molds for 20 minutes before handling and serving.
5. Store leftovers in a sealed container or zip-top plastic bag for
up to a week. The cookies can be frozen for up to 3 weeks and
are best reheated in a 250°F oven for 10 minutes.
CALORIES: 225 FAT: 17.5 g PROTEIN: 8.7 g CARBS: 12 g FIBER: 7.5 g SUGAR
ALCOHOL: 0.8 g
learn how to lose 10 pounds in a week fast results
OVERNIGHT PROTEIN OATS
MAKES: 1 serving ACTIVE PREP TIME: 5 minutes INACTIVE
PREP TIME: at least 4 hours
We are fans of anything that can be made in a mason jar. This
keto oatmeal is loaded with hemp hearts and chia seeds and
packs over 20 grams of protein. Letting it sit overnight allows
the chia seeds to naturally thicken the oatmeal.
¼ cup heavy whipping cream
3 tablespoons hemp hearts
1 tablespoon chia seeds
1 scoop flavored protein powder of choice
1. Put all the ingredients in a bowl and stir to combine. Cover
with plastic wrap and place in the refrigerator for at least 4
hours or overnight.
2. Serve cold, straight out of the refrigerator, or microwave on
high for 20 to 30 seconds before serving.
NOTE
If you use unflavored protein powder, you can add 7 to 10 drops
of liquid stevia to replace the sweetener found in flavored
protein powder.
CALORIES: 439 FAT: 28 g PROTEIN: 39 g CARBS: 9 g FIBER: 8 g
learn how to lose 10 pounds in a week fast results
BREAKFAST ROLL-UPS
MAKES: 3 roll-ups (1 per serving) PREP TIME: 5 minutes
COOK TIME: 11 minutes
How do you make a breakfast wrap without a tortilla? You use
an egg! You can stuff these egg wraps with any fillings you’d
like, but our favorite is this tasty combination of spinach, bacon,
and goat cheese.
4 large eggs
¼ cup heavy whipping cream
½ teaspoon pink Himalayan salt
6 ounces fresh spinach
6 slices bacon, cooked
2 ounces fresh (soft) goat cheese
1. Heat a 12-inch skillet over low heat and grease with coconut
oil spray.
2. Put the eggs, cream, and salt in a medium-sized bowl and
whisk to combine.
3. Using a ⅓-cup measuring cup, scoop out some of the egg
mixture and place it in the center of the hot skillet. Tilt the pan
so that the mixture coats the entire flat surface. Cover with a lid
and cook for 2 to 3 minutes, until cooked through. Repeat with
the rest of the egg mixture to make a total of 3 egg wraps.
4. Turn the heat up to medium-high, grease the skillet with
coconut oil spray, and add the spinach. Cover with the lid and
cook for 1 to 2 minutes, until the spinach has wilted and cooked
down. Remove from the skillet.
5. Divide the cooked spinach among the 3 egg wraps, placing it
along the edge of each wrap. Place 2 slices of bacon on top of
the spinach in each wrap and divide the goat cheese evenly
among the wraps.
6. Starting at the edge with the fillings, roll each egg wrap into
a burrito, folding in the ends, or simply roll it up like crepe.
Serve warm.
TWIST
Matt also likes to fill his roll-up with avocado and Sriracha sauce
for a spicy start to his day!
CALORIES: 299 FAT: 23.7 g PROTEIN: 20.3 g CARBS: 4.3 g FIBER: 1.7 g
learn how to lose 10 pounds in a week fast results
EASY EGGS BENEDICT
MAKES: 1 serving PREP TIME: 10 minutes (not including time
to make English muffin) COOK TIME: 15 minutes
This is one of those rare comfort foods that needs very few
adjustments to make it keto-friendly. While you could just leave
out the English muffin, we’ve never been the type to settle. Pop
a tasty keto English muffin under this high-fat classic and enjoy!
HOLLANDAISE SAUCE:
(makes enough for 4 servings)
2 large egg yolks
½ cup (1 stick) unsalted butter, melted but not hot
1 teaspoon lemon juice
½ teaspoon distilled white vinegar
½ teaspoon pink Himalayan salt
2 large eggs
1 tablespoon distilled white vinegar
1 English Muffin (page 70)
2 slices Canadian bacon, cooked
1. Make the hollandaise: Put all the ingredients for the
hollandaise in a tall, narrow cup that is wide enough to fit an
immersion blender and blend until smooth. Set aside.
2. Poach the eggs: Fill a saucepan halfway full of water. Add the
vinegar and bring to a simmer over medium heat.
3. Crack each egg into a small ramekin and set aside. Once the
water reaches a simmer, use a spoon to quickly swirl the water
in one direction until it’s spinning like a whirlpool.
4. Drop an egg into the center of the whirlpool and cook for 3 to
5 minutes, until the white is fully cooked. Remove with a slotted
spoon and immediately place in an ice bath. Repeat the process
with the second egg.
5. To assemble, slice the muffin in half and toast in a toaster or
in the oven. Lay the halves on a plate. Top each half with a slice
of Canadian bacon and a poached egg. Drizzle on one-quarter
of the hollandaise sauce. Serve immediately.
NOTES
We have found that our one-step method of making hollandaise
differs from most, but it’s a quick way to whip up a delicious
sauce on your busiest mornings. Feel free to improvise with
your preferred method.
This recipe makes more hollandaise than you will need for one
serving of Eggs Benedict. Store leftover sauce in a sealed
container in the refrigerator for up to 3 days. Reheat in the
microwave for 30 to 45 seconds or in a saucepan on the
stovetop over medium-low heat.
CALORIES: 651 FAT: 54.8 g PROTEIN: 26.3 g CARBS: 14.4 g FIBER: 9.5 g
learn how to lose 10 pounds in a week fast results
GOLDEN GATE GRANOLA
MAKES: 4 cups (¼ cup per serving) ACTIVE PREP TIME: 10
minutes INACTIVE PREP TIME: 1 hour COOK TIME: 1 hour
Whenever we go on a weekend trip, we always make a big
batch of granola. It’s a perfect quick snack that you can feel
good about.
¼ cup (½ stick) unsalted butter
¼ cup powdered erythritol
¼ teaspoon plus 10 drops of liquid stevia
1 teaspoon ground cinnamon
½ teaspoon vanilla extract
1 cup raw almonds
1 cup raw hazelnuts
1 cup unsweetened coconut flakes
½ cup raw pumpkin seeds
¼ cup hemp hearts
1. Preheat the oven to 275°F and line a rimmed baking sheet
with parchment paper or a silicone baking mat.
2. In a small saucepan over medium heat, combine the butter,
erythritol, stevia, cinnamon, and vanilla extract. Stirring
occasionally, heat until the butter and erythritol are melted and
dissolved. Remove from the heat and set aside.
3. In a large bowl, combine the nuts, coconut flakes, pumpkin
seeds, and hemp hearts. Pour the melted butter mixture over
the nut mixture and toss using a rubber spatula, making sure
that everything is well coated.
4. Pour the granola onto the lined baking sheet and spread it
out into an even layer. Bake for 1 hour, stirring every 15
minutes or so, until dark golden brown.
5. Let the granola cool in the pan for at least 1 hour to allow it
to harden and form clumps. Store in a sealed jar or zip-top
plastic bag for up to 3 weeks. It does not need to be
refrigerated.
TIP
This is a great snack for whenever you’re on the go. Make it for
your kids, for your next road trip, or just to keep at your desk or
in your purse for times when you need a snack!
CALORIES: 200 FAT: 18.1 g PROTEIN: 4.9 g CARBS: 5.4 g FIBER: 3.3 g SUGAR
ALCOHOL: 3 g
learn how to lose 10 pounds in a week fast results
SAUSAGE AND GRUYÈRE
BREAKFAST CASSEROLE
MAKES: 8 servings PREP TIME: 15 minutes COOK TIME: 50
minutes
Breakfast can get boring, especially when eggs are often on the
menu. We quickly learned that breakfast casseroles make great
use of eggs while transforming them into something exciting
and delicious. Instead of using store-bought bulk breakfast
sausage, we season fresh ground pork with spices and fresh
herbs. Add eggs, cream, and Gruyère, and you have a hearty
and filling breakfast casserole dish! Make it on the weekends for
brunch or to enjoy on weekday mornings before you head off to
work.
¾ pound unseasoned ground pork
1 bunch scallions, chopped
½ teaspoon red pepper flakes
Pinch of ground cloves
1 teaspoon pink Himalayan salt
¼ teaspoon ground black pepper
1 tablespoon chopped fresh sage
1 teaspoon chopped fresh marjoram
8 large eggs
¼ cup heavy whipping cream
1¼ cups shredded Gruyère cheese (about 5 ounces), divided
1. Preheat the oven to 350°F and grease a 1¾-quart baking
dish with coconut oil spray.
2. In a large skillet over medium-high heat, partially cook the
pork, stirring to break it up, about 5 minutes. Add the scallions,
red pepper flakes, cloves, salt, and pepper and stir to combine.
Continue to cook until the pork is fully cooked and browned, an
additional 5 minutes.
3. Add the sage and marjoram and stir to combine—now you
have your own seasoned breakfast sausage! Pour the cooked
sausage into the greased baking dish.
4. In a bowl, whisk together the eggs, cream, and 1 cup of the
shredded cheese. Pour over the sausage in the casserole dish.
5. Sprinkle the remaining Gruyère over the top of the casserole
and bake for 40 minutes, or until the eggs are fully set in the
center and the top is golden brown.
NOTE
You can stir the sausage and egg mixture before baking it if you
want an even distribution of all the ingredients.
CALORIES: 282 FAT: 22 g PROTEIN: 18.6 g CARBS: 1.1 g FIBER: 0 g
learn how to lose 10 pounds in a week fast results
DINER PANCAKES
MAKES: eight 5- to 6-inch pancakes (2 per serving) PREP
TIME: 10 minutes COOK TIME: 28 minutes
This is your classic diner pancake in low-carb form! The
combination of coconut flour and golden flax meal gives these
pancakes just the right amount of fluff and texture, along with a
great flavor to bring you back to your childhood days of Sunday
brunch. We like to top them with butter and sugar-free maple
syrup.
¼ cup plus 2 tablespoons coconut flour
¼ cup finely ground golden flax meal
1 teaspoon baking powder
¼ teaspoon pink Himalayan salt
¼ cup (½ stick) unsalted butter, melted but not hot
½ teaspoon vanilla extract
15 drops of liquid stevia
6 large eggs
¾ cup unsweetened coconut milk or almond milk
FOR SERVING:
Butter
Sugar-free maple syrup
1. In a small mixing bowl, whisk together the coconut flour, flax
meal, baking powder, and salt. Set aside.
2. Put the melted butter, vanilla extract, and stevia in a large
mixing bowl. While whisking, add the eggs one at a time.
Continue whisking for 60 to 90 seconds, until the mixture is airy
and fully combined.
3. Add the milk to the egg mixture and whisk to combine.
4. Add the dry ingredients to the wet ingredients in 2 batches,
whisking until fully combined. Allow the batter to sit for 5
minutes before cooking.
5. Heat a nonstick skillet over medium-low heat. Grease the
pan with coconut oil spray.
6. Using a ¼-cup measuring cup, scoop up some of the batter
and pour it into the center of the skillet. If the batter does not
spread out on its own, use a spoon to spread it out until it is 5
to 6 inches in diameter. (Note: You can make the pancakes any
size you want; just keep in mind that changing the size will
affect the yield and possibly the cooking time.) The pancake is
ready to flip when bubbles start to form on the surface, about 3
minutes. Flip and cook for another minute, until golden brown
on both sides.
7. Repeat this process with the remaining batter, making a total
of 8 pancakes. Grease the pan after each pancake. To keep the
pancakes warm while the rest are cooking, place them on a
baking sheet in a 200°F oven.
8. Serve the pancakes warm with butter and sugar-free maple
syrup.
9. Allow to cool before storing in a sealed container in the
refrigerator for up to 5 days. Reheat in a preheated 200°F oven
for 15 minutes or in the microwave for 30 seconds. Sadly, these
pancakes do not freeze well.
TWIST
learn how to lose 10 pounds in a week fast results
Add some sugar-free chocolate chips or a handful of berries for
a fun take on this classic recipe.
NOTES
The ideal texture of the flax meal for this recipe is very finely
ground. It should be powdery and almost as fine as flour. If the
flax meal you have at home is not finely ground, pulse it in a
coffee grinder until it’s very fine. The finer the flax meal, the
fluffier your pancakes will be.
To make these pancakes nut-free, use coconut milk.
CALORIES: 298 FAT: 23.5 g PROTEIN: 12.5 g CARBS: 8.8 g FIBER: 5.5 g
TOASTED OATMEAL
MAKES: roughly 3 cups (½ cup per serving) ACTIVE PREP
TIME: 7 minutes INACTIVE PREP TIME: 30 minutes
Sadly, oatmeal made with oats is the furthest thing from keto-
friendly, and we miss it just as much as you probably do! So we
created the perfect combination of chia seeds, toasted coconut
flakes, and nuts to create a low-carb version of oatmeal that
some even say is better than the real thing! This is our favorite
make-ahead breakfast when we know we have a busy week
coming up or just simply want a change from good old bacon
and eggs!
¼ cup raw almonds
¼ cup raw pecans
½ cup unsweetened coconut flakes
½ cup heavy whipping cream or coconut cream (see page
23)
¼ cup chia seeds
¾ cup water
1 teaspoon ground cinnamon
½ teaspoon vanilla extract
¼ teaspoon maple extract (optional)
15 drops of liquid stevia
1. Finely chop the nuts.
2. Toast the nuts and coconut flakes in a medium-sized nonstick
skillet over low heat, stirring continuously, for about 5 minutes,
until fragrant and lightly golden. Pour the toasted nuts and
coconut flakes into a large mixing bowl.
3. Add the rest of the ingredients to the mixing bowl and gently
stir everything together. Refrigerate for 30 minutes to allow the
chia seeds to expand and the oatmeal to thicken prior to
serving.
4. Serve the oatmeal straight out of the refrigerator or
microwave for 1 minute and serve warm. We prefer it warm!
5. Store in a sealed mason jar or other container in the
refrigerator for up to a week.
NOTES
Any kind of nuts can be used in this recipe. The maple extract is
optional, but it greatly adds to the flavor, and we do not advise
leaving it out! The sweetness can easily be changed by
adjusting the amount of stevia you add.
To make this oatmeal dairy-free, use coconut cream instead of
heavy whipping cream.
CALORIES: 266 FAT: 24.8 g PROTEIN: 5.2 g CARBS: 9.6 g FIBER: 5.8 g
learn how to lose 10 pounds in a week fast results
ICED BULLETPROOF COFFEE
FRAPPÉ
MAKES: 1 serving PREP TIME: 5 minutes COOK TIME: 1
minute
We love starting our days with a frothy cup of bulletproof coffee.
However, on warm summer mornings, we sometimes want
those same healthy fats in a cool and refreshing iced coffee,
pureed to smooth, creamy perfection in a blender.
8 ounces brewed coffee, cold
1 tablespoon heavy whipping cream
1 tablespoon MCT oil
1 scoop unflavored collagen peptides
15 drops of liquid stevia
¼ teaspoon ground cinnamon
¼ teaspoon xanthan gum
6 or 7 ice cubes
TOPPINGS (OPTIONAL):
Whipped cream
Ground cinnamon
Place all the ingredients in a blender and blend until smooth.
Pour into a 16-ounce glass and top with whipped cream and
cinnamon, if desired.
NOTES
If you are new to using MCT oil, you may want to start with 1
teaspoon and work your way up to 1 tablespoon because it can
cause digestive issues and discomfort. You can also replace the
MCT oil with 2 tablespoons of heavy whipping cream, which will
decrease the fat by 4 grams and increase the carbs by 1 gram.
CALORIES: 220 FAT: 20 g PROTEIN: 10 g CARBS: 0.3 g FIBER: 0.1 g
learn how to lose 10 pounds in a week fast results
MOCHA PROTEIN KETO COFFEE
MAKES: 1 serving PREP TIME: 5 minutes COOK TIME: 1
minute
We live for our morning coffees. We make it a point to spend
time with our cat, Miley, and our dog, Julius, every morning
while we drink our coffee. On days when we have to rush out of
the house, we make this coffee as a meal replacement. Not only
is it delicious, but it has the fat and protein we need to power us
through the day.
12 ounces hot brewed coffee
2 tablespoons heavy whipping cream
1 tablespoon unsalted butter
1 tablespoon cocoa powder
1 scoop chocolate-flavored protein powder
1 scoop unflavored collagen peptides
10 drops of liquid stevia
Place all the ingredients in a blender and blend until smooth
and frothy. Pour into a 16-ounce mug and serve immediately, or
pour it into a Thermos and take it on the go!
TWIST
Megha likes to change up the protein powder to alter the flavor
of her coffee. Her favorite is Isopure’s cookies and cream flavor,
which turns this into a cookies and cream protein coffee!
CALORIES: 361 FAT: 24 g PROTEIN: 37 g CARBS: 4 g FIBER: 2 g
learn how to lose 10 pounds in a week fast results
—Chapter 2—
FRESH BAKED
English Muffins
Cheddar and Thyme Cornbread
Microwave Bread
The Best Keto Bread
Raspberry Fiber Muffins
Cheddar Jalapeño Bagels
Low-Carb Dinner Rolls
Cinnamon Walnut Scones
Chocolate Chip Zucchini Bread
Cheesy Chicken Breadsticks
Navajo Fry Bread
Coconut Flour Tortillas
learn how to lose 10 pounds in a week fast results
ENGLISH MUFFINS
MAKES: 8 muffins (1 per serving) PREP TIME: 10 minutes
COOK TIME: 50 minutes
True story: Matt used to make homemade English muffins every
weekend when he was away at college, so it was only a matter
of time before we figured out how to make a good keto version.
We love using these for egg sandwiches or toasting and
spreading them with peanut butter.
½ cup psyllium husk powder
½ cup coconut flour
2 teaspoons baking powder
1 tablespoon active dry yeast (optional, for flavor)
8 large eggs
½ cup avocado oil
Butter, for serving
1. Preheat the oven to 300°F.
2. Put the psyllium husk powder, coconut flour, and baking
powder in a medium-sized bowl and mix well with a fork. If
desired, add the yeast for flavor and whisk to combine.
3. Put the eggs and oil in a large bowl and combine with a hand
mixer. Add the dry ingredients in 2 parts and combine with the
hand mixer after each addition. Allow the dough to rest for 5
minutes.
4. While the dough is resting, heat a 12-inch cast-iron skillet
over medium heat and grease with coconut oil spray.
5. Using your hands, form the dough into 8 round English
muffin shapes, about 3 inches in diameter and ½ inch thick. If
the dough is not able to be formed by hand, slowly add up to 3
tablespoons more coconut flour until the dough is easy to
shape. Because coconut flour is highly absorptive, it is
important to add a little at a time, mix, and then judge the
consistency before adding more.
6. Place half of the English muffins in the hot skillet and cook
for 5 minutes on each side, or until golden brown. Remove the
muffins from the pan and set aside. Repeat with the remaining
half of the muffins, then return the muffins you set aside to the
pan.
7. Transfer the skillet to the oven and bake the muffins for 15
minutes, until browned and firm to touch. Transfer the muffins
to a plate or wire baking rack and let cool for 10 minutes before
serving.
8. Store leftovers in the refrigerator for up to a week or freeze
for up to a month.
TIP
Our favorite way to eat these is to cut an English muffin in half,
spread butter on each cut side, and toast butter side down in a
nonstick skillet for 2 to 3 minutes, until browned.
CALORIES: 251 FAT: 19.8 g PROTEIN: 7.3 g CARBS: 12.4 g FIBER: 9.5 g
CHEDDAR AND THYME
CORNBREAD
MAKES: one 8-inch round loaf (8 servings) PREP TIME: 15
minutes COOK TIME: 25 minutes
Is there anything better than a thick slice of cornbread? The
secret ingredient in this version is baby corn. Baby corn is very
low in carbs and has a subtle corn flavor, but it greatly adds to
the texture of this keto cornbread.
¾ cup baby corn
1½ cups blanched almond flour
1 tablespoon dried thyme leaves
1 tablespoon baking powder
¼ teaspoon cream of tartar
¼ teaspoon pink Himalayan salt
4 large eggs, room temperature
10 drops of liquid stevia
¼ cup (½ stick) unsalted butter, melted but not hot
⅔ cup shredded cheddar cheese (about 2⅔ ounces)
1. Preheat the oven to 375°F and grease an 8-inch round cake
pan with coconut oil spray.
2. Put the baby corn in a food processor and lightly pulse until
the corn is chopped but still chunky; do not puree. Set aside.
3. Put the almond flour, thyme, baking powder, cream of tartar,
and salt in a medium-sized bowl and mix well with a fork.
4. Put the eggs and stevia in a large mixing bowl and beat with
a hand mixer until combined. With the mixer running, slowly
pour in the melted butter, continuing to mix until all the butter
is added.
5. Add half of the almond flour mixture to the egg mixture and
mix to combine. Add the second half and continue mixing until
all the clumps are gone.
6. Fold the cheddar cheese and baby corn into the batter with a
rubber spatula.
7. Pour the batter into the greased cake pan and smooth the
top. Bake for 25 minutes, until a toothpick comes out clean
when inserted in the center. Allow to cool in the pan for 15
minutes, then cut into 8 slices.
8. Store leftovers in the refrigerator for up to a week.
TWIST
Matt likes to fold in minced jalapeño peppers for a spicy cheese
cornbread.
CALORIES: 249 FAT: 21.4 g PROTEIN: 10.6 g CARBS: 5.8 g FIBER: 2.9 g
learn how to lose 10 pounds in a week fast results
MICROWAVE BREAD
MAKES: 1 serving PREP TIME: 2 to 3 minutes COOK TIME:
about 1½ minutes
You’ve got all the fixings for a tasty sandwich in the fridge, but
you’re missing the bread? Whip up this microwave bread in
under five minutes and you won’t be disappointed!
1 tablespoon unsalted butter
1½ tablespoons blanched almond flour
1½ tablespoons golden flax meal
1 large egg
½ teaspoon baking powder
1. Put the butter in a wide 12-ounce coffee cup or microwave-
safe ramekin. Microwave on high for 20 to 30 seconds, until the
butter is melted.
2. Add the remaining ingredients to the melted butter and mix
with a fork. Microwave on high for 60 to 70 seconds, until the
bread is cooked through and set in the center.
3. Allow to cool in the mug for 2 to 3 minutes, then run a knife
around the edge to release the bread. Slice in half and enjoy.
TWIST
Matt never waits for his bread to cool because hot bread is
optimal for smothering in peanut butter!
CALORIES: 285 FAT: 25 g PROTEIN: 10 g CARBS: 6 g FIBER: 4 g
learn how to lose 10 pounds in a week fast results
THE BEST KETO BREAD
MAKES: one 8 by 4-inch loaf (16 servings) PREP TIME: 10
minutes COOK TIME: 30 minutes
This is by far the most popular recipe on our blog. Thousands of
people have made this bread. When we started writing this
cookbook, it was the first recipe we decided to include. It’s the
perfect combination of simplicity and quality taste.
6 large eggs
¼ teaspoon cream of tartar
1½ cups blanched almond flour
¼ cup (½ stick) unsalted butter, melted but not hot
1 tablespoon baking powder
½ teaspoon pink Himalayan salt
10 drops of liquid stevia
1. Preheat the oven to 375°F and grease an 8 by 4-inch loaf
pan with coconut oil spray.
2. Separate the eggs. Put the whites and cream of tartar in a
large mixing bowl and beat with a hand mixer on high speed
until stiff peaks form.
3. Put the egg yolks, almond flour, melted butter, baking
powder, salt, stevia, and one-third of the beaten egg whites in
another large mixing bowl. Mix with the hand mixer until you
have a thick, uniform dough.
4. Using a rubber spatula, fold in the remaining whipped egg
whites in 2 parts.
5. Pour the batter into the greased loaf pan and bake for 30
minutes, until the bread is set in the center and a toothpick
inserted in the center comes out clean. Allow to cool in the pan
for 10 minutes before removing and slicing.
6. Store leftovers in a zip-top plastic bag for up to 5 days or
freeze for up to 2 weeks. It is best reheated in the oven.
CALORIES: 112 FAT: 9.8 g PROTEIN: 4.6 g CARBS: 2.4 g FIBER: 1.1 g
learn how to lose 10 pounds in a week fast results
RASPBERRY FIBER MUFFINS
MAKES: 1 dozen muffins (1 per serving) PREP TIME: 15
minutes COOK TIME: 17 minutes
When Matt first learned that Megha’s favorite type of muffin is a
bran muffin, he made it his mission to come up with an
awesome keto version, and this is it. We always bring these
muffins with us on our weekend hikes.
1 cup flax meal
1 cup oat fiber
2 teaspoons ground cinnamon
1 teaspoon baking powder
½ teaspoon baking soda
½ teaspoon pink Himalayan salt
¼ cup (½ stick) unsalted butter
¼ cup granular erythritol
4 large eggs, room temperature
½ cup heavy whipping cream
½ teaspoon vanilla extract
½ cup fresh raspberries, divided
1. Preheat the oven to 350°F. Line a standard-size 12-well
muffin tin with paper liners, then spray the liners with coconut
oil spray.
2. Put the flax meal, oat fiber, cinnamon, baking powder,
baking soda, and salt in a medium-sized bowl and mix well with
a fork. Set aside.
3. Put the butter in a large microwave-safe bowl and microwave
on high for 30 seconds, or until melted. Add the erythritol and
beat with a hand mixer until fully combined. Add the eggs,
cream, and vanilla extract and mix with the hand mixer until
fully combined.
4. Add the dry ingredients to the butter mixture and mix using
a whisk until a thick batter forms.
5. Set aside 3 large raspberries for garnish, if desired. Using a
rubber spatula, fold the rest of the raspberries into the batter.
6. Distribute the batter evenly among the muffin liners, filling
them about three-quarters full. If you have set aside
raspberries, cut each of the reserved berries into fourths and
place a fourth on top of each muffin.
7. Bake for 15 to 17 minutes, until a toothpick inserted in the
middle of a muffin comes out clean. Allow to cool in the pan for
15 minutes before removing and serving.
8. Store leftovers in the refrigerator for up to a week.
TWIST
Megha likes to warm her muffin, cut it in half, and top it with 1
tablespoon of butter to get her mornings off to a fibrous and
fatty start!
CALORIES: 131 FAT: 10.4 g PROTEIN: 4.2 g CARBS: 11 g FIBER: 9.8 g SUGAR
ALCOHOL: 4g
learn how to lose 10 pounds in a week fast results
CHEDDAR JALAPEÑO BAGELS
MAKES: 6 bagels (1 per serving) PREP TIME: 10 minutes
COOK TIME: 18 minutes
For us, part of the fun of being keto is re-creating all our favorite
foods in a healthier way. These bagels are the perfect example.
2 jalapeño peppers
3 scoops unflavored whey protein powder
1½ teaspoons baking powder
¾ teaspoon garlic powder
¾ teaspoon onion powder
½ teaspoon pink Himalayan salt
5 ounces cream cheese (10 tablespoons), room temperature
¼ cup (½ stick) unsalted butter, room temperature
1 large egg, room temperature
¾ cup shredded cheddar cheese (about 3 ounces), divided
Cream cheese, for serving (optional)
Special equipment:
6-well silicone donut pan
1. Preheat the oven to 350°F and grease a 6-well silicone donut
pan with coconut oil spray.
2. Mince one of the jalapeño peppers and slice the other
crosswise into rounds.
3. Put the protein powder, baking powder, garlic powder, onion
powder, and salt in a medium-sized bowl and mix well with a
fork.
4. Put the cream cheese, butter, and egg in a large bowl and
cream with a hand mixer until there are no clumps. Add the dry
ingredients and continue to mix with the hand mixer until a
thick batter has formed.
5. Add ¼ cup of the shredded cheese and the minced jalapeño
to the batter and fold in with a rubber spatula.
6. Evenly distribute the batter among the greased wells of the
donut pan, filling them nearly to the top. Top with the remaining
1/2 cup of shredded cheese and the jalapeño slices. Bake for 18
minutes, or until a toothpick inserted in the center of a bagel
comes out clean.
7. Allow to cool in the pan for 10 minutes before removing. To
serve, slice in half and spread with cream cheese, if desired.
8. Store leftovers in the refrigerator for up to a week.
TWIST
Megha always makes sandwiches using these bagels, some
sliced cooked chicken thighs, and a heaping dollop of
guacamole!
CALORIES: 334 FAT: 25.5 g PROTEIN: 22.8 g CARBS: 2.8 g FIBER: 0.5 g
learn how to lose 10 pounds in a week fast results
LOW-CARB DINNER ROLLS
MAKES: 10 rolls (1 per serving) PREP TIME: 15 minutes COOK
TIME: 35 minutes
If you’ve tried a bunch of different low-carb bread recipes and
you haven’t found anything with a true bread texture, then let
us introduce you to your new favorite recipe. The combination
of coconut flour and psyllium husk powder gives these rolls the
doughy, fluffy consistency you’ve been looking for.
½ cup coconut flour
2 tablespoons psyllium husk powder
½ teaspoon baking powder
¼ teaspoon pink Himalayan salt
4 large eggs, room temperature
¾ cup water
¼ cup (½ stick) unsalted butter, melted but not hot
1. Preheat the oven to 350°F and line a baking sheet with
parchment paper.
2. Put the coconut flour, psyllium husk powder, baking powder,
and salt in a medium-sized bowl and mix well with a fork.
3. Put the eggs in a large bowl and beat with a hand mixer until
combined and frothy on top. Add the water, then slowly add the
melted butter while mixing with the hand mixer.
4. Add the dry ingredients to the wet ingredients in 2 parts,
combining with the hand mixer after each addition.
learn how to lose 10 pounds in a week fast results
5. Shape the dough by hand into 10 rolls, about 2 inches in
diameter. If the dough is not shapeable, add more coconut flour
a little bit at a time until the dough is easy to shape. Place on
the lined baking sheet, about 3 inches apart, and bake for 30 to
35 minutes, until the rolls are firm and slightly browned on top.
Allow to cool on the baking sheet for 10 minutes before serving.
6. Store leftovers in the refrigerator for up to a week.
CALORIES: 99 FAT: 7.1 g PROTEIN: 3.3 g CARBS: 4.9 g FIBER: 3.4 g
CINNAMON WALNUT SCONES
MAKES: 8 scones (1 per serving) PREP TIME: 15 minutes
COOK TIME: 40 minutes
A few years ago, you could often find either of us hovering
around the pastry display case at the local coffee shop saying,
“I’ll start my diet tomorrow.” These scones have single-
handedly changed that!
¾ cup coconut flour
¼ cup plus 2 tablespoons granular erythritol
1 teaspoon ground cinnamon, plus extra for garnish
(optional)
½ teaspoon baking powder
¼ teaspoon pink Himalayan salt
4 large eggs, room temperature
¼ cup extra-virgin olive oil
⅓ cup raw walnuts, chopped, plus extra for garnish
(optional)
1. Preheat the oven to 350°F and line a baking sheet with
parchment paper.
2. Put the coconut flour, erythritol, cinnamon, baking powder,
and salt in a medium-sized bowl and mix well with a fork.
3. Put the eggs and olive oil in a large bowl and combine using
a hand mixer. Add the dry ingredients in 2 parts, combining
after each addition with the hand mixer.
4. Fold in the walnuts with a rubber spatula until they are
evenly distributed.
5. Form the dough into a 1-inch-thick circle on the lined baking
sheet. Cut into 8 wedges and separate slightly. If desired,
garnish with additional chopped walnuts, gently pressing them
into the dough.
6. Bake for 35 to 40 minutes, until the edges are lightly
browned.
7. Remove from the oven and, if desired, dust with cinnamon.
Allow to cool on the baking sheet for 10 minutes before serving.
8. Store leftovers in the refrigerator for up to a week.
CALORIES: 174 FAT: 14.0 g PROTEIN: 5.5 g CARBS: 7 g FIBER: 4.3 g SUGAR
ALCOHOL: 9 g
learn how to lose 10 pounds in a week fast results
CHOCOLATE CHIP ZUCCHINI
BREAD
MAKES: one 8 by 4-inch loaf (12 servings) PREP TIME: 15
minutes COOK TIME: 50 minutes
Baking with zucchini is great for a couple of reasons. Not only is
it a good way to sneak some veggies into your diet, but it also
makes breads incredibly moist.
1 loosely packed cup grated zucchini
6 large eggs, room temperature
½ cup extra-virgin olive oil
1 teaspoon vanilla extract
½ teaspoon liquid stevia
1 cup coconut flour
1 teaspoon baking powder
½ cup sugar-free chocolate chips
1. Preheat the oven to 350°F and line an 8 by 4-inch loaf pan
with parchment paper, leaving some paper overhanging for
easy removal of the bread.
2. Place the grated zucchini in a large bowl. Add the eggs, olive
oil, vanilla extract, and stevia. Combine using a hand mixer.
3. Add the coconut flour and baking powder and combine with
the hand mixer until the ingredients are fully incorporated and
there are no clumps of batter remaining.
4. Using a rubber spatula, fold in the chocolate chips.
5. Pour the batter into the loaf pan, smooth the top, and bake
for 50 minutes, or until a toothpick inserted in the center of the
loaf comes out clean.
6. Allow to cool in the pan for 30 minutes before removing and
slicing.
7. Store leftovers in the refrigerator for up to a week.
TWIST
For a decadent Sunday brunch treat, frost this bread with the
Vanilla Buttercream Frosting from the Protein Cake recipe on
page 220!
CALORIES: 170 FAT: 13.7 g PROTEIN: 4.8 g CARBS: 7 g FIBER: 3.9 g SUGAR
ALCOHOL: 0.7 g
CHEESY CHICKEN BREADSTICKS
MAKES: 2 servings PREP TIME: 10 minutes COOK TIME: 25
minutes
You have to get creative when trying to turn some of your
favorite foods into keto staples. This unique combination of
chicken and cheese makes the lowest-carb breadsticks we’ve
ever tried.
2 (5-ounce) cans chunk chicken breast in water
¼ cup grated Parmesan cheese
1 large egg
¼ cup shredded cheddar cheese
¼ cup shredded mozzarella cheese
½ teaspoon dried oregano leaves
½ teaspoon garlic powder
½ teaspoon pink Himalayan salt
Low-carb marinara sauce, for serving
1. Preheat the oven to 350°F and line a baking sheet with
parchment paper.
2. Drain the chicken and place it on the parchment-lined baking
sheet. Use a fork to spread it into an even layer. Bake for 10
minutes, until dried out.
3. Put the dried-out chicken in a medium-sized bowl, then add
the Parmesan and egg and mix with a fork.
learn how to lose 10 pounds in a week fast results
4. Pour the mixture back onto the parchment paper, top with
another piece of parchment, and roll out using a rolling pin into
an oval, about 8 by 5 inches.
5. Bake for 5 minutes. Top the chicken mixture with the
cheddar cheese, mozzarella cheese, oregano, garlic powder,
and salt. Bake for an additional 10 minutes, until the cheese has
melted.
6. Allow to cool slightly before cutting. Slice crosswise into 8
breadsticks. Serve with marinara sauce, if desired.
TWIST
Megha likes to top these heavenly cheese sticks with sliced red
onions (her favorite vegetable) and sliced mushrooms (Matt’s
favorite vegetable) prior to baking! We like Rao’s marinara
sauce for dipping.
CALORIES: 300 FAT: 16 g PROTEIN: 37.5 g CARBS: 1.5 g FIBER: 0 g
learn how to lose 10 pounds in a week fast results
NAVAJO FRY BREAD
MAKES: 8 breads (1 per serving) PREP TIME: 15 minutes
COOK TIME: about 50 minutes
We love learning about cuisines from different cultures and
incorporating elements from them into our own cooking. This
simple fried bread, which was developed in the southwestern
United States by the Navajo people, is perfect for loading up
with chicken breast, mozzarella cheese, chopped parsley, and
Sriracha sauce!
1 cup coconut oil, for frying
½ cup coconut flour
¼ cup psyllium husk powder
½ teaspoon baking powder
¼ teaspoon pink Himalayan salt
¾ cup water
¼ cup extra-virgin olive oil
4 large eggs, room temperature
1. Heat the coconut oil in an 8-inch skillet over medium-high
heat to between 330°F and 345°F. Use a deep-fry thermometer
to read the oil temperature.
2. While the oil is heating, put the coconut flour, psyllium husk
powder, baking powder, and salt in a medium-sized bowl and
mix well with a fork.
3. Put the water, olive oil, and eggs in another large bowl and
combine with a hand mixer. Add the dry ingredients to the wet
ingredients in 2 parts, mixing after each addition. Once
combined, allow the dough to rest for 5 minutes.
4. Divide the dough into 8 equal-sized pieces. Using your
hands, form each piece of dough into a ball, then press it
between your hands into a thin disc. The dough should be as
thin as possible without breaking. If the dough is too sticky to
form by hand, use extra coconut flour when shaping the
flatbreads.
5. Place one flatbread in the oil. Fry for 2 to 4 minutes per side,
until dark brown. Remove from the oil and set on a paper towel
to drain while you fry the remaining flatbreads one at a time.
Allow to cool for 2 minutes before serving.
6. Store in a zip-top plastic bag in the refrigerator for up to a
week. These are best reheated in a 250°F oven for 10 minutes.
NOTE
The nutritional information can’t be precisely pinpointed due to
the oil used for frying. We have provided information based on
the bread itself, but the fat will vary based on the amount of oil
that the bread absorbs.
plus oil from frying
CALORIES: 140 FAT: 10.1 g PROTEIN: 4.1 g CARBS: 8.1 g FIBER: 6 g
COCONUT FLOUR TORTILLAS
MAKES: 16 small tortillas (4 per serving) PREP TIME: 5
minutes COOK TIME: 1½ to 2 hours
Who’s ready for DIY taco night? Filling these easy-to-make
tortillas with all kinds of delicious ingredients is a weekly
activity at our house. Be sure to double up the tortillas to hold
more fillings without breaking.
8 large egg whites
½ cup plus 2 tablespoons water
⅓ cup coconut flour
¼ teaspoon baking powder
1. Heat a small (6-inch) nonstick skillet over low heat. In a
bowl, combine the egg whites and water using a whisk.
2. In another small bowl, combine the coconut flour and baking
powder with a fork. Add the dry ingredients to the egg white
mixture and whisk until the mixture is uniform.
3. Spray the skillet with a light coating of coconut oil spray.
Using a ¼-cup measuring cup, scoop up some of the batter and
place it in the center of the skillet. Tilt the pan so that the batter
covers the entire surface. Cook for 5 to 7 minutes, until the
tortilla is fully cooked through. When it’s ready to flip, you’ll be
able to lift up the edges without it breaking. Flip and cook for an
additional 30 seconds.
learn how to lose 10 pounds in a week fast results
4. Set the cooked tortilla on a plate and repeat with the rest of
the batter, making a total of 16 tortillas.
5. Store leftovers in a tightly sealed container in the
refrigerator for up to 2 days. Reheat in a dry skillet on the
stovetop over high heat for 30 seconds on each side.
TWIST
Megha likes to add seasonings such as ground cumin, garlic
powder, and chili powder to the coconut flour for extra flavor
before mixing it into the batter!
NOTE
If you have two 6-inch nonstick skillets, we recommend that you
use both simultaneously to cook two tortillas at a time. It will
seriously cut down on the cook time for this recipe!
VARIATION
LARGE COCONUT FLOUR TORTILLAS. We use large coconut
flour tortillas to make the quesadillas on page 140. To make
large tortillas, use a 9-inch nonstick skillet, and in Step 3, use a
½-cup measuring cup to scoop up the batter. The cooking time
is the same. Makes 6 large tortillas (1 per serving).
CALORIES: 74 FAT: 1.3 g PROTEIN: 7.3 g CARBS: 5.3 g FIBER: 3.3 g
—Chapter 3—
CLASSIC COMFORT FOODS
Chicken Popper Casserole
Loaded Cauliflower
Spicy Cauliflower Bites
Spaghetti with Meat Sauce
Creamy White Chili
Chicken Tenders
Crispy Chicken Thighs with Pan Sauce
Mexican Chorizo Casserole
Bacon and Crab Mac and Cheese
Chicken Noodle-less Soup
Creamy Chicken Alfredo
Southern Baked Chicken
Mama’s Meatloaf
CHICKEN POPPER CASSEROLE
MAKES: 6 servings PREP TIME: 15 minutes COOK TIME: 18
minutes
Who said jalapeño poppers are only for football Sundays?
Adding some chicken and turning them into a hearty casserole
is the perfect excuse to make this dish any night of the week.
1½ pounds boneless, skinless chicken thighs
Pink Himalayan salt and ground black pepper
2 medium-sized jalapeño peppers
6 ounces cream cheese (¾ cup), room temperature
¼ cup heavy whipping cream
5 slices bacon, cooked and crumbled
½ cup shredded Monterey Jack cheese (about 2 ounces)
½ cup shredded cheddar cheese (about 2 ounces), divided
1 teaspoon minced garlic
¼ teaspoon onion powder
1. Preheat the oven to 400°F.
2. Heat a large skillet over medium-high heat. While the skillet
is heating, chop the chicken thighs into 1-inch pieces and lightly
season with salt and pepper.
3. Spray the hot skillet with coconut oil spray, then add the
chicken. Sauté on all sides until cooked through, 5 to 7 minutes.
4. Meanwhile, seed and mince one-and-a-half of the jalapeños
and put in a small bowl; slice the remaining half into rings and
set aside in another small bowl. (Remove the seeds from the
rings if you don’t care for heat.) 5. When the chicken is cooked,
add the cream cheese and heavy cream and stir to combine.
6. To the chicken mixture, add the minced jalapeños and about
four-fifths of the crumbled bacon; stir to combine. Add the
Monterey Jack cheese and ¼ cup of the cheddar cheese and stir
until melted. Add the garlic powder, onion powder, 1 teaspoon
of salt, and ¼ teaspoon of pepper and stir to combine, then
remove from the heat.
7. Pour the mixture into a 13 by 9-inch baking dish and spread
evenly using a rubber spatula. Top with the remaining cheddar
cheese and crumbled bacon and the sliced jalapeños. Bake for
10 minutes, then turn the oven to broil and broil for 2 minutes,
until the cheese has melted and browned. Serve hot.
CALORIES: 372 FAT: 27.2 g PROTEIN: 30.7 g CARBS: 2.5 g FIBER: 1 g
learn how to lose 10 pounds in a week fast results
LOADED CAULIFLOWER
MAKES: 8 servings PREP TIME: 20 minutes COOK TIME: 5
minutes
The age-old keto dilemma: what do I have with my steak
tonight? We think this loaded cauliflower is a pretty good
answer.
2 heads cauliflower, cored and cut into florets
3 tablespoons unsalted butter, melted
¼ cup heavy whipping cream
¼ cup sour cream
1 teaspoon pink Himalayan salt
½ teaspoon ground black pepper
¼ cup shredded cheddar cheese
4 slices bacon, cooked and crumbled
FOR GARNISH (OPTIONAL):
Chopped fresh chives
Sour cream
1. Set a large pot of water over high heat. Add the cauliflower
florets and bring to a boil. Boil for 10 to 15 minutes, until fork-
tender. Drain the cauliflower.
2. Put half of the florets in a food processor and pulse for 30
seconds. Add half of the melted butter, half of the cream, and
half of the sour cream and process until smooth. As you
process, the mixture will work its way up the sides of the
processor. When this happens, stop processing and push the
mixture down using a rubber spatula.
3. Add half of the salt and pepper to the cauliflower mixture in
the blender and pulse to combine. Pour the cauliflower mash
into a 13 by 9-inch baking dish.
4. Repeat with the remaining cauliflower, butter, cream, sour
cream, salt, and pepper, then add to the baking dish.
5. Smooth the top of the mash with a rubber spatula, then top
with the shredded cheese and crumbled bacon. Broil for 2 to 4
minutes, until the cheese has melted and slightly browned.
Sprinkle the top with chives and garnish each serving with a
dollop of sour cream, if desired.
6. Store leftovers in a sealed container in the refrigerator for up
to a week. Reheat in the microwave for 30 to 60 seconds.
CALORIES: 149 FAT: 11.4 g PROTEIN: 5.4 g CARBS: 8.4 g FIBER: 3.6 g
SPICY CAULIFLOWER BITES
MAKES: 4 servings PREP TIME: 10 minutes COOK TIME: 20
minutes
If we’re using the oven to prepare dinner, then chances are
we’re throwing in a double order of Spicy Cauliflower Bites to go
along with it. Anytime you bite into a cauliflower floret and
mistake it for a chicken wing, you know you’ve got a good
recipe on your hands.
1 head cauliflower, cored and cut into florets
2 tablespoons extra-virgin olive oil
1½ teaspoons chili powder
1½ teaspoons garlic powder
1½ teaspoons paprika
1 teaspoon pink Himalayan salt
½ teaspoon baking powder
Sliced scallions, for topping (optional)
Blue cheese dressing, store-bought or homemade (see
Notes), for serving (optional)
1. Preheat the oven to 450°F and line a rimmed baking sheet
with parchment paper.
2. Put the cauliflower florets in a large mixing bowl. Add the
remaining ingredients, except the scallions and blue cheese
dressing, and, using your hands, toss to coat the cauliflower
evenly. Pour the florets onto the lined baking sheet and spread
into an even layer.
learn how to lose 10 pounds in a week fast results
3. Roast for 20 minutes, or until fork-tender. Serve immediately,
topped with sliced scallions and with blue cheese dressing on
the side, if desired.
4. Store in a sealed container in the refrigerator for up to 3
days. Reheat in a preheated 250°F oven for 10 minutes, or until
crispy.
TWIST
On Michigan game days, Matt loves to eat these alongside our
Chipotle Dry-Rub Wings (page 142)!
NOTES
The addition of baking powder helps dry out the cauliflower so
that you get the crispiest bites possible!
Store-bought blue cheese dressing contains soybean oil;
however, we are comfortable using it sparingly as a dipping
sauce for these bites (or for chicken wings, of course!) or to
dress the occasional salad.
CALORIES: 105 FAT: 7.3 g PROTEIN: 3.3 g CARBS: 9.3 g FIBER: 4 g
SPAGHETTI WITH MEAT SAUCE
MAKES: 1 serving PREP TIME: 10 minutes COOK TIME: 12
minutes
Zucchini noodles are our favorite pasta replacement. Cooked
lightly, these noodles pair perfectly with any traditional pasta
sauce, especially this simple and flavorful meat sauce. This
recipe makes just one serving of zucchini noodles because we
have found that they do not keep and reheat well. Making them
fresh is a lot tastier!
SAUCE:
Makes 1⅓ cups (4 servings)
1 (14½-ounce) can whole peeled tomatoes
1 tablespoon extra-virgin olive oil
½ teaspoon garlic powder
½ teaspoon dried oregano leaves
½ teaspoon dried parsley
¼ teaspoon onion powder
¼ teaspoon red pepper flakes
⅛ teaspoon pink Himalayan salt
3 to 5 drops of liquid stevia
SPAGHETTI (FOR 1 SERVING):
1 medium-sized zucchini
4 ounces ground beef (80/20)
Grated Parmesan cheese, for topping (optional; omit for
dairy-free)
1. Make the sauce: Put the tomatoes, olive oil, seasonings, and
stevia in a blender and blend until the consistency is smooth.
Pour the mixture into a small saucepan and cook over medium
heat for 5 to 7 minutes, until reduced by about one-third.
Remove from the heat.
2. Make the spaghetti: Spiral-slice the zucchini into noodles. Put
in a small bowl and set aside.
3. Heat a medium-sized skillet over medium-high heat and
spray with coconut oil spray. Put the ground beef in the hot
skillet and cook through, stirring to break up the meat as it
cooks. Add ⅓ cup of the sauce to the ground beef and stir to
combine.
4. Place a second medium-sized skillet over medium-high heat.
When it is hot, place the zucchini noodles and 2 to 3
tablespoons of water in the skillet. Cover with the lid and steam
for 1 to 2 minutes, until just tender. Remove the lid, drain the
noodles, and transfer the noodles to a bowl. Top with the meat
sauce and grated Parmesan, if desired.
5. Store the remaining sauce in a sealed container in the
refrigerator for up to 2 weeks.
CALORIES: 327 FAT: 21 g PROTEIN: 24 g CARBS: 11 g FIBER: 3 g
CREAMY WHITE CHILI
MAKES: 6 servings PREP TIME: 15 minutes COOK TIME: 1
hour 20 minutes
Chili is a household favorite of ours. All you really have to do is
throw everything into a pot and let it cook for an hour. So
simple! Green chilies and jalapeño peppers give this white chili
that signature Southwestern flavor.
1½ pounds boneless, skinless chicken thighs
2 tablespoons unsalted butter
2 tablespoons extra-virgin olive oil
½ medium-sized white onion, diced
3 cloves garlic, minced
1 (4-ounce) can green chilies
½ medium-sized jalapeño pepper, seeded and chopped
4 cups low-sodium chicken broth
2 teaspoons ground cumin
½ teaspoon paprika
½ teaspoon pink Himalayan salt
¼ teaspoon chili powder
¼ teaspoon ground black pepper
¼ cup heavy whipping cream
⅓ cup shredded Monterey Jack cheese
FOR GARNISH (OPTIONAL):
Sliced avocado
Sliced jalapeño peppers
Roughly chopped fresh cilantro
1. Put the chicken thighs in a large saucepan and fill with
water, submerging the chicken entirely. Boil over high heat for
20 minutes, or until the chicken is fully cooked through.
2. Drain the chicken and set on a plate to cool. Once cool,
shred the chicken using 2 forks or your hands. Set aside.
3. Put the butter and olive oil in a large pot over medium heat.
Once the butter has melted, add the onion and garlic and cook
for 3 minutes, or until the onion is translucent and fragrant.
4. Add the green chilies and jalapeño and cook for 2 minutes.
Turn the heat up to medium-high, add the broth, and bring to a
boil.
5. Add the shredded chicken and seasonings, stir, and cover
with a lid. Turn the heat down to low and simmer for 45
minutes.
6. Add the cream and cheese and stir. Allow to cook with the lid
off for an additional 10 minutes, then remove from the heat.
Serve garnished with avocado, jalapeños, and cilantro, if
desired.
7. Store leftovers in a sealed container in the refrigerator for up
to a week or freeze for up to 2 months. Reheat in the
microwave if refrigerated or on the stovetop if frozen.
TWIST
Chili is one of Megha’s favorite foods. When she heats up a
bowl, she likes to add shirataki noodles to give it a toothsome
bite!
CALORIES: 278 FAT: 18 g PROTEIN: 24.2 g CARBS: 3.3 g FIBER: 0.5 g
CHICKEN TENDERS
MAKES: 4 servings PREP TIME: 10 minutes COOK TIME: 33
minutes
We’ve tried every type of low-carb breading there is, and this
combination of pork rinds and Italian herbs and spices is the
one we keep going back to. It reminds Matt of the breaded
chicken his grandma used to make for him growing up.
3 ounces pork rinds
2 teaspoons dried oregano leaves
2 teaspoons garlic powder
2 teaspoons onion powder
2 teaspoons red pepper flakes
1 teaspoon pink Himalayan salt
2 large eggs
2 tablespoons heavy whipping cream
1 pound chicken tenders
BBQ sauce, homemade (page 246) or store-bought, for
serving (optional)
1. Preheat the oven to 350°F and line a rimmed baking sheet
with parchment paper.
2. Put the pork rinds and seasonings in a food processor and
pulse until crumbly and combined. Pour onto a dinner plate. Set
aside.
3. Crack the eggs into a small bowl and add the cream.
Combine using a whisk.
learn how to lose 10 pounds in a week fast results
4. Pat the chicken tenders dry and, working in batches, dip
them in the egg wash and then dredge them in the seasoned
pork rinds. Once they are fully coated, lay them on the lined
baking sheet in a single layer.
5. Bake the tenders for 30 minutes, then turn the oven to broil
and broil for 2 to 3 minutes, until the chicken is cooked through
and the breading is browned. Serve with BBQ sauce for dipping,
if desired.
6. Store leftovers in a sealed container in the refrigerator for up
to 3 days. Reheat in the oven for maximum crispiness.
CALORIES: 305 FAT: 16 g PROTEIN: 38 g CARBS: 3.3 g FIBER: 1 g
CRISPY CHICKEN THIGHS WITH
PAN SAUCE
MAKES: 4 servings PREP TIME: 10 minutes COOK TIME: 35
minutes
You’ll probably notice that after you cook skin-on chicken thighs,
you’re left with a ton of delicious drippings in the pan. Don’t let
that flavor go to waste! This pan sauce takes just a couple of
minutes to whip up and adds a bright flavor to the crispy
chicken thighs.
4 boneless, skin-on chicken thighs (about 1 pound)
PAN SAUCE:
¼ medium-sized white onion, finely diced
4 cloves garlic, minced
½ teaspoon pink Himalayan salt
¼ teaspoon ground black pepper
¼ cup low-sodium chicken broth
¼ cup dry white wine
1 teaspoon unflavored beef gelatin powder
2 tablespoons unsalted butter
¼ cup chopped fresh parsley
Juice of ¼ lemon
1. Preheat the oven to 350°F.
2. Heat a medium-sized oven-safe skillet over medium heat.
Grease the skillet with coconut oil spray, pat the chicken thighs
learn how to lose 10 pounds in a week fast results
dry, and lay them skin side down in the pan.
3. Using a spatula, press down on the thighs so that the entire
surface of the skin is in contact with the hot skillet. Sear for 10
minutes, then flip the thighs over and put the skillet in the
oven. Bake for 15 minutes, or until the chicken is fully cooked
through.
4. Make the pan sauce: Remove the thighs from the skillet and
set aside. Return the pan to the stovetop over medium heat.
Add the onion and garlic and cook until the onion is translucent.
Season with the salt and pepper.
5. Add the chicken broth, wine, and gelatin to the pan and
scrape the bottom using a metal spatula to release and
combine the pan drippings with the liquid. Simmer until the
drippings are nearly fully reduced, then add the butter and stir
with the spatula. Cook for 2 to 3 minutes, until the butter is
incorporated into the sauce.
6. Add the parsley and lemon juice and stir to combine. Return
the thighs to the pan and spoon some of the sauce over the top.
Serve family-style, from the skillet, or slice the thighs crosswise
and serve plated with the pan sauce over the chicken or on the
side.
7. Store leftovers in a tightly sealed container in the
refrigerator for up to 5 days. Reheat in the microwave for 60 to
90 seconds.
TWIST
Sometimes Megha likes to change it up and use red wine to
make the reduction!
NOTE
Boneless, skin-on chicken thighs can be hard to find, so you can
either ask your butcher to cut some for you or debone them
yourself. Deboning them yourself will increase the prep time by
about 10 minutes.
CALORIES: 308 FAT: 21 g PROTEIN: 35.5 g CARBS: 3.3 g FIBER: 0.3 g
learn how to lose 10 pounds in a week fast results
MEXICAN CHORIZO CASSEROLE
MAKES: 8 servings PREP TIME: 15 minutes COOK TIME: 40
minutes
We’re always trying to use spicy Mexican chorizo in new
recipes. The flavor is so intense and assertive that it is hard to
come away with a disappointing dish. We like to make this
casserole on the weekend and have it ready throughout the
week in case we don’t have time to cook. Failure to prepare is
preparing to fail!
1 pound fresh (raw) bulk chorizo
¼ medium-sized white onion, diced
5 ounces cream cheese (½ cup plus 2 tablespoons)
¼ cup sour cream
1 small tomato, diced
1 (15-ounce) bag frozen spinach, thawed and drained
1 (4-ounce) can green chilies
¼ teaspoon pink Himalayan salt
¾ cup shredded cheddar cheese (about 3 ounces)
1. Preheat the oven to 350°F.
2. Heat a 12-inch cast-iron skillet or other oven-safe skillet over
medium-high heat. Put the chorizo in the skillet and partially
cook, crumbling the sausage with a spatula as it cooks. Add the
onion and cook until softened, about 5 minutes.
3. Add the cream cheese, sour cream, tomato, spinach, chilies,
and salt and stir to combine. When all the ingredients are
learn how to lose 10 pounds in a week fast results
evenly incorporated, remove from the heat.
4. Flatten out the surface of the casserole and sprinkle on the
cheese, covering the entire surface.
5. Bake for 30 minutes, until the cheese is melted and slightly
browned on top. Allow to rest for 5 minutes, then cut into 8
wedges and serve.
6. Store leftovers in a sealed container in the refrigerator for up
to 10 days or freeze for up to a month. Reheat in the microwave
for 60 to 90 seconds.
CALORIES: 379 FAT: 32.1 g PROTEIN: 17 g CARBS: 5.5 g FIBER: 0.6 g
BACON AND CRAB MAC AND
CHEESE
MAKES: 4 servings PREP TIME: 10 minutes COOK TIME: 30
minutes
We met in the amazing city of San Francisco, and on one of our
first dates, we bought crab mac and cheese from a vendor on
Fisherman’s Wharf. It was the moment we first bonded over our
shared love of food, so it was only right that we re-created that
experience for our first cookbook.
3 slices bacon, chopped
¼ medium-sized white onion, diced
1 head cauliflower, cored and cut into florets
2 teaspoons garlic powder
½ teaspoon pink Himalayan salt
1 (6-ounce) can lump crabmeat
2 tablespoons unsalted butter
¼ cup heavy whipping cream
1 cup shredded white cheddar cheese (about 4 ounces)
½ teaspoon dried parsley leaves, plus extra for garnish
(optional)
¼ teaspoon ground black pepper
2 crab legs, for garnish (optional)
1. Preheat the oven to 425°F.
2. Heat a large skillet over medium-high heat. Put the chopped
bacon in the skillet and cook three-quarters of the way through,
learn how to lose 10 pounds in a week fast results
about 3 minutes. Add the onion and cook for 1 to 2 minutes,
until tender.
3. Add the cauliflower florets, garlic powder, and salt and stir to
combine. Place a lid over the skillet and steam the cauliflower
for 5 to 7 minutes, until cooked through. Remove the lid and
continue to cook for an additional 5 minutes.
4. Remove the skillet from the heat and add the crabmeat. Toss
gently with the cauliflower, then set aside.
5. Put the butter and cream in a small saucepan over low heat.
Allow the butter to melt, stirring often.
6. When the butter is completely melted, add the cheese,
parsley, and pepper and stir to combine. When the cheese is
melted, pour the cheese mixture over the cauliflower and
crabmeat and toss, coating the cauliflower and crabmeat
evenly. Pour the mac and cheese into an 8-inch square baking
dish and bake for 10 minutes, until slightly browned on top.
7. If desired, while the mac and cheese is baking, steam a
couple of crab legs until they turn bright pink. Serve the mac
and cheese garnished with the crab legs, along with some more
parsley.
8. Store leftovers in a sealed container in the refrigerator for up
to a week. Reheat in the microwave for 60 to 90 seconds, until
the cheese is melted.
CALORIES: 320 FAT: 23 g PROTEIN: 20.8 g CARBS: 10.5 g FIBER: 4 g
CHICKEN NOODLE-LESS SOUP
MAKES: 6 servings PREP TIME: 15 minutes COOK TIME: 30
minutes
This is the chicken noodle soup that your mom used to make,
but without the noodles. There’s nothing quite like enjoying a
bowl of this soup while snuggled up with your pets watching a
rerun of It’s Always Sunny in Philadelphia on a Sunday morning.
1½ pounds boneless, skinless chicken breasts
1½ teaspoons pink Himalayan salt, divided
½ teaspoon ground black pepper, divided
1½ tablespoons ghee or coconut oil
3 tablespoons unsalted butter
3 stalks celery, chopped
½ medium-sized white onion, diced
1 teaspoon minced garlic
6 ounces baby bella mushrooms, sliced
1 teaspoon dried oregano leaves
½ teaspoon poultry seasoning
5 cups low-sodium chicken broth
2 teaspoons minced fresh parsley, plus extra for garnish
(optional)
1. Cut the chicken into bite-sized pieces and season with ½
teaspoon of the salt and ¼ teaspoon of the pepper. Heat a large
pot over medium-high heat. Place the ghee in the hot pot, then
add the chicken. Sauté until cooked through, 5 to 7 minutes.
Remove the chicken from the pot and set aside.
2. Turn the heat down to medium and melt the butter in the
pot. Add the celery and onion and allow to cook down for 2 to 3
minutes, stirring frequently. Add the garlic and mushrooms, stir
to combine, and cook for an additional 1 minute.
3. Return the cooked chicken to the pot. Add the remaining
teaspoon of salt, remaining ¼ teaspoon of pepper, oregano, and
poultry seasoning and stir to combine. Turn the heat back up to
medium-high, pour in the chicken broth, stir, and bring to a boil.
Once boiling, cover the pot with a lid, reduce the heat to
medium-low, and simmer for 15 minutes.
4. Before serving, stir in the parsley. Garnish each bowl with
additional parsley, if desired.
TIP
Change up the vegetables in this soup to make it better suited
for your or your family’s taste buds!
CALORIES: 218 FAT: 12.2 g PROTEIN: 24.5 g CARBS: 3.7 g FIBER: 1 g
learn how to lose 10 pounds in a week fast results
CREAMY CHICKEN ALFREDO
MAKES: 1 serving PREP TIME: 5 minutes COOK TIME: 20
minutes
If you’ve never tried shirataki noodles, you’re missing out!
They are nearly zero-calorie noodles made from konjac fiber. If
you take the necessary steps of rinsing and drying the noodles,
they make a delicious base for this creamy Alfredo sauce.
Alfredo sauce deserves the best-quality Romano or Parmesan
cheese you can find!
1 (4-ounce) boneless, skinless chicken thigh
Pink Himalayan salt and ground black pepper
1 (8-ounce) package shirataki noodles
SAUCE:
2 tablespoons unsalted butter
¼ cup heavy whipping cream
¼ cup grated pecorino Romano or Parmigiano-Reggiano
cheese, plus extra for garnish (optional)
1 teaspoon dried parsley leaves, plus extra for garnish
(optional)
¼ teaspoon garlic powder
¼ teaspoon pink Himalayan salt
⅛ teaspoon ground black pepper
FOR SERVING (OPTIONAL):
1 Low-Carb Dinner Roll (page 82) (omit for egg-free)
1. Cook the chicken: Heat a medium-sized skillet over
medium-high heat and grease with coconut oil spray. Pat the
chicken dry and season with salt and pepper. Put the chicken in
the hot skillet and cook for about 3 minutes on each side, until
the internal temperature reaches 165°F. Remove from the
skillet and slice into strips; set aside.
2. Prepare the noodles: Turn the heat under the skillet down to
low. Rinse the noodles with hot water and drain. Pat them as
dry as possible using paper towels and add to the hot skillet.
Stir them around using tongs or a spatula for about 5 minutes,
until they have dried out slightly. Turn off the heat, leaving the
noodles in the skillet.
3. Make the sauce: Put the butter and cream in a small
saucepan over low heat. Allow the butter to melt, stirring
often. Once the butter is melted, add the rest of the sauce
ingredients. Cook, stirring continuously using a rubber spatula,
until the cheese is melted and the sauce is thick.
4. Pour the sauce over the noodles in the skillet and turn the
heat to medium to reheat the noodles. Add the chicken and,
using the tongs, toss to coat the noodles and chicken
thoroughly with the sauce.
5. Serve garnished with additional dried parsley and grated
Romano cheese, and with a low-carb dinner roll on the side, if
desired.
TWIST
Matt likes to add shredded fontina cheese to his Alfredo sauce
for a nutty flavor.
NOTE
This recipe makes only one serving because we have found
that shirataki noodles do not keep and reheat well. Feel free to
double or triple the recipe for a family dinner!
CALORIES: 646 FAT: 54 g PROTEIN: 33 g CARBS: 8 g FIBER: 3 g
learn how to lose 10 pounds in a week fast results
SOUTHERN BAKED CHICKEN
MAKES: 6 servings PREP TIME: 15 minutes COOK TIME: 40
minutes
All the flavor of fried chicken with none of the cleanup! We’ve
found that ground-up pork rinds make the most flavorful
breading for low-carb cooking, and with the right mix of
seasonings, they can be used as breadcrumbs for any type of
cooking.
4 ounces pork rinds
½ teaspoon dried thyme leaves
½ teaspoon paprika
½ teaspoon pink Himalayan salt
¼ teaspoon garlic powder
¼ teaspoon cayenne pepper
¼ teaspoon ground black pepper
3 pounds bone-in, skin-on chicken thighs and legs
1. Preheat the oven to 400°F and place a wire baking rack
inside a rimmed baking sheet.
2. Place the pork rinds and seasonings in a food processor and
process until finely ground. Put the mixture into a gallon-sized
zip-top plastic bag.
3. Pat the chicken dry. In batches, put it in the bag with the
seasoned pork rinds and shake until all the chicken is
thoroughly coated. Place the coated chicken on the baking rack.
4. Bake for 40 minutes, or until the chicken is cooked through.
TIP
If you like your chicken extra-crispy like we do, broil the chicken
for 2 minutes after baking to create a crispier skin!
CALORIES: 469 FAT: 26.7 g PROTEIN: 54.8 g CARBS: 0.5 g FIBER: 0 g
MAMA’S MEATLOAF
MAKES: 8 servings PREP TIME: 15 minutes COOK TIME: 53
minutes
When we make meatloaf, we like to use hemp hearts instead of
breadcrumbs to add nutrients and healthy fats. The hemp
hearts give this dish a signature flavor that will have your
dinner guests trying to guess the secret ingredient.
2 tablespoons extra-virgin olive oil
½ small white onion, diced
5 cloves garlic, minced
2 teaspoons dried thyme leaves
½ teaspoon pink Himalayan salt
½ teaspoon ground black pepper
2 pounds ground beef (80/20)
¼ cup hemp hearts
2 teaspoons soy sauce
TOPPING:
6 tablespoons reduced-sugar ketchup
2 tablespoons apple cider vinegar
1 tablespoon Frank’s RedHot sauce
¼ teaspoon liquid stevia
1. Preheat the oven to 350°F and line a rimmed baking sheet
with parchment paper.
2. Heat a medium-sized skillet over medium heat. Put the olive
oil in the hot skillet, then add the onion and garlic. Cook for 2 to
3 minutes, until the onion is translucent. Add the thyme, salt,
and pepper and stir to combine. Transfer the onion mixture to a
large bowl and allow to cool.
3. When the onion mixture is cool, add the ground beef, hemp
hearts, and soy sauce to the bowl. Using your hands, mix the
ingredients together until well combined, then form the mixture
into a loaf shape in an 8 by 4-inch loaf pan.
4. Flip the loaf pan over onto the lined baking sheet and gently
remove the loaf pan. Bake the meatloaf for 20 minutes.
5. While the meatloaf is baking, make the topping: In a small
bowl, whisk together the ketchup, vinegar, hot sauce, and
stevia.
6. After 20 minutes, remove the meatloaf from the oven. Cover
the surface with the topping and bake for 30 more minutes,
until the meatloaf is cooked through and has reached an
internal temperature of at least 155°F. Let cool on the pan for a
bit, then cut into 8 equal-sized slices and serve.
TIP
If you double the topping recipe, you can apply another coat of
the topping before serving the meatloaf!
CALORIES: 351 FAT: 27.5 g PROTEIN: 21 g CARBS: 3.1 g FIBER: 1 g
learn how to lose 10 pounds in a week fast results
—Chapter 4—
TAKEOUT FAVORITES
Spicy Tuna Hand Rolls
Double Bacon Cheeseburger
Saag Paneer
Thai Yellow Chicken Curry
Buffalo Chicken Crust Pizza
Spicy Shrimp Fried Rice
Chocolate Almond Butter Shake
Thin-Crust Skillet Pizza
Steak Quesadillas
Chipotle Dry-Rub Wings
Beef Satay Skewers
Cheese Shell Mini Tacos
Philly Food Cart Gyros
Sticky Sesame Chicken
SPICY TUNA HAND ROLLS
MAKES: 6 servings PREP TIME: 10 minutes
We’re both certified sushi addicts. We had a fun tradition when
we lived in San Francisco: on Saturday nights when we didn’t
want to go out with our friends, we would go to the sushi
restaurant around the block in sweatpants and order a bunch of
sushi rolls and talk about life. These hand rolls are great
because you get that sushi flavor you’ve been missing, but
without the rice.
TUNA:
12 ounces sushi-grade ahi tuna, finely chopped (see Note)
2 tablespoons Sriracha sauce
1 tablespoon mayonnaise, homemade (page 248) or store-
bought
1 teaspoon toasted sesame oil
HAND ROLLS:
3 sheets nori
1 medium-sized avocado, thinly sliced
½ cucumber, julienned
Black and white sesame seeds, for garnish (optional)
Soy sauce, for serving
1. Put the tuna, Sriracha, mayonnaise, and sesame oil in a
small bowl and mix with a spoon.
learn how to lose 10 pounds in a week fast results
2. Cut the nori sheets in half lengthwise to create 6 rectangular
wrappers.
3. Place a wrapper on the palm of one of your hands. Put 2
ounces of tuna and 3 or 4 slices each of avocado and cucumber
on the left end of the wrapper, on a diagonal to make rolling
easier. Starting from the bottom-left corner, tightly roll into a
cone shape, moistening the edge of the nori to create a seal.
Garnish the top of the roll with sesame seeds, if desired. Repeat
with the remaining ingredients.
4. Serve the rolls with soy sauce. These are best eaten
immediately, as they don’t store well.
NOTE
When purchasing tuna to use in these hand rolls, look for frozen
wild-caught tuna to ensure that the bacteria is killed off in the
freezing process. Buying fresh tuna can be risky when you are
planning to consume it raw.
CALORIES: 133 FAT: 6.3 g PROTEIN: 15.2 g CARBS: 4.2 g FIBER: 2.3 g
DOUBLE BACON CHEESEBURGER
MAKES: 1 serving PREP TIME: 5 minutes COOK TIME: 20
minutes
This American classic happens to be the perfect keto meal once
you find a good replacement for the bun. We’ve tried a bunch of
different options, but the sturdiness of collard greens makes
them our favorite choice.
4 slices bacon
8 ounces ground beef (80/20)
½ teaspoon garlic powder
½ teaspoon onion powder
½ teaspoon pink Himalayan salt
½ teaspoon ground black pepper
2 slices cheddar cheese
4 collard green leaves
1. Heat a cast-iron skillet over medium heat. Put the bacon
slices in the pan and cook for 4 minutes on each side, or until
crispy. Remove and set on a paper towel; leave the bacon
drippings in the pan.
2. Form the ground beef into two patties, about ½ inch thick.
Season the patties on both sides with the garlic powder, onion
powder, salt, and pepper. Increase the heat to medium-high and
place the patties in the skillet. Sear the burgers for 4 to 6
minutes, then flip and top each with a slice of cheddar cheese
and 2 slices of bacon. Cook for another 4 to 6 minutes, until the
desired doneness is achieved. (Note: For medium-done burgers,
cook for 4 minutes on each side; for medium-well, 5 minutes on
each side; and well-done, 6 minutes on each side.) Remove the
patties from the skillet and allow to rest for 5 minutes before
assembling.
3. Using a paring knife, remove the center stem from each
collard leaf. Lay the leaves on top of one another with half of
each leaf overlapping.
4. Stack the beef patties on top of one another in the center of
the collard greens. Fold the edges in to completely enclose the
patties. Use a toothpick to hold everything together, if desired.
TWIST
Matt always adds a fried egg to his burgers, whether we make
them at home or get them out!
CALORIES: 820 FAT: 60 g PROTEIN: 65 g CARBS: 6 g FIBER: 1 g
learn how to lose 10 pounds in a week fast results
SAAG PANEER
MAKES: 4 servings PREP TIME: 10 minutes COOK TIME: 20
minutes
Matt had never tried Indian food until he met Megha, but he
quickly fell in love. Saag paneer was the first Indian dish he
tried, and to this day it’s still his favorite. If you’ve never had
paneer, you’re missing out! It’s a frying cheese that you can
find at any Indian grocer. It is often used as the main protein in
vegetarian dishes.
2 tablespoons ghee, divided
8 ounces paneer, cubed
⅓ medium-sized white onion, roughly chopped
3 cloves garlic, minced
1 (½-inch) piece fresh ginger, grated
1 small tomato, diced
4 cups frozen spinach, thawed
2½ teaspoons garam masala
1½ teaspoons turmeric powder
1 teaspoon chili powder
1 teaspoon pink Himalayan salt
½ cup heavy whipping cream
1. Heat 1 tablespoon of the ghee in a large skillet over medium-
high heat. Add the paneer and cook until browned and crispy, 5
to 7 minutes, tossing every couple of minutes. Remove from the
pan and set aside.
2. Turn the heat down to medium and add the remaining
tablespoon of ghee to the hot pan. Add the onion, garlic, and
ginger and stir to combine. Cook until the onion is translucent.
3. Add the tomato and spinach and stir thoroughly. Cook for 3
to 5 minutes, until most of the water from the tomatoes and
spinach has evaporated.
4. Add the seasonings and cream and stir to combine. Cook for
5 minutes, until the sauce has thickened. Return the paneer to
the pan to reheat for a few minutes. Serve immediately.
5. Store leftovers in a sealed container in the refrigerator for up
to 4 days.
TWIST
Megha prefers to eat her saag paneer with Low-Carb Flatbread
(from the gyro recipe on page 148), while Matt likes cauliflower
rice.
CALORIES: 386 FAT: 31 g PROTEIN: 15.3 g CARBS: 8.3 g FIBER: 1 g
THAI YELLOW CHICKEN CURRY
MAKES: 2 servings PREP TIME: 10 minutes COOK TIME: 20
minutes
Everyone needs a little Thai curry in their life. Whenever we get
into a dinner rut, we turn to this yellow curry to break up the
monotony.
2 tablespoons coconut oil, divided
12 ounces boneless, skinless chicken thighs, cubed
1 tablespoon minced garlic
1 tablespoon grated fresh ginger
½ medium-sized white onion, roughly chopped
2 tablespoons low-sodium chicken broth
1 tablespoon soy sauce
1 tablespoon curry powder
1 teaspoon red pepper flakes
¼ teaspoon pink Himalayan salt
7 ounces (½ can) coconut milk
1½ cups fresh broccoli florets
1 tablespoon minced fresh cilantro
1. Heat 1 tablespoon of the coconut oil in a large skillet over
medium-high heat. Add the cubed chicken and cook through, 5
to 7 minutes. Remove from the pan and set aside.
2. Turn the heat down to medium and add the remaining
tablespoon of coconut oil to the skillet. Add the garlic, ginger,
and onion and stir. Cook until the mixture is fragrant and the
onion is slightly translucent, 2 to 3 minutes.
3. Add the broth, soy sauce, curry powder, red pepper flakes,
and salt and stir. When everything is thoroughly combined, add
the coconut milk and cook, stirring often, until fully incorporated
and heated through, 3 to 5 minutes.
4. Return the chicken to the pan and add the broccoli. Stir so
that everything is coated. Cook for an additional 3 to 5 minutes,
until the broccoli is tender and the chicken is heated through.
Stir in the cilantro and serve immediately.
5. Store leftovers in a sealed container in the refrigerator for up
to 4 days.
CALORIES: 517 FAT: 36 g PROTEIN: 34 g CARBS: 16 g FIBER: 4.5 g
learn how to lose 10 pounds in a week fast results
BUFFALO CHICKEN CRUST PIZZA
MAKES: 2 servings PREP TIME: 10 minutes COOK TIME: 30
minutes
As soon as we figured out the recipe for Cheesy Chicken
Breadsticks (page 88), we knew we had to take that same
dough and use it make a Buffalo chicken pizza. You’ll never buy
bottled Buffalo sauce again once you see how easy it is to make
from scratch!
BUFFALO SAUCE:
¼ cup Frank’s RedHot sauce
¼ cup (½ stick) unsalted butter
2¼ teaspoons apple cider vinegar
CRUST:
2 (5-ounce) cans chunk chicken breast in water, drained
¼ cup grated Parmesan cheese
1 large egg
TOPPINGS:
4 ounces fresh mozzarella cheese, sliced
1 tablespoon sliced scallions (optional)
1. Preheat the oven to 350°F and line a pizza stone or metal
pizza pan with parchment paper.
2. Make the sauce: Put the hot sauce, butter, and vinegar in a
small saucepan over medium heat. Once the butter melts, stir
to combine and remove from the heat. Set aside.
3. Prepare the crust: Spread the drained chicken on the lined
pizza stone/pan and bake for 10 minutes to remove all the
moisture. Remove from the oven and transfer the chicken to a
medium-sized bowl. Increase the oven temperature to 500°F.
4. To the bowl with the chicken, add the Parmesan cheese and
egg. Mix thoroughly with a fork.
5. Place a clean sheet of parchment paper on the counter and
pour the chicken mixture onto it. Spread the chicken into a thin
layer with a rubber spatula. Place another piece of parchment
paper on top of the chicken mixture and flatten it into a ¼-inch-
thick circle using a rolling pin. Remove the top piece of
parchment, transfer the bottom piece of parchment with the
crust on it to the pizza stone/pan, and bake the crust for 8
minutes, until slightly browned and hardened.
6. Remove the crust from the oven and top with the Buffalo
sauce and mozzarella cheese. Bake for 6 to 8 more minutes,
until the cheese is melted and starting to brown. Remove from
the oven, top with the sliced scallions, if using, and cut into 6
slices.
7. Store leftovers in a sealed container in the refrigerator for up
to 3 days. Reheat in a 250°F oven.
TWIST
Megha likes to dip her slices in blue cheese dressing to up the
fat-to-protein ratio and maximize the flavor!
learn how to lose 10 pounds in a week fast results
CALORIES: 600 FAT: 44.5 g PROTEIN: 47.5 g CARBS: 1.5 g FIBER: 0 g
SPICY SHRIMP FRIED RICE
MAKES: 4 servings PREP TIME: 15 minutes COOK TIME: 15
minutes
If there is one dish that summarizes the last year of our lives, it
is shrimp fried rice. It’s quick, it’s easy, you can make it all in
one pot, and it never disappoints. We love the crispy fried rice
and the fresh Asian flavors.
¼ teaspoon cayenne pepper
¼ teaspoon chili powder
¼ teaspoon paprika
¼ teaspoon pink Himalayan salt
¼ teaspoon ground black pepper
1 pound medium-sized shrimp, peeled and deveined
2 tablespoons ghee, divided
4 cups riced cauliflower (see Tip)
½ medium-sized white onion, finely chopped
2 teaspoons minced fresh ginger
1 cup fresh broccoli florets, chopped
3 tablespoons soy sauce
1 tablespoon Sriracha sauce
1½ teaspoons unseasoned rice wine vinegar
2 large eggs
2 teaspoons toasted sesame oil
FOR GARNISH (OPTIONAL):
Sliced scallions
Black and white sesame seeds
1. Put the cayenne, chili powder, paprika, salt, and pepper in a
medium-sized bowl. Mix to blend, then add the shrimp. Toss the
shrimp in the seasoning blend until evenly coated.
2. Heat 1 tablespoon of the ghee in a large skillet over medium-
high heat. Place the seasoned shrimp in the hot skillet and cook
until pink, about 2 minutes on each side. Remove to a small
bowl and set aside.
3. Add the remaining tablespoon of ghee to the hot skillet and
pour in the riced cauliflower. Spread it out with a spatula so it
lies flat on the surface of the skillet and cook until it crisps up, 3
to 5 minutes.
4. Stir the rice, then add the onion and ginger. Cook for 2
minutes, until the onion is slightly tender. Add the broccoli and
cook for 1 to 2 minutes, until bright green in color. Add the soy
sauce, Sriracha, and vinegar. Combine using the spatula.
5. Make a well in the center of the skillet and crack in the eggs.
Scramble using the spatula, then combine with the rest of the
contents of the skillet.
6. Add the shrimp and toss to combine. Drizzle with the sesame
oil and garnish with sliced scallions and sesame seeds, if
desired. Serve immediately.
7. Store leftovers in a sealed container in the refrigerator for up
to 4 days. Reheat in the microwave for 60 to 90 seconds.
TIP
If you don’t have pre-riced cauliflower on hand, simply chop the
florets from a large head of cauliflower into chunks and pulse in
a food processor until the cauliflower is in rice-sized pieces,
about 30 seconds.
learn how to lose 10 pounds in a week fast results
CALORIES: 283 FAT: 13.3 g PROTEIN: 31.8 g CARBS: 12.8 g FIBER: 4 g
CHOCOLATE ALMOND BUTTER
SHAKE
MAKES: 1 serving PREP TIME: 3 minutes
Shakes used to be one our favorite things to order out—
especially at diners! Now we love making our own shakes at
home. Filled with nutrition and great taste, this shake serves
double duty as a great post-workout fuel source and a dessert,
especially when topped with whipped cream and ground
cinnamon (Matt’s favorite version).
1 cup unsweetened almond milk, well chilled
2 tablespoons cocoa powder
2 tablespoons natural almond butter
1 tablespoon chia seeds
1 tablespoon unflavored protein powder
¼ teaspoon plus 5 drops of liquid stevia
¼ teaspoon pink Himalayan salt
Put all the ingredients in a blender and blend until smooth, 30
to 45 seconds. Pour into a 16-ounce glass. Enjoy cold!
TWIST
Sometimes Matt likes to moisten the rim of the serving glass in
water, then dust the rim with cocoa powder to give this shake a
more elegant, dessertlike feel.
learn how to lose 10 pounds in a week fast results
CALORIES: 333 FAT: 23 g PROTEIN: 19 g CARBS: 20 g FIBER: 13 g
THIN-CRUST SKILLET PIZZA
MAKES: 2 servings PREP TIME: 5 minutes COOK TIME: 5
minutes
We’ve come home after having a few drinks and thrown
together this skillet pizza more than a few times. The crispy
pan-fried cheese will make you forget all about the delivery
place down the street!
1½ cups shredded mozzarella cheese
9 slices pepperoni
1 tablespoon sliced black olives
4 fresh basil leaves
1. Heat a 10-inch skillet over medium heat. Spread the
shredded cheese evenly over the surface of the skillet. Cook
until the cheese is almost fully melted, then layer on the
pepperoni slices and olives. Continue to cook until a crust starts
to form. The cheese will harden, turn brown on the bottom, and
naturally lift off the skillet.
2. Once the crust has formed, turn off the heat, slide the pizza
onto a plate, and garnish with basil leaves. Slice into 4 pieces
and serve immediately.
CALORIES: 302 FAT: 23.5 g PROTEIN: 24 g CARBS: 4.5 g FIBER: 1 g
STEAK QUESADILLAS
MAKES: 2 servings PREP TIME: 10 minutes (not including time
to make tortillas) COOK TIME: 30 minutes
Megha is a recovering Taco Bell addict, so this recipe is an
essential at our house! Whenever we have steak for dinner, we
always use the leftovers to make these quesadillas for lunch the
next day.
½ pound flank steak or flat-iron steak
2 tablespoons avocado oil
1 teaspoon chili powder
½ teaspoon ground cumin
½ teaspoon garlic powder
½ teaspoon onion powder
½ teaspoon paprika
½ teaspoon pink Himalayan salt
2 Large Coconut Flour Tortillas (page 92)
⅔ cup shredded cheddar cheese
Lime wedges, for serving
Fresh cilantro, for garnish (optional)
1. Make the steak: Preheat the oven to 350°F and line a
rimmed baking sheet with parchment paper.
2. Combine the avocado oil, chili powder, cumin, garlic powder,
onion powder, paprika, and salt in a small bowl using a spoon.
Sprinkle the mixture evenly over both sides of the steak and rub
it in using your hands.
learn how to lose 10 pounds in a week fast results
3. Put the seasoned steak on the lined baking sheet and bake
for 12 minutes, then turn the oven to broil and broil the steak
for 2 to 3 minutes, until medium-done. Remove from the oven,
transfer to a cutting board, and allow to rest for 10 minutes.
Slice crosswise into ½-inch strips.
4. Make the quesadillas: Heat a 9-inch or larger skillet over
medium heat and grease with coconut oil spray.
5. Place a tortilla in the skillet. Layer half the tortilla with ⅓ cup
of the shredded cheese and half of the steak strips. Close the
tortilla and cook on both sides until the cheese has melted and
the tortilla is slightly browned. Repeat with the remaining
tortilla, cheese, and steak.
6. Slice each quesadilla into 3 wedges and serve immediately
with lime wedges. Garnish with cilantro, if desired.
7. Store leftover wedges in a zip-top plastic bag with the excess
air removed in the refrigerator for up to 3 days.
NOTE
If using leftover steak, skip Steps 1 through 3 and omit the
seasonings from the recipe. Slice the steak into strips and
microwave for 30 to 60 seconds before layering it in the
tortillas.
CALORIES: 532 FAT: 36.8 g PROTEIN: 41.3 g CARBS: 6.3 g FIBER: 4 g
CHIPOTLE DRY-RUB WINGS
MAKES: 4 servings PREP TIME: 10 minutes COOK TIME: 45
minutes
Not only are chicken wings nature’s perfect food, but they also
happen to be a great part of a keto diet. The secret to getting a
crispy wing in the oven is baking powder! Give this recipe a try,
and it will be the only way you make wings in the future.
CHIPOTLE RUB:
1 tablespoon ground chipotle pepper
1 teaspoon paprika
1 teaspoon ground cumin
1 teaspoon ground mustard
1 teaspoon garlic powder
1 teaspoon onion powder
1 teaspoon pink Himalayan salt
2 pounds chicken wings
1 teaspoon baking powder
1. Preheat the oven to 250°F and place a wire baking rack
inside a rimmed baking sheet.
2. Put the seasonings for the rub in a small bowl and stir with a
fork. Divide the spice rub into 2 equal portions.
3. Cut the wings in half, if whole (see Tip), and place in a large
zip-top plastic bag. Add the baking powder and half of the spice
rub to the bag and shake thoroughly to coat the wings.
4. Lay the wings on the baking rack in a single layer. Bake for
25 minutes.
5. Turn the heat up to 450°F and bake the wings for an
additional 20 minutes, until golden brown and crispy.
6. Once the wings are done, place them in a large plastic
container with the remaining half of the spice rub and shake to
coat. Serve immediately.
TIP
We get our wings whole, so the drumette and flat (aka
wingette) with the wing tip are attached. Before we coat them,
we like to cut the drumette apart from the flat and then cut the
tip off the flat and discard it.
CALORIES: 507 FAT: 36 g PROTEIN: 42.3 g CARBS: 3 g FIBER: 0.3 g
learn how to lose 10 pounds in a week fast results
BEEF SATAY SKEWERS
MAKES: 4 servings ACTIVE PREP TIME: 15 minutes
INACTIVE PREP TIME: 2 to 6 hours COOK TIME: 10 minutes
We love exploring cuisines from around the world, and this
Indonesian classic really grabbed our attention. It was a unique
flavor that we’d never had before, and we must have made it
for two weeks straight. We prefer these skewers grilled, but
they’re also great cooked on the stovetop. Either way, we can’t
get enough!
1 pound top sirloin
1 tablespoon fish sauce
1 teaspoon lemongrass paste
2 cloves garlic, minced
1 tablespoon avocado oil
1 tablespoon soy sauce
15 drops of liquid stevia
1 tablespoon ground coriander
½ teaspoon onion powder
½ teaspoon turmeric powder
⅛ teaspoon cayenne pepper
¼ cup water
Sliced green onions, for garnish
Peanut Sauce (page 244), for serving (optional)
Special equipment:
10 (12-inch) bamboo skewers
1. Marinate the meat: Slice the meat into ½-inch-thick slices
and place in a gallon-sized zip-top plastic bag. Add the rest of
the ingredients to the bag with the meat and seal, removing
any excess air. Shake the bag to distribute the seasonings.
Place in the refrigerator to marinate for at least 2 hours or up to
6 hours.
2. Remove the meat from the bag and skewer the slices in
zigzag form; discard any remaining marinade.
3. To grill the skewers, grease the grill with coconut oil spray
and preheat to high heat. To cook the skewers on the stovetop,
heat a skillet over medium-high heat and grease with coconut
oil spray.
4. Working in batches, cook the skewers on the preheated grill
or skillet, flipping them every couple of minutes to ensure that
they cook evenly. They should be fully cooked in about 8
minutes on the grill or 10 minutes on the stovetop.
5. Garnish the skewers with sliced green onions and serve
warm with peanut sauce, if desired.
6. Store leftovers in a zip-top plastic bag in the refrigerator for
up to 4 days.
NOTE
We feel most comfortable buying the Gourmet Garden brand of
lemongrass paste and the Thai Kitchen brand of fish sauce.
CALORIES: 253 FAT: 15.8 g PROTEIN: 23.8 g CARBS: 4 g FIBER: 0.5 g
CHEESE SHELL MINI TACOS
MAKES: 2 servings PREP TIME: 25 minutes COOK TIME: 25
minutes
This recipe was inspired by a trip to Chelsea Market in New York.
We went to the top-rated taco stand in the city, and taco shells
made out of cheese were on the menu! Can you say Taco
Tuesday?
2 cups shredded cheddar cheese
8 ounces ground beef (80/20)
1 teaspoon chili powder
½ teaspoon ground cumin
½ teaspoon garlic powder
½ teaspoon pink Himalayan salt
¼ teaspoon dried oregano leaves
2 Roma tomatoes, diced
2 avocados, diced
FOR GARNISH (OPTIONAL):
Fresh cilantro leaves
Sour cream
Lime wedges
1. Preheat the oven to 350°F and line 2 rimmed baking sheets
with parchment paper.
2. Make 8 (1-ounce) piles of shredded cheese, 4 per baking
sheet, and flatten them slightly into 3-inch circles (they will
spread).
learn how to lose 10 pounds in a week fast results
3. Place one of the baking sheets in the oven and bake for 5 to
7 minutes, until the cheese is melted and the edges are starting
to brown.
4. Meanwhile, set up a cheese shell drying station: Balance 2
long wooden spoons (about ½ inch in diameter) or similar
utensils on 2 cups or bowls. You will lay the warm cheese circles
over the spoon handles to make shells.
5. Remove the cheese circles from the oven and allow to cool
for 1 minute before flipping them over onto the spoon handles,
2 per handle. Let the cheese cool completely before removing
from the spoons and using as taco shells. Repeat with the
second baking sheet of cheese circles to make a total of 8
shells.
6. While the cheese shells harden, heat a medium-sized skillet
over medium-high heat and spray with coconut oil spray. Put
the ground beef in the hot skillet and cook, stirring to break up
the meat. When the beef is mostly cooked through, add the chili
powder, cumin, garlic powder, salt, and oregano and combine
with a spoon. Cook for another 5 to 7 minutes, until browned.
7. To assemble the tacos, divide the meat, diced tomatoes, and
diced avocado evenly among the cheese shells. Top with
cilantro, sour cream, and a squeeze of fresh lime juice, if
desired.
CALORIES: 895 FAT: 71 g PROTEIN: 51 g CARBS: 14.5 g FIBER: 11 g
PHILLY FOOD CART GYROS
MAKES: 6 servings PREP TIME: 20 minutes COOK TIME: 1
hour 20 minutes
Philadelphia was the birthplace of our food blog. During our
year there, we tried all the foods the city is known for, but we
kept going back to the little cart just up the road from our
apartment for authentic gyros.
GYRO MEAT:
1 pound ground lamb
1 pound ground beef (80/20)
½ medium-sized white onion, diced
4 cloves garlic, minced
1 tablespoon dried oregano leaves
2 teaspoons ground cumin
½ teaspoon pink Himalayan salt
½ teaspoon ground black pepper
LOW-CARB FLATBREAD:
½ cup coconut flour
1½ tablespoons psyllium husk powder
¼ teaspoon baking powder
2 tablespoons coconut oil, melted
1 to 1½ cups hot water
FILLINGS:
½ medium-sized cucumber, thinly sliced
¼ red onion, thinly sliced
1 small tomato, thinly sliced
Fresh dill sprigs, for garnish (optional)
1. Preheat the oven to 325°F and line an 8 by 4-inch loaf pan
with parchment paper for easy removal of the meat.
2. In a large bowl, use your hands to combine the lamb, beef,
white onion, garlic, oregano, cumin, salt, and pepper. Once fully
incorporated, form into a loaf in the lined loaf pan.
3. Bake for 1 hour, or until the internal temperature reaches at
least 160°F. Remove from the oven and allow to rest in the pan
while you make the flatbreads.
4. Make the flatbread: In a medium-sized bowl, combine the
coconut flour, psyllium husk powder, and baking powder using a
fork. Add the coconut oil and stir to combine with a wooden
spoon.
5. Add the hot water and combine using the spoon, then allow
to cool. Once cool, use your hands to knead the mixture into a
firm dough. Allow to rest for 5 minutes.
6. Divide the dough into 6 equal portions. Working with one
portion at a time, use your hands to form the dough into a ball,
then place it on a piece of parchment paper. Place another
piece of parchment on top and roll out to ¼-inch thickness with
a rolling pin.
7. Heat a medium-sized nonstick skillet over medium-high heat.
Once hot, place a flatbread in the skillet and cook for 2 to 3
minutes. You will know it is ready to flip when it starts to puff
up. Flip and cook for an additional 30 to 45 seconds. Transfer to
a plate. Repeat with the rest of the flatbread dough.
learn how to lose 10 pounds in a week fast results
8. Remove the gyro meat from the loaf pan and cut it into ¼-
inch-thick slices.
9. To assemble the gyros, top each flatbread with 5 slices of
meat and one-sixth of the cucumber, red onion, and tomato
slices. Garnish with fresh dill, if desired.
10. Store leftover gyro meat and flatbread in separate zip-top
plastic bags in the refrigerator for up to 4 days. Reheat the
meat in the microwave for 60 to 90 seconds and the flatbread in
a preheated skillet over medium heat for 1 to 2 minutes.
CALORIES: 351 FAT: 30.3 g PROTEIN: 20.3 g CARBS: 10.3 g FIBER: 5.5 g
STICKY SESAME CHICKEN
MAKES: 2 servings PREP TIME: 10 minutes COOK TIME: 30
minutes
If you’ve been missing Chinese takeout, look no further than
this recipe. You don’t even have to leave the house! Coconut
flour gives the chicken a tender breading for the thick and
sticky sauce to grab hold of.
CHICKEN:
½ cup coconut oil, for the pan
½ pound boneless, skinless chicken thighs
½ teaspoon pink Himalayan salt
¼ teaspoon ground black pepper
⅓ cup coconut flour
SAUCE:
1½ teaspoons toasted sesame oil
1 clove garlic, minced
1 (½-inch) piece fresh ginger, grated
¼ cup soy sauce
2½ tablespoons unseasoned rice wine vinegar
2½ tablespoons powdered erythritol
2 tablespoons water
½ teaspoon red pepper flakes
¼ teaspoon xanthan gum
2 cups riced cauliflower (see Tip, opposite)
learn how to lose 10 pounds in a week fast results
FOR GARNISH (OPTIONAL):
White and/or black sesame seeds
Sliced scallions
1. Heat the coconut oil in a medium-sized saucepan over
medium-high heat until it reaches 330°F to 350°F on a deep-fry
thermometer.
2. Meanwhile, prepare the chicken: Pat the thighs dry, cut them
into bite-sized pieces, and season with the salt and pepper. Toss
them in the coconut flour until they are fully coated.
3. Working in batches of 3 or 4 pieces, fry the coated chicken in
the hot oil, turning them in the oil so they cook evenly, until
light brown on the outside and cooked through in the center, 3
to 5 minutes. Remove with a slotted spoon and set on a paper
towel–lined plate to drain while you fry the remaining pieces.
4. Once all the chicken is cooked, make the sauce: Heat the
sesame oil in a small saucepan over medium heat. Add the
garlic and ginger and cook for 30 seconds, or until fragrant. Add
the remaining sauce ingredients, except for the xanthan gum,
and whisk to combine. Simmer for about 3 minutes, then add
the xanthan gum and whisk to combine. Turn the heat up to
medium-high and allow the sauce to reduce and thicken, 5 to 7
minutes.
5. While the sauce reduces, steam the rice: Put the riced
cauliflower in a microwave-safe bowl and cover with 2 or 3
damp paper towels. Microwave for 4 to 5 minutes, until tender
but not mushy. Divide the steamed cauliflower rice between 2
bowls.
6. Add the chicken pieces to the saucepan with the thickened
sauce and toss to coat them thoroughly; leave on the stovetop
for 2 minutes to reheat. Divide the chicken and sauce between
the bowls with the cauliflower rice and garnish with sesame
seeds and sliced scallions, if desired.
TIP
If you do not have 2 cups of pre-riced cauliflower on hand,
simply chop the florets of half a large head of cauliflower into
chunks and pulse in a food processor until the cauliflower is in
rice-sized pieces, about 30 seconds.
plus oil from frying
CALORIES: 332 FAT: 15.5 g PROTEIN: 35 g CARBS: 13 g FIBER: 6.5 g SUGAR
ALCOHOL: 15g
—Chapter 5—
FRESH FIXIN'S
Turkey Bacon Club
Caprese Chicken Skillet
Baja Fish Soft Tacos
Curry Chicken Salad
Loaded Cobb Salad
Coconut Shrimp
Fried Red Snapper
California Collard Wrap
Strawberry Coconut Smoothie
Green Power Smoothie
Raspberry Lime Ice Pops
learn how to lose 10 pounds in a week fast results
TURKEY BACON CLUB
MAKES: 1 serving PREP TIME: 5 minutes (not including time
to make bread)
There’s something about making a sandwich with three slices of
bread that brings a smile to our faces. It enables you to pack
more delicious fillings in the middle. We love piling our club
sandwiches high with turkey, bacon, and cheese! We don’t go
the traditional route with this club by toasting the bread, but
feel free to toast it in a skillet on the stovetop or in the oven, if
desired.
2 tablespoons mayonnaise, homemade (page 248) or store-
bought
3 slices The Best Keto Bread (page 76)
2 lettuce leaves
4 slices Roma tomato
1 slice thick-cut bacon, cooked and cut in half crosswise
1 slice cheddar cheese, cut in half
3 ounces sliced turkey deli meat
1. Spread one-third of the mayo on one side of each of the
bread slices.
2. Create the first layer: On one of the mayo-slathered bread
slices, layer a lettuce leaf, 2 tomato slices, the bacon, and a half
slice of cheese. Top that with another mayo-slathered slice of
bread, mayo side facing up (this will be the middle slice).
3. Create the second layer: On top of the middle bread slice,
layer the turkey and the remaining cheese, tomato slices, and
lettuce.
4. Top with the third slice of bread, mayo facing down. Cut the
sandwich in half or, if you’d like to stick to tradition, into
quarters.
TWIST
Matt is not a fan of mayo, so he uses guacamole instead!
CALORIES: 803 FAT: 67.4 g PROTEIN: 43.8 g CARBS: 9.2 g FIBER: 3.3 g
CAPRESE CHICKEN SKILLET
MAKES: 4 servings PREP TIME: 10 minutes COOK TIME: 15
minutes
A good caprese chicken is all about the freshness of the
ingredients you use. When there are fresh cherry tomatoes and
basil at our local farmers’ market, we always make this dish.
The key is to not overcook anything and to let the fresh flavors
of the ingredients shine.
1 tablespoon extra-virgin olive oil
1 pound boneless, skinless chicken thighs
1½ teaspoons pink Himalayan salt, divided
½ teaspoon ground black pepper
1 teaspoon minced garlic
12 cherry tomatoes, halved (about 3 ounces)
¼ teaspoon red pepper flakes
1 medium-sized zucchini, spiral-sliced into noodles
3 or 4 large fresh basil leaves, minced
3 ounces mini mozzarella balls, halved
1. Heat the olive oil in a large skillet over medium-high heat.
2. Chop the chicken into 1-inch pieces and season with 1
teaspoon of the salt and the black pepper.
3. Put the chicken in the hot skillet and cook through, 5 to 7
minutes. (When fully cooked, the chicken will no longer be pink
in the middle.) Remove from the skillet and set aside.
4. Turn the heat down to low and use a spatula to scrape up the
drippings from the bottom of the skillet. Add the garlic and cook
for 20 seconds. Add the tomatoes, remaining ½ teaspoon of
salt, and red pepper flakes. Stir to combine and cover with a lid.
Cook for 5 to 7 minutes, until the tomatoes have burst and
softened.
5. Turn the heat back up to high, add the zucchini noodles and
basil, and cook for 1 minute, until the noodles are slightly
tender but not mushy. Remove from the heat, add the chicken
and mozzarella, and toss to combine. Serve immediately.
NOTE
The zucchini noodles do not store and reheat well; however, if
there are leftovers, they can be kept in a sealed container in the
refrigerator for up to 1 day and reheated in the microwave for
30 to 60 seconds.
CALORIES: 226 FAT: 11.8 g PROTEIN: 26.3 g CARBS: 3.5 g FIBER: 1 g
BAJA FISH SOFT TACOS
MAKES: 2 servings PREP TIME: 15 minutes (not including time
to make tortillas) COOK TIME: 10 minutes
You don’t need to be a surfer to enjoy the fresh flavors of a well-
made fish taco. Sometimes we like to make these when we’re
trapped inside during a snowstorm to bring back memories of a
relaxing day at the beach.
FISH:
1 teaspoon chili powder
1 teaspoon ground cumin
½ teaspoon pink Himalayan salt
¼ teaspoon garlic powder
¼ teaspoon onion powder
⅛ teaspoon cayenne pepper
12 ounces cod fillets
SAUCE:
½ cup sour cream
¼ cup mayonnaise, homemade (page 248) or store-bought
1 teaspoon lime juice
1 teaspoon minced fresh cilantro
1 teaspoon pink Himalayan salt
1 teaspoon chili powder
½ teaspoon ground cumin
½ teaspoon paprika
¼ teaspoon cayenne pepper
¼ teaspoon garlic powder
PICO DE GALLO:
1 small Roma tomato, diced
½ medium-sized white onion, diced
1 teaspoon lime juice
1 bunch fresh cilantro, minced
¼ teaspoon pink Himalayan salt
½ batch Coconut Flour Tortillas (page 92)
FOR SERVING:
Avocado slices (optional)
Fresh cilantro leaves (optional)
Lime wedges
1. Preheat the oven to 400°F and line a rimmed baking sheet
with parchment paper.
2. Make the fish: Put the seasonings for the fish in a small bowl
and combine using a fork. Pat the fish dry with paper towels and
evenly coat the fish with the seasoning mixture.
3. Lay the fish on the baking sheet and bake for 8 to 10
minutes, until opaque in the center and slightly firm to the
touch. Set aside.
4. Make the sauce: Put all the ingredients for the sauce in a
medium-sized mixing bowl and combine using a whisk. Set
aside.
5. Make the pico de gallo: Place all the ingredients in a small
bowl and stir with a spoon. Set aside.
6. Assemble the tacos: Across the middle of a tortilla, layer
about one-eighth of the fish, then top with a spoonful of pico de
gallo and a drizzle of sauce. Repeat until all 8 tacos are made.
Top with avocado slices and cilantro leaves, if desired. Serve
with lime wedges.
learn how to lose 10 pounds in a week fast results
NOTE
The assembled tacos should be enjoyed right away; they do not
store or reheat well. (The tortillas get soggy.)
CALORIES: 270 FAT: 6.8 g PROTEIN: 39.8 g CARBS: 9.3 g FIBER: 4.8 g
CURRY CHICKEN SALAD
MAKES: 4 servings PREP TIME: 10 minutes
Chicken salad is one of our favorite things to have prepared in
case we don’t have time to cook a fresh meal. We have tried
tons of different flavor combinations, but our favorite way to
season chicken salad is with the rich and earthy flavor of curry
powder!
1½ pounds boneless, skinless chicken thighs, cooked
⅓ cup mayonnaise, homemade (page 248) or store-bought
2 tablespoons sour cream
Juice of ½ lemon
1½ tablespoons minced fresh chives, plus extra for garnish
1½ teaspoons curry powder
¼ teaspoon pink Himalayan salt
¼ teaspoon ground black pepper
2 stalks celery, chopped
1. Chop the cooked chicken into bite-sized pieces and set aside.
2. Put the mayo, sour cream, lemon juice, chives, curry powder,
salt, and pepper in a medium-sized mixing bowl and stir to
combine.
3. Add the chicken pieces and celery to the mayo mixture and
toss to coat thoroughly. Serve garnished with additional chives,
if desired.
NOTE
The prep time listed above assumes that you’ve got some
precooked chicken thighs on hand. We like to cook chicken on
Sunday to add to salads or quick soups throughout the week.
You can also use a rotisserie chicken from the hot section of
your local grocery store! By the way, we do the same thing with
eggs on Sunday: we hard-boil several to have on hand for quick
breakfasts, salads, and snacks during the week.
TWIST
For additional crunch and color, Megha likes to toss in some
pumpkin seeds and diced red onions!
CALORIES: 339 FAT: 14.2 g PROTEIN: 25.3 g CARBS: 2.3 g FIBER: 0.8 g
learn how to lose 10 pounds in a week fast results
LOADED COBB SALAD
MAKES: 1 serving PREP TIME: 10 minutes
Our favorite thing about a cobb salad is that it just barely
passes as a salad. Start with a small bed of lettuce and pile it
high with as many delicious toppings as possible.
4 to 5 cups chopped romaine lettuce
1 (4-ounce) boneless, skinless chicken breast, cooked and
cut into strips
2 slices bacon, cooked and chopped
½ Roma tomato, diced
1 hard-boiled egg, sliced
½ ripe avocado, sliced
¼ cup shredded cheddar cheese
2 to 3 tablespoons salad dressing of choice (see Notes)
1. Put the lettuce in a large serving bowl.
2. Arrange the chicken, bacon, tomatoes, egg slices, and
avocado slices on top of the lettuce, around the perimeter of
the bowl. Put the shredded cheese in the middle.
3. Drizzle the dressing of your choice over the salad.
NOTES
The prep time listed above does not include the time to cook
the chicken or bacon or to hard-boil an egg. We like to batch-
cook chicken, bacon, and eggs on Sunday to have them on
hand for adding to salads throughout the week. As a shortcut,
you can use a rotisserie chicken from the hot section of your
local grocery store.
Our favorite way to dress salads is to simply drizzle them with
avocado oil and apple cider vinegar and toss to coat. A good
ratio is about 2 tablespoons of oil to 1½ teaspoons of vinegar;
adjust to your taste.
CALORIES: 778 FAT: 64 g PROTEIN: 43 g CARBS: 15 g FIBER: 10 g
COCONUT SHRIMP
MAKES: 4 servings PREP TIME: 10 minutes COOK TIME: 20
minutes
When Matt’s parents visited him at college, they would go out
to dinner, and he would always order coconut shrimp. The first
time he tried seafood with a sweet dipping sauce, it was
definitely love at first bite. Try this recipe with our strawberry
jam!
½ cup coconut flour
1 teaspoon pink Himalayan salt, divided
½ teaspoon ground black pepper, divided
2 large eggs
½ cup unsweetened shredded coconut
1 pound large shrimp, peeled and deveined
Coconut oil, for deep-frying
Strawberry Chia Seed Jam (page 252), for serving (optional)
1. Put the coconut flour, ½ teaspoon of the salt, and ¼
teaspoon of the pepper in a zip-top plastic bag and shake to
combine.
2. Crack the eggs into a medium-sized bowl. Add the remaining
½ teaspoon of salt and ¼ teaspoon of pepper to the eggs and
whisk to combine.
3. Put the shredded coconut in another medium-sized bowl and
set all 3 battering components aside.
4. Batter the shrimp: Pat the shrimp dry using paper towels.
Working in batches, toss the shrimp in the flour mixture, then
dip them in the egg mixture, and then dredge them in the
shredded coconut. Set the coated shrimp on a large plate.
5. Attach a deep-fry thermometer to a medium-sized saucepan
and fill with enough coconut oil so that it comes halfway up the
side of the pan. Heat over medium-high heat until it reaches
330°F to 350°F. Set out another large plate lined with paper
towels for the fried shrimp to rest on.
6. When the oil reaches temperature, deep-fry the shrimp in
batches, removing them once they have turned golden brown,
about 5 minutes per batch. Set the fried shrimp on the paper
towel–lined plate to soak up any excess oil. Serve immediately
with strawberry jam, if desired.
7. Store in a sealed container in the refrigerator for up to 4
days. Reheat in the oven for maximum crispiness.
NOTE
The nutritional information can’t be precisely pinpointed due to
the oil used for frying. We have provided information based on
the shrimp itself, but the fat will vary based on the amount of
oil that the shrimp absorbs.
plus oil from frying
CALORIES: 276 FAT: 12.5 g PROTEIN: 29.3 g CARBS: 11 g FIBER: 6.3 g
learn how to lose 10 pounds in a week fast results
FRIED RED SNAPPER
MAKES: 4 servings PREP TIME: 10 minutes COOK TIME: 20
minutes
This is the perfect dish if you’re looking to impress your friends.
We always make this along with a few other main dishes to
share when we have friends over for a dinner party.
1 cup coconut flour
1 whole red snapper (about 1½ pounds)
1 cup coconut oil
½ teaspoon pink Himalayan salt
SAUCE:
2 tablespoons soy sauce
1 tablespoon toasted sesame oil
Juice of 1 lime
¼ teaspoon garlic powder
¼ teaspoon ginger powder
¼ teaspoon onion powder
¼ teaspoon paprika
¼ teaspoon ground black pepper
Lime wedges, for serving
1. Place the coconut flour in a zip-top plastic bag. Pat the
snapper dry with paper towels, score the skin, and place it in
the bag with the flour. Seal the bag and shake thoroughly to
coat the fish. Set aside.
2. Put the coconut oil in a 12-inch or larger heavy skillet
(preferably cast-iron) over medium-high heat. (Make sure the
skillet is large enough to fit the fish.) Place a deep-fry
thermometer in the oil and heat until it reaches 350°F.
3. Place the snapper in the hot oil and shallow-fry for 10
minutes on each side, until brown and crispy on the outside. Set
aside on a large plate and season with the salt.
4. In a small bowl, whisk together the ingredients for the sauce.
5. Pour the sauce evenly over the fried snapper and serve
immediately with lime wedges.
6. Store leftovers in a sealed container in the refrigerator for up
to 4 days. Reheat in the microwave for a couple minutes.
NOTES
Only half of the coconut flour will adhere to the fish when you
coat it in Step 1, which is reflected in the nutritional
information.
The fat content can’t be precisely pinpointed due to the oil used
for frying. We have provided information based on the fish itself,
but the fat will vary based on the amount of oil that the fish
absorbs.
plus oil from frying
CALORIES: 183 FAT: 6 g PROTEIN: 25.5 g CARBS: 5.8 g FIBER: 2.5 g
learn how to lose 10 pounds in a week fast results
CALIFORNIA COLLARD WRAP
MAKES: 1 serving PREP TIME: 10 minutes
A great option for lowering your carb intake is to sub lettuce
wraps for breads and buns. Collard greens make for the
sturdiest wraps and hold all those yummy toppings inside with
minimal spillage.
2 large collard leaves
1 tablespoon mayonnaise, homemade (page 248) or store-
bought
4 ounces sliced turkey deli meat ½ small tomato, sliced
½ avocado, sliced
2 slices cooked bacon (optional)
Pink Himalayan salt and ground black pepper
1. Cut the stalks out of both collard leaves and cut them in half
lengthwise. Overlap all 4 pieces so that there are no gaps.
2. Spread the mayo down first, then layer on the turkey,
tomato, avocado, and bacon, if using. Season with salt and
pepper.
3. Roll the leaves halfway, tuck in the sides, and finish rolling.
Cut the wrap in half and use a toothpick to stabilize it for
serving, if desired.
TWIST
Matt likes to double the meat, toss in a couple slices of bacon,
and drizzle with olive oil to up the fat content of this wrap!
CALORIES: 353 FAT: 23 g PROTEIN: 25 g CARBS: 10 g FIBER: 7 g
STRAWBERRY COCONUT
SMOOTHIE
MAKES: 1 serving PREP TIME: 3 minutes
Over the past year, we’ve gotten into the habit of making
smoothies almost daily. We usually opt for green smoothies (see
page 172), but occasionally we like to treat ourselves to this
more indulgent combination of strawberry and coconut. The
collagen and heavy cream give it an extra-thick consistency.
3½ ounces fresh strawberries (about ¾ cup), hulled, plus
extra for garnish (optional)
1 cup coconut milk, chilled
2 tablespoons heavy whipping cream
2 tablespoons unsweetened coconut flakes
1 scoop unflavored collagen peptides
¼ teaspoon liquid stevia
¼ teaspoon pink Himalayan salt
Put all the ingredients in a blender and blend until smooth, 30
to 45 seconds. Pour into a 16-ounce glass and serve
immediately, garnished with strawberries, if desired.
CALORIES: 294 FAT: 23 g PROTEIN: 12 g CARBS: 13 g FIBER: 4 g
learn how to lose 10 pounds in a week fast results
GREEN POWER SMOOTHIE
MAKES: 1 serving PREP TIME: 5 minutes
This smoothie is a daily staple of ours. It’s a great way to load
up on nutrients while getting in some high-quality fats and
protein. You might be surprised by how well spinach and
chocolate go together!
1 cup frozen spinach
1 cup unsweetened almond milk
2 tablespoons hemp hearts
1 tablespoon MCT oil
1 scoop chocolate-flavored protein powder
Put all the ingredients in a blender and blend until smooth, 30
to 45 seconds. Pour into a 16-ounce glass and serve
immediately.
NOTES
If you are new to using MCT oil, you may want to start with 1
teaspoon and work your way up to 1 tablespoon, because MCT
oil can cause digestive issues and discomfort. You can also
replace the MCT oil with 2 tablespoons of heavy whipping
cream.
You can use any flavor of protein powder you have on hand; just
be aware that the flavor of the protein powder will dictate the
flavor of the smoothie! If you use unflavored protein powder,
add 12 to 15 drops of liquid stevia for equivalent sweetness.
learn how to lose 10 pounds in a week fast results
CALORIES: 416 FAT: 27 g PROTEIN: 35 g CARBS: 7 g FIBER: 3 g
RASPBERRY LIME ICE POPS
MAKES: 6 pops (1 per serving) ACTIVE PREP TIME: 10
minutes INACTIVE PREP TIME: 6 hours
If you need some peace and quiet, just hand your kids one of
these ice pops! They are the perfect treat for a hot summer
day, and they have ingredients you can feel good about. You
can use any kind of berries you want, but raspberries are our
favorite for pairing with lime.
1 (13½-ounce) can coconut cream
½ cup fresh raspberries
2 tablespoons lime juice
12 drops of liquid stevia
Special equipment:
6 (4½-ounce) ice pop molds
1. Put the ingredients in a blender, reserving a few of the
raspberries to put in the bottoms of the molds prior to freezing,
if desired. Blend until smooth.
2. If you set aside some raspberries, roughly chop them and
drop them into the molds before adding the blended mixture.
Pour the mixture evenly into the molds and freeze for at least 6
hours prior to serving.
NOTE
learn how to lose 10 pounds in a week fast results
Our ice pop mold makes 6 pops. If yours makes fewer than that,
you can halve the recipe so you don’t end up with leftover
mixture.
CALORIES: 140 FAT: 14.2 g PROTEIN: 1 g CARBS: 3.3 g FIBER: 0 g
—Chapter 6—
SIDES & MUNCHIES
Candied Georgia Pecans
Fathead Crackers
Mexican Layer Dip
Buffalo Chicken Dip
Sweet and Spicy Beef Jerky
Charlie’s Energy Balls
Bar Side Mozzarella Sticks
Salami Chips with Pesto
Radical Radish Chips
Cheesy Broccoli and Bacon
Hush Puppies
Asparagus with Goat Cheese and Sunflower Seeds
Chipotle Cauliflower Mash
Cilantro Lime Rice
CANDIED GEORGIA PECANS
MAKES: 12 servings PREP TIME: 10 minutes COOK TIME: 1
hour
We recently moved to Atlanta, Georgia, and immediately began
exploring the local farmers’ markets. The first thing we
purchased was a 5-pound bag of locally grown pecans. While
they are great on their own, they’re even better when tossed in
a sweet cinnamon mixture and baked to crunchy perfection.
12 ounces raw pecan halves
1 large egg white
1 teaspoon water
2 teaspoons vanilla extract
½ teaspoon plus 10 drops of liquid stevia
1 teaspoon ground cinnamon
1 teaspoon pink Himalayan salt
1. Preheat the oven to 250°F. Line a rimmed baking sheet with
parchment paper.
2. Spread the pecan halves on the prepared baking sheet in an
even layer.
3. In a small bowl, whisk together the egg white, water, vanilla
extract, stevia, cinnamon, and salt until combined. Pour the
mixture over the pecans and toss with your hands or a spoon
until the pecans are evenly coated.
4. Flatten out the pecans into a single layer and bake for 45 to
60 minutes, tossing every 15 minutes. The pecans are done
when they have fully dried out and browned.
NOTE
This method can be used with the nut of your choosing!
CALORIES: 202 FAT: 24 g PROTEIN: 3.3 g CARBS: 4.2 g FIBER: 3.1 g
FATHEAD CRACKERS
MAKES: 8 servings PREP TIME: 10 minutes COOK TIME: 10
minutes
When starting a keto diet, the first things a lot of people miss
are chips and crackers. The crunch factor! These fathead
crackers will fill that void.
1½ cups shredded mozzarella cheese (about 6 ounces)
2 ounces cream cheese (¼ cup)
1 cup blanched almond flour
1 large egg
½ teaspoon dried parsley
½ teaspoon pink Himalayan salt
1. Preheat the oven to 425°F and line a baking sheet with
parchment paper.
2. Put the mozzarella and cream cheese in a large microwave-
safe mixing bowl and microwave for 30 seconds. Combine using
a rubber spatula. Microwave for another 30 seconds, until the
cheese has melted, then stir once more.
3. Add the almond flour, egg, parsley, and salt and, using a
fork, combine everything thoroughly until you have a soft,
sticky, and pliable dough.
4. Once the dough comes together, transfer it to the lined
baking sheet and place another piece of parchment paper on
top. Roll out into a thin rectangle, about ¼ inch thick. Using a
pizza cutter or knife, cut the flattened dough into 20 to 25 small
crackers, about 1 inch.
5. Discard any extra dough and spread out the crackers so they
are not touching one another. Bake for 7 to 10 minutes, until
the crackers have puffed up and browned. Allow to cool on the
baking sheet for 10 minutes prior to eating.
6. These are best eaten the same day they are baked, but
leftovers can be stored in a sealed container in the refrigerator
for up to 5 days. To recrisp, place in a preheated 250°F oven for
5 minutes; however, they will not get as crispy as when freshly
baked.
TWIST
Give the crackers a kick with some minced garlic and chili
powder!
CALORIES: 174 FAT: 14.6 g PROTEIN: 9.4 g CARBS: 4 g FIBER: 1.5 g
learn how to lose 10 pounds in a week fast results
MEXICAN LAYER DIP
MAKES: 16 servings ACTIVE PREP TIME: 25 minutes
INACTIVE PREP TIME: 2 to 3 hours COOK TIME: 8 minutes
Who doesn’t love digging into a delicious layer dip while lying
on the couch watching football? This recipe is a favorite of ours
during football season. The worse our favorite teams do, the
more dip we tend to eat.
LAYER 1 (BEEF AND BEANS):
8 ounces ground beef (80/20)
1 (4-ounce) can green chilies
½ (15-ounce) can black soybeans, drained
½ teaspoon pink Himalayan salt
¼ teaspoon ground black pepper
LAYER 2 (SEASONED SOUR CREAM):
1 cup sour cream
1 teaspoon dried oregano leaves
¾ teaspoon garlic powder
¾ teaspoon ground cumin
¾ teaspoon paprika
½ teaspoon chili powder
½ teaspoon pink Himalayan salt
LAYER 3 (GUACAMOLE):
3 ripe avocados, peeled and pitted
1 teaspoon lime juice
½ teaspoon pink Himalayan salt
½ teaspoon ground black pepper
¼ teaspoon ground cumin
¼ small red onion, diced (optional)
LAYER 4 (CHEESE):
1 cup shredded Mexican cheese blend (about 4 ounces)
LAYER 5 (PICO DE GALLO):
1 Roma tomato, diced
½ small white onion, diced
½ teaspoon lime juice
¼ teaspoon pink Himalayan salt
2 tablespoons minced fresh cilantro
FOR SERVING:
Crackers, homemade (page 180) or store-bought
1. Make layer 1: Heat a medium-sized skillet over medium-high
heat and spray with coconut oil spray. Put the ground beef in
the hot skillet and cook through, stirring to break up the meat
as it cooks, about 8 minutes.
2. Add the green chilies, soybeans, salt, and pepper and stir to
combine. Layer in the bottom of a 7-quart glass baking dish.
3. Make layer 2: In a bowl, whisk together the layer 2
ingredients. Dollop onto the meat and bean mixture in the
baking dish and spread evenly using a rubber spatula.
4. Make layer 3: In a medium-sized bowl, mash the avocados
using a fork. Add the lime juice, salt, pepper, and cumin and
combine with the fork. Mix in the diced red onion, if using.
Dollop on top of the sour cream mixture in the baking dish and
spread evenly using the spatula.
learn how to lose 10 pounds in a week fast results
5. Add layer 4: Sprinkle the cheese blend evenly over the
guacamole layer in the baking dish.
6. Make layer 5: Put the diced tomato and onion in a small
bowl. Add the lime juice and toss using a spoon. Add the salt
and cilantro and toss once more.
7. Layer the pico de gallo over the shredded cheese and chill
the dip for 2 to 3 hours before serving.
8. Store in a sealed container in the refrigerator for up to 4
days.
TWIST
When Megha can’t find perfectly ripe avocados for layer 3, she
likes to use her favorite store-bought guacamole!
CALORIES: 159 FAT: 12.8 g PROTEIN: 6.6 g CARBS: 5.6 g FIBER: 3 g
BUFFALO CHICKEN DIP
MAKES: 16 servings PREP TIME: 5 minutes COOK TIME: 20
minutes
How do you eat Buffalo wings without getting all messy? Turn
the wings into a creamy dip and serve it with celery sticks!
12 ounces cream cheese (1½ cups)
¾ cup Frank’s RedHot sauce
3 cups cooked and shredded chicken breast
¾ cup blue cheese dressing, preferably homemade (see
Note)
1 cup shredded mozzarella cheese (about 4 ounces), divided
¼ cup sliced jalapeños
Celery sticks, for serving
1. Preheat the oven to 350°F.
2. Put the cream cheese and hot sauce in a medium-sized
saucepan over medium heat. As the cream cheese begins to
melt, stir the cheese and hot sauce until combined.
3. Once the cream cheese is fully melted, add the chicken and
blue cheese dressing and stir to coat the chicken in the sauce.
Turn off the heat and stir in ¾ cup of the mozzarella cheese.
4. Transfer the mixture to an 8-inch round baking pan and layer
the rest of the mozzarella and the jalapeños on top. Bake for 10
minutes, until the cheese is melted and bubbling. Serve with
celery sticks.
learn how to lose 10 pounds in a week fast results
5. Store leftovers in a sealed container in the refrigerator for up
to 5 days. Reheat in the microwave for a couple minutes.
TIP
We make this recipe time and time again for parties and on
game days. A great tip to speed up the prep time is to use a
rotisserie chicken from the hot section of your grocery store!
NOTE
Store-bought blue cheese dressings usually contain soybean oil.
For this recipe, which calls for a lot of dressing, we recommend
that you use homemade. To whip some up easily, simply
combine equal parts avocado oil–based mayo and sour cream,
add crumbled blue cheese, and thin with a little lemon juice.
CALORIES: 183 FAT: 13.8 g PROTEIN: 11.9 g CARBS: 1.8 g FIBER: 0 g
SWEET AND SPICY BEEF JERKY
MAKES: 16 servings ACTIVE PREP TIME: 15 minutes
INACTIVE PREP TIME: 4 to 24 hours COOK TIME: 4 to 6 hours
This jerky is our favorite keto snack. We make it about once a
month and store it in the fridge for a guilt-free grab-and-go
option. The apple cider vinegar balances out the heat of the hot
sauce to make this jerky irresistibly sweet and spicy.
3 pounds flat-iron steak
MARINADE:
½ cup soy sauce
½ cup apple cider vinegar
¼ cup Frank’s RedHot sauce
½ teaspoon liquid stevia
2 teaspoons liquid smoke
2 teaspoons ground black pepper
1½ teaspoons garlic powder
1 teaspoon onion powder
Special equipment:
10 (12-inch) bamboo skewers
1. Marinate the steak: Slice the steak into thin jerky-sized
strips, about ¼ inch thick, and put them in a gallon-sized ziptop
plastic bag. Add the marinade ingredients, seal the bag, and
shake to fully coat the meat.
2. Seal the bag tightly (removing any excess air) and place it in
a bowl to catch any leakage. Place the bowl in the refrigerator
for at least 4 hours or up to 24 hours.
3. Make the jerky: Adjust the racks in your oven so that one is
in the highest position and one is in the lowest position. Preheat
the oven to 190°F.
4. Remove the steak strips from the marinade and pat them as
dry as possible using paper towels; discard the remaining
marinade.
5. Using bamboo skewers, pierce the tip of each meat strip so
that there are anywhere from 5 to 7 strips hanging on each
skewer. Be sure to leave space between the strips so that air
can circulate around them. Hang the skewers from the top oven
rack and place a rimmed baking sheet on the lowest rack to
catch any drippings.
6. Bake for 4 to 6 hours, until the jerky is dry to the touch.
7. Store in a zip-top plastic bag in the refrigerator for up to 10
days.
NOTE
Three pounds of raw meat will yield one pound of jerky.
CALORIES: 150 FAT: 9.8 g PROTEIN: 15.8 g CARBS: 0.5 g FIBER: 0 g
learn how to lose 10 pounds in a week fast results
CHARLIE’S ENERGY BALLS
MAKES: 20 balls (1 per serving) PREP TIME: 10 minutes
COOK TIME: 20 minutes
This recipe is an ode to Charlie Kelly from the TV show It’s
Always Sunny in Philadelphia. In one episode, he goes on a
three-day video gaming binge and is fueled by “energy balls.”
This is our take on Charlie’s energy balls. We use these as a
quick fuel source when we’re out and about.
½ cup natural almond butter, room temperature
¼ cup coconut oil, melted
1 large egg
½ cup coconut flour
2 tablespoons unflavored beef gelatin powder
1 scoop chocolate-flavored whey protein powder
1. Preheat the oven to 350°F and grease a rimmed baking
sheet with coconut oil spray.
2. In a large mixing bowl, mix together the almond butter,
coconut oil, and egg using a fork. In a small bowl, whisk
together the coconut flour, gelatin, and protein powder.
3. Pour the dry ingredients into the wet mixture and mash with
a fork until you have a cohesive dough. It should not be too
sticky. Note: If the dough doesn’t come together well or is very
sticky, add a little coconut flour until it combines well.
4. Using your hands, form the dough into 20 even-sized balls,
about 1½ inches in diameter, and put them on the prepared
baking sheet.
5. Bake for 20 minutes, until slightly browned and hardened.
Allow to cool on the baking sheet for 10 minutes prior to
serving.
6. Store in a zip-top plastic bag in the refrigerator for up to a
week.
CALORIES: 91 FAT: 7.1 g PROTEIN: 4.1 g CARBS: 3 g FIBER: 1.6 g
BAR SIDE MOZZARELLA STICKS
MAKES: 16 sticks (4 per serving) ACTIVE PREP TIME: 20
minutes INACTIVE PREP TIME: 2 hours COOK TIME: 20
minutes
We’re convinced that the most delicious foods are the ones
found on kids’ menus. Who says we can’t enjoy kids’ menu
foods as adults? Let’s reclaim the kids’ menu together, starting
with mozzarella sticks!
3 ounces pork rinds, finely ground
¼ cup grated Parmesan cheese, plus extra for garnish
½ teaspoon dried oregano leaves
½ teaspoon red pepper flakes
½ teaspoon pink Himalayan salt
½ teaspoon ground black pepper
2 large eggs
1 tablespoon heavy whipping cream
8 sticks mozzarella string cheese
2 cups coconut oil, for deep-frying
Low-carb marinara sauce, for serving (optional)
1. Place the pork rinds, Parmesan, oregano, red pepper flakes,
salt, and pepper in a shallow dish and combine with a fork.
2. Place the eggs and cream in a separate shallow dish and
lightly beat with a fork.
3. Cut each stick of string cheese in half crosswise. Dip each
piece in the egg mixture and then in the pork rind mixture.
Make sure that each piece has a thick coating. You may have to
press the breading into the cheese to ensure an even coat.
Place on a plate and freeze for 2 hours.
4. In a 2-quart saucepan, heat the oil over medium-high heat
until it reaches between 330°F and 345°F on a deep-fry
thermometer.
5. Remove the breaded cheese sticks from the freezer. Fry in
batches for 3 to 5 minutes per batch, until golden brown. Use a
slotted spoon to remove the sticks from the oil and place on a
paper towel–lined plate to drain. Allow to cool for 5 minutes,
then garnish with grated Parmesan. Serve with marinara sauce,
if desired.
6. Store leftovers in a sealed container in the refrigerator for up
to 4 days. Reheat in a preheated 350°F oven for 10 minutes.
NOTE
The nutritional information can’t be precisely pinpointed due to
the oil used for frying. We have provided information based on
the cheese sticks themselves, but the fat content will vary
based on the amount of oil the cheese sticks absorb.
plus oil from frying
CALORIES: 356 FAT: 25.2 g PROTEIN: 31.6 g CARBS: 2.4 g FIBER: 0 g
learn how to lose 10 pounds in a week fast results
SALAMI CHIPS WITH PESTO
MAKES: 6 servings PREP TIME: 10 minutes COOK TIME: 12
minutes
Anytime we can get our hands on some fresh basil, we always
rush home and make a big batch of pesto. It’s a great high-fat
sauce that pairs well with lots of different dishes. For a late-
night snack, we often crisp up some salami chips and load them
up with pesto!
CHIPS:
6 ounces sliced Genoa salami
PESTO:
1 cup fresh basil leaves
3 cloves garlic
¼ cup grated Parmesan cheese
¼ cup raw walnuts
¼ teaspoon pink Himalayan salt
¼ teaspoon ground black pepper
½ cup extra-virgin olive oil
1. Make the chips: Preheat the oven to 375°F and line 2
rimmed baking sheets with parchment paper.
2. Arrange the salami in a single layer on the lined baking
sheets. Bake for 10 to 12 minutes, until crisp. Transfer to a
paper towel–lined plate to absorb the excess oil. Allow to cool
and crisp up further.
3. Make the pesto: Put all the pesto ingredients, except for the
olive oil, in a food processor and pulse until everything is
roughly chopped and a coarse paste has formed.
4. With the food processor running, slowly pour in the olive oil.
Process until all of the oil has been added and the ingredients
are fully incorporated. Taste and season with additional salt and
pepper, if desired.
5. Pour the pesto into a small serving bowl and serve the
salami chips alongside. Store leftover pesto in a sealed
container in the refrigerator for up to 2 weeks; store the chips in
a zip-top plastic bag in the refrigerator for up to 5 days.
TWIST
When we have pine nuts in the pantry, Matt prefers to replace
the walnuts in this recipe with pine nuts.
CALORIES: 202 FAT: 9.4 g PROTEIN: 7.5 g CARBS: 1.2 g FIBER: 0.1 g
learn how to lose 10 pounds in a week fast results
RADICAL RADISH CHIPS
MAKES: 2 servings PREP TIME: 10 minutes COOK TIME: 20
minutes
Believe us, we’ve tried turning literally every low-carb
vegetable into chips. Most of them were complete fails, but
these radish chips were a standout winner. The bigger the
radishes you can find, the bigger the chips you can make.
1 (16-ounce) bag radishes
1½ cups coconut oil, for deep-frying
¾ teaspoon pink Himalayan salt
½ teaspoon ground black pepper
1. Using a sharp knife, cut the root ends off the radishes, then
slice the radishes into thin chips. Place in a bowl and set aside.
2. Heat the coconut oil in a medium-sized saucepan over
medium-high heat until the temperature reaches between
330°F and 350°F on a deep-fry thermometer.
3. Once the oil reaches temperature, drop in 7 to 10 chips at a
time, flipping them with tongs when their edges start to curl.
Once they begin to brown, remove them from the oil and set on
a paper towel–lined plate to absorb any excess oil.
4. Once all the chips are fried, season with the salt and pepper.
Toss to coat and enjoy immediately!
NOTE
The nutritional information can’t be precisely pinpointed due to
the oil used for frying. We have provided information based on
the chips themselves, but the fat content will vary based on the
amount of oil the chips absorb.
TWIST
Megha likes to dip these chips in a simple combination of sour
cream and Sriracha, a dip she’s been using to coat all her foods
lately!
plus oil from frying
CALORIES: 37 FAT: 0 g PROTEIN: 1.5 g CARBS: 7.5 g FIBER: 3.5 g
CHEESY BROCCOLI AND BACON
MAKES: 4 servings PREP TIME: 10 minutes COOK TIME: 25
minutes
The best way to get your veggies in is by pairing them with
bacon and cheese! This dish is great because broccoli is the
perfect veggie for soaking up all the great flavors you throw at
it.
4 slices bacon
5 cups fresh broccoli florets
1 teaspoon minced garlic
SAUCE:
1 tablespoon unsalted butter
2 tablespoons heavy whipping cream
1 cup shredded cheddar cheese (about 4 ounces), divided
1. Preheat the oven to 400°F.
2. Heat a medium-sized skillet over medium-high heat. Cut the
bacon into bite-sized pieces and put them in the hot pan. Allow
to cook through, 3 to 5 minutes. Take one-quarter of the bacon
pieces out of the pan and set aside on a plate.
3. Add the broccoli and garlic to the skillet and toss to coat in
the fat. Sauté for 5 to 7 minutes, until the broccoli is bright
green and tender. Transfer the broccoli mixture to an 8-inch
round or square baking pan or dish.
learn how to lose 10 pounds in a week fast results
4. Make the sauce: Put the butter and cream in a small
saucepan over low heat. Allow the butter to melt, stirring often.
5. Once the butter is fully melted, add ½ cup of the shredded
cheese and continue to stir until the cheese has melted and
formed a thick sauce.
6. Pour the sauce over the broccoli and toss to coat using a
spoon. Layer the remaining ½ cup of shredded cheese and the
reserved bacon over the entire mixture.
7. Bake for 10 minutes, or until the cheese has melted and
slightly browned. Serve immediately.
8. Store leftovers in a sealed container in the refrigerator for up
to 4 days. Reheat in the microwave for a couple minutes, until
the cheese has melted.
CALORIES: 241 FAT: 18.5 g PROTEIN: 13 g CARBS: 8.5 g FIBER: 3 g
HUSH PUPPIES
MAKES: 4 servings PREP TIME: 10 minutes COOK TIME: 30
minutes
Growing up, Matt’s family would always take trips to the East
Coast, and he’s convinced that it was just for the seafood. Sure,
they hit a few historic sites along the way, but really it was all
about the crab, scallops, lobster, and (his personal favorite)
hush puppies. Nothing goes with a fish fry or crab bake like a
big basket of hush puppies.
½ cup coconut flour
¼ cup psyllium husk powder
1 teaspoon baking powder
½ teaspoon onion powder
½ teaspoon pink Himalayan salt
4 large eggs
⅓ cup extra-virgin olive oil
⅓ cup water
2 tablespoons diced white onions
Coconut oil, for deep-frying
1. In a small mixing bowl, combine the coconut flour, psyllium
husk powder, baking powder, onion powder, and salt using a
whisk. Set aside.
2. In a large mixing bowl, whisk together the eggs, olive oil,
and water. Add the dry mixture to the wet mixture and mix with
a wooden spoon until you have a thick, slightly sticky, and
pliable dough. Fold in the diced onions using a rubber spatula.
3. Place a sheet of parchment paper on a large plate. Using
your hands, form the dough into 20 even-sized balls, 1 to 1½
inches in diameter, and place on the plate.
4. Set a medium-sized saucepan over medium-high heat. Put
enough coconut oil in the pan so that it is deep enough to
completely submerge the hush puppies (but, for safety, do not
fill the pan more than halfway full of oil). Place a deep-fry
thermometer into the oil as it heats. Line a plate with paper
towels.
5. When the oil temperature reaches anywhere from 330°F to
350°F, drop some of the hush puppies into the oil and fry until
dark brown on the outside, about 8 minutes. Once cooked
through, remove the hush puppies from the oil using a slotted
spoon and place on the paper towel–lined plate to absorb the
excess oil.
6. Repeat until all the hush puppies are fried. Serve
immediately.
7. Store leftovers in a zip-top plastic bag. Reheat in the
microwave for 30 to 60 seconds.
TIP
We like to serve these hush puppies with a spicy mayo made of
mayonnaise and Sriracha sauce!
plus oil from frying
CALORIES: 322 FAT: 24.5 g PROTEIN: 8.3 g CARBS: 17 g FIBER: 12 g
learn how to lose 10 pounds in a week fast results
ASPARAGUS WITH GOAT CHEESE
AND SUNFLOWER SEEDS
MAKES: 4 servings PREP TIME: 5 minutes COOK TIME: 12
minutes
In 2015, we moved from San Francisco, where we met, to
Philadelphia. On one of our last nights in town, we went to a
fancy steakhouse and ordered a bone-in filet mignon. To our
surprise, our favorite dish of the night wasn’t the steak, but a
perfectly cooked asparagus dish topped with tangy goat cheese
and crunchy sunflower seeds. Whenever we fall in love with a
dish at a restaurant, we always have to re-create it at home.
1 bunch asparagus (about 1 pound), tough ends removed
1 tablespoon extra-virgin olive oil
½ teaspoon pink Himalayan salt
¼ teaspoon ground black pepper
2 ounces fresh (soft) goat cheese
¼ cup raw sunflower kernels
1. Preheat the oven to 400°F.
2. Line a rimmed baking sheet with a single layer of asparagus.
Brush the asparagus with the olive oil and season with the salt
and pepper.
3. Bake for 10 to 12 minutes, until bright green and fork-tender.
4. Crumble the goat cheese down the center of the asparagus
and top with the sunflower kernels. Serve immediately.
NOTE
The cook time may vary depending on the thickness of your
asparagus stalks. Our stalks were ½ inch thick at the bottom
and cooked through well in the time indicated above.
CALORIES: 148 FAT: 10.1 g PROTEIN: 7.5 g CARBS: 6.3 g FIBER: 2.5 g
learn how to lose 10 pounds in a week fast results
CHIPOTLE CAULIFLOWER MASH
MAKES: 2 servings PREP TIME: 10 minutes COOK TIME: 15
minutes
If you’ve never tried it before, cauliflower mash is even
creamier and more flavorful than mashed potatoes. Chipotle
chili peppers give this dish some heat and a greater depth of
flavor.
½ head cauliflower, cored and cut into florets
1 tablespoon unsalted butter
¼ teaspoon minced garlic
2 tablespoons heavy whipping cream
1 chipotle pepper in adobo sauce, minced (see Note)
1½ teaspoons adobo sauce (from the can of chipotle
peppers, above)
½ teaspoon pink Himalayan salt
1. Fill a medium-sized saucepan halfway full of water and bring
to a boil over high heat. Drop in the cauliflower florets and boil
for 15 minutes, until fork-tender.
2. Drain the cauliflower and put it in a food processor. Pulse for
30 seconds.
3. Melt the butter and garlic in a small microwave-safe bowl for
30 seconds. Add the garlic butter and the cream to the food
processor. Pulse until smooth. You may have to stop and scrape
down the sides with a rubber spatula while processing.
learn how to lose 10 pounds in a week fast results
4. Add the chipotle pepper, adobo sauce, and salt and process
once more, until fully incorporated. Transfer to a serving bowl
and serve immediately.
5. Store leftovers in a sealed container in the refrigerator for up
to 4 days. Reheat in the microwave for 60 to 90 seconds.
NOTE
Chipotle peppers in adobo sauce typically come in 7-ounce cans
and usually can be found in the ethnic food section of the
grocery store. If you prefer more heat, you can mix more
chipotle pepper and adobo sauce into the cauliflower.
CALORIES: 144 FAT: 11 g PROTEIN: 3.5 g CARBS: 9 g FIBER: 3.5 g
learn how to lose 10 pounds in a week fast results
CILANTRO LIME RICE
MAKES: 4 servings PREP TIME: 10 minutes COOK TIME: 10
minutes
Miracle Rice is a low-carb option that we use all the time. On its
own, it is flavorless, but it’s great for piling high with sauces and
seasonings. This cilantro lime–flavored rice is a great side for
Mexican dishes.
3 (8-ounce) packages Miracle Rice (see Note)
3 tablespoons unsalted butter
1½ teaspoons minced garlic
Juice of 1 lime
1 teaspoon pink Himalayan salt
½ teaspoon ground black pepper
3 tablespoons chopped fresh cilantro
Lime wedges, for serving (optional)
1. Put the rice in a fine-mesh sieve or a colander with small
holes and rinse with hot water.
2. Heat a large skillet over medium heat. Put the rice in the hot
skillet and, stirring continuously, allow most of the liquid to
evaporate, 5 to 7 minutes.
3. When nearly all of the liquid has evaporated, add the butter
and garlic and stir until the butter is melted and the rice is
coated in the butter. Add the lime juice, salt, and pepper and
stir to combine. Cook for 2 more minutes, until the lime juice
has evaporated.
4. Stir in the cilantro and serve immediately, with lime wedges
on the side, if desired.
5. Store leftovers in a sealed container in the refrigerator for up
to 4 days. Reheat in the microwave for a couple minutes.
NOTE
We purchase Miracle Rice on Amazon in bulk because we have
yet to see it at a local grocery store.
CALORIES: 90 FAT: 8.3 g PROTEIN: 0 g CARBS: 3 g FIBER: 1 g
—Chapter 7—
DECADENT DESSERTS
Chocolate Protein Truffles
Death by Chocolate Cheesecake
No-Churn Peanut Butter Ice Cream
Snickerdoodle Cream Cheesecake
Giant Skillet Cookie for Two
Flourless Chocolate Cake
Protein Cake with Buttercream Frosting
Chewy Chocolate Chip Cookies
Blackberry Mini Cheesecakes
Extreme Fudge Brownies
Coconut Chocolate Cookies
Peanut Butter Hemp Heart Cookies
County Fair Cinnamon Donuts
Pistachio Coconut Fudge
Strawberry Shortcakes
Vanilla Egg Custard
learnhowtolose10poundsinaweekfastresults
Instant Protein Ice Cream
learn how to lose 10 pounds in a week fast results
CHOCOLATE PROTEIN TRUFFLES
MAKES: 6 truffles (1 per serving) ACTIVE PREP TIME: 10
minutes INACTIVE PREP TIME: 30 minutes
We are huge fans of the “healthy dessert” concept, and this
healthy dessert is one of our favorites. These rich, dark
chocolate truffles pack some protein. They are best consumed
after dinner or when your significant other isn’t looking.
¼ cup blanched almond flour
2 tablespoons chocolate-flavored whey protein powder
1½ tablespoons cocoa powder
1 tablespoon natural almond butter
1 tablespoon sugar-free maple syrup
1 tablespoon unsweetened almond milk
¼ cup unsweetened coconut flakes
1. Put all the ingredients, except for the coconut flakes, in a
medium-sized mixing bowl and combine with a fork until
uniform in texture. Cover and refrigerate until firm to the touch,
at least 30 minutes.
2. Meanwhile, chop up the coconut flakes and set aside.
3. Remove the truffle mixture from the refrigerator and roll
between your hands into 6 even-sized balls, about 1½ inches in
diameter. Roll the balls, one at a time, in the chopped coconut
and set on a plate.
4. Store in a sealed container in the refrigerator for up to a
week.
NOTE
If you use unflavored whey protein powder, we recommend that
you sweeten the truffles with 10 to 12 drops of liquid stevia.
CALORIES: 83 FAT: 6.2 g PROTEIN: 4.3 g CARBS: 3.5 g FIBER: 1 g SUGAR
ALCOHOL: 1.2 g
learn how to lose 10 pounds in a week fast results
DEATH BY CHOCOLATE
CHEESECAKE
MAKES: one 9-inch cheesecake (12 servings) ACTIVE PREP
TIME: 20 minutes INACTIVE PREP TIME: 3 hours COOK
TIME: 70 minutes
With its thick chocolaty crust and intense and creamy dark
chocolate filling, this decadent cheesecake packs a whole lot of
chocolate into every bite. It is so good that even your non-keto
friends and family members will want the recipe! We highly
recommend that you make this dessert if you want to impress
that special someone (like Matt did for Megha on their first
Valentine’s Day together!).
CRUST:
½ cup coconut flour
½ cup cocoa powder
½ cup powdered erythritol
½ cup (1 stick) unsalted butter, melted
FILLING:
3 (8-ounce) packages cream cheese, room temperature
¼ cup plus 2 tablespoons heavy whipping cream
3 large eggs
¾ cup powdered erythritol
3 tablespoons cocoa powder
1 teaspoon vanilla extract
4 ounces unsweetened baking chocolate (100% cacao)
1 tablespoon unsalted butter
FOR GARNISH (OPTIONAL):
1 ounce unsweetened baking chocolate (100% cacao)
1. Make the crust: Preheat the oven to 350°F. Grease a 9-inch
springform pan with coconut oil spray.
2. Put the coconut flour, cocoa powder, and erythritol in a
medium-sized mixing bowl and combine using a fork. Pour the
melted butter over the dry mixture and combine thoroughly
using a rubber spatula.
3. Transfer the crust mixture to the greased pan and press into
an even layer across the bottom. Par-bake the crust for 12
minutes.
4. Remove the crust from the oven and lower the oven
temperature to 300°F. Allow the crust to cool for at least 20
minutes before adding the filling.
5. Make the filling: Put the cream cheese and cream in a large
mixing bowl and beat with a hand mixer until combined and
smooth. Add the eggs, erythritol, cocoa powder, and vanilla
extract and combine with the mixer.
6. Roughly chop the 4 ounces of chocolate and put it in a
microwave-safe bowl with the tablespoon of butter. Microwave
in 20-second increments, stirring after each increment, until
melted. (Alternatively, melt the chocolate and butter in a small
heavy-bottomed saucepan on the stovetop over low heat.) 7.
Add the melted chocolate mixture to the rest of the filling
ingredients and mix with the hand mixer until smooth and fully
incorporated. Pour the filling over the cooled crust and spread
evenly with the rubber spatula.
8. Bake the cheesecake for 55 minutes, until a toothpick
inserted in the middle comes out clean. Set on a wire baking
rack and allow to cool for 15 minutes, then place in the
refrigerator until completely set, at least 3 hours.
9. Use a grater or vegetable peeler to grate or shave 1 ounce
of chocolate on top of the chilled cheesecake, if desired. Allow
to sit at room temperature for 30 minutes prior to serving.
10. To serve, run a knife around the edges to loosen the
cheesecake, then remove the rim of the springform pan. Cut
into 12 slices. Store in the refrigerator for up to a week or in the
freezer for up to 3 months.
NOTES
The amount of unsweetened chocolate used in the filling can be
changed to your taste. For us, 4 ounces results in the perfect
dark chocolate cheesecake. Cut that amount in half for a less-
intense chocolate flavor.
The crust can be made a day in advance and stored in the
refrigerator.
CALORIES: 398 FAT: 37 g PROTEIN: 7.1 g CARBS: 10.8 g FIBER: 5.5 g SUGAR
ALCOHOL: 20g
learn how to lose 10 pounds in a week fast results
NO-CHURN PEANUT BUTTER ICE
CREAM
MAKES: roughly 3 cups (½ cup per serving) ACTIVE PREP
TIME: 15 minutes INACTIVE PREP TIME: 4 hours COOK
TIME: 12 minutes
Everyone needs a scoop of ice cream now and then, and this
version using natural, creamy peanut butter is our favorite. We
like to take it out of the freezer about ten minutes before we
scoop it to maximize the creaminess.
2 cups heavy whipping cream
3 tablespoons unsalted butter, plus extra for topping
(optional)
⅔ cup powdered erythritol
4 large egg yolks
2 tablespoons natural creamy peanut butter, plus extra for
topping (optional)
1 teaspoon vanilla extract
⅛ teaspoon xanthan gum
1. Put the cream, butter, and erythritol in a medium-sized
heavy-bottomed saucepan over medium-high heat. Mix using a
whisk until the sweetener has dissolved. Bring to a boil, then
lower the heat and simmer rapidly for 5 to 7 minutes, until
slightly thickened. Remove from the heat and let cool for about
15 minutes, until just warm to the touch.
2. Put the egg yolks in a large mixing bowl and mix using a
hand mixer until lightened to a pale yellow color, 30 to 45
seconds. Add the peanut butter and vanilla extract and combine
with the mixer.
3. Slowly add the cooled cream mixture to the egg yolk mixture
while mixing with the hand mixer. Add the xanthan gum and
continue to mix until a frothy layer has formed on the top.
4. Pour the ice cream mixture into an 8 by 4-inch loaf pan and
place in the freezer for 30 minutes. Mix with a spoon, then
return the pan to the freezer for another 30 minutes. Mix again,
then return the pan to the freezer until the ice cream is hard
enough to scoop, at least 3 more hours.
5. Allow the ice cream to sit out at room temperature for 10
minutes prior to serving. If desired, garnish each serving with a
spoonful of peanut butter or with a quick peanut butter drizzle
(as shown in the photo), made by combining equal parts peanut
butter and butter in a microwave-safe bowl, microwaving until
the butter has melted, and then combining them with a spoon
until smooth.
6. Store in a sealed container in the freezer for up to a week.
NOTE
This recipe calls for consuming raw eggs, which we are
comfortable doing. If you are concerned, feel free to use
pasteurized eggs.
TWIST
Matt likes to make this ice cream using almond butter instead of
peanut butter to change up the flavor!
CALORIES: 392 FAT: 40.5 g PROTEIN: 4.8 g CARBS: 3.7 g FIBER: 0.5 g SUGAR
ALCOHOL: 21 g
SNICKERDOODLE CREAM
CHEESECAKE
MAKES: 1 serving ACTIVE PREP TIME: 5 minutes INACTIVE
PREP TIME: 30 minutes COOK TIME: 90 seconds
Microwave cakes are our absolute favorite keto desserts. We
aren’t the most patient people, so the fact that we can whip up
this snickerdoodle cake in under five minutes is perfect. And
who doesn’t love cutting into a surprise cream cheese filling?
FILLING:
1 tablespoon cream cheese, room temperature
1 teaspoon powdered erythritol
1 teaspoon ground cinnamon
CAKE:
1½ tablespoons coconut flour
1 tablespoon golden flax meal
¼ teaspoon baking powder
⅛ teaspoon cream of tartar
2 tablespoons unsalted butter, melted but not hot
1 large egg
½ teaspoon vanilla extract
¼ teaspoon plus 15 drops of liquid stevia
FOR GARNISH (OPTIONAL):
Ground cinnamon
Powdered erythritol
learn how to lose 10 pounds in a week fast results
1. Make the filling: Place a piece of plastic wrap in a small bowl
and put the cream cheese, erythritol, and cinnamon in the
center. Use a spoon to combine the ingredients, then wrap the
plastic wrap around the mixture to enclose it securely. Using
your hands, form the filling into a small disc, 1 inch in diameter
and ½ inch thick. Place in the freezer for 30 minutes.
2. Make the cake: In a small bowl, use a fork to whisk together
the coconut flour, flax meal, baking powder, and cream of
tartar. In another small bowl, whisk together the melted butter,
egg, vanilla extract, and stevia.
3. Slowly add the dry mixture to the wet mixture and whisk
together until it has a thick batterlike consistency.
4. Grease a 4- or 5-ounce microwave-safe ramekin with coconut
oil spray. Pour half of the batter into the ramekin. Remove the
cream cheese disc from the freezer, unwrap, and place in the
center of the ramekin. Gently press it down, but do not let it hit
the bottom. Pour the rest of the batter on top of the filling and
spread, fully covering the disc and creating an even surface.
5. Microwave for 90 seconds. Flip the cake over onto a plate
and, if desired, dust with ground cinnamon and powdered
erythritol. Enjoy!
NOTE
If you prefer, you can bake the cake at 350°F for 25 minutes.
CALORIES: 403 FAT: 36 g PROTEIN: 11 g CARBS: 12 g FIBER: 7 g SUGAR
ALCOHOL: 4 g
GIANT SKILLET COOKIE FOR TWO
MAKES: 6-inch cookie (2 servings) PREP TIME: 10 minutes
COOK TIME: 20 minutes
This is the perfect date-night dessert! When we finish dinner
and can feel a snack-fest coming on, we clean the kitchen, put
on some music, and make this giant skillet cookie together. It’s
always better to have a delicious dessert that you put some
thought and effort into than to snack mindlessly. You can wait
for the cookie to cool completely and then cut it into slices, or
dig in with a spoon as soon as it comes out of the oven.
½ cup blanched almond flour
1 teaspoon unflavored beef gelatin powder
½ teaspoon baking powder
¼ teaspoon pink Himalayan salt
2 tablespoons unsalted butter
1 tablespoon cream cheese
2 tablespoons heavy whipping cream
1 large egg yolk
½ teaspoon vanilla extract
½ teaspoon liquid stevia
2 tablespoons sugar-free chocolate chips, divided
1. Preheat the oven to 350°F and grease a 6-inch oven-safe
skillet with coconut oil spray.
2. In a small bowl, combine the almond flour, gelatin, baking
powder, and salt using a fork. Set aside.
3. Put the butter and cream cheese in a small microwave-safe
bowl that’s large enough to accommodate the beaters of a hand
mixer. Microwave for 20 to 30 seconds, just until soft. Combine
using a hand mixer. Add the cream, egg yolk, vanilla extract,
and stevia and mix to combine.
4. Add the dry mixture to the wet mixture and combine using
the mixer until uniform. Fold in 1½ tablespoons of the chocolate
chips using a rubber spatula.
5. Pour the mixture into the greased skillet and spread evenly
with the spatula. Top the cookie with the remaining ½
tablespoon of chocolate chips. Bake for 20 minutes, or until
golden brown.
6. Allow to rest in the skillet for 15 minutes prior to serving, or
dig in immediately with spoons, if desired.
TWIST
Matt likes to add walnuts to his half of the cookie for crunch and
flavor!
CALORIES: 406 FAT: 38.5 g PROTEIN: 9.5 g CARBS: 11.2 g FIBER: 4.5 g
SUGAR ALCOHOL: 2.3g
learn how to lose 10 pounds in a week fast results
FLOURLESS CHOCOLATE CAKE
MAKES: one 9-inch cake (8 servings) PREP TIME: 10 minutes
COOK TIME: 42 minutes
Are you a dark chocolate fan? This recipe uses 100 percent
cacao chocolate for a truly intense dark chocolate flavor. One
slice and your chocolate craving will be satisfied.
5 ounces unsweetened baking chocolate (100% cacao)
½ cup (1 stick) plus 2 tablespoons unsalted butter
5 large eggs
1 cup powdered erythritol
½ cup cocoa powder
½ teaspoon baking powder
1. Preheat the oven to 350°F and grease a 9-inch springform
pan with coconut oil spray.
2. Put the chocolate and butter in a small microwave-safe bowl
and microwave for 30 seconds. Stir and microwave for another
30 seconds, then stir again. If the chocolate is not fully melted,
continue to microwave in 20- to 30-second intervals, stirring
after each interval. Set aside.
3. Crack the eggs into a large bowl and mix with a hand mixer
until frothy. Slowly pour in the melted chocolate as you keep
mixing. Set aside.
4. Put the erythritol, cocoa powder, and baking powder in a
small bowl and combine using a fork. In 2 batches, add the dry
mixture to the wet mixture and combine using the mixer until
you have a thick batter.
5. Pour the batter into the greased springform pan and bake for
40 minutes, or until a toothpick inserted in the center of the
cake comes out clean. Allow to rest in the pan for 15 minutes
prior to cutting and serving. To serve, run a knife around the
edges to loosen the cake, then remove the rim of the
springform pan and cut into 8 slices.
6. Store leftover cake in a sealed container or gallon-sized zip-
top plastic bag for up to a week.
CALORIES: 296 FAT: 26.4 g PROTEIN: 7.4 g CARBS: 8.4 g FIBER: 5.8 g SUGAR
ALCOHOL: 24 g
learn how to lose 10 pounds in a week fast results
PROTEIN CAKE WITH
BUTTERCREAM FROSTING
MAKES: 8 servings PREP TIME: 20 minutes COOK TIME: 30
minutes
This is without a doubt the dessert we make more often than
any other. It’s truly a guilt-free treat. The carbs are super low,
and it tastes great! We often omit the frosting and have it in the
morning with a big cup of coffee.
CAKE:
2¾ ounces cream cheese (⅓ cup), room temperature
¼ cup (½ stick) unsalted butter, melted
2 large eggs, room temperature
¼ cup sour cream
10 drops of liquid stevia
1 teaspoon vanilla extract
2 scoops flavored whey protein powder of choice (see Note)
¼ cup oat fiber
1½ teaspoons baking powder
½ teaspoon cream of tartar
VANILLA BUTTERCREAM FROSTING:
(makes 2½ cups)
1 cup (2 sticks) unsalted butter, room temperature
1½ cups powdered erythritol
2 tablespoons heavy whipping cream
1 teaspoon vanilla extract
1. Preheat the oven to 325°F and grease an 8 by 4-inch loaf
pan with coconut oil spray.
2. Make the cake: In a large bowl, using a hand mixer, beat the
cream cheese and butter until creamy. Add the eggs, sour
cream, stevia, and vanilla extract and mix to combine. Set
aside.
3. In a small bowl, whisk together the protein powder, oat fiber,
baking powder, and cream of tartar. In 2 batches, add the dry
mixture to the wet mixture and combine using the mixer until
you have a pourable batter.
4. Pour the batter into the greased loaf pan and bake for 30
minutes, until golden brown. Allow the cake to cool completely
in the pan before removing and frosting.
5. Make the frosting: Put the butter and erythritol in a medium-
sized mixing bowl and beat using the hand mixer or a whisk
until light and creamy. Add the cream and vanilla extract and
whisk again to combine. Store in the refrigerator until ready to
use.
6. Assemble the cake: Remove the cooled cake from the pan
and, with the knife held parallel to the top, slice it in half
horizontally to create two thin rectangular layers. Cut each
layer into 8 equal-sized pieces to create a total of 16 pieces.
Using half of the frosting, frost the top of each piece of cake,
then stack the layers, two per stack, to make 8 mini two-layer
protein cakes.
7. Store leftover cake in a sealed container in the refrigerator
for up to a week and leftover frosting in a sealed container in
the refrigerator for up to 2 weeks.
CALORIES: 250 FAT: 23.4 g PROTEIN: 8.8 g CARBS: 3.3 g FIBER: 2.5 g SUGAR
ALCOHOL: 18 g
NOTE
You can use any flavor of protein powder you desire. Be aware
that whatever flavor you use will dictate the flavor of the cake.
learn how to lose 10 pounds in a week fast results
CHEWY CHOCOLATE CHIP
COOKIES
MAKES: 16 cookies (1 per serving) PREP TIME: 10 minutes
COOK TIME: 20 minutes
It took us a long time to get this recipe right. We must have
gone through 20 or 30 test runs before we learned about the
secret ingredient: beef gelatin powder. Our friend Deana, the
owner of Good Dee’s low-carb baking mixes, tipped us off to the
magic of beef gelatin powder, and it took our cookies to the
next level.
1½ cups blanched almond flour
½ cup granular erythritol
1 tablespoon unflavored beef gelatin powder
1 teaspoon baking powder
½ cup (1 stick) unsalted butter, melted but not hot
1 large egg
1 teaspoon vanilla extract
½ cup sugar-free chocolate chips
1. Preheat the oven to 350°F and line 2 baking sheets with
parchment paper.
2. Put the almond flour, erythritol, gelatin, and baking powder
in a medium-sized bowl and whisk using a fork. Set aside.
3. Put the melted butter, egg, and vanilla extract in a large
bowl and combine using a hand mixer or whisk. Add the dry
mixture to wet mixture in 2 batches and combine until you have
a soft dough that can easily be rolled between your hands
without sticking.
4. Fold the chocolate chips into the dough with a rubber
spatula. Using a cookie scoop or spoon, scoop 16 even-sized
balls of the dough onto the baking sheets, leaving 2 inches of
space between them. Using your hand or the spatula, flatten
the cookies a little. They will spread slightly in the oven.
5. Bake for 20 minutes, or until golden brown. Allow to cool on
the baking sheets for 15 minutes prior to handling.
6. Store leftovers in a sealed container in the refrigerator for up
to a week or freeze for up to a month.
CALORIES: 125 FAT: 11.8 g PROTEIN: 2.8 g CARBS: 3.2 g FIBER: 1.5 g SUGAR
ALCOHOL: 6.6 g
learn how to lose 10 pounds in a week fast results
BLACKBERRY MINI CHEESECAKES
MAKES: two 4-inch cheesecakes (8 servings) ACTIVE PREP
TIME: 10 minutes INACTIVE PREP TIME: 3 hours COOK
TIME: 13 minutes
We use fruit sparingly in our cooking, but when we do use it, we
usually go with blackberries. Blackberries have a great flavor
and are one of the lowest-carb fruits. We love the pairing of
blackberries and the walnut crust in this recipe, pulled together
by a soft cheesecake filling.
CRUST:
2½ ounces raw walnuts
3 tablespoons unsalted butter
1 large egg yolk
¼ teaspoon plus 10 drops of liquid stevia
¼ teaspoon pink Himalayan salt
FILLING:
12 ounces cream cheese (1½ cups), room temperature
¼ cup plus 2 tablespoons sour cream
¾ cup heavy whipping cream
¾ cup powdered erythritol
3½ ounces fresh blackberries (about ¾ cup), halved, plus
extra whole berries for garnish
1. Make the crust: Put all the crust ingredients in a food
processor and process until finely chopped and fully combined.
Divide the crust mixture between two 4-inch springform pans.
Using a rubber spatula, flatten the crusts to cover the bottoms
of the pans. Place in the freezer to chill for 30 minutes.
2. Preheat the oven to 325°F. Bake the chilled crusts for 13
minutes, or until slightly browned. Allow to cool completely
before adding the filling.
3. Make the filling: Put the cream cheese, sour cream, and
heavy cream in a large mixing bowl and combine using a hand
mixer until the mixture has a thick, creamy consistency. Add the
erythritol and mix to combine.
4. Fold in the halved blackberries. Pour the filling over the
cooled crusts and use a rubber spatula to spread the filling
evenly.
5. Freeze for at least 2½ hours or refrigerate for at least 6
hours prior to unmolding and serving. If you freeze the
cheesecakes, allow them to sit out at room temperature for 10
minutes prior to serving. Garnish each cake with a few
blackberries. To serve, cut each cheesecake into quarters,
yielding a total of 8 servings.
6. Store leftovers in a sealed container in the refrigerator for up
to a week.
NOTE
You can swap in any berry you want in this recipe; however,
note that the nutritional information will change.
CALORIES: 482 FAT: 48.5 g PROTEIN: 7.5 g CARBS: 7.3 g FIBER: 1.7 g SUGAR
ALCOHOL: 24g
EXTREME FUDGE BROWNIES
MAKES: 9 brownies (1 per serving) PREP TIME: 10 minutes
COOK TIME: 52 minutes
Let’s face it: everyone is a fudgy brownie person, even your
weird friend who says he likes cake brownies better. You know
deep down even that guy is on team fudge. These are without a
doubt the fudgiest keto brownies in existence, and this is the
number-one dessert recipe on our blog.
¼ cup cocoa powder
2 tablespoons coconut flour
¼ teaspoon pink Himalayan salt
3 large eggs
½ cup granular erythritol
½ teaspoon vanilla extract
¾ cup (1½ sticks) unsalted butter
2 ounces unsweetened baking chocolate (100% cacao)
Powdered erythritol, for topping (optional)
1. Preheat the oven to 325°F and grease an 8-inch square
brownie pan with coconut oil spray.
2. Put the cocoa powder, coconut flour, and salt in a small bowl
and whisk using a fork. Set aside.
3. In a large bowl, whisk together the eggs, erythritol, and
vanilla extract. Set aside.
learn how to lose 10 pounds in a week fast results
4. In a small microwave-safe bowl, combine the butter and
chocolate. Microwave until fully melted, about 1 minute, stirring
every 30 seconds. Add the melted chocolate mixture to the egg
mixture and whisk to combine.
5. Add the dry mixture to the wet mixture in 2 batches,
whisking after each addition until fully combined.
6. Pour the batter into the greased pan and bake for 50
minutes, or until a toothpick inserted in the center comes out
clean. Allow to cool in the pan for 20 minutes, then cut into 9
pieces. If desired, dust with powdered erythritol before serving.
7. Store leftovers in a sealed container in the refrigerator for up
to a week or freeze for up to a month.
TWIST
Megha likes to swirl a mixture of softened cream cheese and
powdered erythritol into the top of the brownies prior to baking
for a simple take on cheesecake brownies!
CALORIES: 210 FAT: 19.9 g PROTEIN: 3.7 g CARBS: 4.1 g FIBER: 2.8 g SUGAR
ALCOHOL: 10.7 g
COCONUT CHOCOLATE COOKIES
MAKES: 1 dozen cookies (1 per serving) PREP TIME: 10
minutes COOK TIME: 15 minutes
We share a love for anything that combines chocolate and
coconut. Not only do these flavors pair perfectly, but they
are a natural fit for ketogenic baking. Coconut flour and
cocoa powder are naturally low in carbs and, when
combined in the right ratio, make for a chewy cookie that
the whole family will love.
¼ cup (½ stick) unsalted butter, room temperature
1 ounce cream cheese (2 tablespoons), room
temperature
¼ cup plus 2 tablespoons powdered erythritol
1 large egg
¼ cup heavy whipping cream
¼ cup coconut flour
¼ cup cocoa powder
½ teaspoon baking powder
¼ teaspoon pink Himalayan salt
½ cup unsweetened coconut flakes
1. Preheat the oven to 325°F and line 2 baking sheets with
parchment paper.
2. In a large bowl, use a hand mixer to cream the butter,
cream cheese, and erythritol until light and fluffy. Mix in the
egg and cream. Set aside.
3. In a small bowl, whisk together the coconut flour, cocoa
powder, baking powder, and salt. Add the dry mixture to the
wet ingredients in 2 batches, mixing with the hand mixer
after each addition until you achieve a soft, slightly crumbly
consistency. Fold in the coconut flakes.
4. Using a cookie scoop or spoon, scoop 12 even-sized balls
of the dough onto the lined baking sheets and flatten with a
fork to the desired size. They will not spread in the oven.
Bake for 15 minutes, or until slightly firm to touch. Allow to
cool on the baking sheets for 20 minutes prior to handling or
they will fall apart.
5. Store in a sealed container or zip-top plastic bag in the
refrigerator for up to a week.
TWIST
Matt likes to add chopped pecans and chocolate chips for a
simple take on kitchen sink cookies!
CALORIES: 91 FAT: 8.4 g PROTEIN: 1.4 g CARBS: 3 g FIBER: 1.8 g SUGAR
ALCOHOL: 5g
PEANUT BUTTER HEMP HEART
COOKIES
MAKES: 1 dozen cookies (1 per serving) PREP TIME: 10
minutes COOK TIME: 14 minutes
Hemp hearts are one of our favorite ingredients to work with.
They are high in fiber, protein, and fat and have a nice earthy
taste. Hemp hearts give these cookies a rich flavor and boost
the nutrient content.
½ cup natural peanut butter, room temperature
1 large egg
½ cup hemp hearts
¼ cup granular erythritol
¼ teaspoon baking powder
½ teaspoon vanilla extract
½ cup sugar-free chocolate chips
1. Preheat the oven to 350°F and line 2 baking sheets with
parchment paper.
2. In a large mixing bowl, combine the peanut butter and egg
using a whisk. Add the hemp hearts, erythritol, baking powder,
and vanilla extract and combine using a wooden spoon. Fold in
the chocolate chips.
3. Using a cookie scoop or spoon, scoop 12 even-sized balls of
the dough onto the lined baking sheets, spacing them about 2
inches apart. Flatten the cookies with a fork.
learn how to lose 10 pounds in a week fast results
4. Bake the cookies for 12 to 14 minutes, until golden brown
and slightly firm to touch. Allow to cool on the baking sheets for
10 minutes prior to handling or they will fall apart.
5. Store leftovers in a sealed container in the refrigerator for up
to a week or freeze for up to a month.
CALORIES: 120 FAT: 9.8 g PROTEIN: 5.7 g CARBS: 4.1 g FIBER: 2.2 g SUGAR
ALCOHOL: 4.8 g
COUNTY FAIR CINNAMON DONUTS
MAKES: 6 donuts (1 per serving) PREP TIME: 10 minutes
COOK TIME: 25 minutes
The county fair has some of the best-tasting food we’ve ever
tried. We don’t even remember anything else about the fair. We
went with the sole focus of consuming as much fried delicacies
as humanly possible. These baked donuts have the same
cinnamon-sugar flavor that will take you back to your childhood
fair days!
11½ ounces cream cheese (1 cup plus 7 tablespoons), room
temperature
½ cup extra-virgin olive oil
¼ cup heavy whipping cream
4 large eggs
½ teaspoon liquid stevia
½ teaspoon maple extract
½ teaspoon vanilla extract
¼ cup plus 2 tablespoons coconut flour
2 teaspoons ground cinnamon
1 teaspoon baking powder
1 teaspoon xanthan gum
¼ teaspoon pink Himalayan salt
TOPPING:
¼ cup granular erythritol
¼ cup ground cinnamon
Special equipment:
6-cavity silicone donut pan
1. Preheat the oven to 400°F and grease a 6-cavity donut pan
with coconut oil spray.
2. In a large bowl, beat the cream cheese, olive oil, cream,
eggs, stevia, and extracts using a hand mixer until smooth and
fully incorporated. Set aside.
3. In a small bowl, whisk together the coconut flour, cinnamon,
baking powder, xanthan gum, and salt using a whisk. Add the
dry mixture to the wet ingredients and combine using the hand
mixer. Fill the greased cavities of the donut mold to the brim,
making sure not to overfill.
4. Bake for 25 minutes, until the donuts are puffed up and a
toothpick comes out clean.
5. Meanwhile, put the ingredients for the topping on a plate
and combine using your fingers. After removing the donuts from
the oven, allow to cool in the pan for 5 minutes, then toss them,
one at a time, in the cinnamon-sugar mixture. Set the coated
donuts on a wire baking rack to cool for an additional 10
minutes prior to eating.
6. Store leftovers in a sealed container in the refrigerator for up
to 4 days.
CALORIES: 461 FAT: 44.8 g PROTEIN: 8.7 g CARBS: 6.8 g FIBER: 2.5 g SUGAR
ALCOHOL: 8g
learn how to lose 10 pounds in a week fast results
PISTACHIO COCONUT FUDGE
MAKES: 16 pieces (1 piece per serving) ACTIVE PREP TIME:
10 minutes INACTIVE PREP TIME: 2 hours
When Matt was a child, his family took plenty of trips to
Mackinac Island, Michigan, the fudge capital of the world. They
would ride bikes around the island fueled entirely by fudge. His
favorite was the pistachio fudge, which was the inspiration for
this recipe.
½ cup coconut oil, melted
4 ounces cream cheese (½ cup), room temperature
1 teaspoon vanilla extract
¼ teaspoon plus 10 drops of liquid stevia
½ cup shelled raw pistachios, roughly chopped, divided
½ cup unsweetened shredded coconut, divided
1. In a medium-sized bowl, beat the coconut oil and cream
cheese with a hand mixer until smooth and creamy. Add the
vanilla extract and stevia and mix until combined.
2. Fold in one-third of the pistachios and one-third of the
coconut flakes using a rubber spatula. Pour the fudge mixture
into a 5-inch square dish or pan and top with the remaining
pistachios and shredded coconut.
3. Refrigerate for at least 2 hours prior to serving. To serve, cut
into 16 pieces.
4. Store leftovers in a sealed container in the refrigerator for up
to a week.
CALORIES: 123 FAT: 12.9 g PROTEIN: 1.2 g CARBS 2 g FIBER: 0.7 g
STRAWBERRY SHORTCAKES
MAKES: 6 servings PREP TIME: 20 minutes COOK TIME: 20
minutes
Keto desserts tend to be dense and heavy. These fluffy
strawberry shortcakes are the complete opposite. Piled high
with homemade whipped cream and fresh strawberries, they
are the perfect summer treat.
SHORTCAKES:
¼ cup plus 2 tablespoons coconut flour
1 packet sugar-free strawberry-flavored gelatin powder
1 teaspoon baking powder
¼ teaspoon pink Himalayan salt
¼ cup plus 2 tablespoons coconut oil, melted
2 ounces cream cheese (¼ cup), room temperature
¼ cup sour cream
4 large eggs, room temperature
15 drops of liquid stevia
FILLING/TOPPING:
1 cup heavy whipping cream
1 cup fresh strawberries, hulled and thinly sliced
Special equipment:
6-cavity, 3½-inch-diameter silicone muffin top pan
1. Preheat the oven to 350°F and grease a 6-cavity silicone
muffin top pan with coconut oil spray.
2. Make the shortcakes: In a small bowl, whisk together the
coconut flour, gelatin, baking powder, and salt.
3. Put the coconut oil, cream cheese, and sour cream in a large
mixing bowl and combine with the whisk. Add the eggs and
stevia and whisk until smooth.
4. Add the dry mixture to the wet ingredients and whisk until
fully incorporated and smooth. Evenly distribute the mixture
among the greased cavities of the muffin top pan, filling them
to the rim. Level the tops with a butter knife.
5. Bake for 20 minutes, or until a toothpick inserted in the
center of a cake comes out clean. Allow to cool in the pan for 5
minutes, then transfer the shortcakes to a cooling rack to cool
completely before filling.
6. Make the filling/topping: Put the cream in a medium-sized
mixing bowl and beat using a hand mixer until stiff peaks form.
7. Assemble the shortcakes: Slice the cakes in half horizontally
to create a total of 12 round layers. Using a butter knife, frost
the bottom halves with the whipped cream, then make a single
layer of overlapping strawberries. Put the other half of each
cake on top of the strawberries and frost the tops using a piping
bag or butter knife. Make a top layer of sliced strawberries. (We
like to fan the berry slices for a pretty presentation.) 8. Store
leftovers in a sealed container in the refrigerator for up to a
week.
CALORIES: 392 FAT: 36.8 g PROTEIN: 6.2 g CARBS: 8.6 g FIBER: 3 g
learn how to lose 10 pounds in a week fast results
VANILLA EGG CUSTARD
MAKES: 2 servings ACTIVE PREP TIME: 10 minutes
INACTIVE PREP TIME: 2 hours COOK TIME: 30 minutes
This delicate egg custard is the perfect date-night dessert
because it looks and tastes fancy but is absolutely foolproof.
1 cup heavy whipping cream, plus ¼ cup for topping if
desired
2 large egg yolks
2 teaspoons vanilla extract
½ teaspoon liquid stevia
1. Preheat the oven to 300°F.
2. Put the 1 cup of cream, egg yolks, vanilla extract, and stevia
in a medium-sized mixing bowl and beat with a hand mixer until
combined. Pour into two 6-ounce ramekins. Place the ramekins
in a baking dish and fill the baking dish with boiling water so
that it goes two-thirds of the way up the sides of the ramekins.
3. Bake for 30 minutes, or until the edges of the custard are
just starting to brown. It should not be completely baked
through and firm. Place in the refrigerator to chill and set for at
least 2 hours before serving.
4. If making the topping, put the ¼ cup of cream in a medium-
sized mixing bowl and whip using the hand mixer until soft
peaks form. Top the custard with the whipped cream prior to
serving.
TWIST
After the custard has chilled, Megha likes to break through the
top and swirl in some chocolate chips and pumpkin pie spice for
greater richness and a fall spin!
CALORIES: 568 FAT: 59.5 g PROTEIN: 5.5 g CARBS: 4.5 g FIBER: 0 g
INSTANT PROTEIN ICE CREAM
MAKES: 1 serving PREP TIME: 1 minute
Dessert doesn’t have to be complex or require five different
mixing bowls, especially on those busy days when you barely
have enough energy to cook dinner. You can make this delicious
low-carb protein ice cream in under two minutes.
1 cup unsweetened almond milk
1 scoop flavored protein powder of choice
¼ teaspoon xanthan gum
1½ cups ice
Ground cinnamon, for garnish (optional)
1. Put the milk in a blender. Add the protein powder, xanthan
gum, and ice and puree on high until the mixture is smooth, 20
to 30 seconds.
2. Pour into a serving bowl and garnish with a dusting of
cinnamon, if desired. Enjoy immediately.
NOTES
We use cinnamon crunch–flavored Quest Protein Powder, but
any powder you have at home will work!
You can up the fat by adding some heavy whipping cream or
MCT oil.
learn how to lose 10 pounds in a week fast results
CALORIES: 130 FAT: 5 g PROTEIN: 21 g CARBS: 5 g FIBER: 2 g
—Chapter 8—
CONDIMENTS
Peanut Sauce
BBQ Sauce
Homemade Chipotle Mayo
Maple Cinnamon Almond Butter
Strawberry Chia Seed Jam
PEANUT SAUCE
MAKES: ¾ cup (2 tablespoons per serving) PREP TIME: 5
minutes
This is the go-to sauce in our household for a couple reasons.
The first is that it contains peanut butter, which is pretty much
the perfect food. The second is that it is so easy to make. All it
takes is a handful of ingredients, a blender, and five minutes.
This sauce pairs particularly well with Asian dishes.
½ cup natural peanut butter
2 cloves garlic
1 (½-inch) piece fresh ginger, grated
¼ cup water
2 tablespoons soy sauce
1 tablespoon unseasoned rice wine vinegar
10 drops of liquid stevia
½ teaspoon red pepper flakes
FOR GARNISH (OPTIONAL):
Chopped raw peanuts
Sliced scallions
1. Put all the ingredients for the sauce in a blender or food
processor and process until smooth. Check the consistency and
add more water to thin the sauce, if desired.
2. Pour the sauce into a bowl and garnish with chopped
peanuts and sliced scallions, if desired.
learn how to lose 10 pounds in a week fast results
3. Store in a sealed container in the refrigerator for up to a
week.
TIP
If you don’t have rice wine vinegar, you can substitute an equal
amount of lime juice.
CALORIES: 134 FAT: 10.7 g PROTEIN: 6.3 g CARBS: 5.8 g FIBER: 2 g
BBQ SAUCE
MAKES: 1¾ cups plus 2 tablespoons (5 tablespoons per
serving) PREP TIME: 5 minutes COOK TIME: 25 minutes
This tangy apple-flavored barbecue sauce will steal the show at
your next cookout. We usually make a big batch and store it in a
mason jar in the fridge.
1 cup reduced-sugar ketchup
½ cup water
¼ cup apple cider vinegar
2½ tablespoons sugar-free maple syrup
2 teaspoons ground black pepper
1 teaspoon Worcestershire sauce
½ teaspoon liquid smoke
½ teaspoon onion powder
¼ teaspoon pink Himalayan salt
1. Put all the ingredients in a small saucepan and combine
using a whisk. Bring to a boil over high heat, then reduce the
heat and simmer for 15 to 20 minutes, until the desired
consistency is achieved. The longer you reduce the sauce on
the stovetop, the thicker it will get and the more concentrated
the flavors will become.
2. Store in a sealed container in the refrigerator for up to 2
weeks.
CALORIES: 17 FAT: 0 g PROTEIN: 0 g CARBS: 3.5 g FIBER: 0.3 g SUGAR
ALCOHOL: 0.3 g
HOMEMADE CHIPOTLE MAYO
MAKES: 1¾ cups plus 2 tablespoons (1 tablespoon per serving)
PREP TIME: 5 minutes
Store-bought mayo is usually made with vegetable oils that are
loaded with harmful trans fats. This is a healthy alternative you
can feel good about piling onto your next sandwich. We use
avocado oil and spice it up with some ground chipotle pepper
for a little kick. To make a plain mayo, simply omit the chipotle
pepper (see the variation below)—or do what we often do and
pick up a jar of Primal Kitchen’s ready-made avocado oil mayo.
2 large egg yolks
2 tablespoons Dijon mustard
1 tablespoon apple cider vinegar
1 teaspoon ground chipotle pepper
½ teaspoon pink Himalayan salt
1½ cups avocado oil
1. Put the egg yolks, mustard, vinegar, chipotle pepper, and
salt in a food processor and pulse to combine.
2. With the processor running, very slowly pour in the oil until
you use it all and the mayo becomes thick.
3. Store in a sealed container in the refrigerator for up to 2
weeks.
NOTES
It should take you 3 to 4 minutes to drizzle in the oil to achieve
the proper consistency!
This recipe calls for consuming raw eggs, which we are
comfortable doing. If you are concerned, feel free to use
pasteurized eggs.
VARIATION
HOMEMADE MAYO. To make a plain, unflavored mayo, simply
omit the ground chipotle pepper.
CALORIES: 101 FAT: 11.5 g PROTEIN: 0.1 g CARBS: 0.1 g FIBER: 0 g
learn how to lose 10 pounds in a week fast results
MAPLE CINNAMON ALMOND
BUTTER
MAKES: 1¼ cups (2 tablespoons per serving) PREP TIME: 5
minutes COOK TIME: 20 minutes
What could possibly be better than almond butter? How about
roasted maple cinnamon almond butter? We make different
types of nut butter at home all the time, and this is by far the
best version we’ve made. We like to spread it on slices of our
homemade keto bread (page 76) or on pancakes (page 60)—or
just eat it by the spoonful!
2 cups raw almonds
2 tablespoons coconut oil, melted
1½ teaspoons ground cinnamon
¾ teaspoon maple extract
¼ teaspoon plus 5 drops of liquid stevia
1. Preheat the oven to 300°F.
2. Pour the almonds onto a rimmed baking sheet and drizzle
with the coconut oil. Using your hands or a spoon, toss to coat
the almonds.
3. Roast for 20 minutes, until the almonds are dried out and
feel lighter in weight. Remove from the oven and allow to cool.
4. Transfer the cooled almonds to a food processor and process
for 1 minute, until you have a thick, ground meal. Add the
cinnamon, maple extract, and stevia and process for an
additional 3 minutes, until smooth and creamy.
5. Store in a sealed container in the refrigerator for up to 2
weeks.
NOTE
The processing time may vary depending on the speed and
power of your food processor.
TWIST
Megha has a tree nut allergy, so she swaps out the almonds for
peanuts in this recipe. Give it a try!
CALORIES: 190 FAT: 17.1 g PROTEIN: 6 g CARBS: 6.5 g FIBER: 3.8 g
learn how to lose 10 pounds in a week fast results
STRAWBERRY CHIA SEED JAM
MAKES: roughly 1½ cups (1¼ tablespoons per serving) PREP
TIME: 15 minutes COOK TIME: 20 minutes
We love taking advantage of the natural thickening ability of
chia seeds in a variety of recipes. This strawberry jam is just
one example. Peanut butter and jelly sandwiches are back on
the menu!
1 pound fresh strawberries, hulled and halved
½ cup water
½ teaspoon plus 10 drops of liquid stevia
¼ cup chia seeds
1. Bring the strawberries and water to a boil in a heavy-
bottomed saucepan over medium-high heat.
2. Once boiling, use a spoon to smash the strawberries in the
saucepan. Add the stevia, reduce the heat to a simmer, and
cook for an additional 10 to 15 minutes, until the mixture has a
thick, jamlike consistency.
3. Turn off the heat, add the chia seeds, and stir for 1 to 2
minutes.
4. Store in a sealed container in the refrigerator for up to 3
months.
TIP
You can swap out the strawberries for any other berry, but be
aware that doing so will change the nutritional information of
this recipe.
CALORIES: 24 FAT: 0.8 g PROTEIN: 0.9 g CARBS: 3.4 g FIBER: 1.8 g
In this section, there are six different one-week meal plans that
showcase varying eating styles:
• Tony finds that eating two meals a day suits his busy
schedule and his disdain for cooking.
• Sally likes having something sweet every day.
• Brenda sticks to the basics and eats whole foods.
• Marty is a vegetarian and still makes a ketogenic diet
work for him.
• Matt likes to keep carbs very low and fat high in two large
daily meals.
• Megha likes variety, lots of veggies, and snacks.
Rather than try to create basic meal plans that are one-size-fits-
all, we thought that providing a week of different ways of eating
a ketogenic diet would be of more value. Take pieces of each of
these plans to create a way of eating that you find fulfilling and
sustainable.
Although these plans can be followed to a T, they are best used
as references for inspiration and as a visual aid to what a keto
diet looks like. As you can see, no two people’s keto diets are
the same. It’s important to find what works for you. Add more of
the foods you enjoy and take out the foods you don’t.
Note: Unless otherwise specified, the plans assume that you will
eat one serving of each dish as defined in the recipe. The
nutritional information that we have provided for each plan is
based on these portion sizes.
learn how to lose 10 pounds in a week fast results
MEAL PLAN 1:
TWO-MEAL TONY
When eating keto, most people find it advantageous and
natural to break out of the conventional three-meals-a-day
paradigm. Switching to two larger meals per day can be
beneficial and easier to maintain for several reasons. First,
hunger is different on keto. You will no longer be a prisoner to
carb cravings and the blood sugar roller coaster, so it will be
easier to go longer between meals and be productive without
having to eat every few hours. Another good reason is that
most keto meals need to be prepared. Cooking three meals a
day can be time-consuming and could make the diet
unsustainable. Switching to bigger, less frequent meals is a
good way to counter that and seems to be more in tune with
the way human beings have eaten throughout history. It’s
important to note, though, that a decrease in number of meals
does not mean a decrease in number of calories consumed.
You’re still eating the same amount of food, just condensed into
fewer meals.
DAY 1
Links to the recipes:
Three-Cheese Spinach Frittata
Pistachio Coconut Fudge
Crispy Chicken Thighs with Pan Sauce
DAY 2
Links to the recipes:
Mama’s Meatloaf
Protein Cake with Buttercream Frosting
DAY 3
Links to the recipes:
The Best Keto Bread
DAY 4
Links to the recipes:
California Collard Wraps
Pistachio Coconut Fudge
Crispy Chicken Thighs with Pan Sauce
DAY 5
learn how to lose 10 pounds in a week fast results
Links to the recipes:
Three-Cheese Spinach Frittata
Sweet and Spicy Beef Jerky
Chipotle Dry-Rub Wings
Chewy Chocolate Chip Cookies
DAY 6
Links to the recipes:
Overnight Protein Oats
Double Bacon Cheeseburger
DAY 7
Links to the recipes:
Microwave Bread
Spicy Shrimp Fried Rice
Snickerdoodle Cream Cheesecake
learn how to lose 10 pounds in a week fast results
MEAL PLAN 2:
SALLY SWEET TOOTH
This is the dessert-every-night meal plan. Like us, we’re sure
lots of you out there have a sweet tooth. Some are born with it,
and others develop it over years of eating a standard American
diet. Whatever the case may be, there are some good
alternatives that you can rely on when starting a keto diet!
While desserts are best used as occasional treats, you must do
anything you can to get yourself off the “real” desserts. Keto
desserts are great transition foods as you begin your healthy-
eating journey.
DAY 1
Links to the recipes:
Golden Gate Granola
Three-Cheese Spinach Frittata
Crispy Chicken Thighs with Pan Sauce
Extreme Fudge Brownies
DAY 2
Links to the recipes:
Raspberry Fiber Muffins
Chipotle Dry-Rub Wings
Asparagus with Goat Cheese and Sunflower Seeds
Peanut Butter Hemp Heart Cookies
DAY 3
Links to the recipes:
Golden Gate Granola
Raspberry Fiber Muffins
Chicken Tenders
Chewy Chocolate Chip Cookies
learn how to lose 10 pounds in a week fast results
DAY 4
Links to the recipes:
Breakfast Roll-ups
The Best Keto Bread
Loaded Cobb Salad
Pistachio Coconut Fudge
DAY 5
Links to the recipes:
Three-Cheese Spinach Frittata
Golden Gate Granola
Mocha Protein Keto Coffee
Creamy White Chili
Cheddar and Thyme Cornbread
Blackberry Mini Cheesecakes
DAY 6
Links to the recipes:
Chocolate Chip Zucchini Bread
Curry Chicken Salad
Beef Satay Skewers
Peanut Sauce
Protein Cake with Buttercream Frosting
DAY 7
Links to the recipes:
Breakfast Cookies
Three-Cheese Spinach Frittata
Caprese Chicken Skillet
Death by Chocolate Cheesecake
learn how to lose 10 pounds in a week fast results
MEAL PLAN 3:
BASIC BRENDA
Keeping it as simple as possible is the best approach to keto.
Limiting your diet to whole foods, healthy fats, good sources of
protein, and nutrient-rich veggies is a place we all strive to get
to at some point. With that being said, it’s a process, and going
at your own pace is important. Don’t feel intimidated if you
need to have some keto sweets occasionally to make the diet
more sustainable for you. This plan showcases a basic keto diet
and some staple meals that are common in our weekly rotation.
DAY 1
Links to the recipes:
Curry Chicken Salad
DAY 2
Links to the recipes:
The Best Keto Bread
Loaded Cobb Salad
DAY 3
Links to the recipes:
Asparagus with Goat Cheese and Sunflower Seeds
DAY 4
Links to the recipes:
Double Bacon Cheeseburger
DAY 5
Links to the recipes:
Sweet and Spicy Beef Jerky
DAY 6
learn how to lose 10 pounds in a week fast results
Links to the recipes:
Microwave Bread
Chipotle Dry-Rub Wings
DAY 7
MEAL PLAN 4:
MEATLESS MARTY
Although challenging, a vegetarian keto diet is possible. Some
foods that are great to include as part of a vegetarian keto diet
are chia seeds, flax seeds, hemp hearts, nuts, seitan, tofu, and
plant-based protein powders. Because vegetarian protein
sources are much lower in fat than animal protein sources, it’s
important to add fat to your meals. When we make vegetarian
meals, we always find ourselves adding tablespoons of butter or
coconut oil to get the fat content to where we like it.
DAY 1
Links to the recipes:
Loaded Cobb Salad
Peanut Sauce
DAY 2
Links to the recipes:
Toasted Oatmeal
Pistachio Coconut Fudge
DAY 3
learn how to lose 10 pounds in a week fast results
Links to the recipes:
Sausage and Gruyère Breakfast Casserole
Peanut Sauce
DAY 4
Links to the recipes:
Overnight Protein Oats
Loaded Cobb Salad
Breakfast Cookies
Pistachio Coconut Fudge
DAY 5
Links to the recipes:
Three-Cheese Spinach Frittata
Spicy Shrimp Fried Rice
Breakfast Cookies
DAY 6
learn how to lose 10 pounds in a week fast results
Links to the recipes:
Microwave Bread
Loaded Cobb Salad
Protein Cake with Buttercream Frosting
DAY 7
Links to the recipes:
Overnight Protein Oats
Saag Paneer
MEAL PLAN 5:
MATT
This meal plan represents a typical week of eating for Matt. He
starts every day with two butter coffees. That keeps him
productive in the mornings, which is when he gets most of his
work done. We hit the gym together at around 10 a.m., fueled
by caffeine and butter, and then come home, where Matt has a
large meal around lunchtime. He usually has two large meals
per day, with the second one being dinner at around 6 p.m. He
likes to keep his fat ratio north of 75 percent. That is a personal
preference that he has worked out over his three years of
eating keto.
DAY 1
Links to the recipes:
Sausage and Gruyère Breakfast Casserole
Pistachio Coconut Fudge
DAY 2
Links to the recipes:
The Best Keto Bread
Loaded Cobb Salad
DAY 3
Links to the recipes:
Sausage and Gruyère Breakfast Casserole
Crispy Chicken Thighs with Pan Sauce
DAY 4
Links to the recipes:
Easy Eggs Benedict
Pistachio Coconut Fudge
Asparagus with Goat Cheese and Sunflower Seeds
DAY 5
learn how to lose 10 pounds in a week fast results
Links to the recipes:
The Best Keto Bread
Chipotle Dry-Rub Wings
Pistachio Coconut Fudge
DAY 6
Links to the recipes:
Double Bacon Cheeseburger
DAY 7
Links to the recipes:
Sausage and Gruyère Breakfast Casserole
Loaded Cobb Salad
Protein Cake with Buttercream Frosting
MEAL PLAN 6:
MEGHA
Megha has never been a huge coffee drinker, but she likes to
start the morning with a warm, high-fat drink, so she usually
makes a butter chai tea. She is a veggie lover, so she tries to fit
in as many vegetables as possible. Most days she eats just two
large meals, but she is also a huge snacker. That usually means
a fat bomb or a little snack plate between meals or a spoonful
of peanut butter before bed. Her carb intake is higher than
Matt’s most of the time, and her fat intake is lower. Remember,
finding what works best for your body is the key!
DAY 1
Links to the recipes:
Sausage and Gruyère Breakfast Casserole
Crispy Chicken Thighs with Pan Sauce
Snickerdoodle Cream Cheesecake
DAY 2
learn how to lose 10 pounds in a week fast results
Links to the recipes:
Loaded Cobb Salad
DAY 3
Links to the recipes:
Savory Zucchini Cheddar Waffles
Curry Chicken Salad
Chipotle Dry-Rub Wings
DAY 4
Links to the recipes:
Green Power Smoothie
Asparagus with Goat Cheese and Sunflower Seeds
Peanut Butter Hemp Heart Cookies
DAY 5
Links to the recipes:
Mocha Protein Keto Coffee
Giant Skillet Cookie for Two
DAY 6
Links to the recipes:
learn how to lose 10 pounds in a week fast results
Raspberry Fiber Muffins
Creamy White Chili
Saag Paneer
DAY 7
Links to the recipes:
Microwave Bread
Caprese Chicken Skillet
Blackberry Mini Cheesecakes
SUGGESTED READING
While putting the ketogenic diet into practice is simple,
getting a better understanding of the underlying science
can be hugely beneficial. Here we’ve provided a list of books
and websites that you can use to further your knowledge.
This cookbook gives you more than a hundred recipes that
are perfect for your keto journey, but for detailed
information on what a ketogenic diet is and why ketosis is a
great state for your body to be in, we recommend that you
delve into some of these more comprehensive resources.
Books
• The Case Against Sugar by Gary Taubes
• Good Calories, Bad Calories: Fats, Carbs, and the
Controversial Science of Diet and Health by Gary Taubes
• The Obesity Code: Unlocking the Secrets of Weight
Loss by Dr. Jason Fung
• Why We Get Fat: And What to Do About It by Gary
Taubes
Websites
• KetoConnect.net (our food blog; hit the “Start Here”
drop-down menu for a discussion of some of the basics
of the keto diet)
• Reddit.com/r/keto
learn how to lose 10 pounds in a week fast results
RESOURCE GUIDE
The following is a list of ingredients and prepared foods we
commonly use and the brands we prefer to purchase. They can
be found in most grocery stores. For more information about
some of these ingredients, or for information about ingredients
not listed below, check the ingredients section on pages 12 to
21.
Staple Ingredients
Apple cider vinegar, raw and unfiltered
Bragg
Baking chocolate, unsweetened
Baker’s
BBQ Sauce
G Hughes Smokehouse sugar-free BBQ sauce
Chicken broth, low-sodium
Imagine organic free-range broth
Chocolate chips, sugar-free
Lily’s
Coconut aminos (a soy sauce alternative)
Bragg
Coconut cream and coconut milk
Thai Kitchen
Ketchup, reduced-sugar
Heinz
Maple syrup, sugar-free
learn how to lose 10 pounds in a week fast results
Know Foods Know Better Syrup (the best choice, but not
available in most grocery stores)
Log Cabin Sugar-Free (readily available at grocery stores,
but not our first choice because it contains unsavory
sweeteners and artificial colors)
Marinara sauce, low-carb
Rao’s
Mayonnaise, made with avocado oil
Primal Kitchen
MCT oil and MCT powder
Perfect Keto MCT Oil Powder (available at
perfectketo.com and on Amazon.com)
Zenwise (available at zenwisehealth.com and on
Amazon.com)
Meats
Applegate natural uncured beef hot dogs
BUBBA burgers (Angus beef and turkey)
Peanut butter
Crazy Richard’s
Pork rinds
Mac’s
Utz
Tortillas
Mission Carb Balance
Snack Suggestions
Here are some of our favorite ready-made snack options.
Bars
Keto Bars (the best choice, but not available in grocery
stores)
Quest Bars (readily available in grocery stores)
Crackers
Flackers (organic flaxseed crackers)
Ice cream
So Delicious Dairy Free, No Sugar Added
Jerky
Keto Carne (the best choice, but not available in grocery
stores)
Pili nuts
Pizza
Realgood
learn how to lose 10 pounds in a week fast results
Sardines, wild-caught
Wild Planet
Yogurt, almond milk
Kite Hill
RECIPE INDEX
Wake-up Call
Protein Waffles
Three-Cheese Spinach Frittata
Savory Zucchini Cheddar Waffles
Five-Star Breakfast Sandwich
Chorizo Cotija Morning Muffins
Breakfast Cookies
Overnight Protein Oats
Breakfast Roll-ups
Easy Eggs Benedict
learn how to lose 10 pounds in a week fast results
Golden Gate Granola
Sausage and Gruyère Breakfast Casserole
Diner Pancakes
Toasted Oatmeal
Iced Bulletproof Coffee Frappé
Mocha Protein Keto Coffee
Fresh Baked
English Muffins
Cheddar and Thyme Cornbread
Microwave Bread
learn how to lose 10 pounds in a week fast results
The Best Keto Bread
Raspberry Fiber Muffins
Cheddar Jalapeño Bagels
Low-Carb Dinner Rolls
Cinnamon Walnut Scones
Chocolate Chip Zucchini Bread
Cheesy Chicken Breadsticks
Navajo Fry Bread
Coconut Flour Tortillas
Classic Comfort Foods
Chicken Popper Casserole
Loaded Cauliflower
Spicy Cauliflower Bites
Spaghetti with Meat Sauce
Creamy White Chili
Chicken Tenders
Crispy Chicken Thighs with Pan Sauce
Mexican Chorizo Casserole
Bacon and Crab Mac and Cheese
Chicken Noodle-less Soup
Creamy Chicken Alfredo
Southern Baked Chicken
Mama’s Meatloaf
Takeout Favorites
Spicy Tuna Hand Rolls
Double Bacon Cheeseburger
learn how to lose 10 pounds in a week fast results
Saag Paneer
Thai Yellow Chicken Curry
Buffalo Chicken Crust Pizza
Spicy Shrimp Fried Rice
Chocolate Almond Butter Shake
Thin-Crust Skillet Pizza
Steak Quesadillas
Chipotle Dry-Rub Wings
Beef Satay Skewers
Cheese Shell Mini Tacos
Philly Food Cart Gyros
Sticky Sesame Chicken
Fresh Fixin’s
Turkey Bacon Club
Caprese Chicken Skillet
learn how to lose 10 pounds in a week fast results
Baja Fish Soft Tacos
Curry Chicken Salad
Loaded Cobb Salad
Coconut Shrimp
Fried Red Snapper
California Collard Wrap
Strawberry Coconut Smoothie
Green Power Smoothie
Raspberry Lime Ice Pops
Sides & Munchies
Candied Georgia Pecans
Fathead Crackers
Mexican Layer Dip
Buffalo Chicken Dip
Sweet and Spicy Beef Jerky
Charlie’s Energy Balls
Bar Side Mozzarella Sticks
Salami Chips with Pesto
Radical Radish Chips
Cheesy Broccoli and Bacon
Hush Puppies
learn how to lose 10 pounds in a week fast results
Asparagus with Goat Cheese and
Sunflower Seeds
Chipotle Cauliflower Mash
Cilantro Lime Rice
Decadent Desserts
Chocolate Protein Truffles
Death by Chocolate Cheesecake
No-Churn Peanut Butter Ice Cream
Snickerdoodle Cream Cheesecake
Giant Skillet Cookie for Two
Flourless Chocolate Cake
Protein Cake with Buttercream Frosting
Chewy Chocolate Chip Cookies
Blackberry Mini Cheesecakes
Extreme Fudge Brownies
Coconut Chocolate Cookies
learn how to lose 10 pounds in a week fast results
Peanut Butter Hemp Heart Cookies
County Fair Cinnamon Donuts
Pistachio Coconut Fudge
Strawberry Shortcakes
Vanilla Egg Custard
Instant Protein Ice Cream
Condiments
Peanut Sauce
BBQ Sauce
Homemade Chipotle Mayo
Maple Cinnamon Almond Butter
Strawberry Chia Seed Jam
learn how to lose 10 pounds in a week fast results
ALLERGEN INDEX
learn how to lose 10 pounds in a week fast results
Learn how to lose 10 pounds in a week fast results

Learn how to lose 10 pounds in a week fast results

  • 3.
    From Matt: To myparents, Margaret and Richard, and my friends, Tarik, Adam, and Lou—You're the average of the five people you spend the most time with. From Megha: To my dad, Ashok, and my best friend, Kelsey—You have helped me realize that we never have life figured out, and that's okay. Eat good food, and be happy. learn how to lose 10 pounds in a week fast results
  • 4.
    First Published in2018 by Victory Belt Publishing Inc. Copyright © 2018 by Megha Barot and Matt Gaedke
  • 5.
    All rights reserved Nopart of this publication may be reproduced or distributed in any form or by any means, electronic or mechanical, or stored in a database or retrieval system, without prior written permission from the publisher. ISBN-13: 978-1-628602-88-3 The authors are not licensed practitioners, physicians, or medical professionals and offer no medical diagnoses, treatments, suggestions, or counseling. The information presented herein has not been evaluated by the U.S. Food and Drug Administration, and it is not intended to diagnose, treat, cure, or prevent any disease. Full medical clearance from a licensed physician should be obtained before beginning or modifying any diet, exercise, or lifestyle program, and physicians should be informed of all nutritional changes. The authors/owners claim no responsibility to any person or entity for any liability, loss, or damage caused or alleged to be caused directly or indirectly as a result of the use, application, or interpretation of the information presented herein. Front and Back Cover Photography by Kala Snow Cover Design by Justin-Aaron Velasco Interior Design by Yordan Terziev and Boryana Yordanova
  • 6.
  • 7.
    CONTENTS PREFACE HOW TO USETHE RECIPES IN THIS BOOK INGREDIENTS AND KITCHEN TIPS FIVE STEPS TO STARTING KETO KEYS TO SUCCESS Recipes Chapter 1: WAKE-UP CALL Protein Waffles Three-Cheese Spinach Frittata Savory Zucchini Cheddar Waffles Five-Star Breakfast Sandwich Chorizo Cotija Morning Muffins Breakfast Cookies Overnight Protein Oats Breakfast Roll-ups Easy Eggs Benedict Golden Gate Granola Sausage and Gruyère Breakfast Casserole
  • 8.
    Diner Pancakes Toasted Oatmeal IcedBulletproof Coffee Frappé Mocha Protein Keto Coffee Chapter 2: FRESH BAKED English Muffins Cheddar and Thyme Cornbread Microwave Bread The Best Keto Bread Raspberry Fiber Muffins Cheddar Jalapeño Bagels Low-Carb Dinner Rolls Cinnamon Walnut Scones Chocolate Chip Zucchini Bread Cheesy Chicken Breadsticks Navajo Fry Bread Coconut Flour Tortillas Chapter 3: CLASSIC COMFORT FOODS Chicken Popper Casserole Loaded Cauliflower Spicy Cauliflower Bites learn how to lose 10 pounds in a week fast results
  • 9.
    Spaghetti with MeatSauce Creamy White Chili Chicken Tenders Crispy Chicken Thighs with Pan Sauce Mexican Chorizo Casserole Bacon and Crab Mac and Cheese Chicken Noodle-less Soup Creamy Chicken Alfredo Southern Baked Chicken Mama’s Meatloaf Chapter 4: TAKEOUT FAVORITES Spicy Tuna Hand Rolls Double Bacon Cheeseburger Saag Paneer Thai Yellow Chicken Curry Buffalo Chicken Crust Pizza Spicy Shrimp Fried Rice Chocolate Almond Butter Shake Thin-Crust Skillet Pizza Steak Quesadillas Chipotle Dry-Rub Wings
  • 10.
    Beef Satay Skewers CheeseShell Mini Tacos Philly Food Cart Gyros Sticky Sesame Chicken Chapter 5: FRESH FIXIN’S Turkey Bacon Club Caprese Chicken Skillet Baja Fish Soft Tacos Curry Chicken Salad Loaded Cobb Salad Coconut Shrimp Fried Red Snapper California Collard Wrap Strawberry Coconut Smoothie Green Power Smoothie Raspberry Lime Ice Pops Chapter 6: SIDES & MUNCHIES Candied Georgia Pecans Fathead Crackers Mexican Layer Dip Buffalo Chicken Dip
  • 11.
    Sweet and SpicyBeef Jerky Charlie’s Energy Balls Bar Side Mozzarella Sticks Salami Chips with Pesto Radical Radish Chips Cheesy Broccoli and Bacon Hush Puppies Asparagus with Goat Cheese and Sunflower Seeds Chipotle Cauliflower Mash Cilantro Lime Rice Chapter 7: DECADENT DESSERTS Chocolate Protein Truffles Death by Chocolate Cheesecake No-Churn Peanut Butter Ice Cream Snickerdoodle Cream Cheesecake Giant Skillet Cookie for Two Flourless Chocolate Cake Protein Cake with Buttercream Frosting Chewy Chocolate Chip Cookies Blackberry Mini Cheesecakes Extreme Fudge Brownies learn how to lose 10 pounds in a week fast results
  • 12.
    Coconut Chocolate Cookies PeanutButter Hemp Heart Cookies County Fair Cinnamon Donuts Pistachio Coconut Fudge Strawberry Shortcakes Vanilla Egg Custard Instant Protein Ice Cream Chapter 8: CONDIMENTS Peanut Sauce BBQ Sauce Homemade Chipotle Mayo Maple Cinnamon Almond Butter Strawberry Chia Seed Jam Keto Meal Plans Meal Plan 1: TWO-MEAL TONY Meal Plan 2: SALLY SWEET TOOTH Meal Plan 3: BASIC BRENDA Meal Plan 4: MEATLESS MARTY Meal Plan 5: MATT Meal Plan 6: MEGHA SUGGESTED READING RESOURCE GUIDE RECIPE INDEX
  • 13.
  • 14.
    PREFACE If you areholding this book and reading this preface, we want to say thank you. We hope you are excited to enter into this world of recipes that we have created for you in which you can indulge, guilt-free! We are Matt and Megha, and we make up KetoConnect. We run a food blog specific to a low-carb, ketogenic diet. We also have a YouTube channel that gives a glimpse into our lives with our pets, Miley and Julius, but, more importantly, shows you exactly how to make our recipes step by step, how to be prepared and successful in your keto lifestyle, and how to adapt as your body does. Before we even met, we always had a passion for food, both for cooking it and for eating it. In particular, we loved Asian takeout and desserts, but we also highly valued our health. So we met at the crossroads of enjoying sweets and other comfort foods regularly and staying strict and doing what we knew—or, should we say, thought—was “good for us.” But why not have both? Shortly after meeting one another in San Francisco, we discovered the ketogenic diet and decided to give it a go together. We quit carbs cold turkey and got hit with the keto flu —bad! But a short time later, we noticed the exact opposite, with heightened energy and focus being two of the main benefits of our newfound lifestyle. (And since then, we’ve learned that the keto flu can be avoided or lessened through supplementation with the three major electrolytes—sodium, magnesium, and potassium—or by tapering down carb consumption as opposed to going cold turkey like we did.) Once we started to cook with new ingredients and think a little differently about the food we put into our bodies, everything learn how to lose 10 pounds in a week fast results
  • 15.
    else in ourlives changed as well. We ate out less and were more careful about what we consumed, but we still indulged in delicious homemade meals and desserts. Our love for eating higher-quality food and living a healthier lifestyle turned into more than just our bonding time; it became our business, too. We thought, “Hey, what’s stopping us from cooking, taking pictures, and posting it all on the internet for others to benefit?” Well, at the time, a lot. We had no means of making this happen. However, when Matt took the initial step of buying our first camera and the second step of buying the domain name KetoConnect.net, things started to become a little clearer. Although nothing happened overnight, we continued to research the diet, fight about recipes (Megha preferred simple recipes, while Matt liked to overdo it with spices and other ingredients), burn all the desserts we made, and put in countless hours after coming home from our full-time jobs. Sure
  • 16.
    enough, we startedto make a little progress. Everything wonderful in life takes time, and we are big advocates of enjoying the entire journey. If we hadn’t put our heads down, focused, and kept working toward our goal of building KetoConnect, you wouldn’t be holding this cookbook today. With this book, we want to let you in on the idea that you can have it both ways: you can value your health and indulge in delicious foods, too. That is why we made sure to include all the foods we miss from our high-carb days, as well as the recipes that help us stay on track and on budget. The recipes in this book are designed to make the entire process a little easier, which is why we named the book Keto Made Easy. Our goal is to provide you with a foundation of recipes from all categories, ranging from takeout favorites to desserts. We have found cooking to be an intimate and relaxing experience, and we want to give you those same feelings. No matter how busy
  • 17.
    our days are—andsometimes we are working nonstop—we like to take at least ten minutes to make a meal worth eating or drinking! We know many of you are busy, too, or always on the go, so we have made it a point to include several quick-to-make recipes and recipes that you can meal prep for the week. However, we also know that many of you have families and have found cooking to be an enjoyable part of your keto journey, so we also give you the option to make more involved recipes, sure to satisfy even the pickiest kids! Most of our recipes are a great starting point for adding your own twists, and we always encourage a little experimentation. That’s where the magic happens! A lot of our motivation has come from our viewers and supporters. We’ve grown not only as individuals and as a business, but also in our ability to learn from you and then apply that knowledge as we develop new recipes that you can easily re-create and enjoy. We want cooking to be fun, lighthearted, and approachable. We want to inspire the chef within you to make our Southern Baked Chicken (page 118) and our Death by Chocolate Cheesecake (page 210), because you can live your healthiest life and indulge a little, too! learn how to lose 10 pounds in a week fast results
  • 18.
    HOW TO USETHE RECIPES IN THIS BOOK More and more people are cutting out carbs in hopes of losing weight, increasing energy, and performing better mentally and physically. Just about everyone has tried it at some point, but it can be hard to stick to for the long haul. There’s always a holiday or some other special occasion around the corner, and you know what that means: Mom’s fried chicken, your aunt’s homemade dinner rolls, or Grandma’s rhubarb crisp. For every occasion there is a special food that you just can’t pass up; it’s tradition. That’s where this book comes in. It’s loaded with keto-friendly versions of your favorite foods and should be used to supplement your keto diet in a way that makes it more sustainable. Rather than stopping to pick up a pint of ice cream on your way home from work, make one of the delicious desserts in this book. This book is jammed full of better choices!
  • 19.
    Quick Reference Icons We’veincluded quick reference icons in our recipes to designate whether they meet certain dietary restrictions. We have icons for recipes that are dairy-free, egg-free, nut-free, and/or vegetarian. For the sake of labeling, we consider coconut products, such as coconut flour, coconut milk, and coconut flakes, to be nut-free. We have found that those who have allergies to nuts generally do not have issues with coconut. DAIRY-FREE EGG-FREE NUT-FREE
  • 20.
    VEGETARIAN There are anumber of foolproof recipes included in this book. These are the easiest recipes in the book and require very little experience in the kitchen. Look for this icon: FOOLPROOF If you’re unfamiliar with the concept, meal prep is the practice of making meals in bulk, often on the weekend, so that you’ll have ready-to-eat meals throughout the week. This happens to be our number-one tip for success on a keto diet. Be on the lookout for this icon; you will find it accompanying those recipes that are particularly well suited to meal prep. MEAL PREP Ingredients In the “Ingredients and Kitchen Tips” section that begins on page 12, we walk you through the ingredients we use in our daily cooking. We’ve accumulated quite an assortment of exotic ingredients since we started our blog, but we like to keep it simple in most of our recipes. You should be able to find everything you need to make the recipes in this book at your local grocery store, except for a couple of items that can easily be found online. Twists learnhowtolose10poundsinaweekfastresults
  • 21.
    We’ll be thefirst ones to tell you that our recipes are awesome. Each of them has been carefully tested until it’s perfect. But that doesn’t mean you shouldn’t add your own signature occasionally! Recipes are best used as a framework within which to experiment, adding your own touches and changing ingredients to suit your tastes. In that spirit, we’ve included some of our favorite twists on classic recipes throughout the book. You’ll find them at the ends of the recipes, along with other important notes and helpful tips. Nutritional Information For each recipe, we’ve listed the total calories along with the number of grams of fat, protein, carbohydrate, fiber, and sugar alcohol, where applicable. Erythritol is a non-nutritive sweetener that is commonly used in low-carb cooking. Because it does not impact blood glucose levels in most people, it is subtracted from the total carb count of the recipe. It’s important to note that these nutritional values were calculated based on the brands of ingredients we used; there may be slight variations if you opt for different products. We did our best to ensure the accuracy of our calculations, but if you are using a ketogenic diet to treat a medical condition, it is important that you calculate the nutritional values of each recipe for yourself. Also, please keep in mind that optional ingredients are not included in the nutritional information.
  • 23.
    INGREDIENTS AND KITCHENTIPS In this section, we highlight the ingredients that are staples in our cooking, as well as some of the brands we prefer. For a complete list of our brand recommendations for staple ingredients, turn to the “Resource Guide” section on pages 280 to 282. Please note that when shopping for dairy products, you should always buy the full-fat versions. Also, check to make sure that any prepared or canned foods you purchase do not contain added sugars. Always read the labels when buying ingredients, especially those that are unfamiliar to you. learn how to lose 10 pounds in a week fast results
  • 24.
    Flours and Fibers Thissection explores the flours and fibers that we use in our day-to-day cooking and baking. If you’re unfamiliar with low- carb baking, this list will serve as a starter course on the commonly used ingredients. We use two types of flour: • Almond flour is one of the most commonly used grain- free and gluten-free flour substitutes. We always buy finely ground blanched almond flour as opposed to coarsely ground almond flour or almond meal. A finer grind yields
  • 25.
    the best, mostconsistent results. Our go-to brand is Bob’s Red Mill. • Coconut flour is another great option for low-carb baking. Our go-to brand is Anthony’s Goods. It is important to note that coconut flour is dramatically different from almond flour. Coconut flour is much more absorbent, and for this reason it is very hard to use one of these flours in place of the other. A good general rule when substituting one for the other is to use three-and-a-half parts almond flour for every one part of coconut flour, but even then, there is no guarantee that the recipe will turn out well. We use three different types of fiber for baking. Because each type has a different absorbency and texture, it is best to use the specific type of fiber the recipe calls for. Substituting one type for another is possible, but the results will not be nearly as good. • Psyllium husk powder is a high-fiber powder that can be used in tandem with coconut flour to achieve a fluffy consistency in keto baked goods. Depending on the brand you use, it can turn breads gray or purple. We use the NOW Foods brand, which we’ve found has a great taste and does not discolor our baked goods.
  • 26.
    • Oat fiberlends itself more to cakes, cookies, and other desserts than to breads. It has a faint oatmeal flavor and can be delicious when used properly. Our go-to brand is Anthony’s Goods. • Flax meal is made from ground flax seeds. It is less absorbent than the other two fibers and creates a more wheatlike baked good with a toasted flavor. We use both golden and regular flax meal in our recipes; the two are interchangeable. The only difference is flavor. That said, we often prefer the more assertive and “toasty” flavor of golden flax meal and specify it in those recipes in which we think it is best suited. However, feel free to substitute one type for the other, depending on what you have on hand. Our go-to brand for both types of flax meal is Bob’s Red Mill. Sweeteners There are several keto-friendly sweeteners available. The main ones we like to use are erythritol and liquid stevia, both of which have a very low glycemic index and have not been shown to have a negative impact on ketosis. • Erythritol is a sugar alcohol that looks just like table sugar and is 70 percent as sweet. A number of different sugar alcohols are used in low-carb baking, but erythritol is our favorite due to its low glycemic index and pleasant learn how to lose 10 pounds in a week fast results
  • 27.
    taste. If you’venever used it before, know that it can have a slight cooling effect in your mouth. Erythritol comes in a granular form but can easily be ground to a powder in a coffee or spice grinder. We use both granular and powdered erythritol in our recipes. Certain recipes call for powdered erythritol because the granular form won’t yield the same result. For example, the granular form would make sauces and frostings gritty. Our go-to brand of erythritol is Anthony’s Goods. • Liquid stevia is a natural sweetener extracted from the leaves of the stevia plant. It is our favorite sweetener, and we use it daily in our morning coffee. A couple drops do the trick! We prefer the liquid form over the granular form because granular stevia typically contains bulking agents that are high in carbohydrates. If you are unaccustomed to using stevia, you will likely find that it has a slightly bitter aftertaste. This can be lessened by using a smaller amount and combining it with some erythritol to achieve your preferred sweetness level. From our experience, 1 teaspoon of erythritol is equivalent to about 5 drops of liquid stevia. Our go-to liquid stevia product is NOW Foods Better Stevia. • Swerve Confectioners is a convenient option for any recipe that calls for powdered erythritol. It saves you the step of powdering erythritol yourself, but it is more expensive than granular erythritol. To save money, we grind granular erythritol to a powder ourselves. • Sugar-free maple syrup is not our favorite ingredient to use because it tends to contain unsavory artificial sweeteners, but it does provide a great maple flavor, along with a thick consistency that lends itself very well to certain recipes. Unfortunately, it is hard to replicate sugar-free maple syrup; however, Know Foods makes a great sugar- free maple-flavored syrup that is free of those unsavory sweeteners.
  • 28.
    We find itadvantageous to have one form of powdered sweetener and one form of liquid sweetener to use for sweetening foods and drinks. When making smoothies and our morning coffee, we prefer liquid stevia, and for baking, we prefer powdered erythritol. learn how to lose 10 pounds in a week fast results
  • 29.
    Fresh and DriedHerbs and Spices
  • 30.
    Using fresh herbssometimes adds a depth of flavor that you might not be able to achieve by using dried herbs. Soups are a good example. However, when a recipe calls for fresh herbs, feel free to substitute dried herbs if those are all you have on hand. The ratio for subbing dried herbs for fresh ones is one part dried herbs to three parts fresh. Here is a list of the herbs and spices that we use most often in this book. Dried herbs: • Oregano leaves • Parsley • Rosemary leaves Fresh herbs: • Basil • Chives
  • 31.
    • Cilantro • Sage Spices: •Cayenne pepper • Chili powder • Curry powder • Garlic powder • Ginger powder • Ground cinnamon • Ground cumin • Onion powder • Paprika • Red pepper flakes learn how to lose 10 pounds in a week fast results
  • 32.
    Salt For cooking andbaking, our preferred type of salt is finely ground pink Himalayan salt.
  • 33.
    Nut and PeanutButters When purchasing nut and peanut butters, we try to go the natural route. Natural usually means that no sugars are added. Many popular brands contain added sugars, upping the carb count per serving, and many almond butters contain palm oil. Your best bet when buying peanut or nut butter is to read the ingredient list to ensure that there are no additives. The only ingredients you want to see listed are the nut (or peanuts, which are legumes) or, at most, nuts and salt. Our preferred brand of peanut butter is Crazy Richard’s. We don’t have a favorite brand of almond butter; we simply check the ingredient list to make sure that it’s 100 percent almonds (again, salt is okay). In all the recipes in this book that call for peanut or nut butter, we used unsalted; if you use a salted peanut or nut butter, we recommend that you reduce the amount of salt called for in the recipe.
  • 35.
    Protein Powders When arecipe calls for protein powder, whatever you have on hand will likely work just fine. However, some recipes work best when you use a whey-based protein powder; for those recipes, we specify whey protein powder. When purchasing protein powder, we like to find the lowest-carb option, with at most 3 grams of carbohydrate per scoop. • Flavored protein powders are a convenient way to add flavor and sweetness to recipes. Our favorite all-purpose product is Isopure zero/low-carb protein powder. It is whey- based and comes in eleven different flavors (our favorite is Cookies & Cream). For our Instant Protein Ice Cream (page 240), however, we like to use Quest brand flavored protein powders; the mix of whey and casein protein in Quest’s powders gives our ice cream a creamier texture. Aside from that, the flavor of your protein powder is a personal preference. Just remember that the flavor of the protein powder you use generally dictates the flavor of the food you are making. • Unflavored protein powders are a great way to up the protein as well as provide bulk when baking. However, unflavored protein powder does not have any sweetener in it. When using the unflavored type, it is advisable to add sweetener, such as liquid stevia. Our favorite unflavored protein powder is Isopure’s whey protein isolate. learn how to lose 10 pounds in a week fast results
  • 36.
    Chocolate We use twomain types of chocolate in our recipes: unsweetened baking chocolate and sugar-free chocolate chips. While both types can be found in many grocery stores, baking chocolate is more widely available. • Unsweetened baking chocolate is 100 percent cacao; therefore, it has no sweetness. Although it works great as a substitute for sugar-free chocolate chips when chopped into chunks, it generally requires the addition of more sweetener. We like to add some liquid stevia when working with baking chocolate to ensure that the finished dish has the right level of sweetness. We use this product more often because it is more widely available and less expensive than other chocolate options. • Sugar-free chocolate chips are great for cookies, loaves, and anything baked with chocolate. Be aware, though, that not all sugar-free chocolate chips are sweetened with quality keto-friendly sweeteners. Avoid chocolate chips sweetened with cane sugar, coconut sugar, or maltitol, as well as any product that uses the bulking agent maltodextrin. Our favorite brand of sugar-free chocolate chips is Lily’s, which are sweetened with erythritol and stevia and contain no added sugar. The downside is that they are pricey.
  • 37.
    Nondairy Milk When arecipe calls for a nondairy milk, such as almond milk, you can substitute any type of nondairy milk you have on hand. Some examples we’ve used in our baking and cooking are cashew milk, coconut milk, and flax milk. We’ve found that flax milk most closely resembles cow’s milk in flavor. When purchasing nondairy milk, always buy the unsweetened variety, which is the lowest in carbs. You can always add your own sweetener and extract at home when using the milk in baking recipes.
  • 38.
    Oils and Fats Theoil we use most often is refined coconut oil. It can be replaced with ghee in any recipe. Both refined coconut oil and ghee have a high smoke point, which is why they are our preferred fats for cooking and frying. We also like to use coconut oil spray for greasing a baking dish or skillet without adding calories. Coconut oil spray can be found in the baking section of any grocery store. Here are some other tips about keto-friendly oils and fats: • Avocado oil is a great substitute for olive oil, particularly when you want a more neutral flavor. • Coconut oil is a great substitute for butter. • Lard is a handy option for frying. learn how to lose 10 pounds in a week fast results
  • 39.
    Kitchen Tips Here aresome various tips to keep in mind as you prepare the recipes in this book.
  • 40.
    Bring ingredients toroom temperature where noted. When a recipe calls for room-temperature ingredients, it is important to allow them to warm to room temperature prior to using them. This ensures that everything will come together uniformly. Know that different brands of an ingredient can affect the outcome of a recipe. On pages 272 to 274, we’ve provided you with our go-to brands for the products that we’ve found tend to vary from brand to brand. These brands are the ones we use most often in our kitchen and have been the most thoroughly tested. If you use another brand, the consistency and texture of the finished dish may vary slightly.
  • 41.
    Preheat the oven. Alwayspreheat your oven and allow it to reach temperature before putting food in it; otherwise, you might see different results. Flatten cookies before baking where indicated. Some cookies, especially those made with coconut flour, won’t spread in the oven. When a recipe instructs you to do so, it is important to flatten the cookies using your hands or a fork prior to baking. If you don’t flatten them, they may not cook through fully. learn how to lose 10 pounds in a week fast results
  • 42.
    Remember that oventemperatures vary. Temperatures vary from one oven to another, so it’s important to take note of the cook time ranges indicated in the recipes as well as the descriptions of doneness provided. To prevent foods from burning, keep an eye on anything you put in the oven and begin checking for doneness at the start of the cook time range.
  • 43.
    Make your owncoconut cream. You can buy cans of unsweetened coconut cream (we prefer the Thai Kitchen brand), or you can extract coconut cream from a can of full-fat coconut milk. To do that, place the can of coconut milk in the fridge for a full 24 hours. After 24 hours, open the can and, using a spoon, scoop out the cream, which will be about the top 90 percent of the contents of the can. The coconut water will have separated from the cream and will be left at the bottom of the can. If you accidentally get a little of the water while scooping out the cream, don’t worry; it is unlikely that a minimal amount will affect the recipe.
  • 44.
    Store foods safely. Westore opened flours and fibers in tightly sealed zip-top plastic bags, with all the air removed, to keep them as fresh as possible in our pantry. We store fresh herbs in the refrigerator for up to a week. Oils and fats can be stored in the fridge as well, if desired, but will do just fine stored on a shelf in a cool, dry place. learn how to lose 10 pounds in a week fast results
  • 45.
    FIVE STEPS TOSTARTING KETO 1. Cut the carbs. Cutting carbs could mean gradually reducing them over weeks or months or cutting them all at once. An important step is to become aware of how many carbs are in different foods and to become skilled at tracking your carb intake. A good starting place for keto is 20 grams of net carbs per day. Net carbs are simply total carbs minus fiber (both of which are listed on food packaging in the United States). Keeping that number under 20 grams per day will put your body into a state of ketosis. Reducing your carb intake is essential to your success on keto and should definitely be the first line item that you address. TIP: Develop a rotation of five to seven staple meals. Doing so allows you to easily know the nutrition of those meals; plus, you get really good at making those dishes after a while. 2. Brace yourself. The first week on keto is tough. Your body is doing something completely new and is trying to rewire circuitry that has been in place for your entire life. Learning to run on fat is worth it, but the transition is a rough one. Most people feel extremely
  • 46.
    fatigued and lowon energy for the first three to five days. These symptoms can be mitigated with supplementation, but even then you’re going to feel a bit different. We promise that this feeling will pass! Around the five- to seven-day mark, “keto clarity” will hit and you will feel like a new person. TIP: Supplementing with electrolytes is important on a keto diet and can help mitigate some of the adaptation symptoms. Make sure to get sodium in the form of salt; potassium from avocados, broccoli, spinach, and supplements; and magnesium from nuts, spinach, dark chocolate, and supplements. Drinking lots of water also will help. 3. Add some fat. Eating high-fat is counterintuitive for all of us who were raised during the low-fat boom. Our underlying fear of fat will need to be conquered in our quest for health. When starting a keto diet, most people are good about cutting carbs, but they fail to add fat. This results in a high-protein diet, which is going to leave you with low energy and wanting to run back to your
  • 47.
    carbs. Actively seekingout fat will result in much better energy levels, better hunger control, and an overall more sustainable diet. Fat is your new energy source. Don’t be afraid of energy! TIP: Butter coffee and tea are a huge help for adding fat to your diet. So are fat bombs. Fat bombs can be eaten in place of dessert or as a side at meals to increase the fat content. 4. Time your meals. Once you’ve got the first three steps down, it’s time to do some fine-tuning. Ditching the standard breakfast, snack, lunch, snack, dinner, dessert paradigm can be liberating! Don’t confine yourself to the typical eating windows. Experiment with different schedules that match up with your lifestyle. Skip breakfast one day. (“But it’s the most important meal of the day!” said the cereal company.) Eat just one meal a day. Try eating nothing but fat until 2 or 3 p.m. (that’s what Megha does). Don’t be afraid to stray from societal norms around meal timing. After all, early humans didn’t enter starvation mode if they didn’t get their potato chips every two hours! learn how to lose 10 pounds in a week fast results
  • 48.
    TIP: Most people arenot hungry when they first wake up. Listen to your body and eat in accordance with what it’s telling you. 5. Continually improve. Three years into our keto diet, we continue to improve and change things up almost weekly. We view it as a challenge: add something new, see how our bodies react, adjust the next week. View this as a never-ending process, especially if you’re coming straight from the standard American diet. If the Big Mac wrapper from last night is still on the passenger seat of your car, it’s probably not feasible for you to switch to a completely whole-foods diet today. Baby steps. Maybe switch out the Big Mac for a Big Mac with no bun. That’s easy, right? Get yourself some low-carb ice cream from the grocery store. Do the best you can. Tomorrow you will be able to do a little bit better. Think of where you’ll be in a year! TIP: Perfection is often the enemy of improvement. If you think you need to be perfect with your diet from day one, chances are you’ll never even start. The way we started a keto diet was by subbing out high-carb options for low-carb replacements and continually improving from there.
  • 50.
    KEYS TO SUCCESS PREPYOUR MEALS AHEAD One of Matt’s favorite sayings is “if you fail to prepare, you prepare to fail,” and preparation is something we strongly believe in, especially when you’re new to a keto lifestyle! It can be hard to know what to eat and in what proportions. We’ve found that the best way to beat this is bulk meal prepping. Planning and preparing your meals over the weekend for the week ahead gives you the flexibility to create the menu of your choosing, being sure to hit your ideal macros each day. It also makes eating a lot less stressful: all your meals are already made, so all you have to do is heat and eat! We understand, however, that you or members of your family may not like to eat the same thing every day. In that case, another good option is to prep just one item, like a meat. If you prepped our Crispy Chicken Thighs with Pan Sauce (page 108) on Sunday, for example, you could chop up the meat to add to meals throughout the week, such as salads, a stir-fry, or our Curry Chicken Salad (page 160). You could even prep our Raspberry Fiber Muffins (page 78) to take to work for breakfast or a snack each day! learn how to lose 10 pounds in a week fast results
  • 51.
    Another great optionfor staying on track is to have something sweet on hand at all times to satisfy your cravings, or if you know you’re going to want a sweet treat while you watch the season premiere of The Bachelor. We like to make our Chocolate Peanut Butter Fat Bombs to have in the freezer for a sweet nightcap; the recipe is on our blog, KetoConnect.net. KEEP IT SIMPLE Trying creative recipes that you find in cookbooks and on the internet is great, but you also want to have a handful of simple recipes that you make on a regular basis. Bacon and eggs, cobb salads, pan-roasted chicken thighs, and lettuce-wrapped burgers are the meals we make multiple times a week. We supplement those staples with more innovative recipes for date nights, movie nights, or on weekends when we have more time to cook. When you keep things simple, it’s a lot easier to stay accountable and look at food more as a fuel source in which you take pleasure than as your reason for existing. We know that feeling all too well from our pre-keto days, and we’ve found that a keto diet comprised of simple yet filling meals has changed our overall relationship with food. Now, we crave the foods that make us feel the best! FIND A PARTNER
  • 52.
    Find a partnerwho will hold you accountable, and maybe even do the keto diet with you! It could be your significant other, your friend, your neighbor, or even your child. Luckily, we have each other, and it has proven to be a huge part of our success. We push each other to improve a little each day on our diets and in the gym. And if either of us has a slipup, we lend each other a hand of motivation, because there is always something to learn from a setback. If you find that you aren’t getting the support you need at home, you can look to social media support groups, such as those on Facebook and Instagram, to fill your needs. These are great places to share your struggles, stay accountable, and learn new tips and recipes. HAVE A STRONG “WHY” Ask yourself: Why are you doing this? Why are you making a change to your diet and a commitment to improve your health? For us, it was because we wanted more out of life. We were tired of getting home from work with barely enough energy to make it to the couch and watch TV for the rest of the night. Now, we’ve not only started a business but have written a cookbook, too! Figuring out your “why” is sometimes the easy part; it’s reminding yourself that the “why” continues to exist and is your personal source of motivation and power, even on bad days, that is the hard part. We find that taking a moment each day, right when we wake up or just before bed, to reflect on our “why” helps us stay present and focused on what is most important to us. Doing this with your partner or in a support
  • 53.
    group is anothergreat way to remember why you started this journey. EAT ALL THE FAT Eating a lot of fat is the trickiest part for most people who are just starting a keto diet. All our lives we’ve been taught that dietary fat is bad for us. We’ve been told that fat leads to high cholesterol, which leads to clogged arteries and ultimately heart attacks. But with each passing day, more information is revealed about how fat can play a vital role in our health and functionality. We know how hard it can be to make the switch to eating high-fat because we are former high-carb, low-fat eaters ourselves. We didn’t let fear stop us from making the change, and neither should you! Once you’re able to grasp the high-fat concept—and we believe it’ll become easier once you start eating a keto diet—things will seem more doable. You can start by switching from lean cuts of meat to fattier cuts and topping your salads with olive oil instead of low-fat dressings. Lots of little changes can make it easy to increase your daily fat intake. And remember, you don’t have to be perfect. You’re in this for the long haul, so if you find it hard to get in all your fats today, just try again tomorrow! learn how to lose 10 pounds in a week fast results
  • 54.
    START PAYING ATTENTION Beforestarting a keto diet, we never realized how out-of-tune we were with our bodies. There was such a disconnect between our food and how it made us feel. Then we started taking out carbs and, lo and behold, no two o’clock crash! That’s when it clicked: the foods we eat have a huge impact on the way we feel. Just because a food is keto-friendly or fits into your daily macros doesn’t necessarily mean that it agrees with your body. A lot of people have dairy and nut intolerances but choose to eat those foods anyway. This could mean discomfort and bloating throughout the day, and who wants to live like that? By paying attention to what you put into your body and maybe even keeping track of what you’ve eaten in a journal, you could spot a trend that you never knew existed. To make eating and life a lot more intuitive, you need to know which situations and foods make you feel your best. A healthy inside leads to a healthy outside! BEND, DON’T BREAK We’ve all done it before: dived into a super strict diet for a few weeks before having a bad day, giving up on it, and
  • 55.
    indulging in allthe foods we’d been deprived of. Let’s take a different approach this time. Give in to a craving every once in a while so that you don’t feel too restricted; just keep it keto. That way, you can make this diet a more sustainable lifestyle. Craving chocolate cheesecake? Head to page 210. What about chewy chocolate chip cookies? We’ve got those, too, on page 222. We want you to have options, and we want you to know that there is always a healthier substitute for whatever you’re craving. This is why we’ve dedicated a whole chapter of this cookbook to decadent desserts! Eating out or at events can be tough at first, too, but it’s totally doable. Don’t be scared to ask for substitutions, say no, or, if you feel guilty about saying no, kindly accept something and then set it down on the table. This is a time when your “why” comes into play. Why did you start this journey, and why do you want to stay on track? DO YOUR RESEARCH The keto diet is trendy right now, and for good reason. While it’s tempting to jump in on a hot trend, we think it’s important to do some research to get an understanding of the mechanisms behind the efficacy of the keto diet. Having a good base of knowledge will make it easier to stick to this way of eating when you’re tempted to stray. A lot of people ask us what differentiates keto from other low- carb diets, such as Atkins. Most of the differences are subtle, but one huge advantage sets keto apart from all the rest: keto puts your body in a metabolic state in which it uses ketones rather than glucose for fuel. Some of the benefits of being in
  • 56.
    ketosis are heightenedenergy, reduced appetite, and greater mental clarity, which is what makes keto more sustainable than any other low-carb diet. You won’t feel restricted, and you won’t feel low on energy. Your body will be using an entirely new fuel source and will begin functioning more efficiently than ever. If you’ve never tracked your macros before, familiarizing yourself with the macronutrient makeup of common keto foods, such as eggs, avocado, butter, and bacon, could be a great idea. Knowing that nuts can be very calorie dense and can lead to a higher carb intake could make it easier for you to control portions, for example. Everyone’s personal version of keto is going to look a little different, so doing your research and experimenting to find the foods you enjoy and make you feel good is the best way to get a head start! The books and websites that we’ve included in the “Suggested Reading” section on page 279 are a great place to start. learn how to lose 10 pounds in a week fast results
  • 57.
    DON’T LET THENUMBERS BOG YOU DOWN A lot of people look to keto for weight loss, and justifiably so. When you deplete your body of carbohydrates, you naturally hold less water, hence you experience a sudden drop in weight. Although weight loss is a good reason to get healthy, keto has a lot of other benefits, such as heightened energy and focus. So don’t let the numbers bog you down. We are big proponents of relying on intuition. When you wake up, ask yourself how you feel. Do you feel great? If the answer is yes, then we honestly don’t see a need to jump on the scale or test your blood. Yes, we all look for reassurance, but more often than not the scale can have a negative impact on mental health. It is important to know that your weight fluctuates from day to day, and it is impossible to gain 2 pounds of fat overnight. That being said, if you step on the scale and your weight is up a little—or even down, but not as low as you’d hoped—it may be time to put the scale away. The endgame is to feel good every day, have control over your eating, and enjoy life, so doesn’t it seem a bit unfair to let a number on a scale dictate your happiness? We recommend working on mastering each day, focusing more on your daily actions than on the results.
  • 61.
    —Chapter 1— WAKE-UP CALL ProteinWaffles Three-Cheese Spinach Frittata Savory Zucchini Cheddar Waffles Five-Star Breakfast Sandwich Chorizo Cotija Morning Muffins Breakfast Cookies Overnight Protein Oats Breakfast Roll-ups Easy Eggs Benedict Golden Gate Granola Sausage and Gruyère Breakfast Casserole Diner Pancakes Toasted Oatmeal Iced Bulletproof Coffee Frappé Mocha Protein Keto Coffee learn how to lose 10 pounds in a week fast results
  • 62.
    PROTEIN WAFFLES MAKES: 3medium-sized waffles (1 per serving) PREP TIME: 5 minutes COOK TIME: 13 minutes As a “bro” in recovery, Matt is always asking me to make him recipes using protein powder. He loves having these waffles with a cup of coffee after an early-morning workout. WAFFLES: 4 large eggs ¼ cup natural peanut butter ¼ cup mascarpone cheese ¼ cup unsweetened almond milk 1 scoop unflavored whey protein powder 2 tablespoons unsalted butter, melted TOPPINGS (OPTIONAL): Sugar-free maple syrup Natural peanut butter Whipped cream 1. Preheat a waffle iron on the medium setting. 2. Put all the waffle ingredients in a large mixing bowl and combine using a whisk or an electric hand mixer. 3. Open the waffle iron and grease the top and bottom with coconut oil spray.
  • 63.
    4. Using a½-cup measuring cup, scoop up some of the batter and pour it into the center of the waffle iron. Close the lid and allow the waffle to cook for 4 to 4½ minutes, until golden brown. 5. Repeat with the remaining batter, making a total of 3 waffles. 6. Serve the waffles with maple syrup, peanut butter, and/or whipped cream, if desired. TWIST Matt loves to use these waffles to make a breakfast sandwich! CALORIES: 409 FAT: 32.7 g PROTEIN: 24.3 g CARBS: 5.3 g FIBER: 2 g
  • 65.
    THREE-CHEESE SPINACH FRITTATA MAKES:one 12-inch frittata (4 servings) PREP TIME: 10 minutes COOK TIME: 40 minutes Two years ago, when we first started the keto diet, we ate a frittata for breakfast every morning. Needless to say, we got pretty good at making them. We usually have a few slices as soon as it comes out of the oven and save the rest for quick meals throughout the week. 8 large eggs ¼ cup heavy whipping cream ¼ cup water ⅓ cup shredded cheddar cheese, plus extra for the top (optional) ⅓ cup shredded Gruyère cheese, plus extra for the top (optional) ⅓ cup shredded fontina cheese, plus extra for the top (optional) ½ teaspoon garlic powder ¾ teaspoon pink Himalayan salt ¼ teaspoon ground black pepper 1 (10-ounce) package frozen spinach, thawed and drained 1. Preheat the oven to 350°F and grease a 12-inch cast-iron skillet with coconut oil spray. learn how to lose 10 pounds in a week fast results
  • 66.
    2. Put theeggs, cream, and water in a large mixing bowl and whisk to combine. Add the three cheeses and seasonings and whisk together. 3. Pour the egg mixture into the greased skillet. Add the spinach, distributing it evenly throughout the skillet. Top with additional shredded cheese, if desired. 4. Bake for 35 to 40 minutes, until set in the center and lightly browned on the top. Allow to cool slightly before slicing and serving. CALORIES: 148 FAT: 10.6 g PROTEIN: 10.4 g CARBS: 1.4 g FIBER: 0 g
  • 68.
    SAVORY ZUCCHINI CHEDDAR WAFFLES MAKES:4 medium-sized waffles (2 per serving) PREP TIME: 10 minutes COOK TIME: 18 minutes Aside from caring for her pets and eating peanut butter straight from the jar, Megha’s greatest passion is hiding vegetables in delicious baked goods. These zucchini cheddar waffles are a testament to that. They are tasty on their own but can also be used for sandwiches. WAFFLES: 2 large zucchini 2 large eggs ⅔ cup shredded cheddar cheese (about 2⅔ ounces) 2 tablespoons coconut flour ½ teaspoon garlic powder ½ teaspoon red pepper flakes ¼ teaspoon pink Himalayan salt FOR GARNISH (OPTIONAL): Sour cream Shredded cheddar cheese Minced fresh chives 1. Preheat a waffle iron on the medium setting. learn how to lose 10 pounds in a week fast results
  • 69.
    2. Using avegetable or cheese grater, grate the zucchini into a large colander set inside of a bowl. Squeeze the excess water out of the grated zucchini using your hands and drain. 3. Add the eggs and cheese to the drained zucchini and combine with a fork. Add the coconut flour, garlic powder, red pepper flakes, and salt and use the fork to combine once more. 4. Open the waffle iron and grease the top and bottom with coconut oil spray. 5. Using a ⅓-cup measuring cup, scoop out some of the batter, place it in the center of the waffle iron, and close the lid. Cook the waffle for 4 to 4½ minutes, until golden brown and fully cooked through. Use a fork to lift it off the iron and set on a plate. 6. Repeat with the remaining batter, making a total of 4 waffles. Garnish with sour cream, shredded cheddar cheese, and/or minced chives, if desired. CALORIES: 292 FAT: 19 g PROTEIN: 20 g CARBS: 14 g FIBER: 5 g
  • 71.
    FIVE-STAR BREAKFAST SANDWICH MAKES:1 serving PREP TIME: 10 minutes (not including time to make bread) COOK TIME: 8 minutes It might sound odd, but Matt’s all-time favorite food is a breakfast sandwich. What sets this one apart is the Parmesan cheese–crusted sandwich bread. It’s a little bit of extra work, but it’s well worth it! 1 large egg 2 slices The Best Keto Bread (page 76) 2 tablespoons grated Parmesan cheese 1 slice cheddar cheese 1 slice fontina cheese 1 slice bacon, cooked until crispy 3 slices avocado 1. Heat a small skillet over medium-high heat and grease the surface with coconut oil spray. 2. When the skillet is hot, crack in the egg and cover the pan with a lid. Cook until the white is cooked through and the yolk is cooked to your liking. Remove the egg from the skillet and set aside. 3. Preheat the oven broiler to high. 4. Spray one side of each slice of keto bread with coconut oil spray, then evenly sprinkle the Parmesan on the sides sprayed
  • 72.
    with oil. Pressthe cheese into the bread with your hands, if needed. 5. Put the bread in the hot skillet, cheese side down. Cook for 2 minutes, or until the cheese has browned and hardened. Remove from the skillet and set one slice, cheese side down, on an oven-safe plate. 6. Layer the cheddar and fontina cheeses on the bread. Cut the bacon in half and layer on top of the cheese. Place in the oven and broil for 2 to 3 minutes, until the cheese has melted. 7. Remove from the oven and layer with the cooked egg, avocado slices, and second slice of bread, putting the Parmesan-crusted side face up. CALORIES: 585 FAT: 39.8 g PROTEIN: 28.6 g CARBS: 5.4 g FIBER: 3.1 g learn how to lose 10 pounds in a week fast results
  • 74.
    CHORIZO COTIJA MORNING MUFFINS MAKES:1 dozen muffins (1 per serving) PREP TIME: 15 minutes COOK TIME: 27 minutes Having these flavorful high-fat, high-fiber muffins to keep you satisfied between meals can be hugely beneficial when first switching to a ketogenic diet. 6 ounces fresh (raw) chorizo ½ cup (1 stick) unsalted butter, melted (but not hot) 4 large eggs ¼ cup water 1 cup golden flax meal ¼ cup coconut flour 1 cup shredded Cotija cheese (about 4 ounces), plus extra for garnish (optional) 1 teaspoon baking powder ½ teaspoon pink Himalayan salt ½ teaspoon garlic powder ½ teaspoon dried oregano leaves ¼ teaspoon chili powder ¼ teaspoon paprika 1. Preheat the oven to 350°F and line a standard-size 12-well muffin tin with paper liners. 2. Heat a medium-sized skillet over medium-high heat. Slice open the chorizo links and squeeze the sausage into the hot
  • 75.
    skillet. Using aspatula, flatten and break apart the sausage. Cook for 5 to 7 minutes, until cooked through. Remove the chorizo from the skillet and set aside on a paper towel–lined plate. 3. Put the melted butter, eggs, and water in a large bowl and combine using a whisk. Add the flax meal, coconut flour, Cotija cheese, baking powder, and seasonings and combine with a rubber spatula. 4. Add the cooked chorizo and stir to combine. Using a cookie scoop or spoon, scoop the mixture evenly into the 12 cupcake liners, filling them nearly to the top. 5. Bake for 20 minutes, or until a toothpick inserted in the center of a muffin comes out clean. Allow to cool in the pan for at least 10 minutes before removing and serving. Garnish with extra Cotija, if desired. 6. Store leftovers in a sealed container or zip-top plastic bag for up to a week. To reheat, microwave for 30 to 45 seconds. Unfortunately, these muffins do not freeze well. CALORIES: 246 FAT: 19.6 g PROTEIN: 12.4 g CARBS: 5.4 g FIBER: 3.5 g learn how to lose 10 pounds in a week fast results
  • 77.
    BREAKFAST COOKIES MAKES: 6cookies (1 per serving) PREP TIME: 10 minutes COOK TIME: 15 minutes We love to have a grab-and-go breakfast ready for busy days. These high-fat, high-fiber breakfast cookies are the perfect way to start your morning. The addition of cacao nibs gives them a nice chocolaty crunch. ⅔ cup flax meal 2 teaspoons ground cinnamon ½ cup natural peanut butter ¼ cup sugar-free maple syrup ¼ cup unsweetened almond milk ¼ cup cacao nibs Special equipment: 6-cavity, 3½-inch-diameter silicone muffin top pan 1. Preheat the oven to 300°F and grease a 6-cavity, 3½-inch- diameter silicone muffin top pan. 2. Put the flax meal and cinnamon in a medium-sized mixing bowl and blend with a fork. Add the peanut butter, maple syrup, and almond milk and stir to combine. 3. Using a rubber spatula, fold in the cacao nibs. Scoop the batter evenly into the muffin top pan, filling each cavity to the brim.
  • 78.
    4. Bake for15 minutes, or until the cookies are firm. Allow to cool in the molds for 20 minutes before handling and serving. 5. Store leftovers in a sealed container or zip-top plastic bag for up to a week. The cookies can be frozen for up to 3 weeks and are best reheated in a 250°F oven for 10 minutes. CALORIES: 225 FAT: 17.5 g PROTEIN: 8.7 g CARBS: 12 g FIBER: 7.5 g SUGAR ALCOHOL: 0.8 g learn how to lose 10 pounds in a week fast results
  • 80.
    OVERNIGHT PROTEIN OATS MAKES:1 serving ACTIVE PREP TIME: 5 minutes INACTIVE PREP TIME: at least 4 hours We are fans of anything that can be made in a mason jar. This keto oatmeal is loaded with hemp hearts and chia seeds and packs over 20 grams of protein. Letting it sit overnight allows the chia seeds to naturally thicken the oatmeal. ¼ cup heavy whipping cream 3 tablespoons hemp hearts 1 tablespoon chia seeds 1 scoop flavored protein powder of choice 1. Put all the ingredients in a bowl and stir to combine. Cover with plastic wrap and place in the refrigerator for at least 4 hours or overnight. 2. Serve cold, straight out of the refrigerator, or microwave on high for 20 to 30 seconds before serving. NOTE If you use unflavored protein powder, you can add 7 to 10 drops of liquid stevia to replace the sweetener found in flavored protein powder.
  • 81.
    CALORIES: 439 FAT:28 g PROTEIN: 39 g CARBS: 9 g FIBER: 8 g learn how to lose 10 pounds in a week fast results
  • 83.
    BREAKFAST ROLL-UPS MAKES: 3roll-ups (1 per serving) PREP TIME: 5 minutes COOK TIME: 11 minutes How do you make a breakfast wrap without a tortilla? You use an egg! You can stuff these egg wraps with any fillings you’d like, but our favorite is this tasty combination of spinach, bacon, and goat cheese. 4 large eggs ¼ cup heavy whipping cream ½ teaspoon pink Himalayan salt 6 ounces fresh spinach 6 slices bacon, cooked 2 ounces fresh (soft) goat cheese 1. Heat a 12-inch skillet over low heat and grease with coconut oil spray. 2. Put the eggs, cream, and salt in a medium-sized bowl and whisk to combine. 3. Using a ⅓-cup measuring cup, scoop out some of the egg mixture and place it in the center of the hot skillet. Tilt the pan so that the mixture coats the entire flat surface. Cover with a lid and cook for 2 to 3 minutes, until cooked through. Repeat with the rest of the egg mixture to make a total of 3 egg wraps. 4. Turn the heat up to medium-high, grease the skillet with coconut oil spray, and add the spinach. Cover with the lid and
  • 84.
    cook for 1to 2 minutes, until the spinach has wilted and cooked down. Remove from the skillet. 5. Divide the cooked spinach among the 3 egg wraps, placing it along the edge of each wrap. Place 2 slices of bacon on top of the spinach in each wrap and divide the goat cheese evenly among the wraps. 6. Starting at the edge with the fillings, roll each egg wrap into a burrito, folding in the ends, or simply roll it up like crepe. Serve warm. TWIST Matt also likes to fill his roll-up with avocado and Sriracha sauce for a spicy start to his day! CALORIES: 299 FAT: 23.7 g PROTEIN: 20.3 g CARBS: 4.3 g FIBER: 1.7 g learn how to lose 10 pounds in a week fast results
  • 86.
    EASY EGGS BENEDICT MAKES:1 serving PREP TIME: 10 minutes (not including time to make English muffin) COOK TIME: 15 minutes This is one of those rare comfort foods that needs very few adjustments to make it keto-friendly. While you could just leave out the English muffin, we’ve never been the type to settle. Pop a tasty keto English muffin under this high-fat classic and enjoy! HOLLANDAISE SAUCE: (makes enough for 4 servings) 2 large egg yolks ½ cup (1 stick) unsalted butter, melted but not hot 1 teaspoon lemon juice ½ teaspoon distilled white vinegar ½ teaspoon pink Himalayan salt 2 large eggs 1 tablespoon distilled white vinegar 1 English Muffin (page 70) 2 slices Canadian bacon, cooked 1. Make the hollandaise: Put all the ingredients for the hollandaise in a tall, narrow cup that is wide enough to fit an immersion blender and blend until smooth. Set aside. 2. Poach the eggs: Fill a saucepan halfway full of water. Add the vinegar and bring to a simmer over medium heat.
  • 87.
    3. Crack eachegg into a small ramekin and set aside. Once the water reaches a simmer, use a spoon to quickly swirl the water in one direction until it’s spinning like a whirlpool. 4. Drop an egg into the center of the whirlpool and cook for 3 to 5 minutes, until the white is fully cooked. Remove with a slotted spoon and immediately place in an ice bath. Repeat the process with the second egg. 5. To assemble, slice the muffin in half and toast in a toaster or in the oven. Lay the halves on a plate. Top each half with a slice of Canadian bacon and a poached egg. Drizzle on one-quarter of the hollandaise sauce. Serve immediately. NOTES We have found that our one-step method of making hollandaise differs from most, but it’s a quick way to whip up a delicious sauce on your busiest mornings. Feel free to improvise with your preferred method. This recipe makes more hollandaise than you will need for one serving of Eggs Benedict. Store leftover sauce in a sealed container in the refrigerator for up to 3 days. Reheat in the microwave for 30 to 45 seconds or in a saucepan on the stovetop over medium-low heat. CALORIES: 651 FAT: 54.8 g PROTEIN: 26.3 g CARBS: 14.4 g FIBER: 9.5 g learn how to lose 10 pounds in a week fast results
  • 89.
    GOLDEN GATE GRANOLA MAKES:4 cups (¼ cup per serving) ACTIVE PREP TIME: 10 minutes INACTIVE PREP TIME: 1 hour COOK TIME: 1 hour Whenever we go on a weekend trip, we always make a big batch of granola. It’s a perfect quick snack that you can feel good about. ¼ cup (½ stick) unsalted butter ¼ cup powdered erythritol ¼ teaspoon plus 10 drops of liquid stevia 1 teaspoon ground cinnamon ½ teaspoon vanilla extract 1 cup raw almonds 1 cup raw hazelnuts 1 cup unsweetened coconut flakes ½ cup raw pumpkin seeds ¼ cup hemp hearts 1. Preheat the oven to 275°F and line a rimmed baking sheet with parchment paper or a silicone baking mat. 2. In a small saucepan over medium heat, combine the butter, erythritol, stevia, cinnamon, and vanilla extract. Stirring occasionally, heat until the butter and erythritol are melted and dissolved. Remove from the heat and set aside. 3. In a large bowl, combine the nuts, coconut flakes, pumpkin seeds, and hemp hearts. Pour the melted butter mixture over the nut mixture and toss using a rubber spatula, making sure that everything is well coated.
  • 90.
    4. Pour thegranola onto the lined baking sheet and spread it out into an even layer. Bake for 1 hour, stirring every 15 minutes or so, until dark golden brown. 5. Let the granola cool in the pan for at least 1 hour to allow it to harden and form clumps. Store in a sealed jar or zip-top plastic bag for up to 3 weeks. It does not need to be refrigerated. TIP This is a great snack for whenever you’re on the go. Make it for your kids, for your next road trip, or just to keep at your desk or in your purse for times when you need a snack! CALORIES: 200 FAT: 18.1 g PROTEIN: 4.9 g CARBS: 5.4 g FIBER: 3.3 g SUGAR ALCOHOL: 3 g learn how to lose 10 pounds in a week fast results
  • 92.
    SAUSAGE AND GRUYÈRE BREAKFASTCASSEROLE MAKES: 8 servings PREP TIME: 15 minutes COOK TIME: 50 minutes Breakfast can get boring, especially when eggs are often on the menu. We quickly learned that breakfast casseroles make great use of eggs while transforming them into something exciting and delicious. Instead of using store-bought bulk breakfast sausage, we season fresh ground pork with spices and fresh herbs. Add eggs, cream, and Gruyère, and you have a hearty and filling breakfast casserole dish! Make it on the weekends for brunch or to enjoy on weekday mornings before you head off to work. ¾ pound unseasoned ground pork 1 bunch scallions, chopped ½ teaspoon red pepper flakes Pinch of ground cloves 1 teaspoon pink Himalayan salt ¼ teaspoon ground black pepper 1 tablespoon chopped fresh sage 1 teaspoon chopped fresh marjoram 8 large eggs ¼ cup heavy whipping cream 1¼ cups shredded Gruyère cheese (about 5 ounces), divided 1. Preheat the oven to 350°F and grease a 1¾-quart baking dish with coconut oil spray.
  • 93.
    2. In alarge skillet over medium-high heat, partially cook the pork, stirring to break it up, about 5 minutes. Add the scallions, red pepper flakes, cloves, salt, and pepper and stir to combine. Continue to cook until the pork is fully cooked and browned, an additional 5 minutes. 3. Add the sage and marjoram and stir to combine—now you have your own seasoned breakfast sausage! Pour the cooked sausage into the greased baking dish. 4. In a bowl, whisk together the eggs, cream, and 1 cup of the shredded cheese. Pour over the sausage in the casserole dish. 5. Sprinkle the remaining Gruyère over the top of the casserole and bake for 40 minutes, or until the eggs are fully set in the center and the top is golden brown. NOTE You can stir the sausage and egg mixture before baking it if you want an even distribution of all the ingredients. CALORIES: 282 FAT: 22 g PROTEIN: 18.6 g CARBS: 1.1 g FIBER: 0 g learn how to lose 10 pounds in a week fast results
  • 95.
    DINER PANCAKES MAKES: eight5- to 6-inch pancakes (2 per serving) PREP TIME: 10 minutes COOK TIME: 28 minutes This is your classic diner pancake in low-carb form! The combination of coconut flour and golden flax meal gives these pancakes just the right amount of fluff and texture, along with a great flavor to bring you back to your childhood days of Sunday brunch. We like to top them with butter and sugar-free maple syrup. ¼ cup plus 2 tablespoons coconut flour ¼ cup finely ground golden flax meal 1 teaspoon baking powder ¼ teaspoon pink Himalayan salt ¼ cup (½ stick) unsalted butter, melted but not hot ½ teaspoon vanilla extract 15 drops of liquid stevia 6 large eggs ¾ cup unsweetened coconut milk or almond milk FOR SERVING: Butter Sugar-free maple syrup 1. In a small mixing bowl, whisk together the coconut flour, flax meal, baking powder, and salt. Set aside. 2. Put the melted butter, vanilla extract, and stevia in a large mixing bowl. While whisking, add the eggs one at a time.
  • 96.
    Continue whisking for60 to 90 seconds, until the mixture is airy and fully combined. 3. Add the milk to the egg mixture and whisk to combine. 4. Add the dry ingredients to the wet ingredients in 2 batches, whisking until fully combined. Allow the batter to sit for 5 minutes before cooking. 5. Heat a nonstick skillet over medium-low heat. Grease the pan with coconut oil spray. 6. Using a ¼-cup measuring cup, scoop up some of the batter and pour it into the center of the skillet. If the batter does not spread out on its own, use a spoon to spread it out until it is 5 to 6 inches in diameter. (Note: You can make the pancakes any size you want; just keep in mind that changing the size will affect the yield and possibly the cooking time.) The pancake is ready to flip when bubbles start to form on the surface, about 3 minutes. Flip and cook for another minute, until golden brown on both sides. 7. Repeat this process with the remaining batter, making a total of 8 pancakes. Grease the pan after each pancake. To keep the pancakes warm while the rest are cooking, place them on a baking sheet in a 200°F oven. 8. Serve the pancakes warm with butter and sugar-free maple syrup. 9. Allow to cool before storing in a sealed container in the refrigerator for up to 5 days. Reheat in a preheated 200°F oven for 15 minutes or in the microwave for 30 seconds. Sadly, these pancakes do not freeze well. TWIST learn how to lose 10 pounds in a week fast results
  • 97.
    Add some sugar-freechocolate chips or a handful of berries for a fun take on this classic recipe. NOTES The ideal texture of the flax meal for this recipe is very finely ground. It should be powdery and almost as fine as flour. If the flax meal you have at home is not finely ground, pulse it in a coffee grinder until it’s very fine. The finer the flax meal, the fluffier your pancakes will be. To make these pancakes nut-free, use coconut milk. CALORIES: 298 FAT: 23.5 g PROTEIN: 12.5 g CARBS: 8.8 g FIBER: 5.5 g
  • 99.
    TOASTED OATMEAL MAKES: roughly3 cups (½ cup per serving) ACTIVE PREP TIME: 7 minutes INACTIVE PREP TIME: 30 minutes Sadly, oatmeal made with oats is the furthest thing from keto- friendly, and we miss it just as much as you probably do! So we created the perfect combination of chia seeds, toasted coconut flakes, and nuts to create a low-carb version of oatmeal that some even say is better than the real thing! This is our favorite make-ahead breakfast when we know we have a busy week coming up or just simply want a change from good old bacon and eggs! ¼ cup raw almonds ¼ cup raw pecans ½ cup unsweetened coconut flakes ½ cup heavy whipping cream or coconut cream (see page 23) ¼ cup chia seeds ¾ cup water 1 teaspoon ground cinnamon ½ teaspoon vanilla extract ¼ teaspoon maple extract (optional) 15 drops of liquid stevia 1. Finely chop the nuts. 2. Toast the nuts and coconut flakes in a medium-sized nonstick skillet over low heat, stirring continuously, for about 5 minutes,
  • 100.
    until fragrant andlightly golden. Pour the toasted nuts and coconut flakes into a large mixing bowl. 3. Add the rest of the ingredients to the mixing bowl and gently stir everything together. Refrigerate for 30 minutes to allow the chia seeds to expand and the oatmeal to thicken prior to serving. 4. Serve the oatmeal straight out of the refrigerator or microwave for 1 minute and serve warm. We prefer it warm! 5. Store in a sealed mason jar or other container in the refrigerator for up to a week. NOTES Any kind of nuts can be used in this recipe. The maple extract is optional, but it greatly adds to the flavor, and we do not advise leaving it out! The sweetness can easily be changed by adjusting the amount of stevia you add. To make this oatmeal dairy-free, use coconut cream instead of heavy whipping cream. CALORIES: 266 FAT: 24.8 g PROTEIN: 5.2 g CARBS: 9.6 g FIBER: 5.8 g learn how to lose 10 pounds in a week fast results
  • 102.
    ICED BULLETPROOF COFFEE FRAPPÉ MAKES:1 serving PREP TIME: 5 minutes COOK TIME: 1 minute We love starting our days with a frothy cup of bulletproof coffee. However, on warm summer mornings, we sometimes want those same healthy fats in a cool and refreshing iced coffee, pureed to smooth, creamy perfection in a blender. 8 ounces brewed coffee, cold 1 tablespoon heavy whipping cream 1 tablespoon MCT oil 1 scoop unflavored collagen peptides 15 drops of liquid stevia ¼ teaspoon ground cinnamon ¼ teaspoon xanthan gum 6 or 7 ice cubes TOPPINGS (OPTIONAL): Whipped cream Ground cinnamon Place all the ingredients in a blender and blend until smooth. Pour into a 16-ounce glass and top with whipped cream and cinnamon, if desired. NOTES
  • 103.
    If you arenew to using MCT oil, you may want to start with 1 teaspoon and work your way up to 1 tablespoon because it can cause digestive issues and discomfort. You can also replace the MCT oil with 2 tablespoons of heavy whipping cream, which will decrease the fat by 4 grams and increase the carbs by 1 gram. CALORIES: 220 FAT: 20 g PROTEIN: 10 g CARBS: 0.3 g FIBER: 0.1 g learn how to lose 10 pounds in a week fast results
  • 105.
    MOCHA PROTEIN KETOCOFFEE MAKES: 1 serving PREP TIME: 5 minutes COOK TIME: 1 minute We live for our morning coffees. We make it a point to spend time with our cat, Miley, and our dog, Julius, every morning while we drink our coffee. On days when we have to rush out of the house, we make this coffee as a meal replacement. Not only is it delicious, but it has the fat and protein we need to power us through the day. 12 ounces hot brewed coffee 2 tablespoons heavy whipping cream 1 tablespoon unsalted butter 1 tablespoon cocoa powder 1 scoop chocolate-flavored protein powder 1 scoop unflavored collagen peptides 10 drops of liquid stevia Place all the ingredients in a blender and blend until smooth and frothy. Pour into a 16-ounce mug and serve immediately, or pour it into a Thermos and take it on the go! TWIST Megha likes to change up the protein powder to alter the flavor of her coffee. Her favorite is Isopure’s cookies and cream flavor, which turns this into a cookies and cream protein coffee!
  • 106.
    CALORIES: 361 FAT:24 g PROTEIN: 37 g CARBS: 4 g FIBER: 2 g learn how to lose 10 pounds in a week fast results
  • 109.
    —Chapter 2— FRESH BAKED EnglishMuffins Cheddar and Thyme Cornbread Microwave Bread The Best Keto Bread Raspberry Fiber Muffins Cheddar Jalapeño Bagels Low-Carb Dinner Rolls Cinnamon Walnut Scones Chocolate Chip Zucchini Bread Cheesy Chicken Breadsticks Navajo Fry Bread Coconut Flour Tortillas learn how to lose 10 pounds in a week fast results
  • 110.
    ENGLISH MUFFINS MAKES: 8muffins (1 per serving) PREP TIME: 10 minutes COOK TIME: 50 minutes True story: Matt used to make homemade English muffins every weekend when he was away at college, so it was only a matter of time before we figured out how to make a good keto version. We love using these for egg sandwiches or toasting and spreading them with peanut butter. ½ cup psyllium husk powder ½ cup coconut flour 2 teaspoons baking powder 1 tablespoon active dry yeast (optional, for flavor) 8 large eggs ½ cup avocado oil Butter, for serving 1. Preheat the oven to 300°F. 2. Put the psyllium husk powder, coconut flour, and baking powder in a medium-sized bowl and mix well with a fork. If desired, add the yeast for flavor and whisk to combine. 3. Put the eggs and oil in a large bowl and combine with a hand mixer. Add the dry ingredients in 2 parts and combine with the hand mixer after each addition. Allow the dough to rest for 5 minutes. 4. While the dough is resting, heat a 12-inch cast-iron skillet over medium heat and grease with coconut oil spray.
  • 111.
    5. Using yourhands, form the dough into 8 round English muffin shapes, about 3 inches in diameter and ½ inch thick. If the dough is not able to be formed by hand, slowly add up to 3 tablespoons more coconut flour until the dough is easy to shape. Because coconut flour is highly absorptive, it is important to add a little at a time, mix, and then judge the consistency before adding more. 6. Place half of the English muffins in the hot skillet and cook for 5 minutes on each side, or until golden brown. Remove the muffins from the pan and set aside. Repeat with the remaining half of the muffins, then return the muffins you set aside to the pan. 7. Transfer the skillet to the oven and bake the muffins for 15 minutes, until browned and firm to touch. Transfer the muffins to a plate or wire baking rack and let cool for 10 minutes before serving. 8. Store leftovers in the refrigerator for up to a week or freeze for up to a month. TIP Our favorite way to eat these is to cut an English muffin in half, spread butter on each cut side, and toast butter side down in a nonstick skillet for 2 to 3 minutes, until browned. CALORIES: 251 FAT: 19.8 g PROTEIN: 7.3 g CARBS: 12.4 g FIBER: 9.5 g
  • 113.
    CHEDDAR AND THYME CORNBREAD MAKES:one 8-inch round loaf (8 servings) PREP TIME: 15 minutes COOK TIME: 25 minutes Is there anything better than a thick slice of cornbread? The secret ingredient in this version is baby corn. Baby corn is very low in carbs and has a subtle corn flavor, but it greatly adds to the texture of this keto cornbread. ¾ cup baby corn 1½ cups blanched almond flour 1 tablespoon dried thyme leaves 1 tablespoon baking powder ¼ teaspoon cream of tartar ¼ teaspoon pink Himalayan salt 4 large eggs, room temperature 10 drops of liquid stevia ¼ cup (½ stick) unsalted butter, melted but not hot ⅔ cup shredded cheddar cheese (about 2⅔ ounces) 1. Preheat the oven to 375°F and grease an 8-inch round cake pan with coconut oil spray. 2. Put the baby corn in a food processor and lightly pulse until the corn is chopped but still chunky; do not puree. Set aside. 3. Put the almond flour, thyme, baking powder, cream of tartar, and salt in a medium-sized bowl and mix well with a fork.
  • 114.
    4. Put theeggs and stevia in a large mixing bowl and beat with a hand mixer until combined. With the mixer running, slowly pour in the melted butter, continuing to mix until all the butter is added. 5. Add half of the almond flour mixture to the egg mixture and mix to combine. Add the second half and continue mixing until all the clumps are gone. 6. Fold the cheddar cheese and baby corn into the batter with a rubber spatula. 7. Pour the batter into the greased cake pan and smooth the top. Bake for 25 minutes, until a toothpick comes out clean when inserted in the center. Allow to cool in the pan for 15 minutes, then cut into 8 slices. 8. Store leftovers in the refrigerator for up to a week. TWIST Matt likes to fold in minced jalapeño peppers for a spicy cheese cornbread. CALORIES: 249 FAT: 21.4 g PROTEIN: 10.6 g CARBS: 5.8 g FIBER: 2.9 g learn how to lose 10 pounds in a week fast results
  • 116.
    MICROWAVE BREAD MAKES: 1serving PREP TIME: 2 to 3 minutes COOK TIME: about 1½ minutes You’ve got all the fixings for a tasty sandwich in the fridge, but you’re missing the bread? Whip up this microwave bread in under five minutes and you won’t be disappointed! 1 tablespoon unsalted butter 1½ tablespoons blanched almond flour 1½ tablespoons golden flax meal 1 large egg ½ teaspoon baking powder 1. Put the butter in a wide 12-ounce coffee cup or microwave- safe ramekin. Microwave on high for 20 to 30 seconds, until the butter is melted. 2. Add the remaining ingredients to the melted butter and mix with a fork. Microwave on high for 60 to 70 seconds, until the bread is cooked through and set in the center. 3. Allow to cool in the mug for 2 to 3 minutes, then run a knife around the edge to release the bread. Slice in half and enjoy. TWIST Matt never waits for his bread to cool because hot bread is optimal for smothering in peanut butter!
  • 117.
    CALORIES: 285 FAT:25 g PROTEIN: 10 g CARBS: 6 g FIBER: 4 g learn how to lose 10 pounds in a week fast results
  • 119.
    THE BEST KETOBREAD MAKES: one 8 by 4-inch loaf (16 servings) PREP TIME: 10 minutes COOK TIME: 30 minutes This is by far the most popular recipe on our blog. Thousands of people have made this bread. When we started writing this cookbook, it was the first recipe we decided to include. It’s the perfect combination of simplicity and quality taste. 6 large eggs ¼ teaspoon cream of tartar 1½ cups blanched almond flour ¼ cup (½ stick) unsalted butter, melted but not hot 1 tablespoon baking powder ½ teaspoon pink Himalayan salt 10 drops of liquid stevia 1. Preheat the oven to 375°F and grease an 8 by 4-inch loaf pan with coconut oil spray. 2. Separate the eggs. Put the whites and cream of tartar in a large mixing bowl and beat with a hand mixer on high speed until stiff peaks form. 3. Put the egg yolks, almond flour, melted butter, baking powder, salt, stevia, and one-third of the beaten egg whites in another large mixing bowl. Mix with the hand mixer until you have a thick, uniform dough.
  • 120.
    4. Using arubber spatula, fold in the remaining whipped egg whites in 2 parts. 5. Pour the batter into the greased loaf pan and bake for 30 minutes, until the bread is set in the center and a toothpick inserted in the center comes out clean. Allow to cool in the pan for 10 minutes before removing and slicing. 6. Store leftovers in a zip-top plastic bag for up to 5 days or freeze for up to 2 weeks. It is best reheated in the oven. CALORIES: 112 FAT: 9.8 g PROTEIN: 4.6 g CARBS: 2.4 g FIBER: 1.1 g learn how to lose 10 pounds in a week fast results
  • 122.
    RASPBERRY FIBER MUFFINS MAKES:1 dozen muffins (1 per serving) PREP TIME: 15 minutes COOK TIME: 17 minutes When Matt first learned that Megha’s favorite type of muffin is a bran muffin, he made it his mission to come up with an awesome keto version, and this is it. We always bring these muffins with us on our weekend hikes. 1 cup flax meal 1 cup oat fiber 2 teaspoons ground cinnamon 1 teaspoon baking powder ½ teaspoon baking soda ½ teaspoon pink Himalayan salt ¼ cup (½ stick) unsalted butter ¼ cup granular erythritol 4 large eggs, room temperature ½ cup heavy whipping cream ½ teaspoon vanilla extract ½ cup fresh raspberries, divided 1. Preheat the oven to 350°F. Line a standard-size 12-well muffin tin with paper liners, then spray the liners with coconut oil spray. 2. Put the flax meal, oat fiber, cinnamon, baking powder, baking soda, and salt in a medium-sized bowl and mix well with a fork. Set aside.
  • 123.
    3. Put thebutter in a large microwave-safe bowl and microwave on high for 30 seconds, or until melted. Add the erythritol and beat with a hand mixer until fully combined. Add the eggs, cream, and vanilla extract and mix with the hand mixer until fully combined. 4. Add the dry ingredients to the butter mixture and mix using a whisk until a thick batter forms. 5. Set aside 3 large raspberries for garnish, if desired. Using a rubber spatula, fold the rest of the raspberries into the batter. 6. Distribute the batter evenly among the muffin liners, filling them about three-quarters full. If you have set aside raspberries, cut each of the reserved berries into fourths and place a fourth on top of each muffin. 7. Bake for 15 to 17 minutes, until a toothpick inserted in the middle of a muffin comes out clean. Allow to cool in the pan for 15 minutes before removing and serving. 8. Store leftovers in the refrigerator for up to a week. TWIST Megha likes to warm her muffin, cut it in half, and top it with 1 tablespoon of butter to get her mornings off to a fibrous and fatty start! CALORIES: 131 FAT: 10.4 g PROTEIN: 4.2 g CARBS: 11 g FIBER: 9.8 g SUGAR ALCOHOL: 4g learn how to lose 10 pounds in a week fast results
  • 125.
    CHEDDAR JALAPEÑO BAGELS MAKES:6 bagels (1 per serving) PREP TIME: 10 minutes COOK TIME: 18 minutes For us, part of the fun of being keto is re-creating all our favorite foods in a healthier way. These bagels are the perfect example. 2 jalapeño peppers 3 scoops unflavored whey protein powder 1½ teaspoons baking powder ¾ teaspoon garlic powder ¾ teaspoon onion powder ½ teaspoon pink Himalayan salt 5 ounces cream cheese (10 tablespoons), room temperature ¼ cup (½ stick) unsalted butter, room temperature 1 large egg, room temperature ¾ cup shredded cheddar cheese (about 3 ounces), divided Cream cheese, for serving (optional) Special equipment: 6-well silicone donut pan 1. Preheat the oven to 350°F and grease a 6-well silicone donut pan with coconut oil spray. 2. Mince one of the jalapeño peppers and slice the other crosswise into rounds.
  • 126.
    3. Put theprotein powder, baking powder, garlic powder, onion powder, and salt in a medium-sized bowl and mix well with a fork. 4. Put the cream cheese, butter, and egg in a large bowl and cream with a hand mixer until there are no clumps. Add the dry ingredients and continue to mix with the hand mixer until a thick batter has formed. 5. Add ¼ cup of the shredded cheese and the minced jalapeño to the batter and fold in with a rubber spatula. 6. Evenly distribute the batter among the greased wells of the donut pan, filling them nearly to the top. Top with the remaining 1/2 cup of shredded cheese and the jalapeño slices. Bake for 18 minutes, or until a toothpick inserted in the center of a bagel comes out clean. 7. Allow to cool in the pan for 10 minutes before removing. To serve, slice in half and spread with cream cheese, if desired. 8. Store leftovers in the refrigerator for up to a week. TWIST Megha always makes sandwiches using these bagels, some sliced cooked chicken thighs, and a heaping dollop of guacamole! CALORIES: 334 FAT: 25.5 g PROTEIN: 22.8 g CARBS: 2.8 g FIBER: 0.5 g learn how to lose 10 pounds in a week fast results
  • 128.
    LOW-CARB DINNER ROLLS MAKES:10 rolls (1 per serving) PREP TIME: 15 minutes COOK TIME: 35 minutes If you’ve tried a bunch of different low-carb bread recipes and you haven’t found anything with a true bread texture, then let us introduce you to your new favorite recipe. The combination of coconut flour and psyllium husk powder gives these rolls the doughy, fluffy consistency you’ve been looking for. ½ cup coconut flour 2 tablespoons psyllium husk powder ½ teaspoon baking powder ¼ teaspoon pink Himalayan salt 4 large eggs, room temperature ¾ cup water ¼ cup (½ stick) unsalted butter, melted but not hot 1. Preheat the oven to 350°F and line a baking sheet with parchment paper. 2. Put the coconut flour, psyllium husk powder, baking powder, and salt in a medium-sized bowl and mix well with a fork. 3. Put the eggs in a large bowl and beat with a hand mixer until combined and frothy on top. Add the water, then slowly add the melted butter while mixing with the hand mixer. 4. Add the dry ingredients to the wet ingredients in 2 parts, combining with the hand mixer after each addition. learn how to lose 10 pounds in a week fast results
  • 129.
    5. Shape thedough by hand into 10 rolls, about 2 inches in diameter. If the dough is not shapeable, add more coconut flour a little bit at a time until the dough is easy to shape. Place on the lined baking sheet, about 3 inches apart, and bake for 30 to 35 minutes, until the rolls are firm and slightly browned on top. Allow to cool on the baking sheet for 10 minutes before serving. 6. Store leftovers in the refrigerator for up to a week. CALORIES: 99 FAT: 7.1 g PROTEIN: 3.3 g CARBS: 4.9 g FIBER: 3.4 g
  • 131.
    CINNAMON WALNUT SCONES MAKES:8 scones (1 per serving) PREP TIME: 15 minutes COOK TIME: 40 minutes A few years ago, you could often find either of us hovering around the pastry display case at the local coffee shop saying, “I’ll start my diet tomorrow.” These scones have single- handedly changed that! ¾ cup coconut flour ¼ cup plus 2 tablespoons granular erythritol 1 teaspoon ground cinnamon, plus extra for garnish (optional) ½ teaspoon baking powder ¼ teaspoon pink Himalayan salt 4 large eggs, room temperature ¼ cup extra-virgin olive oil ⅓ cup raw walnuts, chopped, plus extra for garnish (optional) 1. Preheat the oven to 350°F and line a baking sheet with parchment paper. 2. Put the coconut flour, erythritol, cinnamon, baking powder, and salt in a medium-sized bowl and mix well with a fork. 3. Put the eggs and olive oil in a large bowl and combine using a hand mixer. Add the dry ingredients in 2 parts, combining after each addition with the hand mixer.
  • 132.
    4. Fold inthe walnuts with a rubber spatula until they are evenly distributed. 5. Form the dough into a 1-inch-thick circle on the lined baking sheet. Cut into 8 wedges and separate slightly. If desired, garnish with additional chopped walnuts, gently pressing them into the dough. 6. Bake for 35 to 40 minutes, until the edges are lightly browned. 7. Remove from the oven and, if desired, dust with cinnamon. Allow to cool on the baking sheet for 10 minutes before serving. 8. Store leftovers in the refrigerator for up to a week. CALORIES: 174 FAT: 14.0 g PROTEIN: 5.5 g CARBS: 7 g FIBER: 4.3 g SUGAR ALCOHOL: 9 g learn how to lose 10 pounds in a week fast results
  • 134.
    CHOCOLATE CHIP ZUCCHINI BREAD MAKES:one 8 by 4-inch loaf (12 servings) PREP TIME: 15 minutes COOK TIME: 50 minutes Baking with zucchini is great for a couple of reasons. Not only is it a good way to sneak some veggies into your diet, but it also makes breads incredibly moist. 1 loosely packed cup grated zucchini 6 large eggs, room temperature ½ cup extra-virgin olive oil 1 teaspoon vanilla extract ½ teaspoon liquid stevia 1 cup coconut flour 1 teaspoon baking powder ½ cup sugar-free chocolate chips 1. Preheat the oven to 350°F and line an 8 by 4-inch loaf pan with parchment paper, leaving some paper overhanging for easy removal of the bread. 2. Place the grated zucchini in a large bowl. Add the eggs, olive oil, vanilla extract, and stevia. Combine using a hand mixer. 3. Add the coconut flour and baking powder and combine with the hand mixer until the ingredients are fully incorporated and there are no clumps of batter remaining. 4. Using a rubber spatula, fold in the chocolate chips.
  • 135.
    5. Pour thebatter into the loaf pan, smooth the top, and bake for 50 minutes, or until a toothpick inserted in the center of the loaf comes out clean. 6. Allow to cool in the pan for 30 minutes before removing and slicing. 7. Store leftovers in the refrigerator for up to a week. TWIST For a decadent Sunday brunch treat, frost this bread with the Vanilla Buttercream Frosting from the Protein Cake recipe on page 220! CALORIES: 170 FAT: 13.7 g PROTEIN: 4.8 g CARBS: 7 g FIBER: 3.9 g SUGAR ALCOHOL: 0.7 g
  • 137.
    CHEESY CHICKEN BREADSTICKS MAKES:2 servings PREP TIME: 10 minutes COOK TIME: 25 minutes You have to get creative when trying to turn some of your favorite foods into keto staples. This unique combination of chicken and cheese makes the lowest-carb breadsticks we’ve ever tried. 2 (5-ounce) cans chunk chicken breast in water ¼ cup grated Parmesan cheese 1 large egg ¼ cup shredded cheddar cheese ¼ cup shredded mozzarella cheese ½ teaspoon dried oregano leaves ½ teaspoon garlic powder ½ teaspoon pink Himalayan salt Low-carb marinara sauce, for serving 1. Preheat the oven to 350°F and line a baking sheet with parchment paper. 2. Drain the chicken and place it on the parchment-lined baking sheet. Use a fork to spread it into an even layer. Bake for 10 minutes, until dried out. 3. Put the dried-out chicken in a medium-sized bowl, then add the Parmesan and egg and mix with a fork. learn how to lose 10 pounds in a week fast results
  • 138.
    4. Pour themixture back onto the parchment paper, top with another piece of parchment, and roll out using a rolling pin into an oval, about 8 by 5 inches. 5. Bake for 5 minutes. Top the chicken mixture with the cheddar cheese, mozzarella cheese, oregano, garlic powder, and salt. Bake for an additional 10 minutes, until the cheese has melted. 6. Allow to cool slightly before cutting. Slice crosswise into 8 breadsticks. Serve with marinara sauce, if desired. TWIST Megha likes to top these heavenly cheese sticks with sliced red onions (her favorite vegetable) and sliced mushrooms (Matt’s favorite vegetable) prior to baking! We like Rao’s marinara sauce for dipping. CALORIES: 300 FAT: 16 g PROTEIN: 37.5 g CARBS: 1.5 g FIBER: 0 g learn how to lose 10 pounds in a week fast results
  • 140.
    NAVAJO FRY BREAD MAKES:8 breads (1 per serving) PREP TIME: 15 minutes COOK TIME: about 50 minutes We love learning about cuisines from different cultures and incorporating elements from them into our own cooking. This simple fried bread, which was developed in the southwestern United States by the Navajo people, is perfect for loading up with chicken breast, mozzarella cheese, chopped parsley, and Sriracha sauce! 1 cup coconut oil, for frying ½ cup coconut flour ¼ cup psyllium husk powder ½ teaspoon baking powder ¼ teaspoon pink Himalayan salt ¾ cup water ¼ cup extra-virgin olive oil 4 large eggs, room temperature 1. Heat the coconut oil in an 8-inch skillet over medium-high heat to between 330°F and 345°F. Use a deep-fry thermometer to read the oil temperature. 2. While the oil is heating, put the coconut flour, psyllium husk powder, baking powder, and salt in a medium-sized bowl and mix well with a fork. 3. Put the water, olive oil, and eggs in another large bowl and combine with a hand mixer. Add the dry ingredients to the wet ingredients in 2 parts, mixing after each addition. Once combined, allow the dough to rest for 5 minutes.
  • 141.
    4. Divide thedough into 8 equal-sized pieces. Using your hands, form each piece of dough into a ball, then press it between your hands into a thin disc. The dough should be as thin as possible without breaking. If the dough is too sticky to form by hand, use extra coconut flour when shaping the flatbreads. 5. Place one flatbread in the oil. Fry for 2 to 4 minutes per side, until dark brown. Remove from the oil and set on a paper towel to drain while you fry the remaining flatbreads one at a time. Allow to cool for 2 minutes before serving. 6. Store in a zip-top plastic bag in the refrigerator for up to a week. These are best reheated in a 250°F oven for 10 minutes. NOTE The nutritional information can’t be precisely pinpointed due to the oil used for frying. We have provided information based on the bread itself, but the fat will vary based on the amount of oil that the bread absorbs. plus oil from frying CALORIES: 140 FAT: 10.1 g PROTEIN: 4.1 g CARBS: 8.1 g FIBER: 6 g
  • 143.
    COCONUT FLOUR TORTILLAS MAKES:16 small tortillas (4 per serving) PREP TIME: 5 minutes COOK TIME: 1½ to 2 hours Who’s ready for DIY taco night? Filling these easy-to-make tortillas with all kinds of delicious ingredients is a weekly activity at our house. Be sure to double up the tortillas to hold more fillings without breaking. 8 large egg whites ½ cup plus 2 tablespoons water ⅓ cup coconut flour ¼ teaspoon baking powder 1. Heat a small (6-inch) nonstick skillet over low heat. In a bowl, combine the egg whites and water using a whisk. 2. In another small bowl, combine the coconut flour and baking powder with a fork. Add the dry ingredients to the egg white mixture and whisk until the mixture is uniform. 3. Spray the skillet with a light coating of coconut oil spray. Using a ¼-cup measuring cup, scoop up some of the batter and place it in the center of the skillet. Tilt the pan so that the batter covers the entire surface. Cook for 5 to 7 minutes, until the tortilla is fully cooked through. When it’s ready to flip, you’ll be able to lift up the edges without it breaking. Flip and cook for an additional 30 seconds. learn how to lose 10 pounds in a week fast results
  • 144.
    4. Set thecooked tortilla on a plate and repeat with the rest of the batter, making a total of 16 tortillas. 5. Store leftovers in a tightly sealed container in the refrigerator for up to 2 days. Reheat in a dry skillet on the stovetop over high heat for 30 seconds on each side. TWIST Megha likes to add seasonings such as ground cumin, garlic powder, and chili powder to the coconut flour for extra flavor before mixing it into the batter! NOTE If you have two 6-inch nonstick skillets, we recommend that you use both simultaneously to cook two tortillas at a time. It will seriously cut down on the cook time for this recipe! VARIATION LARGE COCONUT FLOUR TORTILLAS. We use large coconut flour tortillas to make the quesadillas on page 140. To make large tortillas, use a 9-inch nonstick skillet, and in Step 3, use a ½-cup measuring cup to scoop up the batter. The cooking time is the same. Makes 6 large tortillas (1 per serving).
  • 145.
    CALORIES: 74 FAT:1.3 g PROTEIN: 7.3 g CARBS: 5.3 g FIBER: 3.3 g
  • 147.
    —Chapter 3— CLASSIC COMFORTFOODS Chicken Popper Casserole Loaded Cauliflower Spicy Cauliflower Bites Spaghetti with Meat Sauce Creamy White Chili Chicken Tenders Crispy Chicken Thighs with Pan Sauce Mexican Chorizo Casserole Bacon and Crab Mac and Cheese Chicken Noodle-less Soup Creamy Chicken Alfredo Southern Baked Chicken Mama’s Meatloaf
  • 148.
    CHICKEN POPPER CASSEROLE MAKES:6 servings PREP TIME: 15 minutes COOK TIME: 18 minutes Who said jalapeño poppers are only for football Sundays? Adding some chicken and turning them into a hearty casserole is the perfect excuse to make this dish any night of the week. 1½ pounds boneless, skinless chicken thighs Pink Himalayan salt and ground black pepper 2 medium-sized jalapeño peppers 6 ounces cream cheese (¾ cup), room temperature ¼ cup heavy whipping cream 5 slices bacon, cooked and crumbled ½ cup shredded Monterey Jack cheese (about 2 ounces) ½ cup shredded cheddar cheese (about 2 ounces), divided 1 teaspoon minced garlic ¼ teaspoon onion powder 1. Preheat the oven to 400°F. 2. Heat a large skillet over medium-high heat. While the skillet is heating, chop the chicken thighs into 1-inch pieces and lightly season with salt and pepper. 3. Spray the hot skillet with coconut oil spray, then add the chicken. Sauté on all sides until cooked through, 5 to 7 minutes.
  • 149.
    4. Meanwhile, seedand mince one-and-a-half of the jalapeños and put in a small bowl; slice the remaining half into rings and set aside in another small bowl. (Remove the seeds from the rings if you don’t care for heat.) 5. When the chicken is cooked, add the cream cheese and heavy cream and stir to combine. 6. To the chicken mixture, add the minced jalapeños and about four-fifths of the crumbled bacon; stir to combine. Add the Monterey Jack cheese and ¼ cup of the cheddar cheese and stir until melted. Add the garlic powder, onion powder, 1 teaspoon of salt, and ¼ teaspoon of pepper and stir to combine, then remove from the heat. 7. Pour the mixture into a 13 by 9-inch baking dish and spread evenly using a rubber spatula. Top with the remaining cheddar cheese and crumbled bacon and the sliced jalapeños. Bake for 10 minutes, then turn the oven to broil and broil for 2 minutes, until the cheese has melted and browned. Serve hot. CALORIES: 372 FAT: 27.2 g PROTEIN: 30.7 g CARBS: 2.5 g FIBER: 1 g learn how to lose 10 pounds in a week fast results
  • 151.
    LOADED CAULIFLOWER MAKES: 8servings PREP TIME: 20 minutes COOK TIME: 5 minutes The age-old keto dilemma: what do I have with my steak tonight? We think this loaded cauliflower is a pretty good answer. 2 heads cauliflower, cored and cut into florets 3 tablespoons unsalted butter, melted ¼ cup heavy whipping cream ¼ cup sour cream 1 teaspoon pink Himalayan salt ½ teaspoon ground black pepper ¼ cup shredded cheddar cheese 4 slices bacon, cooked and crumbled FOR GARNISH (OPTIONAL): Chopped fresh chives Sour cream 1. Set a large pot of water over high heat. Add the cauliflower florets and bring to a boil. Boil for 10 to 15 minutes, until fork- tender. Drain the cauliflower. 2. Put half of the florets in a food processor and pulse for 30 seconds. Add half of the melted butter, half of the cream, and half of the sour cream and process until smooth. As you process, the mixture will work its way up the sides of the
  • 152.
    processor. When thishappens, stop processing and push the mixture down using a rubber spatula. 3. Add half of the salt and pepper to the cauliflower mixture in the blender and pulse to combine. Pour the cauliflower mash into a 13 by 9-inch baking dish. 4. Repeat with the remaining cauliflower, butter, cream, sour cream, salt, and pepper, then add to the baking dish. 5. Smooth the top of the mash with a rubber spatula, then top with the shredded cheese and crumbled bacon. Broil for 2 to 4 minutes, until the cheese has melted and slightly browned. Sprinkle the top with chives and garnish each serving with a dollop of sour cream, if desired. 6. Store leftovers in a sealed container in the refrigerator for up to a week. Reheat in the microwave for 30 to 60 seconds. CALORIES: 149 FAT: 11.4 g PROTEIN: 5.4 g CARBS: 8.4 g FIBER: 3.6 g
  • 154.
    SPICY CAULIFLOWER BITES MAKES:4 servings PREP TIME: 10 minutes COOK TIME: 20 minutes If we’re using the oven to prepare dinner, then chances are we’re throwing in a double order of Spicy Cauliflower Bites to go along with it. Anytime you bite into a cauliflower floret and mistake it for a chicken wing, you know you’ve got a good recipe on your hands. 1 head cauliflower, cored and cut into florets 2 tablespoons extra-virgin olive oil 1½ teaspoons chili powder 1½ teaspoons garlic powder 1½ teaspoons paprika 1 teaspoon pink Himalayan salt ½ teaspoon baking powder Sliced scallions, for topping (optional) Blue cheese dressing, store-bought or homemade (see Notes), for serving (optional) 1. Preheat the oven to 450°F and line a rimmed baking sheet with parchment paper. 2. Put the cauliflower florets in a large mixing bowl. Add the remaining ingredients, except the scallions and blue cheese dressing, and, using your hands, toss to coat the cauliflower evenly. Pour the florets onto the lined baking sheet and spread into an even layer. learn how to lose 10 pounds in a week fast results
  • 155.
    3. Roast for20 minutes, or until fork-tender. Serve immediately, topped with sliced scallions and with blue cheese dressing on the side, if desired. 4. Store in a sealed container in the refrigerator for up to 3 days. Reheat in a preheated 250°F oven for 10 minutes, or until crispy. TWIST On Michigan game days, Matt loves to eat these alongside our Chipotle Dry-Rub Wings (page 142)! NOTES The addition of baking powder helps dry out the cauliflower so that you get the crispiest bites possible! Store-bought blue cheese dressing contains soybean oil; however, we are comfortable using it sparingly as a dipping sauce for these bites (or for chicken wings, of course!) or to dress the occasional salad. CALORIES: 105 FAT: 7.3 g PROTEIN: 3.3 g CARBS: 9.3 g FIBER: 4 g
  • 157.
    SPAGHETTI WITH MEATSAUCE MAKES: 1 serving PREP TIME: 10 minutes COOK TIME: 12 minutes Zucchini noodles are our favorite pasta replacement. Cooked lightly, these noodles pair perfectly with any traditional pasta sauce, especially this simple and flavorful meat sauce. This recipe makes just one serving of zucchini noodles because we have found that they do not keep and reheat well. Making them fresh is a lot tastier! SAUCE: Makes 1⅓ cups (4 servings) 1 (14½-ounce) can whole peeled tomatoes 1 tablespoon extra-virgin olive oil ½ teaspoon garlic powder ½ teaspoon dried oregano leaves ½ teaspoon dried parsley ¼ teaspoon onion powder ¼ teaspoon red pepper flakes ⅛ teaspoon pink Himalayan salt 3 to 5 drops of liquid stevia SPAGHETTI (FOR 1 SERVING): 1 medium-sized zucchini 4 ounces ground beef (80/20)
  • 158.
    Grated Parmesan cheese,for topping (optional; omit for dairy-free) 1. Make the sauce: Put the tomatoes, olive oil, seasonings, and stevia in a blender and blend until the consistency is smooth. Pour the mixture into a small saucepan and cook over medium heat for 5 to 7 minutes, until reduced by about one-third. Remove from the heat. 2. Make the spaghetti: Spiral-slice the zucchini into noodles. Put in a small bowl and set aside. 3. Heat a medium-sized skillet over medium-high heat and spray with coconut oil spray. Put the ground beef in the hot skillet and cook through, stirring to break up the meat as it cooks. Add ⅓ cup of the sauce to the ground beef and stir to combine. 4. Place a second medium-sized skillet over medium-high heat. When it is hot, place the zucchini noodles and 2 to 3 tablespoons of water in the skillet. Cover with the lid and steam for 1 to 2 minutes, until just tender. Remove the lid, drain the noodles, and transfer the noodles to a bowl. Top with the meat sauce and grated Parmesan, if desired. 5. Store the remaining sauce in a sealed container in the refrigerator for up to 2 weeks. CALORIES: 327 FAT: 21 g PROTEIN: 24 g CARBS: 11 g FIBER: 3 g
  • 160.
    CREAMY WHITE CHILI MAKES:6 servings PREP TIME: 15 minutes COOK TIME: 1 hour 20 minutes Chili is a household favorite of ours. All you really have to do is throw everything into a pot and let it cook for an hour. So simple! Green chilies and jalapeño peppers give this white chili that signature Southwestern flavor. 1½ pounds boneless, skinless chicken thighs 2 tablespoons unsalted butter 2 tablespoons extra-virgin olive oil ½ medium-sized white onion, diced 3 cloves garlic, minced 1 (4-ounce) can green chilies ½ medium-sized jalapeño pepper, seeded and chopped 4 cups low-sodium chicken broth 2 teaspoons ground cumin ½ teaspoon paprika ½ teaspoon pink Himalayan salt ¼ teaspoon chili powder ¼ teaspoon ground black pepper ¼ cup heavy whipping cream ⅓ cup shredded Monterey Jack cheese FOR GARNISH (OPTIONAL): Sliced avocado Sliced jalapeño peppers Roughly chopped fresh cilantro
  • 161.
    1. Put thechicken thighs in a large saucepan and fill with water, submerging the chicken entirely. Boil over high heat for 20 minutes, or until the chicken is fully cooked through. 2. Drain the chicken and set on a plate to cool. Once cool, shred the chicken using 2 forks or your hands. Set aside. 3. Put the butter and olive oil in a large pot over medium heat. Once the butter has melted, add the onion and garlic and cook for 3 minutes, or until the onion is translucent and fragrant. 4. Add the green chilies and jalapeño and cook for 2 minutes. Turn the heat up to medium-high, add the broth, and bring to a boil. 5. Add the shredded chicken and seasonings, stir, and cover with a lid. Turn the heat down to low and simmer for 45 minutes. 6. Add the cream and cheese and stir. Allow to cook with the lid off for an additional 10 minutes, then remove from the heat. Serve garnished with avocado, jalapeños, and cilantro, if desired. 7. Store leftovers in a sealed container in the refrigerator for up to a week or freeze for up to 2 months. Reheat in the microwave if refrigerated or on the stovetop if frozen. TWIST Chili is one of Megha’s favorite foods. When she heats up a bowl, she likes to add shirataki noodles to give it a toothsome bite!
  • 162.
    CALORIES: 278 FAT:18 g PROTEIN: 24.2 g CARBS: 3.3 g FIBER: 0.5 g
  • 164.
    CHICKEN TENDERS MAKES: 4servings PREP TIME: 10 minutes COOK TIME: 33 minutes We’ve tried every type of low-carb breading there is, and this combination of pork rinds and Italian herbs and spices is the one we keep going back to. It reminds Matt of the breaded chicken his grandma used to make for him growing up. 3 ounces pork rinds 2 teaspoons dried oregano leaves 2 teaspoons garlic powder 2 teaspoons onion powder 2 teaspoons red pepper flakes 1 teaspoon pink Himalayan salt 2 large eggs 2 tablespoons heavy whipping cream 1 pound chicken tenders BBQ sauce, homemade (page 246) or store-bought, for serving (optional) 1. Preheat the oven to 350°F and line a rimmed baking sheet with parchment paper. 2. Put the pork rinds and seasonings in a food processor and pulse until crumbly and combined. Pour onto a dinner plate. Set aside. 3. Crack the eggs into a small bowl and add the cream. Combine using a whisk. learn how to lose 10 pounds in a week fast results
  • 165.
    4. Pat thechicken tenders dry and, working in batches, dip them in the egg wash and then dredge them in the seasoned pork rinds. Once they are fully coated, lay them on the lined baking sheet in a single layer. 5. Bake the tenders for 30 minutes, then turn the oven to broil and broil for 2 to 3 minutes, until the chicken is cooked through and the breading is browned. Serve with BBQ sauce for dipping, if desired. 6. Store leftovers in a sealed container in the refrigerator for up to 3 days. Reheat in the oven for maximum crispiness. CALORIES: 305 FAT: 16 g PROTEIN: 38 g CARBS: 3.3 g FIBER: 1 g
  • 167.
    CRISPY CHICKEN THIGHSWITH PAN SAUCE MAKES: 4 servings PREP TIME: 10 minutes COOK TIME: 35 minutes You’ll probably notice that after you cook skin-on chicken thighs, you’re left with a ton of delicious drippings in the pan. Don’t let that flavor go to waste! This pan sauce takes just a couple of minutes to whip up and adds a bright flavor to the crispy chicken thighs. 4 boneless, skin-on chicken thighs (about 1 pound) PAN SAUCE: ¼ medium-sized white onion, finely diced 4 cloves garlic, minced ½ teaspoon pink Himalayan salt ¼ teaspoon ground black pepper ¼ cup low-sodium chicken broth ¼ cup dry white wine 1 teaspoon unflavored beef gelatin powder 2 tablespoons unsalted butter ¼ cup chopped fresh parsley Juice of ¼ lemon 1. Preheat the oven to 350°F. 2. Heat a medium-sized oven-safe skillet over medium heat. Grease the skillet with coconut oil spray, pat the chicken thighs learn how to lose 10 pounds in a week fast results
  • 168.
    dry, and laythem skin side down in the pan. 3. Using a spatula, press down on the thighs so that the entire surface of the skin is in contact with the hot skillet. Sear for 10 minutes, then flip the thighs over and put the skillet in the oven. Bake for 15 minutes, or until the chicken is fully cooked through. 4. Make the pan sauce: Remove the thighs from the skillet and set aside. Return the pan to the stovetop over medium heat. Add the onion and garlic and cook until the onion is translucent. Season with the salt and pepper. 5. Add the chicken broth, wine, and gelatin to the pan and scrape the bottom using a metal spatula to release and combine the pan drippings with the liquid. Simmer until the drippings are nearly fully reduced, then add the butter and stir with the spatula. Cook for 2 to 3 minutes, until the butter is incorporated into the sauce. 6. Add the parsley and lemon juice and stir to combine. Return the thighs to the pan and spoon some of the sauce over the top. Serve family-style, from the skillet, or slice the thighs crosswise and serve plated with the pan sauce over the chicken or on the side. 7. Store leftovers in a tightly sealed container in the refrigerator for up to 5 days. Reheat in the microwave for 60 to 90 seconds. TWIST Sometimes Megha likes to change it up and use red wine to make the reduction!
  • 169.
    NOTE Boneless, skin-on chickenthighs can be hard to find, so you can either ask your butcher to cut some for you or debone them yourself. Deboning them yourself will increase the prep time by about 10 minutes. CALORIES: 308 FAT: 21 g PROTEIN: 35.5 g CARBS: 3.3 g FIBER: 0.3 g learn how to lose 10 pounds in a week fast results
  • 171.
    MEXICAN CHORIZO CASSEROLE MAKES:8 servings PREP TIME: 15 minutes COOK TIME: 40 minutes We’re always trying to use spicy Mexican chorizo in new recipes. The flavor is so intense and assertive that it is hard to come away with a disappointing dish. We like to make this casserole on the weekend and have it ready throughout the week in case we don’t have time to cook. Failure to prepare is preparing to fail! 1 pound fresh (raw) bulk chorizo ¼ medium-sized white onion, diced 5 ounces cream cheese (½ cup plus 2 tablespoons) ¼ cup sour cream 1 small tomato, diced 1 (15-ounce) bag frozen spinach, thawed and drained 1 (4-ounce) can green chilies ¼ teaspoon pink Himalayan salt ¾ cup shredded cheddar cheese (about 3 ounces) 1. Preheat the oven to 350°F. 2. Heat a 12-inch cast-iron skillet or other oven-safe skillet over medium-high heat. Put the chorizo in the skillet and partially cook, crumbling the sausage with a spatula as it cooks. Add the onion and cook until softened, about 5 minutes. 3. Add the cream cheese, sour cream, tomato, spinach, chilies, and salt and stir to combine. When all the ingredients are learn how to lose 10 pounds in a week fast results
  • 172.
    evenly incorporated, removefrom the heat. 4. Flatten out the surface of the casserole and sprinkle on the cheese, covering the entire surface. 5. Bake for 30 minutes, until the cheese is melted and slightly browned on top. Allow to rest for 5 minutes, then cut into 8 wedges and serve. 6. Store leftovers in a sealed container in the refrigerator for up to 10 days or freeze for up to a month. Reheat in the microwave for 60 to 90 seconds. CALORIES: 379 FAT: 32.1 g PROTEIN: 17 g CARBS: 5.5 g FIBER: 0.6 g
  • 174.
    BACON AND CRABMAC AND CHEESE MAKES: 4 servings PREP TIME: 10 minutes COOK TIME: 30 minutes We met in the amazing city of San Francisco, and on one of our first dates, we bought crab mac and cheese from a vendor on Fisherman’s Wharf. It was the moment we first bonded over our shared love of food, so it was only right that we re-created that experience for our first cookbook. 3 slices bacon, chopped ¼ medium-sized white onion, diced 1 head cauliflower, cored and cut into florets 2 teaspoons garlic powder ½ teaspoon pink Himalayan salt 1 (6-ounce) can lump crabmeat 2 tablespoons unsalted butter ¼ cup heavy whipping cream 1 cup shredded white cheddar cheese (about 4 ounces) ½ teaspoon dried parsley leaves, plus extra for garnish (optional) ¼ teaspoon ground black pepper 2 crab legs, for garnish (optional) 1. Preheat the oven to 425°F. 2. Heat a large skillet over medium-high heat. Put the chopped bacon in the skillet and cook three-quarters of the way through, learn how to lose 10 pounds in a week fast results
  • 175.
    about 3 minutes.Add the onion and cook for 1 to 2 minutes, until tender. 3. Add the cauliflower florets, garlic powder, and salt and stir to combine. Place a lid over the skillet and steam the cauliflower for 5 to 7 minutes, until cooked through. Remove the lid and continue to cook for an additional 5 minutes. 4. Remove the skillet from the heat and add the crabmeat. Toss gently with the cauliflower, then set aside. 5. Put the butter and cream in a small saucepan over low heat. Allow the butter to melt, stirring often. 6. When the butter is completely melted, add the cheese, parsley, and pepper and stir to combine. When the cheese is melted, pour the cheese mixture over the cauliflower and crabmeat and toss, coating the cauliflower and crabmeat evenly. Pour the mac and cheese into an 8-inch square baking dish and bake for 10 minutes, until slightly browned on top. 7. If desired, while the mac and cheese is baking, steam a couple of crab legs until they turn bright pink. Serve the mac and cheese garnished with the crab legs, along with some more parsley. 8. Store leftovers in a sealed container in the refrigerator for up to a week. Reheat in the microwave for 60 to 90 seconds, until the cheese is melted. CALORIES: 320 FAT: 23 g PROTEIN: 20.8 g CARBS: 10.5 g FIBER: 4 g
  • 177.
    CHICKEN NOODLE-LESS SOUP MAKES:6 servings PREP TIME: 15 minutes COOK TIME: 30 minutes This is the chicken noodle soup that your mom used to make, but without the noodles. There’s nothing quite like enjoying a bowl of this soup while snuggled up with your pets watching a rerun of It’s Always Sunny in Philadelphia on a Sunday morning. 1½ pounds boneless, skinless chicken breasts 1½ teaspoons pink Himalayan salt, divided ½ teaspoon ground black pepper, divided 1½ tablespoons ghee or coconut oil 3 tablespoons unsalted butter 3 stalks celery, chopped ½ medium-sized white onion, diced 1 teaspoon minced garlic 6 ounces baby bella mushrooms, sliced 1 teaspoon dried oregano leaves ½ teaspoon poultry seasoning 5 cups low-sodium chicken broth 2 teaspoons minced fresh parsley, plus extra for garnish (optional) 1. Cut the chicken into bite-sized pieces and season with ½ teaspoon of the salt and ¼ teaspoon of the pepper. Heat a large pot over medium-high heat. Place the ghee in the hot pot, then
  • 178.
    add the chicken.Sauté until cooked through, 5 to 7 minutes. Remove the chicken from the pot and set aside. 2. Turn the heat down to medium and melt the butter in the pot. Add the celery and onion and allow to cook down for 2 to 3 minutes, stirring frequently. Add the garlic and mushrooms, stir to combine, and cook for an additional 1 minute. 3. Return the cooked chicken to the pot. Add the remaining teaspoon of salt, remaining ¼ teaspoon of pepper, oregano, and poultry seasoning and stir to combine. Turn the heat back up to medium-high, pour in the chicken broth, stir, and bring to a boil. Once boiling, cover the pot with a lid, reduce the heat to medium-low, and simmer for 15 minutes. 4. Before serving, stir in the parsley. Garnish each bowl with additional parsley, if desired. TIP Change up the vegetables in this soup to make it better suited for your or your family’s taste buds! CALORIES: 218 FAT: 12.2 g PROTEIN: 24.5 g CARBS: 3.7 g FIBER: 1 g learn how to lose 10 pounds in a week fast results
  • 180.
    CREAMY CHICKEN ALFREDO MAKES:1 serving PREP TIME: 5 minutes COOK TIME: 20 minutes If you’ve never tried shirataki noodles, you’re missing out! They are nearly zero-calorie noodles made from konjac fiber. If you take the necessary steps of rinsing and drying the noodles, they make a delicious base for this creamy Alfredo sauce. Alfredo sauce deserves the best-quality Romano or Parmesan cheese you can find! 1 (4-ounce) boneless, skinless chicken thigh Pink Himalayan salt and ground black pepper 1 (8-ounce) package shirataki noodles SAUCE: 2 tablespoons unsalted butter ¼ cup heavy whipping cream ¼ cup grated pecorino Romano or Parmigiano-Reggiano cheese, plus extra for garnish (optional) 1 teaspoon dried parsley leaves, plus extra for garnish (optional) ¼ teaspoon garlic powder ¼ teaspoon pink Himalayan salt ⅛ teaspoon ground black pepper FOR SERVING (OPTIONAL): 1 Low-Carb Dinner Roll (page 82) (omit for egg-free)
  • 181.
    1. Cook thechicken: Heat a medium-sized skillet over medium-high heat and grease with coconut oil spray. Pat the chicken dry and season with salt and pepper. Put the chicken in the hot skillet and cook for about 3 minutes on each side, until the internal temperature reaches 165°F. Remove from the skillet and slice into strips; set aside. 2. Prepare the noodles: Turn the heat under the skillet down to low. Rinse the noodles with hot water and drain. Pat them as dry as possible using paper towels and add to the hot skillet. Stir them around using tongs or a spatula for about 5 minutes, until they have dried out slightly. Turn off the heat, leaving the noodles in the skillet. 3. Make the sauce: Put the butter and cream in a small saucepan over low heat. Allow the butter to melt, stirring often. Once the butter is melted, add the rest of the sauce ingredients. Cook, stirring continuously using a rubber spatula, until the cheese is melted and the sauce is thick. 4. Pour the sauce over the noodles in the skillet and turn the heat to medium to reheat the noodles. Add the chicken and, using the tongs, toss to coat the noodles and chicken thoroughly with the sauce. 5. Serve garnished with additional dried parsley and grated Romano cheese, and with a low-carb dinner roll on the side, if desired. TWIST Matt likes to add shredded fontina cheese to his Alfredo sauce for a nutty flavor.
  • 182.
    NOTE This recipe makesonly one serving because we have found that shirataki noodles do not keep and reheat well. Feel free to double or triple the recipe for a family dinner! CALORIES: 646 FAT: 54 g PROTEIN: 33 g CARBS: 8 g FIBER: 3 g learn how to lose 10 pounds in a week fast results
  • 184.
    SOUTHERN BAKED CHICKEN MAKES:6 servings PREP TIME: 15 minutes COOK TIME: 40 minutes All the flavor of fried chicken with none of the cleanup! We’ve found that ground-up pork rinds make the most flavorful breading for low-carb cooking, and with the right mix of seasonings, they can be used as breadcrumbs for any type of cooking. 4 ounces pork rinds ½ teaspoon dried thyme leaves ½ teaspoon paprika ½ teaspoon pink Himalayan salt ¼ teaspoon garlic powder ¼ teaspoon cayenne pepper ¼ teaspoon ground black pepper 3 pounds bone-in, skin-on chicken thighs and legs 1. Preheat the oven to 400°F and place a wire baking rack inside a rimmed baking sheet. 2. Place the pork rinds and seasonings in a food processor and process until finely ground. Put the mixture into a gallon-sized zip-top plastic bag. 3. Pat the chicken dry. In batches, put it in the bag with the seasoned pork rinds and shake until all the chicken is thoroughly coated. Place the coated chicken on the baking rack.
  • 185.
    4. Bake for40 minutes, or until the chicken is cooked through. TIP If you like your chicken extra-crispy like we do, broil the chicken for 2 minutes after baking to create a crispier skin! CALORIES: 469 FAT: 26.7 g PROTEIN: 54.8 g CARBS: 0.5 g FIBER: 0 g
  • 187.
    MAMA’S MEATLOAF MAKES: 8servings PREP TIME: 15 minutes COOK TIME: 53 minutes When we make meatloaf, we like to use hemp hearts instead of breadcrumbs to add nutrients and healthy fats. The hemp hearts give this dish a signature flavor that will have your dinner guests trying to guess the secret ingredient. 2 tablespoons extra-virgin olive oil ½ small white onion, diced 5 cloves garlic, minced 2 teaspoons dried thyme leaves ½ teaspoon pink Himalayan salt ½ teaspoon ground black pepper 2 pounds ground beef (80/20) ¼ cup hemp hearts 2 teaspoons soy sauce TOPPING: 6 tablespoons reduced-sugar ketchup 2 tablespoons apple cider vinegar 1 tablespoon Frank’s RedHot sauce ¼ teaspoon liquid stevia 1. Preheat the oven to 350°F and line a rimmed baking sheet with parchment paper. 2. Heat a medium-sized skillet over medium heat. Put the olive oil in the hot skillet, then add the onion and garlic. Cook for 2 to 3 minutes, until the onion is translucent. Add the thyme, salt,
  • 188.
    and pepper andstir to combine. Transfer the onion mixture to a large bowl and allow to cool. 3. When the onion mixture is cool, add the ground beef, hemp hearts, and soy sauce to the bowl. Using your hands, mix the ingredients together until well combined, then form the mixture into a loaf shape in an 8 by 4-inch loaf pan. 4. Flip the loaf pan over onto the lined baking sheet and gently remove the loaf pan. Bake the meatloaf for 20 minutes. 5. While the meatloaf is baking, make the topping: In a small bowl, whisk together the ketchup, vinegar, hot sauce, and stevia. 6. After 20 minutes, remove the meatloaf from the oven. Cover the surface with the topping and bake for 30 more minutes, until the meatloaf is cooked through and has reached an internal temperature of at least 155°F. Let cool on the pan for a bit, then cut into 8 equal-sized slices and serve. TIP If you double the topping recipe, you can apply another coat of the topping before serving the meatloaf! CALORIES: 351 FAT: 27.5 g PROTEIN: 21 g CARBS: 3.1 g FIBER: 1 g learn how to lose 10 pounds in a week fast results
  • 191.
    —Chapter 4— TAKEOUT FAVORITES SpicyTuna Hand Rolls Double Bacon Cheeseburger Saag Paneer Thai Yellow Chicken Curry Buffalo Chicken Crust Pizza Spicy Shrimp Fried Rice Chocolate Almond Butter Shake Thin-Crust Skillet Pizza Steak Quesadillas Chipotle Dry-Rub Wings Beef Satay Skewers Cheese Shell Mini Tacos Philly Food Cart Gyros Sticky Sesame Chicken
  • 192.
    SPICY TUNA HANDROLLS MAKES: 6 servings PREP TIME: 10 minutes We’re both certified sushi addicts. We had a fun tradition when we lived in San Francisco: on Saturday nights when we didn’t want to go out with our friends, we would go to the sushi restaurant around the block in sweatpants and order a bunch of sushi rolls and talk about life. These hand rolls are great because you get that sushi flavor you’ve been missing, but without the rice. TUNA: 12 ounces sushi-grade ahi tuna, finely chopped (see Note) 2 tablespoons Sriracha sauce 1 tablespoon mayonnaise, homemade (page 248) or store- bought 1 teaspoon toasted sesame oil HAND ROLLS: 3 sheets nori 1 medium-sized avocado, thinly sliced ½ cucumber, julienned Black and white sesame seeds, for garnish (optional) Soy sauce, for serving 1. Put the tuna, Sriracha, mayonnaise, and sesame oil in a small bowl and mix with a spoon. learn how to lose 10 pounds in a week fast results
  • 193.
    2. Cut thenori sheets in half lengthwise to create 6 rectangular wrappers. 3. Place a wrapper on the palm of one of your hands. Put 2 ounces of tuna and 3 or 4 slices each of avocado and cucumber on the left end of the wrapper, on a diagonal to make rolling easier. Starting from the bottom-left corner, tightly roll into a cone shape, moistening the edge of the nori to create a seal. Garnish the top of the roll with sesame seeds, if desired. Repeat with the remaining ingredients. 4. Serve the rolls with soy sauce. These are best eaten immediately, as they don’t store well. NOTE When purchasing tuna to use in these hand rolls, look for frozen wild-caught tuna to ensure that the bacteria is killed off in the freezing process. Buying fresh tuna can be risky when you are planning to consume it raw. CALORIES: 133 FAT: 6.3 g PROTEIN: 15.2 g CARBS: 4.2 g FIBER: 2.3 g
  • 195.
    DOUBLE BACON CHEESEBURGER MAKES:1 serving PREP TIME: 5 minutes COOK TIME: 20 minutes This American classic happens to be the perfect keto meal once you find a good replacement for the bun. We’ve tried a bunch of different options, but the sturdiness of collard greens makes them our favorite choice. 4 slices bacon 8 ounces ground beef (80/20) ½ teaspoon garlic powder ½ teaspoon onion powder ½ teaspoon pink Himalayan salt ½ teaspoon ground black pepper 2 slices cheddar cheese 4 collard green leaves 1. Heat a cast-iron skillet over medium heat. Put the bacon slices in the pan and cook for 4 minutes on each side, or until crispy. Remove and set on a paper towel; leave the bacon drippings in the pan. 2. Form the ground beef into two patties, about ½ inch thick. Season the patties on both sides with the garlic powder, onion powder, salt, and pepper. Increase the heat to medium-high and place the patties in the skillet. Sear the burgers for 4 to 6 minutes, then flip and top each with a slice of cheddar cheese and 2 slices of bacon. Cook for another 4 to 6 minutes, until the
  • 196.
    desired doneness isachieved. (Note: For medium-done burgers, cook for 4 minutes on each side; for medium-well, 5 minutes on each side; and well-done, 6 minutes on each side.) Remove the patties from the skillet and allow to rest for 5 minutes before assembling. 3. Using a paring knife, remove the center stem from each collard leaf. Lay the leaves on top of one another with half of each leaf overlapping. 4. Stack the beef patties on top of one another in the center of the collard greens. Fold the edges in to completely enclose the patties. Use a toothpick to hold everything together, if desired. TWIST Matt always adds a fried egg to his burgers, whether we make them at home or get them out! CALORIES: 820 FAT: 60 g PROTEIN: 65 g CARBS: 6 g FIBER: 1 g learn how to lose 10 pounds in a week fast results
  • 198.
    SAAG PANEER MAKES: 4servings PREP TIME: 10 minutes COOK TIME: 20 minutes Matt had never tried Indian food until he met Megha, but he quickly fell in love. Saag paneer was the first Indian dish he tried, and to this day it’s still his favorite. If you’ve never had paneer, you’re missing out! It’s a frying cheese that you can find at any Indian grocer. It is often used as the main protein in vegetarian dishes. 2 tablespoons ghee, divided 8 ounces paneer, cubed ⅓ medium-sized white onion, roughly chopped 3 cloves garlic, minced 1 (½-inch) piece fresh ginger, grated 1 small tomato, diced 4 cups frozen spinach, thawed 2½ teaspoons garam masala 1½ teaspoons turmeric powder 1 teaspoon chili powder 1 teaspoon pink Himalayan salt ½ cup heavy whipping cream 1. Heat 1 tablespoon of the ghee in a large skillet over medium- high heat. Add the paneer and cook until browned and crispy, 5 to 7 minutes, tossing every couple of minutes. Remove from the pan and set aside.
  • 199.
    2. Turn theheat down to medium and add the remaining tablespoon of ghee to the hot pan. Add the onion, garlic, and ginger and stir to combine. Cook until the onion is translucent. 3. Add the tomato and spinach and stir thoroughly. Cook for 3 to 5 minutes, until most of the water from the tomatoes and spinach has evaporated. 4. Add the seasonings and cream and stir to combine. Cook for 5 minutes, until the sauce has thickened. Return the paneer to the pan to reheat for a few minutes. Serve immediately. 5. Store leftovers in a sealed container in the refrigerator for up to 4 days. TWIST Megha prefers to eat her saag paneer with Low-Carb Flatbread (from the gyro recipe on page 148), while Matt likes cauliflower rice. CALORIES: 386 FAT: 31 g PROTEIN: 15.3 g CARBS: 8.3 g FIBER: 1 g
  • 201.
    THAI YELLOW CHICKENCURRY MAKES: 2 servings PREP TIME: 10 minutes COOK TIME: 20 minutes Everyone needs a little Thai curry in their life. Whenever we get into a dinner rut, we turn to this yellow curry to break up the monotony. 2 tablespoons coconut oil, divided 12 ounces boneless, skinless chicken thighs, cubed 1 tablespoon minced garlic 1 tablespoon grated fresh ginger ½ medium-sized white onion, roughly chopped 2 tablespoons low-sodium chicken broth 1 tablespoon soy sauce 1 tablespoon curry powder 1 teaspoon red pepper flakes ¼ teaspoon pink Himalayan salt 7 ounces (½ can) coconut milk 1½ cups fresh broccoli florets 1 tablespoon minced fresh cilantro 1. Heat 1 tablespoon of the coconut oil in a large skillet over medium-high heat. Add the cubed chicken and cook through, 5 to 7 minutes. Remove from the pan and set aside. 2. Turn the heat down to medium and add the remaining tablespoon of coconut oil to the skillet. Add the garlic, ginger, and onion and stir. Cook until the mixture is fragrant and the onion is slightly translucent, 2 to 3 minutes.
  • 202.
    3. Add thebroth, soy sauce, curry powder, red pepper flakes, and salt and stir. When everything is thoroughly combined, add the coconut milk and cook, stirring often, until fully incorporated and heated through, 3 to 5 minutes. 4. Return the chicken to the pan and add the broccoli. Stir so that everything is coated. Cook for an additional 3 to 5 minutes, until the broccoli is tender and the chicken is heated through. Stir in the cilantro and serve immediately. 5. Store leftovers in a sealed container in the refrigerator for up to 4 days. CALORIES: 517 FAT: 36 g PROTEIN: 34 g CARBS: 16 g FIBER: 4.5 g learn how to lose 10 pounds in a week fast results
  • 204.
    BUFFALO CHICKEN CRUSTPIZZA MAKES: 2 servings PREP TIME: 10 minutes COOK TIME: 30 minutes As soon as we figured out the recipe for Cheesy Chicken Breadsticks (page 88), we knew we had to take that same dough and use it make a Buffalo chicken pizza. You’ll never buy bottled Buffalo sauce again once you see how easy it is to make from scratch! BUFFALO SAUCE: ¼ cup Frank’s RedHot sauce ¼ cup (½ stick) unsalted butter 2¼ teaspoons apple cider vinegar CRUST: 2 (5-ounce) cans chunk chicken breast in water, drained ¼ cup grated Parmesan cheese 1 large egg TOPPINGS: 4 ounces fresh mozzarella cheese, sliced 1 tablespoon sliced scallions (optional) 1. Preheat the oven to 350°F and line a pizza stone or metal pizza pan with parchment paper.
  • 205.
    2. Make thesauce: Put the hot sauce, butter, and vinegar in a small saucepan over medium heat. Once the butter melts, stir to combine and remove from the heat. Set aside. 3. Prepare the crust: Spread the drained chicken on the lined pizza stone/pan and bake for 10 minutes to remove all the moisture. Remove from the oven and transfer the chicken to a medium-sized bowl. Increase the oven temperature to 500°F. 4. To the bowl with the chicken, add the Parmesan cheese and egg. Mix thoroughly with a fork. 5. Place a clean sheet of parchment paper on the counter and pour the chicken mixture onto it. Spread the chicken into a thin layer with a rubber spatula. Place another piece of parchment paper on top of the chicken mixture and flatten it into a ¼-inch- thick circle using a rolling pin. Remove the top piece of parchment, transfer the bottom piece of parchment with the crust on it to the pizza stone/pan, and bake the crust for 8 minutes, until slightly browned and hardened. 6. Remove the crust from the oven and top with the Buffalo sauce and mozzarella cheese. Bake for 6 to 8 more minutes, until the cheese is melted and starting to brown. Remove from the oven, top with the sliced scallions, if using, and cut into 6 slices. 7. Store leftovers in a sealed container in the refrigerator for up to 3 days. Reheat in a 250°F oven. TWIST Megha likes to dip her slices in blue cheese dressing to up the fat-to-protein ratio and maximize the flavor! learn how to lose 10 pounds in a week fast results
  • 206.
    CALORIES: 600 FAT:44.5 g PROTEIN: 47.5 g CARBS: 1.5 g FIBER: 0 g
  • 208.
    SPICY SHRIMP FRIEDRICE MAKES: 4 servings PREP TIME: 15 minutes COOK TIME: 15 minutes If there is one dish that summarizes the last year of our lives, it is shrimp fried rice. It’s quick, it’s easy, you can make it all in one pot, and it never disappoints. We love the crispy fried rice and the fresh Asian flavors. ¼ teaspoon cayenne pepper ¼ teaspoon chili powder ¼ teaspoon paprika ¼ teaspoon pink Himalayan salt ¼ teaspoon ground black pepper 1 pound medium-sized shrimp, peeled and deveined 2 tablespoons ghee, divided 4 cups riced cauliflower (see Tip) ½ medium-sized white onion, finely chopped 2 teaspoons minced fresh ginger 1 cup fresh broccoli florets, chopped 3 tablespoons soy sauce 1 tablespoon Sriracha sauce 1½ teaspoons unseasoned rice wine vinegar 2 large eggs 2 teaspoons toasted sesame oil FOR GARNISH (OPTIONAL): Sliced scallions Black and white sesame seeds
  • 209.
    1. Put thecayenne, chili powder, paprika, salt, and pepper in a medium-sized bowl. Mix to blend, then add the shrimp. Toss the shrimp in the seasoning blend until evenly coated. 2. Heat 1 tablespoon of the ghee in a large skillet over medium- high heat. Place the seasoned shrimp in the hot skillet and cook until pink, about 2 minutes on each side. Remove to a small bowl and set aside. 3. Add the remaining tablespoon of ghee to the hot skillet and pour in the riced cauliflower. Spread it out with a spatula so it lies flat on the surface of the skillet and cook until it crisps up, 3 to 5 minutes. 4. Stir the rice, then add the onion and ginger. Cook for 2 minutes, until the onion is slightly tender. Add the broccoli and cook for 1 to 2 minutes, until bright green in color. Add the soy sauce, Sriracha, and vinegar. Combine using the spatula. 5. Make a well in the center of the skillet and crack in the eggs. Scramble using the spatula, then combine with the rest of the contents of the skillet. 6. Add the shrimp and toss to combine. Drizzle with the sesame oil and garnish with sliced scallions and sesame seeds, if desired. Serve immediately. 7. Store leftovers in a sealed container in the refrigerator for up to 4 days. Reheat in the microwave for 60 to 90 seconds. TIP If you don’t have pre-riced cauliflower on hand, simply chop the florets from a large head of cauliflower into chunks and pulse in a food processor until the cauliflower is in rice-sized pieces, about 30 seconds. learn how to lose 10 pounds in a week fast results
  • 210.
    CALORIES: 283 FAT:13.3 g PROTEIN: 31.8 g CARBS: 12.8 g FIBER: 4 g
  • 212.
    CHOCOLATE ALMOND BUTTER SHAKE MAKES:1 serving PREP TIME: 3 minutes Shakes used to be one our favorite things to order out— especially at diners! Now we love making our own shakes at home. Filled with nutrition and great taste, this shake serves double duty as a great post-workout fuel source and a dessert, especially when topped with whipped cream and ground cinnamon (Matt’s favorite version). 1 cup unsweetened almond milk, well chilled 2 tablespoons cocoa powder 2 tablespoons natural almond butter 1 tablespoon chia seeds 1 tablespoon unflavored protein powder ¼ teaspoon plus 5 drops of liquid stevia ¼ teaspoon pink Himalayan salt Put all the ingredients in a blender and blend until smooth, 30 to 45 seconds. Pour into a 16-ounce glass. Enjoy cold! TWIST Sometimes Matt likes to moisten the rim of the serving glass in water, then dust the rim with cocoa powder to give this shake a more elegant, dessertlike feel. learn how to lose 10 pounds in a week fast results
  • 213.
    CALORIES: 333 FAT:23 g PROTEIN: 19 g CARBS: 20 g FIBER: 13 g
  • 215.
    THIN-CRUST SKILLET PIZZA MAKES:2 servings PREP TIME: 5 minutes COOK TIME: 5 minutes We’ve come home after having a few drinks and thrown together this skillet pizza more than a few times. The crispy pan-fried cheese will make you forget all about the delivery place down the street! 1½ cups shredded mozzarella cheese 9 slices pepperoni 1 tablespoon sliced black olives 4 fresh basil leaves 1. Heat a 10-inch skillet over medium heat. Spread the shredded cheese evenly over the surface of the skillet. Cook until the cheese is almost fully melted, then layer on the pepperoni slices and olives. Continue to cook until a crust starts to form. The cheese will harden, turn brown on the bottom, and naturally lift off the skillet. 2. Once the crust has formed, turn off the heat, slide the pizza onto a plate, and garnish with basil leaves. Slice into 4 pieces and serve immediately. CALORIES: 302 FAT: 23.5 g PROTEIN: 24 g CARBS: 4.5 g FIBER: 1 g
  • 217.
    STEAK QUESADILLAS MAKES: 2servings PREP TIME: 10 minutes (not including time to make tortillas) COOK TIME: 30 minutes Megha is a recovering Taco Bell addict, so this recipe is an essential at our house! Whenever we have steak for dinner, we always use the leftovers to make these quesadillas for lunch the next day. ½ pound flank steak or flat-iron steak 2 tablespoons avocado oil 1 teaspoon chili powder ½ teaspoon ground cumin ½ teaspoon garlic powder ½ teaspoon onion powder ½ teaspoon paprika ½ teaspoon pink Himalayan salt 2 Large Coconut Flour Tortillas (page 92) ⅔ cup shredded cheddar cheese Lime wedges, for serving Fresh cilantro, for garnish (optional) 1. Make the steak: Preheat the oven to 350°F and line a rimmed baking sheet with parchment paper. 2. Combine the avocado oil, chili powder, cumin, garlic powder, onion powder, paprika, and salt in a small bowl using a spoon. Sprinkle the mixture evenly over both sides of the steak and rub it in using your hands. learn how to lose 10 pounds in a week fast results
  • 218.
    3. Put theseasoned steak on the lined baking sheet and bake for 12 minutes, then turn the oven to broil and broil the steak for 2 to 3 minutes, until medium-done. Remove from the oven, transfer to a cutting board, and allow to rest for 10 minutes. Slice crosswise into ½-inch strips. 4. Make the quesadillas: Heat a 9-inch or larger skillet over medium heat and grease with coconut oil spray. 5. Place a tortilla in the skillet. Layer half the tortilla with ⅓ cup of the shredded cheese and half of the steak strips. Close the tortilla and cook on both sides until the cheese has melted and the tortilla is slightly browned. Repeat with the remaining tortilla, cheese, and steak. 6. Slice each quesadilla into 3 wedges and serve immediately with lime wedges. Garnish with cilantro, if desired. 7. Store leftover wedges in a zip-top plastic bag with the excess air removed in the refrigerator for up to 3 days. NOTE If using leftover steak, skip Steps 1 through 3 and omit the seasonings from the recipe. Slice the steak into strips and microwave for 30 to 60 seconds before layering it in the tortillas. CALORIES: 532 FAT: 36.8 g PROTEIN: 41.3 g CARBS: 6.3 g FIBER: 4 g
  • 220.
    CHIPOTLE DRY-RUB WINGS MAKES:4 servings PREP TIME: 10 minutes COOK TIME: 45 minutes Not only are chicken wings nature’s perfect food, but they also happen to be a great part of a keto diet. The secret to getting a crispy wing in the oven is baking powder! Give this recipe a try, and it will be the only way you make wings in the future. CHIPOTLE RUB: 1 tablespoon ground chipotle pepper 1 teaspoon paprika 1 teaspoon ground cumin 1 teaspoon ground mustard 1 teaspoon garlic powder 1 teaspoon onion powder 1 teaspoon pink Himalayan salt 2 pounds chicken wings 1 teaspoon baking powder 1. Preheat the oven to 250°F and place a wire baking rack inside a rimmed baking sheet. 2. Put the seasonings for the rub in a small bowl and stir with a fork. Divide the spice rub into 2 equal portions.
  • 221.
    3. Cut thewings in half, if whole (see Tip), and place in a large zip-top plastic bag. Add the baking powder and half of the spice rub to the bag and shake thoroughly to coat the wings. 4. Lay the wings on the baking rack in a single layer. Bake for 25 minutes. 5. Turn the heat up to 450°F and bake the wings for an additional 20 minutes, until golden brown and crispy. 6. Once the wings are done, place them in a large plastic container with the remaining half of the spice rub and shake to coat. Serve immediately. TIP We get our wings whole, so the drumette and flat (aka wingette) with the wing tip are attached. Before we coat them, we like to cut the drumette apart from the flat and then cut the tip off the flat and discard it. CALORIES: 507 FAT: 36 g PROTEIN: 42.3 g CARBS: 3 g FIBER: 0.3 g learn how to lose 10 pounds in a week fast results
  • 223.
    BEEF SATAY SKEWERS MAKES:4 servings ACTIVE PREP TIME: 15 minutes INACTIVE PREP TIME: 2 to 6 hours COOK TIME: 10 minutes We love exploring cuisines from around the world, and this Indonesian classic really grabbed our attention. It was a unique flavor that we’d never had before, and we must have made it for two weeks straight. We prefer these skewers grilled, but they’re also great cooked on the stovetop. Either way, we can’t get enough! 1 pound top sirloin 1 tablespoon fish sauce 1 teaspoon lemongrass paste 2 cloves garlic, minced 1 tablespoon avocado oil 1 tablespoon soy sauce 15 drops of liquid stevia 1 tablespoon ground coriander ½ teaspoon onion powder ½ teaspoon turmeric powder ⅛ teaspoon cayenne pepper ¼ cup water Sliced green onions, for garnish Peanut Sauce (page 244), for serving (optional) Special equipment: 10 (12-inch) bamboo skewers
  • 224.
    1. Marinate themeat: Slice the meat into ½-inch-thick slices and place in a gallon-sized zip-top plastic bag. Add the rest of the ingredients to the bag with the meat and seal, removing any excess air. Shake the bag to distribute the seasonings. Place in the refrigerator to marinate for at least 2 hours or up to 6 hours. 2. Remove the meat from the bag and skewer the slices in zigzag form; discard any remaining marinade. 3. To grill the skewers, grease the grill with coconut oil spray and preheat to high heat. To cook the skewers on the stovetop, heat a skillet over medium-high heat and grease with coconut oil spray. 4. Working in batches, cook the skewers on the preheated grill or skillet, flipping them every couple of minutes to ensure that they cook evenly. They should be fully cooked in about 8 minutes on the grill or 10 minutes on the stovetop. 5. Garnish the skewers with sliced green onions and serve warm with peanut sauce, if desired. 6. Store leftovers in a zip-top plastic bag in the refrigerator for up to 4 days. NOTE We feel most comfortable buying the Gourmet Garden brand of lemongrass paste and the Thai Kitchen brand of fish sauce. CALORIES: 253 FAT: 15.8 g PROTEIN: 23.8 g CARBS: 4 g FIBER: 0.5 g
  • 226.
    CHEESE SHELL MINITACOS MAKES: 2 servings PREP TIME: 25 minutes COOK TIME: 25 minutes This recipe was inspired by a trip to Chelsea Market in New York. We went to the top-rated taco stand in the city, and taco shells made out of cheese were on the menu! Can you say Taco Tuesday? 2 cups shredded cheddar cheese 8 ounces ground beef (80/20) 1 teaspoon chili powder ½ teaspoon ground cumin ½ teaspoon garlic powder ½ teaspoon pink Himalayan salt ¼ teaspoon dried oregano leaves 2 Roma tomatoes, diced 2 avocados, diced FOR GARNISH (OPTIONAL): Fresh cilantro leaves Sour cream Lime wedges 1. Preheat the oven to 350°F and line 2 rimmed baking sheets with parchment paper. 2. Make 8 (1-ounce) piles of shredded cheese, 4 per baking sheet, and flatten them slightly into 3-inch circles (they will spread). learn how to lose 10 pounds in a week fast results
  • 227.
    3. Place oneof the baking sheets in the oven and bake for 5 to 7 minutes, until the cheese is melted and the edges are starting to brown. 4. Meanwhile, set up a cheese shell drying station: Balance 2 long wooden spoons (about ½ inch in diameter) or similar utensils on 2 cups or bowls. You will lay the warm cheese circles over the spoon handles to make shells. 5. Remove the cheese circles from the oven and allow to cool for 1 minute before flipping them over onto the spoon handles, 2 per handle. Let the cheese cool completely before removing from the spoons and using as taco shells. Repeat with the second baking sheet of cheese circles to make a total of 8 shells. 6. While the cheese shells harden, heat a medium-sized skillet over medium-high heat and spray with coconut oil spray. Put the ground beef in the hot skillet and cook, stirring to break up the meat. When the beef is mostly cooked through, add the chili powder, cumin, garlic powder, salt, and oregano and combine with a spoon. Cook for another 5 to 7 minutes, until browned. 7. To assemble the tacos, divide the meat, diced tomatoes, and diced avocado evenly among the cheese shells. Top with cilantro, sour cream, and a squeeze of fresh lime juice, if desired. CALORIES: 895 FAT: 71 g PROTEIN: 51 g CARBS: 14.5 g FIBER: 11 g
  • 229.
    PHILLY FOOD CARTGYROS MAKES: 6 servings PREP TIME: 20 minutes COOK TIME: 1 hour 20 minutes Philadelphia was the birthplace of our food blog. During our year there, we tried all the foods the city is known for, but we kept going back to the little cart just up the road from our apartment for authentic gyros. GYRO MEAT: 1 pound ground lamb 1 pound ground beef (80/20) ½ medium-sized white onion, diced 4 cloves garlic, minced 1 tablespoon dried oregano leaves 2 teaspoons ground cumin ½ teaspoon pink Himalayan salt ½ teaspoon ground black pepper LOW-CARB FLATBREAD: ½ cup coconut flour 1½ tablespoons psyllium husk powder ¼ teaspoon baking powder 2 tablespoons coconut oil, melted 1 to 1½ cups hot water FILLINGS: ½ medium-sized cucumber, thinly sliced ¼ red onion, thinly sliced
  • 230.
    1 small tomato,thinly sliced Fresh dill sprigs, for garnish (optional) 1. Preheat the oven to 325°F and line an 8 by 4-inch loaf pan with parchment paper for easy removal of the meat. 2. In a large bowl, use your hands to combine the lamb, beef, white onion, garlic, oregano, cumin, salt, and pepper. Once fully incorporated, form into a loaf in the lined loaf pan. 3. Bake for 1 hour, or until the internal temperature reaches at least 160°F. Remove from the oven and allow to rest in the pan while you make the flatbreads. 4. Make the flatbread: In a medium-sized bowl, combine the coconut flour, psyllium husk powder, and baking powder using a fork. Add the coconut oil and stir to combine with a wooden spoon. 5. Add the hot water and combine using the spoon, then allow to cool. Once cool, use your hands to knead the mixture into a firm dough. Allow to rest for 5 minutes. 6. Divide the dough into 6 equal portions. Working with one portion at a time, use your hands to form the dough into a ball, then place it on a piece of parchment paper. Place another piece of parchment on top and roll out to ¼-inch thickness with a rolling pin. 7. Heat a medium-sized nonstick skillet over medium-high heat. Once hot, place a flatbread in the skillet and cook for 2 to 3 minutes. You will know it is ready to flip when it starts to puff up. Flip and cook for an additional 30 to 45 seconds. Transfer to a plate. Repeat with the rest of the flatbread dough. learn how to lose 10 pounds in a week fast results
  • 231.
    8. Remove thegyro meat from the loaf pan and cut it into ¼- inch-thick slices. 9. To assemble the gyros, top each flatbread with 5 slices of meat and one-sixth of the cucumber, red onion, and tomato slices. Garnish with fresh dill, if desired. 10. Store leftover gyro meat and flatbread in separate zip-top plastic bags in the refrigerator for up to 4 days. Reheat the meat in the microwave for 60 to 90 seconds and the flatbread in a preheated skillet over medium heat for 1 to 2 minutes. CALORIES: 351 FAT: 30.3 g PROTEIN: 20.3 g CARBS: 10.3 g FIBER: 5.5 g
  • 233.
    STICKY SESAME CHICKEN MAKES:2 servings PREP TIME: 10 minutes COOK TIME: 30 minutes If you’ve been missing Chinese takeout, look no further than this recipe. You don’t even have to leave the house! Coconut flour gives the chicken a tender breading for the thick and sticky sauce to grab hold of. CHICKEN: ½ cup coconut oil, for the pan ½ pound boneless, skinless chicken thighs ½ teaspoon pink Himalayan salt ¼ teaspoon ground black pepper ⅓ cup coconut flour SAUCE: 1½ teaspoons toasted sesame oil 1 clove garlic, minced 1 (½-inch) piece fresh ginger, grated ¼ cup soy sauce 2½ tablespoons unseasoned rice wine vinegar 2½ tablespoons powdered erythritol 2 tablespoons water ½ teaspoon red pepper flakes ¼ teaspoon xanthan gum 2 cups riced cauliflower (see Tip, opposite) learn how to lose 10 pounds in a week fast results
  • 234.
    FOR GARNISH (OPTIONAL): Whiteand/or black sesame seeds Sliced scallions 1. Heat the coconut oil in a medium-sized saucepan over medium-high heat until it reaches 330°F to 350°F on a deep-fry thermometer. 2. Meanwhile, prepare the chicken: Pat the thighs dry, cut them into bite-sized pieces, and season with the salt and pepper. Toss them in the coconut flour until they are fully coated. 3. Working in batches of 3 or 4 pieces, fry the coated chicken in the hot oil, turning them in the oil so they cook evenly, until light brown on the outside and cooked through in the center, 3 to 5 minutes. Remove with a slotted spoon and set on a paper towel–lined plate to drain while you fry the remaining pieces. 4. Once all the chicken is cooked, make the sauce: Heat the sesame oil in a small saucepan over medium heat. Add the garlic and ginger and cook for 30 seconds, or until fragrant. Add the remaining sauce ingredients, except for the xanthan gum, and whisk to combine. Simmer for about 3 minutes, then add the xanthan gum and whisk to combine. Turn the heat up to medium-high and allow the sauce to reduce and thicken, 5 to 7 minutes. 5. While the sauce reduces, steam the rice: Put the riced cauliflower in a microwave-safe bowl and cover with 2 or 3 damp paper towels. Microwave for 4 to 5 minutes, until tender but not mushy. Divide the steamed cauliflower rice between 2 bowls. 6. Add the chicken pieces to the saucepan with the thickened sauce and toss to coat them thoroughly; leave on the stovetop for 2 minutes to reheat. Divide the chicken and sauce between
  • 235.
    the bowls withthe cauliflower rice and garnish with sesame seeds and sliced scallions, if desired. TIP If you do not have 2 cups of pre-riced cauliflower on hand, simply chop the florets of half a large head of cauliflower into chunks and pulse in a food processor until the cauliflower is in rice-sized pieces, about 30 seconds. plus oil from frying CALORIES: 332 FAT: 15.5 g PROTEIN: 35 g CARBS: 13 g FIBER: 6.5 g SUGAR ALCOHOL: 15g
  • 238.
    —Chapter 5— FRESH FIXIN'S TurkeyBacon Club Caprese Chicken Skillet Baja Fish Soft Tacos Curry Chicken Salad Loaded Cobb Salad Coconut Shrimp Fried Red Snapper California Collard Wrap Strawberry Coconut Smoothie Green Power Smoothie Raspberry Lime Ice Pops learn how to lose 10 pounds in a week fast results
  • 239.
    TURKEY BACON CLUB MAKES:1 serving PREP TIME: 5 minutes (not including time to make bread) There’s something about making a sandwich with three slices of bread that brings a smile to our faces. It enables you to pack more delicious fillings in the middle. We love piling our club sandwiches high with turkey, bacon, and cheese! We don’t go the traditional route with this club by toasting the bread, but feel free to toast it in a skillet on the stovetop or in the oven, if desired. 2 tablespoons mayonnaise, homemade (page 248) or store- bought 3 slices The Best Keto Bread (page 76) 2 lettuce leaves 4 slices Roma tomato 1 slice thick-cut bacon, cooked and cut in half crosswise 1 slice cheddar cheese, cut in half 3 ounces sliced turkey deli meat 1. Spread one-third of the mayo on one side of each of the bread slices. 2. Create the first layer: On one of the mayo-slathered bread slices, layer a lettuce leaf, 2 tomato slices, the bacon, and a half slice of cheese. Top that with another mayo-slathered slice of bread, mayo side facing up (this will be the middle slice). 3. Create the second layer: On top of the middle bread slice, layer the turkey and the remaining cheese, tomato slices, and lettuce.
  • 240.
    4. Top withthe third slice of bread, mayo facing down. Cut the sandwich in half or, if you’d like to stick to tradition, into quarters. TWIST Matt is not a fan of mayo, so he uses guacamole instead! CALORIES: 803 FAT: 67.4 g PROTEIN: 43.8 g CARBS: 9.2 g FIBER: 3.3 g
  • 242.
    CAPRESE CHICKEN SKILLET MAKES:4 servings PREP TIME: 10 minutes COOK TIME: 15 minutes A good caprese chicken is all about the freshness of the ingredients you use. When there are fresh cherry tomatoes and basil at our local farmers’ market, we always make this dish. The key is to not overcook anything and to let the fresh flavors of the ingredients shine. 1 tablespoon extra-virgin olive oil 1 pound boneless, skinless chicken thighs 1½ teaspoons pink Himalayan salt, divided ½ teaspoon ground black pepper 1 teaspoon minced garlic 12 cherry tomatoes, halved (about 3 ounces) ¼ teaspoon red pepper flakes 1 medium-sized zucchini, spiral-sliced into noodles 3 or 4 large fresh basil leaves, minced 3 ounces mini mozzarella balls, halved 1. Heat the olive oil in a large skillet over medium-high heat. 2. Chop the chicken into 1-inch pieces and season with 1 teaspoon of the salt and the black pepper. 3. Put the chicken in the hot skillet and cook through, 5 to 7 minutes. (When fully cooked, the chicken will no longer be pink in the middle.) Remove from the skillet and set aside. 4. Turn the heat down to low and use a spatula to scrape up the drippings from the bottom of the skillet. Add the garlic and cook
  • 243.
    for 20 seconds.Add the tomatoes, remaining ½ teaspoon of salt, and red pepper flakes. Stir to combine and cover with a lid. Cook for 5 to 7 minutes, until the tomatoes have burst and softened. 5. Turn the heat back up to high, add the zucchini noodles and basil, and cook for 1 minute, until the noodles are slightly tender but not mushy. Remove from the heat, add the chicken and mozzarella, and toss to combine. Serve immediately. NOTE The zucchini noodles do not store and reheat well; however, if there are leftovers, they can be kept in a sealed container in the refrigerator for up to 1 day and reheated in the microwave for 30 to 60 seconds. CALORIES: 226 FAT: 11.8 g PROTEIN: 26.3 g CARBS: 3.5 g FIBER: 1 g
  • 245.
    BAJA FISH SOFTTACOS MAKES: 2 servings PREP TIME: 15 minutes (not including time to make tortillas) COOK TIME: 10 minutes You don’t need to be a surfer to enjoy the fresh flavors of a well- made fish taco. Sometimes we like to make these when we’re trapped inside during a snowstorm to bring back memories of a relaxing day at the beach. FISH: 1 teaspoon chili powder 1 teaspoon ground cumin ½ teaspoon pink Himalayan salt ¼ teaspoon garlic powder ¼ teaspoon onion powder ⅛ teaspoon cayenne pepper 12 ounces cod fillets SAUCE: ½ cup sour cream ¼ cup mayonnaise, homemade (page 248) or store-bought 1 teaspoon lime juice 1 teaspoon minced fresh cilantro 1 teaspoon pink Himalayan salt 1 teaspoon chili powder ½ teaspoon ground cumin ½ teaspoon paprika ¼ teaspoon cayenne pepper ¼ teaspoon garlic powder
  • 246.
    PICO DE GALLO: 1small Roma tomato, diced ½ medium-sized white onion, diced 1 teaspoon lime juice 1 bunch fresh cilantro, minced ¼ teaspoon pink Himalayan salt ½ batch Coconut Flour Tortillas (page 92) FOR SERVING: Avocado slices (optional) Fresh cilantro leaves (optional) Lime wedges 1. Preheat the oven to 400°F and line a rimmed baking sheet with parchment paper. 2. Make the fish: Put the seasonings for the fish in a small bowl and combine using a fork. Pat the fish dry with paper towels and evenly coat the fish with the seasoning mixture. 3. Lay the fish on the baking sheet and bake for 8 to 10 minutes, until opaque in the center and slightly firm to the touch. Set aside. 4. Make the sauce: Put all the ingredients for the sauce in a medium-sized mixing bowl and combine using a whisk. Set aside. 5. Make the pico de gallo: Place all the ingredients in a small bowl and stir with a spoon. Set aside. 6. Assemble the tacos: Across the middle of a tortilla, layer about one-eighth of the fish, then top with a spoonful of pico de gallo and a drizzle of sauce. Repeat until all 8 tacos are made. Top with avocado slices and cilantro leaves, if desired. Serve with lime wedges. learn how to lose 10 pounds in a week fast results
  • 247.
    NOTE The assembled tacosshould be enjoyed right away; they do not store or reheat well. (The tortillas get soggy.) CALORIES: 270 FAT: 6.8 g PROTEIN: 39.8 g CARBS: 9.3 g FIBER: 4.8 g
  • 249.
    CURRY CHICKEN SALAD MAKES:4 servings PREP TIME: 10 minutes Chicken salad is one of our favorite things to have prepared in case we don’t have time to cook a fresh meal. We have tried tons of different flavor combinations, but our favorite way to season chicken salad is with the rich and earthy flavor of curry powder! 1½ pounds boneless, skinless chicken thighs, cooked ⅓ cup mayonnaise, homemade (page 248) or store-bought 2 tablespoons sour cream Juice of ½ lemon 1½ tablespoons minced fresh chives, plus extra for garnish 1½ teaspoons curry powder ¼ teaspoon pink Himalayan salt ¼ teaspoon ground black pepper 2 stalks celery, chopped 1. Chop the cooked chicken into bite-sized pieces and set aside. 2. Put the mayo, sour cream, lemon juice, chives, curry powder, salt, and pepper in a medium-sized mixing bowl and stir to combine. 3. Add the chicken pieces and celery to the mayo mixture and toss to coat thoroughly. Serve garnished with additional chives, if desired. NOTE
  • 250.
    The prep timelisted above assumes that you’ve got some precooked chicken thighs on hand. We like to cook chicken on Sunday to add to salads or quick soups throughout the week. You can also use a rotisserie chicken from the hot section of your local grocery store! By the way, we do the same thing with eggs on Sunday: we hard-boil several to have on hand for quick breakfasts, salads, and snacks during the week. TWIST For additional crunch and color, Megha likes to toss in some pumpkin seeds and diced red onions! CALORIES: 339 FAT: 14.2 g PROTEIN: 25.3 g CARBS: 2.3 g FIBER: 0.8 g learn how to lose 10 pounds in a week fast results
  • 252.
    LOADED COBB SALAD MAKES:1 serving PREP TIME: 10 minutes Our favorite thing about a cobb salad is that it just barely passes as a salad. Start with a small bed of lettuce and pile it high with as many delicious toppings as possible. 4 to 5 cups chopped romaine lettuce 1 (4-ounce) boneless, skinless chicken breast, cooked and cut into strips 2 slices bacon, cooked and chopped ½ Roma tomato, diced 1 hard-boiled egg, sliced ½ ripe avocado, sliced ¼ cup shredded cheddar cheese 2 to 3 tablespoons salad dressing of choice (see Notes) 1. Put the lettuce in a large serving bowl. 2. Arrange the chicken, bacon, tomatoes, egg slices, and avocado slices on top of the lettuce, around the perimeter of the bowl. Put the shredded cheese in the middle. 3. Drizzle the dressing of your choice over the salad. NOTES The prep time listed above does not include the time to cook the chicken or bacon or to hard-boil an egg. We like to batch- cook chicken, bacon, and eggs on Sunday to have them on hand for adding to salads throughout the week. As a shortcut,
  • 253.
    you can usea rotisserie chicken from the hot section of your local grocery store. Our favorite way to dress salads is to simply drizzle them with avocado oil and apple cider vinegar and toss to coat. A good ratio is about 2 tablespoons of oil to 1½ teaspoons of vinegar; adjust to your taste. CALORIES: 778 FAT: 64 g PROTEIN: 43 g CARBS: 15 g FIBER: 10 g
  • 255.
    COCONUT SHRIMP MAKES: 4servings PREP TIME: 10 minutes COOK TIME: 20 minutes When Matt’s parents visited him at college, they would go out to dinner, and he would always order coconut shrimp. The first time he tried seafood with a sweet dipping sauce, it was definitely love at first bite. Try this recipe with our strawberry jam! ½ cup coconut flour 1 teaspoon pink Himalayan salt, divided ½ teaspoon ground black pepper, divided 2 large eggs ½ cup unsweetened shredded coconut 1 pound large shrimp, peeled and deveined Coconut oil, for deep-frying Strawberry Chia Seed Jam (page 252), for serving (optional) 1. Put the coconut flour, ½ teaspoon of the salt, and ¼ teaspoon of the pepper in a zip-top plastic bag and shake to combine. 2. Crack the eggs into a medium-sized bowl. Add the remaining ½ teaspoon of salt and ¼ teaspoon of pepper to the eggs and whisk to combine. 3. Put the shredded coconut in another medium-sized bowl and set all 3 battering components aside. 4. Batter the shrimp: Pat the shrimp dry using paper towels. Working in batches, toss the shrimp in the flour mixture, then
  • 256.
    dip them inthe egg mixture, and then dredge them in the shredded coconut. Set the coated shrimp on a large plate. 5. Attach a deep-fry thermometer to a medium-sized saucepan and fill with enough coconut oil so that it comes halfway up the side of the pan. Heat over medium-high heat until it reaches 330°F to 350°F. Set out another large plate lined with paper towels for the fried shrimp to rest on. 6. When the oil reaches temperature, deep-fry the shrimp in batches, removing them once they have turned golden brown, about 5 minutes per batch. Set the fried shrimp on the paper towel–lined plate to soak up any excess oil. Serve immediately with strawberry jam, if desired. 7. Store in a sealed container in the refrigerator for up to 4 days. Reheat in the oven for maximum crispiness. NOTE The nutritional information can’t be precisely pinpointed due to the oil used for frying. We have provided information based on the shrimp itself, but the fat will vary based on the amount of oil that the shrimp absorbs. plus oil from frying CALORIES: 276 FAT: 12.5 g PROTEIN: 29.3 g CARBS: 11 g FIBER: 6.3 g learn how to lose 10 pounds in a week fast results
  • 258.
    FRIED RED SNAPPER MAKES:4 servings PREP TIME: 10 minutes COOK TIME: 20 minutes This is the perfect dish if you’re looking to impress your friends. We always make this along with a few other main dishes to share when we have friends over for a dinner party. 1 cup coconut flour 1 whole red snapper (about 1½ pounds) 1 cup coconut oil ½ teaspoon pink Himalayan salt SAUCE: 2 tablespoons soy sauce 1 tablespoon toasted sesame oil Juice of 1 lime ¼ teaspoon garlic powder ¼ teaspoon ginger powder ¼ teaspoon onion powder ¼ teaspoon paprika ¼ teaspoon ground black pepper Lime wedges, for serving 1. Place the coconut flour in a zip-top plastic bag. Pat the snapper dry with paper towels, score the skin, and place it in the bag with the flour. Seal the bag and shake thoroughly to coat the fish. Set aside. 2. Put the coconut oil in a 12-inch or larger heavy skillet (preferably cast-iron) over medium-high heat. (Make sure the
  • 259.
    skillet is largeenough to fit the fish.) Place a deep-fry thermometer in the oil and heat until it reaches 350°F. 3. Place the snapper in the hot oil and shallow-fry for 10 minutes on each side, until brown and crispy on the outside. Set aside on a large plate and season with the salt. 4. In a small bowl, whisk together the ingredients for the sauce. 5. Pour the sauce evenly over the fried snapper and serve immediately with lime wedges. 6. Store leftovers in a sealed container in the refrigerator for up to 4 days. Reheat in the microwave for a couple minutes. NOTES Only half of the coconut flour will adhere to the fish when you coat it in Step 1, which is reflected in the nutritional information. The fat content can’t be precisely pinpointed due to the oil used for frying. We have provided information based on the fish itself, but the fat will vary based on the amount of oil that the fish absorbs. plus oil from frying CALORIES: 183 FAT: 6 g PROTEIN: 25.5 g CARBS: 5.8 g FIBER: 2.5 g learn how to lose 10 pounds in a week fast results
  • 261.
    CALIFORNIA COLLARD WRAP MAKES:1 serving PREP TIME: 10 minutes A great option for lowering your carb intake is to sub lettuce wraps for breads and buns. Collard greens make for the sturdiest wraps and hold all those yummy toppings inside with minimal spillage. 2 large collard leaves 1 tablespoon mayonnaise, homemade (page 248) or store- bought 4 ounces sliced turkey deli meat ½ small tomato, sliced ½ avocado, sliced 2 slices cooked bacon (optional) Pink Himalayan salt and ground black pepper 1. Cut the stalks out of both collard leaves and cut them in half lengthwise. Overlap all 4 pieces so that there are no gaps. 2. Spread the mayo down first, then layer on the turkey, tomato, avocado, and bacon, if using. Season with salt and pepper. 3. Roll the leaves halfway, tuck in the sides, and finish rolling. Cut the wrap in half and use a toothpick to stabilize it for serving, if desired. TWIST Matt likes to double the meat, toss in a couple slices of bacon, and drizzle with olive oil to up the fat content of this wrap!
  • 262.
    CALORIES: 353 FAT:23 g PROTEIN: 25 g CARBS: 10 g FIBER: 7 g
  • 264.
    STRAWBERRY COCONUT SMOOTHIE MAKES: 1serving PREP TIME: 3 minutes Over the past year, we’ve gotten into the habit of making smoothies almost daily. We usually opt for green smoothies (see page 172), but occasionally we like to treat ourselves to this more indulgent combination of strawberry and coconut. The collagen and heavy cream give it an extra-thick consistency. 3½ ounces fresh strawberries (about ¾ cup), hulled, plus extra for garnish (optional) 1 cup coconut milk, chilled 2 tablespoons heavy whipping cream 2 tablespoons unsweetened coconut flakes 1 scoop unflavored collagen peptides ¼ teaspoon liquid stevia ¼ teaspoon pink Himalayan salt Put all the ingredients in a blender and blend until smooth, 30 to 45 seconds. Pour into a 16-ounce glass and serve immediately, garnished with strawberries, if desired. CALORIES: 294 FAT: 23 g PROTEIN: 12 g CARBS: 13 g FIBER: 4 g learn how to lose 10 pounds in a week fast results
  • 266.
    GREEN POWER SMOOTHIE MAKES:1 serving PREP TIME: 5 minutes This smoothie is a daily staple of ours. It’s a great way to load up on nutrients while getting in some high-quality fats and protein. You might be surprised by how well spinach and chocolate go together! 1 cup frozen spinach 1 cup unsweetened almond milk 2 tablespoons hemp hearts 1 tablespoon MCT oil 1 scoop chocolate-flavored protein powder Put all the ingredients in a blender and blend until smooth, 30 to 45 seconds. Pour into a 16-ounce glass and serve immediately. NOTES If you are new to using MCT oil, you may want to start with 1 teaspoon and work your way up to 1 tablespoon, because MCT oil can cause digestive issues and discomfort. You can also replace the MCT oil with 2 tablespoons of heavy whipping cream. You can use any flavor of protein powder you have on hand; just be aware that the flavor of the protein powder will dictate the flavor of the smoothie! If you use unflavored protein powder, add 12 to 15 drops of liquid stevia for equivalent sweetness. learn how to lose 10 pounds in a week fast results
  • 267.
    CALORIES: 416 FAT:27 g PROTEIN: 35 g CARBS: 7 g FIBER: 3 g
  • 269.
    RASPBERRY LIME ICEPOPS MAKES: 6 pops (1 per serving) ACTIVE PREP TIME: 10 minutes INACTIVE PREP TIME: 6 hours If you need some peace and quiet, just hand your kids one of these ice pops! They are the perfect treat for a hot summer day, and they have ingredients you can feel good about. You can use any kind of berries you want, but raspberries are our favorite for pairing with lime. 1 (13½-ounce) can coconut cream ½ cup fresh raspberries 2 tablespoons lime juice 12 drops of liquid stevia Special equipment: 6 (4½-ounce) ice pop molds 1. Put the ingredients in a blender, reserving a few of the raspberries to put in the bottoms of the molds prior to freezing, if desired. Blend until smooth. 2. If you set aside some raspberries, roughly chop them and drop them into the molds before adding the blended mixture. Pour the mixture evenly into the molds and freeze for at least 6 hours prior to serving. NOTE learn how to lose 10 pounds in a week fast results
  • 270.
    Our ice popmold makes 6 pops. If yours makes fewer than that, you can halve the recipe so you don’t end up with leftover mixture. CALORIES: 140 FAT: 14.2 g PROTEIN: 1 g CARBS: 3.3 g FIBER: 0 g
  • 273.
    —Chapter 6— SIDES &MUNCHIES Candied Georgia Pecans Fathead Crackers Mexican Layer Dip Buffalo Chicken Dip Sweet and Spicy Beef Jerky Charlie’s Energy Balls Bar Side Mozzarella Sticks Salami Chips with Pesto Radical Radish Chips Cheesy Broccoli and Bacon Hush Puppies Asparagus with Goat Cheese and Sunflower Seeds Chipotle Cauliflower Mash Cilantro Lime Rice
  • 274.
    CANDIED GEORGIA PECANS MAKES:12 servings PREP TIME: 10 minutes COOK TIME: 1 hour We recently moved to Atlanta, Georgia, and immediately began exploring the local farmers’ markets. The first thing we purchased was a 5-pound bag of locally grown pecans. While they are great on their own, they’re even better when tossed in a sweet cinnamon mixture and baked to crunchy perfection. 12 ounces raw pecan halves 1 large egg white 1 teaspoon water 2 teaspoons vanilla extract ½ teaspoon plus 10 drops of liquid stevia 1 teaspoon ground cinnamon 1 teaspoon pink Himalayan salt 1. Preheat the oven to 250°F. Line a rimmed baking sheet with parchment paper. 2. Spread the pecan halves on the prepared baking sheet in an even layer. 3. In a small bowl, whisk together the egg white, water, vanilla extract, stevia, cinnamon, and salt until combined. Pour the mixture over the pecans and toss with your hands or a spoon until the pecans are evenly coated.
  • 275.
    4. Flatten outthe pecans into a single layer and bake for 45 to 60 minutes, tossing every 15 minutes. The pecans are done when they have fully dried out and browned. NOTE This method can be used with the nut of your choosing! CALORIES: 202 FAT: 24 g PROTEIN: 3.3 g CARBS: 4.2 g FIBER: 3.1 g
  • 277.
    FATHEAD CRACKERS MAKES: 8servings PREP TIME: 10 minutes COOK TIME: 10 minutes When starting a keto diet, the first things a lot of people miss are chips and crackers. The crunch factor! These fathead crackers will fill that void. 1½ cups shredded mozzarella cheese (about 6 ounces) 2 ounces cream cheese (¼ cup) 1 cup blanched almond flour 1 large egg ½ teaspoon dried parsley ½ teaspoon pink Himalayan salt 1. Preheat the oven to 425°F and line a baking sheet with parchment paper. 2. Put the mozzarella and cream cheese in a large microwave- safe mixing bowl and microwave for 30 seconds. Combine using a rubber spatula. Microwave for another 30 seconds, until the cheese has melted, then stir once more. 3. Add the almond flour, egg, parsley, and salt and, using a fork, combine everything thoroughly until you have a soft, sticky, and pliable dough. 4. Once the dough comes together, transfer it to the lined baking sheet and place another piece of parchment paper on top. Roll out into a thin rectangle, about ¼ inch thick. Using a pizza cutter or knife, cut the flattened dough into 20 to 25 small crackers, about 1 inch.
  • 278.
    5. Discard anyextra dough and spread out the crackers so they are not touching one another. Bake for 7 to 10 minutes, until the crackers have puffed up and browned. Allow to cool on the baking sheet for 10 minutes prior to eating. 6. These are best eaten the same day they are baked, but leftovers can be stored in a sealed container in the refrigerator for up to 5 days. To recrisp, place in a preheated 250°F oven for 5 minutes; however, they will not get as crispy as when freshly baked. TWIST Give the crackers a kick with some minced garlic and chili powder! CALORIES: 174 FAT: 14.6 g PROTEIN: 9.4 g CARBS: 4 g FIBER: 1.5 g learn how to lose 10 pounds in a week fast results
  • 280.
    MEXICAN LAYER DIP MAKES:16 servings ACTIVE PREP TIME: 25 minutes INACTIVE PREP TIME: 2 to 3 hours COOK TIME: 8 minutes Who doesn’t love digging into a delicious layer dip while lying on the couch watching football? This recipe is a favorite of ours during football season. The worse our favorite teams do, the more dip we tend to eat. LAYER 1 (BEEF AND BEANS): 8 ounces ground beef (80/20) 1 (4-ounce) can green chilies ½ (15-ounce) can black soybeans, drained ½ teaspoon pink Himalayan salt ¼ teaspoon ground black pepper LAYER 2 (SEASONED SOUR CREAM): 1 cup sour cream 1 teaspoon dried oregano leaves ¾ teaspoon garlic powder ¾ teaspoon ground cumin ¾ teaspoon paprika ½ teaspoon chili powder ½ teaspoon pink Himalayan salt LAYER 3 (GUACAMOLE): 3 ripe avocados, peeled and pitted 1 teaspoon lime juice ½ teaspoon pink Himalayan salt
  • 281.
    ½ teaspoon groundblack pepper ¼ teaspoon ground cumin ¼ small red onion, diced (optional) LAYER 4 (CHEESE): 1 cup shredded Mexican cheese blend (about 4 ounces) LAYER 5 (PICO DE GALLO): 1 Roma tomato, diced ½ small white onion, diced ½ teaspoon lime juice ¼ teaspoon pink Himalayan salt 2 tablespoons minced fresh cilantro FOR SERVING: Crackers, homemade (page 180) or store-bought 1. Make layer 1: Heat a medium-sized skillet over medium-high heat and spray with coconut oil spray. Put the ground beef in the hot skillet and cook through, stirring to break up the meat as it cooks, about 8 minutes. 2. Add the green chilies, soybeans, salt, and pepper and stir to combine. Layer in the bottom of a 7-quart glass baking dish. 3. Make layer 2: In a bowl, whisk together the layer 2 ingredients. Dollop onto the meat and bean mixture in the baking dish and spread evenly using a rubber spatula. 4. Make layer 3: In a medium-sized bowl, mash the avocados using a fork. Add the lime juice, salt, pepper, and cumin and combine with the fork. Mix in the diced red onion, if using. Dollop on top of the sour cream mixture in the baking dish and spread evenly using the spatula. learn how to lose 10 pounds in a week fast results
  • 282.
    5. Add layer4: Sprinkle the cheese blend evenly over the guacamole layer in the baking dish. 6. Make layer 5: Put the diced tomato and onion in a small bowl. Add the lime juice and toss using a spoon. Add the salt and cilantro and toss once more. 7. Layer the pico de gallo over the shredded cheese and chill the dip for 2 to 3 hours before serving. 8. Store in a sealed container in the refrigerator for up to 4 days. TWIST When Megha can’t find perfectly ripe avocados for layer 3, she likes to use her favorite store-bought guacamole! CALORIES: 159 FAT: 12.8 g PROTEIN: 6.6 g CARBS: 5.6 g FIBER: 3 g
  • 284.
    BUFFALO CHICKEN DIP MAKES:16 servings PREP TIME: 5 minutes COOK TIME: 20 minutes How do you eat Buffalo wings without getting all messy? Turn the wings into a creamy dip and serve it with celery sticks! 12 ounces cream cheese (1½ cups) ¾ cup Frank’s RedHot sauce 3 cups cooked and shredded chicken breast ¾ cup blue cheese dressing, preferably homemade (see Note) 1 cup shredded mozzarella cheese (about 4 ounces), divided ¼ cup sliced jalapeños Celery sticks, for serving 1. Preheat the oven to 350°F. 2. Put the cream cheese and hot sauce in a medium-sized saucepan over medium heat. As the cream cheese begins to melt, stir the cheese and hot sauce until combined. 3. Once the cream cheese is fully melted, add the chicken and blue cheese dressing and stir to coat the chicken in the sauce. Turn off the heat and stir in ¾ cup of the mozzarella cheese. 4. Transfer the mixture to an 8-inch round baking pan and layer the rest of the mozzarella and the jalapeños on top. Bake for 10 minutes, until the cheese is melted and bubbling. Serve with celery sticks. learn how to lose 10 pounds in a week fast results
  • 285.
    5. Store leftoversin a sealed container in the refrigerator for up to 5 days. Reheat in the microwave for a couple minutes. TIP We make this recipe time and time again for parties and on game days. A great tip to speed up the prep time is to use a rotisserie chicken from the hot section of your grocery store! NOTE Store-bought blue cheese dressings usually contain soybean oil. For this recipe, which calls for a lot of dressing, we recommend that you use homemade. To whip some up easily, simply combine equal parts avocado oil–based mayo and sour cream, add crumbled blue cheese, and thin with a little lemon juice. CALORIES: 183 FAT: 13.8 g PROTEIN: 11.9 g CARBS: 1.8 g FIBER: 0 g
  • 287.
    SWEET AND SPICYBEEF JERKY MAKES: 16 servings ACTIVE PREP TIME: 15 minutes INACTIVE PREP TIME: 4 to 24 hours COOK TIME: 4 to 6 hours This jerky is our favorite keto snack. We make it about once a month and store it in the fridge for a guilt-free grab-and-go option. The apple cider vinegar balances out the heat of the hot sauce to make this jerky irresistibly sweet and spicy. 3 pounds flat-iron steak MARINADE: ½ cup soy sauce ½ cup apple cider vinegar ¼ cup Frank’s RedHot sauce ½ teaspoon liquid stevia 2 teaspoons liquid smoke 2 teaspoons ground black pepper 1½ teaspoons garlic powder 1 teaspoon onion powder Special equipment: 10 (12-inch) bamboo skewers 1. Marinate the steak: Slice the steak into thin jerky-sized strips, about ¼ inch thick, and put them in a gallon-sized ziptop
  • 288.
    plastic bag. Addthe marinade ingredients, seal the bag, and shake to fully coat the meat. 2. Seal the bag tightly (removing any excess air) and place it in a bowl to catch any leakage. Place the bowl in the refrigerator for at least 4 hours or up to 24 hours. 3. Make the jerky: Adjust the racks in your oven so that one is in the highest position and one is in the lowest position. Preheat the oven to 190°F. 4. Remove the steak strips from the marinade and pat them as dry as possible using paper towels; discard the remaining marinade. 5. Using bamboo skewers, pierce the tip of each meat strip so that there are anywhere from 5 to 7 strips hanging on each skewer. Be sure to leave space between the strips so that air can circulate around them. Hang the skewers from the top oven rack and place a rimmed baking sheet on the lowest rack to catch any drippings. 6. Bake for 4 to 6 hours, until the jerky is dry to the touch. 7. Store in a zip-top plastic bag in the refrigerator for up to 10 days. NOTE Three pounds of raw meat will yield one pound of jerky. CALORIES: 150 FAT: 9.8 g PROTEIN: 15.8 g CARBS: 0.5 g FIBER: 0 g learn how to lose 10 pounds in a week fast results
  • 290.
    CHARLIE’S ENERGY BALLS MAKES:20 balls (1 per serving) PREP TIME: 10 minutes COOK TIME: 20 minutes This recipe is an ode to Charlie Kelly from the TV show It’s Always Sunny in Philadelphia. In one episode, he goes on a three-day video gaming binge and is fueled by “energy balls.” This is our take on Charlie’s energy balls. We use these as a quick fuel source when we’re out and about. ½ cup natural almond butter, room temperature ¼ cup coconut oil, melted 1 large egg ½ cup coconut flour 2 tablespoons unflavored beef gelatin powder 1 scoop chocolate-flavored whey protein powder 1. Preheat the oven to 350°F and grease a rimmed baking sheet with coconut oil spray. 2. In a large mixing bowl, mix together the almond butter, coconut oil, and egg using a fork. In a small bowl, whisk together the coconut flour, gelatin, and protein powder. 3. Pour the dry ingredients into the wet mixture and mash with a fork until you have a cohesive dough. It should not be too sticky. Note: If the dough doesn’t come together well or is very sticky, add a little coconut flour until it combines well. 4. Using your hands, form the dough into 20 even-sized balls, about 1½ inches in diameter, and put them on the prepared
  • 291.
    baking sheet. 5. Bakefor 20 minutes, until slightly browned and hardened. Allow to cool on the baking sheet for 10 minutes prior to serving. 6. Store in a zip-top plastic bag in the refrigerator for up to a week. CALORIES: 91 FAT: 7.1 g PROTEIN: 4.1 g CARBS: 3 g FIBER: 1.6 g
  • 293.
    BAR SIDE MOZZARELLASTICKS MAKES: 16 sticks (4 per serving) ACTIVE PREP TIME: 20 minutes INACTIVE PREP TIME: 2 hours COOK TIME: 20 minutes We’re convinced that the most delicious foods are the ones found on kids’ menus. Who says we can’t enjoy kids’ menu foods as adults? Let’s reclaim the kids’ menu together, starting with mozzarella sticks! 3 ounces pork rinds, finely ground ¼ cup grated Parmesan cheese, plus extra for garnish ½ teaspoon dried oregano leaves ½ teaspoon red pepper flakes ½ teaspoon pink Himalayan salt ½ teaspoon ground black pepper 2 large eggs 1 tablespoon heavy whipping cream 8 sticks mozzarella string cheese 2 cups coconut oil, for deep-frying Low-carb marinara sauce, for serving (optional) 1. Place the pork rinds, Parmesan, oregano, red pepper flakes, salt, and pepper in a shallow dish and combine with a fork. 2. Place the eggs and cream in a separate shallow dish and lightly beat with a fork. 3. Cut each stick of string cheese in half crosswise. Dip each piece in the egg mixture and then in the pork rind mixture. Make sure that each piece has a thick coating. You may have to
  • 294.
    press the breadinginto the cheese to ensure an even coat. Place on a plate and freeze for 2 hours. 4. In a 2-quart saucepan, heat the oil over medium-high heat until it reaches between 330°F and 345°F on a deep-fry thermometer. 5. Remove the breaded cheese sticks from the freezer. Fry in batches for 3 to 5 minutes per batch, until golden brown. Use a slotted spoon to remove the sticks from the oil and place on a paper towel–lined plate to drain. Allow to cool for 5 minutes, then garnish with grated Parmesan. Serve with marinara sauce, if desired. 6. Store leftovers in a sealed container in the refrigerator for up to 4 days. Reheat in a preheated 350°F oven for 10 minutes. NOTE The nutritional information can’t be precisely pinpointed due to the oil used for frying. We have provided information based on the cheese sticks themselves, but the fat content will vary based on the amount of oil the cheese sticks absorb. plus oil from frying CALORIES: 356 FAT: 25.2 g PROTEIN: 31.6 g CARBS: 2.4 g FIBER: 0 g learn how to lose 10 pounds in a week fast results
  • 296.
    SALAMI CHIPS WITHPESTO MAKES: 6 servings PREP TIME: 10 minutes COOK TIME: 12 minutes Anytime we can get our hands on some fresh basil, we always rush home and make a big batch of pesto. It’s a great high-fat sauce that pairs well with lots of different dishes. For a late- night snack, we often crisp up some salami chips and load them up with pesto! CHIPS: 6 ounces sliced Genoa salami PESTO: 1 cup fresh basil leaves 3 cloves garlic ¼ cup grated Parmesan cheese ¼ cup raw walnuts ¼ teaspoon pink Himalayan salt ¼ teaspoon ground black pepper ½ cup extra-virgin olive oil 1. Make the chips: Preheat the oven to 375°F and line 2 rimmed baking sheets with parchment paper. 2. Arrange the salami in a single layer on the lined baking sheets. Bake for 10 to 12 minutes, until crisp. Transfer to a paper towel–lined plate to absorb the excess oil. Allow to cool and crisp up further.
  • 297.
    3. Make thepesto: Put all the pesto ingredients, except for the olive oil, in a food processor and pulse until everything is roughly chopped and a coarse paste has formed. 4. With the food processor running, slowly pour in the olive oil. Process until all of the oil has been added and the ingredients are fully incorporated. Taste and season with additional salt and pepper, if desired. 5. Pour the pesto into a small serving bowl and serve the salami chips alongside. Store leftover pesto in a sealed container in the refrigerator for up to 2 weeks; store the chips in a zip-top plastic bag in the refrigerator for up to 5 days. TWIST When we have pine nuts in the pantry, Matt prefers to replace the walnuts in this recipe with pine nuts. CALORIES: 202 FAT: 9.4 g PROTEIN: 7.5 g CARBS: 1.2 g FIBER: 0.1 g learn how to lose 10 pounds in a week fast results
  • 299.
    RADICAL RADISH CHIPS MAKES:2 servings PREP TIME: 10 minutes COOK TIME: 20 minutes Believe us, we’ve tried turning literally every low-carb vegetable into chips. Most of them were complete fails, but these radish chips were a standout winner. The bigger the radishes you can find, the bigger the chips you can make. 1 (16-ounce) bag radishes 1½ cups coconut oil, for deep-frying ¾ teaspoon pink Himalayan salt ½ teaspoon ground black pepper 1. Using a sharp knife, cut the root ends off the radishes, then slice the radishes into thin chips. Place in a bowl and set aside. 2. Heat the coconut oil in a medium-sized saucepan over medium-high heat until the temperature reaches between 330°F and 350°F on a deep-fry thermometer. 3. Once the oil reaches temperature, drop in 7 to 10 chips at a time, flipping them with tongs when their edges start to curl. Once they begin to brown, remove them from the oil and set on a paper towel–lined plate to absorb any excess oil. 4. Once all the chips are fried, season with the salt and pepper. Toss to coat and enjoy immediately!
  • 300.
    NOTE The nutritional informationcan’t be precisely pinpointed due to the oil used for frying. We have provided information based on the chips themselves, but the fat content will vary based on the amount of oil the chips absorb. TWIST Megha likes to dip these chips in a simple combination of sour cream and Sriracha, a dip she’s been using to coat all her foods lately! plus oil from frying CALORIES: 37 FAT: 0 g PROTEIN: 1.5 g CARBS: 7.5 g FIBER: 3.5 g
  • 302.
    CHEESY BROCCOLI ANDBACON MAKES: 4 servings PREP TIME: 10 minutes COOK TIME: 25 minutes The best way to get your veggies in is by pairing them with bacon and cheese! This dish is great because broccoli is the perfect veggie for soaking up all the great flavors you throw at it. 4 slices bacon 5 cups fresh broccoli florets 1 teaspoon minced garlic SAUCE: 1 tablespoon unsalted butter 2 tablespoons heavy whipping cream 1 cup shredded cheddar cheese (about 4 ounces), divided 1. Preheat the oven to 400°F. 2. Heat a medium-sized skillet over medium-high heat. Cut the bacon into bite-sized pieces and put them in the hot pan. Allow to cook through, 3 to 5 minutes. Take one-quarter of the bacon pieces out of the pan and set aside on a plate. 3. Add the broccoli and garlic to the skillet and toss to coat in the fat. Sauté for 5 to 7 minutes, until the broccoli is bright green and tender. Transfer the broccoli mixture to an 8-inch round or square baking pan or dish. learn how to lose 10 pounds in a week fast results
  • 303.
    4. Make thesauce: Put the butter and cream in a small saucepan over low heat. Allow the butter to melt, stirring often. 5. Once the butter is fully melted, add ½ cup of the shredded cheese and continue to stir until the cheese has melted and formed a thick sauce. 6. Pour the sauce over the broccoli and toss to coat using a spoon. Layer the remaining ½ cup of shredded cheese and the reserved bacon over the entire mixture. 7. Bake for 10 minutes, or until the cheese has melted and slightly browned. Serve immediately. 8. Store leftovers in a sealed container in the refrigerator for up to 4 days. Reheat in the microwave for a couple minutes, until the cheese has melted. CALORIES: 241 FAT: 18.5 g PROTEIN: 13 g CARBS: 8.5 g FIBER: 3 g
  • 305.
    HUSH PUPPIES MAKES: 4servings PREP TIME: 10 minutes COOK TIME: 30 minutes Growing up, Matt’s family would always take trips to the East Coast, and he’s convinced that it was just for the seafood. Sure, they hit a few historic sites along the way, but really it was all about the crab, scallops, lobster, and (his personal favorite) hush puppies. Nothing goes with a fish fry or crab bake like a big basket of hush puppies. ½ cup coconut flour ¼ cup psyllium husk powder 1 teaspoon baking powder ½ teaspoon onion powder ½ teaspoon pink Himalayan salt 4 large eggs ⅓ cup extra-virgin olive oil ⅓ cup water 2 tablespoons diced white onions Coconut oil, for deep-frying 1. In a small mixing bowl, combine the coconut flour, psyllium husk powder, baking powder, onion powder, and salt using a whisk. Set aside. 2. In a large mixing bowl, whisk together the eggs, olive oil, and water. Add the dry mixture to the wet mixture and mix with a wooden spoon until you have a thick, slightly sticky, and pliable dough. Fold in the diced onions using a rubber spatula.
  • 306.
    3. Place asheet of parchment paper on a large plate. Using your hands, form the dough into 20 even-sized balls, 1 to 1½ inches in diameter, and place on the plate. 4. Set a medium-sized saucepan over medium-high heat. Put enough coconut oil in the pan so that it is deep enough to completely submerge the hush puppies (but, for safety, do not fill the pan more than halfway full of oil). Place a deep-fry thermometer into the oil as it heats. Line a plate with paper towels. 5. When the oil temperature reaches anywhere from 330°F to 350°F, drop some of the hush puppies into the oil and fry until dark brown on the outside, about 8 minutes. Once cooked through, remove the hush puppies from the oil using a slotted spoon and place on the paper towel–lined plate to absorb the excess oil. 6. Repeat until all the hush puppies are fried. Serve immediately. 7. Store leftovers in a zip-top plastic bag. Reheat in the microwave for 30 to 60 seconds. TIP We like to serve these hush puppies with a spicy mayo made of mayonnaise and Sriracha sauce! plus oil from frying CALORIES: 322 FAT: 24.5 g PROTEIN: 8.3 g CARBS: 17 g FIBER: 12 g learn how to lose 10 pounds in a week fast results
  • 308.
    ASPARAGUS WITH GOATCHEESE AND SUNFLOWER SEEDS MAKES: 4 servings PREP TIME: 5 minutes COOK TIME: 12 minutes In 2015, we moved from San Francisco, where we met, to Philadelphia. On one of our last nights in town, we went to a fancy steakhouse and ordered a bone-in filet mignon. To our surprise, our favorite dish of the night wasn’t the steak, but a perfectly cooked asparagus dish topped with tangy goat cheese and crunchy sunflower seeds. Whenever we fall in love with a dish at a restaurant, we always have to re-create it at home. 1 bunch asparagus (about 1 pound), tough ends removed 1 tablespoon extra-virgin olive oil ½ teaspoon pink Himalayan salt ¼ teaspoon ground black pepper 2 ounces fresh (soft) goat cheese ¼ cup raw sunflower kernels 1. Preheat the oven to 400°F. 2. Line a rimmed baking sheet with a single layer of asparagus. Brush the asparagus with the olive oil and season with the salt and pepper. 3. Bake for 10 to 12 minutes, until bright green and fork-tender. 4. Crumble the goat cheese down the center of the asparagus and top with the sunflower kernels. Serve immediately.
  • 309.
    NOTE The cook timemay vary depending on the thickness of your asparagus stalks. Our stalks were ½ inch thick at the bottom and cooked through well in the time indicated above. CALORIES: 148 FAT: 10.1 g PROTEIN: 7.5 g CARBS: 6.3 g FIBER: 2.5 g learn how to lose 10 pounds in a week fast results
  • 311.
    CHIPOTLE CAULIFLOWER MASH MAKES:2 servings PREP TIME: 10 minutes COOK TIME: 15 minutes If you’ve never tried it before, cauliflower mash is even creamier and more flavorful than mashed potatoes. Chipotle chili peppers give this dish some heat and a greater depth of flavor. ½ head cauliflower, cored and cut into florets 1 tablespoon unsalted butter ¼ teaspoon minced garlic 2 tablespoons heavy whipping cream 1 chipotle pepper in adobo sauce, minced (see Note) 1½ teaspoons adobo sauce (from the can of chipotle peppers, above) ½ teaspoon pink Himalayan salt 1. Fill a medium-sized saucepan halfway full of water and bring to a boil over high heat. Drop in the cauliflower florets and boil for 15 minutes, until fork-tender. 2. Drain the cauliflower and put it in a food processor. Pulse for 30 seconds. 3. Melt the butter and garlic in a small microwave-safe bowl for 30 seconds. Add the garlic butter and the cream to the food processor. Pulse until smooth. You may have to stop and scrape down the sides with a rubber spatula while processing. learn how to lose 10 pounds in a week fast results
  • 312.
    4. Add thechipotle pepper, adobo sauce, and salt and process once more, until fully incorporated. Transfer to a serving bowl and serve immediately. 5. Store leftovers in a sealed container in the refrigerator for up to 4 days. Reheat in the microwave for 60 to 90 seconds. NOTE Chipotle peppers in adobo sauce typically come in 7-ounce cans and usually can be found in the ethnic food section of the grocery store. If you prefer more heat, you can mix more chipotle pepper and adobo sauce into the cauliflower. CALORIES: 144 FAT: 11 g PROTEIN: 3.5 g CARBS: 9 g FIBER: 3.5 g learn how to lose 10 pounds in a week fast results
  • 314.
    CILANTRO LIME RICE MAKES:4 servings PREP TIME: 10 minutes COOK TIME: 10 minutes Miracle Rice is a low-carb option that we use all the time. On its own, it is flavorless, but it’s great for piling high with sauces and seasonings. This cilantro lime–flavored rice is a great side for Mexican dishes. 3 (8-ounce) packages Miracle Rice (see Note) 3 tablespoons unsalted butter 1½ teaspoons minced garlic Juice of 1 lime 1 teaspoon pink Himalayan salt ½ teaspoon ground black pepper 3 tablespoons chopped fresh cilantro Lime wedges, for serving (optional) 1. Put the rice in a fine-mesh sieve or a colander with small holes and rinse with hot water. 2. Heat a large skillet over medium heat. Put the rice in the hot skillet and, stirring continuously, allow most of the liquid to evaporate, 5 to 7 minutes. 3. When nearly all of the liquid has evaporated, add the butter and garlic and stir until the butter is melted and the rice is coated in the butter. Add the lime juice, salt, and pepper and stir to combine. Cook for 2 more minutes, until the lime juice has evaporated.
  • 315.
    4. Stir inthe cilantro and serve immediately, with lime wedges on the side, if desired. 5. Store leftovers in a sealed container in the refrigerator for up to 4 days. Reheat in the microwave for a couple minutes. NOTE We purchase Miracle Rice on Amazon in bulk because we have yet to see it at a local grocery store. CALORIES: 90 FAT: 8.3 g PROTEIN: 0 g CARBS: 3 g FIBER: 1 g
  • 318.
    —Chapter 7— DECADENT DESSERTS ChocolateProtein Truffles Death by Chocolate Cheesecake No-Churn Peanut Butter Ice Cream Snickerdoodle Cream Cheesecake Giant Skillet Cookie for Two Flourless Chocolate Cake Protein Cake with Buttercream Frosting Chewy Chocolate Chip Cookies Blackberry Mini Cheesecakes Extreme Fudge Brownies Coconut Chocolate Cookies Peanut Butter Hemp Heart Cookies County Fair Cinnamon Donuts Pistachio Coconut Fudge Strawberry Shortcakes Vanilla Egg Custard learnhowtolose10poundsinaweekfastresults
  • 319.
    Instant Protein IceCream learn how to lose 10 pounds in a week fast results
  • 320.
    CHOCOLATE PROTEIN TRUFFLES MAKES:6 truffles (1 per serving) ACTIVE PREP TIME: 10 minutes INACTIVE PREP TIME: 30 minutes We are huge fans of the “healthy dessert” concept, and this healthy dessert is one of our favorites. These rich, dark chocolate truffles pack some protein. They are best consumed after dinner or when your significant other isn’t looking. ¼ cup blanched almond flour 2 tablespoons chocolate-flavored whey protein powder 1½ tablespoons cocoa powder 1 tablespoon natural almond butter 1 tablespoon sugar-free maple syrup 1 tablespoon unsweetened almond milk ¼ cup unsweetened coconut flakes 1. Put all the ingredients, except for the coconut flakes, in a medium-sized mixing bowl and combine with a fork until uniform in texture. Cover and refrigerate until firm to the touch, at least 30 minutes. 2. Meanwhile, chop up the coconut flakes and set aside. 3. Remove the truffle mixture from the refrigerator and roll between your hands into 6 even-sized balls, about 1½ inches in diameter. Roll the balls, one at a time, in the chopped coconut and set on a plate.
  • 321.
    4. Store ina sealed container in the refrigerator for up to a week. NOTE If you use unflavored whey protein powder, we recommend that you sweeten the truffles with 10 to 12 drops of liquid stevia. CALORIES: 83 FAT: 6.2 g PROTEIN: 4.3 g CARBS: 3.5 g FIBER: 1 g SUGAR ALCOHOL: 1.2 g learn how to lose 10 pounds in a week fast results
  • 323.
    DEATH BY CHOCOLATE CHEESECAKE MAKES:one 9-inch cheesecake (12 servings) ACTIVE PREP TIME: 20 minutes INACTIVE PREP TIME: 3 hours COOK TIME: 70 minutes With its thick chocolaty crust and intense and creamy dark chocolate filling, this decadent cheesecake packs a whole lot of chocolate into every bite. It is so good that even your non-keto friends and family members will want the recipe! We highly recommend that you make this dessert if you want to impress that special someone (like Matt did for Megha on their first Valentine’s Day together!). CRUST: ½ cup coconut flour ½ cup cocoa powder ½ cup powdered erythritol ½ cup (1 stick) unsalted butter, melted FILLING: 3 (8-ounce) packages cream cheese, room temperature ¼ cup plus 2 tablespoons heavy whipping cream 3 large eggs ¾ cup powdered erythritol 3 tablespoons cocoa powder 1 teaspoon vanilla extract 4 ounces unsweetened baking chocolate (100% cacao)
  • 324.
    1 tablespoon unsaltedbutter FOR GARNISH (OPTIONAL): 1 ounce unsweetened baking chocolate (100% cacao) 1. Make the crust: Preheat the oven to 350°F. Grease a 9-inch springform pan with coconut oil spray. 2. Put the coconut flour, cocoa powder, and erythritol in a medium-sized mixing bowl and combine using a fork. Pour the melted butter over the dry mixture and combine thoroughly using a rubber spatula. 3. Transfer the crust mixture to the greased pan and press into an even layer across the bottom. Par-bake the crust for 12 minutes. 4. Remove the crust from the oven and lower the oven temperature to 300°F. Allow the crust to cool for at least 20 minutes before adding the filling. 5. Make the filling: Put the cream cheese and cream in a large mixing bowl and beat with a hand mixer until combined and smooth. Add the eggs, erythritol, cocoa powder, and vanilla extract and combine with the mixer. 6. Roughly chop the 4 ounces of chocolate and put it in a microwave-safe bowl with the tablespoon of butter. Microwave in 20-second increments, stirring after each increment, until melted. (Alternatively, melt the chocolate and butter in a small heavy-bottomed saucepan on the stovetop over low heat.) 7. Add the melted chocolate mixture to the rest of the filling ingredients and mix with the hand mixer until smooth and fully incorporated. Pour the filling over the cooled crust and spread evenly with the rubber spatula.
  • 325.
    8. Bake thecheesecake for 55 minutes, until a toothpick inserted in the middle comes out clean. Set on a wire baking rack and allow to cool for 15 minutes, then place in the refrigerator until completely set, at least 3 hours. 9. Use a grater or vegetable peeler to grate or shave 1 ounce of chocolate on top of the chilled cheesecake, if desired. Allow to sit at room temperature for 30 minutes prior to serving. 10. To serve, run a knife around the edges to loosen the cheesecake, then remove the rim of the springform pan. Cut into 12 slices. Store in the refrigerator for up to a week or in the freezer for up to 3 months. NOTES The amount of unsweetened chocolate used in the filling can be changed to your taste. For us, 4 ounces results in the perfect dark chocolate cheesecake. Cut that amount in half for a less- intense chocolate flavor. The crust can be made a day in advance and stored in the refrigerator. CALORIES: 398 FAT: 37 g PROTEIN: 7.1 g CARBS: 10.8 g FIBER: 5.5 g SUGAR ALCOHOL: 20g learn how to lose 10 pounds in a week fast results
  • 327.
    NO-CHURN PEANUT BUTTERICE CREAM MAKES: roughly 3 cups (½ cup per serving) ACTIVE PREP TIME: 15 minutes INACTIVE PREP TIME: 4 hours COOK TIME: 12 minutes Everyone needs a scoop of ice cream now and then, and this version using natural, creamy peanut butter is our favorite. We like to take it out of the freezer about ten minutes before we scoop it to maximize the creaminess. 2 cups heavy whipping cream 3 tablespoons unsalted butter, plus extra for topping (optional) ⅔ cup powdered erythritol 4 large egg yolks 2 tablespoons natural creamy peanut butter, plus extra for topping (optional) 1 teaspoon vanilla extract ⅛ teaspoon xanthan gum 1. Put the cream, butter, and erythritol in a medium-sized heavy-bottomed saucepan over medium-high heat. Mix using a whisk until the sweetener has dissolved. Bring to a boil, then lower the heat and simmer rapidly for 5 to 7 minutes, until slightly thickened. Remove from the heat and let cool for about 15 minutes, until just warm to the touch. 2. Put the egg yolks in a large mixing bowl and mix using a hand mixer until lightened to a pale yellow color, 30 to 45
  • 328.
    seconds. Add thepeanut butter and vanilla extract and combine with the mixer. 3. Slowly add the cooled cream mixture to the egg yolk mixture while mixing with the hand mixer. Add the xanthan gum and continue to mix until a frothy layer has formed on the top. 4. Pour the ice cream mixture into an 8 by 4-inch loaf pan and place in the freezer for 30 minutes. Mix with a spoon, then return the pan to the freezer for another 30 minutes. Mix again, then return the pan to the freezer until the ice cream is hard enough to scoop, at least 3 more hours. 5. Allow the ice cream to sit out at room temperature for 10 minutes prior to serving. If desired, garnish each serving with a spoonful of peanut butter or with a quick peanut butter drizzle (as shown in the photo), made by combining equal parts peanut butter and butter in a microwave-safe bowl, microwaving until the butter has melted, and then combining them with a spoon until smooth. 6. Store in a sealed container in the freezer for up to a week. NOTE This recipe calls for consuming raw eggs, which we are comfortable doing. If you are concerned, feel free to use pasteurized eggs. TWIST Matt likes to make this ice cream using almond butter instead of peanut butter to change up the flavor!
  • 329.
    CALORIES: 392 FAT:40.5 g PROTEIN: 4.8 g CARBS: 3.7 g FIBER: 0.5 g SUGAR ALCOHOL: 21 g
  • 331.
    SNICKERDOODLE CREAM CHEESECAKE MAKES: 1serving ACTIVE PREP TIME: 5 minutes INACTIVE PREP TIME: 30 minutes COOK TIME: 90 seconds Microwave cakes are our absolute favorite keto desserts. We aren’t the most patient people, so the fact that we can whip up this snickerdoodle cake in under five minutes is perfect. And who doesn’t love cutting into a surprise cream cheese filling? FILLING: 1 tablespoon cream cheese, room temperature 1 teaspoon powdered erythritol 1 teaspoon ground cinnamon CAKE: 1½ tablespoons coconut flour 1 tablespoon golden flax meal ¼ teaspoon baking powder ⅛ teaspoon cream of tartar 2 tablespoons unsalted butter, melted but not hot 1 large egg ½ teaspoon vanilla extract ¼ teaspoon plus 15 drops of liquid stevia FOR GARNISH (OPTIONAL): Ground cinnamon Powdered erythritol learn how to lose 10 pounds in a week fast results
  • 332.
    1. Make thefilling: Place a piece of plastic wrap in a small bowl and put the cream cheese, erythritol, and cinnamon in the center. Use a spoon to combine the ingredients, then wrap the plastic wrap around the mixture to enclose it securely. Using your hands, form the filling into a small disc, 1 inch in diameter and ½ inch thick. Place in the freezer for 30 minutes. 2. Make the cake: In a small bowl, use a fork to whisk together the coconut flour, flax meal, baking powder, and cream of tartar. In another small bowl, whisk together the melted butter, egg, vanilla extract, and stevia. 3. Slowly add the dry mixture to the wet mixture and whisk together until it has a thick batterlike consistency. 4. Grease a 4- or 5-ounce microwave-safe ramekin with coconut oil spray. Pour half of the batter into the ramekin. Remove the cream cheese disc from the freezer, unwrap, and place in the center of the ramekin. Gently press it down, but do not let it hit the bottom. Pour the rest of the batter on top of the filling and spread, fully covering the disc and creating an even surface. 5. Microwave for 90 seconds. Flip the cake over onto a plate and, if desired, dust with ground cinnamon and powdered erythritol. Enjoy! NOTE If you prefer, you can bake the cake at 350°F for 25 minutes. CALORIES: 403 FAT: 36 g PROTEIN: 11 g CARBS: 12 g FIBER: 7 g SUGAR ALCOHOL: 4 g
  • 334.
    GIANT SKILLET COOKIEFOR TWO MAKES: 6-inch cookie (2 servings) PREP TIME: 10 minutes COOK TIME: 20 minutes This is the perfect date-night dessert! When we finish dinner and can feel a snack-fest coming on, we clean the kitchen, put on some music, and make this giant skillet cookie together. It’s always better to have a delicious dessert that you put some thought and effort into than to snack mindlessly. You can wait for the cookie to cool completely and then cut it into slices, or dig in with a spoon as soon as it comes out of the oven. ½ cup blanched almond flour 1 teaspoon unflavored beef gelatin powder ½ teaspoon baking powder ¼ teaspoon pink Himalayan salt 2 tablespoons unsalted butter 1 tablespoon cream cheese 2 tablespoons heavy whipping cream 1 large egg yolk ½ teaspoon vanilla extract ½ teaspoon liquid stevia 2 tablespoons sugar-free chocolate chips, divided 1. Preheat the oven to 350°F and grease a 6-inch oven-safe skillet with coconut oil spray. 2. In a small bowl, combine the almond flour, gelatin, baking powder, and salt using a fork. Set aside. 3. Put the butter and cream cheese in a small microwave-safe bowl that’s large enough to accommodate the beaters of a hand
  • 335.
    mixer. Microwave for20 to 30 seconds, just until soft. Combine using a hand mixer. Add the cream, egg yolk, vanilla extract, and stevia and mix to combine. 4. Add the dry mixture to the wet mixture and combine using the mixer until uniform. Fold in 1½ tablespoons of the chocolate chips using a rubber spatula. 5. Pour the mixture into the greased skillet and spread evenly with the spatula. Top the cookie with the remaining ½ tablespoon of chocolate chips. Bake for 20 minutes, or until golden brown. 6. Allow to rest in the skillet for 15 minutes prior to serving, or dig in immediately with spoons, if desired. TWIST Matt likes to add walnuts to his half of the cookie for crunch and flavor! CALORIES: 406 FAT: 38.5 g PROTEIN: 9.5 g CARBS: 11.2 g FIBER: 4.5 g SUGAR ALCOHOL: 2.3g learn how to lose 10 pounds in a week fast results
  • 337.
    FLOURLESS CHOCOLATE CAKE MAKES:one 9-inch cake (8 servings) PREP TIME: 10 minutes COOK TIME: 42 minutes Are you a dark chocolate fan? This recipe uses 100 percent cacao chocolate for a truly intense dark chocolate flavor. One slice and your chocolate craving will be satisfied. 5 ounces unsweetened baking chocolate (100% cacao) ½ cup (1 stick) plus 2 tablespoons unsalted butter 5 large eggs 1 cup powdered erythritol ½ cup cocoa powder ½ teaspoon baking powder 1. Preheat the oven to 350°F and grease a 9-inch springform pan with coconut oil spray. 2. Put the chocolate and butter in a small microwave-safe bowl and microwave for 30 seconds. Stir and microwave for another 30 seconds, then stir again. If the chocolate is not fully melted, continue to microwave in 20- to 30-second intervals, stirring after each interval. Set aside. 3. Crack the eggs into a large bowl and mix with a hand mixer until frothy. Slowly pour in the melted chocolate as you keep mixing. Set aside. 4. Put the erythritol, cocoa powder, and baking powder in a small bowl and combine using a fork. In 2 batches, add the dry
  • 338.
    mixture to thewet mixture and combine using the mixer until you have a thick batter. 5. Pour the batter into the greased springform pan and bake for 40 minutes, or until a toothpick inserted in the center of the cake comes out clean. Allow to rest in the pan for 15 minutes prior to cutting and serving. To serve, run a knife around the edges to loosen the cake, then remove the rim of the springform pan and cut into 8 slices. 6. Store leftover cake in a sealed container or gallon-sized zip- top plastic bag for up to a week. CALORIES: 296 FAT: 26.4 g PROTEIN: 7.4 g CARBS: 8.4 g FIBER: 5.8 g SUGAR ALCOHOL: 24 g learn how to lose 10 pounds in a week fast results
  • 340.
    PROTEIN CAKE WITH BUTTERCREAMFROSTING MAKES: 8 servings PREP TIME: 20 minutes COOK TIME: 30 minutes This is without a doubt the dessert we make more often than any other. It’s truly a guilt-free treat. The carbs are super low, and it tastes great! We often omit the frosting and have it in the morning with a big cup of coffee. CAKE: 2¾ ounces cream cheese (⅓ cup), room temperature ¼ cup (½ stick) unsalted butter, melted 2 large eggs, room temperature ¼ cup sour cream 10 drops of liquid stevia 1 teaspoon vanilla extract 2 scoops flavored whey protein powder of choice (see Note) ¼ cup oat fiber 1½ teaspoons baking powder ½ teaspoon cream of tartar VANILLA BUTTERCREAM FROSTING: (makes 2½ cups) 1 cup (2 sticks) unsalted butter, room temperature 1½ cups powdered erythritol 2 tablespoons heavy whipping cream 1 teaspoon vanilla extract
  • 341.
    1. Preheat theoven to 325°F and grease an 8 by 4-inch loaf pan with coconut oil spray. 2. Make the cake: In a large bowl, using a hand mixer, beat the cream cheese and butter until creamy. Add the eggs, sour cream, stevia, and vanilla extract and mix to combine. Set aside. 3. In a small bowl, whisk together the protein powder, oat fiber, baking powder, and cream of tartar. In 2 batches, add the dry mixture to the wet mixture and combine using the mixer until you have a pourable batter. 4. Pour the batter into the greased loaf pan and bake for 30 minutes, until golden brown. Allow the cake to cool completely in the pan before removing and frosting. 5. Make the frosting: Put the butter and erythritol in a medium- sized mixing bowl and beat using the hand mixer or a whisk until light and creamy. Add the cream and vanilla extract and whisk again to combine. Store in the refrigerator until ready to use. 6. Assemble the cake: Remove the cooled cake from the pan and, with the knife held parallel to the top, slice it in half horizontally to create two thin rectangular layers. Cut each layer into 8 equal-sized pieces to create a total of 16 pieces. Using half of the frosting, frost the top of each piece of cake, then stack the layers, two per stack, to make 8 mini two-layer protein cakes. 7. Store leftover cake in a sealed container in the refrigerator for up to a week and leftover frosting in a sealed container in the refrigerator for up to 2 weeks. CALORIES: 250 FAT: 23.4 g PROTEIN: 8.8 g CARBS: 3.3 g FIBER: 2.5 g SUGAR ALCOHOL: 18 g
  • 342.
    NOTE You can useany flavor of protein powder you desire. Be aware that whatever flavor you use will dictate the flavor of the cake. learn how to lose 10 pounds in a week fast results
  • 344.
    CHEWY CHOCOLATE CHIP COOKIES MAKES:16 cookies (1 per serving) PREP TIME: 10 minutes COOK TIME: 20 minutes It took us a long time to get this recipe right. We must have gone through 20 or 30 test runs before we learned about the secret ingredient: beef gelatin powder. Our friend Deana, the owner of Good Dee’s low-carb baking mixes, tipped us off to the magic of beef gelatin powder, and it took our cookies to the next level. 1½ cups blanched almond flour ½ cup granular erythritol 1 tablespoon unflavored beef gelatin powder 1 teaspoon baking powder ½ cup (1 stick) unsalted butter, melted but not hot 1 large egg 1 teaspoon vanilla extract ½ cup sugar-free chocolate chips 1. Preheat the oven to 350°F and line 2 baking sheets with parchment paper. 2. Put the almond flour, erythritol, gelatin, and baking powder in a medium-sized bowl and whisk using a fork. Set aside. 3. Put the melted butter, egg, and vanilla extract in a large bowl and combine using a hand mixer or whisk. Add the dry mixture to wet mixture in 2 batches and combine until you have
  • 345.
    a soft doughthat can easily be rolled between your hands without sticking. 4. Fold the chocolate chips into the dough with a rubber spatula. Using a cookie scoop or spoon, scoop 16 even-sized balls of the dough onto the baking sheets, leaving 2 inches of space between them. Using your hand or the spatula, flatten the cookies a little. They will spread slightly in the oven. 5. Bake for 20 minutes, or until golden brown. Allow to cool on the baking sheets for 15 minutes prior to handling. 6. Store leftovers in a sealed container in the refrigerator for up to a week or freeze for up to a month. CALORIES: 125 FAT: 11.8 g PROTEIN: 2.8 g CARBS: 3.2 g FIBER: 1.5 g SUGAR ALCOHOL: 6.6 g learn how to lose 10 pounds in a week fast results
  • 347.
    BLACKBERRY MINI CHEESECAKES MAKES:two 4-inch cheesecakes (8 servings) ACTIVE PREP TIME: 10 minutes INACTIVE PREP TIME: 3 hours COOK TIME: 13 minutes We use fruit sparingly in our cooking, but when we do use it, we usually go with blackberries. Blackberries have a great flavor and are one of the lowest-carb fruits. We love the pairing of blackberries and the walnut crust in this recipe, pulled together by a soft cheesecake filling. CRUST: 2½ ounces raw walnuts 3 tablespoons unsalted butter 1 large egg yolk ¼ teaspoon plus 10 drops of liquid stevia ¼ teaspoon pink Himalayan salt FILLING: 12 ounces cream cheese (1½ cups), room temperature ¼ cup plus 2 tablespoons sour cream ¾ cup heavy whipping cream ¾ cup powdered erythritol 3½ ounces fresh blackberries (about ¾ cup), halved, plus extra whole berries for garnish 1. Make the crust: Put all the crust ingredients in a food processor and process until finely chopped and fully combined.
  • 348.
    Divide the crustmixture between two 4-inch springform pans. Using a rubber spatula, flatten the crusts to cover the bottoms of the pans. Place in the freezer to chill for 30 minutes. 2. Preheat the oven to 325°F. Bake the chilled crusts for 13 minutes, or until slightly browned. Allow to cool completely before adding the filling. 3. Make the filling: Put the cream cheese, sour cream, and heavy cream in a large mixing bowl and combine using a hand mixer until the mixture has a thick, creamy consistency. Add the erythritol and mix to combine. 4. Fold in the halved blackberries. Pour the filling over the cooled crusts and use a rubber spatula to spread the filling evenly. 5. Freeze for at least 2½ hours or refrigerate for at least 6 hours prior to unmolding and serving. If you freeze the cheesecakes, allow them to sit out at room temperature for 10 minutes prior to serving. Garnish each cake with a few blackberries. To serve, cut each cheesecake into quarters, yielding a total of 8 servings. 6. Store leftovers in a sealed container in the refrigerator for up to a week. NOTE You can swap in any berry you want in this recipe; however, note that the nutritional information will change. CALORIES: 482 FAT: 48.5 g PROTEIN: 7.5 g CARBS: 7.3 g FIBER: 1.7 g SUGAR ALCOHOL: 24g
  • 350.
    EXTREME FUDGE BROWNIES MAKES:9 brownies (1 per serving) PREP TIME: 10 minutes COOK TIME: 52 minutes Let’s face it: everyone is a fudgy brownie person, even your weird friend who says he likes cake brownies better. You know deep down even that guy is on team fudge. These are without a doubt the fudgiest keto brownies in existence, and this is the number-one dessert recipe on our blog. ¼ cup cocoa powder 2 tablespoons coconut flour ¼ teaspoon pink Himalayan salt 3 large eggs ½ cup granular erythritol ½ teaspoon vanilla extract ¾ cup (1½ sticks) unsalted butter 2 ounces unsweetened baking chocolate (100% cacao) Powdered erythritol, for topping (optional) 1. Preheat the oven to 325°F and grease an 8-inch square brownie pan with coconut oil spray. 2. Put the cocoa powder, coconut flour, and salt in a small bowl and whisk using a fork. Set aside. 3. In a large bowl, whisk together the eggs, erythritol, and vanilla extract. Set aside. learn how to lose 10 pounds in a week fast results
  • 351.
    4. In asmall microwave-safe bowl, combine the butter and chocolate. Microwave until fully melted, about 1 minute, stirring every 30 seconds. Add the melted chocolate mixture to the egg mixture and whisk to combine. 5. Add the dry mixture to the wet mixture in 2 batches, whisking after each addition until fully combined. 6. Pour the batter into the greased pan and bake for 50 minutes, or until a toothpick inserted in the center comes out clean. Allow to cool in the pan for 20 minutes, then cut into 9 pieces. If desired, dust with powdered erythritol before serving. 7. Store leftovers in a sealed container in the refrigerator for up to a week or freeze for up to a month. TWIST Megha likes to swirl a mixture of softened cream cheese and powdered erythritol into the top of the brownies prior to baking for a simple take on cheesecake brownies! CALORIES: 210 FAT: 19.9 g PROTEIN: 3.7 g CARBS: 4.1 g FIBER: 2.8 g SUGAR ALCOHOL: 10.7 g
  • 353.
    COCONUT CHOCOLATE COOKIES MAKES:1 dozen cookies (1 per serving) PREP TIME: 10 minutes COOK TIME: 15 minutes We share a love for anything that combines chocolate and coconut. Not only do these flavors pair perfectly, but they are a natural fit for ketogenic baking. Coconut flour and cocoa powder are naturally low in carbs and, when combined in the right ratio, make for a chewy cookie that the whole family will love. ¼ cup (½ stick) unsalted butter, room temperature 1 ounce cream cheese (2 tablespoons), room temperature ¼ cup plus 2 tablespoons powdered erythritol 1 large egg ¼ cup heavy whipping cream ¼ cup coconut flour ¼ cup cocoa powder ½ teaspoon baking powder ¼ teaspoon pink Himalayan salt ½ cup unsweetened coconut flakes 1. Preheat the oven to 325°F and line 2 baking sheets with parchment paper. 2. In a large bowl, use a hand mixer to cream the butter, cream cheese, and erythritol until light and fluffy. Mix in the
  • 354.
    egg and cream.Set aside. 3. In a small bowl, whisk together the coconut flour, cocoa powder, baking powder, and salt. Add the dry mixture to the wet ingredients in 2 batches, mixing with the hand mixer after each addition until you achieve a soft, slightly crumbly consistency. Fold in the coconut flakes. 4. Using a cookie scoop or spoon, scoop 12 even-sized balls of the dough onto the lined baking sheets and flatten with a fork to the desired size. They will not spread in the oven. Bake for 15 minutes, or until slightly firm to touch. Allow to cool on the baking sheets for 20 minutes prior to handling or they will fall apart. 5. Store in a sealed container or zip-top plastic bag in the refrigerator for up to a week. TWIST Matt likes to add chopped pecans and chocolate chips for a simple take on kitchen sink cookies! CALORIES: 91 FAT: 8.4 g PROTEIN: 1.4 g CARBS: 3 g FIBER: 1.8 g SUGAR ALCOHOL: 5g
  • 356.
    PEANUT BUTTER HEMPHEART COOKIES MAKES: 1 dozen cookies (1 per serving) PREP TIME: 10 minutes COOK TIME: 14 minutes Hemp hearts are one of our favorite ingredients to work with. They are high in fiber, protein, and fat and have a nice earthy taste. Hemp hearts give these cookies a rich flavor and boost the nutrient content. ½ cup natural peanut butter, room temperature 1 large egg ½ cup hemp hearts ¼ cup granular erythritol ¼ teaspoon baking powder ½ teaspoon vanilla extract ½ cup sugar-free chocolate chips 1. Preheat the oven to 350°F and line 2 baking sheets with parchment paper. 2. In a large mixing bowl, combine the peanut butter and egg using a whisk. Add the hemp hearts, erythritol, baking powder, and vanilla extract and combine using a wooden spoon. Fold in the chocolate chips. 3. Using a cookie scoop or spoon, scoop 12 even-sized balls of the dough onto the lined baking sheets, spacing them about 2 inches apart. Flatten the cookies with a fork. learn how to lose 10 pounds in a week fast results
  • 357.
    4. Bake thecookies for 12 to 14 minutes, until golden brown and slightly firm to touch. Allow to cool on the baking sheets for 10 minutes prior to handling or they will fall apart. 5. Store leftovers in a sealed container in the refrigerator for up to a week or freeze for up to a month. CALORIES: 120 FAT: 9.8 g PROTEIN: 5.7 g CARBS: 4.1 g FIBER: 2.2 g SUGAR ALCOHOL: 4.8 g
  • 359.
    COUNTY FAIR CINNAMONDONUTS MAKES: 6 donuts (1 per serving) PREP TIME: 10 minutes COOK TIME: 25 minutes The county fair has some of the best-tasting food we’ve ever tried. We don’t even remember anything else about the fair. We went with the sole focus of consuming as much fried delicacies as humanly possible. These baked donuts have the same cinnamon-sugar flavor that will take you back to your childhood fair days! 11½ ounces cream cheese (1 cup plus 7 tablespoons), room temperature ½ cup extra-virgin olive oil ¼ cup heavy whipping cream 4 large eggs ½ teaspoon liquid stevia ½ teaspoon maple extract ½ teaspoon vanilla extract ¼ cup plus 2 tablespoons coconut flour 2 teaspoons ground cinnamon 1 teaspoon baking powder 1 teaspoon xanthan gum ¼ teaspoon pink Himalayan salt TOPPING: ¼ cup granular erythritol ¼ cup ground cinnamon Special equipment:
  • 360.
    6-cavity silicone donutpan 1. Preheat the oven to 400°F and grease a 6-cavity donut pan with coconut oil spray. 2. In a large bowl, beat the cream cheese, olive oil, cream, eggs, stevia, and extracts using a hand mixer until smooth and fully incorporated. Set aside. 3. In a small bowl, whisk together the coconut flour, cinnamon, baking powder, xanthan gum, and salt using a whisk. Add the dry mixture to the wet ingredients and combine using the hand mixer. Fill the greased cavities of the donut mold to the brim, making sure not to overfill. 4. Bake for 25 minutes, until the donuts are puffed up and a toothpick comes out clean. 5. Meanwhile, put the ingredients for the topping on a plate and combine using your fingers. After removing the donuts from the oven, allow to cool in the pan for 5 minutes, then toss them, one at a time, in the cinnamon-sugar mixture. Set the coated donuts on a wire baking rack to cool for an additional 10 minutes prior to eating. 6. Store leftovers in a sealed container in the refrigerator for up to 4 days. CALORIES: 461 FAT: 44.8 g PROTEIN: 8.7 g CARBS: 6.8 g FIBER: 2.5 g SUGAR ALCOHOL: 8g learn how to lose 10 pounds in a week fast results
  • 362.
    PISTACHIO COCONUT FUDGE MAKES:16 pieces (1 piece per serving) ACTIVE PREP TIME: 10 minutes INACTIVE PREP TIME: 2 hours When Matt was a child, his family took plenty of trips to Mackinac Island, Michigan, the fudge capital of the world. They would ride bikes around the island fueled entirely by fudge. His favorite was the pistachio fudge, which was the inspiration for this recipe. ½ cup coconut oil, melted 4 ounces cream cheese (½ cup), room temperature 1 teaspoon vanilla extract ¼ teaspoon plus 10 drops of liquid stevia ½ cup shelled raw pistachios, roughly chopped, divided ½ cup unsweetened shredded coconut, divided 1. In a medium-sized bowl, beat the coconut oil and cream cheese with a hand mixer until smooth and creamy. Add the vanilla extract and stevia and mix until combined. 2. Fold in one-third of the pistachios and one-third of the coconut flakes using a rubber spatula. Pour the fudge mixture into a 5-inch square dish or pan and top with the remaining pistachios and shredded coconut. 3. Refrigerate for at least 2 hours prior to serving. To serve, cut into 16 pieces. 4. Store leftovers in a sealed container in the refrigerator for up to a week.
  • 363.
    CALORIES: 123 FAT:12.9 g PROTEIN: 1.2 g CARBS 2 g FIBER: 0.7 g
  • 365.
    STRAWBERRY SHORTCAKES MAKES: 6servings PREP TIME: 20 minutes COOK TIME: 20 minutes Keto desserts tend to be dense and heavy. These fluffy strawberry shortcakes are the complete opposite. Piled high with homemade whipped cream and fresh strawberries, they are the perfect summer treat. SHORTCAKES: ¼ cup plus 2 tablespoons coconut flour 1 packet sugar-free strawberry-flavored gelatin powder 1 teaspoon baking powder ¼ teaspoon pink Himalayan salt ¼ cup plus 2 tablespoons coconut oil, melted 2 ounces cream cheese (¼ cup), room temperature ¼ cup sour cream 4 large eggs, room temperature 15 drops of liquid stevia FILLING/TOPPING: 1 cup heavy whipping cream 1 cup fresh strawberries, hulled and thinly sliced Special equipment: 6-cavity, 3½-inch-diameter silicone muffin top pan
  • 366.
    1. Preheat theoven to 350°F and grease a 6-cavity silicone muffin top pan with coconut oil spray. 2. Make the shortcakes: In a small bowl, whisk together the coconut flour, gelatin, baking powder, and salt. 3. Put the coconut oil, cream cheese, and sour cream in a large mixing bowl and combine with the whisk. Add the eggs and stevia and whisk until smooth. 4. Add the dry mixture to the wet ingredients and whisk until fully incorporated and smooth. Evenly distribute the mixture among the greased cavities of the muffin top pan, filling them to the rim. Level the tops with a butter knife. 5. Bake for 20 minutes, or until a toothpick inserted in the center of a cake comes out clean. Allow to cool in the pan for 5 minutes, then transfer the shortcakes to a cooling rack to cool completely before filling. 6. Make the filling/topping: Put the cream in a medium-sized mixing bowl and beat using a hand mixer until stiff peaks form. 7. Assemble the shortcakes: Slice the cakes in half horizontally to create a total of 12 round layers. Using a butter knife, frost the bottom halves with the whipped cream, then make a single layer of overlapping strawberries. Put the other half of each cake on top of the strawberries and frost the tops using a piping bag or butter knife. Make a top layer of sliced strawberries. (We like to fan the berry slices for a pretty presentation.) 8. Store leftovers in a sealed container in the refrigerator for up to a week. CALORIES: 392 FAT: 36.8 g PROTEIN: 6.2 g CARBS: 8.6 g FIBER: 3 g learn how to lose 10 pounds in a week fast results
  • 368.
    VANILLA EGG CUSTARD MAKES:2 servings ACTIVE PREP TIME: 10 minutes INACTIVE PREP TIME: 2 hours COOK TIME: 30 minutes This delicate egg custard is the perfect date-night dessert because it looks and tastes fancy but is absolutely foolproof. 1 cup heavy whipping cream, plus ¼ cup for topping if desired 2 large egg yolks 2 teaspoons vanilla extract ½ teaspoon liquid stevia 1. Preheat the oven to 300°F. 2. Put the 1 cup of cream, egg yolks, vanilla extract, and stevia in a medium-sized mixing bowl and beat with a hand mixer until combined. Pour into two 6-ounce ramekins. Place the ramekins in a baking dish and fill the baking dish with boiling water so that it goes two-thirds of the way up the sides of the ramekins. 3. Bake for 30 minutes, or until the edges of the custard are just starting to brown. It should not be completely baked through and firm. Place in the refrigerator to chill and set for at least 2 hours before serving. 4. If making the topping, put the ¼ cup of cream in a medium- sized mixing bowl and whip using the hand mixer until soft peaks form. Top the custard with the whipped cream prior to serving.
  • 369.
    TWIST After the custardhas chilled, Megha likes to break through the top and swirl in some chocolate chips and pumpkin pie spice for greater richness and a fall spin! CALORIES: 568 FAT: 59.5 g PROTEIN: 5.5 g CARBS: 4.5 g FIBER: 0 g
  • 371.
    INSTANT PROTEIN ICECREAM MAKES: 1 serving PREP TIME: 1 minute Dessert doesn’t have to be complex or require five different mixing bowls, especially on those busy days when you barely have enough energy to cook dinner. You can make this delicious low-carb protein ice cream in under two minutes. 1 cup unsweetened almond milk 1 scoop flavored protein powder of choice ¼ teaspoon xanthan gum 1½ cups ice Ground cinnamon, for garnish (optional) 1. Put the milk in a blender. Add the protein powder, xanthan gum, and ice and puree on high until the mixture is smooth, 20 to 30 seconds. 2. Pour into a serving bowl and garnish with a dusting of cinnamon, if desired. Enjoy immediately. NOTES We use cinnamon crunch–flavored Quest Protein Powder, but any powder you have at home will work! You can up the fat by adding some heavy whipping cream or MCT oil. learn how to lose 10 pounds in a week fast results
  • 372.
    CALORIES: 130 FAT:5 g PROTEIN: 21 g CARBS: 5 g FIBER: 2 g
  • 375.
    —Chapter 8— CONDIMENTS Peanut Sauce BBQSauce Homemade Chipotle Mayo Maple Cinnamon Almond Butter Strawberry Chia Seed Jam
  • 376.
    PEANUT SAUCE MAKES: ¾cup (2 tablespoons per serving) PREP TIME: 5 minutes This is the go-to sauce in our household for a couple reasons. The first is that it contains peanut butter, which is pretty much the perfect food. The second is that it is so easy to make. All it takes is a handful of ingredients, a blender, and five minutes. This sauce pairs particularly well with Asian dishes. ½ cup natural peanut butter 2 cloves garlic 1 (½-inch) piece fresh ginger, grated ¼ cup water 2 tablespoons soy sauce 1 tablespoon unseasoned rice wine vinegar 10 drops of liquid stevia ½ teaspoon red pepper flakes FOR GARNISH (OPTIONAL): Chopped raw peanuts Sliced scallions 1. Put all the ingredients for the sauce in a blender or food processor and process until smooth. Check the consistency and add more water to thin the sauce, if desired. 2. Pour the sauce into a bowl and garnish with chopped peanuts and sliced scallions, if desired. learn how to lose 10 pounds in a week fast results
  • 377.
    3. Store ina sealed container in the refrigerator for up to a week. TIP If you don’t have rice wine vinegar, you can substitute an equal amount of lime juice. CALORIES: 134 FAT: 10.7 g PROTEIN: 6.3 g CARBS: 5.8 g FIBER: 2 g
  • 379.
    BBQ SAUCE MAKES: 1¾cups plus 2 tablespoons (5 tablespoons per serving) PREP TIME: 5 minutes COOK TIME: 25 minutes This tangy apple-flavored barbecue sauce will steal the show at your next cookout. We usually make a big batch and store it in a mason jar in the fridge. 1 cup reduced-sugar ketchup ½ cup water ¼ cup apple cider vinegar 2½ tablespoons sugar-free maple syrup 2 teaspoons ground black pepper 1 teaspoon Worcestershire sauce ½ teaspoon liquid smoke ½ teaspoon onion powder ¼ teaspoon pink Himalayan salt 1. Put all the ingredients in a small saucepan and combine using a whisk. Bring to a boil over high heat, then reduce the heat and simmer for 15 to 20 minutes, until the desired consistency is achieved. The longer you reduce the sauce on the stovetop, the thicker it will get and the more concentrated the flavors will become. 2. Store in a sealed container in the refrigerator for up to 2 weeks. CALORIES: 17 FAT: 0 g PROTEIN: 0 g CARBS: 3.5 g FIBER: 0.3 g SUGAR ALCOHOL: 0.3 g
  • 381.
    HOMEMADE CHIPOTLE MAYO MAKES:1¾ cups plus 2 tablespoons (1 tablespoon per serving) PREP TIME: 5 minutes Store-bought mayo is usually made with vegetable oils that are loaded with harmful trans fats. This is a healthy alternative you can feel good about piling onto your next sandwich. We use avocado oil and spice it up with some ground chipotle pepper for a little kick. To make a plain mayo, simply omit the chipotle pepper (see the variation below)—or do what we often do and pick up a jar of Primal Kitchen’s ready-made avocado oil mayo. 2 large egg yolks 2 tablespoons Dijon mustard 1 tablespoon apple cider vinegar 1 teaspoon ground chipotle pepper ½ teaspoon pink Himalayan salt 1½ cups avocado oil 1. Put the egg yolks, mustard, vinegar, chipotle pepper, and salt in a food processor and pulse to combine. 2. With the processor running, very slowly pour in the oil until you use it all and the mayo becomes thick. 3. Store in a sealed container in the refrigerator for up to 2 weeks. NOTES
  • 382.
    It should takeyou 3 to 4 minutes to drizzle in the oil to achieve the proper consistency! This recipe calls for consuming raw eggs, which we are comfortable doing. If you are concerned, feel free to use pasteurized eggs. VARIATION HOMEMADE MAYO. To make a plain, unflavored mayo, simply omit the ground chipotle pepper. CALORIES: 101 FAT: 11.5 g PROTEIN: 0.1 g CARBS: 0.1 g FIBER: 0 g learn how to lose 10 pounds in a week fast results
  • 384.
    MAPLE CINNAMON ALMOND BUTTER MAKES:1¼ cups (2 tablespoons per serving) PREP TIME: 5 minutes COOK TIME: 20 minutes What could possibly be better than almond butter? How about roasted maple cinnamon almond butter? We make different types of nut butter at home all the time, and this is by far the best version we’ve made. We like to spread it on slices of our homemade keto bread (page 76) or on pancakes (page 60)—or just eat it by the spoonful! 2 cups raw almonds 2 tablespoons coconut oil, melted 1½ teaspoons ground cinnamon ¾ teaspoon maple extract ¼ teaspoon plus 5 drops of liquid stevia 1. Preheat the oven to 300°F. 2. Pour the almonds onto a rimmed baking sheet and drizzle with the coconut oil. Using your hands or a spoon, toss to coat the almonds. 3. Roast for 20 minutes, until the almonds are dried out and feel lighter in weight. Remove from the oven and allow to cool. 4. Transfer the cooled almonds to a food processor and process for 1 minute, until you have a thick, ground meal. Add the cinnamon, maple extract, and stevia and process for an additional 3 minutes, until smooth and creamy.
  • 385.
    5. Store ina sealed container in the refrigerator for up to 2 weeks. NOTE The processing time may vary depending on the speed and power of your food processor. TWIST Megha has a tree nut allergy, so she swaps out the almonds for peanuts in this recipe. Give it a try! CALORIES: 190 FAT: 17.1 g PROTEIN: 6 g CARBS: 6.5 g FIBER: 3.8 g learn how to lose 10 pounds in a week fast results
  • 387.
    STRAWBERRY CHIA SEEDJAM MAKES: roughly 1½ cups (1¼ tablespoons per serving) PREP TIME: 15 minutes COOK TIME: 20 minutes We love taking advantage of the natural thickening ability of chia seeds in a variety of recipes. This strawberry jam is just one example. Peanut butter and jelly sandwiches are back on the menu! 1 pound fresh strawberries, hulled and halved ½ cup water ½ teaspoon plus 10 drops of liquid stevia ¼ cup chia seeds 1. Bring the strawberries and water to a boil in a heavy- bottomed saucepan over medium-high heat. 2. Once boiling, use a spoon to smash the strawberries in the saucepan. Add the stevia, reduce the heat to a simmer, and cook for an additional 10 to 15 minutes, until the mixture has a thick, jamlike consistency. 3. Turn off the heat, add the chia seeds, and stir for 1 to 2 minutes. 4. Store in a sealed container in the refrigerator for up to 3 months.
  • 388.
    TIP You can swapout the strawberries for any other berry, but be aware that doing so will change the nutritional information of this recipe. CALORIES: 24 FAT: 0.8 g PROTEIN: 0.9 g CARBS: 3.4 g FIBER: 1.8 g
  • 392.
    In this section,there are six different one-week meal plans that showcase varying eating styles: • Tony finds that eating two meals a day suits his busy schedule and his disdain for cooking. • Sally likes having something sweet every day. • Brenda sticks to the basics and eats whole foods. • Marty is a vegetarian and still makes a ketogenic diet work for him. • Matt likes to keep carbs very low and fat high in two large daily meals. • Megha likes variety, lots of veggies, and snacks. Rather than try to create basic meal plans that are one-size-fits- all, we thought that providing a week of different ways of eating a ketogenic diet would be of more value. Take pieces of each of these plans to create a way of eating that you find fulfilling and sustainable. Although these plans can be followed to a T, they are best used as references for inspiration and as a visual aid to what a keto diet looks like. As you can see, no two people’s keto diets are the same. It’s important to find what works for you. Add more of the foods you enjoy and take out the foods you don’t. Note: Unless otherwise specified, the plans assume that you will eat one serving of each dish as defined in the recipe. The nutritional information that we have provided for each plan is based on these portion sizes. learn how to lose 10 pounds in a week fast results
  • 393.
    MEAL PLAN 1: TWO-MEALTONY When eating keto, most people find it advantageous and natural to break out of the conventional three-meals-a-day paradigm. Switching to two larger meals per day can be beneficial and easier to maintain for several reasons. First, hunger is different on keto. You will no longer be a prisoner to carb cravings and the blood sugar roller coaster, so it will be easier to go longer between meals and be productive without having to eat every few hours. Another good reason is that most keto meals need to be prepared. Cooking three meals a day can be time-consuming and could make the diet unsustainable. Switching to bigger, less frequent meals is a good way to counter that and seems to be more in tune with the way human beings have eaten throughout history. It’s important to note, though, that a decrease in number of meals does not mean a decrease in number of calories consumed. You’re still eating the same amount of food, just condensed into fewer meals. DAY 1
  • 394.
    Links to therecipes: Three-Cheese Spinach Frittata Pistachio Coconut Fudge Crispy Chicken Thighs with Pan Sauce DAY 2
  • 395.
    Links to therecipes: Mama’s Meatloaf Protein Cake with Buttercream Frosting DAY 3 Links to the recipes:
  • 396.
    The Best KetoBread DAY 4 Links to the recipes: California Collard Wraps Pistachio Coconut Fudge Crispy Chicken Thighs with Pan Sauce DAY 5 learn how to lose 10 pounds in a week fast results
  • 397.
    Links to therecipes: Three-Cheese Spinach Frittata Sweet and Spicy Beef Jerky Chipotle Dry-Rub Wings Chewy Chocolate Chip Cookies DAY 6
  • 398.
    Links to therecipes: Overnight Protein Oats Double Bacon Cheeseburger DAY 7
  • 399.
    Links to therecipes: Microwave Bread Spicy Shrimp Fried Rice Snickerdoodle Cream Cheesecake learn how to lose 10 pounds in a week fast results
  • 400.
    MEAL PLAN 2: SALLYSWEET TOOTH This is the dessert-every-night meal plan. Like us, we’re sure lots of you out there have a sweet tooth. Some are born with it, and others develop it over years of eating a standard American diet. Whatever the case may be, there are some good alternatives that you can rely on when starting a keto diet! While desserts are best used as occasional treats, you must do anything you can to get yourself off the “real” desserts. Keto desserts are great transition foods as you begin your healthy- eating journey. DAY 1 Links to the recipes:
  • 401.
    Golden Gate Granola Three-CheeseSpinach Frittata Crispy Chicken Thighs with Pan Sauce Extreme Fudge Brownies DAY 2 Links to the recipes: Raspberry Fiber Muffins Chipotle Dry-Rub Wings
  • 402.
    Asparagus with GoatCheese and Sunflower Seeds Peanut Butter Hemp Heart Cookies DAY 3 Links to the recipes: Golden Gate Granola Raspberry Fiber Muffins Chicken Tenders Chewy Chocolate Chip Cookies learn how to lose 10 pounds in a week fast results
  • 403.
    DAY 4 Links tothe recipes: Breakfast Roll-ups The Best Keto Bread Loaded Cobb Salad Pistachio Coconut Fudge DAY 5
  • 404.
    Links to therecipes: Three-Cheese Spinach Frittata Golden Gate Granola Mocha Protein Keto Coffee Creamy White Chili Cheddar and Thyme Cornbread Blackberry Mini Cheesecakes DAY 6
  • 405.
    Links to therecipes: Chocolate Chip Zucchini Bread Curry Chicken Salad Beef Satay Skewers Peanut Sauce Protein Cake with Buttercream Frosting DAY 7
  • 406.
    Links to therecipes: Breakfast Cookies Three-Cheese Spinach Frittata Caprese Chicken Skillet Death by Chocolate Cheesecake learn how to lose 10 pounds in a week fast results
  • 407.
    MEAL PLAN 3: BASICBRENDA Keeping it as simple as possible is the best approach to keto. Limiting your diet to whole foods, healthy fats, good sources of protein, and nutrient-rich veggies is a place we all strive to get to at some point. With that being said, it’s a process, and going at your own pace is important. Don’t feel intimidated if you need to have some keto sweets occasionally to make the diet more sustainable for you. This plan showcases a basic keto diet and some staple meals that are common in our weekly rotation. DAY 1 Links to the recipes:
  • 408.
    Curry Chicken Salad DAY2 Links to the recipes: The Best Keto Bread Loaded Cobb Salad DAY 3
  • 409.
    Links to therecipes: Asparagus with Goat Cheese and Sunflower Seeds DAY 4 Links to the recipes: Double Bacon Cheeseburger
  • 410.
    DAY 5 Links tothe recipes: Sweet and Spicy Beef Jerky DAY 6 learn how to lose 10 pounds in a week fast results
  • 411.
    Links to therecipes: Microwave Bread Chipotle Dry-Rub Wings DAY 7
  • 413.
    MEAL PLAN 4: MEATLESSMARTY Although challenging, a vegetarian keto diet is possible. Some foods that are great to include as part of a vegetarian keto diet are chia seeds, flax seeds, hemp hearts, nuts, seitan, tofu, and plant-based protein powders. Because vegetarian protein sources are much lower in fat than animal protein sources, it’s important to add fat to your meals. When we make vegetarian meals, we always find ourselves adding tablespoons of butter or coconut oil to get the fat content to where we like it. DAY 1 Links to the recipes:
  • 414.
    Loaded Cobb Salad PeanutSauce DAY 2 Links to the recipes: Toasted Oatmeal Pistachio Coconut Fudge DAY 3 learn how to lose 10 pounds in a week fast results
  • 415.
    Links to therecipes: Sausage and Gruyère Breakfast Casserole Peanut Sauce DAY 4
  • 416.
    Links to therecipes: Overnight Protein Oats Loaded Cobb Salad Breakfast Cookies Pistachio Coconut Fudge DAY 5
  • 417.
    Links to therecipes: Three-Cheese Spinach Frittata Spicy Shrimp Fried Rice Breakfast Cookies DAY 6 learn how to lose 10 pounds in a week fast results
  • 418.
    Links to therecipes: Microwave Bread Loaded Cobb Salad Protein Cake with Buttercream Frosting DAY 7 Links to the recipes: Overnight Protein Oats Saag Paneer
  • 419.
    MEAL PLAN 5: MATT Thismeal plan represents a typical week of eating for Matt. He starts every day with two butter coffees. That keeps him productive in the mornings, which is when he gets most of his work done. We hit the gym together at around 10 a.m., fueled by caffeine and butter, and then come home, where Matt has a large meal around lunchtime. He usually has two large meals per day, with the second one being dinner at around 6 p.m. He likes to keep his fat ratio north of 75 percent. That is a personal preference that he has worked out over his three years of eating keto. DAY 1
  • 420.
    Links to therecipes: Sausage and Gruyère Breakfast Casserole Pistachio Coconut Fudge DAY 2
  • 421.
    Links to therecipes: The Best Keto Bread Loaded Cobb Salad DAY 3
  • 422.
    Links to therecipes: Sausage and Gruyère Breakfast Casserole Crispy Chicken Thighs with Pan Sauce DAY 4 Links to the recipes: Easy Eggs Benedict Pistachio Coconut Fudge Asparagus with Goat Cheese and Sunflower Seeds DAY 5 learn how to lose 10 pounds in a week fast results
  • 423.
    Links to therecipes: The Best Keto Bread Chipotle Dry-Rub Wings Pistachio Coconut Fudge DAY 6
  • 424.
    Links to therecipes: Double Bacon Cheeseburger DAY 7 Links to the recipes: Sausage and Gruyère Breakfast Casserole Loaded Cobb Salad Protein Cake with Buttercream Frosting
  • 425.
    MEAL PLAN 6: MEGHA Meghahas never been a huge coffee drinker, but she likes to start the morning with a warm, high-fat drink, so she usually makes a butter chai tea. She is a veggie lover, so she tries to fit in as many vegetables as possible. Most days she eats just two large meals, but she is also a huge snacker. That usually means a fat bomb or a little snack plate between meals or a spoonful of peanut butter before bed. Her carb intake is higher than Matt’s most of the time, and her fat intake is lower. Remember, finding what works best for your body is the key! DAY 1
  • 426.
    Links to therecipes: Sausage and Gruyère Breakfast Casserole Crispy Chicken Thighs with Pan Sauce Snickerdoodle Cream Cheesecake DAY 2 learn how to lose 10 pounds in a week fast results
  • 427.
    Links to therecipes: Loaded Cobb Salad DAY 3 Links to the recipes:
  • 428.
    Savory Zucchini CheddarWaffles Curry Chicken Salad Chipotle Dry-Rub Wings DAY 4 Links to the recipes: Green Power Smoothie Asparagus with Goat Cheese and Sunflower Seeds Peanut Butter Hemp Heart Cookies DAY 5
  • 429.
    Links to therecipes: Mocha Protein Keto Coffee Giant Skillet Cookie for Two DAY 6 Links to the recipes: learn how to lose 10 pounds in a week fast results
  • 430.
    Raspberry Fiber Muffins CreamyWhite Chili Saag Paneer DAY 7 Links to the recipes: Microwave Bread Caprese Chicken Skillet Blackberry Mini Cheesecakes
  • 433.
    SUGGESTED READING While puttingthe ketogenic diet into practice is simple, getting a better understanding of the underlying science can be hugely beneficial. Here we’ve provided a list of books and websites that you can use to further your knowledge. This cookbook gives you more than a hundred recipes that are perfect for your keto journey, but for detailed information on what a ketogenic diet is and why ketosis is a great state for your body to be in, we recommend that you delve into some of these more comprehensive resources. Books • The Case Against Sugar by Gary Taubes • Good Calories, Bad Calories: Fats, Carbs, and the Controversial Science of Diet and Health by Gary Taubes • The Obesity Code: Unlocking the Secrets of Weight Loss by Dr. Jason Fung • Why We Get Fat: And What to Do About It by Gary Taubes Websites • KetoConnect.net (our food blog; hit the “Start Here” drop-down menu for a discussion of some of the basics
  • 434.
    of the ketodiet) • Reddit.com/r/keto learn how to lose 10 pounds in a week fast results
  • 435.
    RESOURCE GUIDE The followingis a list of ingredients and prepared foods we commonly use and the brands we prefer to purchase. They can be found in most grocery stores. For more information about some of these ingredients, or for information about ingredients not listed below, check the ingredients section on pages 12 to 21. Staple Ingredients Apple cider vinegar, raw and unfiltered Bragg Baking chocolate, unsweetened Baker’s
  • 436.
    BBQ Sauce G HughesSmokehouse sugar-free BBQ sauce Chicken broth, low-sodium Imagine organic free-range broth Chocolate chips, sugar-free Lily’s
  • 437.
    Coconut aminos (asoy sauce alternative) Bragg Coconut cream and coconut milk Thai Kitchen Ketchup, reduced-sugar Heinz Maple syrup, sugar-free learn how to lose 10 pounds in a week fast results
  • 438.
    Know Foods KnowBetter Syrup (the best choice, but not available in most grocery stores) Log Cabin Sugar-Free (readily available at grocery stores, but not our first choice because it contains unsavory sweeteners and artificial colors) Marinara sauce, low-carb Rao’s Mayonnaise, made with avocado oil Primal Kitchen MCT oil and MCT powder Perfect Keto MCT Oil Powder (available at perfectketo.com and on Amazon.com) Zenwise (available at zenwisehealth.com and on Amazon.com) Meats Applegate natural uncured beef hot dogs
  • 439.
    BUBBA burgers (Angusbeef and turkey) Peanut butter Crazy Richard’s Pork rinds Mac’s Utz Tortillas Mission Carb Balance Snack Suggestions Here are some of our favorite ready-made snack options. Bars Keto Bars (the best choice, but not available in grocery stores)
  • 440.
    Quest Bars (readilyavailable in grocery stores) Crackers Flackers (organic flaxseed crackers) Ice cream So Delicious Dairy Free, No Sugar Added Jerky Keto Carne (the best choice, but not available in grocery stores) Pili nuts Pizza Realgood learn how to lose 10 pounds in a week fast results
  • 441.
  • 443.
    RECIPE INDEX Wake-up Call ProteinWaffles Three-Cheese Spinach Frittata Savory Zucchini Cheddar Waffles Five-Star Breakfast Sandwich
  • 444.
    Chorizo Cotija MorningMuffins Breakfast Cookies Overnight Protein Oats Breakfast Roll-ups Easy Eggs Benedict learn how to lose 10 pounds in a week fast results
  • 445.
    Golden Gate Granola Sausageand Gruyère Breakfast Casserole Diner Pancakes Toasted Oatmeal Iced Bulletproof Coffee Frappé
  • 446.
    Mocha Protein KetoCoffee Fresh Baked English Muffins Cheddar and Thyme Cornbread Microwave Bread learn how to lose 10 pounds in a week fast results
  • 447.
    The Best KetoBread Raspberry Fiber Muffins Cheddar Jalapeño Bagels Low-Carb Dinner Rolls Cinnamon Walnut Scones
  • 448.
    Chocolate Chip ZucchiniBread Cheesy Chicken Breadsticks Navajo Fry Bread Coconut Flour Tortillas Classic Comfort Foods
  • 449.
    Chicken Popper Casserole LoadedCauliflower Spicy Cauliflower Bites Spaghetti with Meat Sauce Creamy White Chili Chicken Tenders
  • 450.
    Crispy Chicken Thighswith Pan Sauce Mexican Chorizo Casserole Bacon and Crab Mac and Cheese Chicken Noodle-less Soup Creamy Chicken Alfredo
  • 451.
    Southern Baked Chicken Mama’sMeatloaf Takeout Favorites Spicy Tuna Hand Rolls Double Bacon Cheeseburger learn how to lose 10 pounds in a week fast results
  • 452.
    Saag Paneer Thai YellowChicken Curry Buffalo Chicken Crust Pizza Spicy Shrimp Fried Rice Chocolate Almond Butter Shake
  • 453.
    Thin-Crust Skillet Pizza SteakQuesadillas Chipotle Dry-Rub Wings Beef Satay Skewers Cheese Shell Mini Tacos
  • 454.
    Philly Food CartGyros Sticky Sesame Chicken Fresh Fixin’s Turkey Bacon Club Caprese Chicken Skillet learn how to lose 10 pounds in a week fast results
  • 455.
    Baja Fish SoftTacos Curry Chicken Salad Loaded Cobb Salad Coconut Shrimp Fried Red Snapper
  • 456.
    California Collard Wrap StrawberryCoconut Smoothie Green Power Smoothie Raspberry Lime Ice Pops Sides & Munchies
  • 457.
    Candied Georgia Pecans FatheadCrackers Mexican Layer Dip Buffalo Chicken Dip Sweet and Spicy Beef Jerky Charlie’s Energy Balls
  • 458.
    Bar Side MozzarellaSticks Salami Chips with Pesto Radical Radish Chips Cheesy Broccoli and Bacon Hush Puppies learn how to lose 10 pounds in a week fast results
  • 459.
    Asparagus with GoatCheese and Sunflower Seeds Chipotle Cauliflower Mash Cilantro Lime Rice Decadent Desserts Chocolate Protein Truffles
  • 460.
    Death by ChocolateCheesecake No-Churn Peanut Butter Ice Cream Snickerdoodle Cream Cheesecake Giant Skillet Cookie for Two Flourless Chocolate Cake
  • 461.
    Protein Cake withButtercream Frosting Chewy Chocolate Chip Cookies Blackberry Mini Cheesecakes Extreme Fudge Brownies Coconut Chocolate Cookies learn how to lose 10 pounds in a week fast results
  • 462.
    Peanut Butter HempHeart Cookies County Fair Cinnamon Donuts Pistachio Coconut Fudge Strawberry Shortcakes Vanilla Egg Custard
  • 463.
    Instant Protein IceCream Condiments Peanut Sauce BBQ Sauce Homemade Chipotle Mayo
  • 464.
    Maple Cinnamon AlmondButter Strawberry Chia Seed Jam learn how to lose 10 pounds in a week fast results
  • 465.
    ALLERGEN INDEX learn howto lose 10 pounds in a week fast results