
Recommended
More Related Content
More from fjsjekkmdmme
More from fjsjekkmdmme (20)
Recently uploaded
Recently uploaded (20)
Kohler aegis lh685 liquid cooled horizontal crankshaft engine service repair manual
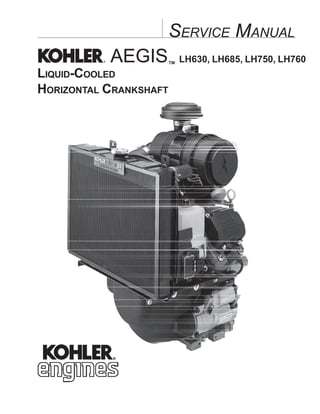
- 1. AEGIS™ LH630, LH685, LH750, LH760 SERVICE MANUAL LIQUID-COOLED HORIZONTAL CRANKSHAFT
- 2. Contents Section 1. Safety and General Information ............................................................................ Section 2. Special Tools .......................................................................................................... Section 3. Troubleshooting ..................................................................................................... Section 4. Air Cleaner System................................................................................................. Section 5. Fuel System and Governor .................................................................................... Section 5B. Electronic Fuel Injection (EFI) Fuel System ...................................................... Section 6. Lubrication System ................................................................................................ Section 7. Cooling System ...................................................................................................... Section 8. Electrical System and Components ..................................................................... Section 9. Disassembly ........................................................................................................... Section 10. Inspection and Reconditioning ........................................................................... Section 11. Reassembly........................................................................................................... 4 2 11 10 9 8 7 6 5 3 1 5B
- 3. 1.1 Section 1 Safety and General Information 1 Section 1 Safety and General Information Safety Precautions To ensure safe operations please read the following statements and understand their meaning. Also refer to your equipment manufacturer's manual for other important safety information. This manual contains safety precautions which are explained below. Please read carefully. WARNING Warning is used to indicate the presence of a hazard that can cause severe personal injury, death, or substantial property damage if the warning is ignored. CAUTION Caution is used to indicate the presence of a hazard that will or can cause minor personal injury or property damage if the caution is ignored. NOTE Note is used to notify people of installation, operation, or maintenance information that is important but not hazard-related. For Your Safety! These precautions should be followed at all times. Failure to follow these precautions could result in injury to yourself and others. LH630, LH685, LH750, LH760 Rotating Parts can cause severe injury. Stay away while engine is in operation. WARNING Rotating Parts! Keep hands, feet, hair, and clothing away from all moving parts to prevent injury. Never operate the engine with covers, shrouds, or guards removed. Hot Parts can cause severe burns. Do not touch engine while operating or just after stopping. WARNING Hot Parts! Engine components can get extremely hot from operation. To prevent severe burns, do not touch these areas while the engine is running - or immediately after it is turned off. Never operate the engine with heat shields or guards removed. Accidental Starts can cause severe injury or death. Disconnect and ground spark plug leads before servicing. WARNING Accidental Starts! Disabling engine. Accidental starting can cause severe injury or death. Before working on the engine or equipment, disable the engine as follows: 1) Disconnect the spark plug lead(s). 2) Disconnect negative (-) battery cable from battery.
- 4. 1.2 Section 1 Safety and General Information Carbon Monoxide can cause severe nausea, fainting or death. Do not operate engine in closed or confined area. WARNING WARNING Electrical Shock can cause injury. Do not touch wires while engine is running. CAUTION Hot liquid can cause severe burns. Do not loosen radiator cap while engine is operating or warm to the touch. WARNING Explosive Gas can cause fires and severe acid burns. Charge battery only in a well ventilated area. Keep sources of ignition away. Lethal Exhaust Gases! Engine exhaust gases contain poisonous carbon monoxide. Carbon monoxide is odorless, colorless, and can cause death if inhaled. Avoid inhaling exhaust fumes, and never run the engine in a closed building or confined area. Hot Liquid! The liquid coolant can get extremely hot from operation. Turning the radiator cap when the engine is hot can allow steam and scalding liquid to blow out and burn you severely. Shut off machine. Only remove radiator cap when cool enough to touch with bare hands. Slowly loosen cap to first stop to relieve pressure before removing completely. Explosive Gas! Batteries produce explosive hydrogen gas while being charged. To prevent a fire or explosion, charge batteries only in well ventilated areas. Keep sparks, open flames, and other sources of ignition away from the battery at all times. Keep batteries out of the reach of children. Remove all jewelry when servicing batteries. Before disconnecting the negative (-) ground cable, make sure all switches are OFF. If ON, a spark will occur at the ground cable terminal which could cause an explosion if hydrogen gas or gasoline vapors are present. Explosive Fuel can cause fires and severe burns. Stop engine before filling fuel tank. WARNING Explosive Fuel! Gasoline is extremely flammable and its vapors can explode if ignited. Store gasoline only in approved containers, in well ventilated, unoccupied buildings, away from sparks or flames. Do not fill the fuel tank while the engine is hot or running, since spilled fuel could ignite if it comes in contact with hot parts or sparks from ignition. Do not start the engine near spilled fuel. Never use gasoline as a cleaning agent. Cleaning Solvents can cause severe injury or death. Use only in well ventilated areas away from ignition sources. WARNING Flammable Solvents! Carburetor cleaners and solvents are extremely flammable. Keep sparks, flames, and other sources of ignition away from the area. Follow the cleaner manufacturer’s warnings and instructions on its proper and safe use. Never use gasoline as a cleaning agent. Electrical Shock! Never touch electrical wires or components while the engine is running. They can be sources of electrical shock.
- 5. 1.3 Section 1 Safety and General Information 1 L H 685 S A. Model No. Liquid Cooled Horizontal Crankshaft Numerical Designation Version Code S = Electric Start Figure 1-2. Explanation of Engine Identification Numbers. Engine Identification Numbers When ordering parts, or in any communication involving an engine, always give the Model, Specification, and Serial Numbers, including letter suffixes if there are any. The engine identification numbers appear on a decal, or decals, affixed to the engine. The primary location is on the side of the flywheel cover. See Figure 1-1. Placement may vary due to OEM requirements and specific options involved. An explanation of these numbers is shown in Figure 1-2. Figure 1-1. Engine Identification Decal Location. B. Spec. No. Engine Model Model LH630 LH685 LH750 LH760 LH685-0001 First spec written in this model series 31 05810334 Factory Code C. Serial No. Year Manufactured Code Code Year 31 2001 32 2002 33 2003 34 2004 Identification Decal
- 6. 1.4 Section 1 Safety and General Information Oil Recommendations Using the proper type and weight of oil in the crankcase is extremely important. So is checking oil daily and changing oil regularly. Failure to use the correct oil, or using dirty oil, causes premature engine wear and failure. Oil Type Use high-quality detergent oil of API (American Petroleum Institute) Service Class SG, SH, SJ or higher. Select the viscosity based on the air temperature at the time of operation as shown in the following table. NOTE: Using other than service class SG, SH, SJ or higher oil or extending oil change intervals longer than recommended can cause engine damage. A logo or symbol on oil containers identifies the API service class and SAE viscosity grade. See Figure 1-3. *Use of synthetic oil having 5W-20 or 5W-30 rating is acceptable, up to 4°C (40°F). **Synthetic oils will provide better starting in extreme cold below -23°C (-10°F). Figure 1-3. Oil Container Logo. Refer to Section 6 - “Lubrication System” for detailed procedures on checking the oil, changing the oil and changing the oil filter. Coolant Recommendations Use equal parts of ethylene glycol and water only. Distilled or deionized water is recommended, especially in areas where the water contains a high mineral content. Propylene glycol based antifreeze is not recommended. This mixture will provide protection from -37°C (-34°F) to 108°C (226°F). For protection and use outside the indicated temperature limits, follow the antifreeze manufacturer's instructions on the container, but do not exceed 70% antifreeze. DO NOT use antifreeze with stop-leak additive(s), or put any other additives in the cooling system. Fuel Recommendations WARNING: Explosive Fuel! Gasoline is extremely flammable and its vapors can explode if ignited. Store gasoline only in approved containers, in well ventilated, unoccupied buildings, away from sparks or flames. Do not fill the fuel tank while the engine is hot or running, since spilled fuel could ignite if it comes in contact with hot parts or sparks from ignition. Do not start the engine near spilled fuel. Never use gasoline as a cleaning agent. General Recommendations Purchase gasoline in small quantities and store in clean, approved containers. A container with a capacity of 2 gallons or less with a pouring spout is recommended. Such a container is easier to handle and helps eliminate spillage during refueling. Do not use gasoline left over from the previous season, to minimize gum deposits in your fuel system and to ensure easy starting. Do not add oil to the gasoline. Do not overfill the fuel tank. Leave room for the fuel to expand. * **
- 7. 1.5 Section 1 Safety and General Information 1 Fuel Type For best results, use only clean, fresh, unleaded gasoline with a pump sticker octane rating of 87 or higher. In countries using the Research method, it should be 90 octane minimum. Unleaded gasoline is recommended, as it leaves fewer combustion chamber deposits. Leaded gasoline may be used in areas where unleaded is not available and exhaust emissions are not regulated. Be aware, however, that the cylinder head will require more frequent service. Gasoline/Alcohol blends Gasohol (up to 10% ethyl alcohol, 90% unleaded gasoline by volume) is approved as a fuel for Kohler engines. Other gasoline/alcohol blends are not approved. Gasoline/Ether blends Methyl Tertiary Butyl Ether (MTBE) and unleaded gasoline blends (up to a maximum of 15% MTBE by volume) are approved as a fuel for Kohler engines. Other gasoline/ether blends are not approved. Periodic Maintenance WARNING: Accidental Starts! Disabling engine. Accidental starting can cause severe injury or death. Before working on the engine or equipment, disable the engine as follows: 1) Disconnect the spark plug lead(s). 2) Disconnect negative (-) battery cable from battery. Maintenance Schedule These required maintenance procedures should be performed at the frequency stated in the table. They should also be included as part of any seasonal tune-up. 1 Perform these maintenance procedures more frequently under extremely dusty, dirty conditions. Refer to: Section 5 Section 6 Section 7 Section 4 Section 7 Maintenance Required Frequency • Fill fuel tank. • Check oil level. • Check coolant level. • Check air cleaner for dirty1 , loose, or damaged parts. • Check the screen, radiator, and cooling areas, clean as necessary1 . Daily or Before Starting Engine Section 7 Section 5 Section 6 Section 8 • Clean and check cooling areas1 . • Replace fuel filter. Every 100 Hours Annually or Every 200 Hours • Change oil and oil filter (more frequently under severe conditions). • Check spark plug condition and gap. Section 4 • Replace air cleaner element and check inner element1 . Annually or Every 500 Hours Every 2 Years or Every 1000 Hours Section 7 • Replace spark plugs. Every 250 Hours Section 8 • Change engine coolant.
- 8. 1.6 Section 1 Safety and General Information Storage If the engine will be out of service for two months or more, use the following storage procedure: 1. Clean the exterior surfaces of the radiator and engine. 2. Change the oil and filter while the engine is still warm from operation. See “Change Oil and Filter” in Section 6. 3. The coolant (antifreeze) mixture should be in good condition and tested to guard against freezing in cold temperatures. The recommended equal parts mixture will normally provide protection down to temperatures of -37°C (-34°F). If storage temperatures will fall below this, the cooling system should be drained. A note should then be attached to the equipment and/or engine as a reminder to refill the cooling system before starting. 4. The fuel system must be completely emptied, or the gasoline must be treated with a stabilizer to prevent deterioration. If you choose to use a stabilizer, follow the manufacturer’s recommendations, and add the correct amount for the capacity of the fuel system. Fill the fuel tank with clean, fresh gasoline. Run the engine for 2-3 minutes to get stabilized fuel into the carburetor. Close fuel shut-off valve when unit is being stored or transported. To empty the system, run the engine until the tank and system are empty. 5. Remove the spark plugs. Add one tablespoon of engine oil into each spark plug hole. Install plugs, but do not connect the plug leads. Crank the engine two or three revolutions. 6. Store the engine in a clean, dry place.
- 9. 1.7 Section 1 Safety and General Information 1 Figure 1-4. Typical Engine Dimensions. Optional Oil Fill 152.08 (5.987) Oil Drain 38.00 (1.496) 143.25 (5.640) 175.41 (6.906) C L Mounting Hole "A" 490.74 (19.320) Center of Air Intake 583.30 (22.965) Air Intake Optional Orientation Engine Mounting Surface 38.00 (1.496) Oil Drain Plug C L 89.00 (3.504) Mounting Holes 238.61 (9.394) 431.61 (16.992) Mounting Hole "A" Mounting Surface 4.00 (.157) Pilot C L C L 155.58 (6.125) 36.50 (1.437) 28.575 (1.125) Option 112.92 (4.446) 101.60 (4.000) Option 1/4 Inch Square Key 5/8-18 UNF Thread 7/16-20 Thread Option 120.96 (4.762) Coolant Overflow Fill 39.00 (1.535) Oil Fill 119.78 (4.716) 673.70 (26.524) Overall Fuel Pump 440.00 (17.323) 2X 184.20 (7.252) 127.90 (5.035) C L Mounting Hole 458.49 (18.051) Overall 23 (.906) Rain Cap Removal 622.54 (24.509) Overall without Rain Cap C L Mounting Hole Dimensions in millimeters. Inch equivalents shown in (). 50.99 (2.007) Mounting Hole "A" 4X 3/8-16 UNC-2B Inch 299.00 (11.77) Oil Filter 235.19 (9.259) 2X 297.47 (1.711) Exhaust Ports 177.80 Pilot (7.000) Bolt Circle 197.00 (7.756) 15.70 Oil Filter Removal (.618) 142.88 Bolt Circle (5.625) 4X 45° 2X 45° 2X 60° 4x 7/16-14 UNC-2B Inch Oil Filter Side PTO Side Top View Starter Side Flywheel End
- 10. 1.8 Section 1 Safety and General Information General Specifications1 Power (@ 3600 RPM, corrected to SAE J1995) LH630 ..............................................................Maximum ............. 16.4 kW (22 HP) Recommended..... 13.9 kW (18.7 HP) LH685 ..............................................................Maximum ............. 18.6 kW (25 HP) Recommended..... 15.9 kW (21.3 HP) LH750 ..............................................................Maximum ............. 20.1 kW (27 HP) Recommended..... 17.1 kW (22.9 HP) LH760 ..............................................................Maximum ............. 21.6 kW (29 HP) Recommended..... 18.4 kW (24.7 HP) Peak Torque LH630 (@ 2200 RPM).................................................................... 48.0 N·m (35.4 ft. lb.) LH685 (@ 2200 RPM).................................................................... 54.3 N·m (40.1 ft. lb.) LH750 (@ 2200 RPM).................................................................... 61.0 N·m (45 ft. lb.) LH760 (@ 2600 RPM).................................................................... 61.7 N·m (45.5 ft. lb.) Bore LH630 ............................................................................................ 77 mm (3.03 in.) LH685 ............................................................................................ 80 mm (3.15 in.) LH750, LH760 ................................................................................ 83 mm (3.3 in.) Stroke LH630, LH685 ................................................................................ 67 mm (2.64 in.) LH750, LH760 ................................................................................ 69 mm (2.7 in.) Displacement LH630 ............................................................................................ 624 cc (38.1 cu. in.) LH685 ............................................................................................ 674 cc (41.1 cu. in.) LH750, LH760 ................................................................................ 748 cc (45.6 cu. in.) Compression Ratio LH630, LH685 ................................................................................. 8.5:1 LH750, LH760 ................................................................................. 8.7:1 Dry Weight LH630, LH685, LH750 ................................................................... 51.7 kg (114 lb.) LH760 ............................................................................................ 52.6 kg (116 lb.) Oil Capacity (with filter) LH630, LH685, LH750 ................................................................... 1.9 L (2.0 U.S. qt.) LH760 ............................................................................................ 2.0 L (2.1 U.S. qt.) Coolant Capacity (equal parts of water and ethylene glycol) ................. 2.0 L (2.18 U.S. qt.) Angle of Operation - Maximum (at full oil level) All Directions ............... 20° Camshaft End Play (With Shim) ........................................................................... 0.076/0.127 mm (0.0030/0.0050 in.) Running Clearance ............................................................................... 0.025/0.063 mm (0.0010/0.0025 in.) 1 Values are in Metric units. Values in parentheses are English equivalents. Lubricate threads with engine oil prior to assembly. NOTE: All listed dimensions and tolerances are measured at 20°C (68°F).
- 11. Thank you very much for your reading. Please Click Here. Then Get COMPLETE MANUAL. NO WAITING NOTE: If there is no response to click on the link above, please download the PDF document first and then click on it.
- 12. 1.9 Section 1 Safety and General Information 1 Camshaft cont. Bore I.D. New................................................................................................ 20.000/20.025 mm (0.7874/0.7884 in.) Max. Wear Limit ............................................................................. 20.038 mm (0.7889 in.) Camshaft Bearing Surface O.D. New................................................................................................ 19.962/19.975 mm (0.7859/0.7864 in.) Max. Wear Limit ............................................................................. 19.959 mm (0.7858 in.) Carburetor and Intake Manifold Intake Manifold Fastener Torque (torque in 2 increments) .................... 7.4, 9.9 N·m (66, 88 in. lb.) Carburetor Mounting Fastener Torque .................................................. 9.9 N·m (88 in. lb.) Connecting Rod Cap Fastener Torque (torque in increments) ........................................ 11.3 N·m (100 in. lb.) Connecting Rod-to-Crankpin Running Clearance New................................................................................................ 0.043/0.068 mm (0.0016/0.0026 in.) Max. Wear Limit ............................................................................. 0.083 mm (0.0032 in.) Connecting Rod-to-Crankpin Side Clearance ....................................... 0.26/0.63 mm (0.0102/0.0248 in.) Connecting Rod-to-Piston Pin Running Clearance ............................... 0.015/0.028 mm (0.0006/0.0011 in.) Piston Pin End I.D. New................................................................................................ 17.015/17.023 mm (0.6699/0.6702 in.) Max. Wear Limit ............................................................................. 17.036 mm (0.6707 in.) Crankcase Governor Cross Shaft Bore I.D. New................................................................................................ 8.025/8.075 mm (0.3159/0.3179 in.) Max. Wear Limit ............................................................................. 8.088 mm (0.3184 in.) Breather Cover Fastener Torque ........................................................ 10.7 N·m (95 in. lb.) Into new as-cast hole 7.3 N·m (65 in. lb.) Into used hole Oil Drain Plug Torque............................................................................ 13.6 N·m (120 in. lb.) Crankshaft End Play (free)...................................................................................... 0.070/0.590 mm (0.0028/0.0232 in.) Crankshaft Sleeve Bearing I.D. (crankcase) New................................................................................................ 40.974/40.987 mm (1.6131/1.6136 in.) Max. Wear Limit ............................................................................. 41.000 mm (1.6141 in.) Crankshaft Bore (in closure plate) New................................................................................................ 40.974/41.000 mm (1.6131/1.6141 in.) Max. Wear Limit ............................................................................. 41.038 mm (1.6156 in.) Crankshaft Bore (in closure plate)-to-Crankshaft Running Clearance - New .............................................................. 0.039/0.087 mm (0.0015/0.0034 in.)
- 13. 1.10 Section 1 Safety and General Information Crankshaft cont. Main Bearing Journals O.D. - New ..................................................................................... 40.913/40.935 mm (1.6107/1.6116 in.) O.D. - Max. Wear Limit .................................................................. 40.84 mm (1.608 in.) Max. Taper ..................................................................................... 0.022 mm (0.0009 in.) Max. Out-of-Round ........................................................................ 0.025 mm (0.0010 in.) Crankshaft to Sleeve Bearing (crankcase) Running Clearance - New .............................................................. 0.039/0.0074 mm (0.0015/0.0029 in.) Connecting Rod Journal O.D. - New ..................................................................................... 35.955/35.973 mm (1.4156/1.4163 in.) O.D. - Max. Wear Limit .................................................................. 35.94 mm (1.415 in.) Max. Taper ..................................................................................... 0.018 mm (0.0007 in.) Max. Out-of-Round ........................................................................ 0.025 mm (0.0010 in.) Crankshaft T.I.R. PTO End, Crank in Engine ............................................................. 0.15 mm (0.0059 in.) Entire Crank, in V-Blocks ............................................................... 0.10 mm (0.0039 in.) Cylinder Bore Cylinder Bore I.D. New LH630 ...................................................................................... 77.000/77.025 mm (3.0315/3.0325 in.) LH685 ...................................................................................... 80.000/80.025 mm (3.1496/3.1506 in.) LH750, LH760 ......................................................................... 83.006/83.031 mm (3.2679/3.2689 in.) Max. Wear Limit LH630 ...................................................................................... 77.063 mm (3.0340 in.) LH685 ...................................................................................... 80.065 mm (3.1522 in.) LH750, LH760 ......................................................................... 83.069 mm (3.2704 in.) Max. Out-of-Round ........................................................................ 0.12 mm (0.0047 in.) Max. Taper ..................................................................................... 0.05 mm (0.0020 in.) Cylinder Head Cylinder Head Fastener Torque (torque in 2 increments)...................... 16.9, 33.9 N·m (150, 300 in. lb.) Max. Out-of-Flatness ............................................................................ 0.076 mm (0.003 in.) Rocker Pivot Fastener Torque .............................................................. 11.3 N·m (100 in. lb.) Electric Starter Starter Thru Bolt Torque........................................................................ 5.6-9.0 N·m (49-79 in. lb.) Starter Mounting Screw Torque............................................................. 15.3 N·m (135 in. lb.) Starter Brush Holder Fastener Torque .................................................. 2.5-3.3 N·m (22-29 in. lb.) Starter Solenoid Fastener Torque ......................................................... 4.0-6.0 N·m (35-53 in. lb.) Starter Solenoid Positive (+) Brush Lead Retaining Nut Torque ............ 8.0-11.0 N·m (71-97 in. lb.)
- 14. 1.11 Section 1 Safety and General Information 1 Fan/Flywheel Rear Fan Shaft to Mounting Bracket Nut Torque .................................. 15.8 N·m (140 in. lb.) Front Fan Assembly to Fan Shaft Nut Toque ........................................ 15.8 N·m (140 in. lb.) Fan/Pulley/Hub Assembly Fastener Torque .......................................... 6.8 N·m (60 in. lb.) Flywheel Retaining Screw Torque ......................................................... 66.4 N·m (49 ft. lb.) Lower Flywheel Cover Mounting Screw Torque .................................... 9.9 N·m (88 in. lb.) Lower Pulley Mounting Screw Torque ................................................... 24.3 N·m (215 in. lb.) Governor Governor Cross Shaft to Crankcase Running Clearance...................... 0.025/0.126 mm (0.0009/0.0049 in.) Governor Cross Shaft O.D. New................................................................................................ 7.949/8.000 mm (0.3129/0.3149 in.) Max. Wear Limit ............................................................................. 7.936 mm (0.3124 in.) Governor Gear Shaft O.D. New................................................................................................ 5.990/6.000 mm (0.2358/0.2362 in.) Max. Wear Limit ............................................................................. 5.977 mm (0.2353 in.) Governor Gear Shaft-to-Governor Gear Running Clearance ................ 0.090/0.160 mm (0.0035/0.0063 in.) Ignition Spark Plug Type (Champion® or equivalent) ......................................... RC14YC Spark Plug Gap .................................................................................... 0.76 mm (0.030 in.) Spark Plug Torque ................................................................................ 24.4-29.8 N·m (18-22 ft. lb.) Ignition Module Air Gap ........................................................................ 0.2/0.3 mm (0.008/0.012 in.) Ignition Module Fastener Torque .......................................................... 6.2 N·m (55 in. lb.) Into new as-cast hole 4.0 N·m (35 in. lb.) Into used hole Rectifier-Regulator Fastener Torque ..................................................... 4.0 N·m (35 in. lb.) Muffler Muffler Retaining Nuts Torque .............................................................. 24.4 N·m (216 in. lb.) Oil Filter/Closure Plate Oil Filter Torque .................................................................................... 10.4-12.7 N·m (90-110 in. lb.) Closure Plate Fastener Torque ............................................................. 24.4 N·m (216 in. lb.)
- 15. 1.12 Section 1 Safety and General Information ²Measure 6 mm (0.236 in.) above the bottom of the piston skirt at right angles to the piston pin. Piston, Piston Rings, and Piston Pin Piston-to-Piston Pin .............................................................................. 0.006/0.018 mm (0.0002/0.0007 in.) Piston Pin Bore I.D. New................................................................................................ 17.006/17.013 mm (0.6695/0.6698 in.) Max. Wear Limit ............................................................................. 17.025 mm (0.6703 in.) Piston Pin O.D. New................................................................................................ 16.995/17.000 mm (0.6691/0.6693 in.) Max. Wear Limit ............................................................................. 16.994 mm (0.6691 in.) Top Compression Ring-to-Groove Side Clearance LH630 ............................................................................................ 0.040/0.086 mm (0.0016/0.0034 in.) LH685 ............................................................................................ 0.050/0.096 mm (0.0020/0.0038 in.) LH750, LH760 ................................................................................ 0.014/0.041 mm (0.0005/0.0016 in.) Middle Compression Ring-to-Groove Side Clearance LH630 ............................................................................................ 0.040/0.086 mm (0.0016/0.0034 in.) LH685 ............................................................................................ 0.030/0.076 mm (0.0012/0.0030 in.) LH750, LH760 ................................................................................ 0.012/0.039 mm (0.0004/0.0015 in.) Oil Control Ring-to-Groove Side Clearance LH630 ............................................................................................ 0.046/0.196 mm (0.0018/0.0077 in.) LH685 ............................................................................................ 0.046/0.196 mm (0.0018/0.0077 in.) LH750, LH760 ................................................................................ 0.026/0.176 mm (0.0010/0.0070 in.) Top and Middle Compression Ring End Gap LH630 New Bore Top Ring ............................................................................ 0.180/0.380 mm (0.0071/0.0150 in.) Middle Ring ....................................................................... 0.250/0.450 mm (0.0098/0.0177 in.) Used Bore (Max.) .................................................................... 0.77 mm (0.030 in.) LH685 New Bore Top Ring ............................................................................ 0.180/0.430 mm (0.0071/0.0169 in.) Middle Ring ....................................................................... 0.250/0.460 mm (0.0098/0.0181 in.) Used Bore (Max.) .................................................................... 0.80 mm (0.0315 in.) LH750, LH760 New Bore................................................................................. 0.250/0.56 mm (0.0098/0.022 in.) Used Bore ............................................................................... 0.94 mm (0.037 in.) Piston Thrust Face O.D.² LH630 New ......................................................................................... 76.967/76.985 mm (3.0302/3.0309 in.) Max. Wear Limit ...................................................................... 76.840 mm (3.0252 in.) LH685 New ......................................................................................... 79.963/79.981 mm (3.1481/3.1488 in.) Max. Wear Limit ...................................................................... 79.831 mm (3.1430 in.) LH750, LH760 New ......................................................................................... 82.973/82.991 mm (3.2666/3.2673 in.) Max. Wear Limit ...................................................................... 82.841 mm (3.3136 in.)
- 16. 1.13 Section 1 Safety and General Information 1 Piston, Piston Rings, and Piston Pin cont. Piston Thrust Face-to-Cylinder Bore² Running Clearance LH630 ............................................................................................ 0.014/0.057 mm (0.0005/0.0022 in.) LH685 ............................................................................................ 0.019/0.062 mm (0.0007/0.0024 in.) LH750, LH760 ................................................................................ 0.015/0.058 mm (0.005/0.0022 in.) Speed Control Speed Control Bracket Assembly Fastener Torque............................... 10.7 N·m (95 in. lb.) Into new as-cast hole 7.3 N·m (65 in. lb.) Into used hole Stator Stator Mounting Screw Torque .............................................................. 6.2 N·m (55 in. lb.) Throttle/Choke Controls Governor Control Lever Fastener Torque ............................................. 9.9 N·m (88 in. lb.) Valve Cover/Rocker Arms Valve Cover Fastener Torque ............................................................... 6.2 N·m (55 in. lb.) Valves and Valve Lifters Hydraulic Valve Lifter to Crankcase Running Clearance ....................... 0.0124/0.0501 mm (0.0005/0.0020 in.) Intake Valve Stem-to-Valve Guide Running Clearance ......................... 0.038/0.076 mm (0.0015/0.0030 in.) Exhaust Valve Stem-to-Valve Guide Running Clearance ...................... 0.050/0.088 mm (0.0020/0.0035 in.) Intake Valve Guide I.D. New................................................................................................ 7.038/7.058 mm (0.2771/0.2779 in.) Max. Wear Limit ............................................................................. 7.134 mm (0.2809 in.) Intake Valve Stem Diameter New................................................................................................ 6.982/7.000 mm (0.2749/0.2756 in.) Exhaust Valve Guide I.D. New................................................................................................ 7.038/7.058 mm (0.2771/0.2779 in.) Max. Wear Limit ............................................................................. 7.159 mm (0.2819 in.) Exhaust Valve Stem Diameter New................................................................................................ 6.970/6.988 (0.2744/0.2751 in.) Valve Guide Reamer Size Standard......................................................................................... 7.048 mm (0.2775 in.) 0.25 mm O.S. ................................................................................. 7.298 mm (0.2873 in.) Intake Valve Lift .................................................................................... 8.88 mm (0.3496 in.) Exhaust Valve Lift ................................................................................. 8.88 mm (0.3496 in.) Nominal Valve Seat Angle..................................................................... 45° ²Measure 6 mm (0.236 in.) above the bottom of the piston skirt at right angles to the piston pin.