SlideShare a Scribd company logo
Service
Manual
8027Z
8032Z
PUBLISHED BY THE
TECHNICAL PUBLICATIONS DEPARTMENT
OF JCB SERVICE: © WORLD PARTS CENTRE,
WATERLOO PARK, UTTOXETER,ST14 5PA,
ENGLAND
Tel. ROCESTER (01889) 590312
PRINTED IN ENGLAND
Publication No. 9803/9300 Issue 1
General Information 1
Care & Safety 2
3
Optional Equipment A
Body & Framework B
Electrics C
Controls D
Hydraulics E
Transmission F
J
Track & Running Gear
Engine K
Routine Maintenance
Open front screen
9803/9300 Issue 1
Introduction
This publication is designed for the benefit of JCB Distributor Service Engineers who are receiving, or have received, training
by JCB Technical Training Department.
It is assumed that these personnel have a sound knowledge of workshop practice, safety procedures and general techniques
associated with the maintenance and repair of hydraulic earthmoving equipment. Therefore, these basic subjects generally
are omitted from this manual, the intention being to convey only more specialised information concerning particular aspects
of a machine or component.
For example, renewal of oil seals, gaskets etc., and any component showing obvious signs of wear oar damage is expected
as a matter of course and, therefore, information of this nature is included only in the context of specialised procedures or
where a range of wear tolerances is required. Similarly, it is expected that components will be cleaned and lubricated where
appropriate, also that any opened hose or pipe connections will be blanked to prevent excessive loss of hydraulic fluid and
ingress of dirt. Finally, please remember above all SAFETY MUST COME FIRST!
The manual is compiled in sections, the first three are numbered and contain information as follows:
1 = General Information - includes torque settings and service tools.
2 = Care & Safety - includes warnings and cautions pertinent to aspects of workshop procedures etc.
3 = Routine Maintenance - includes service schedules and recommended lubricants for the machine.
The remaining sections are alphabetically coded and deal with Dismantling, Overhaul etc. of specific components, for
example:
A = Optional Equipment
B = Body & Framework ...etc
The page numbering in each alphabetically coded section is not continuous. This allows for the insertion of new items in later
issues of the manual.
Section contents, technical data, circuit descriptions, operation descriptions etc. are inserted at the beginning of each
alphabetically coded section.
All sections are listed on the front cover; tabbed divider cards align directly with individual sections on the front cover for
rapid reference.
Illustrations which show a dismantled component are numbered as a guide to the dismantling sequence, which generally can
be reversed for assembly.
Torque settings are given as a ‘mean’ figure which may be varied by plus or minus 3%. Torque figures indicated are for dry
threads, hence for lubricated threads may be reduced by one third.
‘Left Hand’ and ‘Right Hand’ are as viewed from the rear of the machine.
References to alternative servicing intervals are to be treated on a ‘whichever occurs first’ basis.
i
Section 1 General Information
9803/9300
Section 1
i
Issue 2*
Contents Page No.
Identifying your Machine 1 - 1
Preparation for Storage 1 - 2
Preparation after Storage 1 - 2
Operation
Introduction 2 - 1
Before Entering the Cab 2 - 2
Machine Walk Round Inspection 2 - 2
Entering/Exiting the Cab 2 - 3
Cab 2 - 4
Opening and Closing the Door 2 - 4
Opening the Windscreen 2 - 5
Opening the Side Window 2 - 5
Heater Controls 2 - 6
Seat Control 2 - 7
Seat Belt 2 - 7
Engine and Track Controls, Switches and Instruments 3 - 1
Track Controls 3 - 2
Engine Controls 3 - 3
Switches 3 - 3
Instrument Cluster 3 - 5
Digital LCD Fuel Gauge 3 - 5
Dozer Controls 4 - 1
Excavator Controls 4 - 2
Slew Controls 4 - 3
Swing Boom 4 - 4
Raise / Lower Boom 4 - 4
Dipper 4 - 5
Bucket 4 - 5
Refuelling the Machine 5 - 1
Before Starting the Engine 5 - 2
Starting the Engine 5 - 3
Jump Starting the Engine 5 - 4
Cold Climate Warm Up 5 - 5
Operating in High Temperatures 5 - 6
Operating in Low Temperatures 5 - 6
Stopping and Parking the Machine 6 - 1
Preparing for Site Travel 6 - 2
Getting the Machine Moving 6 - 2
Working with the Dozer 7 - 1
Working with the Excavator 7 - 2
Installing a Bucket - non Quickhitch Models 7 - 2
Replacing Bucket Teeth 7 - 2
Bucket Selection 7 - 3
Removing a Bucket - non Quickhitch Models 7 - 3
Installing a Bucket on a Quickhitch 7 - 4
Removing a Bucket from a Quickhitch 7 - 5
Working on Slopes 7 - 5
Digging 7 - 6
Moving the Machine while Digging on the Level 7 - 7
Digging Near Walls 7 - 7
Digging up against Obstructions 7 - 7
Lifting (Craning) Regulations and Safe Working Loads 8 - 1
*
ii
Section 1 General Information
9803/9300
Section 1
ii
Issue 2*
Contents Page No.
Using the Attachments and Site Safety 8 - 2
Using the Attachments 9 - 1
Removing a Quickhitch Rockbreaker 9 - 2
Using Hand Held Tools 9 - 2
Moving a Disabled Machine 10 - 1
Transporting the Machine 10 - 2
Before Using the Trailer 10 - 3
Securing the Machine 10 - 3
Service Tools Numerical List 11 - 1
Sealing and Retaining Compounds 12 - 1
Service Tools
Section B - Body and Framework 13 - 1
Section C - Electrics 13 - 3
Section E - Hydraulics 14 - 1
Section K - Engine 14 - 2
*
*
*
1 - 1
The machine has a Data Plate attached to the left hand front
face of the machine.
The serial numbers of the machine, engine and gearboxes
are stamped on this plate.
If the engine is replaced, stamp the new serial number in
place of the old one.
Explanation of Vehicle Identification
Number (VIN)
Code A B C D E
Example SLP 0803 X E 0765001
A World Manufacturer Identification SLP = JCB
B Machine Model 0803 = 803
C Year of Manufacture
R = 1994 W = 1998 2 = 2002
S = 1995 X = 1999 3 = 2003
T = 1996 Y = 2000 4 = 2004
V = 1997 1 = 2001 5 = 2005
D Manufacturers Location E = England
E Machine Serial Number 0765001
Explanation of Engine Identification
Number
Code A B C D E
Example KE 50390 J 000001 y
A Engine Type
B Engine Parts List
C Country of Manufacture
D Engine Serial Number
E Year of Manufacture
Section 1 General Information
9803/9300
Section 1
1 - 1
Issue 1
J C BAMFORD EXCAVATORS LTD
ROCESTER, STAFFS, ENGLAND
CONSTRUCTOR
Product
Identification
Number
VIN Vehicle Identification Number
ENGINE SERIAL NUMBER
SLEW GEARBOX SERIAL NUMBER
WEIGHT kg
LH TRACK GEARBOX SERIAL NUMBER
RH TRACK GEARBOX SERIAL NUMBER
ENGINE POWER kW @ RPM
FM 14063
OSEN ISO9001
H04343
YEAR OF MANUFACTURE
1 - 2
Preparation for Storage
The operations to place a machine into storage (-15 °C [5 °F]
to 44 °C [111 °F]) are given below.
1 Park the machine safely with the bucket and dipper
rams retracted and the dig end outstretched. Lower the
boom until the bucket rests on the ground.
Lower the dozer to the ground.
2 Switch off the engine. Operate controls to release
pressure from the rams.
3 Disconnect the battery to prevent discharge.
4 Ensure that the fuel tank is filled to a maximum, leaving
no air space.
5 Ensure that the hydraulic tank is filled to maximum on
the sight gauge.
6 Spray exposed ram rods with Waxoyl.
7 Slacken off rubber tracks until no visible spring tension
exists.
Preparation after Storage
The operations to remove a machine into storage (-15 °C [5
°F] to 44 °C [111 °F]) are given below.
1 Lower the fuel level to ensure that sufficient air space
exists in the tank.
2 Check all oil and water levels, adjust contents to correct
levels as necessary.
3 Ensure that the battery is fully charged.
4 Reconnect the battery.
5 Remove the electrical supply from the fuel injection
pump solenoid.
6 Crank the engine for 20 seconds or until the oil
pressure warning light goes out.
7 Reconnect the electrical supply to the fuel injection
pump solenoid.
8 Start the engine. If the engine fails to start after several
attempts, bleed the fuel system.
9 Adjust track tensions.
10 Grease all lubrication points.
Section 1 General Information
9803/9300
Section 1
1 - 2
Issue 1
2 - 1
Introduction
This chapter is arranged to guide you step-by-step through
the task of learning how to use the machine. Read it through
from beginning to end. By the end of the chapter you should
have a good understanding of the machine and how to
operate it.
Pay particular attention to all safety messages. They are
there to warn you of possible hazards. Do not just read
them-think about what they mean. Understand the hazards
and how to avoid them.
If there is anything you do not understand, ask your JCB
dealer, he will be pleased to advise you.
When you have learned where the driving controls are and
what they do, practise using them. Practise driving the
machine in a safe, open space clear of other people.
Get to know the "feel" of the machine and its driving
controls.
Move on to the attachment controls only when you can drive
the machine confidently and safely.
Take great care when practising with the attachment
controls. Practise in an open space, keep people clear. Do
not jerk the controls: operate them slowly until you
understand the effect they have on the machine.
Finally, do not rush the job of learning. Take your time and
take it safely.
Remember BE CAREFUL
BE ALERT
BE SAFE
Section 1 General Information
9803/9300
Section 1
2 - 1
Issue 1
Operation
2 - 2
Before Entering the Cab
! WARNING
Walking or working under raised attachments can be
hazardous. You could be crushed by the attachments or
get caught in the linkages.
Lower the attachments to the ground before doing these
checks. If you are new to his machine, get an experienced
operator to lower them for you.
If there is nobody to help you, study this handbook until you
have learned how to lower the attachments. Also make sure
that the slew lock is engaged before doing these checks.
The following checks should be made each time you return
to the machine after leaving it for any period of time. We
advise you also to stop the machine occasionally during
long work sessions and do the checks again.
All these checks concern the serviceability of the machine.
Some concern your safety. Get your service engineer to
check and correct any defects.
Machine Walk Round Inspection
1 Check for cleanliness:
a Clean the windows and light lenses.
b Remove dirt and debris, especially from around the
linkages, rams, pivot points and radiator.
c Make sure the cab and handrails are clean and dry.
d Clean all safety decals. Replace any that are
missing or cannot be read.
2 Check for damage:
a Inspect the machine generally for damaged and
missing parts.
b Make sure that the bucket teeth are secure and in
good condition
c Make sure that all the pivot pins are secured
correctly in place
d Inspect the windows for cracks and damage
e Check for oil, fuel and coolant leakages beneath the
machine.
! WARNING
You could be killed or injured with damaged tracks. Do
not use the machine with damaged or excessively worn
tracks.
HOP27
3 Check the Tracks (Rubber)
Check for cut rubber and penetration by sharp objects.
Do not use a machine with damaged tracks.
4 Check the engine cover/panels and fuel filler cap
a Make sure the engine cover / panels are fitted and
securely locked.
b Make sure the fuel filler cap is tightly closed (we
also recommend that you lock it).
Section 1 General Information
9803/9300
Section 1
2 - 2
Issue 1
Operation
2 - 3
Entering/Exiting the Cab
! WARNING
Do not enter or exit the cab unless the arm rest or lever
lock is fully engaged (raised position).
To give sufficient clearance to enter or leave the cab, the left
lever lock must be raised.
When the lever lock and control pod are in the raised
position the excavator controls cannot be operated.
Lowering the lever lock to the normal position connects the
excavator controls and allows normal operation.
It is recommended that the engine is switched off before
exiting the machine.
! WARNING
Always face the machine when entering or leaving the
cab. Use the step(s) and handrails. Make sure the
step(s), handrails and your boot soles are clean and dry.
Do not jump from the machine. Do not use the machine
controls or lever locks as handholds, use the handrails.
Failure to follow these instructions could result in
unexpected movement of the machine.
Section 1 General Information
9803/9300
Section 1
2 - 3
Issue 1
Operation
2 - 4
Cab
The cab is bolted on top of the mainframe and is a welded
steel construction. The cab has a sliding windows on the
right side, a hinged door also containing an opening window
and an up and over windscreen. All windows are of
toughened glass. The cab is fitted with a windscreen
wash/wipe, heater fan, seat and all operating controls and
instruments.
! CAUTION
Do not drive the machine with the door unlatched. It
must be correctly closed when operating the machine.
Opening and Closing the Door
To open a door from the outside, unlock it with the key
provided to release the catch. To open a door from inside,
push lever B. Close the door from the inside by pulling it
firmly using the handle, it will latch itself. The door must be
in the closed position when operating the machine.
Section 1 General Information
9803/9300
Section 1
2 - 4
Issue 1
Operation
A386190
A
A
B
B
Thank you very much
for your reading. Please
Click Here Then Get
More Information.
NOTE:
If there is no response to
click on the link above,
please download the PDF
document first and then
click on it.
2 - 5
Opening the Windscreen
To open the up and over window, hold handles A, press
and hold down securing levers B. Lift the screen into a
position parallel with the roof using handles A, secure in
position by releasing levers B.
Note: Care must be taken when lowering the window not to
bump the top edge of the lower front window.
Opening the Side Windows and Door
Window
The side windows are held closed by catches A operated
from inside the cab.
To open the windows, operate the catches A and slide the
windows to the desired position.
To close a window, slide the window fully shut and check
that the catch A has located on the frame.
Section 1 General Information
9803/9300
Section 1
2 - 5
Issue 1
Operation
378000 A386200
A
A
A
A
B
B
A
A
2 - 6
Heater Controls
Air can be directed into the cab by selecting the required fan
speed using switch A. Temperature can be selected by
means of rotary dial B.
Section 1 General Information
9803/9300
Section 1
2 - 6
Issue 1
Operation
A395200
A B
2 - 7
Seat Control
! WARNING
Do not adjust the seat with the engine running otherwise
your legs could knock the control levers.
HOP31
Depending on the type of machine various adjustments can
be made to the positions of the control levers and the seat
consoles/armrests.
The operators seat can be adjusted for your comfort. A
correctly adjusted seat will reduce operator fatigue. Position
the seat so that you can comfortably reach the controls with
your feet on the cab floor. The seat is adjustable for height
and reach.
! CAUTION
Having adjusted the seat position, ensure the seat
locking lever has engaged fully.
A Backrest angle adjustment
B Horizontal adjustment
C Weight adjustment (50 - 120 kg [110 - 243 lb] )
D Seat cushion tilt control
Seat Belt
Fasten the seat belt
Sit correctly in the seat. Make sure the belt is not twisted.
Push the male fitting A into the buckle B until it latches.
Release the seat belt
Press button C and pull the recoil side of the belt outwards.
Note: Your machine is fitted with a seat belt, USE IT!
Section 1 General Information
9803/9300
Section 1
2 - 7
Issue 1
Operation
A386520
H26160
B
C
A
B
B
C
C
A
A
C
C
B
B
D
D
A
A
3 - 1
Engine and Track Controls, Switches and
Instruments
1 Left Track Control Lever
2 Right Track Control Lever
3 Right Hand Controller
3a Horn Button
4 Dozer Lever
4a Two speed Tracking Switch
5 Hand Throttle Lever
6 Instrument Cluster
6a Charge (Fault) Indicator
6b Coolant Temperature (High) Indicator
6c Not operational on this machine
6d Two Speed (High Engaged) indicator
6e SAE Controls (selected) indicator
6f Glow Plugs (On) indicator
6g Air Filter (Blocked) indicator
6h Not operational on this machine
6j Not operational on this machine
6k Engine Oil pressure (Low) indicator
7 Fuel Gauge
8 Hourmeter
9 Ignition Switch
10 Accessory Power Socket (Beacon etc.)
11 Blank
12 Windscreen Wash/Wipe Switch
13 Work Lights Switch
14 Rotating Beacon Switch
15 Left Hand Controller
15a Slew / Swing Selector Switch
Section 1 General Information
9803/9300
Section 1
3 - 1
Issue 1
Operation
H52200
0 1 SAE
3
4
5
6
9
15
11 12 13
1 2
14
4a
3a
6d
10
15a
6e
6g
8
6h
6k
6b 6c
7
6j 6f
6a

More Related Content

What's hot

Jcb 8052 midi excavator service repair manual sn802000 803999
Jcb 8052 midi excavator service repair manual sn802000 803999Jcb 8052 midi excavator service repair manual sn802000 803999
Jcb 8052 midi excavator service repair manual sn802000 803999
jfjnse jmfkdm
 
JCB 8052 MIDI EXCAVATOR Service Repair Manual SN802000-803999
JCB 8052 MIDI EXCAVATOR Service Repair Manual SN802000-803999JCB 8052 MIDI EXCAVATOR Service Repair Manual SN802000-803999
JCB 8052 MIDI EXCAVATOR Service Repair Manual SN802000-803999
jkdjksmde
 
JCB 165, 165HF ROBOT Service Repair Manual SN678000 Onwards
JCB 165, 165HF ROBOT Service Repair Manual SN678000 OnwardsJCB 165, 165HF ROBOT Service Repair Manual SN678000 Onwards
JCB 165, 165HF ROBOT Service Repair Manual SN678000 Onwards
yjshefjnd jkdfjmmd
 
Jcb js30 compact excavator service repair manual sn 2305191 to 2307191
Jcb js30 compact excavator service repair manual sn 2305191 to 2307191Jcb js30 compact excavator service repair manual sn 2305191 to 2307191
Jcb js30 compact excavator service repair manual sn 2305191 to 2307191
ujfjjskekkksmem
 
Jcb 8040 z mini excavator service repair manual sn 1056000 onwards
Jcb 8040 z mini excavator service repair manual sn 1056000 onwardsJcb 8040 z mini excavator service repair manual sn 1056000 onwards
Jcb 8040 z mini excavator service repair manual sn 1056000 onwards
jkmsedopl
 
JCB 3.0D 4×4, 3.5D 4×4 TELETRUK Service Repair Manual SN(78001 Onwards)
JCB 3.0D 4×4, 3.5D 4×4 TELETRUK Service Repair Manual SN(78001 Onwards)JCB 3.0D 4×4, 3.5D 4×4 TELETRUK Service Repair Manual SN(78001 Onwards)
JCB 3.0D 4×4, 3.5D 4×4 TELETRUK Service Repair Manual SN(78001 Onwards)
sjehfd ksejfm
 
JCB 2.5G, 3.0G TELETRUK Service Repair Manual SN:1175813 to 1176999
JCB 2.5G, 3.0G TELETRUK Service Repair Manual SN:1175813 to 1176999JCB 2.5G, 3.0G TELETRUK Service Repair Manual SN:1175813 to 1176999
JCB 2.5G, 3.0G TELETRUK Service Repair Manual SN:1175813 to 1176999
jdnnnd efjmdd
 
Jcb 411 ht, 413s, 417ht wheel loader service repair manual from 2094871 to 20...
Jcb 411 ht, 413s, 417ht wheel loader service repair manual from 2094871 to 20...Jcb 411 ht, 413s, 417ht wheel loader service repair manual from 2094871 to 20...
Jcb 411 ht, 413s, 417ht wheel loader service repair manual from 2094871 to 20...
fjjsjekksemm
 
JCB 530-120 TELESCOPIC HANDLER Service Repair Manual ALL:562601 Onwards
JCB 530-120 TELESCOPIC HANDLER Service Repair Manual ALL:562601 OnwardsJCB 530-120 TELESCOPIC HANDLER Service Repair Manual ALL:562601 Onwards
JCB 530-120 TELESCOPIC HANDLER Service Repair Manual ALL:562601 Onwards
kjksemjdmkdm
 
Jcb 8040 zts mini crawler excavator service repair manual sn 1056000
Jcb 8040 zts mini crawler excavator service repair manual sn 1056000Jcb 8040 zts mini crawler excavator service repair manual sn 1056000
Jcb 8040 zts mini crawler excavator service repair manual sn 1056000
dujjsjekkekmme
 
Jcb 532 120 telescopic handler service repair manual sn796000-1185999
Jcb 532 120 telescopic handler service repair manual sn796000-1185999Jcb 532 120 telescopic handler service repair manual sn796000-1185999
Jcb 532 120 telescopic handler service repair manual sn796000-1185999
fjskekdmmse
 
JCB 411 WHEELED LOADER Service Repair Manual SN:M1241500
JCB 411 WHEELED LOADER Service Repair Manual SN:M1241500JCB 411 WHEELED LOADER Service Repair Manual SN:M1241500
JCB 411 WHEELED LOADER Service Repair Manual SN:M1241500
jkjskmmd
 

What's hot (12)

Jcb 8052 midi excavator service repair manual sn802000 803999
Jcb 8052 midi excavator service repair manual sn802000 803999Jcb 8052 midi excavator service repair manual sn802000 803999
Jcb 8052 midi excavator service repair manual sn802000 803999
 
JCB 8052 MIDI EXCAVATOR Service Repair Manual SN802000-803999
JCB 8052 MIDI EXCAVATOR Service Repair Manual SN802000-803999JCB 8052 MIDI EXCAVATOR Service Repair Manual SN802000-803999
JCB 8052 MIDI EXCAVATOR Service Repair Manual SN802000-803999
 
JCB 165, 165HF ROBOT Service Repair Manual SN678000 Onwards
JCB 165, 165HF ROBOT Service Repair Manual SN678000 OnwardsJCB 165, 165HF ROBOT Service Repair Manual SN678000 Onwards
JCB 165, 165HF ROBOT Service Repair Manual SN678000 Onwards
 
Jcb js30 compact excavator service repair manual sn 2305191 to 2307191
Jcb js30 compact excavator service repair manual sn 2305191 to 2307191Jcb js30 compact excavator service repair manual sn 2305191 to 2307191
Jcb js30 compact excavator service repair manual sn 2305191 to 2307191
 
Jcb 8040 z mini excavator service repair manual sn 1056000 onwards
Jcb 8040 z mini excavator service repair manual sn 1056000 onwardsJcb 8040 z mini excavator service repair manual sn 1056000 onwards
Jcb 8040 z mini excavator service repair manual sn 1056000 onwards
 
JCB 3.0D 4×4, 3.5D 4×4 TELETRUK Service Repair Manual SN(78001 Onwards)
JCB 3.0D 4×4, 3.5D 4×4 TELETRUK Service Repair Manual SN(78001 Onwards)JCB 3.0D 4×4, 3.5D 4×4 TELETRUK Service Repair Manual SN(78001 Onwards)
JCB 3.0D 4×4, 3.5D 4×4 TELETRUK Service Repair Manual SN(78001 Onwards)
 
JCB 2.5G, 3.0G TELETRUK Service Repair Manual SN:1175813 to 1176999
JCB 2.5G, 3.0G TELETRUK Service Repair Manual SN:1175813 to 1176999JCB 2.5G, 3.0G TELETRUK Service Repair Manual SN:1175813 to 1176999
JCB 2.5G, 3.0G TELETRUK Service Repair Manual SN:1175813 to 1176999
 
Jcb 411 ht, 413s, 417ht wheel loader service repair manual from 2094871 to 20...
Jcb 411 ht, 413s, 417ht wheel loader service repair manual from 2094871 to 20...Jcb 411 ht, 413s, 417ht wheel loader service repair manual from 2094871 to 20...
Jcb 411 ht, 413s, 417ht wheel loader service repair manual from 2094871 to 20...
 
JCB 530-120 TELESCOPIC HANDLER Service Repair Manual ALL:562601 Onwards
JCB 530-120 TELESCOPIC HANDLER Service Repair Manual ALL:562601 OnwardsJCB 530-120 TELESCOPIC HANDLER Service Repair Manual ALL:562601 Onwards
JCB 530-120 TELESCOPIC HANDLER Service Repair Manual ALL:562601 Onwards
 
Jcb 8040 zts mini crawler excavator service repair manual sn 1056000
Jcb 8040 zts mini crawler excavator service repair manual sn 1056000Jcb 8040 zts mini crawler excavator service repair manual sn 1056000
Jcb 8040 zts mini crawler excavator service repair manual sn 1056000
 
Jcb 532 120 telescopic handler service repair manual sn796000-1185999
Jcb 532 120 telescopic handler service repair manual sn796000-1185999Jcb 532 120 telescopic handler service repair manual sn796000-1185999
Jcb 532 120 telescopic handler service repair manual sn796000-1185999
 
JCB 411 WHEELED LOADER Service Repair Manual SN:M1241500
JCB 411 WHEELED LOADER Service Repair Manual SN:M1241500JCB 411 WHEELED LOADER Service Repair Manual SN:M1241500
JCB 411 WHEELED LOADER Service Repair Manual SN:M1241500
 

More from fjjskedmmemm

Daewoo doosan dx160 w 3 (dieu exp) wheel excavator parts catalogue manual
Daewoo doosan dx160 w 3 (dieu exp) wheel excavator parts catalogue manualDaewoo doosan dx160 w 3 (dieu exp) wheel excavator parts catalogue manual
Daewoo doosan dx160 w 3 (dieu exp) wheel excavator parts catalogue manual
fjjskedmmemm
 
Daewoo doosan dx160 lc 3 crawler excavator parts catalogue manual
Daewoo doosan dx160 lc 3 crawler excavator parts catalogue manualDaewoo doosan dx160 lc 3 crawler excavator parts catalogue manual
Daewoo doosan dx160 lc 3 crawler excavator parts catalogue manual
fjjskedmmemm
 
Daewoo doosan dx140 w 3 (dieu exp) wheel excavator parts catalogue manual
Daewoo doosan dx140 w 3 (dieu exp) wheel excavator parts catalogue manualDaewoo doosan dx140 w 3 (dieu exp) wheel excavator parts catalogue manual
Daewoo doosan dx140 w 3 (dieu exp) wheel excavator parts catalogue manual
fjjskedmmemm
 
Daewoo doosan solar 030 plus mini crawler excavator parts catalogue manual (s...
Daewoo doosan solar 030 plus mini crawler excavator parts catalogue manual (s...Daewoo doosan solar 030 plus mini crawler excavator parts catalogue manual (s...
Daewoo doosan solar 030 plus mini crawler excavator parts catalogue manual (s...
fjjskedmmemm
 
Daewoo doosan solar 015 plus mini crawler excavator parts catalogue manual (s...
Daewoo doosan solar 015 plus mini crawler excavator parts catalogue manual (s...Daewoo doosan solar 015 plus mini crawler excavator parts catalogue manual (s...
Daewoo doosan solar 015 plus mini crawler excavator parts catalogue manual (s...
fjjskedmmemm
 
Daewoo doosan solar 015 plus mini crawler excavator parts catalogue manual
Daewoo doosan solar 015 plus mini crawler excavator parts catalogue manualDaewoo doosan solar 015 plus mini crawler excavator parts catalogue manual
Daewoo doosan solar 015 plus mini crawler excavator parts catalogue manual
fjjskedmmemm
 
Daewoo doosan solar 015 plus s018 vt mini crawler excavator parts catalogue ...
Daewoo doosan solar 015 plus  s018 vt mini crawler excavator parts catalogue ...Daewoo doosan solar 015 plus  s018 vt mini crawler excavator parts catalogue ...
Daewoo doosan solar 015 plus s018 vt mini crawler excavator parts catalogue ...
fjjskedmmemm
 
Daewoo doosan solar 015 mini crawler excavator parts catalogue manual
Daewoo doosan solar 015 mini crawler excavator parts catalogue manualDaewoo doosan solar 015 mini crawler excavator parts catalogue manual
Daewoo doosan solar 015 mini crawler excavator parts catalogue manual
fjjskedmmemm
 
Daewoo doosan solar 010 mini crawler excavator parts catalogue manual (sn 200...
Daewoo doosan solar 010 mini crawler excavator parts catalogue manual (sn 200...Daewoo doosan solar 010 mini crawler excavator parts catalogue manual (sn 200...
Daewoo doosan solar 010 mini crawler excavator parts catalogue manual (sn 200...
fjjskedmmemm
 
Daewoo doosan solar 010 mini crawler excavator parts catalogue manual
Daewoo doosan solar 010 mini crawler excavator parts catalogue manualDaewoo doosan solar 010 mini crawler excavator parts catalogue manual
Daewoo doosan solar 010 mini crawler excavator parts catalogue manual
fjjskedmmemm
 
Daewoo doosan mt41 moxy articulated dump truck parts catalogue manual
Daewoo doosan mt41 moxy articulated dump truck parts catalogue manualDaewoo doosan mt41 moxy articulated dump truck parts catalogue manual
Daewoo doosan mt41 moxy articulated dump truck parts catalogue manual
fjjskedmmemm
 
Daewoo doosan mt40 b moxy articulated dump truck parts catalogue manual
Daewoo doosan mt40 b moxy articulated dump truck parts catalogue manualDaewoo doosan mt40 b moxy articulated dump truck parts catalogue manual
Daewoo doosan mt40 b moxy articulated dump truck parts catalogue manual
fjjskedmmemm
 
Daewoo doosan mt36 moxy articulated dump truck parts catalogue manual sn 41...
Daewoo doosan mt36 moxy articulated dump truck parts catalogue manual   sn 41...Daewoo doosan mt36 moxy articulated dump truck parts catalogue manual   sn 41...
Daewoo doosan mt36 moxy articulated dump truck parts catalogue manual sn 41...
fjjskedmmemm
 
Daewoo doosan mt36 moxy articulated dump truck parts catalogue manual
Daewoo doosan mt36 moxy articulated dump truck parts catalogue manualDaewoo doosan mt36 moxy articulated dump truck parts catalogue manual
Daewoo doosan mt36 moxy articulated dump truck parts catalogue manual
fjjskedmmemm
 
Daewoo doosan mt31 moxy articulated dump truck parts catalogue manual sn 71...
Daewoo doosan mt31 moxy articulated dump truck parts catalogue manual   sn 71...Daewoo doosan mt31 moxy articulated dump truck parts catalogue manual   sn 71...
Daewoo doosan mt31 moxy articulated dump truck parts catalogue manual sn 71...
fjjskedmmemm
 
Daewoo doosan mt26 moxy articulated dump truck parts catalogue manual sn 71...
Daewoo doosan mt26 moxy articulated dump truck parts catalogue manual   sn 71...Daewoo doosan mt26 moxy articulated dump truck parts catalogue manual   sn 71...
Daewoo doosan mt26 moxy articulated dump truck parts catalogue manual sn 71...
fjjskedmmemm
 
Daewoo doosan mt25 moxy articulated dump truck parts catalogue manual sn 71...
Daewoo doosan mt25 moxy articulated dump truck parts catalogue manual   sn 71...Daewoo doosan mt25 moxy articulated dump truck parts catalogue manual   sn 71...
Daewoo doosan mt25 moxy articulated dump truck parts catalogue manual sn 71...
fjjskedmmemm
 

More from fjjskedmmemm (20)

Daewoo doosan dx160 w 3 (dieu exp) wheel excavator parts catalogue manual
Daewoo doosan dx160 w 3 (dieu exp) wheel excavator parts catalogue manualDaewoo doosan dx160 w 3 (dieu exp) wheel excavator parts catalogue manual
Daewoo doosan dx160 w 3 (dieu exp) wheel excavator parts catalogue manual
 
Daewoo doosan dx160 lc 3 crawler excavator parts catalogue manual
Daewoo doosan dx160 lc 3 crawler excavator parts catalogue manualDaewoo doosan dx160 lc 3 crawler excavator parts catalogue manual
Daewoo doosan dx160 lc 3 crawler excavator parts catalogue manual
 
Daewoo doosan dx140 w 3 (dieu exp) wheel excavator parts catalogue manual
Daewoo doosan dx140 w 3 (dieu exp) wheel excavator parts catalogue manualDaewoo doosan dx140 w 3 (dieu exp) wheel excavator parts catalogue manual
Daewoo doosan dx140 w 3 (dieu exp) wheel excavator parts catalogue manual
 
Daewoo doosan solar 030 plus mini crawler excavator parts catalogue manual (s...
Daewoo doosan solar 030 plus mini crawler excavator parts catalogue manual (s...Daewoo doosan solar 030 plus mini crawler excavator parts catalogue manual (s...
Daewoo doosan solar 030 plus mini crawler excavator parts catalogue manual (s...
 
Daewoo doosan solar 015 plus mini crawler excavator parts catalogue manual (s...
Daewoo doosan solar 015 plus mini crawler excavator parts catalogue manual (s...Daewoo doosan solar 015 plus mini crawler excavator parts catalogue manual (s...
Daewoo doosan solar 015 plus mini crawler excavator parts catalogue manual (s...
 
Daewoo doosan solar 015 plus mini crawler excavator parts catalogue manual
Daewoo doosan solar 015 plus mini crawler excavator parts catalogue manualDaewoo doosan solar 015 plus mini crawler excavator parts catalogue manual
Daewoo doosan solar 015 plus mini crawler excavator parts catalogue manual
 
Daewoo doosan solar 015 plus s018 vt mini crawler excavator parts catalogue ...
Daewoo doosan solar 015 plus  s018 vt mini crawler excavator parts catalogue ...Daewoo doosan solar 015 plus  s018 vt mini crawler excavator parts catalogue ...
Daewoo doosan solar 015 plus s018 vt mini crawler excavator parts catalogue ...
 
Daewoo doosan solar 015 mini crawler excavator parts catalogue manual
Daewoo doosan solar 015 mini crawler excavator parts catalogue manualDaewoo doosan solar 015 mini crawler excavator parts catalogue manual
Daewoo doosan solar 015 mini crawler excavator parts catalogue manual
 
Daewoo doosan solar 010 mini crawler excavator parts catalogue manual (sn 200...
Daewoo doosan solar 010 mini crawler excavator parts catalogue manual (sn 200...Daewoo doosan solar 010 mini crawler excavator parts catalogue manual (sn 200...
Daewoo doosan solar 010 mini crawler excavator parts catalogue manual (sn 200...
 
Daewoo doosan solar 010 mini crawler excavator parts catalogue manual
Daewoo doosan solar 010 mini crawler excavator parts catalogue manualDaewoo doosan solar 010 mini crawler excavator parts catalogue manual
Daewoo doosan solar 010 mini crawler excavator parts catalogue manual
 
Daewoo doosan mt41 moxy articulated dump truck parts catalogue manual
Daewoo doosan mt41 moxy articulated dump truck parts catalogue manualDaewoo doosan mt41 moxy articulated dump truck parts catalogue manual
Daewoo doosan mt41 moxy articulated dump truck parts catalogue manual
 
Daewoo doosan mt40 b moxy articulated dump truck parts catalogue manual
Daewoo doosan mt40 b moxy articulated dump truck parts catalogue manualDaewoo doosan mt40 b moxy articulated dump truck parts catalogue manual
Daewoo doosan mt40 b moxy articulated dump truck parts catalogue manual
 
Daewoo doosan mt36 moxy articulated dump truck parts catalogue manual sn 41...
Daewoo doosan mt36 moxy articulated dump truck parts catalogue manual   sn 41...Daewoo doosan mt36 moxy articulated dump truck parts catalogue manual   sn 41...
Daewoo doosan mt36 moxy articulated dump truck parts catalogue manual sn 41...
 
Daewoo doosan mt36 moxy articulated dump truck parts catalogue manual
Daewoo doosan mt36 moxy articulated dump truck parts catalogue manualDaewoo doosan mt36 moxy articulated dump truck parts catalogue manual
Daewoo doosan mt36 moxy articulated dump truck parts catalogue manual
 
Daewoo doosan mt31 moxy articulated dump truck parts catalogue manual sn 71...
Daewoo doosan mt31 moxy articulated dump truck parts catalogue manual   sn 71...Daewoo doosan mt31 moxy articulated dump truck parts catalogue manual   sn 71...
Daewoo doosan mt31 moxy articulated dump truck parts catalogue manual sn 71...
 
Daewoo doosan mt31 moxy articulated dump truck parts catalogue manual sn 71...
Daewoo doosan mt31 moxy articulated dump truck parts catalogue manual   sn 71...Daewoo doosan mt31 moxy articulated dump truck parts catalogue manual   sn 71...
Daewoo doosan mt31 moxy articulated dump truck parts catalogue manual sn 71...
 
Daewoo doosan mt26 moxy articulated dump truck parts catalogue manual sn 71...
Daewoo doosan mt26 moxy articulated dump truck parts catalogue manual   sn 71...Daewoo doosan mt26 moxy articulated dump truck parts catalogue manual   sn 71...
Daewoo doosan mt26 moxy articulated dump truck parts catalogue manual sn 71...
 
Daewoo doosan mt26 moxy articulated dump truck parts catalogue manual sn 71...
Daewoo doosan mt26 moxy articulated dump truck parts catalogue manual   sn 71...Daewoo doosan mt26 moxy articulated dump truck parts catalogue manual   sn 71...
Daewoo doosan mt26 moxy articulated dump truck parts catalogue manual sn 71...
 
Daewoo doosan mt25 moxy articulated dump truck parts catalogue manual sn 71...
Daewoo doosan mt25 moxy articulated dump truck parts catalogue manual   sn 71...Daewoo doosan mt25 moxy articulated dump truck parts catalogue manual   sn 71...
Daewoo doosan mt25 moxy articulated dump truck parts catalogue manual sn 71...
 
Daewoo doosan mt25 moxy articulated dump truck parts catalogue manual sn 71...
Daewoo doosan mt25 moxy articulated dump truck parts catalogue manual   sn 71...Daewoo doosan mt25 moxy articulated dump truck parts catalogue manual   sn 71...
Daewoo doosan mt25 moxy articulated dump truck parts catalogue manual sn 71...
 

Recently uploaded

What Exactly Is The Common Rail Direct Injection System & How Does It Work
What Exactly Is The Common Rail Direct Injection System & How Does It WorkWhat Exactly Is The Common Rail Direct Injection System & How Does It Work
What Exactly Is The Common Rail Direct Injection System & How Does It Work
Motor Cars International
 
What Does the Active Steering Malfunction Warning Mean for Your BMW
What Does the Active Steering Malfunction Warning Mean for Your BMWWhat Does the Active Steering Malfunction Warning Mean for Your BMW
What Does the Active Steering Malfunction Warning Mean for Your BMW
Tanner Motors
 
Empowering Limpopo Entrepreneurs Consulting SMEs.pptx
Empowering Limpopo Entrepreneurs  Consulting SMEs.pptxEmpowering Limpopo Entrepreneurs  Consulting SMEs.pptx
Empowering Limpopo Entrepreneurs Consulting SMEs.pptx
Precious Mvulane CA (SA),RA
 
Antique Plastic Traders Company Profile
Antique Plastic Traders Company ProfileAntique Plastic Traders Company Profile
Antique Plastic Traders Company Profile
Antique Plastic Traders
 
What Does the PARKTRONIC Inoperative, See Owner's Manual Message Mean for You...
What Does the PARKTRONIC Inoperative, See Owner's Manual Message Mean for You...What Does the PARKTRONIC Inoperative, See Owner's Manual Message Mean for You...
What Does the PARKTRONIC Inoperative, See Owner's Manual Message Mean for You...
Autohaus Service and Sales
 
Tyre Industrymarket overview with examples of CEAT
Tyre Industrymarket overview with examples of CEATTyre Industrymarket overview with examples of CEAT
Tyre Industrymarket overview with examples of CEAT
kshamashah95
 
gtyccccccccccccccccccccccccccccccccccccccccccccccccccccccc
gtycccccccccccccccccccccccccccccccccccccccccccccccccccccccgtyccccccccccccccccccccccccccccccccccccccccccccccccccccccc
gtyccccccccccccccccccccccccccccccccccccccccccccccccccccccc
4thzenzstar
 
Core technology of Hyundai Motor Group's EV platform 'E-GMP'
Core technology of Hyundai Motor Group's EV platform 'E-GMP'Core technology of Hyundai Motor Group's EV platform 'E-GMP'
Core technology of Hyundai Motor Group's EV platform 'E-GMP'
Hyundai Motor Group
 
What Causes 'Trans Failsafe Prog' to Trigger in BMW X5
What Causes 'Trans Failsafe Prog' to Trigger in BMW X5What Causes 'Trans Failsafe Prog' to Trigger in BMW X5
What Causes 'Trans Failsafe Prog' to Trigger in BMW X5
European Service Center
 
Ec330B Lc Excavator Volvo Service Repair.pdf
Ec330B Lc Excavator Volvo Service Repair.pdfEc330B Lc Excavator Volvo Service Repair.pdf
Ec330B Lc Excavator Volvo Service Repair.pdf
Excavator
 
Why Isn't Your BMW X5's Comfort Access Functioning Properly Find Out Here
Why Isn't Your BMW X5's Comfort Access Functioning Properly Find Out HereWhy Isn't Your BMW X5's Comfort Access Functioning Properly Find Out Here
Why Isn't Your BMW X5's Comfort Access Functioning Properly Find Out Here
Masters European & Gapanese Auto Repair
 
Ec460b lc Excavator Volvo Service Repair.pdf
Ec460b lc Excavator Volvo Service Repair.pdfEc460b lc Excavator Volvo Service Repair.pdf
Ec460b lc Excavator Volvo Service Repair.pdf
Excavator
 
一比一原版BC毕业证波士顿学院毕业证成绩单如何办理
一比一原版BC毕业证波士顿学院毕业证成绩单如何办理一比一原版BC毕业证波士顿学院毕业证成绩单如何办理
一比一原版BC毕业证波士顿学院毕业证成绩单如何办理
amvovau
 
Things to remember while upgrading the brakes of your car
Things to remember while upgrading the brakes of your carThings to remember while upgrading the brakes of your car
Things to remember while upgrading the brakes of your car
jennifermiller8137
 
Statistics5,c.xz,c.;c.;d.c;d;ssssss.pptx
Statistics5,c.xz,c.;c.;d.c;d;ssssss.pptxStatistics5,c.xz,c.;c.;d.c;d;ssssss.pptx
Statistics5,c.xz,c.;c.;d.c;d;ssssss.pptx
coc7987515756
 
5 Warning Signs Your BMW's Intelligent Battery Sensor Needs Attention
5 Warning Signs Your BMW's Intelligent Battery Sensor Needs Attention5 Warning Signs Your BMW's Intelligent Battery Sensor Needs Attention
5 Warning Signs Your BMW's Intelligent Battery Sensor Needs Attention
Bertini's German Motors
 
Why Is Your BMW X3 Hood Not Responding To Release Commands
Why Is Your BMW X3 Hood Not Responding To Release CommandsWhy Is Your BMW X3 Hood Not Responding To Release Commands
Why Is Your BMW X3 Hood Not Responding To Release Commands
Dart Auto
 
一比一原版SDSU毕业证圣地亚哥州立大学毕业证成绩单如何办理
一比一原版SDSU毕业证圣地亚哥州立大学毕业证成绩单如何办理一比一原版SDSU毕业证圣地亚哥州立大学毕业证成绩单如何办理
一比一原版SDSU毕业证圣地亚哥州立大学毕业证成绩单如何办理
psavhef
 
Wondering if Your Mercedes EIS is at Fault Here’s How to Tell
Wondering if Your Mercedes EIS is at Fault Here’s How to TellWondering if Your Mercedes EIS is at Fault Here’s How to Tell
Wondering if Your Mercedes EIS is at Fault Here’s How to Tell
Vic Auto Collision & Repair
 

Recently uploaded (19)

What Exactly Is The Common Rail Direct Injection System & How Does It Work
What Exactly Is The Common Rail Direct Injection System & How Does It WorkWhat Exactly Is The Common Rail Direct Injection System & How Does It Work
What Exactly Is The Common Rail Direct Injection System & How Does It Work
 
What Does the Active Steering Malfunction Warning Mean for Your BMW
What Does the Active Steering Malfunction Warning Mean for Your BMWWhat Does the Active Steering Malfunction Warning Mean for Your BMW
What Does the Active Steering Malfunction Warning Mean for Your BMW
 
Empowering Limpopo Entrepreneurs Consulting SMEs.pptx
Empowering Limpopo Entrepreneurs  Consulting SMEs.pptxEmpowering Limpopo Entrepreneurs  Consulting SMEs.pptx
Empowering Limpopo Entrepreneurs Consulting SMEs.pptx
 
Antique Plastic Traders Company Profile
Antique Plastic Traders Company ProfileAntique Plastic Traders Company Profile
Antique Plastic Traders Company Profile
 
What Does the PARKTRONIC Inoperative, See Owner's Manual Message Mean for You...
What Does the PARKTRONIC Inoperative, See Owner's Manual Message Mean for You...What Does the PARKTRONIC Inoperative, See Owner's Manual Message Mean for You...
What Does the PARKTRONIC Inoperative, See Owner's Manual Message Mean for You...
 
Tyre Industrymarket overview with examples of CEAT
Tyre Industrymarket overview with examples of CEATTyre Industrymarket overview with examples of CEAT
Tyre Industrymarket overview with examples of CEAT
 
gtyccccccccccccccccccccccccccccccccccccccccccccccccccccccc
gtycccccccccccccccccccccccccccccccccccccccccccccccccccccccgtyccccccccccccccccccccccccccccccccccccccccccccccccccccccc
gtyccccccccccccccccccccccccccccccccccccccccccccccccccccccc
 
Core technology of Hyundai Motor Group's EV platform 'E-GMP'
Core technology of Hyundai Motor Group's EV platform 'E-GMP'Core technology of Hyundai Motor Group's EV platform 'E-GMP'
Core technology of Hyundai Motor Group's EV platform 'E-GMP'
 
What Causes 'Trans Failsafe Prog' to Trigger in BMW X5
What Causes 'Trans Failsafe Prog' to Trigger in BMW X5What Causes 'Trans Failsafe Prog' to Trigger in BMW X5
What Causes 'Trans Failsafe Prog' to Trigger in BMW X5
 
Ec330B Lc Excavator Volvo Service Repair.pdf
Ec330B Lc Excavator Volvo Service Repair.pdfEc330B Lc Excavator Volvo Service Repair.pdf
Ec330B Lc Excavator Volvo Service Repair.pdf
 
Why Isn't Your BMW X5's Comfort Access Functioning Properly Find Out Here
Why Isn't Your BMW X5's Comfort Access Functioning Properly Find Out HereWhy Isn't Your BMW X5's Comfort Access Functioning Properly Find Out Here
Why Isn't Your BMW X5's Comfort Access Functioning Properly Find Out Here
 
Ec460b lc Excavator Volvo Service Repair.pdf
Ec460b lc Excavator Volvo Service Repair.pdfEc460b lc Excavator Volvo Service Repair.pdf
Ec460b lc Excavator Volvo Service Repair.pdf
 
一比一原版BC毕业证波士顿学院毕业证成绩单如何办理
一比一原版BC毕业证波士顿学院毕业证成绩单如何办理一比一原版BC毕业证波士顿学院毕业证成绩单如何办理
一比一原版BC毕业证波士顿学院毕业证成绩单如何办理
 
Things to remember while upgrading the brakes of your car
Things to remember while upgrading the brakes of your carThings to remember while upgrading the brakes of your car
Things to remember while upgrading the brakes of your car
 
Statistics5,c.xz,c.;c.;d.c;d;ssssss.pptx
Statistics5,c.xz,c.;c.;d.c;d;ssssss.pptxStatistics5,c.xz,c.;c.;d.c;d;ssssss.pptx
Statistics5,c.xz,c.;c.;d.c;d;ssssss.pptx
 
5 Warning Signs Your BMW's Intelligent Battery Sensor Needs Attention
5 Warning Signs Your BMW's Intelligent Battery Sensor Needs Attention5 Warning Signs Your BMW's Intelligent Battery Sensor Needs Attention
5 Warning Signs Your BMW's Intelligent Battery Sensor Needs Attention
 
Why Is Your BMW X3 Hood Not Responding To Release Commands
Why Is Your BMW X3 Hood Not Responding To Release CommandsWhy Is Your BMW X3 Hood Not Responding To Release Commands
Why Is Your BMW X3 Hood Not Responding To Release Commands
 
一比一原版SDSU毕业证圣地亚哥州立大学毕业证成绩单如何办理
一比一原版SDSU毕业证圣地亚哥州立大学毕业证成绩单如何办理一比一原版SDSU毕业证圣地亚哥州立大学毕业证成绩单如何办理
一比一原版SDSU毕业证圣地亚哥州立大学毕业证成绩单如何办理
 
Wondering if Your Mercedes EIS is at Fault Here’s How to Tell
Wondering if Your Mercedes EIS is at Fault Here’s How to TellWondering if Your Mercedes EIS is at Fault Here’s How to Tell
Wondering if Your Mercedes EIS is at Fault Here’s How to Tell
 

Jcb 8027 z mini excavator service repair manual sn898000 onwards

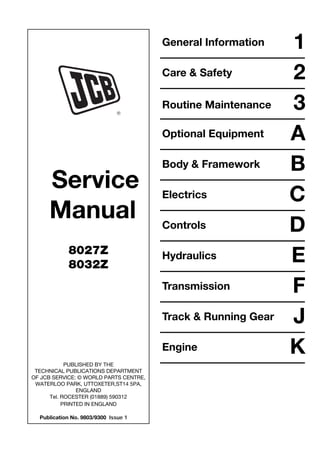
  • 1. Service Manual 8027Z 8032Z PUBLISHED BY THE TECHNICAL PUBLICATIONS DEPARTMENT OF JCB SERVICE: © WORLD PARTS CENTRE, WATERLOO PARK, UTTOXETER,ST14 5PA, ENGLAND Tel. ROCESTER (01889) 590312 PRINTED IN ENGLAND Publication No. 9803/9300 Issue 1 General Information 1 Care & Safety 2 3 Optional Equipment A Body & Framework B Electrics C Controls D Hydraulics E Transmission F J Track & Running Gear Engine K Routine Maintenance Open front screen
  • 2. 9803/9300 Issue 1 Introduction This publication is designed for the benefit of JCB Distributor Service Engineers who are receiving, or have received, training by JCB Technical Training Department. It is assumed that these personnel have a sound knowledge of workshop practice, safety procedures and general techniques associated with the maintenance and repair of hydraulic earthmoving equipment. Therefore, these basic subjects generally are omitted from this manual, the intention being to convey only more specialised information concerning particular aspects of a machine or component. For example, renewal of oil seals, gaskets etc., and any component showing obvious signs of wear oar damage is expected as a matter of course and, therefore, information of this nature is included only in the context of specialised procedures or where a range of wear tolerances is required. Similarly, it is expected that components will be cleaned and lubricated where appropriate, also that any opened hose or pipe connections will be blanked to prevent excessive loss of hydraulic fluid and ingress of dirt. Finally, please remember above all SAFETY MUST COME FIRST! The manual is compiled in sections, the first three are numbered and contain information as follows: 1 = General Information - includes torque settings and service tools. 2 = Care & Safety - includes warnings and cautions pertinent to aspects of workshop procedures etc. 3 = Routine Maintenance - includes service schedules and recommended lubricants for the machine. The remaining sections are alphabetically coded and deal with Dismantling, Overhaul etc. of specific components, for example: A = Optional Equipment B = Body & Framework ...etc The page numbering in each alphabetically coded section is not continuous. This allows for the insertion of new items in later issues of the manual. Section contents, technical data, circuit descriptions, operation descriptions etc. are inserted at the beginning of each alphabetically coded section. All sections are listed on the front cover; tabbed divider cards align directly with individual sections on the front cover for rapid reference. Illustrations which show a dismantled component are numbered as a guide to the dismantling sequence, which generally can be reversed for assembly. Torque settings are given as a ‘mean’ figure which may be varied by plus or minus 3%. Torque figures indicated are for dry threads, hence for lubricated threads may be reduced by one third. ‘Left Hand’ and ‘Right Hand’ are as viewed from the rear of the machine. References to alternative servicing intervals are to be treated on a ‘whichever occurs first’ basis.
  • 3. i Section 1 General Information 9803/9300 Section 1 i Issue 2* Contents Page No. Identifying your Machine 1 - 1 Preparation for Storage 1 - 2 Preparation after Storage 1 - 2 Operation Introduction 2 - 1 Before Entering the Cab 2 - 2 Machine Walk Round Inspection 2 - 2 Entering/Exiting the Cab 2 - 3 Cab 2 - 4 Opening and Closing the Door 2 - 4 Opening the Windscreen 2 - 5 Opening the Side Window 2 - 5 Heater Controls 2 - 6 Seat Control 2 - 7 Seat Belt 2 - 7 Engine and Track Controls, Switches and Instruments 3 - 1 Track Controls 3 - 2 Engine Controls 3 - 3 Switches 3 - 3 Instrument Cluster 3 - 5 Digital LCD Fuel Gauge 3 - 5 Dozer Controls 4 - 1 Excavator Controls 4 - 2 Slew Controls 4 - 3 Swing Boom 4 - 4 Raise / Lower Boom 4 - 4 Dipper 4 - 5 Bucket 4 - 5 Refuelling the Machine 5 - 1 Before Starting the Engine 5 - 2 Starting the Engine 5 - 3 Jump Starting the Engine 5 - 4 Cold Climate Warm Up 5 - 5 Operating in High Temperatures 5 - 6 Operating in Low Temperatures 5 - 6 Stopping and Parking the Machine 6 - 1 Preparing for Site Travel 6 - 2 Getting the Machine Moving 6 - 2 Working with the Dozer 7 - 1 Working with the Excavator 7 - 2 Installing a Bucket - non Quickhitch Models 7 - 2 Replacing Bucket Teeth 7 - 2 Bucket Selection 7 - 3 Removing a Bucket - non Quickhitch Models 7 - 3 Installing a Bucket on a Quickhitch 7 - 4 Removing a Bucket from a Quickhitch 7 - 5 Working on Slopes 7 - 5 Digging 7 - 6 Moving the Machine while Digging on the Level 7 - 7 Digging Near Walls 7 - 7 Digging up against Obstructions 7 - 7 Lifting (Craning) Regulations and Safe Working Loads 8 - 1 *
  • 4. ii Section 1 General Information 9803/9300 Section 1 ii Issue 2* Contents Page No. Using the Attachments and Site Safety 8 - 2 Using the Attachments 9 - 1 Removing a Quickhitch Rockbreaker 9 - 2 Using Hand Held Tools 9 - 2 Moving a Disabled Machine 10 - 1 Transporting the Machine 10 - 2 Before Using the Trailer 10 - 3 Securing the Machine 10 - 3 Service Tools Numerical List 11 - 1 Sealing and Retaining Compounds 12 - 1 Service Tools Section B - Body and Framework 13 - 1 Section C - Electrics 13 - 3 Section E - Hydraulics 14 - 1 Section K - Engine 14 - 2 * * *
  • 5. 1 - 1 The machine has a Data Plate attached to the left hand front face of the machine. The serial numbers of the machine, engine and gearboxes are stamped on this plate. If the engine is replaced, stamp the new serial number in place of the old one. Explanation of Vehicle Identification Number (VIN) Code A B C D E Example SLP 0803 X E 0765001 A World Manufacturer Identification SLP = JCB B Machine Model 0803 = 803 C Year of Manufacture R = 1994 W = 1998 2 = 2002 S = 1995 X = 1999 3 = 2003 T = 1996 Y = 2000 4 = 2004 V = 1997 1 = 2001 5 = 2005 D Manufacturers Location E = England E Machine Serial Number 0765001 Explanation of Engine Identification Number Code A B C D E Example KE 50390 J 000001 y A Engine Type B Engine Parts List C Country of Manufacture D Engine Serial Number E Year of Manufacture Section 1 General Information 9803/9300 Section 1 1 - 1 Issue 1 J C BAMFORD EXCAVATORS LTD ROCESTER, STAFFS, ENGLAND CONSTRUCTOR Product Identification Number VIN Vehicle Identification Number ENGINE SERIAL NUMBER SLEW GEARBOX SERIAL NUMBER WEIGHT kg LH TRACK GEARBOX SERIAL NUMBER RH TRACK GEARBOX SERIAL NUMBER ENGINE POWER kW @ RPM FM 14063 OSEN ISO9001 H04343 YEAR OF MANUFACTURE
  • 6. 1 - 2 Preparation for Storage The operations to place a machine into storage (-15 °C [5 °F] to 44 °C [111 °F]) are given below. 1 Park the machine safely with the bucket and dipper rams retracted and the dig end outstretched. Lower the boom until the bucket rests on the ground. Lower the dozer to the ground. 2 Switch off the engine. Operate controls to release pressure from the rams. 3 Disconnect the battery to prevent discharge. 4 Ensure that the fuel tank is filled to a maximum, leaving no air space. 5 Ensure that the hydraulic tank is filled to maximum on the sight gauge. 6 Spray exposed ram rods with Waxoyl. 7 Slacken off rubber tracks until no visible spring tension exists. Preparation after Storage The operations to remove a machine into storage (-15 °C [5 °F] to 44 °C [111 °F]) are given below. 1 Lower the fuel level to ensure that sufficient air space exists in the tank. 2 Check all oil and water levels, adjust contents to correct levels as necessary. 3 Ensure that the battery is fully charged. 4 Reconnect the battery. 5 Remove the electrical supply from the fuel injection pump solenoid. 6 Crank the engine for 20 seconds or until the oil pressure warning light goes out. 7 Reconnect the electrical supply to the fuel injection pump solenoid. 8 Start the engine. If the engine fails to start after several attempts, bleed the fuel system. 9 Adjust track tensions. 10 Grease all lubrication points. Section 1 General Information 9803/9300 Section 1 1 - 2 Issue 1
  • 7. 2 - 1 Introduction This chapter is arranged to guide you step-by-step through the task of learning how to use the machine. Read it through from beginning to end. By the end of the chapter you should have a good understanding of the machine and how to operate it. Pay particular attention to all safety messages. They are there to warn you of possible hazards. Do not just read them-think about what they mean. Understand the hazards and how to avoid them. If there is anything you do not understand, ask your JCB dealer, he will be pleased to advise you. When you have learned where the driving controls are and what they do, practise using them. Practise driving the machine in a safe, open space clear of other people. Get to know the "feel" of the machine and its driving controls. Move on to the attachment controls only when you can drive the machine confidently and safely. Take great care when practising with the attachment controls. Practise in an open space, keep people clear. Do not jerk the controls: operate them slowly until you understand the effect they have on the machine. Finally, do not rush the job of learning. Take your time and take it safely. Remember BE CAREFUL BE ALERT BE SAFE Section 1 General Information 9803/9300 Section 1 2 - 1 Issue 1 Operation
  • 8. 2 - 2 Before Entering the Cab ! WARNING Walking or working under raised attachments can be hazardous. You could be crushed by the attachments or get caught in the linkages. Lower the attachments to the ground before doing these checks. If you are new to his machine, get an experienced operator to lower them for you. If there is nobody to help you, study this handbook until you have learned how to lower the attachments. Also make sure that the slew lock is engaged before doing these checks. The following checks should be made each time you return to the machine after leaving it for any period of time. We advise you also to stop the machine occasionally during long work sessions and do the checks again. All these checks concern the serviceability of the machine. Some concern your safety. Get your service engineer to check and correct any defects. Machine Walk Round Inspection 1 Check for cleanliness: a Clean the windows and light lenses. b Remove dirt and debris, especially from around the linkages, rams, pivot points and radiator. c Make sure the cab and handrails are clean and dry. d Clean all safety decals. Replace any that are missing or cannot be read. 2 Check for damage: a Inspect the machine generally for damaged and missing parts. b Make sure that the bucket teeth are secure and in good condition c Make sure that all the pivot pins are secured correctly in place d Inspect the windows for cracks and damage e Check for oil, fuel and coolant leakages beneath the machine. ! WARNING You could be killed or injured with damaged tracks. Do not use the machine with damaged or excessively worn tracks. HOP27 3 Check the Tracks (Rubber) Check for cut rubber and penetration by sharp objects. Do not use a machine with damaged tracks. 4 Check the engine cover/panels and fuel filler cap a Make sure the engine cover / panels are fitted and securely locked. b Make sure the fuel filler cap is tightly closed (we also recommend that you lock it). Section 1 General Information 9803/9300 Section 1 2 - 2 Issue 1 Operation
  • 9. 2 - 3 Entering/Exiting the Cab ! WARNING Do not enter or exit the cab unless the arm rest or lever lock is fully engaged (raised position). To give sufficient clearance to enter or leave the cab, the left lever lock must be raised. When the lever lock and control pod are in the raised position the excavator controls cannot be operated. Lowering the lever lock to the normal position connects the excavator controls and allows normal operation. It is recommended that the engine is switched off before exiting the machine. ! WARNING Always face the machine when entering or leaving the cab. Use the step(s) and handrails. Make sure the step(s), handrails and your boot soles are clean and dry. Do not jump from the machine. Do not use the machine controls or lever locks as handholds, use the handrails. Failure to follow these instructions could result in unexpected movement of the machine. Section 1 General Information 9803/9300 Section 1 2 - 3 Issue 1 Operation
  • 10. 2 - 4 Cab The cab is bolted on top of the mainframe and is a welded steel construction. The cab has a sliding windows on the right side, a hinged door also containing an opening window and an up and over windscreen. All windows are of toughened glass. The cab is fitted with a windscreen wash/wipe, heater fan, seat and all operating controls and instruments. ! CAUTION Do not drive the machine with the door unlatched. It must be correctly closed when operating the machine. Opening and Closing the Door To open a door from the outside, unlock it with the key provided to release the catch. To open a door from inside, push lever B. Close the door from the inside by pulling it firmly using the handle, it will latch itself. The door must be in the closed position when operating the machine. Section 1 General Information 9803/9300 Section 1 2 - 4 Issue 1 Operation A386190 A A B B
  • 11. Thank you very much for your reading. Please Click Here Then Get More Information. NOTE: If there is no response to click on the link above, please download the PDF document first and then click on it.
  • 12. 2 - 5 Opening the Windscreen To open the up and over window, hold handles A, press and hold down securing levers B. Lift the screen into a position parallel with the roof using handles A, secure in position by releasing levers B. Note: Care must be taken when lowering the window not to bump the top edge of the lower front window. Opening the Side Windows and Door Window The side windows are held closed by catches A operated from inside the cab. To open the windows, operate the catches A and slide the windows to the desired position. To close a window, slide the window fully shut and check that the catch A has located on the frame. Section 1 General Information 9803/9300 Section 1 2 - 5 Issue 1 Operation 378000 A386200 A A A A B B A A
  • 13. 2 - 6 Heater Controls Air can be directed into the cab by selecting the required fan speed using switch A. Temperature can be selected by means of rotary dial B. Section 1 General Information 9803/9300 Section 1 2 - 6 Issue 1 Operation A395200 A B
  • 14. 2 - 7 Seat Control ! WARNING Do not adjust the seat with the engine running otherwise your legs could knock the control levers. HOP31 Depending on the type of machine various adjustments can be made to the positions of the control levers and the seat consoles/armrests. The operators seat can be adjusted for your comfort. A correctly adjusted seat will reduce operator fatigue. Position the seat so that you can comfortably reach the controls with your feet on the cab floor. The seat is adjustable for height and reach. ! CAUTION Having adjusted the seat position, ensure the seat locking lever has engaged fully. A Backrest angle adjustment B Horizontal adjustment C Weight adjustment (50 - 120 kg [110 - 243 lb] ) D Seat cushion tilt control Seat Belt Fasten the seat belt Sit correctly in the seat. Make sure the belt is not twisted. Push the male fitting A into the buckle B until it latches. Release the seat belt Press button C and pull the recoil side of the belt outwards. Note: Your machine is fitted with a seat belt, USE IT! Section 1 General Information 9803/9300 Section 1 2 - 7 Issue 1 Operation A386520 H26160 B C A B B C C A A C C B B D D A A
  • 15. 3 - 1 Engine and Track Controls, Switches and Instruments 1 Left Track Control Lever 2 Right Track Control Lever 3 Right Hand Controller 3a Horn Button 4 Dozer Lever 4a Two speed Tracking Switch 5 Hand Throttle Lever 6 Instrument Cluster 6a Charge (Fault) Indicator 6b Coolant Temperature (High) Indicator 6c Not operational on this machine 6d Two Speed (High Engaged) indicator 6e SAE Controls (selected) indicator 6f Glow Plugs (On) indicator 6g Air Filter (Blocked) indicator 6h Not operational on this machine 6j Not operational on this machine 6k Engine Oil pressure (Low) indicator 7 Fuel Gauge 8 Hourmeter 9 Ignition Switch 10 Accessory Power Socket (Beacon etc.) 11 Blank 12 Windscreen Wash/Wipe Switch 13 Work Lights Switch 14 Rotating Beacon Switch 15 Left Hand Controller 15a Slew / Swing Selector Switch Section 1 General Information 9803/9300 Section 1 3 - 1 Issue 1 Operation H52200 0 1 SAE 3 4 5 6 9 15 11 12 13 1 2 14 4a 3a 6d 10 15a 6e 6g 8 6h 6k 6b 6c 7 6j 6f 6a