The document is a comprehensive guide on the Java programming language covering various topics such as graphics, collections, annotations, applets, arrays, and concurrency. It includes detailed chapters with examples, syntax explanations, and best practices for using different Java features and libraries. Additionally, it addresses common pitfalls, type conversions, behavior of control structures, and more advanced topics like concurrent programming and bytecode manipulation.


![Expression Statements 379
Chapter 56: File I/O 381
Introduction 381
Examples 381
Reading all bytes to a byte[] 381
Reading an image from a file 381
Writing a byte[] to a file 381
Stream vs Writer/Reader API 382
Reading a whole file at once 383
Reading a file with a Scanner 384
Iterating over a directory and filter by file extension 384
Migrating from java.io.File to Java 7 NIO (java.nio.file.Path) 385
Point to a path 385
Paths relative to another path 385
Converting File from/to Path for use with libraries 385
Check if the file exists and delete it if it does 385
Write to a file via an OutputStream 386
Iterating on each file within a folder 386
Recursive folder iteration 387
File Read/Write Using FileInputStream/FileOutputStream 387
Reading from a binary file 389
Locking 389
Copying a file using InputStream and OutputStream 390
Reading a file using Channel and Buffer 390
Copying a file using Channel 391
Reading a file using BufferedInputStream 392
Writing a file using Channel and Buffer 392
Writing a file using PrintStream 393
Iterate over a directory printing subdirectories in it 393
Adding Directories 394
Blocking or redirecting standard output / error 394](https://image.slidesharecdn.com/java-language-pdfroom-240812184155-f7515a4f/85/java-language-programacao-2-PDF-Room-pdf-24-320.jpg)
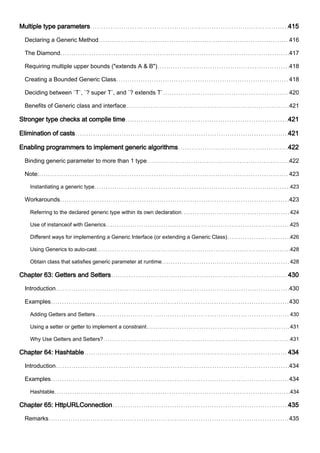


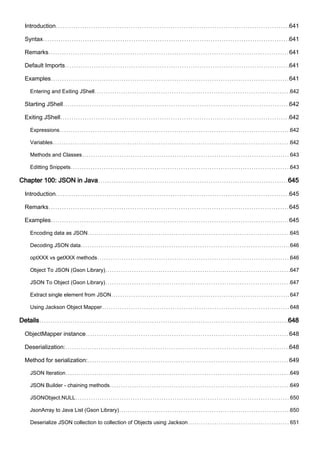

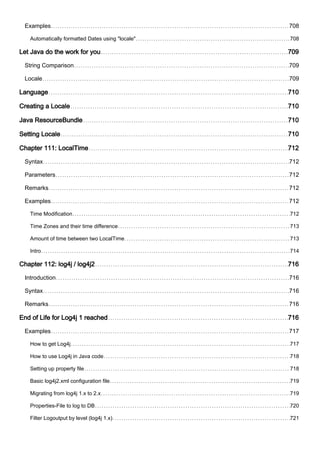


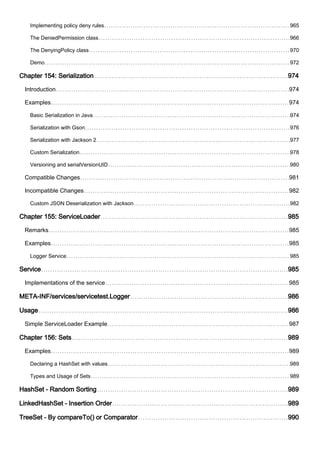


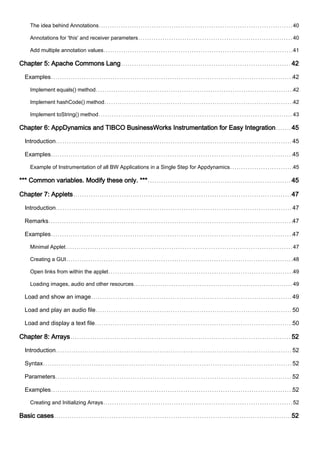
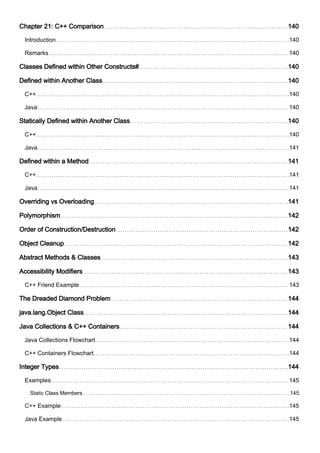
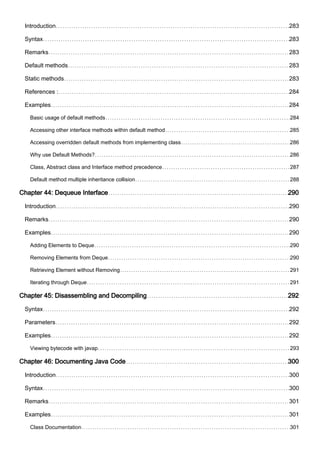
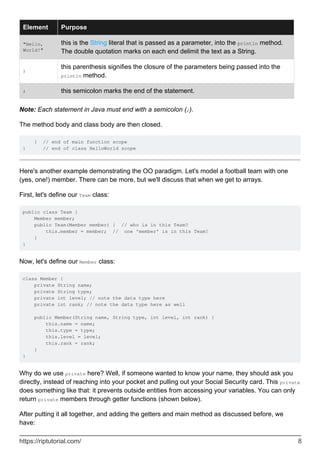
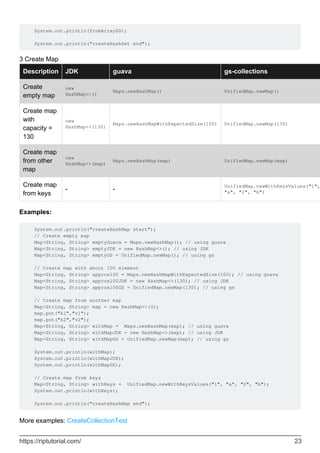
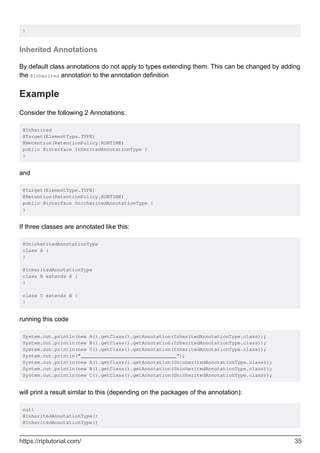
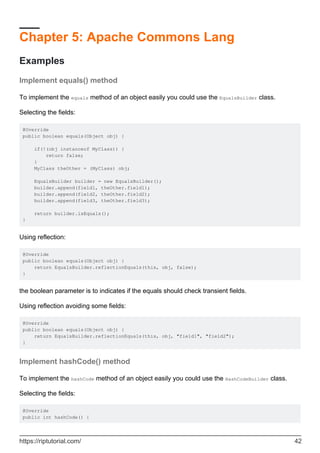
![1. In Versions section the end-of-life (free) date is when Oracle will stop posting further updates of Java SE to its
public download sites. Customers who need continued access to critical bug fixes and security fixes as well as general
maintenance for Java SE can get long term support through Oracle Java SE Support.
Versions
Java SE Version Code Name End-of-life (free1) Release Date
Java SE 9 (Early Access) None future 2017-07-27
Java SE 8 Spider future 2014-03-18
Java SE 7 Dolphin 2015-04-14 2011-07-28
Java SE 6 Mustang 2013-04-16 2006-12-23
Java SE 5 Tiger 2009-11-04 2004-10-04
Java SE 1.4 Merlin prior to 2009-11-04 2002-02-06
Java SE 1.3 Kestrel prior to 2009-11-04 2000-05-08
Java SE 1.2 Playground prior to 2009-11-04 1998-12-08
Java SE 1.1 None prior to 2009-11-04 1997-02-19
Java SE 1.0 Oak prior to 2009-11-04 1996-01-21
Examples
Creating Your First Java Program
Create a new file in your text editor or IDE named HelloWorld.java. Then paste this code block into
the file and save:
public class HelloWorld {
public static void main(String[] args) {
System.out.println("Hello, World!");
}
}
Run live on Ideone
Note: For Java to recognize this as a public class (and not throw a compile time error), the
filename must be the same as the class name (HelloWorld in this example) with a .java extension.
There should also be a public access modifier before it.
Naming conventions recommend that Java classes begin with an uppercase character, and be in
camel case format (in which the first letter of each word is capitalized). The conventions
https://riptutorial.com/ 4](https://image.slidesharecdn.com/java-language-pdfroom-240812184155-f7515a4f/85/java-language-programacao-2-PDF-Room-pdf-72-320.jpg)
![recommend against underscores (_) and dollar signs ($).
To compile, open a terminal window and navigate to the directory of HelloWorld.java:
cd /path/to/containing/folder/
Note: cd is the terminal command to change directory.
Enter javac followed by the file name and extension as follows:
$ javac HelloWorld.java
It's fairly common to get the error 'javac' is not recognized as an internal or external command,
operable program or batch file. even when you have installed the JDK and are able to run the
program from IDE ex. eclipse etc. Since the path is not added to the environment by default.
In case you get this on windows, to resolve, first try browsing to your javac.exe path, it's most
probably in your C:Program FilesJavajdk(version number)bin. Then try running it with below.
$ C:Program FilesJavajdk(version number)binjavac HelloWorld.java
Previously when we were calling javac it was same as above command. Only in that case your OS
knew where javac resided. So let's tell it now, this way you don't have to type the whole path
every-time. We would need to add this to our PATH
To edit the PATH environment variable in Windows XP/Vista/7/8/10:
Control Panel ⇒ System ⇒ Advanced system settings
•
Switch to "Advanced" tab ⇒ Environment Variables
•
In "System Variables", scroll down to select "PATH" ⇒ Edit
•
You cannot undo this so be careful. First copy your existing path to notepad. Then to get the
exact PATH to your javac browse manually to the folder where javac resides and click on the
address bar and then copy it. It should look something like c:Program FilesJavajdk1.8.0_xxbin
In "Variable value" field, paste this IN FRONT of all the existing directories, followed by a semi-
colon (;). DO NOT DELETE any existing entries.
Variable name : PATH
Variable value : c:Program FilesJavajdk1.8.0_xxbin;[Existing Entries...]
Now this should resolve.
For Linux Based systems try here.
Note: The javac command invokes the Java compiler.
The compiler will then generate a bytecode file called HelloWorld.class which can be executed in
the Java Virtual Machine (JVM). The Java programming language compiler, javac, reads source
https://riptutorial.com/ 5](https://image.slidesharecdn.com/java-language-pdfroom-240812184155-f7515a4f/85/java-language-programacao-2-PDF-Room-pdf-73-320.jpg)
![files written in the Java programming language and compiles them into bytecode class files.
Optionally, the compiler can also process annotations found in source and class files using the
Pluggable Annotation Processing API. The compiler is a command line tool but can also be invoked
using the Java Compiler API.
To run your program, enter java followed by the name of the class which contains the main method
(HelloWorld in our example). Note how the .class is omitted:
$ java HelloWorld
Note: The java command runs a Java application.
This will output to your console:
Hello, World!
You have successfully coded and built your very first Java program!
Note: In order for Java commands (java, javac, etc) to be recognized, you will need to make sure:
A JDK is installed (e.g. Oracle, OpenJDK and other sources)
•
Your environment variables are properly set up
•
You will need to use a compiler (javac) and an executor (java) provided by your JVM. To find out
which versions you have installed, enter java -version and javac -version on the command line.
The version number of your program will be printed in the terminal (e.g. 1.8.0_73).
A closer look at the Hello World program
The "Hello World" program contains a single file, which consists of a HelloWorld class definition, a
main method, and a statement inside the main method.
public class HelloWorld {
The class keyword begins the class definition for a class named HelloWorld. Every Java application
contains at least one class definition (Further information about classes).
public static void main(String[] args) {
This is an entry point method (defined by its name and signature of public static void
main(String[])) from which the JVM can run your program. Every Java program should have one. It
is:
public: meaning that the method can be called from anywhere mean from outside the
program as well. See Visibility for more information on this.
•
static: meaning it exists and can be run by itself (at the class level without creating an
•
https://riptutorial.com/ 6](https://image.slidesharecdn.com/java-language-pdfroom-240812184155-f7515a4f/85/java-language-programacao-2-PDF-Room-pdf-74-320.jpg)
![object).
void: meaning it returns no value. Note: This is unlike C and C++ where a return code such
as int is expected (Java's way is System.exit()).
•
This main method accepts:
An array (typically called args) of Strings passed as arguments to main function (e.g. from
command line arguments).
•
Almost all of this is required for a Java entry point method.
Non-required parts:
The name args is a variable name, so it can be called anything you want, although it is
typically called args.
•
Whether its parameter type is an array (String[] args) or Varargs (String... args) does not
matter because arrays can be passed into varargs.
•
Note: A single application may have multiple classes containing an entry point (main) method. The
entry point of the application is determined by the class name passed as an argument to the java
command.
Inside the main method, we see the following statement:
System.out.println("Hello, World!");
Let's break down this statement element-by-element:
Element Purpose
System
this denotes that the subsequent expression will call upon the System class, from
the java.lang package.
.
this is a "dot operator". Dot operators provide you access to a classes members
1; i.e. its fields (variables) and its methods. In this case, this dot operator allows
you to reference the out static field within the System class.
out
this is the name of the static field of PrintStream type within the System class
containing the standard output functionality.
.
this is another dot operator. This dot operator provides access to the println
method within the out variable.
println
this is the name of a method within the PrintStream class. This method in
particular prints the contents of the parameters into the console and inserts a
newline after.
(
this parenthesis indicates that a method is being accessed (and not a field) and
begins the parameters being passed into the println method.
https://riptutorial.com/ 7](https://image.slidesharecdn.com/java-language-pdfroom-240812184155-f7515a4f/85/java-language-programacao-2-PDF-Room-pdf-75-320.jpg)
![public class Team {
Member member;
public Team(Member member) {
this.member = member;
}
// here's our main method
public static void main(String[] args) {
Member myMember = new Member("Aurieel", "light", 10, 1);
Team myTeam = new Team(myMember);
System.out.println(myTeam.member.getName());
System.out.println(myTeam.member.getType());
System.out.println(myTeam.member.getLevel());
System.out.println(myTeam.member.getRank());
}
}
class Member {
private String name;
private String type;
private int level;
private int rank;
public Member(String name, String type, int level, int rank) {
this.name = name;
this.type = type;
this.level = level;
this.rank = rank;
}
/* let's define our getter functions here */
public String getName() { // what is your name?
return this.name; // my name is ...
}
public String getType() { // what is your type?
return this.type; // my type is ...
}
public int getLevel() { // what is your level?
return this.level; // my level is ...
}
public int getRank() { // what is your rank?
return this.rank; // my rank is
}
}
Output:
Aurieel
light
10
1
Run on ideone
Once again, the main method inside the Test class is the entry point to our program. Without the
main method, we cannot tell the Java Virtual Machine (JVM) from where to begin execution of the
https://riptutorial.com/ 9](https://image.slidesharecdn.com/java-language-pdfroom-240812184155-f7515a4f/85/java-language-programacao-2-PDF-Room-pdf-77-320.jpg)

![Frame and put MyPanel with p=new MyPanel() object in it.By running Test Class we see a
Rectangle and a Blue Color Filled Rectangle.
First Class: MyPanel
import javax.swing.*;
import java.awt.*;
// MyPanel extends JPanel, which will eventually be placed in a JFrame
public class MyPanel extends JPanel {
// custom painting is performed by the paintComponent method
@Override
public void paintComponent(Graphics g){
// clear the previous painting
super.paintComponent(g);
// cast Graphics to Graphics2D
Graphics2D g2 = (Graphics2D) g;
g2.setColor(Color.red); // sets Graphics2D color
// draw the rectangle
g2.drawRect(0,0,100,100); // drawRect(x-position, y-position, width, height)
g2.setColor(Color.blue);
g2.fillRect(200,0,100,100); // fill new rectangle with color blue
}
}
Second Class: Test
import javax.swing.;
import java.awt.;
public class Test { //the Class by which we display our rectangle
JFrame f;
MyPanel p;
public Test(){
f = new JFrame();
// get the content area of Panel.
Container c = f.getContentPane();
// set the LayoutManager
c.setLayout(new BorderLayout());
p = new MyPanel();
// add MyPanel object into container
c.add(p);
// set the size of the JFrame
f.setSize(400,400);
// make the JFrame visible
f.setVisible(true);
// sets close behavior; EXIT_ON_CLOSE invokes System.exit(0) on closing the JFrame
f.setDefaultCloseOperation(JFrame.EXIT_ON_CLOSE);
}
public static void main(String args[ ]){
Test t = new Test();
}
}
For More Explanation about Border Layout:
https://docs.oracle.com/javase/tutorial/uiswing/layout/border.html
paintComponent( )
https://riptutorial.com/ 12](https://image.slidesharecdn.com/java-language-pdfroom-240812184155-f7515a4f/85/java-language-programacao-2-PDF-Room-pdf-80-320.jpg)

![TreeBag(Arrays.asList(INPUT_TEXT.split(" "))));
// Print count words
System.out.println(bag); // print [1:All!,2:Hello,1:Hi,2:World!]- in natural (alphabet)
order
// Print all unique words
System.out.println(bag.uniqueSet()); // print [All!, Hello, Hi, World!]- in natural
(alphabet) order
// Print count occurrences of words
System.out.println("Hello = " + bag.getCount("Hello")); // print 2
System.out.println("World = " + bag.getCount("World!")); // print 2
System.out.println("All = " + bag.getCount("All!")); // print 1
System.out.println("Hi = " + bag.getCount("Hi")); // print 1
System.out.println("Empty = " + bag.getCount("Empty")); // print 0
// Print count all words
System.out.println(bag.size()); //print 6
// Print count unique words
System.out.println(bag.uniqueSet().size()); //print 4
2. Using TreeBag from Eclipse(GC):
// Parse text to separate words
String INPUT_TEXT = "Hello World! Hello All! Hi World!";
// Create Multiset
MutableSortedBag<String> bag = TreeBag.newBag(Arrays.asList(INPUT_TEXT.split(" ")));
// Print count words
System.out.println(bag); // print [All!, Hello, Hello, Hi, World!, World!]- in natural
order
// Print all unique words
System.out.println(bag.toSortedSet()); // print [All!, Hello, Hi, World!]- in natural
order
// Print count occurrences of words
System.out.println("Hello = " + bag.occurrencesOf("Hello")); // print 2
System.out.println("World = " + bag.occurrencesOf("World!")); // print 2
System.out.println("All = " + bag.occurrencesOf("All!")); // print 1
System.out.println("Hi = " + bag.occurrencesOf("Hi")); // print 1
System.out.println("Empty = " + bag.occurrencesOf("Empty")); // print 0
// Print count all words
System.out.println(bag.size()); //print 6
// Print count unique words
System.out.println(bag.toSet().size()); //print 4
3. Using LinkedHashMultiset from Guava:
// Parse text to separate words
String INPUT_TEXT = "Hello World! Hello All! Hi World!";
// Create Multiset
Multiset<String> multiset = LinkedHashMultiset.create(Arrays.asList(INPUT_TEXT.split("
")));
https://riptutorial.com/ 15](https://image.slidesharecdn.com/java-language-pdfroom-240812184155-f7515a4f/85/java-language-programacao-2-PDF-Room-pdf-83-320.jpg)
![// Print count words
System.out.println(multiset); // print [Hello x 2, World! x 2, All!, Hi]- in predictable
iteration order
// Print all unique words
System.out.println(multiset.elementSet()); // print [Hello, World!, All!, Hi] - in
predictable iteration order
// Print count occurrences of words
System.out.println("Hello = " + multiset.count("Hello")); // print 2
System.out.println("World = " + multiset.count("World!")); // print 2
System.out.println("All = " + multiset.count("All!")); // print 1
System.out.println("Hi = " + multiset.count("Hi")); // print 1
System.out.println("Empty = " + multiset.count("Empty")); // print 0
// Print count all words
System.out.println(multiset.size()); //print 6
// Print count unique words
System.out.println(multiset.elementSet().size()); //print 4
More examples:
I. Apache Collection:
HashBag - order not defined
1.
SynchronizedBag - concurrent and order not defined
2.
SynchronizedSortedBag - - concurrent and sorted order
3.
TreeBag - sorted order
4.
II. GS / Eclipse Collection
MutableBag - order not defined
5.
MutableSortedBag - sorted order
6.
III. Guava
HashMultiset - order not defined
7.
TreeMultiset - sorted order
8.
LinkedHashMultiset - insertion order
9.
ConcurrentHashMultiset - concurrent and order not defined
10.
Multimap in Guava, Apache and Eclipse Collections
This multimap allows duplicate key-value pairs. JDK analogs are HashMap<K, List>, HashMap<K,
Set> and so on.
Key's
order
Value's
order
Duplicate Analog key Analog value Guava Apache
not
defined
Insertion-
order
yes HashMap ArrayList ArrayListMultimap MultiVal
https://riptutorial.com/ 16](https://image.slidesharecdn.com/java-language-pdfroom-240812184155-f7515a4f/85/java-language-programacao-2-PDF-Room-pdf-84-320.jpg)
![Key's
order
Value's
order
Duplicate Analog key Analog value Guava Apache
not
defined
not
defined
no HashMap HashSet HashMultimap
MultiVal
multiVal
HashMap<
HashSet.
not
defined
sorted no HashMap TreeSet
Multimaps.
newMultimap(
HashMap, Supplier
<TreeSet>)
MultiVal
new Hash
TreeSet.
Insertion-
order
Insertion-
order
yes LinkedHashMap ArrayList LinkedListMultimap
MultiVal
multiVal
LinkedH
ArrayLis
Insertion-
order
Insertion-
order
no LinkedHashMap LinkedHashSet LinkedHashMultimap
MultiVal
multiVal
LinkedHa
LinkedHa
sorted sorted no TreeMap TreeSet TreeMultimap
MultiVal
multiVal
TreeMap<
Set>(),T
Examples using Multimap
Task: Parse "Hello World! Hello All! Hi World!" string to separate words and print all indexes of
every word using MultiMap (for example, Hello=[0, 2], World!=[1, 5] and so on)
1. MultiValueMap from Apache
String INPUT_TEXT = "Hello World! Hello All! Hi World!";
// Parse text to words and index
List<String> words = Arrays.asList(INPUT_TEXT.split(" "));
// Create Multimap
MultiMap<String, Integer> multiMap = new MultiValueMap<String, Integer>();
// Fill Multimap
int i = 0;
for(String word: words) {
multiMap.put(word, i);
i++;
}
// Print all words
System.out.println(multiMap); // print {Hi=[4], Hello=[0, 2], World!=[1, 5], All!=[3]} -
in random orders
// Print all unique words
System.out.println(multiMap.keySet()); // print [Hi, Hello, World!, All!] - in random
orders
// Print all indexes
System.out.println("Hello = " + multiMap.get("Hello")); // print [0, 2]
System.out.println("World = " + multiMap.get("World!")); // print [1, 5]
System.out.println("All = " + multiMap.get("All!")); // print [3]
https://riptutorial.com/ 17](https://image.slidesharecdn.com/java-language-pdfroom-240812184155-f7515a4f/85/java-language-programacao-2-PDF-Room-pdf-85-320.jpg)
![System.out.println("Hi = " + multiMap.get("Hi")); // print [4]
System.out.println("Empty = " + multiMap.get("Empty")); // print null
// Print count unique words
System.out.println(multiMap.keySet().size()); //print 4
2. HashBiMap from GS / Eclipse Collection
String[] englishWords = {"one", "two", "three","ball","snow"};
String[] russianWords = {"jeden", "dwa", "trzy", "kula", "snieg"};
// Create Multiset
MutableBiMap<String, String> biMap = new HashBiMap(englishWords.length);
// Create English-Polish dictionary
int i = 0;
for(String englishWord: englishWords) {
biMap.put(englishWord, russianWords[i]);
i++;
}
// Print count words
System.out.println(biMap); // print {two=dwa, ball=kula, one=jeden, snow=snieg,
three=trzy} - in random orders
// Print all unique words
System.out.println(biMap.keySet()); // print [snow, two, one, three, ball] - in random
orders
System.out.println(biMap.values()); // print [dwa, kula, jeden, snieg, trzy] - in
random orders
// Print translate by words
System.out.println("one = " + biMap.get("one")); // print one = jeden
System.out.println("two = " + biMap.get("two")); // print two = dwa
System.out.println("kula = " + biMap.inverse().get("kula")); // print kula = ball
System.out.println("snieg = " + biMap.inverse().get("snieg")); // print snieg = snow
System.out.println("empty = " + biMap.get("empty")); // print empty = null
// Print count word's pair
System.out.println(biMap.size()); //print 5
HashMultiMap from Guava
String INPUT_TEXT = "Hello World! Hello All! Hi World!";
// Parse text to words and index
List<String> words = Arrays.asList(INPUT_TEXT.split(" "));
// Create Multimap
Multimap<String, Integer> multiMap = HashMultimap.create();
// Fill Multimap
int i = 0;
for(String word: words) {
multiMap.put(word, i);
i++;
}
// Print all words
System.out.println(multiMap); // print {Hi=[4], Hello=[0, 2], World!=[1, 5], All!=[3]} -
keys and values in random orders
// Print all unique words
3.
https://riptutorial.com/ 18](https://image.slidesharecdn.com/java-language-pdfroom-240812184155-f7515a4f/85/java-language-programacao-2-PDF-Room-pdf-86-320.jpg)
![System.out.println(multiMap.keySet()); // print [Hi, Hello, World!, All!] - in random
orders
// Print all indexes
System.out.println("Hello = " + multiMap.get("Hello")); // print [0, 2]
System.out.println("World = " + multiMap.get("World!")); // print [1, 5]
System.out.println("All = " + multiMap.get("All!")); // print [3]
System.out.println("Hi = " + multiMap.get("Hi")); // print [4]
System.out.println("Empty = " + multiMap.get("Empty")); // print []
// Print count all words
System.out.println(multiMap.size()); //print 6
// Print count unique words
System.out.println(multiMap.keySet().size()); //print 4
Nore examples:
I. Apache Collection:
MultiValueMap
1.
MultiValueMapLinked
2.
MultiValueMapTree
3.
II. GS / Eclipse Collection
FastListMultimap
1.
HashBagMultimap
2.
TreeSortedSetMultimap
3.
UnifiedSetMultimap
4.
III. Guava
HashMultiMap
1.
LinkedHashMultimap
2.
LinkedListMultimap
3.
TreeMultimap
4.
ArrayListMultimap
5.
Compare operation with collections - Create collections
Compare operation with collections - Create collections
1. Create List
Description JDK guava gs-collections
Create
empty list
new ArrayList<>() Lists.newArrayList() FastList.newList()
Create list Arrays.asList("1", "2",
"3")
Lists.newArrayList("1", "2", "3")
FastList.newListWith("1",
"2", "3")
https://riptutorial.com/ 19](https://image.slidesharecdn.com/java-language-pdfroom-240812184155-f7515a4f/85/java-language-programacao-2-PDF-Room-pdf-87-320.jpg)
![// Create list from any Iterable interface (any collection)
Collection<String> collection = new HashSet<>(3);
collection.add("1");
collection.add("2");
collection.add("3");
List<String> fromIterable = Lists.newArrayList(collection); // using guava
List<String> fromIterableJDK = new ArrayList<>(collection); // using JDK
MutableList<String> fromIterableGS = FastList.newList(collection); // using gs
System.out.println(fromIterable);
System.out.println(fromIterableJDK);
System.out.println(fromIterableGS);
/* Attention: JDK create list only from Collection, but guava and gs can create list from
Iterable and Collection */
// Create list from any Iterator
Iterator<String> iterator = collection.iterator();
List<String> fromIterator = Lists.newArrayList(iterator); // using guava
System.out.println(fromIterator);
// Create list from any array
String[] array = {"4", "5", "6"};
List<String> fromArray = Lists.newArrayList(array); // using guava
List<String> fromArrayJDK = Arrays.asList(array); // using JDK
MutableList<String> fromArrayGS = FastList.newListWith(array); // using gs
System.out.println(fromArray);
System.out.println(fromArrayJDK);
System.out.println(fromArrayGS);
// Create list using fabric
MutableList<String> fromFabricGS = FastList.newWithNValues(10, () ->
String.valueOf(Math.random())); // using gs
System.out.println(fromFabricGS);
System.out.println("createArrayList end");
2 Create Set
Description JDK guava gs-collections
Create
empty set
new HashSet<>() Sets.newHashSet() UnifiedSet.newSet()
Creatre set
from values
new
HashSet<>(Arrays.asList("alpha",
"beta", "gamma"))
Sets.newHashSet("alpha",
"beta", "gamma")
UnifiedSet.newSetWith("a
"beta", "gamma")
Create set
from any
collections
new HashSet<>(collection) Sets.newHashSet(collection) UnifiedSet.newSet(collec
Create set
from any
Iterable
- Sets.newHashSet(iterable) UnifiedSet.newSet(iterab
Create set - Sets.newHashSet(iterator) -
https://riptutorial.com/ 21](https://image.slidesharecdn.com/java-language-pdfroom-240812184155-f7515a4f/85/java-language-programacao-2-PDF-Room-pdf-89-320.jpg)
![Description JDK guava gs-collections
from any
Iterator
Create set
from Array
new
HashSet<>(Arrays.asList(array))
Sets.newHashSet(array) UnifiedSet.newSetWith(ar
Examples:
System.out.println("createHashSet start");
// Create empty set
Set<String> emptyGuava = Sets.newHashSet(); // using guava
Set<String> emptyJDK = new HashSet<>(); // using JDK
Set<String> emptyGS = UnifiedSet.newSet(); // using gs
// Create set with 100 element
Set<String> approx100 = Sets.newHashSetWithExpectedSize(100); // using guava
Set<String> approx100JDK = new HashSet<>(130); // using JDK
Set<String> approx100GS = UnifiedSet.newSet(130); // using gs
// Create set from some elements
Set<String> withElements = Sets.newHashSet("alpha", "beta", "gamma"); // using guava
Set<String> withElementsJDK = new HashSet<>(Arrays.asList("alpha", "beta", "gamma")); //
using JDK
Set<String> withElementsGS = UnifiedSet.newSetWith("alpha", "beta", "gamma"); // using gs
System.out.println(withElements);
System.out.println(withElementsJDK);
System.out.println(withElementsGS);
// Create set from any Iterable interface (any collection)
Collection<String> collection = new ArrayList<>(3);
collection.add("1");
collection.add("2");
collection.add("3");
Set<String> fromIterable = Sets.newHashSet(collection); // using guava
Set<String> fromIterableJDK = new HashSet<>(collection); // using JDK
Set<String> fromIterableGS = UnifiedSet.newSet(collection); // using gs
System.out.println(fromIterable);
System.out.println(fromIterableJDK);
System.out.println(fromIterableGS);
/* Attention: JDK create set only from Collection, but guava and gs can create set from
Iterable and Collection */
// Create set from any Iterator
Iterator<String> iterator = collection.iterator();
Set<String> fromIterator = Sets.newHashSet(iterator); // using guava
System.out.println(fromIterator);
// Create set from any array
String[] array = {"4", "5", "6"};
Set<String> fromArray = Sets.newHashSet(array); // using guava
Set<String> fromArrayJDK = new HashSet<>(Arrays.asList(array)); // using JDK
Set<String> fromArrayGS = UnifiedSet.newSetWith(array); // using gs
System.out.println(fromArray);
System.out.println(fromArrayJDK);
https://riptutorial.com/ 22](https://image.slidesharecdn.com/java-language-pdfroom-240812184155-f7515a4f/85/java-language-programacao-2-PDF-Room-pdf-90-320.jpg)

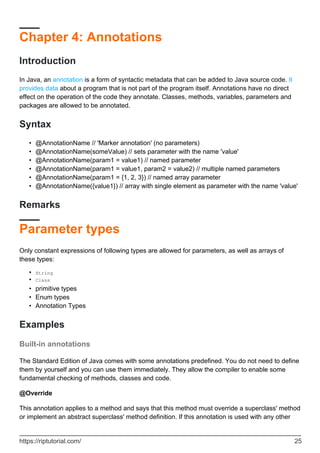
![In almost all cases, when the compiler emits a warning, the most appropriate action is to fix the
cause. In some instances (Generics code using untype-safe pre-generics code, for example) this
may not be possible and it's better to suppress those warnings that you expect and cannot fix, so
you can more clearly see unexpected warnings.
This annotation can be applied to a whole class, method or line. It takes the category of warning
as a parameter.
@SuppressWarnings("deprecation")
public class RiddledWithWarnings {
// several methods calling deprecated code here
}
@SuppressWarning("finally")
public boolean checkData() {
// method calling return from within finally block
}
It is better to limit the scope of the annotation as much as possible, to prevent unexpected
warnings also being suppressed. For example, confining the scope of the annotation to a single-
line:
ComplexAlgorithm algorithm = new ComplexAlgorithm();
@SuppressWarnings("deprecation") algoritm.slowUnthreadSafeMethod();
// we marked this method deprecated in an example above
@SuppressWarnings("unsafe") List<Integer> list = getUntypeSafeList();
// old library returns, non-generic List containing only integers
The warnings supported by this annotation may vary from compiler to compiler. Only the unchecked
and deprecation warnings are specifically mentioned in the JLS. Unrecognized warning types will
be ignored.
@SafeVarargs
Because of type erasure, void method(T... t) will be converted to void method(Object[] t) meaning
that the compiler is not always able to verify that the use of varargs is type-safe. For instance:
private static <T> void generatesVarargsWarning(T... lists) {
There are instances where the use is safe, in which case you can annotate the method with the
SafeVarargs annotation to suppress the warning. This obviously hides the warning if your use is
unsafe too.
@FunctionalInterface
This is an optional annotation used to mark a FunctionalInterface. It will cause the compiler to
complain if it does not conform to the FunctionalInterface spec (has a single abstract method)
@FunctionalInterface
public interface ITrade {
https://riptutorial.com/ 28](https://image.slidesharecdn.com/java-language-pdfroom-240812184155-f7515a4f/85/java-language-programacao-2-PDF-Room-pdf-96-320.jpg)
![public boolean check(Trade t);
}
@FunctionalInterface
public interface Predicate<T> {
boolean test(T t);
}
Runtime annotation checks via reflection
Java's Reflection API allows the programmer to perform various checks and operations on class
fields, methods and annotations during runtime. However, in order for an annotation to be at all
visible at runtime, the RetentionPolicy must be changed to RUNTIME, as demonstrated in the
example below:
@interface MyDefaultAnnotation {
}
@Retention(RetentionPolicy.RUNTIME)
@interface MyRuntimeVisibleAnnotation {
}
public class AnnotationAtRuntimeTest {
@MyDefaultAnnotation
static class RuntimeCheck1 {
}
@MyRuntimeVisibleAnnotation
static class RuntimeCheck2 {
}
public static void main(String[] args) {
Annotation[] annotationsByType = RuntimeCheck1.class.getAnnotations();
Annotation[] annotationsByType2 = RuntimeCheck2.class.getAnnotations();
System.out.println("default retention: " + Arrays.toString(annotationsByType));
System.out.println("runtime retention: " + Arrays.toString(annotationsByType2));
}
}
Defining annotation types
Annotation types are defined with @interface. Parameters are defined similar to methods of a
regular interface.
@interface MyAnnotation {
String param1();
boolean param2();
int[] param3(); // array parameter
}
https://riptutorial.com/ 29](https://image.slidesharecdn.com/java-language-pdfroom-240812184155-f7515a4f/85/java-language-programacao-2-PDF-Room-pdf-97-320.jpg)
![Default values
@interface MyAnnotation {
String param1() default "someValue";
boolean param2() default true;
int[] param3() default {};
}
Meta-Annotations
Meta-annotations are annotations that can be applied to annotation types. Special predefined
meta-annotation define how annotation types can be used.
@Target
The @Target meta-annotation restricts the types the annotation can be applied to.
@Target(ElementType.METHOD)
@interface MyAnnotation {
// this annotation can only be applied to methods
}
Multiple values can be added using array notation, e.g. @Target({ElementType.FIELD,
ElementType.TYPE})
Available Values
ElementType target example usage on target element
ANNOTATION_TYPE annotation types
@Retention(RetentionPolicy.RUNTIME)
@interface MyAnnotation
CONSTRUCTOR constructors
@MyAnnotation
public MyClass() {}
FIELD fields, enum constants
@XmlAttribute
private int count;
for (@LoopVariable int i = 0; i < 100;
i++) {
@Unused
String resultVariable;
LOCAL_VARIABLE
variable declarations
inside methods
https://riptutorial.com/ 30](https://image.slidesharecdn.com/java-language-pdfroom-240812184155-f7515a4f/85/java-language-programacao-2-PDF-Room-pdf-98-320.jpg)


![String value() default "bar";
}
class AnnotationExample {
// Put the Annotation on the method, but leave the defaults
@MyAnnotation
public void testDefaults() throws Exception {
// Using reflection, get the public method "testDefaults", which is this method with
no args
Method method = AnnotationExample.class.getMethod("testDefaults", null);
// Fetch the Annotation that is of type MyAnnotation from the Method
MyAnnotation annotation = (MyAnnotation)method.getAnnotation(MyAnnotation.class);
// Print out the settings of the Annotation
print(annotation);
}
//Put the Annotation on the method, but override the settings
@MyAnnotation(key="baz", value="buzz")
public void testValues() throws Exception {
// Using reflection, get the public method "testValues", which is this method with no
args
Method method = AnnotationExample.class.getMethod("testValues", null);
// Fetch the Annotation that is of type MyAnnotation from the Method
MyAnnotation annotation = (MyAnnotation)method.getAnnotation(MyAnnotation.class);
// Print out the settings of the Annotation
print(annotation);
}
public void print(MyAnnotation annotation) {
// Fetch the MyAnnotation 'key' & 'value' properties, and print them out
System.out.println(annotation.key() + " = " + annotation.value());
}
public static void main(String[] args) {
AnnotationExample example = new AnnotationExample();
try {
example.testDefaults();
example.testValues();
} catch( Exception e ) {
// Shouldn't throw any Exceptions
System.err.println("Exception [" + e.getClass().getName() + "] - " +
e.getMessage());
e.printStackTrace(System.err);
}
}
}
The output will be
foo = bar
baz = buzz
Repeating Annotations
https://riptutorial.com/ 33](https://image.slidesharecdn.com/java-language-pdfroom-240812184155-f7515a4f/85/java-language-programacao-2-PDF-Room-pdf-101-320.jpg)
![Until Java 8, two instances of the same annotation could not be applied to a single element. The
standard workaround was to use a container annotation holding an array of some other
annotation:
// Author.java
@Retention(RetentionPolicy.RUNTIME)
public @interface Author {
String value();
}
// Authors.java
@Retention(RetentionPolicy.RUNTIME)
public @interface Authors {
Author[] value();
}
// Test.java
@Authors({
@Author("Mary"),
@Author("Sam")
})
public class Test {
public static void main(String[] args) {
Author[] authors = Test.class.getAnnotation(Authors.class).value();
for (Author author : authors) {
System.out.println(author.value());
// Output:
// Mary
// Sam
}
}
}
Java SE 8
Java 8 provides a cleaner, more transparent way of using container annotations, using the
@Repeatable annotation. First we add this to the Author class:
@Repeatable(Authors.class)
This tells Java to treat multiple @Author annotations as though they were surrounded by the
@Authors container. We can also use Class.getAnnotationsByType() to access the @Author array by its
own class, instead of through its container:
@Author("Mary")
@Author("Sam")
public class Test {
public static void main(String[] args) {
Author[] authors = Test.class.getAnnotationsByType(Author.class);
for (Author author : authors) {
System.out.println(author.value());
// Output:
// Mary
// Sam
}
}
https://riptutorial.com/ 34](https://image.slidesharecdn.com/java-language-pdfroom-240812184155-f7515a4f/85/java-language-programacao-2-PDF-Room-pdf-102-320.jpg)
![// get messager for printing errors
messager = processingEnvironment.getMessager();
}
}
Packaging
To be applied by the compiler, the annotation processor needs to be made available to the SPI
(see ServiceLoader).
To do this a text file META-INF/services/javax.annotation.processing.Processor needs to be added to
the jar file containing the annotation processor and the annotation in addition to the other files. The
file needs to include the fully qualified name of the annotation processor, i.e. it should look like this
annotation.processor.SetterProcessor
We'll assume the jar file is called AnnotationProcessor.jar below.
Example annotated class
The following class is example class in the default package with the annotations being applied to
the correct elements according to the retention policy. However only the annotation processor only
considers the second method a valid annotation target.
import annotation.Setter;
public class AnnotationProcessorTest {
@Setter
private void setValue(String value) {}
@Setter
public void setString(String value) {}
@Setter
public static void main(String[] args) {}
}
Using the annotation processor with javac
If the annotation processor is discovered using the SPI, it is automatically used to process
annotated elements. E.g. compiling the AnnotationProcessorTest class using
javac -cp AnnotationProcessor.jar AnnotationProcessorTest.java
https://riptutorial.com/ 38](https://image.slidesharecdn.com/java-language-pdfroom-240812184155-f7515a4f/85/java-language-programacao-2-PDF-Room-pdf-106-320.jpg)
![yields the following output
AnnotationProcessorTest.java:6: error: setter must be public
private void setValue(String value) {}
^
AnnotationProcessorTest.java:12: error: setter name must start with "set"
public static void main(String[] args) {}
^
2 errors
instead of compiling normally. No .class file is created.
This could be prevented by specifying the -proc:none option for javac. You could also forgo the
usual compilation by specifying -proc:only instead.
IDE integration
Netbeans
Annotation processors can be used in the NetBeans editor. To do this the annotation processor
needs to be specified in the project settings:
go to Project Properties > Build > Compiling
1.
add check marks for Enable Annotation Processing and Enable Annotation Processing in
Editor
2.
click Add next to the annotation processor list
3.
in the popup that appears enter the fully qualified class name of the annotation processor
and click Ok.
4.
Result
https://riptutorial.com/ 39](https://image.slidesharecdn.com/java-language-pdfroom-240812184155-f7515a4f/85/java-language-programacao-2-PDF-Room-pdf-107-320.jpg)
![// ...
}
public void doIt(Inner this) {
// ...
}
}
}
The sole purpose of receiver parameters is to allow you to add annotations. For example, you
might have a custom annotation @IsOpen whose purpose is to assert that a Closeable object has not
been closed when a method is called. For example:
public class MyResource extends Closeable {
public void update(@IsOpen MyResource this, int value) {
// ...
}
public void close() {
// ...
}
}
At one level, the @IsOpen annotation on this could simply serve as documentation. However, we
could potentially do more. For example:
An annotation processor could insert a runtime check that this is not in closed state when
update is called.
•
A code checker could perform a static code analysis to find cases where this could be
closed when update is called.
•
Add multiple annotation values
An Annotation parameter can accept multiple values if it is defined as an array. For example the
standard annotation @SuppressWarnings is defined like this:
public @interface SuppressWarnings {
String[] value();
}
The value parameter is an array of Strings. You can set multiple values by using a notation similar
to Array initializers:
@SuppressWarnings({"unused"})
@SuppressWarnings({"unused", "javadoc"})
If you only need to set a single value, the brackets can be omitted:
@SuppressWarnings("unused")
Read Annotations online: https://riptutorial.com/java/topic/157/annotations
https://riptutorial.com/ 41](https://image.slidesharecdn.com/java-language-pdfroom-240812184155-f7515a4f/85/java-language-programacao-2-PDF-Room-pdf-109-320.jpg)
![HashCodeBuilder builder = new HashCodeBuilder();
builder.append(field1);
builder.append(field2);
builder.append(field3);
return builder.hashCode();
}
Using reflection:
@Override
public int hashCode() {
return HashCodeBuilder.reflectionHashCode(this, false);
}
the boolean parameter indicates if it should use transient fields.
Using reflection avoiding some fields:
@Override
public int hashCode() {
return HashCodeBuilder.reflectionHashCode(this, "field1", "field2");
}
Implement toString() method
To implement the toString method of an object easily you could use the ToStringBuilder class.
Selecting the fields:
@Override
public String toString() {
ToStringBuilder builder = new ToStringBuilder(this);
builder.append(field1);
builder.append(field2);
builder.append(field3);
return builder.toString();
}
Example result:
ar.com.jonat.lang.MyClass@dd7123[<null>,0,false]
Explicitly giving names to the fields:
@Override
public String toString() {
ToStringBuilder builder = new ToStringBuilder(this);
builder.append("field1",field1);
https://riptutorial.com/ 43](https://image.slidesharecdn.com/java-language-pdfroom-240812184155-f7515a4f/85/java-language-programacao-2-PDF-Room-pdf-111-320.jpg)
![builder.append("field2",field2);
builder.append("field3",field3);
return builder.toString();
}
Example result:
ar.com.jonat.lang.MyClass@dd7404[field1=<null>,field2=0,field3=false]
You could change the style via parameter:
@Override
public String toString() {
ToStringBuilder builder = new ToStringBuilder(this,
ToStringStyle.MULTI_LINE_STYLE);
builder.append("field1", field1);
builder.append("field2", field2);
builder.append("field3", field3);
return builder.toString();
}
Example result:
ar.com.bna.lang.MyClass@ebbf5c[
field1=<null>
field2=0
field3=false
]
There are some styles, for example JSON, no Classname, short, etc ...
Via reflection:
@Override
public String toString() {
return ToStringBuilder.reflectionToString(this);
}
You could also indicate the style:
@Override
public String toString() {
return ToStringBuilder.reflectionToString(this, ToStringStyle.JSON_STYLE);
}
Read Apache Commons Lang online: https://riptutorial.com/java/topic/3338/apache-commons-
lang
https://riptutorial.com/ 44](https://image.slidesharecdn.com/java-language-pdfroom-240812184155-f7515a4f/85/java-language-programacao-2-PDF-Room-pdf-112-320.jpg)

![JOptionPane.showMessageDialog(null,"Hello " + textField.getText());
} else {
JOptionPane.showMessageDialog(null,textField.getText() + " stinks!");
}
}
});
cmbBox = new JComboBox<>(new String[]{"greet", "offend"});
textField = new JTextField("John Doe");
panel.add(cmbBox);
panel.add(textField);
panel.add(button);
add(panel);
}
}
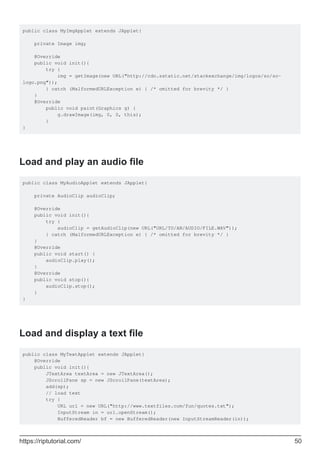
Open links from within the applet
You can use the method getAppletContext() to get an AppletContext object that allows you to
request the browser to open a link. For this you use the method showDocument(). Its second
parameter tells the browser to use a new window _blank or the one that shows the applet _self.
public class MyLinkApplet extends JApplet{
@Override
public void init(){
JButton button = new JButton("ClickMe!");
button.addActionListener(new ActionListener(){
@Override
public void actionPerformed(ActionEvent ae) {
AppletContext a = getAppletContext();
try {
URL url = new URL("http://stackoverflow.com/");
a.showDocument(url,"_blank");
} catch (Exception e) { /* omitted for brevity */ }
}
});
add(button);
}
}
Loading images, audio and other resources
Java applets are able to load different resources. But since they are running in the web browser of
the client you need to make sure that these resources are accessible. Applets are not able to
access client resources as the local file system.
If you want to load resources from the same URL the Applet is stored you can use the method
getCodeBase() to retrieve the base URL. To load resources, applets offer the methods getImage()
and getAudioClip() to load images or audio files.
Load and show an image
https://riptutorial.com/ 49](https://image.slidesharecdn.com/java-language-pdfroom-240812184155-f7515a4f/85/java-language-programacao-2-PDF-Room-pdf-117-320.jpg)

![Chapter 8: Arrays
Introduction
Arrays allow for the storage and retrieval of an arbitrary quantity of values. They are analogous to
vectors in mathematics. Arrays of arrays are analogous to matrices, and act as multidimensional
arrays. Arrays can store any data of any type: primitives such as int or reference types such as
Object.
Syntax
ArrayType[] myArray; // Declaring arrays
•
ArrayType myArray[]; // Another valid syntax (less commonly used and discouraged)
•
ArrayType[][][] myArray; // Declaring multi-dimensional jagged arrays (repeat []s)
•
ArrayType myVar = myArray[index]; // Accessing (reading) element at index
•
myArray[index] = value; // Assign value to position index of array
•
ArrayType[] myArray = new ArrayType[arrayLength]; // Array initialization syntax
•
int[] ints = {1, 2, 3}; // Array initialization syntax with values provided, length is inferred
from the number of provided values: {[value1[, value2]*]}
•
new int[]{4, -5, 6} // Can be used as argument, without a local variable
•
int[] ints = new int[3]; // same as {0, 0, 0}
•
int[][] ints = {{1, 2}, {3}, null}; // Multi-dimensional array initialization. int[] extends
Object (and so does anyType[]) so null is a valid value.
•
Parameters
Parameter Details
ArrayType
Type of the array. This can be primitive (int, long, byte) or Objects (String,
MyObject, etc).
index Index refers to the position of a certain Object in an array.
length
Every array, when being created, needs a set length specified. This is either
done when creating an empty array (new int[3]) or implied when specifying
values ({1, 2, 3}).
Examples
Creating and Initializing Arrays
Basic cases
https://riptutorial.com/ 52](https://image.slidesharecdn.com/java-language-pdfroom-240812184155-f7515a4f/85/java-language-programacao-2-PDF-Room-pdf-120-320.jpg)
![int[] numbers1 = new int[3]; // Array for 3 int values, default value is 0
int[] numbers2 = { 1, 2, 3 }; // Array literal of 3 int values
int[] numbers3 = new int[] { 1, 2, 3 }; // Array of 3 int values initialized
int[][] numbers4 = { { 1, 2 }, { 3, 4, 5 } }; // Jagged array literal
int[][] numbers5 = new int[5][]; // Jagged array, one dimension 5 long
int[][] numbers6 = new int[5][4]; // Multidimensional array: 5x4
Arrays may be created using any primitive or reference type.
float[] boats = new float[5]; // Array of five 32-bit floating point numbers.
double[] header = new double[] { 4.56, 332.267, 7.0, 0.3367, 10.0 };
// Array of five 64-bit floating point numbers.
String[] theory = new String[] { "a", "b", "c" };
// Array of three strings (reference type).
Object[] dArt = new Object[] { new Object(), "We love Stack Overflow.", new Integer(3) };
// Array of three Objects (reference type).
For the last example, note that subtypes of the declared array type are allowed in the array.
Arrays for user defined types can also be built similar to primitive types
UserDefinedClass[] udType = new UserDefinedClass[5];
Arrays, Collections, and Streams
Java SE 1.2
// Parameters require objects, not primitives
// Auto-boxing happening for int 127 here
Integer[] initial = { 127, Integer.valueOf( 42 ) };
List<Integer> toList = Arrays.asList( initial ); // Fixed size!
// Note: Works with all collections
Integer[] fromCollection = toList.toArray( new Integer[toList.size()] );
//Java doesn't allow you to create an array of a parameterized type
List<String>[] list = new ArrayList<String>[2]; // Compilation error!
Java SE 8
// Streams - JDK 8+
Stream<Integer> toStream = Arrays.stream( initial );
Integer[] fromStream = toStream.toArray( Integer[]::new );
Intro
An array is a data structure that holds a fixed number of primitive values or references to object
instances.
https://riptutorial.com/ 53](https://image.slidesharecdn.com/java-language-pdfroom-240812184155-f7515a4f/85/java-language-programacao-2-PDF-Room-pdf-121-320.jpg)
![Each item in an array is called an element, and each element is accessed by its numerical index.
The length of an array is established when the array is created:
int size = 42;
int[] array = new int[size];
The size of an array is fixed at runtime when initialized. It cannot be changed after
initialization. If the size must be mutable at runtime, a Collection class such as ArrayList should be
used instead. ArrayList stores elements in an array and supports resizing by allocating a new
array and copying elements from the old array.
If the array is of a primitive type, i.e.
int[] array1 = { 1,2,3 };
int[] array2 = new int[10];
the values are stored in the array itself. In the absence of an initializer (as in array2 above), the
default value assigned to each element is 0 (zero).
If the array type is an object reference, as in
SomeClassOrInterface[] array = new SomeClassOrInterface[10];
then the array contains references to objects of type SomeClassOrInterface. Those references can
refer to an instance of SomeClassOrInterface or any subclass (for classes) or implementing class
(for interfaces) of SomeClassOrInterface. If the array declaration has no initializer then the default
value of null is assigned to each element.
Because all arrays are int-indexed, the size of an array must be specified by an int. The size of
the array cannot be specified as a long:
long size = 23L;
int[] array = new int[size]; // Compile-time error:
// incompatible types: possible lossy conversion from
// long to int
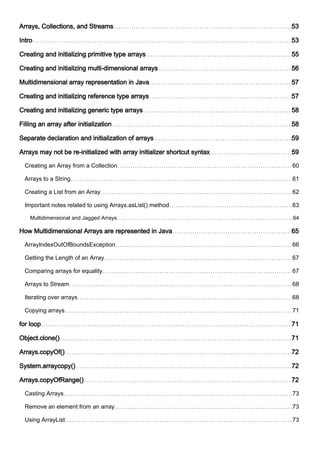
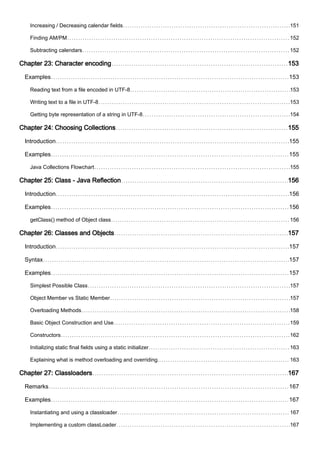
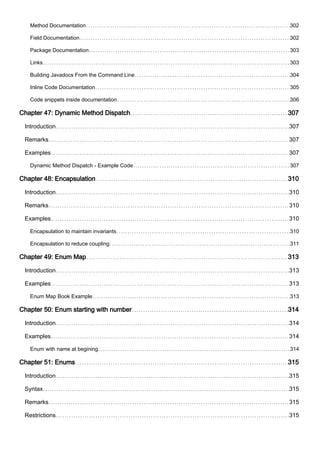
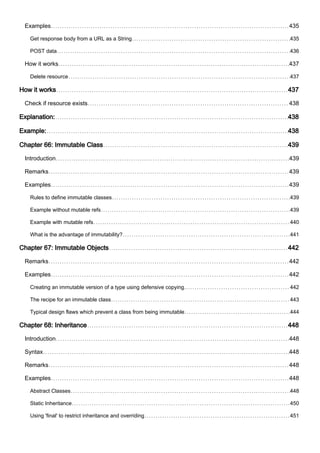
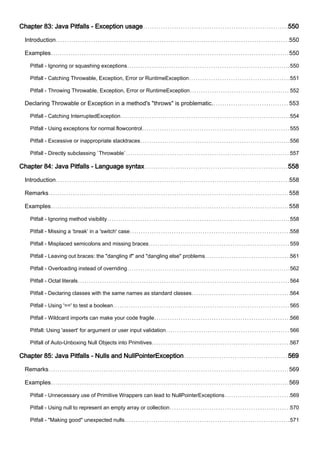
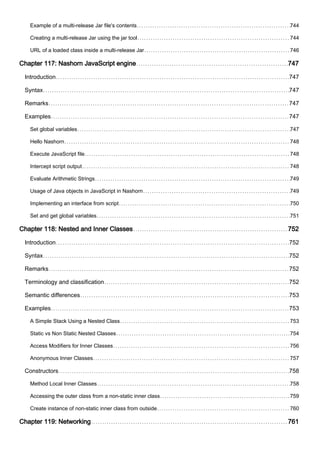
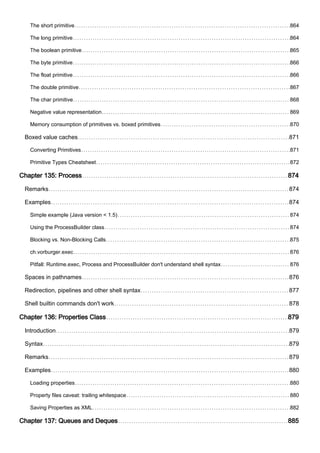
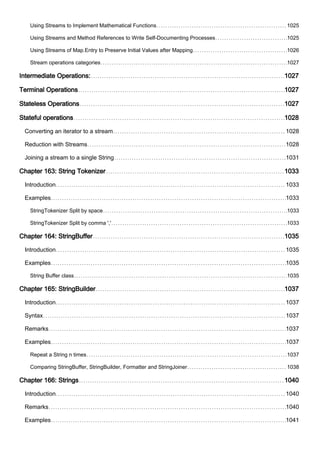
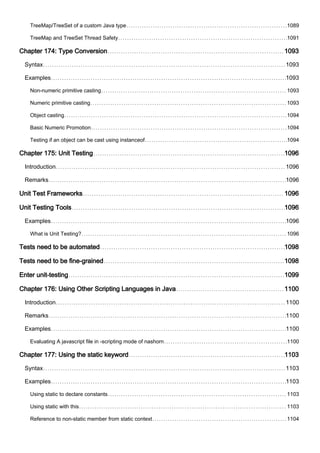
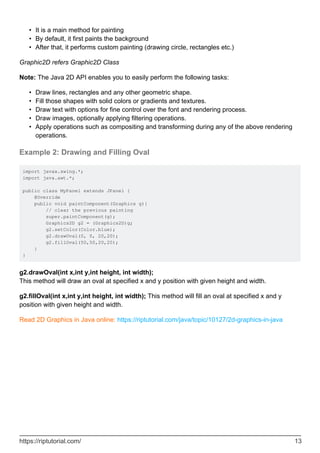
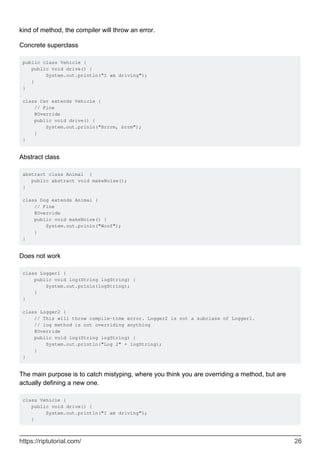
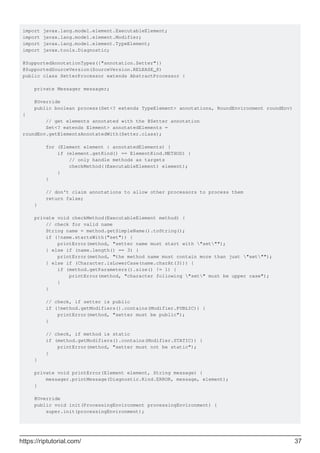
Arrays use a zero-based index system, which means indexing starts at 0 and ends at length - 1.
For example, the following image represents an array with size 10. Here, the first element is at
index 0 and the last element is at index 9, instead of the first element being at index 1 and the last
element at index 10 (see figure below).
https://riptutorial.com/ 54](https://image.slidesharecdn.com/java-language-pdfroom-240812184155-f7515a4f/85/java-language-programacao-2-PDF-Room-pdf-122-320.jpg)
![Accesses to elements of arrays are done in constant time. That means accessing to the first
element of the array has the same cost (in time) of accessing the second element, the third
element and so on.
Java offers several ways of defining and initializing arrays, including literal and constructor
notations. When declaring arrays using the new Type[length] constructor, each element will be
initialized with the following default values:
0 for primitive numerical types: byte, short, int, long, float, and double.
•
'u0000' (null character) for the char type.
•
false for the boolean type.
•
null for reference types.
•
Creating and initializing primitive type arrays
int[] array1 = new int[] { 1, 2, 3 }; // Create an array with new operator and
// array initializer.
int[] array2 = { 1, 2, 3 }; // Shortcut syntax with array initializer.
int[] array3 = new int[3]; // Equivalent to { 0, 0, 0 }
int[] array4 = null; // The array itself is an object, so it
// can be set as null.
When declaring an array, [] will appear as part of the type at the beginning of the declaration
(after the type name), or as part of the declarator for a particular variable (after variable name), or
both:
int array5[]; /* equivalent to */ int[] array5;
int a, b[], c[][]; /* equivalent to */ int a; int[] b; int[][] c;
int[] a, b[]; /* equivalent to */ int[] a; int[][] b;
int a, []b, c[][]; /* Compilation Error, because [] is not part of the type at beginning
of the declaration, rather it is before 'b'. */
// The same rules apply when declaring a method that returns an array:
int foo()[] { ... } /* equivalent to */ int[] foo() { ... }
In the following example, both declarations are correct and can compile and run without any
problems. However, both the Java Coding Convention and the Google Java Style Guide
discourage the form with brackets after the variable name—the brackets identify the array type
and should appear with the type designation. The same should be used for method return
signatures.
float array[]; /* and */ int foo()[] { ... } /* are discouraged */
float[] array; /* and */ int[] foo() { ... } /* are encouraged */
The discouraged type is meant to accommodate transitioning C users, who are familiar with the
syntax for C which has the brackets after the variable name.
In Java, it is possible to have arrays of size 0:
int[] array = new int[0]; // Compiles and runs fine.
https://riptutorial.com/ 55](https://image.slidesharecdn.com/java-language-pdfroom-240812184155-f7515a4f/85/java-language-programacao-2-PDF-Room-pdf-123-320.jpg)
![int[] array2 = {}; // Equivalent syntax.
However, since it's an empty array, no elements can be read from it or assigned to it:
array[0] = 1; // Throws java.lang.ArrayIndexOutOfBoundsException.
int i = array2[0]; // Also throws ArrayIndexOutOfBoundsException.
Such empty arrays are typically useful as return values, so that the calling code only has to worry
about dealing with an array, rather than a potential null value that may lead to a
NullPointerException.
The length of an array must be a non-negative integer:
int[] array = new int[-1]; // Throws java.lang.NegativeArraySizeException
The array size can be determined using a public final field called length:
System.out.println(array.length); // Prints 0 in this case.
Note: array.length returns the actual size of the array and not the number of array elements which
were assigned a value, unlike ArrayList.size() which returns the number of array elements which
were assigned a value.
Creating and initializing multi-dimensional
arrays
The simplest way to create a multi-dimensional array is as follows:
int[][] a = new int[2][3];
It will create two three-length int arrays—a[0] and a[1]. This is very similar to the classical, C-style
initialization of rectangular multi-dimensional arrays.
You can create and initialize at the same time:
int[][] a = { {1, 2}, {3, 4}, {5, 6} };
Unlike C, where only rectangular multi-dimensional arrays are supported, inner arrays do not need
to be of the same length, or even defined:
int[][] a = { {1}, {2, 3}, null };
Here, a[0] is a one-length int array, whereas a[1] is a two-length int array and a[2] is null. Arrays
like this are called jagged arrays or ragged arrays, that is, they are arrays of arrays. Multi-
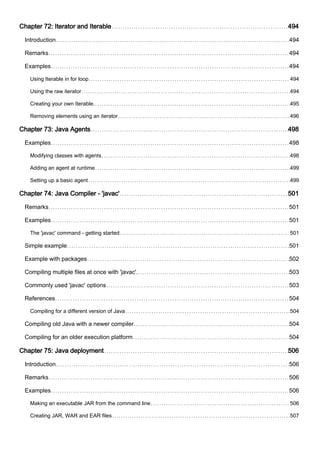
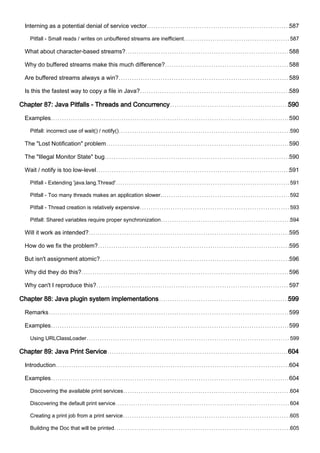
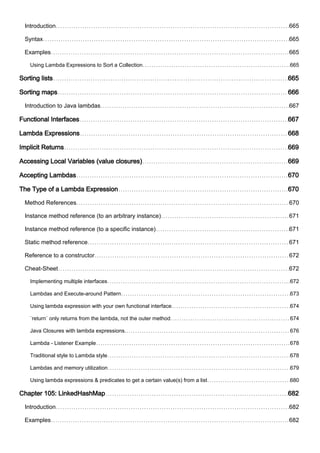
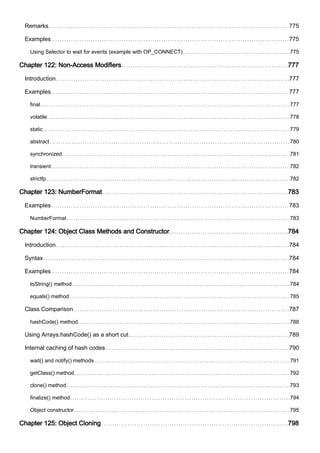
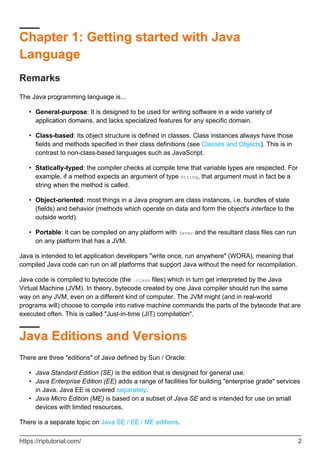
dimensional arrays in Java are implemented as arrays of arrays, i.e. array[i][j][k] is equivalent to
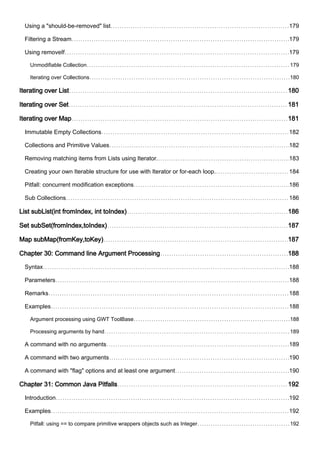
https://riptutorial.com/ 56](https://image.slidesharecdn.com/java-language-pdfroom-240812184155-f7515a4f/85/java-language-programacao-2-PDF-Room-pdf-124-320.jpg)
![((array[i])[j])[k]. Unlike C#, the syntax array[i,j] is not supported in Java.
Multidimensional array representation in Java
Source - Live on Ideone
Creating and initializing reference type arrays
String[] array6 = new String[] { "Laurel", "Hardy" }; // Create an array with new
// operator and array initializer.
String[] array7 = { "Laurel", "Hardy" }; // Shortcut syntax with array
// initializer.
String[] array8 = new String[3]; // { null, null, null }
String[] array9 = null; // null
Live on Ideone
In addition to the String literals and primitives shown above, the shortcut syntax for array
initialization also works with canonical Object types:
Object[] array10 = { new Object(), new Object() };
Because arrays are covariant, a reference type array can be initialized as an array of a subclass,
although an ArrayStoreException will be thrown if you try to set an element to something other than
a String:
Object[] array11 = new String[] { "foo", "bar", "baz" };
array11[1] = "qux"; // fine
array11[1] = new StringBuilder(); // throws ArrayStoreException
The shortcut syntax cannot be used for this because the shortcut syntax would have an implicit
https://riptutorial.com/ 57](https://image.slidesharecdn.com/java-language-pdfroom-240812184155-f7515a4f/85/java-language-programacao-2-PDF-Room-pdf-125-320.jpg)
![type of Object[].
An array can be initialized with zero elements by using String[] emptyArray = new String[0]. For
example, an array with zero length like this is used for Creating an Array from a Collection when
the method needs the runtime type of an object.
In both primitive and reference types, an empty array initialization (for example String[] array8 =
new String[3]) will initialize the array with the default value for each data type.
Creating and initializing generic type arrays
In generic classes, arrays of generic types cannot be initialized like this due to type erasure:
public class MyGenericClass<T> {
private T[] a;
public MyGenericClass() {
a = new T[5]; // Compile time error: generic array creation
}
}
Instead, they can be created using one of the following methods: (note that these will generate
unchecked warnings)
By creating an Object array, and casting it to the generic type:
a = (T[]) new Object[5];
This is the simplest method, but since the underlying array is still of type Object[], this
method does not provide type safety. Therefore, this method of creating an array is best
used only within the generic class - not exposed publicly.
1.
By using Array.newInstance with a class parameter:
public MyGenericClass(Class<T> clazz) {
a = (T[]) Array.newInstance(clazz, 5);
}
Here the class of T has to be explicitly passed to the constructor. The return type of
Array.newInstance is always Object. However, this method is safer because the newly created
array is always of type T[], and therefore can be safely externalized.
2.
Filling an array after initialization
Java SE 1.2
Arrays.fill() can be used to fill an array with the same value after initialization:
https://riptutorial.com/ 58](https://image.slidesharecdn.com/java-language-pdfroom-240812184155-f7515a4f/85/java-language-programacao-2-PDF-Room-pdf-126-320.jpg)
![Arrays.fill(array8, "abc"); // { "abc", "abc", "abc" }
Live on Ideone
fill() can also assign a value to each element of the specified range of the array:
Arrays.fill(array8, 1, 2, "aaa"); // Placing "aaa" from index 1 to 2.
Live on Ideone
Java SE 8
Since Java version 8, the method setAll, and its Concurrent equivalent parallelSetAll, can be used
to set every element of an array to generated values. These methods are passed a generator
function which accepts an index and returns the desired value for that position.
The following example creates an integer array and sets all of its elements to their respective
index value:
int[] array = new int[5];
Arrays.setAll(array, i -> i); // The array becomes { 0, 1, 2, 3, 4 }.
Live on Ideone
Separate declaration and initialization of
arrays
The value of an index for an array element must be a whole number (0, 1, 2, 3, 4, ...) and less than
the length of the array (indexes are zero-based). Otherwise, an ArrayIndexOutOfBoundsException
will be thrown:
int[] array9; // Array declaration - uninitialized
array9 = new int[3]; // Initialize array - { 0, 0, 0 }
array9[0] = 10; // Set index 0 value - { 10, 0, 0 }
array9[1] = 20; // Set index 1 value - { 10, 20, 0 }
array9[2] = 30; // Set index 2 value - { 10, 20, 30 }
Arrays may not be re-initialized with array
initializer shortcut syntax
It is not possible to re-initialize an array via a shortcut syntax with an array initializer since an array
initializer can only be specified in a field declaration or local variable declaration, or as a part of an
array creation expression.
https://riptutorial.com/ 59](https://image.slidesharecdn.com/java-language-pdfroom-240812184155-f7515a4f/85/java-language-programacao-2-PDF-Room-pdf-127-320.jpg)
![However, it is possible to create a new array and assign it to the variable being used to reference
the old array. While this results in the array referenced by that variable being re-initialized, the
variable contents are a completely new array. To do this, the new operator can be used with an
array initializer and assigned to the array variable:
// First initialization of array
int[] array = new int[] { 1, 2, 3 };
// Prints "1 2 3 ".
for (int i : array) {
System.out.print(i + " ");
}
// Re-initializes array to a new int[] array.
array = new int[] { 4, 5, 6 };
// Prints "4 5 6 ".
for (int i : array) {
System.out.print(i + " ");
}
array = { 1, 2, 3, 4 }; // Compile-time error! Can't re-initialize an array via shortcut
// syntax with array initializer.
Live on Ideone
Creating an Array from a Collection
Two methods in java.util.Collection create an array from a collection:
Object[] toArray()
•
<T> T[] toArray(T[] a)
•
Object[] toArray() can be used as follows:
Java SE 5
Set<String> set = new HashSet<String>();
set.add("red");
set.add("blue");
// although set is a Set<String>, toArray() returns an Object[] not a String[]
Object[] objectArray = set.toArray();
<T> T[] toArray(T[] a) can be used as follows:
Java SE 5
Set<String> set = new HashSet<String>();
set.add("red");
set.add("blue");
// The array does not need to be created up front with the correct size.
// Only the array type matters. (If the size is wrong, a new array will
https://riptutorial.com/ 60](https://image.slidesharecdn.com/java-language-pdfroom-240812184155-f7515a4f/85/java-language-programacao-2-PDF-Room-pdf-128-320.jpg)
![// be created with the same type.)
String[] stringArray = set.toArray(new String[0]);
// If you supply an array of the same size as collection or bigger, it
// will be populated with collection values and returned (new array
// won't be allocated)
String[] stringArray2 = set.toArray(new String[set.size()]);
The difference between them is more than just having untyped vs typed results. Their performance
can differ as well (for details please read this performance analysis section):
Object[] toArray() uses vectorized arraycopy, which is much faster than the type-checked
arraycopy used in T[] toArray(T[] a).
•
T[] toArray(new T[non-zero-size]) needs to zero-out the array at runtime, while T[]
toArray(new T[0]) does not. Such avoidance makes the latter call faster than the former.
Detailed analysis here : Arrays of Wisdom of the Ancients.
•
Java SE 8
Starting from Java SE 8+, where the concept of Stream has been introduced, it is possible to use
the Stream produced by the collection in order to create a new Array using the Stream.toArray
method.
String[] strings = list.stream().toArray(String[]::new);
Examples taken from two answers (1, 2) to Converting 'ArrayList to 'String[]' in Java on Stack
Overflow.
Arrays to a String
Java SE 5
Since Java 1.5 you can get a String representation of the contents of the specified array without
iterating over its every element. Just use Arrays.toString(Object[]) or
Arrays.deepToString(Object[]) for multidimentional arrays:
int[] arr = {1, 2, 3, 4, 5};
System.out.println(Arrays.toString(arr)); // [1, 2, 3, 4, 5]
int[][] arr = {
{1, 2, 3},
{4, 5, 6},
{7, 8, 9}
};
System.out.println(Arrays.deepToString(arr)); // [[1, 2, 3], [4, 5, 6], [7, 8, 9]]
Arrays.toString() method uses Object.toString() method to produce String values of every item in
the array, beside primitive type array, it can be used for all type of arrays. For instance:
public class Cat { /* implicitly extends Object */
https://riptutorial.com/ 61](https://image.slidesharecdn.com/java-language-pdfroom-240812184155-f7515a4f/85/java-language-programacao-2-PDF-Room-pdf-129-320.jpg)
![@Override
public String toString() {
return "CAT!";
}
}
Cat[] arr = { new Cat(), new Cat() };
System.out.println(Arrays.toString(arr)); // [CAT!, CAT!]
If no overridden toString() exists for the class, then the inherited toString() from Object will be
used. Usually the output is then not very useful, for example:
public class Dog {
/* implicitly extends Object */
}
Dog[] arr = { new Dog() };
System.out.println(Arrays.toString(arr)); // [Dog@17ed40e0]
Creating a List from an Array
The Arrays.asList() method can be used to return a fixed-size List containing the elements of the
given array. The resulting List will be of the same parameter type as the base type of the array.
String[] stringArray = {"foo", "bar", "baz"};
List<String> stringList = Arrays.asList(stringArray);
Note: This list is backed by (a view of) the original array, meaning that any changes to the list will
change the array and vice versa. However, changes to the list that would change its size (and
hence the array length) will throw an exception.
To create a copy of the list, use the constructor of java.util.ArrayList taking a Collection as an
argument:
Java SE 5
String[] stringArray = {"foo", "bar", "baz"};
List<String> stringList = new ArrayList<String>(Arrays.asList(stringArray));
Java SE 7
In Java SE 7 and later, a pair of angle brackets <> (empty set of type arguments) can be used,
which is called the Diamond. The compiler can determine the type arguments from the context.
This means the type information can be left out when calling the constructor of ArrayList and it will
be inferred automatically during compilation. This is called Type Inference which is a part of Java
Generics.
// Using Arrays.asList()
String[] stringArray = {"foo", "bar", "baz"};
List<String> stringList = new ArrayList<>(Arrays.asList(stringArray));
https://riptutorial.com/ 62](https://image.slidesharecdn.com/java-language-pdfroom-240812184155-f7515a4f/85/java-language-programacao-2-PDF-Room-pdf-130-320.jpg)
![// Using ArrayList.addAll()
String[] stringArray = {"foo", "bar", "baz"};
ArrayList<String> list = new ArrayList<>();
list.addAll(Arrays.asList(stringArray));
// Using Collections.addAll()
String[] stringArray = {"foo", "bar", "baz"};
ArrayList<String> list = new ArrayList<>();
Collections.addAll(list, stringArray);
A point worth noting about the Diamond is that it cannot be used with Anonymous Classes.
Java SE 8
// Using Streams
int[] ints = {1, 2, 3};
List<Integer> list = Arrays.stream(ints).boxed().collect(Collectors.toList());
String[] stringArray = {"foo", "bar", "baz"};
List<Object> list = Arrays.stream(stringArray).collect(Collectors.toList());
Important notes related to using Arrays.asList() method
This method returns List, which is an instance of Arrays$ArrayList(static inner class of Arrays
) and not java.util.ArrayList. The resulting List is of fixed-size. That means, adding or
removing elements is not supported and will throw an UnsupportedOperationException:
stringList.add("something"); // throws java.lang.UnsupportedOperationException
•
A new List can be created by passing an array-backed List to the constructor of a new List.
This creates a new copy of the data, which has changeable size and that is not backed by
the original array:
List<String> modifiableList = new ArrayList<>(Arrays.asList("foo", "bar"));
•
Calling <T> List<T> asList(T... a) on a primitive array, such as an int[], will produce a
List<int[]> whose only element is the source primitive array instead of the actual elements
of the source array.
The reason for this behavior is that primitive types cannot be used in place of generic type
parameters, so the entire primitive array replaces the generic type parameter in this case. In
order to convert a primitive array to a List, first of all, convert the primitive array to an array
of the corresponding wrapper type (i.e. call Arrays.asList on an Integer[] instead of an int[]
).
Therefore, this will print false:
•
https://riptutorial.com/ 63](https://image.slidesharecdn.com/java-language-pdfroom-240812184155-f7515a4f/85/java-language-programacao-2-PDF-Room-pdf-131-320.jpg)
![int[] arr = {1, 2, 3}; // primitive array of int
System.out.println(Arrays.asList(arr).contains(1));
View Demo
On the other hand, this will print true:
Integer[] arr = {1, 2, 3}; // object array of Integer (wrapper for int)
System.out.println(Arrays.asList(arr).contains(1));
View Demo
This will also print true, because the array will be interpreted as an Integer[]):
System.out.println(Arrays.asList(1,2,3).contains(1));
View Demo
Multidimensional and Jagged Arrays
It is possible to define an array with more than one dimension. Instead of being accessed by
providing a single index, a multidimensional array is accessed by specifying an index for each
dimension.
The declaration of multidimensional array can be done by adding [] for each dimension to a
regular array decleration. For instance, to make a 2-dimensional int array, add another set of
brackets to the declaration, such as int[][]. This continues for 3-dimensional arrays (int[][][])
and so forth.
To define a 2-dimensional array with three rows and three columns:
int rows = 3;
int columns = 3;
int[][] table = new int[rows][columns];
The array can be indexed and assign values to it with this construct. Note that the unassigned
values are the default values for the type of an array, in this case 0 for int.
table[0][0] = 0;
table[0][1] = 1;
table[0][2] = 2;
It is also possible to instantiate a dimension at a time, and even make non-rectangular arrays.
These are more commonly referred to as jagged arrays.
int[][] nonRect = new int[4][];
It is important to note that although it is possible to define any dimension of jagged array, it's
https://riptutorial.com/ 64](https://image.slidesharecdn.com/java-language-pdfroom-240812184155-f7515a4f/85/java-language-programacao-2-PDF-Room-pdf-132-320.jpg)
![preceding level must be defined.
// valid
String[][] employeeGraph = new String[30][];
// invalid
int[][] unshapenMatrix = new int[][10];
// also invalid
int[][][] misshapenGrid = new int[100][][10];
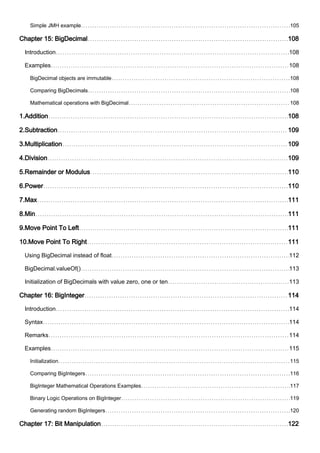
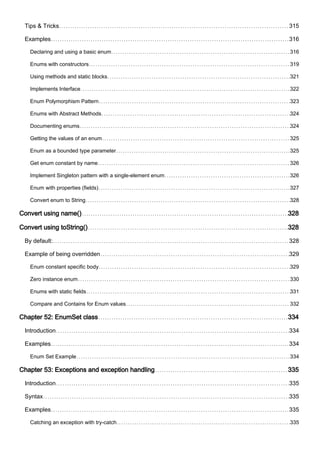
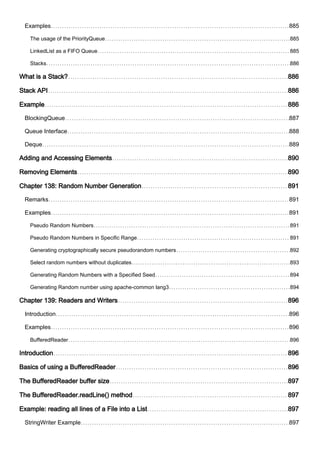
How Multidimensional Arrays are represented
in Java
Image source: http://math.hws.edu/eck/cs124/javanotes3/c8/s5.html
Jagged array literal intialization
Multidimensional arrays and jagged arrays can also be initialized with a literal expression. The
following declares and populates a 2x3 int array:
int[][] table = {
{1, 2, 3},
{4, 5, 6}
};
Note: Jagged subarrays may also be null. For instance, the following code declares and
populates a two dimensional int array whose first subarray is null, second subarray is of zero
length, third subarray is of one length and the last subarray is a two length array:
int[][] table = {
null,
https://riptutorial.com/ 65](https://image.slidesharecdn.com/java-language-pdfroom-240812184155-f7515a4f/85/java-language-programacao-2-PDF-Room-pdf-133-320.jpg)
![{},
{1},
{1,2}
};
For multidimensional array it is possible to extract arrays of lower-level dimension by their indices:
int[][][] arr = new int[3][3][3];
int[][] arr1 = arr[0]; // get first 3x3-dimensional array from arr
int[] arr2 = arr1[0]; // get first 3-dimensional array from arr1
int[] arr3 = arr[0]; // error: cannot convert from int[][] to int[]
ArrayIndexOutOfBoundsException
The ArrayIndexOutOfBoundsException is thrown when a non-existing index of an array is being
accessed.
Arrays are zero-based indexed, so the index of the first element is 0 and the index of the last
element is the array capacity minus 1 (i.e. array.length - 1).
Therefore, any request for an array element by the index i has to satisfy the condition 0 <= i <
array.length, otherwise the ArrayIndexOutOfBoundsException will be thrown.
The following code is a simple example where an ArrayIndexOutOfBoundsException is thrown.
String[] people = new String[] { "Carol", "Andy" };
// An array will be created:
// people[0]: "Carol"
// people[1]: "Andy"
// Notice: no item on index 2. Trying to access it triggers the exception:
System.out.println(people[2]); // throws an ArrayIndexOutOfBoundsException.
Output:
Exception in thread "main" java.lang.ArrayIndexOutOfBoundsException: 2
at your.package.path.method(YourClass.java:15)
Note that the illegal index that is being accessed is also included in the exception (2 in the
example); this information could be useful to find the cause of the exception.
To avoid this, simply check that the index is within the limits of the array:
int index = 2;
if (index >= 0 && index < people.length) {
System.out.println(people[index]);
}
https://riptutorial.com/ 66](https://image.slidesharecdn.com/java-language-pdfroom-240812184155-f7515a4f/85/java-language-programacao-2-PDF-Room-pdf-134-320.jpg)
![Getting the Length of an Array
Arrays are objects which provide space to store up to its size of elements of specified type. An
array's size can not be modified after the array is created.
int[] arr1 = new int[0];
int[] arr2 = new int[2];
int[] arr3 = new int[]{1, 2, 3, 4};
int[] arr4 = {1, 2, 3, 4, 5, 6, 7};
int len1 = arr1.length; // 0
int len2 = arr2.length; // 2
int len3 = arr3.length; // 4
int len4 = arr4.length; // 7
The length field in an array stores the size of an array. It is a final field and cannot be modified.
This code shows the difference between the length of an array and amount of objects an array
stores.
public static void main(String[] args) {
Integer arr[] = new Integer[] {1,2,3,null,5,null,7,null,null,null,11,null,13};
int arrayLength = arr.length;
int nonEmptyElementsCount = 0;
for (int i=0; i<arrayLength; i++) {
Integer arrElt = arr[i];
if (arrElt != null) {
nonEmptyElementsCount++;
}
}
System.out.println("Array 'arr' has a length of "+arrayLength+"n"
+ "and it contains "+nonEmptyElementsCount+" non-empty values");
}
Result:
Array 'arr' has a length of 13
and it contains 7 non-empty values
Comparing arrays for equality
Array types inherit their equals() (and hashCode()) implementations from java.lang.Object, so
equals() will only return true when comparing against the exact same array object. To compare
arrays for equality based on their values, use java.util.Arrays.equals, which is overloaded for all
array types.
int[] a = new int[]{1, 2, 3};
int[] b = new int[]{1, 2, 3};
System.out.println(a.equals(b)); //prints "false" because a and b refer to different objects
System.out.println(Arrays.equals(a, b)); //prints "true" because the elements of a and b have
https://riptutorial.com/ 67](https://image.slidesharecdn.com/java-language-pdfroom-240812184155-f7515a4f/85/java-language-programacao-2-PDF-Room-pdf-135-320.jpg)
![the same values
When the element type is a reference type, Arrays.equals() calls equals() on the array elements to
determine equality. In particular, if the element type is itself an array type, identity comparison will
be used. To compare multidimensional arrays for equality, use Arrays.deepEquals() instead as
below:
int a[] = { 1, 2, 3 };
int b[] = { 1, 2, 3 };
Object[] aObject = { a }; // aObject contains one element
Object[] bObject = { b }; // bObject contains one element
System.out.println(Arrays.equals(aObject, bObject)); // false
System.out.println(Arrays.deepEquals(aObject, bObject));// true
Because sets and maps use equals() and hashCode(), arrays are generally not useful as set
elements or map keys. Either wrap them in a helper class that implements equals() and hashCode()
in terms of the array elements, or convert them to List instances and store the lists.
Arrays to Stream
Java SE 8
Converting an array of objects to Stream:
String[] arr = new String[] {"str1", "str2", "str3"};
Stream<String> stream = Arrays.stream(arr);
Converting an array of primitives to Stream using Arrays.stream() will transform the array to a
primitive specialization of Stream:
int[] intArr = {1, 2, 3};
IntStream intStream = Arrays.stream(intArr);
You can also limit the Stream to a range of elements in the array. The start index is inclusive and
the end index is exclusive:
int[] values = {1, 2, 3, 4};
IntStream intStream = Arrays.stream(values, 2, 4);
A method similar to Arrays.stream() appears in the Stream class: Stream.of(). The difference is that
Stream.of() uses a varargs parameter, so you can write something like:
Stream<Integer> intStream = Stream.of(1, 2, 3);
Stream<String> stringStream = Stream.of("1", "2", "3");
Stream<Double> doubleStream = Stream.of(new Double[]{1.0, 2.0});
Iterating over arrays
https://riptutorial.com/ 68](https://image.slidesharecdn.com/java-language-pdfroom-240812184155-f7515a4f/85/java-language-programacao-2-PDF-Room-pdf-136-320.jpg)
![You can iterate over arrays either by using enhanced for loop (aka foreach) or by using array
indices:
int[] array = new int[10];
// using indices: read and write
for (int i = 0; i < array.length; i++) {
array[i] = i;
}
Java SE 5
// extended for: read only
for (int e : array) {
System.out.println(e);
}
It is worth noting here that there is no direct way to use an Iterator on an Array, but through the
Arrays library it can be easily converted to a list to obtain an Iterable object.
For boxed arrays use Arrays.asList:
Integer[] boxed = {1, 2, 3};
Iterable<Integer> boxedIt = Arrays.asList(boxed); // list-backed iterable
Iterator<Integer> fromBoxed1 = boxedIt.iterator();
For primitive arrays (using java 8) use streams (specifically in this example - Arrays.stream ->
IntStream):
int[] primitives = {1, 2, 3};
IntStream primitiveStream = Arrays.stream(primitives); // list-backed iterable
PrimitiveIterator.OfInt fromPrimitive1 = primitiveStream.iterator();
If you can't use streams (no java 8), you can choose to use google's guava library:
Iterable<Integer> fromPrimitive2 = Ints.asList(primitives);
In two-dimensional arrays or more, both techniques can be used in a slightly more complex
fashion.
Example:
int[][] array = new int[10][10];
for (int indexOuter = 0; indexOuter < array.length; indexOuter++) {
for (int indexInner = 0; indexInner < array[indexOuter].length; indexInner++) {
array[indexOuter][indexInner] = indexOuter + indexInner;
}
}
Java SE 5
https://riptutorial.com/ 69](https://image.slidesharecdn.com/java-language-pdfroom-240812184155-f7515a4f/85/java-language-programacao-2-PDF-Room-pdf-137-320.jpg)
![for (int[] numbers : array) {
for (int value : numbers) {
System.out.println(value);
}
}
It is impossible to set an Array to any non-uniform value without using an index based loop.
Of course you can also use while or do-while loops when iterating using indices.
One note of caution: when using array indices, make sure the index is between 0 and
array.length - 1 (both inclusive). Don't make hard coded assumptions on the array length
otherwise you might break your code if the array length changes but your hard coded values don't.
Example:
int[] numbers = {1, 2, 3, 4};
public void incrementNumbers() {
// DO THIS :
for (int i = 0; i < numbers.length; i++) {
numbers[i] += 1; //or this: numbers[i] = numbers[i] + 1; or numbers[i]++;
}
// DON'T DO THIS :
for (int i = 0; i < 4; i++) {
numbers[i] += 1;
}
}
It's also best if you don't use fancy calculations to get the index but use the index to iterate and if
you need different values calculate those.
Example:
public void fillArrayWithDoubleIndex(int[] array) {
// DO THIS :
for (int i = 0; i < array.length; i++) {
array[i] = i * 2;
}
// DON'T DO THIS :
int doubleLength = array.length * 2;
for (int i = 0; i < doubleLength; i += 2) {
array[i / 2] = i;
}
}
Accessing Arrays in reverse order
int[] array = {0, 1, 1, 2, 3, 5, 8, 13};
for (int i = array.length - 1; i >= 0; i--) {
System.out.println(array[i]);
https://riptutorial.com/ 70](https://image.slidesharecdn.com/java-language-pdfroom-240812184155-f7515a4f/85/java-language-programacao-2-PDF-Room-pdf-138-320.jpg)
![}
Using temporary Arrays to reduce code repetition
Iterating over a temporary array instead of repeating code can make your code cleaner. It can be
used where the same operation is performed on multiple variables.
// we want to print out all of these
String name = "Margaret";
int eyeCount = 16;
double height = 50.2;
int legs = 9;
int arms = 5;
// copy-paste approach:
System.out.println(name);
System.out.println(eyeCount);
System.out.println(height);
System.out.println(legs);
System.out.println(arms);
// temporary array approach:
for(Object attribute : new Object[]{name, eyeCount, height, legs, arms})
System.out.println(attribute);
// using only numbers
for(double number : new double[]{eyeCount, legs, arms, height})
System.out.println(Math.sqrt(number));
Keep in mind that this code should not be used in performance-critical sections, as an array is
created every time the loop is entered, and that primitive variables will be copied into the array and
thus cannot be modified.
Copying arrays
Java provides several ways to copy an array.
for loop
int[] a = { 4, 1, 3, 2 };
int[] b = new int[a.length];
for (int i = 0; i < a.length; i++) {
b[i] = a[i];
}
Note that using this option with an Object array instead of primitive array will fill the copy with
reference to the original content instead of copy of it.
https://riptutorial.com/ 71](https://image.slidesharecdn.com/java-language-pdfroom-240812184155-f7515a4f/85/java-language-programacao-2-PDF-Room-pdf-139-320.jpg)
![Object.clone()
Since arrays are Objects in Java, you can use Object.clone().
int[] a = { 4, 1, 3, 2 };
int[] b = a.clone(); // [4, 1, 3, 2]
Note that the Object.clone method for an array performs a shallow copy, i.e. it returns a reference
to a new array which references the same elements as the source array.
Arrays.copyOf()
java.util.Arrays provides an easy way to perform the copy of an array to another. Here is the
basic usage:
int[] a = {4, 1, 3, 2};
int[] b = Arrays.copyOf(a, a.length); // [4, 1, 3, 2]
Note that Arrays.copyOf also provides an overload which allows you to change the type of the
array:
Double[] doubles = { 1.0, 2.0, 3.0 };
Number[] numbers = Arrays.copyOf(doubles, doubles.length, Number[].class);
System.arraycopy()
public static void arraycopy(Object src, int srcPos, Object dest, int destPos, int
length) Copies an array from the specified source array, beginning at the specified
position, to the specified position of the destination array.
Below an example of use
int[] a = { 4, 1, 3, 2 };
int[] b = new int[a.length];
System.arraycopy(a, 0, b, 0, a.length); // [4, 1, 3, 2]
Arrays.copyOfRange()
Mainly used to copy a part of an Array, you can also use it to copy whole array to another as
below:
https://riptutorial.com/ 72](https://image.slidesharecdn.com/java-language-pdfroom-240812184155-f7515a4f/85/java-language-programacao-2-PDF-Room-pdf-140-320.jpg)
![int[] a = { 4, 1, 3, 2 };
int[] b = Arrays.copyOfRange(a, 0, a.length); // [4, 1, 3, 2]
Casting Arrays
Arrays are objects, but their type is defined by the type of the contained objects. Therefore, one
cannot just cast A[] to T[], but each A member of the specific A[] must be cast to a T object.
Generic example:
public static <T, A> T[] castArray(T[] target, A[] array) {
for (int i = 0; i < array.length; i++) {
target[i] = (T) array[i];
}
return target;
}
Thus, given an A[] array:
T[] target = new T[array.Length];
target = castArray(target, array);
Java SE provides the method Arrays.copyOf(original, newLength, newType) for this purpose:
Double[] doubles = { 1.0, 2.0, 3.0 };
Number[] numbers = Arrays.copyOf(doubles, doubles.length, Number[].class);
Remove an element from an array
Java doesn't provide a direct method in java.util.Arrays to remove an element from an array. To
perform it, you can either copy the original array to a new one without the element to remove or
convert your array to another structure allowing the removal.
Using ArrayList
You can convert the array to a java.util.List, remove the element and convert the list back to an
array as follows:
String[] array = new String[]{"foo", "bar", "baz"};
List<String> list = new ArrayList<>(Arrays.asList(array));
list.remove("foo");
// Creates a new array with the same size as the list and copies the list
// elements to it.
array = list.toArray(new String[list.size()]);
System.out.println(Arrays.toString(array)); //[bar, baz]
https://riptutorial.com/ 73](https://image.slidesharecdn.com/java-language-pdfroom-240812184155-f7515a4f/85/java-language-programacao-2-PDF-Room-pdf-141-320.jpg)
![Using System.arraycopy
System.arraycopy() can be used to make a copy of the original array and remove the element you
want. Below an example:
int[] array = new int[] { 1, 2, 3, 4 }; // Original array.
int[] result = new int[array.length - 1]; // Array which will contain the result.
int index = 1; // Remove the value "2".
// Copy the elements at the left of the index.
System.arraycopy(array, 0, result, 0, index);
// Copy the elements at the right of the index.
System.arraycopy(array, index + 1, result, index, array.length - index - 1);
System.out.println(Arrays.toString(result)); //[1, 3, 4]
Using Apache Commons Lang
To easily remove an element, you can use the Apache Commons Lang library and especially the
static method removeElement() of the class ArrayUtils. Below an example:
int[] array = new int[]{1,2,3,4};
array = ArrayUtils.removeElement(array, 2); //remove first occurrence of 2
System.out.println(Arrays.toString(array)); //[1, 3, 4]
Array Covariance
Object arrays are covariant, which means that just as Integer is a subclass of Number, Integer[] is a
subclass of Number[]. This may seem intuitive, but can result in surprising behavior:
Integer[] integerArray = {1, 2, 3};
Number[] numberArray = integerArray; // valid
Number firstElement = numberArray[0]; // valid
numberArray[0] = 4L; // throws ArrayStoreException at runtime
Although Integer[] is a subclass of Number[], it can only hold Integers, and trying to assign a Long
element throws a runtime exception.
Note that this behavior is unique to arrays, and can be avoided by using a generic List instead:
List<Integer> integerList = Arrays.asList(1, 2, 3);
//List<Number> numberList = integerList; // compile error
List<? extends Number> numberList = integerList;
Number firstElement = numberList.get(0);
//numberList.set(0, 4L); // compile error
It's not necessary for all of the array elements to share the same type, as long as they are a
subclass of the array's type:
https://riptutorial.com/ 74](https://image.slidesharecdn.com/java-language-pdfroom-240812184155-f7515a4f/85/java-language-programacao-2-PDF-Room-pdf-142-320.jpg)
![interface I {}
class A implements I {}
class B implements I {}
class C implements I {}
I[] array10 = new I[] { new A(), new B(), new C() }; // Create an array with new
// operator and array initializer.
I[] array11 = { new A(), new B(), new C() }; // Shortcut syntax with array
// initializer.
I[] array12 = new I[3]; // { null, null, null }
I[] array13 = new A[] { new A(), new A() }; // Works because A implements I.
Object[] array14 = new Object[] { "Hello, World!", 3.14159, 42 }; // Create an array with
// new operator and array initializer.
Object[] array15 = { new A(), 64, "My String" }; // Shortcut syntax
// with array initializer.
How do you change the size of an array?
The simple answer is that you cannot do this. Once an array has been created, its size cannot be
changed. Instead, an array can only be "resized" by creating a new array with the appropriate size
and copying the elements from the existing array to the new one.
String[] listOfCities = new String[3]; // array created with size 3.
listOfCities[0] = "New York";
listOfCities[1] = "London";
listOfCities[2] = "Berlin";
Suppose (for example) that a new element needs to be added to the listOfCities array defined as
above. To do this, you will need to:
create a new array with size 4,
1.
copy the existing 3 elements of the old array to the new array at offsets 0, 1 and 2, and
2.
add the new element to the new array at offset 3.
3.
There are various ways to do the above. Prior to Java 6, the most concise way was:
String[] newArray = new String[listOfCities.length + 1];
System.arraycopy(listOfCities, 0, newArray, 0, listOfCities.length);
newArray[listOfCities.length] = "Sydney";
From Java 6 onwards, the Arrays.copyOf and Arrays.copyOfRange methods can do this more simply:
String[] newArray = Arrays.copyOf(listOfCities, listOfCities.length + 1);
newArray[listOfCities.length] = "Sydney";
For other ways to copy an array, refer to the following example. Bear in mind that you need an
array copy with a different length to the original when resizing.
https://riptutorial.com/ 75](https://image.slidesharecdn.com/java-language-pdfroom-240812184155-f7515a4f/85/java-language-programacao-2-PDF-Room-pdf-143-320.jpg)
![Copying arrays
•
A better alternatives to array resizing
There two major drawbacks with resizing an array as described above:
It is inefficient. Making an array bigger (or smaller) involves copying many or all of the
existing array elements, and allocating a new array object. The larger the array, the more
expensive it gets.
•
You need to be able to update any "live" variables that contain references to the old array.
•
One alternative is to create the array with a large enough size to start with. This is only viable if
you can determine that size accurately before allocating the array. If you cannot do that, then the
problem of resizing the array arises again.
The other alternative is to use a data structure class provided by the Java SE class library or a
third-party library. For example, the Java SE "collections" framework provides a number of
implementations of the List, Set and Map APIs with different runtime properties. The ArrayList class
is closest to performance characteristics of a plain array (e.g. O(N) lookup, O(1) get and set, O(N)
random insertion and deletion) while providing more efficient resizing without the reference update
problem.
(The resize efficiency for ArrayList comes from its strategy of doubling the size of the backing
array on each resize. For a typical use-case, this means that you only resize occasionally. When
you amortize over the lifetime of the list, the resize cost per insert is O(1). It may be possible to use
the same strategy when resizing a plain array.)
Finding an element in an array
There are many ways find the location of a value in an array. The following example snippets all
assume that the array is one of the following:
String[] strings = new String[] { "A", "B", "C" };
int[] ints = new int[] { 1, 2, 3, 4 };
In addition, each one sets index or index2 to either the index of required element, or -1 if the
element is not present.
Using Arrays.binarySearch (for sorted arrays only)
int index = Arrays.binarySearch(strings, "A");
int index2 = Arrays.binarySearch(ints, 1);
Using a Arrays.asList (for non-primitive arrays only)
int index = Arrays.asList(strings).indexOf("A");
https://riptutorial.com/ 76](https://image.slidesharecdn.com/java-language-pdfroom-240812184155-f7515a4f/85/java-language-programacao-2-PDF-Room-pdf-144-320.jpg)
![int index2 = Arrays.asList(ints).indexOf(1); // compilation error
Using a Stream
Java SE 8
int index = IntStream.range(0, strings.length)
.filter(i -> "A".equals(strings[i]))
.findFirst()
.orElse(-1); // If not present, gives us -1.
// Similar for an array of primitives
Linear search using a loop
int index = -1;
for (int i = 0; i < array.length; i++) {
if ("A".equals(array[i])) {
index = i;
break;
}
}
// Similar for an array of primitives
Linear search using 3rd-party libraries such as
org.apache.commons
int index = org.apache.commons.lang3.ArrayUtils.contains(strings, "A");
int index2 = org.apache.commons.lang3.ArrayUtils.contains(ints, 1);
Note: Using a direct linear search is more efficient than wrapping in a list.
Testing if an array contains an element
The examples above can be adapted to test if the array contains an element by simply testing to
see if the index computed is greater or equal to zero.
Alternatively, there are also some more concise variations:
boolean isPresent = Arrays.asList(strings).contains("A");
Java SE 8
boolean isPresent = Stream<String>.of(strings).anyMatch(x -> "A".equals(x));
boolean isPresent = false;
for (String s : strings) {
if ("A".equals(s)) {
https://riptutorial.com/ 77](https://image.slidesharecdn.com/java-language-pdfroom-240812184155-f7515a4f/85/java-language-programacao-2-PDF-Room-pdf-145-320.jpg)
![isPresent = true;
break;
}
}
boolean isPresent = org.apache.commons.lang3.ArrayUtils.contains(ints, 4);
Sorting arrays
Sorting arrays can be easily done with the Arrays api.
import java.util.Arrays;
// creating an array with integers
int[] array = {7, 4, 2, 1, 19};
// this is the sorting part just one function ready to be used
Arrays.sort(array);
// prints [1, 2, 4, 7, 19]
System.out.println(Arrays.toString(array));
Sorting String arrays:
String is not a numeric data, it defines it's own order which is called lexicographic order, also
known as alphabetic order. When you sort an array of String using sort() method, it sorts array
into natural order defined by Comparable interface, as shown below :
Increasing Order
String[] names = {"John", "Steve", "Shane", "Adam", "Ben"};
System.out.println("String array before sorting : " + Arrays.toString(names));
Arrays.sort(names);
System.out.println("String array after sorting in ascending order : " +
Arrays.toString(names));
Output:
String array before sorting : [John, Steve, Shane, Adam, Ben]
String array after sorting in ascending order : [Adam, Ben, John, Shane, Steve]
Decreasing Order
Arrays.sort(names, 0, names.length, Collections.reverseOrder());
System.out.println("String array after sorting in descending order : " +
Arrays.toString(names));
Output:
String array after sorting in descending order : [Steve, Shane, John, Ben, Adam]
Sorting an Object array
https://riptutorial.com/ 78](https://image.slidesharecdn.com/java-language-pdfroom-240812184155-f7515a4f/85/java-language-programacao-2-PDF-Room-pdf-146-320.jpg)
![In order to sort an object array, all elements must implement either Comparable or Comparator
interface to define the order of the sorting.
We can use either sort(Object[]) method to sort an object array on its natural order, but you must
ensure that all elements in the array must implement Comparable.
Furthermore, they must be mutually comparable as well, for example e1.compareTo(e2) must not
throw a ClassCastException for any elements e1 and e2 in the array. Alternatively you can sort an
Object array on custom order using sort(T[], Comparator) method as shown in following example.
// How to Sort Object Array in Java using Comparator and Comparable
Course[] courses = new Course[4];
courses[0] = new Course(101, "Java", 200);
courses[1] = new Course(201, "Ruby", 300);
courses[2] = new Course(301, "Python", 400);
courses[3] = new Course(401, "Scala", 500);
System.out.println("Object array before sorting : " + Arrays.toString(courses));
Arrays.sort(courses);
System.out.println("Object array after sorting in natural order : " +
Arrays.toString(courses));
Arrays.sort(courses, new Course.PriceComparator());
System.out.println("Object array after sorting by price : " + Arrays.toString(courses));
Arrays.sort(courses, new Course.NameComparator());
System.out.println("Object array after sorting by name : " + Arrays.toString(courses));
Output:
Object array before sorting : [#101 Java@200 , #201 Ruby@300 , #301 Python@400 , #401
Scala@500 ]
Object array after sorting in natural order : [#101 Java@200 , #201 Ruby@300 , #301 Python@400
, #401 Scala@500 ]
Object array after sorting by price : [#101 Java@200 , #201 Ruby@300 , #301 Python@400 , #401
Scala@500 ]
Object array after sorting by name : [#101 Java@200 , #301 Python@400 , #201 Ruby@300 , #401
Scala@500 ]
Converting arrays between primitives and boxed types
Sometimes conversion of primitive types to boxed types is necessary.
To convert the array, it's possible to use streams (in Java 8 and above):
Java SE 8
int[] primitiveArray = {1, 2, 3, 4};
Integer[] boxedArray =
Arrays.stream(primitiveArray).boxed().toArray(Integer[]::new);
With lower versions it can be by iterating the primitive array and explicitly copying it to the boxed
array:
https://riptutorial.com/ 79](https://image.slidesharecdn.com/java-language-pdfroom-240812184155-f7515a4f/85/java-language-programacao-2-PDF-Room-pdf-147-320.jpg)
![Java SE 8
int[] primitiveArray = {1, 2, 3, 4};
Integer[] boxedArray = new Integer[primitiveArray.length];
for (int i = 0; i < primitiveArray.length; ++i) {
boxedArray[i] = primitiveArray[i]; // Each element is autoboxed here
}
Similarly, a boxed array can be converted to an array of its primitive counterpart:
Java SE 8
Integer[] boxedArray = {1, 2, 3, 4};
int[] primitiveArray =
Arrays.stream(boxedArray).mapToInt(Integer::intValue).toArray();
Java SE 8
Integer[] boxedArray = {1, 2, 3, 4};
int[] primitiveArray = new int[boxedArray.length];
for (int i = 0; i < boxedArray.length; ++i) {
primitiveArray[i] = boxedArray[i]; // Each element is outboxed here
}
Read Arrays online: https://riptutorial.com/java/topic/99/arrays
https://riptutorial.com/ 80](https://image.slidesharecdn.com/java-language-pdfroom-240812184155-f7515a4f/85/java-language-programacao-2-PDF-Room-pdf-148-320.jpg)
![Similarly for other instance types.
AtomicIntegerArray aIntArray = new AtomicIntegerArray(10) // Create array of specific length
AtomicIntegerArray aIntArray = new AtomicIntegerArray(new int[] {1, 2, 3}) // Initialize array
with another array
Similarly for other atomic types.
There is a notable exception that there is no float and double types. These can be simulated
through the use of Float.floatToIntBits(float) and Float.intBitsToFloat(int) for float as well as
Double.doubleToLongBits(double) and Double.longBitsToDouble(long) for doubles.
If you are willing to use sun.misc.Unsafe you can use any primitive variable as atomic by using the
atomic operation in sun.misc.Unsafe. All primitive types should be converted or encoded in int or
longs to so use it in this way. For more on this see: sun.misc.Unsafe.
Motivation for Atomic Types
The simple way to implement multi-threaded applications is to use Java's built-in synchronization
and locking primitives; e.g. the synchronized keyword. The following example shows how we might
use synchronized to accumulate counts.
public class Counters {
private final int[] counters;
public Counters(int nosCounters) {
counters = new int[nosCounters];
}
/**
* Increments the integer at the given index
*/
public synchronized void count(int number) {
if (number >= 0 && number < counters.length) {
counters[number]++;
}
}
/**
* Obtains the current count of the number at the given index,
* or if there is no number at that index, returns 0.
*/
public synchronized int getCount(int number) {
return (number >= 0 && number < counters.length) ? counters[number] : 0;
}
}
This implementation will work correctly. However, if you have a large number of threads making
lots of simultaneous calls on the same Counters object, the synchronization is liable to be a
bottleneck. Specifically:
Each synchronized method call will start with the current thread acquiring the lock for the
Counters instance.
1.
https://riptutorial.com/ 83](https://image.slidesharecdn.com/java-language-pdfroom-240812184155-f7515a4f/85/java-language-programacao-2-PDF-Room-pdf-151-320.jpg)
![The thread will hold the lock while it checks number value and updates the counter.
2.
Finally, the it will release the lock, allowing other threads access.
3.
If one thread attempts to acquire the lock while another one holds it, the attempting thread will be
blocked (stopped) at step 1 until the lock is released. If multiple threads are waiting, one of them
will get it, and the others will continue to be blocked.
This can lead to a couple of problems:
If there is a lot of contention for the lock (i.e. lots of thread try to acquire it), then some
threads can be blocked for a long time.
•
When a thread is blocked waiting for the lock, the operating system will typically try switch
execution to a different thread. This context switching incurs a relatively large performance
impact on the processor.
•
When there are multiple threads blocked on the same lock, there are no guarantees that any
one of them will be treated "fairly" (i.e. each thread is guaranteed to be scheduled to run).
This can lead to thread starvation.
•
How does one implement Atomic Types?
Let us start by rewriting the example above using AtomicInteger counters:
public class Counters {
private final AtomicInteger[] counters;
public Counters(int nosCounters) {
counters = new AtomicInteger[nosCounters];
for (int i = 0; i < nosCounters; i++) {
counters[i] = new AtomicInteger();
}
}
/**
* Increments the integer at the given index
*/
public void count(int number) {
if (number >= 0 && number < counters.length) {
counters[number].incrementAndGet();
}
}
/**
* Obtains the current count of the object at the given index,
* or if there is no number at that index, returns 0.
*/
public int getCount(int number) {
return (number >= 0 && number < counters.length) ?
counters[number].get() : 0;
}
}
We have replaced the int[] with an AtomicInteger[], and initialized it with an instance in each
https://riptutorial.com/ 84](https://image.slidesharecdn.com/java-language-pdfroom-240812184155-f7515a4f/85/java-language-programacao-2-PDF-Room-pdf-152-320.jpg)

![Chapter 11: Audio
Remarks
Instead of using the javax.sound.sampled Clip, you can also use the AudioClip which is from the
applet API. It is however recommended to use Clip since AudioClip is just older and presents
limited functionalities.
Examples
Play an Audio file Looped
Needed imports:
import javax.sound.sampled.AudioSystem;
import javax.sound.sampled.Clip;
This code will create a clip and play it continuously once started:
Clip clip = AudioSystem.getClip();
clip.open(AudioSystem.getAudioInputStream(new URL(filename)));
clip.start();
clip.loop(Clip.LOOP_CONTINUOUSLY);
Get an Array with all supported file types:
AudioFileFormat.Type [] audioFileTypes = AudioSystem.getAudioFileTypes();
Play a MIDI file
MIDI files can be played by using several classes from the javax.sound.midi package. A Sequencer
performs playback of the MIDI file, and many of its methods can be used to set playback controls
such as loop count, tempo, track muting, and others.
General playback of MIDI data can be done in this way:
import java.io.File;
import java.io.IOException;
import javax.sound.midi.InvalidMidiDataException;
import javax.sound.midi.MidiSystem;
import javax.sound.midi.MidiUnavailableException;
import javax.sound.midi.Sequence;
import javax.sound.midi.Sequencer;
public class MidiPlayback {
public static void main(String[] args) {
try {
Sequencer sequencer = MidiSystem.getSequencer(); // Get the default Sequencer
https://riptutorial.com/ 87](https://image.slidesharecdn.com/java-language-pdfroom-240812184155-f7515a4f/85/java-language-programacao-2-PDF-Room-pdf-155-320.jpg)
![if (sequencer==null) {
System.err.println("Sequencer device not supported");
return;
}
sequencer.open(); // Open device
// Create sequence, the File must contain MIDI file data.
Sequence sequence = MidiSystem.getSequence(new File(args[0]));
sequencer.setSequence(sequence); // load it into sequencer
sequencer.start(); // start the playback
} catch (MidiUnavailableException | InvalidMidiDataException | IOException ex) {
ex.printStackTrace();
}
}
}
To stop the playback use:
sequencer.stop(); // Stop the playback
A sequencer can be set to mute one or more of the sequence's tracks during playback so none of
the instruments in those specified play. The following example sets the first track in the sequence
to be muted:
import javax.sound.midi.Track;
// ...
Track[] track = sequence.getTracks();
sequencer.setTrackMute(track[0]);
A sequencer can play a sequence repeatedly if the loop count is given. The following sets the
sequencer to play a sequence four times and indefinitely:
sequencer.setLoopCount(3);
sequencer.setLoopCount(Sequencer.LOOP_CONTINUOUSLY);
The sequencer does not always have to play the sequence from the beginning, nor does it have to
play the sequence until the end. It can start and end at any point by specifying the tick in the
sequence to start and end at. It is also possible to specify manually which tick in the sequence the
sequencer should play from:
sequencer.setLoopStartPoint(512);
sequencer.setLoopEndPoint(32768);
sequencer.setTickPosition(8192);
Sequencers can also play a MIDI file at a certain tempo, which can be controlled by specifying the
tempo in beats per minute (BPM) or microseconds per quarter note (MPQ). The factor at which the
sequence is played can be adjusted as well.
sequencer.setTempoInBPM(1250f);
sequencer.setTempoInMPQ(4750f);
sequencer.setTempoFactor(1.5f);
https://riptutorial.com/ 88](https://image.slidesharecdn.com/java-language-pdfroom-240812184155-f7515a4f/85/java-language-programacao-2-PDF-Room-pdf-156-320.jpg)
![When you finished using the Sequencer, remeber to close it
sequencer.close();
Bare metal sound
You can also go almost bare-metal when producing sound with java. This code will write raw
binary data into the OS audio buffer to generate sound. It's extremely important to understand the
limitations and necessary calculations to generating sound like this. Since playback is basically
instantaneous, calculations need to be performed at almost real-time.
As such this method is unusable for more complicated sound-sampling. For such purposes using
specialized tools is the better approach.
The following method generates and directly outputs a rectangle-wave of a given frequency in a
given volume for a given duration.
public void rectangleWave(byte volume, int hertz, int msecs) {
final SourceDataLine dataLine;
// 24 kHz x 8bit, single-channel, signed little endian AudioFormat
AudioFormat af = new AudioFormat(24_000, 8, 1, true, false);
try {
dataLine = AudioSystem.getSourceDataLine(af);
dataLine.open(af, 10_000); // audio buffer size: 10k samples
} catch (LineUnavailableException e) {
throw new RuntimeException(e);
}
int waveHalf = 24_000 / hertz; // samples for half a period
byte[] buffer = new byte[waveHalf * 20];
int samples = msecs * (24_000 / 1000); // 24k (samples / sec) / 1000 (ms/sec) * time(ms)
dataLine.start(); // starts playback
int sign = 1;
for (int i = 0; i < samples; i += buffer.length) {
for (int j = 0; j < 20; j++) { // generate 10 waves into buffer
sign *= -1;
// fill from the jth wave-half to the j+1th wave-half with volume
Arrays.fill(buffer, waveHalf * j, waveHalf * (j+1), (byte) (volume * sign));
}
dataLine.write(buffer, 0, buffer.length); //
}
dataLine.drain(); // forces buffer drain to hardware
dataLine.stop(); // ends playback
}
For a more differentiated way to generate different soundwaves sinus calculations and possibly
larger sample sizes are necessary. This results in significantly more complex code and is
accordingly omitted here.
Basic audio output
The Hello Audio! of Java that plays a sound file from local or internet storage looks as follows. It
https://riptutorial.com/ 89](https://image.slidesharecdn.com/java-language-pdfroom-240812184155-f7515a4f/85/java-language-programacao-2-PDF-Room-pdf-157-320.jpg)
![works for uncompressed .wav files and should not be used for playing mp3 or compressed files.
import java.io.*;
import java.net.URL;
import javax.sound.sampled.*;
public class SoundClipTest {
// Constructor
public SoundClipTest() {
try {
// Open an audio input stream.
File soundFile = new File("/usr/share/sounds/alsa/Front_Center.wav"); //you could
also get the sound file with an URL
AudioInputStream audioIn = AudioSystem.getAudioInputStream(soundFile);
AudioFormat format = audioIn.getFormat();
// Get a sound clip resource.
DataLine.Info info = new DataLine.Info(Clip.class, format);
Clip clip = (Clip)AudioSystem.getLine(info);
// Open audio clip and load samples from the audio input stream.
clip.open(audioIn);
clip.start();
} catch (UnsupportedAudioFileException e) {
e.printStackTrace();
} catch (IOException e) {
e.printStackTrace();
} catch (LineUnavailableException e) {
e.printStackTrace();
}
}
public static void main(String[] args) {
new SoundClipTest();
}
}
Read Audio online: https://riptutorial.com/java/topic/160/audio
https://riptutorial.com/ 90](https://image.slidesharecdn.com/java-language-pdfroom-240812184155-f7515a4f/85/java-language-programacao-2-PDF-Room-pdf-158-320.jpg)
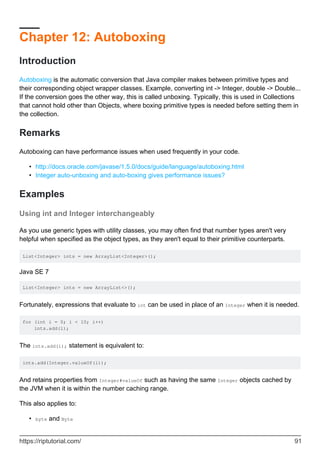
![short and Short
•
float and Float
•
double and Double
•
long and Long
•
char and Character
•
boolean and Boolean
•
Care must be taken, however, in ambiguous situations. Consider the following code:
List<Integer> ints = new ArrayList<Integer>();
ints.add(1);
ints.add(2);
ints.add(3);
ints.remove(1); // ints is now [1, 3]
The java.util.List interface contains both a remove(int index) (List interface method) and a
remove(Object o) (method inherited from java.util.Collection). In this case no boxing takes place
and remove(int index) is called.
One more example of strange Java code behavior caused by autoboxing Integers with values in
range from -128 to 127:
Integer a = 127;
Integer b = 127;
Integer c = 128;
Integer d = 128;
System.out.println(a == b); // true
System.out.println(c <= d); // true
System.out.println(c >= d); // true
System.out.println(c == d); // false
This happens because >= operator implicitly calls intValue() which returns int while == compares
references, not the int values.
By default, Java caches values in range [-128, 127], so the operator == works because the
Integers in this range reference to the same objects if their values are same. Maximal value of the
cacheable range can be defined with -XX:AutoBoxCacheMax JVM option. So, if you run the program
with -XX:AutoBoxCacheMax=1000, the following code will print true:
Integer a = 1000;
Integer b = 1000;
System.out.println(a == b); // true
Using Boolean in if statement
Due to auto unboxing, one can use a Boolean in an if statement:
Boolean a = Boolean.TRUE;
if (a) { // a gets converted to boolean
System.out.println("It works!");
}
https://riptutorial.com/ 92](https://image.slidesharecdn.com/java-language-pdfroom-240812184155-f7515a4f/85/java-language-programacao-2-PDF-Room-pdf-160-320.jpg)
![That works for while, do while and the condition in the for statements as well.
Note that, if the Boolean is null, a NullPointerException will be thrown in the conversion.
Auto-unboxing may lead to NullPointerException
This code compiles:
Integer arg = null;
int x = arg;
But it will crash at runtime with a java.lang.NullPointerException on the second line.
The problem is that a primitive int cannot have a null value.
This is a minimalistic example, but in practice it often manifests in more sophisticated forms. The
NullPointerException is not very intuitive and is often little help in locating such bugs.
Rely on autoboxing and auto-unboxing with care, make sure that unboxed values will not have
null values at runtime.
Memory and Computational Overhead of Autoboxing
Autoboxing can come at a substantial memory overhead. For example:
Map<Integer, Integer> square = new HashMap<Integer, Integer>();
for(int i = 256; i < 1024; i++) {
square.put(i, i * i); // Autoboxing of large integers
}
will typically consume substantial amount of memory (about 60kb for 6k of actual data).
Furthermore, boxed integers usually require additional round-trips in the memory, and thus make
CPU caches less effective. In above example, the memory accessed is spread out to five different
locations that may be in entirely different regions of the memory: 1. the HashMap object, 2. the map's
Entry[] table object, 3. the Entry object, 4. the entrys key object (boxing the primitive key), 5. the
entrys value object (boxing the primitive value).
class Example {
int primitive; // Stored directly in the class `Example`
Integer boxed; // Reference to another memory location
}
Reading boxed requires two memory accesses, accessing primitive only one.
When getting data from this map, the seemingly innocent code
int sumOfSquares = 0;
for(int i = 256; i < 1024; i++) {
sumOfSquares += square.get(i);
https://riptutorial.com/ 93](https://image.slidesharecdn.com/java-language-pdfroom-240812184155-f7515a4f/85/java-language-programacao-2-PDF-Room-pdf-161-320.jpg)

![{...
return j;}//Is a valid statement
Integer ex_method1()
{...
return i;//Is a valid statement
}
Case 3: While performing operations.
Whenever performing operations on numbers the primitive type variable and object of respective
wrapper class can be used interchangeably.
int i=5;
Integer j=new Integer(7);
int k=i+j;//Is a valid statement
Integer m=i+j;//Is also a valid statement
Pitfall:Remember to initialize or assign a value to an object of the wrapper class.
While using wrapper class object and primitive variable interchangeably never forget or miss to
initialize or assign a value to the wrapper class object else it may lead to null pointer exception at
runtime.
Example:
public class Test{
Integer i;
int j;
public void met()
{j=i;//Null pointer exception
SOP(j);
SOP(i);}
public static void main(String[] args)
{Test t=new Test();
t.go();//Null pointer exception
}
In the above example, the value of the object is unassigned and uninitialized and thus at runtime
the program will run into null pointer exception.So as clear from the above example the value of
object should never be left uninitialized and unassigned.
Read Autoboxing online: https://riptutorial.com/java/topic/138/autoboxing
https://riptutorial.com/ 95](https://image.slidesharecdn.com/java-language-pdfroom-240812184155-f7515a4f/85/java-language-programacao-2-PDF-Room-pdf-163-320.jpg)
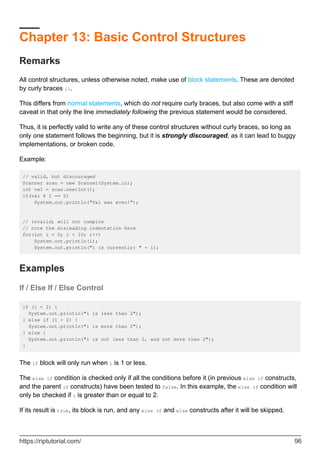
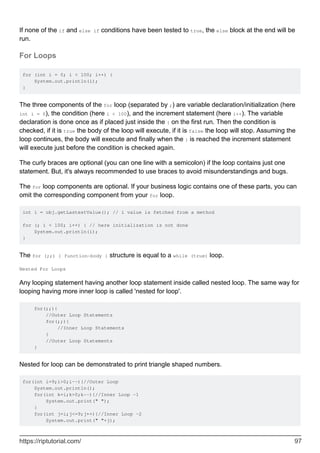
![With Java 5 and up, one can use for-each loops, also known as enhanced for-loops:
List strings = new ArrayList();
strings.add("This");
strings.add("is");
strings.add("a for-each loop");
for (String string : strings) {
System.out.println(string);
}
For each loops can be used to iterate over Arrays and implementations of the Iterable interface,
the later includes Collections classes, such as List or Set.
The loop variable can be of any type that is assignable from the source type.
The loop variable for a enhanced for loop for Iterable<T> or T[] can be of type S, if
T extends S
•
both T and S are primitive types and assignable without a cast
•
S is a primitive type and T can be converted to a type assignable to S after unboxing
conversion.
•
T is a primitive type and can be converted to S by autoboxing conversion.
•
Examples:
T elements = ...
for (S s : elements) {
}
T S Compiles
int[] long yes
long[] int no
Iterable<Byte> long yes
Iterable<String> CharSequence yes
Iterable<CharSequence> String no
int[] Long no
int[] Integer yes
If / Else
int i = 2;
https://riptutorial.com/ 99](https://image.slidesharecdn.com/java-language-pdfroom-240812184155-f7515a4f/85/java-language-programacao-2-PDF-Room-pdf-167-320.jpg)
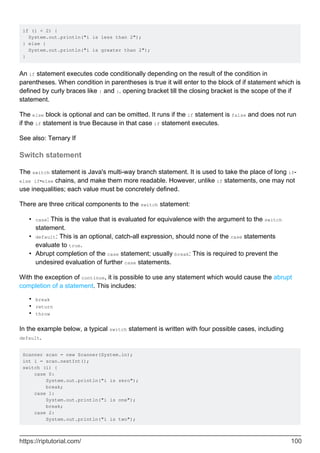
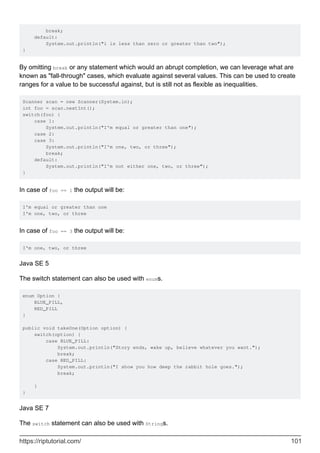
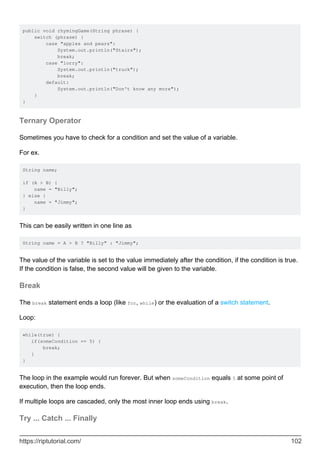
![}
}
There is no other use for labels in Java.
Continue Statement in Java
The continue statement is used to skip the remaining steps in the current iteration and start with
the next loop iteration. The control goes from the continue statement to the step value (increment
or decrement), if any.
String[] programmers = {"Adrian", "Paul", "John", "Harry"};
//john is not printed out
for (String name : programmers) {
if (name.equals("John"))
continue;
System.out.println(name);
}
The continue statement can also make the control of the program shift to the step value (if any) of
a named loop:
Outer: // The name of the outermost loop is kept here as 'Outer'
for(int i = 0; i < 5; )
{
for(int j = 0; j < 5; j++)
{
continue Outer;
}
}
Read Basic Control Structures online: https://riptutorial.com/java/topic/118/basic-control-structures
https://riptutorial.com/ 104](https://image.slidesharecdn.com/java-language-pdfroom-240812184155-f7515a4f/85/java-language-programacao-2-PDF-Room-pdf-172-320.jpg)
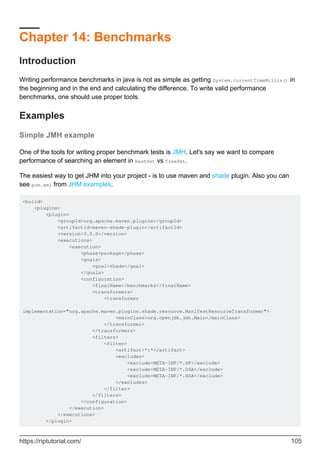
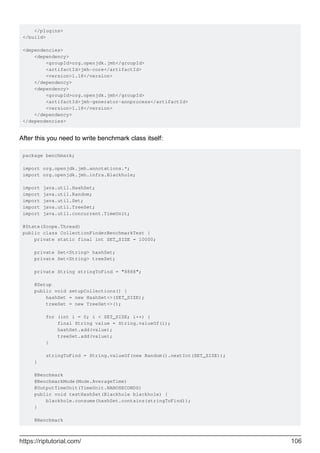
![@BenchmarkMode(Mode.AverageTime)
@OutputTimeUnit(TimeUnit.NANOSECONDS)
public void testTreeSet(Blackhole blackhole) {
blackhole.consume(treeSet.contains(stringToFind));
}
}
Please keep in mind this blackhole.consume(), we'll get back to it later. Also we need main class for
running benchmark:
package benchmark;
import org.openjdk.jmh.runner.Runner;
import org.openjdk.jmh.runner.RunnerException;
import org.openjdk.jmh.runner.options.Options;
import org.openjdk.jmh.runner.options.OptionsBuilder;
public class BenchmarkMain {
public static void main(String[] args) throws RunnerException {
final Options options = new OptionsBuilder()
.include(CollectionFinderBenchmarkTest.class.getSimpleName())
.forks(1)
.build();
new Runner(options).run();
}
}
And we're all set. We just need to run mvn package (it will create benchmarks.jar in your /target
folder) and run our benchmark test:
java -cp target/benchmarks.jar benchmark.BenchmarkMain
And after some warmup and calculation iterations, we will have our results:
# Run complete. Total time: 00:01:21
Benchmark Mode Cnt Score Error Units
CollectionFinderBenchmarkTest.testHashSet avgt 20 9.940 ± 0.270 ns/op
CollectionFinderBenchmarkTest.testTreeSet avgt 20 98.858 ± 13.743 ns/op
About that blackhole.consume(). If your calculations do not change the state of your application,
java will most likely just ignore it. So, in order to avoid it, you can either make your benchmark
methods return some value, or use Blackhole object to consume it.
You can find more information about writing proper benchmarks in Aleksey Shipilëv's blog, in
Jacob Jenkov's blog and in java-performance blog: 1, 2.
Read Benchmarks online: https://riptutorial.com/java/topic/9514/benchmarks
https://riptutorial.com/ 107](https://image.slidesharecdn.com/java-language-pdfroom-240812184155-f7515a4f/85/java-language-programacao-2-PDF-Room-pdf-175-320.jpg)
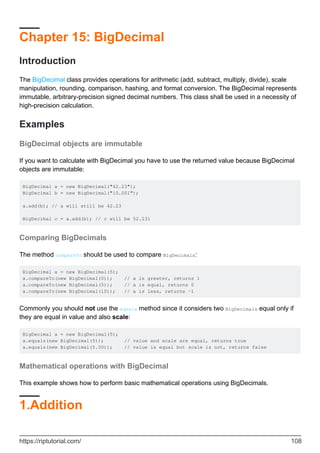

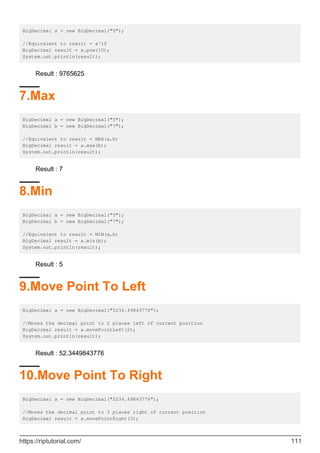
![System.out.println(result);
Result : 5234498.43776
There are many more options and combination of parameters for the above mentioned examples
(For instance, there are 6 variations of the divide method), this set is a non-exhaustive list and
covers a few basic examples.
Using BigDecimal instead of float
Due to way that the float type is represented in computer memory, results of operations using this
type can be inaccurate - some values are stored as approximations. Good examples of this are
monetary calculations. If high precision is necessary, other types should be used. e.g. Java 7
provides BigDecimal.
import java.math.BigDecimal;
public class FloatTest {
public static void main(String[] args) {
float accountBalance = 10000.00f;
System.out.println("Operations using float:");
System.out.println("1000 operations for 1.99");
for(int i = 0; i<1000; i++){
accountBalance -= 1.99f;
}
System.out.println(String.format("Account balance after float operations: %f",
accountBalance));
BigDecimal accountBalanceTwo = new BigDecimal("10000.00");
System.out.println("Operations using BigDecimal:");
System.out.println("1000 operations for 1.99");
BigDecimal operation = new BigDecimal("1.99");
for(int i = 0; i<1000; i++){
accountBalanceTwo = accountBalanceTwo.subtract(operation);
}
System.out.println(String.format("Account balance after BigDecimal operations: %f",
accountBalanceTwo));
}
Output of this program is:
Operations using float:
1000 operations for 1.99
Account balance after float operations: 8009,765625
Operations using BigDecimal:
1000 operations for 1.99
Account balance after BigDecimal operations: 8010,000000
For a starting balance of 10000.00, after 1000 operations for 1.99, we expect the balance to be
8010.00. Using the float type gives us an answer around 8009.77, which is unacceptably
imprecise in the case of monetary calculations. Using BigDecimal gives us the proper result.
https://riptutorial.com/ 112](https://image.slidesharecdn.com/java-language-pdfroom-240812184155-f7515a4f/85/java-language-programacao-2-PDF-Room-pdf-180-320.jpg)
![Chapter 16: BigInteger
Introduction
The BigInteger class is used for mathematical operations involving large integers with magnitudes
too large for primitive data types. For example 100-factorial is 158 digits - much larger than a long
can represent. BigInteger provides analogues to all of Java's primitive integer operators, and all
relevant methods from java.lang.Math as well as few other operations.
Syntax
BigInteger variable_name = new BigInteger("12345678901234567890"); // a decimal integer
as a string
•
BigInteger variable_name = new
BigInteger("1010101101010100101010011000110011101011000111110000101011010010",
2) // a binary integer as a string
•
BigInteger variable_name = new BigInteger("ab54a98ceb1f0800", 16) // a hexadecimal
integer as a string
•
BigInteger variable_name = new BigInteger(64, new Random()); // a pseudorandom number
generator supplying 64 bits to construct an integer
•
BigInteger variable_name = new BigInteger(new byte[]{0, -85, 84, -87, -116, -21, 31, 10, -
46}); // signed two's complement representation of an integer (big endian)
•
BigInteger variable_name = new BigInteger(1, new byte[]{-85, 84, -87, -116, -21, 31, 10, -
46}); // unsigned two's complement representation of a positive integer (big endian)
•
Remarks
BigInteger is immutable. Therefore you can't change its state. For example, the following won't
work as sum won't be updated due to immutability.
BigInteger sum = BigInteger.ZERO;
for(int i = 1; i < 5000; i++) {
sum.add(BigInteger.valueOf(i));
}
Assign the result to the sum variable to make it work.
sum = sum.add(BigInteger.valueOf(i));
Java SE 8
The official documentation of BigInteger states that BigInteger implementations should support all
integers between -22147483647 and 22147483647 (exclusive). This means BigIntegers can have
more than 2 billion bits!
https://riptutorial.com/ 114](https://image.slidesharecdn.com/java-language-pdfroom-240812184155-f7515a4f/85/java-language-programacao-2-PDF-Room-pdf-182-320.jpg)
![Examples
Initialization
The java.math.BigInteger class provides operations analogues to all of Java's primitive integer
operators and for all relevant methods from java.lang.Math. As the java.math package is not
automatically made available you may have to import java.math.BigInteger before you can use the
simple class name.
To convert long or int values to BigInteger use:
long longValue = Long.MAX_VALUE;
BigInteger valueFromLong = BigInteger.valueOf(longValue);
or, for integers:
int intValue = Integer.MIN_VALUE; // negative
BigInteger valueFromInt = BigInteger.valueOf(intValue);
which will widen the intValue integer to long, using sign bit extension for negative values, so that
negative values will stay negative.
To convert a numeric String to BigInteger use:
String decimalString = "-1";
BigInteger valueFromDecimalString = new BigInteger(decimalString);
Following constructor is used to translate the String representation of a BigInteger in the specified
radix into a BigInteger.
String binaryString = "10";
int binaryRadix = 2;
BigInteger valueFromBinaryString = new BigInteger(binaryString , binaryRadix);
Java also supports direct conversion of bytes to an instance of BigInteger. Currently only signed
and unsigned big endian encoding may be used:
byte[] bytes = new byte[] { (byte) 0x80 };
BigInteger valueFromBytes = new BigInteger(bytes);
This will generate a BigInteger instance with value -128 as the first bit is interpreted as the sign bit.
byte[] unsignedBytes = new byte[] { (byte) 0x80 };
int sign = 1; // positive
BigInteger valueFromUnsignedBytes = new BigInteger(sign, unsignedBytes);
This will generate a BigInteger instance with value 128 as the bytes are interpreted as unsigned
https://riptutorial.com/ 115](https://image.slidesharecdn.com/java-language-pdfroom-240812184155-f7515a4f/85/java-language-programacao-2-PDF-Room-pdf-183-320.jpg)
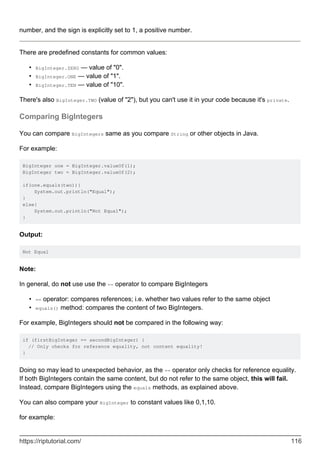
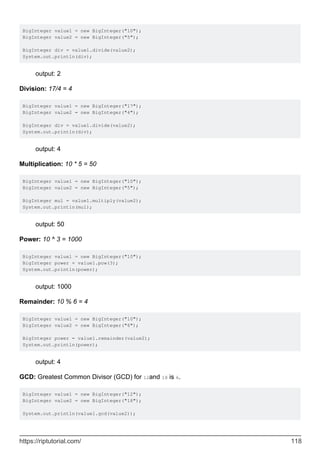
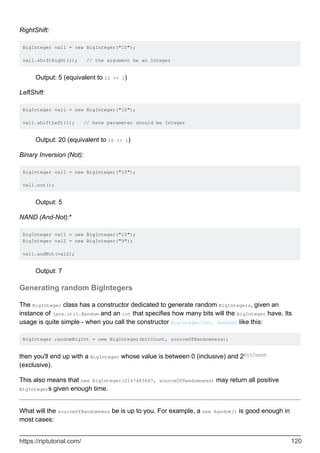
![Chapter 17: Bit Manipulation
Remarks
Unlike C/C++, Java is completely endian-neutral with respect to the underlying machine
hardware. You do not get big or little endian behavior by default; you have to explicitly
specify which behavior you want.
•
The byte type is signed, with the range -128 to +127. To convert a byte value to its unsigned
equivalent, mask it with 0xFF like this: (b & 0xFF).
•
Examples
Packing / unpacking values as bit fragments
It is common for memory performance to compress multiple values into a single primitive value.
This may be useful to pass various information into a single variable.
For example, one can pack 3 bytes - such as color code in RGB - into an single int.
Packing the values
// Raw bytes as input
byte[] b = {(byte)0x65, (byte)0xFF, (byte)0x31};
// Packed in big endian: x == 0x65FF31
int x = (b[0] & 0xFF) << 16 // Red
| (b[1] & 0xFF) << 8 // Green
| (b[2] & 0xFF) << 0; // Blue
// Packed in little endian: y == 0x31FF65
int y = (b[0] & 0xFF) << 0
| (b[1] & 0xFF) << 8
| (b[2] & 0xFF) << 16;
Unpacking the values
// Raw int32 as input
int x = 0x31FF65;
// Unpacked in big endian: {0x65, 0xFF, 0x31}
byte[] c = {
(byte)(x >> 16),
(byte)(x >> 8),
(byte)(x & 0xFF)
};
// Unpacked in little endian: {0x31, 0xFF, 0x65}
byte[] d = {
(byte)(x & 0xFF),
(byte)(x >> 8),
https://riptutorial.com/ 122](https://image.slidesharecdn.com/java-language-pdfroom-240812184155-f7515a4f/85/java-language-programacao-2-PDF-Room-pdf-190-320.jpg)
![(byte)(x >> 16)
};
Checking, setting, clearing, and toggling individual bits. Using long as bit
mask
Assuming we want to modify bit n of an integer primitive, i (byte, short, char, int, or long):
(i & 1 << n) != 0 // checks bit 'n'
i |= 1 << n; // sets bit 'n' to 1
i &= ~(1 << n); // sets bit 'n' to 0
i ^= 1 << n; // toggles the value of bit 'n'
Using long/int/short/byte as a bit mask:
public class BitMaskExample {
private static final long FIRST_BIT = 1L << 0;
private static final long SECOND_BIT = 1L << 1;
private static final long THIRD_BIT = 1L << 2;
private static final long FOURTH_BIT = 1L << 3;
private static final long FIFTH_BIT = 1L << 4;
private static final long BIT_55 = 1L << 54;
public static void main(String[] args) {
checkBitMask(FIRST_BIT | THIRD_BIT | FIFTH_BIT | BIT_55);
}
private static void checkBitMask(long bitmask) {
System.out.println("FIRST_BIT: " + ((bitmask & FIRST_BIT) != 0));
System.out.println("SECOND_BIT: " + ((bitmask & SECOND_BIT) != 0));
System.out.println("THIRD_BIT: " + ((bitmask & THIRD_BIT) != 0));
System.out.println("FOURTh_BIT: " + ((bitmask & FOURTH_BIT) != 0));
System.out.println("FIFTH_BIT: " + ((bitmask & FIFTH_BIT) != 0));
System.out.println("BIT_55: " + ((bitmask & BIT_55) != 0));
}
}
Prints
FIRST_BIT: true
SECOND_BIT: false
THIRD_BIT: true
FOURTh_BIT: false
FIFTH_BIT: true
BIT_55: true
which matches that mask we passed as checkBitMask parameter: FIRST_BIT | THIRD_BIT | FIFTH_BIT
| BIT_55.
Expressing the power of 2
For expressing the power of 2 (2^n) of integers, one may use a bitshift operation that allows to
explicitly specify the n.
https://riptutorial.com/ 123](https://image.slidesharecdn.com/java-language-pdfroom-240812184155-f7515a4f/85/java-language-programacao-2-PDF-Room-pdf-191-320.jpg)
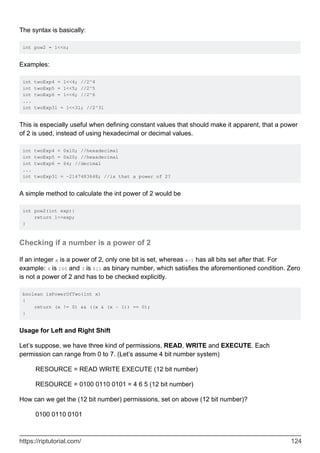

![0001 0000 0000 (Left shift by 8 bits)
0000 0000 0100 << 4 (WRITE)
0000 0100 0000 (Left shift by 4 bits)
0000 0000 0001 (EXECUTE)
Now if we add the results of above shifting, it will be something like;
0001 0000 0000 (READ)
0000 0100 0000 (WRITE)
0000 0000 0001 (EXECUTE)
0001 0100 0001 (PERMISSIONS)
java.util.BitSet class
Since 1.7 there's a java.util.BitSet class that provides simple and user-friendly bit storage and
manipulation interface:
final BitSet bitSet = new BitSet(8); // by default all bits are unset
IntStream.range(0, 8).filter(i -> i % 2 == 0).forEach(bitSet::set); // {0, 2, 4, 6}
bitSet.set(3); // {0, 2, 3, 4, 6}
bitSet.set(3, false); // {0, 2, 4, 6}
final boolean b = bitSet.get(3); // b = false
bitSet.flip(6); // {0, 2, 4}
bitSet.set(100); // {0, 2, 4, 100} - expands automatically
BitSet implements Clonable and Serializable, and under the hood all bit values are stored in long[]
words field, that expands automatically.
It also supports whole-set logical operations and, or, xor, andNot:
bitSet.and(new BitSet(8));
bitSet.or(new BitSet(8));
bitSet.xor(new BitSet(8));
bitSet.andNot(new BitSet(8));
Signed vs unsigned shift
In Java, all number primitives are signed. For example, an int always represent values from [-2^31
- 1, 2^31], keeping the first bit to sign the value - 1 for negative value, 0 for positive.
https://riptutorial.com/ 126](https://image.slidesharecdn.com/java-language-pdfroom-240812184155-f7515a4f/85/java-language-programacao-2-PDF-Room-pdf-194-320.jpg)
![Basic shift operators >> and << are signed operators. They will conserve the sign of the value.
But it is common for programmers to use numbers to store unsigned values. For an int, it means
shifting the range to [0, 2^32 - 1], to have twice as much value as with a signed int.
For those power users, the bit for sign as no meaning. That's why Java added >>>, a left-shift
operator, disregarding that sign bit.
initial value: 4 ( 100)
signed left-shift: 4 << 1 8 ( 1000)
signed right-shift: 4 >> 1 2 ( 10)
unsigned right-shift: 4 >>> 1 2 ( 10)
initial value: -4 ( 11111111111111111111111111111100)
signed left-shift: -4 << 1 -8 ( 11111111111111111111111111111000)
signed right-shift: -4 >> 1 -2 ( 11111111111111111111111111111110)
unsigned right-shift: -4 >>> 1 2147483646 ( 1111111111111111111111111111110)
Why is there no <<< ?
This comes from the intended definition of right-shift. As it fills the emptied places on the left, there
are no decision to take regarding the bit of sign. As a consequence, there is no need for 2 different
operators.
See this question for a more detailled answer.
Read Bit Manipulation online: https://riptutorial.com/java/topic/1177/bit-manipulation
https://riptutorial.com/ 127](https://image.slidesharecdn.com/java-language-pdfroom-240812184155-f7515a4f/85/java-language-programacao-2-PDF-Room-pdf-195-320.jpg)

![Chapter 19: ByteBuffer
Introduction
The ByteBuffer class was introduced in java 1.4 to ease working on binary data. It's especially
suited to use with primitive type data. It allows the creation, but also subsequent manipulation of a
byte[]s on a higher abstraction level
Syntax
byte[] arr = new byte[1000];
•
ByteBuffer buffer = ByteBuffer.wrap(arr);
•
ByteBuffer buffer = ByteBuffer.allocate(1024);
•
ByteBuffer buffer = ByteBuffer.allocateDirect(1024);
•
byte b = buffer.get();
•
byte b = buffer.get(10);
•
short s = buffer.getShort(10);
•
buffer.put((byte) 120);
•
buffer.putChar('a');
•
Examples
Basic Usage - Creating a ByteBuffer
There's two ways to create a ByteBuffer, where one can be subdivided again.
If you have an already existing byte[], you can "wrap" it into a ByteBuffer to simplify processing:
byte[] reqBuffer = new byte[BUFFER_SIZE];
int readBytes = socketInputStream.read(reqBuffer);
final ByteBuffer reqBufferWrapper = ByteBuffer.wrap(reqBuffer);
This would be a possibility for code that handles low-level networking interactions
If you do not have an already existing byte[], you can create a ByteBuffer over an array that's
specifically allocated for the buffer like this:
final ByteBuffer respBuffer = ByteBuffer.allocate(RESPONSE_BUFFER_SIZE);
putResponseData(respBuffer);
socketOutputStream.write(respBuffer.array());
If the code-path is extremely performance critical and you need direct system memory access,
the ByteBuffer can even allocate direct buffers using #allocateDirect()
https://riptutorial.com/ 130](https://image.slidesharecdn.com/java-language-pdfroom-240812184155-f7515a4f/85/java-language-programacao-2-PDF-Room-pdf-198-320.jpg)
![Basic Usage - Write Data to the Buffer
Given a ByteBuffer instance one can write primitive-type data to it using relative and absolute put.
The striking difference is that putting data using the relative method keeps track of the index the
data is inserted at for you, while the absolute method always requires giving an index to put the
data at.
Both methods allow "chaining" calls. Given a sufficiently sized buffer one can accordingly do the
following:
buffer.putInt(0xCAFEBABE).putChar('c').putFloat(0.25).putLong(0xDEADBEEFCAFEBABE);
which is equivalent to:
buffer.putInt(0xCAFEBABE);
buffer.putChar('c');
buffer.putFloat(0.25);
buffer.putLong(0xDEADBEEFCAFEBABE);
Do note that the method operating on bytes is not named specially. Additionally note that it's also
valid to pass both a ByteBuffer and a byte[] to put. Other than that, all primitive types have
specialized put-methods.
An additional note: The index given when using absolute put* is always counted in bytes.
Basic Usage - Using DirectByteBuffer
DirectByteBuffer is special implementation of ByteBuffer that has no byte[] laying underneath.
We can allocate such ByteBuffer by calling:
ByteBuffer directBuffer = ByteBuffer.allocateDirect(16);
This operation will allocate 16 bytes of memory. The contents of direct buffers may reside outside
of the normal garbage-collected heap.
We can verify whether ByteBuffer is direct by calling:
directBuffer.isDirect(); // true
The main characteristics of DirectByteBuffer is that JVM will try to natively work on allocated
memory without any additional buffering so operations performed on it may be faster then those
performed on ByteBuffers with arrays lying underneath.
It is recomended to use DirectByteBuffer with heavy IO operations that rely on speed of execution,
like real time communication.
We have to be aware that if we try using array() method we will get UnsupportedOperationException.
https://riptutorial.com/ 131](https://image.slidesharecdn.com/java-language-pdfroom-240812184155-f7515a4f/85/java-language-programacao-2-PDF-Room-pdf-199-320.jpg)
![So it is a good practice to chech whether our ByteBuffer has it (byte array) before we try to access
it:
byte[] arrayOfBytes;
if(buffer.hasArray()) {
arrayOfBytes = buffer.array();
}
Another use of direct byte buffer is interop through JNI. Since a direct byte buffer does not use a
byte[], but an actual block of memory, it is possible to access that memory directly through a
pointer in native code. This can save a bit of trouble and overhead on marshalling between the
Java and native representation of data.
The JNI interface defines several functions to handle direct byte buffers: NIO Support.
Read ByteBuffer online: https://riptutorial.com/java/topic/702/bytebuffer
https://riptutorial.com/ 132](https://image.slidesharecdn.com/java-language-pdfroom-240812184155-f7515a4f/85/java-language-programacao-2-PDF-Room-pdf-200-320.jpg)
![Chapter 20: Bytecode Modification
Examples
What is Bytecode?
Bytecode is the set of instructions used by the JVM. To illustrate this let's take this Hello World
program.
public static void main(String[] args){
System.out.println("Hello World");
}
This is what it turns into when compiled into bytecode.
public static main([Ljava/lang/String; args)V
getstatic java/lang/System out Ljava/io/PrintStream;
ldc "Hello World"
invokevirtual java/io/PrintStream print(Ljava/lang/String;)V
What's the logic behind this?
getstatic - Retreives the value of a static field of a class. In this case, the PrintStream "Out" of
System.
ldc - Push a constant onto the stack. In this case, the String "Hello World"
invokevirtual - Invokes a method on a loaded reference on the stack and puts the result on the
stack. Parameters of the method are also taken from the stack.
Well, there has to be more right?
There are 255 opcodes, but not all of them are implemented yet. A table with all of the current
opcodes can be found here: Java bytecode instruction listings.
How can I write / edit bytecode?
There's multiple ways to write and edit bytecode. You can use a compiler, use a library, or use a
program.
For writing:
Jasmin
•
https://riptutorial.com/ 133](https://image.slidesharecdn.com/java-language-pdfroom-240812184155-f7515a4f/85/java-language-programacao-2-PDF-Room-pdf-201-320.jpg)
![Krakatau
•
For editing:
Libraries
ASM
○
Javassist
○
BCEL - Doesn't support Java 8+
○
•
Tools
Bytecode-Viewer
○
JBytedit
○
reJ - Doesn't support Java 8+
○
JBE - Doesn't support Java 8+
○
•
I'd like to learn more about bytecode!
There's probably a specific documentation page specificially for bytecode. This page focuses on
the modification of bytecode using different libraries and tools.
How to edit jar files with ASM
Firstly the classes from the jar need to be loaded. We'll use three methods for this process:
loadClasses(File)
•
readJar(JarFile, JarEntry, Map)
•
getNode(byte[])
•
Map<String, ClassNode> loadClasses(File jarFile) throws IOException {
Map<String, ClassNode> classes = new HashMap<String, ClassNode>();
JarFile jar = new JarFile(jarFile);
Stream<JarEntry> str = jar.stream();
str.forEach(z -> readJar(jar, z, classes));
jar.close();
return classes;
}
Map<String, ClassNode> readJar(JarFile jar, JarEntry entry, Map<String, ClassNode> classes) {
String name = entry.getName();
try (InputStream jis = jar.getInputStream(entry)){
if (name.endsWith(".class")) {
byte[] bytes = IOUtils.toByteArray(jis);
String cafebabe = String.format("%02X%02X%02X%02X", bytes[0], bytes[1], bytes[2],
bytes[3]);
if (!cafebabe.toLowerCase().equals("cafebabe")) {
// This class doesn't have a valid magic
return classes;
}
try {
ClassNode cn = getNode(bytes);
classes.put(cn.name, cn);
} catch (Exception e) {
e.printStackTrace();
https://riptutorial.com/ 134](https://image.slidesharecdn.com/java-language-pdfroom-240812184155-f7515a4f/85/java-language-programacao-2-PDF-Room-pdf-202-320.jpg)
![}
}
} catch (IOException e) {
e.printStackTrace();
}
return classes;
}
ClassNode getNode(byte[] bytes) {
ClassReader cr = new ClassReader(bytes);
ClassNode cn = new ClassNode();
try {
cr.accept(cn, ClassReader.EXPAND_FRAMES);
} catch (Exception e) {
e.printStackTrace();
}
cr = null;
return cn;
}
With these methods loading and changing a jar file becomes a simple matter of changing
ClassNodes in a map. In this example we will replace all Strings in the jar with capitalized ones
using the Tree API.
File jarFile = new File("sample.jar");
Map<String, ClassNode> nodes = loadClasses(jarFile);
// Iterate ClassNodes
for (ClassNode cn : nodes.values()){
// Iterate methods in class
for (MethodNode mn : cn.methods){
// Iterate instructions in method
for (AbstractInsnNode ain : mn.instructions.toArray()){
// If the instruction is loading a constant value
if (ain.getOpcode() == Opcodes.LDC){
// Cast current instruction to Ldc
// If the constant is a string then capitalize it.
LdcInsnNode ldc = (LdcInsnNode) ain;
if (ldc.cst instanceof String){
ldc.cst = ldc.cst.toString().toUpperCase();
}
}
}
}
}
Now that all of the ClassNode's strings have been modified we need to save the changes. In order
to save the changes and have a working output a few things have to be done:
Export ClassNodes to bytes
•
Load non-class jar entries (Ex: Manifest.mf / other binary resources in jar) as bytes
•
Save all bytes to a new jar
•
From the last portion above, we'll create three methods.
processNodes(Map<String, ClassNode> nodes)
•
loadNonClasses(File jarFile)
•
https://riptutorial.com/ 135](https://image.slidesharecdn.com/java-language-pdfroom-240812184155-f7515a4f/85/java-language-programacao-2-PDF-Room-pdf-203-320.jpg)
![saveAsJar(Map<String, byte[]> outBytes, String fileName)
•
Usage:
Map<String, byte[]> out = process(nodes, new HashMap<String, MappedClass>());
out.putAll(loadNonClassEntries(jarFile));
saveAsJar(out, "sample-edit.jar");
The methods used:
static Map<String, byte[]> processNodes(Map<String, ClassNode> nodes, Map<String, MappedClass>
mappings) {
Map<String, byte[]> out = new HashMap<String, byte[]>();
// Iterate nodes and add them to the map of <Class names , Class bytes>
// Using Compute_Frames ensures that stack-frames will be re-calculated automatically
for (ClassNode cn : nodes.values()) {
ClassWriter cw = new ClassWriter(ClassWriter.COMPUTE_FRAMES);
out.put(mappings.containsKey(cn.name) ? mappings.get(cn.name).getNewName() : cn.name,
cw.toByteArray());
}
return out;
}
static Map<String, byte[]> loadNonClasses(File jarFile) throws IOException {
Map<String, byte[]> entries = new HashMap<String, byte[]>();
ZipInputStream jis = new ZipInputStream(new FileInputStream(jarFile));
ZipEntry entry;
// Iterate all entries
while ((entry = jis.getNextEntry()) != null) {
try {
String name = entry.getName();
if (!name.endsWith(".class") && !entry.isDirectory()) {
// Apache Commons - byte[] toByteArray(InputStream input)
//
// Add each entry to the map <Entry name , Entry bytes>
byte[] bytes = IOUtils.toByteArray(jis);
entries.put(name, bytes);
}
} catch (Exception e) {
e.printStackTrace();
} finally {
jis.closeEntry();
}
}
jis.close();
return entries;
}
static void saveAsJar(Map<String, byte[]> outBytes, String fileName) {
try {
// Create jar output stream
JarOutputStream out = new JarOutputStream(new FileOutputStream(fileName));
// For each entry in the map, save the bytes
for (String entry : outBytes.keySet()) {
// Appent class names to class entries
String ext = entry.contains(".") ? "" : ".class";
out.putNextEntry(new ZipEntry(entry + ext));
out.write(outBytes.get(entry));
out.closeEntry();
https://riptutorial.com/ 136](https://image.slidesharecdn.com/java-language-pdfroom-240812184155-f7515a4f/85/java-language-programacao-2-PDF-Room-pdf-204-320.jpg)
![}
out.close();
} catch (IOException e) {
e.printStackTrace();
}
}
That's it. All the changes will be saved to "sample-edit.jar".
How to load a ClassNode as a Class
/**
* Load a class by from a ClassNode
*
* @param cn
* ClassNode to load
* @return
*/
public static Class<?> load(ClassNode cn) {
ClassWriter cw = new ClassWriter(ClassWriter.COMPUTE_FRAMES);
return new ClassDefiner(ClassLoader.getSystemClassLoader()).get(cn.name.replace("/", "."),
cw.toByteArray());
}
/**
* Classloader that loads a class from bytes.
*/
static class ClassDefiner extends ClassLoader {
public ClassDefiner(ClassLoader parent) {
super(parent);
}
public Class<?> get(String name, byte[] bytes) {
Class<?> c = defineClass(name, bytes, 0, bytes.length);
resolveClass(c);
return c;
}
}
How to rename classes in a jar file
public static void main(String[] args) throws Exception {
File jarFile = new File("Input.jar");
Map<String, ClassNode> nodes = JarUtils.loadClasses(jarFile);
Map<String, byte[]> out = JarUtils.loadNonClassEntries(jarFile);
Map<String, String> mappings = new HashMap<String, String>();
mappings.put("me/example/ExampleClass", "me/example/ExampleRenamed");
out.putAll(process(nodes, mappings));
JarUtils.saveAsJar(out, "Input-new.jar");
}
static Map<String, byte[]> process(Map<String, ClassNode> nodes, Map<String, String> mappings)
{
Map<String, byte[]> out = new HashMap<String, byte[]>();
Remapper mapper = new SimpleRemapper(mappings);
for (ClassNode cn : nodes.values()) {
https://riptutorial.com/ 137](https://image.slidesharecdn.com/java-language-pdfroom-240812184155-f7515a4f/85/java-language-programacao-2-PDF-Room-pdf-205-320.jpg)
![ClassWriter cw = new ClassWriter(ClassWriter.COMPUTE_FRAMES);
ClassVisitor remapper = new ClassRemapper(cw, mapper);
cn.accept(remapper);
out.put(mappings.containsKey(cn.name) ? mappings.get(cn.name) : cn.name,
cw.toByteArray());
}
return out;
}
SimpleRemapper is an existing class in the ASM library. However it only allows for class names to
be changed. If you wish to rename fields and methods you should create your own implemenation
of the Remapper class.
Javassist Basic
Javassist is a bytecode instrumentation library that allows you to modify bytecode injecting Java
code that will be converted to bytecode by Javassist and added to the instrumented class/method
at runtime.
Lets write the first transformer that actually take an hypothetical class
"com.my.to.be.instrumented.MyClass" and add to the instructions of each method a log call.
import java.lang.instrument.ClassFileTransformer;
import java.lang.instrument.IllegalClassFormatException;
import java.security.ProtectionDomain;
import javassist.ClassPool;
import javassist.CtClass;
import javassist.CtMethod;
public class DynamicTransformer implements ClassFileTransformer {
public byte[] transform(ClassLoader loader, String className, Class classBeingRedefined,
ProtectionDomain protectionDomain, byte[] classfileBuffer) throws
IllegalClassFormatException {
byte[] byteCode = classfileBuffer;
// into the transformer will arrive every class loaded so we filter
// to match only what we need
if (className.equals("com/my/to/be/instrumented/MyClass")) {
try {
// retrive default Javassist class pool
ClassPool cp = ClassPool.getDefault();
// get from the class pool our class with this qualified name
CtClass cc = cp.get("com.my.to.be.instrumented.MyClass");
// get all the methods of the retrieved class
CtMethod[] methods = cc.getDeclaredMethods()
for(CtMethod meth : methods) {
// The instrumentation code to be returned and injected
final StringBuffer buffer = new StringBuffer();
String name = meth.getName();
// just print into the buffer a log for example
buffer.append("System.out.println("Method " + name + " executed" );");
meth.insertBefore(buffer.toString())
}
// create the byteclode of the class
https://riptutorial.com/ 138](https://image.slidesharecdn.com/java-language-pdfroom-240812184155-f7515a4f/85/java-language-programacao-2-PDF-Room-pdf-206-320.jpg)
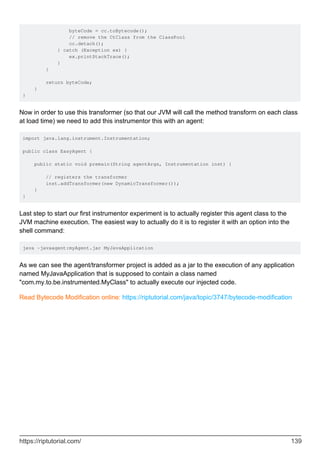
![Chapter 21: C++ Comparison
Introduction
Java and C++ are similar languages. This topic serves as a quick reference guide for Java and
C++ Engineers.
Remarks
Classes Defined within Other Constructs#
Defined within Another Class
C++
Nested Class[ref] (needs a reference to enclosing class)
class Outer {
class Inner {
public:
Inner(Outer* o) :outer(o) {}
private:
Outer* outer;
};
};
Java
[non-static] Nested Class (aka Inner Class or Member Class)
class OuterClass {
...
class InnerClass {
...
}
}
Statically Defined within Another Class
C++
https://riptutorial.com/ 140](https://image.slidesharecdn.com/java-language-pdfroom-240812184155-f7515a4f/85/java-language-programacao-2-PDF-Room-pdf-208-320.jpg)
![Static Nested Class
class Outer {
class Inner {
...
};
};
Java
Static Nested Class (aka Static Member Class)[ref]
class OuterClass {
...
static class StaticNestedClass {
...
}
}
Defined within a Method
(e.g. event handling)
C++
Local Class[ref]
void fun() {
class Test {
/* members of Test class */
};
}
See also Lambda expressions
Java
Local Class[ref]
class Test {
void f() {
new Thread(new Runnable() {
public void run() {
doSomethingBackgroundish();
}
}).start();
}
}
https://riptutorial.com/ 141](https://image.slidesharecdn.com/java-language-pdfroom-240812184155-f7515a4f/85/java-language-programacao-2-PDF-Room-pdf-209-320.jpg)
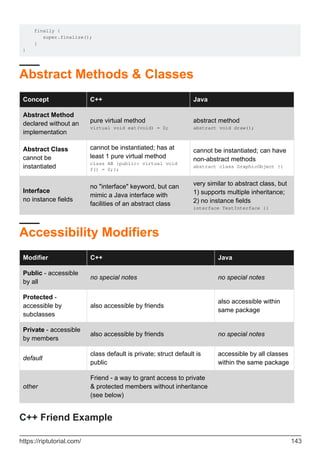
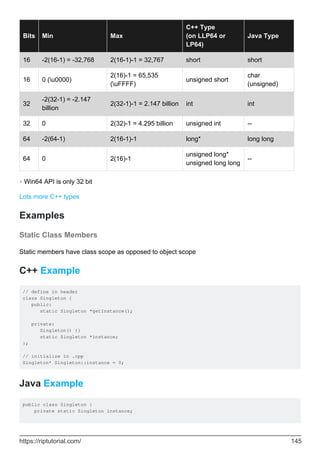
![private Singleton() {}
public static Singleton getInstance() {
if(instance == null) {
instance = new Singleton();
}
return instance;
}
}
Classes Defined within Other Constructs
Defined within Another Class
C++
Nested Class[ref] (needs a reference to enclosing class)
class Outer {
class Inner {
public:
Inner(Outer* o) :outer(o) {}
private:
Outer* outer;
};
};
Java
[non-static] Nested Class (aka Inner Class or Member Class)
class OuterClass {
...
class InnerClass {
...
}
}
Statically Defined within Another Class
C++
Static Nested Class
class Outer {
class Inner {
...
https://riptutorial.com/ 146](https://image.slidesharecdn.com/java-language-pdfroom-240812184155-f7515a4f/85/java-language-programacao-2-PDF-Room-pdf-214-320.jpg)
![};
};
Java
Static Nested Class (aka Static Member Class)[ref]
class OuterClass {
...
static class StaticNestedClass {
...
}
}
Defined within a Method
(e.g. event handling)
C++
Local Class[ref]
void fun() {
class Test {
/* members of Test class */
};
}
Java
Local Class[ref]
class Test {
void f() {
new Thread(new Runnable() {
public void run() {
doSomethingBackgroundish();
}
}).start();
}
}
Pass-by-value & Pass-by-reference
Many argue that Java is ONLY pass-by-value, but it's more nuanced than that. Compare the
following C++ and Java examples to see the many flavors of pass-by-value (aka copy) and pass-
by-reference (aka alias).
https://riptutorial.com/ 147](https://image.slidesharecdn.com/java-language-pdfroom-240812184155-f7515a4f/85/java-language-programacao-2-PDF-Room-pdf-215-320.jpg)
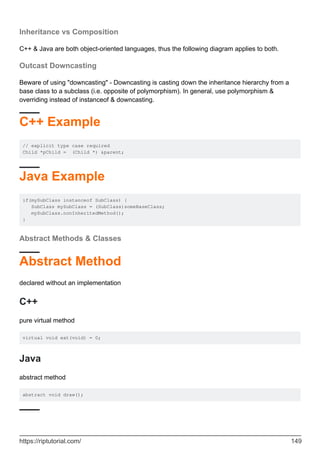
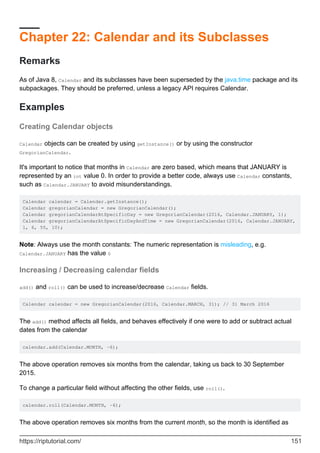
![Chapter 23: Character encoding
Examples
Reading text from a file encoded in UTF-8
import java.io.BufferedReader;
import java.io.BufferedWriter;
import java.io.IOException;
import java.nio.charset.StandardCharsets;
import java.nio.file.Files;
import java.nio.file.Paths;
public class ReadingUTF8TextFile {
public static void main(String[] args) throws IOException {
//StandardCharsets is available since Java 1.7
//for ealier version use Charset.forName("UTF-8");
try (BufferedWriter wr = Files.newBufferedWriter(Paths.get("test.txt"),
StandardCharsets.UTF_8)) {
wr.write("Strange cyrillic symbol Ы");
}
/* First Way. For big files */
try (BufferedReader reader = Files.newBufferedReader(Paths.get("test.txt"),
StandardCharsets.UTF_8)) {
String line;
while ((line = reader.readLine()) != null) {
System.out.print(line);
}
}
System.out.println(); //just separating output
/* Second way. For small files */
String s = new String(Files.readAllBytes(Paths.get("test.txt")),
StandardCharsets.UTF_8);
System.out.print(s);
}
}
Writing text to a file in UTF-8
import java.io.BufferedWriter;
import java.io.IOException;
import java.nio.charset.StandardCharsets;
import java.nio.file.Files;
import java.nio.file.Paths;
public class WritingUTF8TextFile {
public static void main(String[] args) throws IOException {
//StandardCharsets is available since Java 1.7
//for ealier version use Charset.forName("UTF-8");
try (BufferedWriter wr = Files.newBufferedWriter(Paths.get("test2.txt"),
StandardCharsets.UTF_8)) {
https://riptutorial.com/ 153](https://image.slidesharecdn.com/java-language-pdfroom-240812184155-f7515a4f/85/java-language-programacao-2-PDF-Room-pdf-221-320.jpg)
![wr.write("Cyrillic symbol Ы");
}
}
}
Getting byte representation of a string in UTF-8
import java.nio.charset.StandardCharsets;
import java.util.Arrays;
public class GetUtf8BytesFromString {
public static void main(String[] args) {
String str = "Cyrillic symbol Ы";
//StandardCharsets is available since Java 1.7
//for ealier version use Charset.forName("UTF-8");
byte[] textInUtf8 = str.getBytes(StandardCharsets.UTF_8);
System.out.println(Arrays.toString(textInUtf8));
}
}
Read Character encoding online: https://riptutorial.com/java/topic/2735/character-encoding
https://riptutorial.com/ 154](https://image.slidesharecdn.com/java-language-pdfroom-240812184155-f7515a4f/85/java-language-programacao-2-PDF-Room-pdf-222-320.jpg)

![Chapter 25: Class - Java Reflection
Introduction
The java.lang.Class class provides many methods that can be used to get metadata, examine and
change the run time behavior of a class.
The java.lang and java.lang.reflect packages provide classes for java reflection.
Where it is used
The Reflection API is mainly used in:
IDE (Integrated Development Environment) e.g. Eclipse, MyEclipse, NetBeans etc. Debugger Test
Tools etc.
Examples
getClass() method of Object class
class Simple { }
class Test {
void printName(Object obj){
Class c = obj.getClass();
System.out.println(c.getName());
}
public static void main(String args[]){
Simple s = new Simple();
Test t = new Test();
t.printName(s);
}
}
Read Class - Java Reflection online: https://riptutorial.com/java/topic/10151/class---java-reflection
https://riptutorial.com/ 156](https://image.slidesharecdn.com/java-language-pdfroom-240812184155-f7515a4f/85/java-language-programacao-2-PDF-Room-pdf-224-320.jpg)
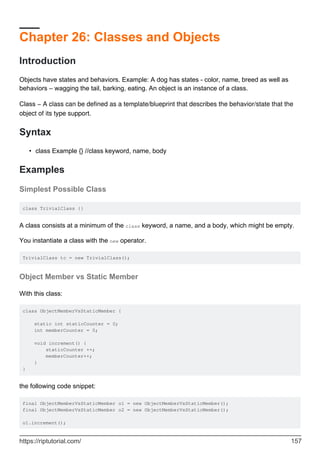
![o2.increment();
o2.increment();
System.out.println("o1 static counter " + o1.staticCounter);
System.out.println("o1 member counter " + o1.memberCounter);
System.out.println();
System.out.println("o2 static counter " + o2.staticCounter);
System.out.println("o2 member counter " + o2.memberCounter);
System.out.println();
System.out.println("ObjectMemberVsStaticMember.staticCounter = " +
ObjectMemberVsStaticMember.staticCounter);
// the following line does not compile. You need an object
// to access its members
//System.out.println("ObjectMemberVsStaticMember.staticCounter = " +
ObjectMemberVsStaticMember.memberCounter);
produces this output:
o1 static counter 3
o1 member counter 1
o2 static counter 3
o2 member counter 2
ObjectMemberVsStaticMember.staticCounter = 3
Note: You should not call static members on objects, but on classes. While it does not make a
difference for the JVM, human readers will appreciate it.
static members are part of the class and exists only once per class. Non-static members exist on
instances, there is an independent copy for each instance. This also means that you need access
to an object of that class to access its members.
Overloading Methods
Sometimes the same functionality has to be written for different kinds of inputs. At that time, one
can use the same method name with a different set of parameters. Each different set of
parameters is known as a method signature. As seen per the example, a single method can have
multiple signatures.
public class Displayer {
public void displayName(String firstName) {
System.out.println("Name is: " + firstName);
}
public void displayName(String firstName, String lastName) {
System.out.println("Name is: " + firstName + " " + lastName);
}
public static void main(String[] args) {
https://riptutorial.com/ 158](https://image.slidesharecdn.com/java-language-pdfroom-240812184155-f7515a4f/85/java-language-programacao-2-PDF-Room-pdf-226-320.jpg)

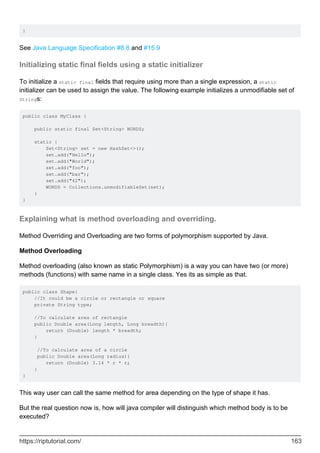
![Well Java have made it clear that even though the method names (area() in our case) can be
same but the arguments method is taking should be different.
Overloaded methods must have different arguments list (quantity and types).
That being said we cannot add another method to calculate area of a square like this : public
Double area(Long side) because in this case, it will conflict with area method of circle and will cause
ambiguity for java compiler.
Thank god, there are some relaxations while writing overloaded methods like
May have different return types.
May have different access modifiers.
May throw different exceptions.
Why is this called static polymorphism?
Well that's because which overloaded methods is to be invoked is decided at compile time, based
on the actual number of arguments and the compile-time types of the arguments.
One of common reasons of using method overloading is the simplicity of code it
provides. For example remember String.valueOf() which takes almost any type of
argument? What is written behind the scene is probably something like this :-
static String valueOf(boolean b)
static String valueOf(char c)
static String valueOf(char[] data)
static String valueOf(char[] data, int offset, int count)
static String valueOf(double d)
static String valueOf(float f)
static String valueOf(int i)
static String valueOf(long l)
static String valueOf(Object obj)
Method Overriding
Well, method overriding (yes you guess it right, it is also known as dynamic polymorphism) is
somewhat more interesting and complex topic.
In method overriding we overwrite the method body provided by the parent class. Got it? No? Let's
go through an example.
public abstract class Shape{
public abstract Double area(){
return 0.0;
}
}
So we have a class called Shape and it has method called area which will probably return the area
https://riptutorial.com/ 164](https://image.slidesharecdn.com/java-language-pdfroom-240812184155-f7515a4f/85/java-language-programacao-2-PDF-Room-pdf-232-320.jpg)
![of the shape.
Let's say now we have two classes called Circle and Rectangle.
public class Circle extends Shape {
private Double radius = 5.0;
// See this annotation @Override, it is telling that this method is from parent
// class Shape and is overridden here
@Override
public Double area(){
return 3.14 * radius * radius;
}
}
Similarly rectangle class:
public class Rectangle extends Shape {
private Double length = 5.0;
private Double breadth= 10.0;
// See this annotation @Override, it is telling that this method is from parent
// class Shape and is overridden here
@Override
public Double area(){
return length * breadth;
}
}
So, now both of your children classes have updated method body provided by the parent (Shape)
class. Now question is how to see the result? Well lets do it the old psvm way.
public class AreaFinder{
public static void main(String[] args){
//This will create an object of circle class
Shape circle = new Circle();
//This will create an object of Rectangle class
Shape rectangle = new Rectangle();
// Drumbeats ......
//This should print 78.5
System.out.println("Shape of circle : "+circle.area());
//This should print 50.0
System.out.println("Shape of rectangle: "+rectangle.area());
}
}
Wow! isn't it great? Two objects of same type calling same methods and returning different values.
My friend, that's the power of dynamic polymorphism.
Here's a chart to better compare the differences between these two:-
https://riptutorial.com/ 165](https://image.slidesharecdn.com/java-language-pdfroom-240812184155-f7515a4f/85/java-language-programacao-2-PDF-Room-pdf-233-320.jpg)

![Chapter 27: Classloaders
Remarks
A classloader is a class whose primary purpose is to mediate the location and loading of classes
used by an application. A class loader can also find and loaded resources.
The standard classloader classes can load classes and resources from directories in the file
system and from JAR and ZIP files. They can also download and cache JAR and ZIP files from a
remote server.
Classloaders are normally chained, so that the JVM will try to load classes from the standard class
libraries in preference to application-provided sources. Custom classloaders allow the programmer
to alter this. The also can do such things as decrypting bytecode files and bytecode modification.
Examples
Instantiating and using a classloader
This basic example shows how an application can instantiate a classloader and use it to
dynamically load a class.
URL[] urls = new URL[] {new URL("file:/home/me/extras.jar")};
Classloader loader = new URLClassLoader(urls);
Class<?> myObjectClass = loader.findClass("com.example.MyObject");
The classloader created in this example will have the default classloader as its parent, and will first
try to find any class in the parent classloader before looking in "extra.jar". If the requested class
has already been loaded, the findClass call will return the reference to the previously loaded class.
The findClass call can fail in a variety of ways. The most common are:
If the named class cannot be found, the call with throw ClassNotFoundException.
•
If the named class depends on some other class that cannot be found, the call will throw
NoClassDefFoundError.
•
Implementing a custom classLoader
Every custom loader must directly or indirectly extend the java.lang.ClassLoader class. The main
extension points are the following methods:
findClass(String) - overload this method if your classloader follows the standard delegation
model for class loading.
•
loadClass(String, boolean) - overload this method to implement an alternative delegation
model.
•
findResource and findResources - overload these methods to customize resource loading.
•
https://riptutorial.com/ 167](https://image.slidesharecdn.com/java-language-pdfroom-240812184155-f7515a4f/85/java-language-programacao-2-PDF-Room-pdf-235-320.jpg)
![The defineClass methods which are responsible for actually loading the class from a byte array are
final to prevent overloading. Any custom behavior needs to be performed prior to calling
defineClass.
Here is a simple that loads a specific class from a byte array:
public class ByteArrayClassLoader extends ClassLoader {
private String classname;
private byte[] classfile;
public ByteArrayClassLoader(String classname, byte[] classfile) {
this.classname = classname;
this.classfile = classfile.clone();
}
@Override
protected Class findClass(String classname) throws ClassNotFoundException {
if (classname.equals(this.classname)) {
return defineClass(classname, classfile, 0, classfile.length);
} else {
throw new ClassNotFoundException(classname);
}
}
}
Since we have only overridden the findClass method, this custom class loader is going to behave
as follows when loadClass is called.
The classloader's loadClass method calls findLoadedClass to see if a class with this name has
already been loaded by this classloader. If that succeeds, the resulting Class object is
returned to the requestor.
1.
The loadClass method then delegates to the parent classloader by calling its loadClass call. If
the parent can deal with the request, it will return a Class object which is then returned to the
requestor.
2.
If the parent classloader cannot load the class, findClass then calls our override findClass
method, passing the name of the class to be loaded.
3.
If the requested name matches this.classname, we call defineClass to load the actual class
from the this.classfile byte array. The resulting Class object is then returned.
4.
If the name did not match, we throw ClassNotFoundException.
5.
Loading an external .class file
To load a class we first need to define it. The class is defined by the ClassLoader. There's just one
problem, Oracle didn't write the ClassLoader's code with this feature available. To define the class
we will need to access a method named defineClass() which is a private method of the ClassLoader
.
To access it, what we will do is create a new class, ByteClassLoader, and extend it to ClassLoader.
Now that we have extended our class to ClassLoader, we can access the ClassLoader's private
methods. To make defineClass() available, we will create a new method that will act like a mirror
for the private defineClass() method. To call the private method we will need the class name, name,
https://riptutorial.com/ 168](https://image.slidesharecdn.com/java-language-pdfroom-240812184155-f7515a4f/85/java-language-programacao-2-PDF-Room-pdf-236-320.jpg)
![the class bytes, classBytes, the first byte's offset, which will be 0 because classBytes' data starts at
classBytes[0], and the last byte's offset, which will be classBytes.lenght because it represents the
size of the data, which will be the last offset.
public class ByteClassLoader extends ClassLoader {
public Class<?> defineClass(String name, byte[] classBytes) {
return defineClass(name, classBytes, 0, classBytes.length);
}
}
Now, we have a public defineClass() method. It can be called by passing the name of the class
and the class bytes as arguments.
Let's say we have class named MyClass in the package stackoverflow...
To call the method we need the class bytes so we create a Path object representing our class' path
by using the Paths.get() method and passing the path of the binary class as an argument. Now,
we can get the class bytes with Files.readAllBytes(path). So we create a ByteClassLoader instance
and use the method we created, defineClass(). We already have the class bytes but to call our
method we also need the class name which is given by the package name (dot) the class
canonical name, in this case stackoverflow.MyClass.
Path path = Paths.get("MyClass.class");
ByteClassLoader loader = new ByteClassLoader();
loader.defineClass("stackoverflow.MyClass", Files.readAllBytes(path);
Note: The defineClass() method returns a Class<?> object. You can save it if you want.
To load the class, we just call loadClass() and pass the class name. This method can throw an
ClassNotFoundException so we need to use a try cath block
try{
loader.loadClass("stackoverflow.MyClass");
} catch(ClassNotFoundException e){
e.printStackTrace();
}
Read Classloaders online: https://riptutorial.com/java/topic/5443/classloaders
https://riptutorial.com/ 169](https://image.slidesharecdn.com/java-language-pdfroom-240812184155-f7515a4f/85/java-language-programacao-2-PDF-Room-pdf-237-320.jpg)
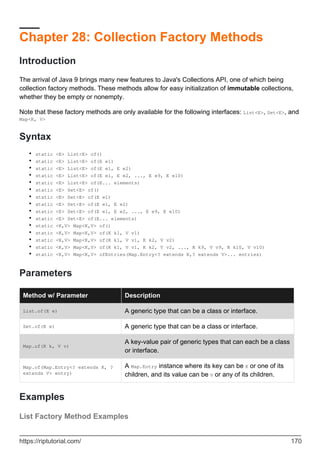
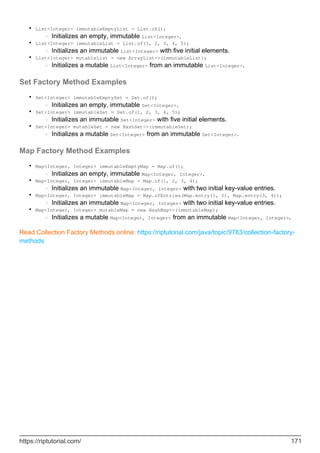
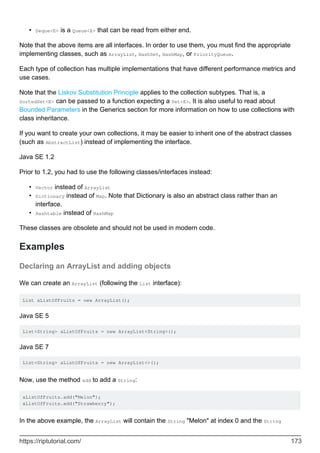
![Java Collections framework
Similarly for maps, given a Map<String, Object> map a new map can be constructed with all
elements as follows:
Map<String, Object> map1 = new HashMap<>(map);
SortedMap<String, Object> map2 = new TreeMap<>(map);
Apache Commons Collections framework
Using Apache Commons you can create Map using array in ArrayUtils.toMap as well as MapUtils.toMap:
import org.apache.commons.lang3.ArrayUtils;
...
// Taken from org.apache.commons.lang.ArrayUtils#toMap JavaDoc
// Create a Map mapping colors.
Map colorMap = MapUtils.toMap(new String[][] {{
{"RED", "#FF0000"},
{"GREEN", "#00FF00"},
{"BLUE", "#0000FF"}});
Each element of the array must be either a Map.Entry or an Array, containing at least two
elements, where the first element is used as key and the second as value.
Google Guava Collections framework
Utility class from Google Guava framework is named Maps:
import com.google.common.collect.Maps;
...
void howToCreateMapsMethod(Function<? super K,V> valueFunction,
Iterable<K> keys1,
Set<K> keys2,
SortedSet<K> keys3) {
ImmutableMap<K, V> map1 = toMap(keys1, valueFunction); // Immutable copy
Map<K, V> map2 = asMap(keys2, valueFunction); // Live Map view
SortedMap<K, V> map3 = toMap(keys3, valueFunction); // Live Map view
}
Java SE 8
Using Stream,
Stream.of("xyz", "abc").collect(Collectors.toList());
or
Arrays.stream("xyz", "abc").collect(Collectors.toList());
https://riptutorial.com/ 175](https://image.slidesharecdn.com/java-language-pdfroom-240812184155-f7515a4f/85/java-language-programacao-2-PDF-Room-pdf-243-320.jpg)
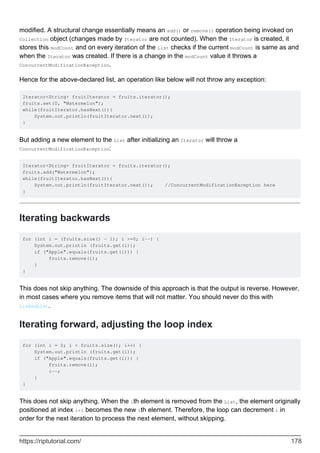
![public class MyPojoClass {
private List<Integer> intList = new ArrayList<>();
public void addValueToIntList(Integer value){
intList.add(value);
}
public List<Integer> getIntList() {
return Collections.unmodifiableList(intList);
}
}
The following attempt to modify an unmodifiable collection will throw an exception:
import java.util.List;
public class App {
public static void main(String[] args) {
MyPojoClass pojo = new MyPojoClass();
pojo.addValueToIntList(42);
List<Integer> list = pojo.getIntList();
list.add(69);
}
}
output:
Exception in thread "main" java.lang.UnsupportedOperationException
at java.util.Collections$UnmodifiableCollection.add(Collections.java:1055)
at App.main(App.java:12)
Iterating over Collections
Iterating over List
List<String> names = new ArrayList<>(Arrays.asList("Clementine", "Duran", "Mike"));
Java SE 8
names.forEach(System.out::println);
If we need parallelism use
names.parallelStream().forEach(System.out::println);
Java SE 5
for (String name : names) {
https://riptutorial.com/ 180](https://image.slidesharecdn.com/java-language-pdfroom-240812184155-f7515a4f/85/java-language-programacao-2-PDF-Room-pdf-248-320.jpg)

![Collections in Java only work for objects. I.e. there is no Map<int, int> in Java. Instead, primitive
values need to be boxed into objects, as in Map<Integer, Integer>. Java auto-boxing will enable
transparent use of these collections:
Map<Integer, Integer> map = new HashMap<>();
map.put(1, 17); // Automatic boxing of int to Integer objects
int a = map.get(1); // Automatic unboxing.
Unfortunately, the overhead of this is substantial. A HashMap<Integer, Integer> will require about 72
bytes per entry (e.g. on 64-bit JVM with compressed pointers, and assuming integers larger than
256, and assuming 50% load of the map). Because the actual data is only 8 bytes, this yields a
massive overhead. Furthermore, it requires two level of indirection (Map -> Entry -> Value) it is
unnecessarily slow.
There exist several libraries with optimized collections for primitive data types (that require only
~16 bytes per entry at 50% load, i.e. 4x less memory, and one level of indirection less), that can
yield substantial performance benefits when using large collections of primitive values in Java.
Removing matching items from Lists using Iterator.
Above I noticed an example to remove items from a List within a Loop and I thought of another
example that may come in handy this time using the Iterator interface.
This is a demonstration of a trick that might come in handy when dealing with duplicate items in
lists that you want to get rid of.
Note: This is only adding on to the Removing items from a List within a loop example:
So let's define our lists as usual
String[] names = {"James","Smith","Sonny","Huckle","Berry","Finn","Allan"};
List<String> nameList = new ArrayList<>();
//Create a List from an Array
nameList.addAll(Arrays.asList(names));
String[] removeNames = {"Sonny","Huckle","Berry"};
List<String> removeNameList = new ArrayList<>();
//Create a List from an Array
removeNameList.addAll(Arrays.asList(removeNames));
The following method takes in two Collection objects and performs the magic of removing the
elements in our removeNameList that match with elements in nameList.
private static void removeNames(Collection<String> collection1, Collection<String>
collection2) {
//get Iterator.
Iterator<String> iterator = collection1.iterator();
//Loop while collection has items
while(iterator.hasNext()){
if (collection2.contains(iterator.next()))
https://riptutorial.com/ 183](https://image.slidesharecdn.com/java-language-pdfroom-240812184155-f7515a4f/85/java-language-programacao-2-PDF-Room-pdf-251-320.jpg)
![@Override
public boolean hasNext() {
return node != null;
}
@Override
public T next() {
if (!hasNext())
throw new NoSuchElementException();
Node<T> prevNode = node;
node = node.next;
return prevNode.data;
}
@Override
public void remove() {
throw new UnsupportedOperationException("Removal logic not implemented.");
}
}
public void add(T data) {
Node current = head;
while (current.next != null)
current = current.next;
current.next = new Node<>(data);
}
}
class App {
public static void main(String[] args) {
LinkedList<Integer> list = new LinkedList<>(1);
list.add(2);
list.add(4);
list.add(3);
//Test #1
System.out.println("using Iterator:");
Iterator<Integer> itr = list.iterator();
while (itr.hasNext()) {
Integer i = itr.next();
System.out.print(i + " ");
}
//Test #2
System.out.println("nnusing for-each:");
for (Integer data : list) {
System.out.print(data + " ");
}
}
}
Output
using Iterator:
1 2 4 3
using for-each:
1 2 4 3
https://riptutorial.com/ 185](https://image.slidesharecdn.com/java-language-pdfroom-240812184155-f7515a4f/85/java-language-programacao-2-PDF-Room-pdf-253-320.jpg)
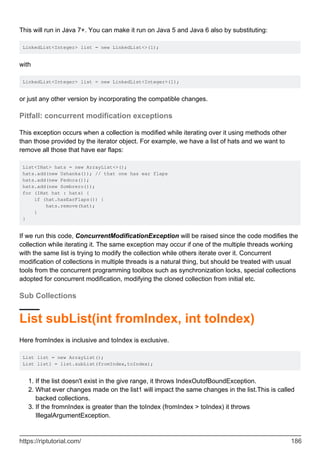
![Example:
List<String> list = new ArrayList<String>();
List<String> list = new ArrayList<String>();
list.add("Hello1");
list.add("Hello2");
System.out.println("Before Sublist "+list);
List<String> list2 = list.subList(0, 1);
list2.add("Hello3");
System.out.println("After sublist changes "+list);
Output:
Before Sublist [Hello1, Hello2]
After sublist changes [Hello1, Hello3, Hello2]
Set subSet(fromIndex,toIndex)
Here fromIndex is inclusive and toIndex is exclusive.
Set set = new TreeSet();
Set set1 = set.subSet(fromIndex,toIndex);
The returned set will throw an IllegalArgumentException on an attempt to insert an element
outside its range.
Map subMap(fromKey,toKey)
fromKey is inclusive and toKey is exclusive
Map map = new TreeMap();
Map map1 = map.get(fromKey,toKey);
If fromKey is greater than toKey or if this map itself has a restricted range, and fromKey or toKey
lies outside the bounds of the range then it throws IllegalArgumentException.
All the collections support backed collections means changes made on the sub collection will have
same change on the main collection.
Read Collections online: https://riptutorial.com/java/topic/90/collections
https://riptutorial.com/ 187](https://image.slidesharecdn.com/java-language-pdfroom-240812184155-f7515a4f/85/java-language-programacao-2-PDF-Room-pdf-255-320.jpg)
![Chapter 30: Command line Argument
Processing
Syntax
public static void main(String[] args)
•
Parameters
Parameter Details
args
The command line arguments. Assuming that the main method is invoked by the
Java launcher, args will be non-null, and will have no null elements.
Remarks
When a regular Java application is launched using the java command (or equivalent), a main
method will be called, passing the arguments from the command line in the args array.
Unfortunately, the Java SE class libraries do not provide any direct support for command
argument processing. This leaves you two alternatives:
Implement the argument processing by hand in Java.
•
Make use of a 3rd-party library.
•
This Topic will attempt to cover some of the more popular 3rd-party libraries. For an extensive list
of the alternatives, see this answer to the StackOverflow Question "How to parse command line
arguments in Java?".
Examples
Argument processing using GWT ToolBase
If you want to parse more complex command-line arguments, e.g. with optional parameters, than
the best is to use google's GWT approach. All classes are public available at:
https://gwt.googlesource.com/gwt/+/2.8.0-
beta1/dev/core/src/com/google/gwt/util/tools/ToolBase.java
An example for handling the command-line myprogram -dir "~/Documents" -port 8888 is:
public class MyProgramHandler extends ToolBase {
protected File dir;
https://riptutorial.com/ 188](https://image.slidesharecdn.com/java-language-pdfroom-240812184155-f7515a4f/85/java-language-programacao-2-PDF-Room-pdf-256-320.jpg)
![protected int port;
// getters for dir and port
...
public MyProgramHandler() {
this.registerHandler(new ArgHandlerDir() {
@Override
public void setDir(File dir) {
this.dir = dir;
}
});
this.registerHandler(new ArgHandlerInt() {
@Override
public String[] getTagArgs() {
return new String[]{"port"};
}
@Override
public void setInt(int value) {
this.port = value;
}
});
}
public static void main(String[] args) {
MyProgramHandler myShell = new MyProgramHandler();
if (myShell.processArgs(args)) {
// main program operation
System.out.println(String.format("port: %d; dir: %s",
myShell.getPort(), myShell.getDir()));
}
System.exit(1);
}
}
ArgHandler also has a method isRequired() which can be overwritten to say that the command-line
argument is required (default return is false so that the argument is optional.
Processing arguments by hand
When the command-line syntax for an application is simple, it is reasonable to do the command
argument processing entirely in custom code.
In this example, we will present a series of simple case studies. In each case, the code will
produce error messages if the arguments are unacceptable, and then call System.exit(1) to tell the
shell that the command has failed. (We will assume in each case that the Java code is invoked
using a wrapper whose name is "myapp".)
A command with no arguments
In this case-study, the command requires no arguments. The code illustrates that args.length
gives us the number of command line arguments.
public class Main {
public static void main(String[] args) {
if (args.length > 0) {
System.err.println("usage: myapp");
https://riptutorial.com/ 189](https://image.slidesharecdn.com/java-language-pdfroom-240812184155-f7515a4f/85/java-language-programacao-2-PDF-Room-pdf-257-320.jpg)
![System.exit(1);
}
// Run the application
System.out.println("It worked");
}
}
A command with two arguments
In this case-study, the command requires at precisely two arguments.
public class Main {
public static void main(String[] args) {
if (args.length != 2) {
System.err.println("usage: myapp <arg1> <arg2>");
System.exit(1);
}
// Run the application
System.out.println("It worked: " + args[0] + ", " + args[1]);
}
}
Note that if we neglected to check args.length, the command would crash if the user ran it with too
few command-line arguments.
A command with "flag" options and at least one argument
In this case-study, the command has a couple of (optional) flag options, and requires at least one
argument after the options.
package tommy;
public class Main {
public static void main(String[] args) {
boolean feelMe = false;
boolean seeMe = false;
int index;
loop: for (index = 0; index < args.length; index++) {
String opt = args[index];
switch (opt) {
case "-c":
seeMe = true;
break;
case "-f":
feelMe = true;
break;
default:
if (!opts.isEmpty() && opts.charAt(0) == '-') {
error("Unknown option: '" + opt + "');
}
break loop;
}
}
if (index >= args.length) {
error("Missing argument(s)");
}
https://riptutorial.com/ 190](https://image.slidesharecdn.com/java-language-pdfroom-240812184155-f7515a4f/85/java-language-programacao-2-PDF-Room-pdf-258-320.jpg)
![// Run the application
// ...
}
private static void error(String message) {
if (message != null) {
System.err.println(message);
}
System.err.println("usage: myapp [-f] [-c] [ <arg> ...]");
System.exit(1);
}
}
As you can see, processing the arguments and options gets rather cumbersome if the command
syntax is complicated. It is advisable to use a "command line parsing" library; see the other
examples.
Read Command line Argument Processing online:
https://riptutorial.com/java/topic/4775/command-line-argument-processing
https://riptutorial.com/ 191](https://image.slidesharecdn.com/java-language-pdfroom-240812184155-f7515a4f/85/java-language-programacao-2-PDF-Room-pdf-259-320.jpg)
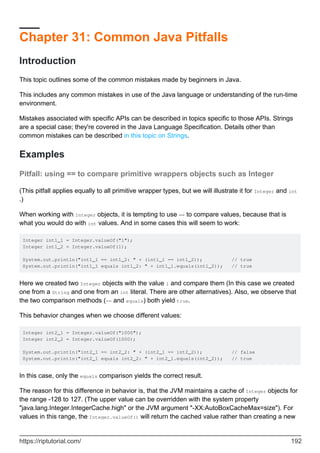
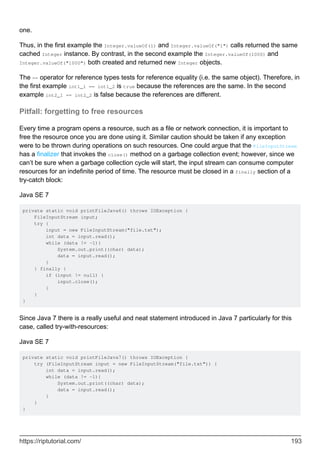
![final Deque<BigDecimal> numbers = new LinkedBlockingDeque<>();
final BigDecimal divisor = new BigDecimal(51);
scheduledExecutorService.scheduleAtFixedRate(() -> {
BigDecimal number = numbers.peekLast();
if (number != null && number.remainder(divisor).byteValue() == 0) {
System.out.println("Number: " + number);
System.out.println("Deque size: " + numbers.size());
}
}, 10, 10, TimeUnit.MILLISECONDS);
scheduledExecutorService.scheduleAtFixedRate(() -> {
numbers.add(new BigDecimal(System.currentTimeMillis()));
}, 10, 10, TimeUnit.MILLISECONDS);
try {
scheduledExecutorService.awaitTermination(1, TimeUnit.DAYS);
} catch (InterruptedException e) {
e.printStackTrace();
}
This example creates two scheduled tasks. The first task takes the last number from a deque
called numbers, and, if the number is divisible by 51, it prints the number and the deque's size. The
second task puts numbers into the deque. Both tasks are scheduled at a fixed rate, and they run
every 10 ms.
If the code is executed, you’ll see that the size of the deque is permanently increasing. This will
eventually cause the deque to be filled with objects that consume all available heap memory.
To prevent this while preserving the semantics of this program, we can use a different method for
taking numbers from the deque: pollLast. Contrary to the method peekLast, pollLast returns the
element and removes it from the deque while peekLast only returns the last element.
Pitfall: using == to compare strings
A common mistake for Java beginners is to use the == operator to test if two strings are equal. For
example:
public class Hello {
public static void main(String[] args) {
if (args.length > 0) {
if (args[0] == "hello") {
System.out.println("Hello back to you");
} else {
System.out.println("Are you feeling grumpy today?");
}
}
}
}
The above program is supposed to test the first command line argument and print different
messages when it and isn't the word "hello". But the problem is that it won't work. That program
will output "Are you feeling grumpy today?" no matter what the first command line argument is.
https://riptutorial.com/ 195](https://image.slidesharecdn.com/java-language-pdfroom-240812184155-f7515a4f/85/java-language-programacao-2-PDF-Room-pdf-263-320.jpg)
![In this particular case the String "hello" is put in the string pool while the String args[0] resides on
the heap. This means there are two objects representing the same literal, each with its reference.
Since == tests for references, not actual equality, the comparison will yield a false most of the
times. This doesn't mean that it will always do so.
When you use == to test strings, what you are actually testing is if two String objects are the same
Java object. Unfortunately, that is not what string equality means in Java. In fact, the correct way
to test strings is to use the equals(Object) method. For a pair of strings, we usually want to test if
they consist of the same characters in the same order.
public class Hello2 {
public static void main(String[] args) {
if (args.length > 0) {
if (args[0].equals("hello")) {
System.out.println("Hello back to you");
} else {
System.out.println("Are you feeling grumpy today?");
}
}
}
}
But it actually gets worse. The problem is that == will give the expected answer in some
circumstances. For example
public class Test1 {
public static void main(String[] args) {
String s1 = "hello";
String s2 = "hello";
if (s1 == s2) {
System.out.println("same");
} else {
System.out.println("different");
}
}
}
Interestingly, this will print "same", even though we are testing the strings the wrong way. Why is
that? Because the Java Language Specification (Section 3.10.5: String Literals) stipulates that any
two string >>literals<< consisting of the same characters will actually be represented by the same
Java object. Hence, the == test will give true for equal literals. (The string literals are "interned" and
added to a shared "string pool" when your code is loaded, but that is actually an implementation
detail.)
To add to the confusion, the Java Language Specification also stipulates that when you have a
compile-time constant expression that concatenates two string literals, that is equivalent to a
single literal. Thus:
public class Test1 {
public static void main(String[] args) {
String s1 = "hello";
String s2 = "hel" + "lo";
String s3 = " mum";
https://riptutorial.com/ 196](https://image.slidesharecdn.com/java-language-pdfroom-240812184155-f7515a4f/85/java-language-programacao-2-PDF-Room-pdf-264-320.jpg)
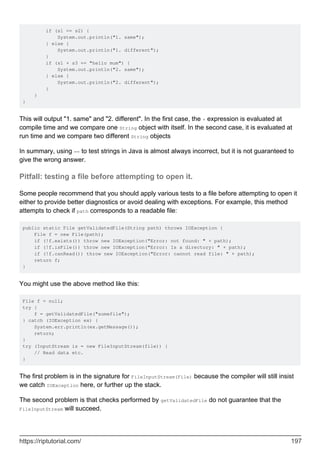
![Race conditions: another thread or a separate process could rename the file, delete the file,
or remove read access after the getValidatedFile returns. That would lead to a "plain"
IOException without the custom message.
•
There are edge cases not covered by those tests. For example, on a system with SELinux in
"enforcing" mode, an attempt to read a file can fail despite canRead() returning true.
•
The third problem is that the tests are inefficient. For example, the exists, isFile and canRead calls
will each make a syscall to perform the required check. Another syscall is then made to open the
file, which repeats the same checks behind the scenes.
In short, methods like getValidatedFile are misguided. It is better to simply attempt to open the file
and handle the exception:
try (InputStream is = new FileInputStream("somefile")) {
// Read data etc.
} catch (IOException ex) {
System.err.println("IO Error processing 'somefile': " + ex.getMessage());
return;
}
If you wanted to distinguish IO errors thrown while opening and reading, you could use a nested
try / catch. If you wanted to produce better diagnostics for open failures, you could perform the
exists, isFile and canRead checks in the handler.
Pitfall: thinking of variables as objects
No Java variable represents an object.
String foo; // NOT AN OBJECT
Neither does any Java array contain objects.
String bar[] = new String[100]; // No member is an object.
If you mistakenly think of variables as objects, the actual behavior of the Java language will
surprise you.
For Java variables which have a primitive type (such as int or float) the variable holds a
copy of the value. All copies of a primitive value are indistinguishable; i.e. there is only one
int value for the number one. Primitive values are not objects and they do not behave like
objects.
•
For Java variables which have a reference type (either a class or an array type) the variable
holds a reference. All copies of a reference are indistinguishable. References may point to
objects, or they may be null which means that they point to no object. However, they are not
objects and they don't behave like objects.
•
Variables are not objects in either case, and they don't contain objects in either case. They may
https://riptutorial.com/ 198](https://image.slidesharecdn.com/java-language-pdfroom-240812184155-f7515a4f/85/java-language-programacao-2-PDF-Room-pdf-266-320.jpg)
![contain references to objects, but that is saying something different.
Example class
The examples that follow use this class, which represents a point in 2D space.
public final class MutableLocation {
public int x;
public int y;
public MutableLocation(int x, int y) {
this.x = x;
this.y = y;
}
public boolean equals(Object other) {
if (!(other instanceof MutableLocation) {
return false;
}
MutableLocation that = (MutableLocation) other;
return this.x == that.x && this.y == that.y;
}
}
An instance of this class is an object that has two fields x and y which have the type int.
We can have many instances of the MutableLocation class. Some will represent the same locations
in 2D space; i.e. the respective values of x and y will match. Others will represent different
locations.
Multiple variables can point to the same object
MutableLocation here = new MutableLocation(1, 2);
MutableLocation there = here;
MutableLocation elsewhere = new MutableLocation(1, 2);
In the above, we have declared three variables here, there and elsewhere that can hold references
to MutableLocation objects.
If you (incorrectly) think of these variables as being objects, then you are likely to misread the
statements as saying:
Copy the location "[1, 2]" to here
1.
Copy the location "[1, 2]" to there
2.
Copy the location "[1, 2]" to elsewhere
3.
From that, you are likely to infer we have three independent objects in the three variables. In fact
there are only two objects created by the above. The variables here and there actually refer to the
same object.
We can demonstrate this. Assuming the variable declarations as above:
https://riptutorial.com/ 199](https://image.slidesharecdn.com/java-language-pdfroom-240812184155-f7515a4f/85/java-language-programacao-2-PDF-Room-pdf-267-320.jpg)
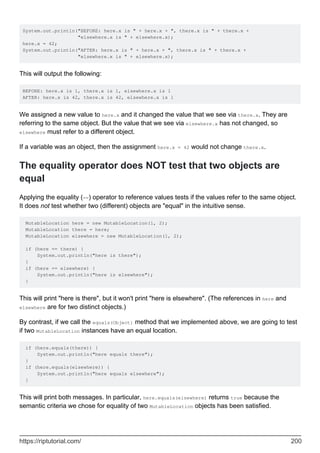
![Method calls do NOT pass objects at all
Java method calls use pass by value1 to pass arguments and return a result.
When you pass a reference value to a method, you're actually passing a reference to an object by
value, which means that it is creating a copy of the object reference.
As long as both object references are still pointing to the same object, you can modify that object
from either reference, and this is what causes confusion for some.
However, you are not passing an object by reference2. The distinction is that if the object
reference copy is modified to point to another object, the original object reference will still point to
the original object.
void f(MutableLocation foo) {
foo = new MutableLocation(3, 4); // Point local foo at a different object.
}
void g() {
MutableLocation foo = MutableLocation(1, 2);
f(foo);
System.out.println("foo.x is " + foo.x); // Prints "foo.x is 1".
}
Neither are you passing a copy of the object.
void f(MutableLocation foo) {
foo.x = 42;
}
void g() {
MutableLocation foo = new MutableLocation(0, 0);
f(foo);
System.out.println("foo.x is " + foo.x); // Prints "foo.x is 42"
}
1 - In languages like Python and Ruby, the term "pass by sharing" is preferred for "pass by value" of an object /
reference.
2 - The term "pass by reference" or "call by reference" has a very specific meaning in programming language
terminology. In effect, it means that you pass the address of a variable or an array element, so that when the called
method assigns a new value to the formal argument, it changes the value in the original variable. Java does not
support this. For a more fulsome description of different mechanisms for passing parameters, please refer to
https://en.wikipedia.org/wiki/Evaluation_strategy.
Pitfall: combining assignment and side-effects
Occasionally we see StackOverflow Java questions (and C or C++ questions) that ask what
something like this:
i += a[i++] + b[i--];
https://riptutorial.com/ 201](https://image.slidesharecdn.com/java-language-pdfroom-240812184155-f7515a4f/85/java-language-programacao-2-PDF-Room-pdf-269-320.jpg)
![evaluates to ... for some known initial states of i, a and b.
Generally speaking:
for Java the answer is always specified1, but non-obvious, and often difficult to figure out
•
for C and C++ the answer is often unspecified.
•
Such examples are often used in exams or job interviews as an attempt to see if the student or
interviewee understands how expression evaluation really works in the Java programming
language. This is arguably legitimate as a "test of knowledge", but that does not mean that you
should ever do this in a real program.
To illustrate, the following seemingly simple example has appeared a few times in StackOverflow
questions (like this one). In some cases, it appears as a genuine mistake in someone's code.
int a = 1;
a = a++;
System.out.println(a); // What does this print.
Most programmers (including Java experts) reading those statements quickly would say that it
outputs 2. In fact, it outputs 1. For a detailed explanation of why, please read this Answer.
However the real takeaway from this and similar examples is that any Java statement that both
assigns to and side-effects the same variable is going to be at best hard to understand, and at
worst downright misleading. You should avoid writing code like this.
1 - modulo potential issues with the Java Memory Model if the variables or objects are visible to other threads.
Pitfall: Not understanding that String is an immutable class
New Java programmers often forget, or fail to fully comprehend, that the Java String class is
immutable. This leads to problems like the one in the following example:
public class Shout {
public static void main(String[] args) {
for (String s : args) {
s.toUpperCase();
System.out.print(s);
System.out.print(" ");
}
System.out.println();
}
}
The above code is supposed to print command line arguments in upper case. Unfortunately, it
does not work, the case of the arguments is not changed. The problem is this statement:
s.toUpperCase();
You might think that calling toUpperCase() is going to change s to an uppercase string. It doesn't. It
https://riptutorial.com/ 202](https://image.slidesharecdn.com/java-language-pdfroom-240812184155-f7515a4f/85/java-language-programacao-2-PDF-Room-pdf-270-320.jpg)

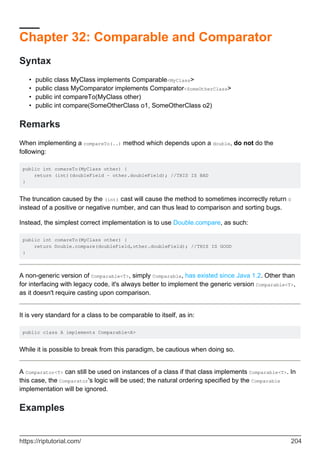
![Sorting a List using Comparable or a Comparator
Say we are working on a class representing a Person by their first and last names. We have
created a basic class to do this and implemented proper equals and hashCode methods.
public class Person {
private final String lastName; //invariant - nonnull
private final String firstName; //invariant - nonnull
public Person(String firstName, String lastName){
this.firstName = firstName != null ? firstName : "";
this.lastName = lastName != null ? lastName : "";
}
public String getFirstName() {
return firstName;
}
public String getLastName() {
return lastName;
}
public String toString() {
return lastName + ", " + firstName;
}
@Override
public boolean equals(Object o) {
if (! (o instanceof Person)) return false;
Person p = (Person)o;
return firstName.equals(p.firstName) && lastName.equals(p.lastName);
}
@Override
public int hashCode() {
return Objects.hash(firstName, lastName);
}
}
Now we would like to sort a list of Person objects by their name, such as in the following scenario:
public static void main(String[] args) {
List<Person> people = Arrays.asList(new Person("John", "Doe"),
new Person("Bob", "Dole"),
new Person("Ronald", "McDonald"),
new Person("Alice", "McDonald"),
new Person("Jill", "Doe"));
Collections.sort(people); //This currently won't work.
}
Unfortunately, as marked, the above currently won't compile. Collections.sort(..) only knows how
to sort a list if the elements in that list are comparable, or a custom method of comparison is given.
If you were asked to sort the following list : 1,3,5,4,2, you'd have no problem saying the answer is
1,2,3,4,5. This is because Integers (both in Java and mathematically) have a natural ordering, a
https://riptutorial.com/ 205](https://image.slidesharecdn.com/java-language-pdfroom-240812184155-f7515a4f/85/java-language-programacao-2-PDF-Room-pdf-273-320.jpg)
![standard, default comparison base ordering. To give our Person class a natural ordering, we
implement Comparable<Person>, which requires implementing the method compareTo(Person p):
public class Person implements Comparable<Person> {
private final String lastName; //invariant - nonnull
private final String firstName; //invariant - nonnull
public Person(String firstName, String lastName) {
this.firstName = firstName != null ? firstName : "";
this.lastName = lastName != null ? lastName : "";
}
public String getFirstName() {
return firstName;
}
public String getLastName() {
return lastName;
}
public String toString() {
return lastName + ", " + firstName;
}
@Override
public boolean equals(Object o) {
if (! (o instanceof Person)) return false;
Person p = (Person)o;
return firstName.equals(p.firstName) && lastName.equals(p.lastName);
}
@Override
public int hashCode() {
return Objects.hash(firstName, lastName);
}
@Override
public int compareTo(Person other) {
// If this' lastName and other's lastName are not comparably equivalent,
// Compare this to other by comparing their last names.
// Otherwise, compare this to other by comparing their first names
int lastNameCompare = lastName.compareTo(other.lastName);
if (lastNameCompare != 0) {
return lastNameCompare;
} else {
return firstName.compareTo(other.firstName);
}
}
}
Now, the main method given will function correctly
public static void main(String[] args) {
List<Person> people = Arrays.asList(new Person("John", "Doe"),
new Person("Bob", "Dole"),
new Person("Ronald", "McDonald"),
new Person("Alice", "McDonald"),
new Person("Jill", "Doe"));
https://riptutorial.com/ 206](https://image.slidesharecdn.com/java-language-pdfroom-240812184155-f7515a4f/85/java-language-programacao-2-PDF-Room-pdf-274-320.jpg)
![Collections.sort(people); //Now functions correctly
//people is now sorted by last name, then first name:
// --> Jill Doe, John Doe, Bob Dole, Alice McDonald, Ronald McDonald
}
If, however, you either do not want or are unable to modify class Person, you can provide a custom
Comparator<T> that handles the comparison of any two Person objects. If you were asked to sort the
following list: circle, square, rectangle, triangle, hexagon you could not, but if you were asked to
sort that list based on the number of corners, you could. Just so, providing a comparator instructs
Java how to compare two normally not comparable objects.
public class PersonComparator implements Comparator<Person> {
public int compare(Person p1, Person p2) {
// If p1's lastName and p2's lastName are not comparably equivalent,
// Compare p1 to p2 by comparing their last names.
// Otherwise, compare p1 to p2 by comparing their first names
if (p1.getLastName().compareTo(p2.getLastName()) != 0) {
return p1.getLastName().compareTo(p2.getLastName());
} else {
return p1.getFirstName().compareTo(p2.getFirstName());
}
}
}
//Assume the first version of Person (that does not implement Comparable) is used here
public static void main(String[] args) {
List<Person> people = Arrays.asList(new Person("John", "Doe"),
new Person("Bob", "Dole"),
new Person("Ronald", "McDonald"),
new Person("Alice", "McDonald"),
new Person("Jill", "Doe"));
Collections.sort(people); //Illegal, Person doesn't implement Comparable.
Collections.sort(people, new PersonComparator()); //Legal
//people is now sorted by last name, then first name:
// --> Jill Doe, John Doe, Bob Dole, Alice McDonald, Ronald McDonald
}
Comparators can also be created/used as an anonymous inner class
//Assume the first version of Person (that does not implement Comparable) is used here
public static void main(String[] args) {
List<Person> people = Arrays.asList(new Person("John", "Doe"),
new Person("Bob", "Dole"),
new Person("Ronald", "McDonald"),
new Person("Alice", "McDonald"),
new Person("Jill", "Doe"));
Collections.sort(people); //Illegal, Person doesn't implement Comparable.
Collections.sort(people, new PersonComparator()); //Legal
//people is now sorted by last name, then first name:
// --> Jill Doe, John Doe, Bob Dole, Alice McDonald, Ronald McDonald
//Anonymous Class
https://riptutorial.com/ 207](https://image.slidesharecdn.com/java-language-pdfroom-240812184155-f7515a4f/85/java-language-programacao-2-PDF-Room-pdf-275-320.jpg)

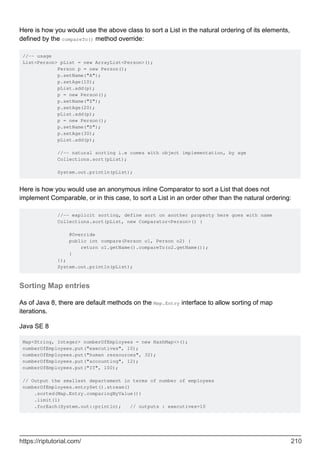
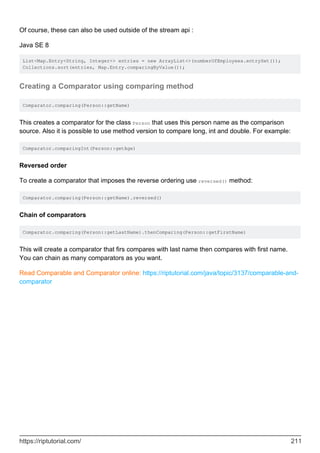
![Chapter 33: CompletableFuture
Introduction
CompletableFuture is a class added to Java SE 8 which implements the Future interface from
Java SE 5. In addition to supporting the Future interface it adds many methods that allow
asynchronous callback when the future is completed.
Examples
Convert blocking method to asynchonous
The following method will take a second or two depending on your connection to retrieve a web
page and count the text length. Whatever thread calls it will block for that period of time. Also it
rethrows an exception which is useful later on.
public static long blockingGetWebPageLength(String urlString) {
try (BufferedReader br = new BufferedReader(new InputStreamReader(new
URL(urlString).openConnection().getInputStream()))) {
StringBuilder sb = new StringBuilder();
String line;
while ((line = br.readLine()) != null) {
sb.append(line);
}
return sb.toString().length();
} catch (IOException ex) {
throw new RuntimeException(ex);
}
}
This converts it to a method that will return immediately by moving the blocking method call to
another thread. By default the supplyAsync method will run the supplier on the common pool. For
a blocking method this is probably not a good choice since one might exhaust the threads in that
pool which is why I added the optional service parameter.
static private ExecutorService service = Executors.newCachedThreadPool();
static public CompletableFuture<Long> asyncGetWebPageLength(String url) {
return CompletableFuture.supplyAsync(() -> blockingGetWebPageLength(url), service);
}
To use the function in an asynchronous fashion one should use on of the methods that accepts a
lamda to be called with the result of the of the supplier when it completes such as thenAccept.
Also it is important to use exceptionally or handle method to log any exceptions that might have
happened.
public static void main(String[] args) {
https://riptutorial.com/ 212](https://image.slidesharecdn.com/java-language-pdfroom-240812184155-f7515a4f/85/java-language-programacao-2-PDF-Room-pdf-280-320.jpg)
![asyncGetWebPageLength("https://stackoverflow.com/")
.thenAccept(l -> {
System.out.println("Stack Overflow returned " + l);
})
.exceptionally((Throwable throwable) -> {
Logger.getLogger("myclass").log(Level.SEVERE, "", throwable);
return null;
});
}
Simple Example of CompletableFuture
In the example below, the calculateShippingPrice method calculates shipping cost, which takes
some processing time. In a real world example, this would e.g. be contacting another server which
returns the price based on the weight of the product and the shipping method.
By modeling this in an async way via CompletableFuture, we can continue different work in the
method (i.e. calculating packaging costs).
public static void main(String[] args) {
int price = 15; // Let's keep it simple and work with whole number prices here
int weightInGrams = 900;
calculateShippingPrice(weightInGrams) // Here, we get the future
.thenAccept(shippingPrice -> { // And then immediately work on it!
// This fluent style is very useful for keeping it concise
System.out.println("Your total price is: " + (price + shippingPrice));
});
System.out.println("Please stand by. We are calculating your total price.");
}
public static CompletableFuture<Integer> calculateShippingPrice(int weightInGrams) {
return CompletableFuture.supplyAsync(() -> {
// supplyAsync is a factory method that turns a given
// Supplier<U> into a CompletableFuture<U>
// Let's just say each 200 grams is a new dollar on your shipping costs
int shippingCosts = weightInGrams / 200;
try {
Thread.sleep(2000L); // Now let's simulate some waiting time...
} catch(InterruptedException e) { /* We can safely ignore that */ }
return shippingCosts; // And send the costs back!
});
}
Read CompletableFuture online: https://riptutorial.com/java/topic/10935/completablefuture
https://riptutorial.com/ 213](https://image.slidesharecdn.com/java-language-pdfroom-240812184155-f7515a4f/85/java-language-programacao-2-PDF-Room-pdf-281-320.jpg)
![Chapter 34: Concurrent Collections
Introduction
A concurrent collection is a [collection][1] which permits access by more than one thread at the
same time. Different threads can typically iterate through the contents of the collection and add or
remove elements. The collection is responsible for ensuring that the collection doesn't become
corrupt. [1]:
http://stackoverflow.com/documentation/java/90/collections#t=201612221936497298484
Examples
Thread-safe Collections
By default, the various Collection types are not thread-safe.
However, it's fairly easy to make a collection thread-safe.
List<String> threadSafeList = Collections.synchronizedList(new ArrayList<String>());
Set<String> threadSafeSet = Collections.synchronizedSet(new HashSet<String>());
Map<String, String> threadSafeMap = Collections.synchronizedMap(new HashMap<String,
String>());
When you make a thread-safe collection, you should never access it through the original
collection, only through the thread-safe wrapper.
Java SE 5
Starting in Java 5, java.util.collections has several new thread-safe collections that don't need
the various Collections.synchronized methods.
List<String> threadSafeList = new CopyOnWriteArrayList<String>();
Set<String> threadSafeSet = new ConcurrentHashSet<String>();
Map<String, String> threadSafeMap = new ConcurrentHashMap<String, String>();
Concurrent Collections
Concurrent collections are a generalization of thread-safe collections, that allow for a broader
usage in a concurrent environment.
While thread-safe collections have safe element addition or removal from multiple threads, they do
not necessarily have safe iteration in the same context (one may not be able to safely iterate
through the collection in one thread, while another one modifies it by adding/removing elements).
This is where concurrent collections are used.
As iteration is often the base implementation of several bulk methods in collections, like addAll,
https://riptutorial.com/ 214](https://image.slidesharecdn.com/java-language-pdfroom-240812184155-f7515a4f/85/java-language-programacao-2-PDF-Room-pdf-282-320.jpg)
![removeAll, or also collection copying (through a constructor, or other means), sorting, ... the use
case for concurrent collections is actually pretty large.
For example, the Java SE 5 java.util.concurrent.CopyOnWriteArrayList is a thread safe and
concurrent List implementation, its javadoc states :
The "snapshot" style iterator method uses a reference to the state of the array at the
point that the iterator was created. This array never changes during the lifetime of the
iterator, so interference is impossible and the iterator is guaranteed not to throw
ConcurrentModificationException.
Therefore, the following code is safe :
public class ThreadSafeAndConcurrent {
public static final List<Integer> LIST = new CopyOnWriteArrayList<>();
public static void main(String[] args) throws InterruptedException {
Thread modifier = new Thread(new ModifierRunnable());
Thread iterator = new Thread(new IteratorRunnable());
modifier.start();
iterator.start();
modifier.join();
iterator.join();
}
public static final class ModifierRunnable implements Runnable {
@Override
public void run() {
try {
for (int i = 0; i < 50000; i++) {
LIST.add(i);
}
} catch (Exception e) {
e.printStackTrace();
}
}
}
public static final class IteratorRunnable implements Runnable {
@Override
public void run() {
try {
for (int i = 0; i < 10000; i++) {
long total = 0;
for(Integer inList : LIST) {
total += inList;
}
System.out.println(total);
}
} catch (Exception e) {
e.printStackTrace();
}
}
}
}
https://riptutorial.com/ 215](https://image.slidesharecdn.com/java-language-pdfroom-240812184155-f7515a4f/85/java-language-programacao-2-PDF-Room-pdf-283-320.jpg)
![Another concurrent collection regarding iteration is ConcurrentLinkedQueue, which states :
Iterators are weakly consistent, returning elements reflecting the state of the queue at
some point at or since the creation of the iterator. They do not throw
java.util.ConcurrentModificationException, and may proceed concurrently with other
operations. Elements contained in the queue since the creation of the iterator will be
returned exactly once.
One should check the javadocs to see if a collection is concurrent, or not. The attributes of the
iterator returned by the iterator() method ("fail fast", "weakly consistent", ...) is the most important
attribute to look for.
Thread safe but non concurrent examples
In the above code, changing the LIST declaration to
public static final List<Integer> LIST = Collections.synchronizedList(new ArrayList<>());
Could (and statistically will on most modern, multi CPU/core architectures) lead to exceptions.
Synchronized collections from the Collections utility methods are thread safe for addition/removal
of elements, but not iteration (unless the underlying collection being passed to it already is).
Insertion into ConcurrentHashMap
public class InsertIntoConcurrentHashMap
{
public static void main(String[] args)
{
ConcurrentHashMap<Integer, SomeObject> concurrentHashMap = new ConcurrentHashMap<>();
SomeObject value = new SomeObject();
Integer key = 1;
SomeObject previousValue = concurrentHashMap.putIfAbsent(1, value);
if (previousValue != null)
{
//Then some other value was mapped to key = 1. 'value' that was passed to
//putIfAbsent method is NOT inserted, hence, any other thread which calls
//concurrentHashMap.get(1) would NOT receive a reference to the 'value'
//that your thread attempted to insert. Decide how you wish to handle
//this situation.
}
else
{
//'value' reference is mapped to key = 1.
}
}
}
https://riptutorial.com/ 216](https://image.slidesharecdn.com/java-language-pdfroom-240812184155-f7515a4f/85/java-language-programacao-2-PDF-Room-pdf-284-320.jpg)

![Chapter 35: Concurrent Programming
(Threads)
Introduction
Concurrent computing is a form of computing in which several computations are executed
concurrently instead of sequentially. Java language is designed to support concurrent
programming through the usage of threads. Objects and resources can be accessed by multiple
threads; each thread can potentially access any object in the program and the programmer must
ensure read and write access to objects is properly synchronized between threads.
Remarks
Related topic(s) on StackOverflow:
Atomic Types
•
Executor, ExecutorService and Thread pools
•
Extending Thread versus implementing Runnable
•
Examples
Basic Multithreading
If you have many tasks to execute, and all these tasks are not dependent of the result of the
precedent ones, you can use Multithreading for your computer to do all this tasks at the same
time using more processors if your computer can. This can make your program execution faster if
you have some big independent tasks.
class CountAndPrint implements Runnable {
private final String name;
CountAndPrint(String name) {
this.name = name;
}
/** This is what a CountAndPrint will do */
@Override
public void run() {
for (int i = 0; i < 10000; i++) {
System.out.println(this.name + ": " + i);
}
}
public static void main(String[] args) {
// Launching 4 parallel threads
for (int i = 1; i <= 4; i++) {
// `start` method will call the `run` method
https://riptutorial.com/ 218](https://image.slidesharecdn.com/java-language-pdfroom-240812184155-f7515a4f/85/java-language-programacao-2-PDF-Room-pdf-286-320.jpg)

![}
}
public class Consumer implements Runnable {
private final BlockingQueue<ProducedData> queue;
public Consumer(BlockingQueue<ProducedData> queue) {
this.queue = queue;
}
public void run() {
int consumedCount = 0;
try {
while (true) {
//put throws an InterruptedException when the thread is interrupted
ProducedData data = queue.poll(10, TimeUnit.MILLISECONDS);
// process data
consumedCount++;
}
} catch (InterruptedException e) {
// the thread has been interrupted: cleanup and exit
consumedCount--;
//re-interrupt the thread in case the interrupt flag is needeed higher up
Thread.currentThread().interrupt();
}
System.out.println("Consumed " + consumedCount + " objects");
}
}
public class ProducerConsumerExample {
static class ProducedData {
// empty data object
}
public static void main(String[] args) throws InterruptedException {
BlockingQueue<ProducedData> queue = new ArrayBlockingQueue<ProducedData>(1000);
// choice of queue determines the actual behavior: see various BlockingQueue
implementations
Thread producer = new Thread(new Producer(queue));
Thread consumer = new Thread(new Consumer(queue));
producer.start();
consumer.start();
Thread.sleep(1000);
producer.interrupt();
Thread.sleep(10);
consumer.interrupt();
}
}
Using ThreadLocal
A useful tool in Java Concurrency is ThreadLocal – this allows you to have a variable that will be
unique to a given thread. Thus, if the same code runs in different threads, these executions will not
share the value, but instead each thread has its own variable that is local to the thread.
https://riptutorial.com/ 220](https://image.slidesharecdn.com/java-language-pdfroom-240812184155-f7515a4f/85/java-language-programacao-2-PDF-Room-pdf-288-320.jpg)
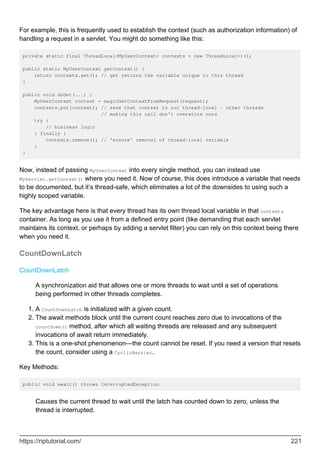
![public void countDown()
Decrements the count of the latch, releasing all waiting threads if the count reaches
zero.
Example:
import java.util.concurrent.*;
class DoSomethingInAThread implements Runnable {
CountDownLatch latch;
public DoSomethingInAThread(CountDownLatch latch) {
this.latch = latch;
}
public void run() {
try {
System.out.println("Do some thing");
latch.countDown();
} catch(Exception err) {
err.printStackTrace();
}
}
}
public class CountDownLatchDemo {
public static void main(String[] args) {
try {
int numberOfThreads = 5;
if (args.length < 1) {
System.out.println("Usage: java CountDownLatchDemo numberOfThreads");
return;
}
try {
numberOfThreads = Integer.parseInt(args[0]);
} catch(NumberFormatException ne) {
}
CountDownLatch latch = new CountDownLatch(numberOfThreads);
for (int n = 0; n < numberOfThreads; n++) {
Thread t = new Thread(new DoSomethingInAThread(latch));
t.start();
}
latch.await();
System.out.println("In Main thread after completion of " + numberOfThreads + "
threads");
} catch(Exception err) {
err.printStackTrace();
}
}
}
output:
java CountDownLatchDemo 5
Do some thing
Do some thing
Do some thing
Do some thing
https://riptutorial.com/ 222](https://image.slidesharecdn.com/java-language-pdfroom-240812184155-f7515a4f/85/java-language-programacao-2-PDF-Room-pdf-290-320.jpg)
![Do some thing
In Main thread after completion of 5 threads
Explanation:
CountDownLatch is initialized with a counter of 5 in Main thread
1.
Main thread is waiting by using await() method.
2.
Five instances of DoSomethingInAThread have been created. Each instance decremented the
counter with countDown() method.
3.
Once the counter becomes zero, Main thread will resume
4.
Synchronization
In Java, there is a built-in language-level locking mechanism: the synchronized block, which can
use any Java object as an intrinsic lock (i.e. every Java object may have a monitor associated with
it).
Intrinsic locks provide atomicity to groups of statements. To understand what that means for us,
let's have a look at an example where synchronized is useful:
private static int t = 0;
private static Object mutex = new Object();
public static void main(String[] args) {
ExecutorService executorService = Executors.newFixedThreadPool(400); // The high thread
count is for demonstration purposes.
for (int i = 0; i < 100; i++) {
executorService.execute(() -> {
synchronized (mutex) {
t++;
System.out.println(MessageFormat.format("t: {0}", t));
}
});
}
executorService.shutdown();
}
In this case, if it weren't for the synchronized block, there would have been multiple concurrency
issues involved. The first one would be with the post increment operator (it isn't atomic in itself),
and the second would be that we would be observing the value of t after an arbitrary amount of
other threads has had the chance to modify it. However, since we acquired an intrinsic lock, there
will be no race conditions here and the output will contain numbers from 1 to 100 in their normal
order.
Intrinsic locks in Java are mutexes (i.e. mutual execution locks). Mutual execution means that if
one thread has acquired the lock, the second will be forced to wait for the first one to release it
before it can acquire the lock for itself. Note: An operation that may put the thread into the wait
(sleep) state is called a blocking operation. Thus, acquiring a lock is a blocking operation.
Intrinsic locks in Java are reentrant. This means that if a thread attempts to acquire a lock it
already owns, it will not block and it will successfully acquire it. For instance, the following code will
https://riptutorial.com/ 223](https://image.slidesharecdn.com/java-language-pdfroom-240812184155-f7515a4f/85/java-language-programacao-2-PDF-Room-pdf-291-320.jpg)
![An atomic operation is an operation that is executed "all at once", without any chance of other
threads observing or modifying state during the atomic operation's execution.
Lets consider a BAD EXAMPLE.
private static int t = 0;
public static void main(String[] args) {
ExecutorService executorService = Executors.newFixedThreadPool(400); // The high thread
count is for demonstration purposes.
for (int i = 0; i < 100; i++) {
executorService.execute(() -> {
t++;
System.out.println(MessageFormat.format("t: {0}", t));
});
}
executorService.shutdown();
}
In this case, there are two issues. The first issue is that the post increment operator is not atomic.
It is comprised of multiple operations: get the value, add 1 to the value, set the value. That's why if
we run the example, it is likely that we won't see t: 100 in the output - two threads may
concurrently get the value, increment it, and set it: let's say the value of t is 10, and two threads
are incrementing t. Both threads will set the value of t to 11, since the second thread observes the
value of t before the first thread had finished incrementing it.
The second issue is with how we are observing t. When we are printing the value of t, the value
may have already been changed by a different thread after this thread's increment operation.
To fix those issues, we'll use the java.util.concurrent.atomic.AtomicInteger, which has many
atomic operations for us to use.
private static AtomicInteger t = new AtomicInteger(0);
public static void main(String[] args) {
ExecutorService executorService = Executors.newFixedThreadPool(400); // The high thread
count is for demonstration purposes.
for (int i = 0; i < 100; i++) {
executorService.execute(() -> {
int currentT = t.incrementAndGet();
System.out.println(MessageFormat.format("t: {0}", currentT));
});
}
executorService.shutdown();
}
The incrementAndGet method of AtomicInteger atomically increments and returns the new value,
thus eliminating the previous race condition. Please note that in this example the lines will still be
out of order because we make no effort to sequence the println calls and that this falls outside the
scope of this example, since it would require synchronization and the goal of this example is to
show how to use AtomicInteger to eliminate race conditions concerning state.
Creating basic deadlocked system
https://riptutorial.com/ 225](https://image.slidesharecdn.com/java-language-pdfroom-240812184155-f7515a4f/85/java-language-programacao-2-PDF-Room-pdf-293-320.jpg)
![A deadlock occurs when two competing actions wait for the other to finish, and thus neither ever
does. In java there is one lock associated with each object. To avoid concurrent modification done
by multiple threads on single object we can use synchronized keyword, but everything comes at a
cost. Using synchronized keyword wrongly can lead to stuck systems called as deadlocked system.
Consider there are 2 threads working on 1 instance, Lets call threads as First and Second, and
lets say we have 2 resources R1 and R2. First acquires R1 and also needs R2 for its completion
while Second acquires R2 and needs R1 for completion.
so say at time t=0,
First has R1 and Second has R2. now First is waiting for R2 while Second is waiting for R1. this
wait is indefinite and this leads to deadlock.
public class Example2 {
public static void main(String[] args) throws InterruptedException {
final DeadLock dl = new DeadLock();
Thread t1 = new Thread(new Runnable() {
@Override
public void run() {
// TODO Auto-generated method stub
dl.methodA();
}
});
Thread t2 = new Thread(new Runnable() {
@Override
public void run() {
// TODO Auto-generated method stub
try {
dl.method2();
} catch (InterruptedException e) {
// TODO Auto-generated catch block
e.printStackTrace();
}
}
});
t1.setName("First");
t2.setName("Second");
t1.start();
t2.start();
}
}
class DeadLock {
Object mLock1 = new Object();
Object mLock2 = new Object();
public void methodA() {
System.out.println("methodA wait for mLock1 " + Thread.currentThread().getName());
synchronized (mLock1) {
System.out.println("methodA mLock1 acquired " +
Thread.currentThread().getName());
https://riptutorial.com/ 226](https://image.slidesharecdn.com/java-language-pdfroom-240812184155-f7515a4f/85/java-language-programacao-2-PDF-Room-pdf-294-320.jpg)
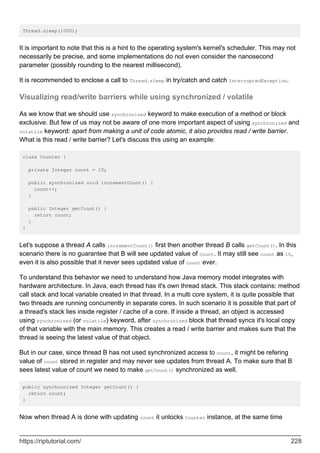
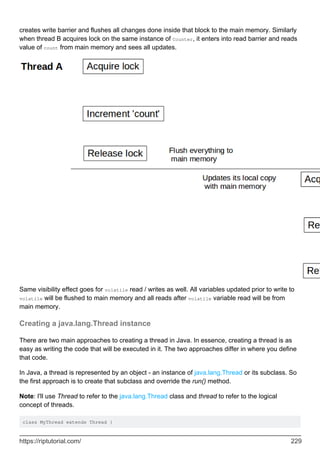

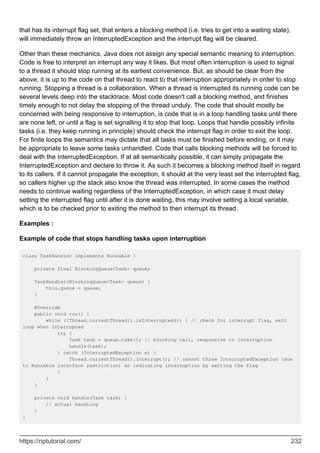
![Below code showcases multiple Producer/Consumer program. Both Producer and Consumer
threads share same global queue.
import java.util.concurrent.*;
import java.util.Random;
public class ProducerConsumerWithES {
public static void main(String args[]) {
BlockingQueue<Integer> sharedQueue = new LinkedBlockingQueue<Integer>();
ExecutorService pes = Executors.newFixedThreadPool(2);
ExecutorService ces = Executors.newFixedThreadPool(2);
pes.submit(new Producer(sharedQueue, 1));
pes.submit(new Producer(sharedQueue, 2));
ces.submit(new Consumer(sharedQueue, 1));
ces.submit(new Consumer(sharedQueue, 2));
pes.shutdown();
ces.shutdown();
}
}
/* Different producers produces a stream of integers continuously to a shared queue,
which is shared between all Producers and consumers */
class Producer implements Runnable {
private final BlockingQueue<Integer> sharedQueue;
private int threadNo;
private Random random = new Random();
public Producer(BlockingQueue<Integer> sharedQueue,int threadNo) {
this.threadNo = threadNo;
this.sharedQueue = sharedQueue;
}
@Override
public void run() {
// Producer produces a continuous stream of numbers for every 200 milli seconds
while (true) {
try {
int number = random.nextInt(1000);
System.out.println("Produced:" + number + ":by thread:"+ threadNo);
sharedQueue.put(number);
Thread.sleep(200);
} catch (Exception err) {
err.printStackTrace();
}
}
}
}
/* Different consumers consume data from shared queue, which is shared by both producer and
consumer threads */
class Consumer implements Runnable {
private final BlockingQueue<Integer> sharedQueue;
private int threadNo;
public Consumer (BlockingQueue<Integer> sharedQueue,int threadNo) {
this.sharedQueue = sharedQueue;
this.threadNo = threadNo;
}
@Override
public void run() {
https://riptutorial.com/ 234](https://image.slidesharecdn.com/java-language-pdfroom-240812184155-f7515a4f/85/java-language-programacao-2-PDF-Room-pdf-302-320.jpg)
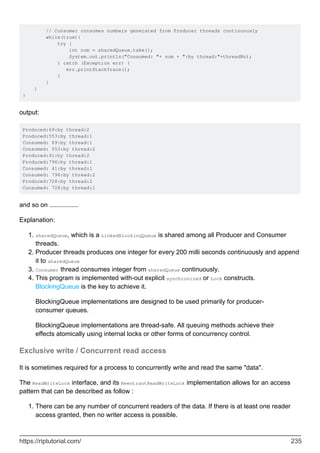

![This lock works very differently from the ReadWriteLock, and this sample is not transposable.
Runnable Object
The Runnable interface defines a single method, run(), meant to contain the code executed in the
thread.
The Runnable object is passed to the Thread constructor. And Thread's start() method is called.
Example
public class HelloRunnable implements Runnable {
@Override
public void run() {
System.out.println("Hello from a thread");
}
public static void main(String[] args) {
new Thread(new HelloRunnable()).start();
}
}
Example in Java8:
public static void main(String[] args) {
Runnable r = () -> System.out.println("Hello world");
new Thread(r).start();
}
Runnable vs Thread subclass
A Runnable object employment is more general, because the Runnable object can subclass a class
other than Thread.
Thread subclassing is easier to use in simple applications, but is limited by the fact that your task
class must be a descendant of Thread.
A Runnable object is applicable to the high-level thread management APIs.
Semaphore
A Semaphore is a high-level synchronizer that maintains a set of permits that can be acquired and
released by threads. A Semaphore can be imagined as a counter of permits that will be
decremented when a thread acquires, and incremented when a thread releases. If the amount of
permits is 0 when a thread attempts to acquire, then the thread will block until a permit is made
available (or until the thread is interrupted).
A semaphore is initialized as:
Semaphore semaphore = new Semaphore(1); // The int value being the number of permits
https://riptutorial.com/ 237](https://image.slidesharecdn.com/java-language-pdfroom-240812184155-f7515a4f/85/java-language-programacao-2-PDF-Room-pdf-305-320.jpg)
![int[] firstArray = { 2, 4, 6, 8 };
int[] secondArray = { 1, 3, 5, 7 };
int[] result = { 0, 0, 0, 0 };
ExecutorService pool = Executors.newCachedThreadPool();
// Setup the ThreadPool:
// for each element in the array, submit a worker to the pool that adds elements
for (int i = 0; i < result.length; i++) {
final int worker = i;
pool.submit(() -> result[worker] = firstArray[worker] + secondArray[worker] );
}
// Wait for all Workers to finish:
try {
// execute all submitted tasks
pool.shutdown();
// waits until all workers finish, or the timeout ends
pool.awaitTermination(12, TimeUnit.SECONDS);
}
catch (InterruptedException e) {
pool.shutdownNow(); //kill thread
}
System.out.println(Arrays.toString(result));
Notes:
This example is purely illustrative. In practice, there won't be any speedup by using threads
for a task this small. A slowdown is likely, since the overheads of task creation and
scheduling will swamp the time taken to run a task.
1.
If you were using Java 7 and earlier, you would use anonymous classes instead of lambdas
to implement the tasks.
2.
Get status of all threads started by your program excluding system threads
Code snippet:
import java.util.Set;
public class ThreadStatus {
public static void main(String args[]) throws Exception {
for (int i = 0; i < 5; i++){
Thread t = new Thread(new MyThread());
t.setName("MyThread:" + i);
t.start();
}
int threadCount = 0;
Set<Thread> threadSet = Thread.getAllStackTraces().keySet();
for (Thread t : threadSet) {
if (t.getThreadGroup() == Thread.currentThread().getThreadGroup()) {
System.out.println("Thread :" + t + ":" + "state:" + t.getState());
++threadCount;
}
}
System.out.println("Thread count started by Main thread:" + threadCount);
https://riptutorial.com/ 239](https://image.slidesharecdn.com/java-language-pdfroom-240812184155-f7515a4f/85/java-language-programacao-2-PDF-Room-pdf-307-320.jpg)
![}
}
class MyThread implements Runnable {
public void run() {
try {
Thread.sleep(2000);
} catch(Exception err) {
err.printStackTrace();
}
}
}
Output:
Thread :Thread[MyThread:1,5,main]:state:TIMED_WAITING
Thread :Thread[MyThread:3,5,main]:state:TIMED_WAITING
Thread :Thread[main,5,main]:state:RUNNABLE
Thread :Thread[MyThread:4,5,main]:state:TIMED_WAITING
Thread :Thread[MyThread:0,5,main]:state:TIMED_WAITING
Thread :Thread[MyThread:2,5,main]:state:TIMED_WAITING
Thread count started by Main thread:6
Explanation:
Thread.getAllStackTraces().keySet() returns all Threads including application threads and system
threads. If you are interested only in status of Threads, started by your application, iterate the
Thread set by checking Thread Group of a particular thread against your main program thread.
In absence of above ThreadGroup condition, the program returns status of below System
Threads:
Reference Handler
Signal Dispatcher
Attach Listener
Finalizer
Callable and Future
While Runnable provides a means to wrap code to be executed in a different thread, it has a
limitation in that it cannot return a result from the execution. The only way to get some return value
from the execution of a Runnable is to assign the result to a variable accessible in a scope outside
of the Runnable.
Callable was introduced in Java 5 as a peer to Runnable. Callable is essentially the same except it
has a call method instead of run. The call method has the additional capability to return a result
and is also allowed to throw checked exceptions.
The result from a Callable task submission is available to be tapped via a Future
Future can be considered a container of sorts that houses the result of the Callable computation.
Computation of the callable can carry on in another thread, and any attempt to tap the result of a
Future
https://riptutorial.com/ 240](https://image.slidesharecdn.com/java-language-pdfroom-240812184155-f7515a4f/85/java-language-programacao-2-PDF-Room-pdf-308-320.jpg)
![will block and will only return the result once it is available.
Callable Interface
public interface Callable<V> {
V call() throws Exception;
}
Future
interface Future<V> {
V get();
V get(long timeout, TimeUnit unit);
boolean cancel(boolean mayInterruptIfRunning);
boolean isCancelled();
boolean isDone();
}
Using Callable and Future example:
public static void main(String[] args) throws Exception {
ExecutorService es = Executors.newSingleThreadExecutor();
System.out.println("Time At Task Submission : " + new Date());
Future<String> result = es.submit(new ComplexCalculator());
// the call to Future.get() blocks until the result is available.So we are in for about a
10 sec wait now
System.out.println("Result of Complex Calculation is : " + result.get());
System.out.println("Time At the Point of Printing the Result : " + new Date());
}
Our Callable that does a lengthy computation
public class ComplexCalculator implements Callable<String> {
@Override
public String call() throws Exception {
// just sleep for 10 secs to simulate a lengthy computation
Thread.sleep(10000);
System.out.println("Result after a lengthy 10sec calculation");
return "Complex Result"; // the result
}
}
Output
Time At Task Submission : Thu Aug 04 15:05:15 EDT 2016
Result after a lengthy 10sec calculation
Result of Complex Calculation is : Complex Result
Time At the Point of Printing the Result : Thu Aug 04 15:05:25 EDT 2016
Other operations permitted on Future
While get() is the method to extract the actual result Future has provision
https://riptutorial.com/ 241](https://image.slidesharecdn.com/java-language-pdfroom-240812184155-f7515a4f/85/java-language-programacao-2-PDF-Room-pdf-309-320.jpg)
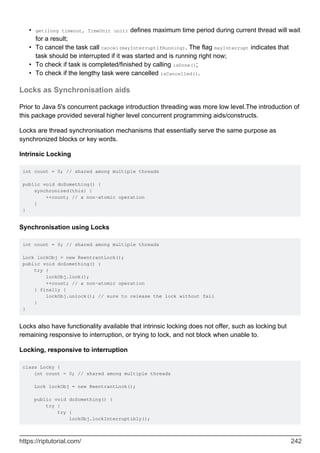
![There are two methods for obtaining Strings, next() and nextLine(). next() returns text up until the
first space (also known as a "token"), and nextLine() returns all text that the user inputted until
pressing enter.
Scanner also provides utility methods for reading data types other than String. These include:
scanner.nextByte();
scanner.nextShort();
scanner.nextInt();
scanner.nextLong();
scanner.nextFloat();
scanner.nextDouble();
scanner.nextBigInteger();
scanner.nextBigDecimal();
Prefixing any of these methods with has (as in hasNextLine(), hasNextInt()) returns true if the
stream has any more of the request type. Note: These methods will crash the program if the input
is not of the requested type (for example, typing "a" for nextInt() ). You can use a try {} catch()
{} to prevent this (see: Exceptions)
Scanner scanner = new Scanner(System.in); //Create the scanner
scanner.useLocale(Locale.US); //Set number format excepted
System.out.println("Please input a float, decimal separator is .");
if (scanner.hasNextFloat()){ //Check if it is a float
float fValue = scanner.nextFloat(); //retrive the value directly as float
System.out.println(fValue + " is a float");
}else{
String sValue = scanner.next(); //We can not retrive as float
System.out.println(sValue + " is not a float");
}
Using System.console:
Java SE 6
String name = System.console().readLine("Please type your name and press Enter%n");
System.out.printf("Hello, %s!", name);
//To read passwords (without echoing as in unix terminal)
char[] password = System.console().readPassword();
Advantages:
Reading methods are synchronized
•
Format string syntax can be used
•
Note: This will only work if the program is run from a real command line without redirecting the
standard input and output streams. It does not work when the program is run from within certain
IDEs, such as Eclipse. For code that works within IDEs and with stream redirection, see the other
examples.
https://riptutorial.com/ 245](https://image.slidesharecdn.com/java-language-pdfroom-240812184155-f7515a4f/85/java-language-programacao-2-PDF-Room-pdf-313-320.jpg)
![Implementing Basic Command-Line Behavior
For basic prototypes or basic command-line behavior, the following loop comes in handy.
public class ExampleCli {
private static final String CLI_LINE = "example-cli>"; //console like string
private static final String CMD_QUIT = "quit"; //string for exiting the program
private static final String CMD_HELLO = "hello"; //string for printing "Hello World!"
on the screen
private static final String CMD_ANSWER = "answer"; //string for printing 42 on the
screen
public static void main(String[] args) {
ExampleCli claimCli = new ExampleCli(); // creates an object of this class
try {
claimCli.start(); //calls the start function to do the work like console
}
catch (IOException e) {
e.printStackTrace(); //prints the exception log if it is failed to do get the
user input or something like that
}
}
private void start() throws IOException {
String cmd = "";
BufferedReader reader = new BufferedReader(new InputStreamReader(System.in));
while (!cmd.equals(CMD_QUIT)) { // terminates console if user input is "quit"
System.out.print(CLI_LINE); //prints the console-like string
cmd = reader.readLine(); //takes input from user. user input should be started
with "hello", "answer" or "quit"
String[] cmdArr = cmd.split(" ");
if (cmdArr[0].equals(CMD_HELLO)) { //executes when user input starts with
"hello"
hello(cmdArr);
}
else if (cmdArr[0].equals(CMD_ANSWER)) { //executes when user input starts with
"answer"
answer(cmdArr);
}
}
}
// prints "Hello World!" on the screen if user input starts with "hello"
private void hello(String[] cmdArr) {
System.out.println("Hello World!");
}
// prints "42" on the screen if user input starts with "answer"
private void answer(String[] cmdArr) {
System.out.println("42");
}
}
https://riptutorial.com/ 246](https://image.slidesharecdn.com/java-language-pdfroom-240812184155-f7515a4f/85/java-language-programacao-2-PDF-Room-pdf-314-320.jpg)
![Aligning strings in console
The method PrintWriter.format (called through System.out.format) can be used to print aligned
strings in console. The method receives a String with the format information and a series of
objects to format:
String rowsStrings[] = new String[] {"1",
"1234",
"1234567",
"123456789"};
String column1Format = "%-3s"; // min 3 characters, left aligned
String column2Format = "%-5.8s"; // min 5 and max 8 characters, left aligned
String column3Format = "%6.6s"; // fixed size 6 characters, right aligned
String formatInfo = column1Format + " " + column2Format + " " + column3Format;
for(int i = 0; i < rowsStrings.length; i++) {
System.out.format(formatInfo, rowsStrings[i], rowsStrings[i], rowsStrings[i]);
System.out.println();
}
Output:
1 1 1
1234 1234 1234
1234567 1234567 123456
123456789 12345678 123456
Using format strings with fixed size permits to print the strings in a table-like appearance with fixed
size columns:
String rowsStrings[] = new String[] {"1",
"1234",
"1234567",
"123456789"};
String column1Format = "%-3.3s"; // fixed size 3 characters, left aligned
String column2Format = "%-8.8s"; // fixed size 8 characters, left aligned
String column3Format = "%6.6s"; // fixed size 6 characters, right aligned
String formatInfo = column1Format + " " + column2Format + " " + column3Format;
for(int i = 0; i < rowsStrings.length; i++) {
System.out.format(formatInfo, rowsStrings[i], rowsStrings[i], rowsStrings[i]);
System.out.println();
}
Output:
1 1 1
123 1234 1234
123 1234567 123456
123 12345678 123456
https://riptutorial.com/ 247](https://image.slidesharecdn.com/java-language-pdfroom-240812184155-f7515a4f/85/java-language-programacao-2-PDF-Room-pdf-315-320.jpg)
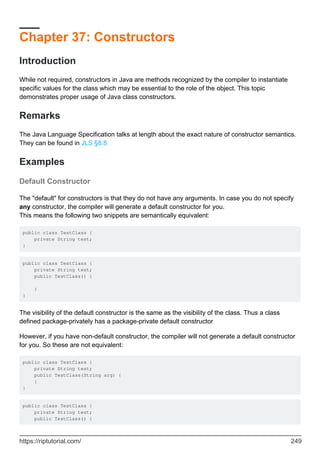
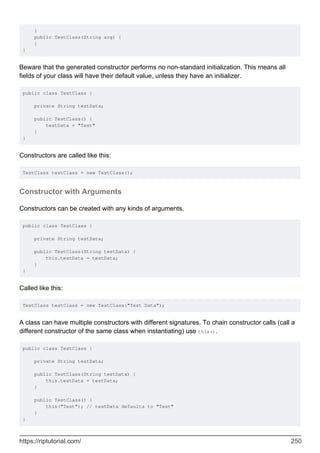
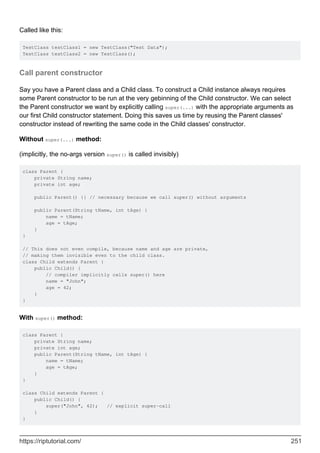
![Chapter 38: Converting to and from Strings
Examples
Converting other datatypes to String
You can get the value of other primitive data types as a String using one the String class's
valueOf methods.
For example:
int i = 42;
String string = String.valueOf(i);
//string now equals "42”.
This method is also overloaded for other datatypes, such as float, double, boolean, and even
Object.
•
You can also get any other Object (any instance of any class) as a String by calling .toString
on it. For this to give useful output, the class must override toString(). Most of the standard
Java library classes do, such as Date and others.
For example:
Foo foo = new Foo(); //Any class.
String stringifiedFoo = foo.toString().
Here stringifiedFoo contains a representation of foo as a String.
•
You can also convert any number type to String with short notation like below.
int i = 10;
String str = i + "";
Or just simple way is
String str = 10 + "";
Conversion to / from bytes
To encode a string into a byte array, you can simply use the String#getBytes() method, with one of
the standard character sets available on any Java runtime:
byte[] bytes = "test".getBytes(StandardCharsets.UTF_8);
and to decode:
https://riptutorial.com/ 253](https://image.slidesharecdn.com/java-language-pdfroom-240812184155-f7515a4f/85/java-language-programacao-2-PDF-Room-pdf-321-320.jpg)
![String testString = new String(bytes, StandardCharsets.UTF_8);
you can further simplify the call by using a static import:
import static java.nio.charset.StandardCharsets.UTF_8;
...
byte[] bytes = "test".getBytes(UTF_8);
For less common character sets you can indicate the character set with a string:
byte[] bytes = "test".getBytes("UTF-8");
and the reverse:
String testString = new String (bytes, "UTF-8");
this does however mean that you have to handle the checked UnsupportedCharsetException.
The following call will use the default character set. The default character set is platform specific
and generally differs between Windows, Mac and Linux platforms.
byte[] bytes = "test".getBytes();
and the reverse:
String testString = new String(bytes);
Note that invalid characters and bytes may be replaced or skipped by these methods. For more
control - for instance for validating input - you're encouraged to use the CharsetEncoder and
CharsetDecoder classes.
Base64 Encoding / Decoding
Occasionally you will find the need to encode binary data as a base64-encoded string.
For this we can use the DatatypeConverter class from the javax.xml.bind package:
import javax.xml.bind.DatatypeConverter;
import java.util.Arrays;
// arbitrary binary data specified as a byte array
byte[] binaryData = "some arbitrary data".getBytes("UTF-8");
// convert the binary data to the base64-encoded string
String encodedData = DatatypeConverter.printBase64Binary(binaryData);
// encodedData is now "c29tZSBhcmJpdHJhcnkgZGF0YQ=="
// convert the base64-encoded string back to a byte array
https://riptutorial.com/ 254](https://image.slidesharecdn.com/java-language-pdfroom-240812184155-f7515a4f/85/java-language-programacao-2-PDF-Room-pdf-322-320.jpg)
![byte[] decodedData = DatatypeConverter.parseBase64Binary(encodedData);
// assert that the original data and the decoded data are equal
assert Arrays.equals(binaryData, decodedData);
Apache commons-codec
Alternatively, we can use Base64 from Apache commons-codec.
import org.apache.commons.codec.binary.Base64;
// your blob of binary as a byte array
byte[] blob = "someBinaryData".getBytes();
// use the Base64 class to encode
String binaryAsAString = Base64.encodeBase64String(blob);
// use the Base64 class to decode
byte[] blob2 = Base64.decodeBase64(binaryAsAString);
// assert that the two blobs are equal
System.out.println("Equal : " + Boolean.toString(Arrays.equals(blob, blob2)));
If you inspect this program wile running, you will see that someBinaryData encodes to
c29tZUJpbmFyeURhdGE=, a very managable UTF-8 String object.
Java SE 8
Details for the same can be found at Base64
// encode with padding
String encoded = Base64.getEncoder().encodeToString(someByteArray);
// encode without padding
String encoded = Base64.getEncoder().withoutPadding().encodeToString(someByteArray);
// decode a String
byte [] barr = Base64.getDecoder().decode(encoded);
Reference
Parsing Strings to a Numerical Value
String to a primitive numeric type or a numeric wrapper type:
Each numeric wrapper class provides a parseXxx method that converts a String to the
corresponding primitive type. The following code converts a String to an int using the
Integer.parseInt method:
String string = "59";
int primitive = Integer.parseInteger(string);
https://riptutorial.com/ 255](https://image.slidesharecdn.com/java-language-pdfroom-240812184155-f7515a4f/85/java-language-programacao-2-PDF-Room-pdf-323-320.jpg)
![To convert to a String to an instance of a numeric wrapper class you can either use an overload of
the wrapper classes valueOf method:
String string = "59";
Integer wrapper = Integer.valueOf(string);
or rely on auto boxing (Java 5 and later):
String string = "59";
Integer wrapper = Integer.parseInteger(string); // 'int' result is autoboxed
The above pattern works for byte, short, int, long, float and double and the corresponding wrapper
classes (Byte, Short, Integer, Long, Float and Double).
String to Integer using radix:
String integerAsString = "0101"; // binary representation
int parseInt = Integer.parseInt(integerAsString,2);
Integer valueOfInteger = Integer.valueOf(integerAsString,2);
System.out.println(valueOfInteger); // prints 5
System.out.println(parseInt); // prints 5
Exceptions
The unchecked NumberFormatException exception will be thrown if a numeric valueOf(String) or
parseXxx(...) method is called for a string that is not an acceptable numeric representation, or that
represents a value that is out of range.
Getting a `String` from an `InputStream`
A String can be read from an InputStream using the byte array constructor.
import java.io.*;
public String readString(InputStream input) throws IOException {
byte[] bytes = new byte[50]; // supply the length of the string in bytes here
input.read(bytes);
return new String(bytes);
}
This uses the system default charset, although an alternate charset may be specified:
return new String(bytes, Charset.forName("UTF-8"));
Converting String to other datatypes.
You can convert a numeric string to various Java numeric types as follows:
String to int:
https://riptutorial.com/ 256](https://image.slidesharecdn.com/java-language-pdfroom-240812184155-f7515a4f/85/java-language-programacao-2-PDF-Room-pdf-324-320.jpg)

![Chapter 39: Creating Images
Programmatically
Remarks
BufferedImage.getGraphics() always returns Graphics2D.
Using a VolatileImage may significantly improve the speed of drawing operations, but also has its
drawbacks: its contents may be lost at any moment and they may have to be redrawn from
scratch.
Examples
Creating a simple image programmatically and displaying it
class ImageCreationExample {
static Image createSampleImage() {
// instantiate a new BufferedImage (subclass of Image) instance
BufferedImage img = new BufferedImage(640, 480, BufferedImage.TYPE_INT_ARGB);
//draw something on the image
paintOnImage(img);
return img;
}
static void paintOnImage(BufferedImage img) {
// get a drawable Graphics2D (subclass of Graphics) object
Graphics2D g2d = (Graphics2D) img.getGraphics();
// some sample drawing
g2d.setColor(Color.BLACK);
g2d.fillRect(0, 0, 640, 480);
g2d.setColor(Color.WHITE);
g2d.drawLine(0, 0, 640, 480);
g2d.drawLine(0, 480, 640, 0);
g2d.setColor(Color.YELLOW);
g2d.drawOval(200, 100, 240, 280);
g2d.setColor(Color.RED);
g2d.drawRect(150, 70, 340, 340);
// drawing on images can be very memory-consuming
// so it's better to free resources early
// it's not necessary, though
g2d.dispose();
}
public static void main(String[] args) {
JFrame frame = new JFrame();
frame.setDefaultCloseOperation(JFrame.EXIT_ON_CLOSE);
Image img = createSampleImage();
https://riptutorial.com/ 259](https://image.slidesharecdn.com/java-language-pdfroom-240812184155-f7515a4f/85/java-language-programacao-2-PDF-Room-pdf-327-320.jpg)

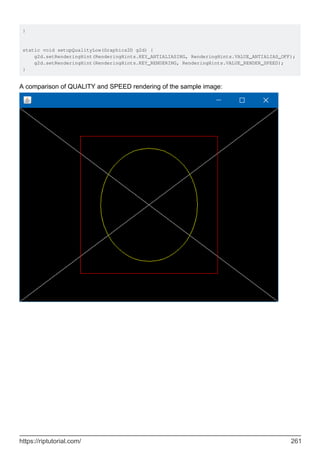
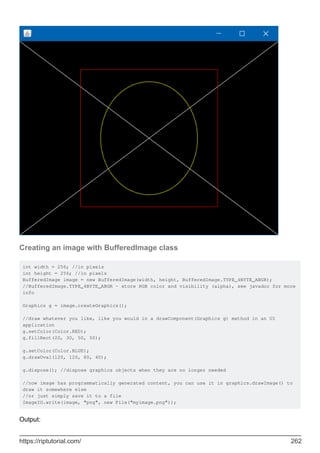
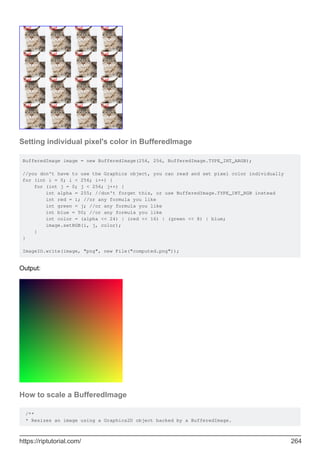
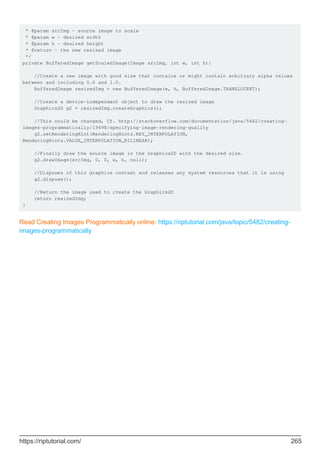
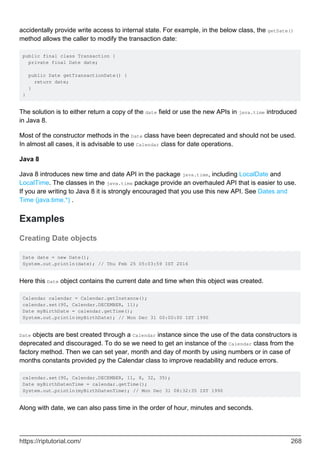
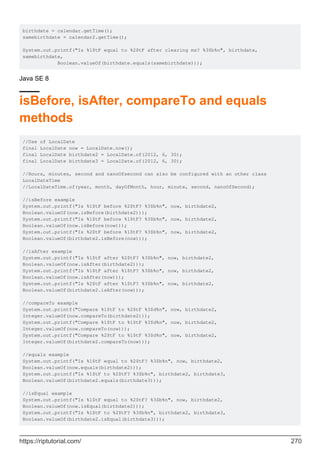
![Date comparison before Java 8
Before Java 8, dates could be compared using java.util.Calendar and java.util.Date classes. Date
class offers 4 methods to compare dates :
after(Date when)
•
before(Date when)
•
compareTo(Date anotherDate)
•
equals(Object obj)
•
after, before, compareTo and equals methods compare the values returned by getTime() method for
each date.
compareTo method returns positive integer.
Value greater than 0 : when the Date is after the Date argument
•
Value greater than 0 : when the Date is before the Date argument
•
Value equals to 0 : when the Date is equal to the Date argument
•
equals results can be surprising as shown in the example because values, like milliseconds, are
not initialize with the same value if not explicitly given.
Since Java 8
With Java 8 a new Object to work with Date is available java.time.LocalDate. LocalDate implements
ChronoLocalDate, the abstract representation of a date where the Chronology, or calendar
system, is pluggable.
To have the date time precision the Object java.time.LocalDateTime has to be used. LocalDate and
LocalDateTime use the same methods name for comparing.
Comparing dates using a LocalDate is different from using ChronoLocalDate because the chronology,
or calendar system are not taken in account the first one.
Because most application should use LocalDate, ChronoLocalDate is not included in examples.
Further reading here.
Most applications should declare method signatures, fields and variables as LocalDate,
not this[ChronoLocalDate] interface.
LocalDate has 5 methods to compare dates :
isAfter(ChronoLocalDate other)
•
isBefore(ChronoLocalDate other)
•
isEqual(ChronoLocalDate other)
•
compareTo(ChronoLocalDate other)
•
equals(Object obj)
•
https://riptutorial.com/ 271](https://image.slidesharecdn.com/java-language-pdfroom-240812184155-f7515a4f/85/java-language-programacao-2-PDF-Room-pdf-339-320.jpg)
![current time in the system default timezone
However, it is possible to display the date represented by the point in time described by the Date
object in a different time zone using e.g. java.text.SimpleDateFormat:
Date date = new Date();
//print default time zone
System.out.println(TimeZone.getDefault().getDisplayName());
SimpleDateFormat sdf = new SimpleDateFormat("yyyy-MM-dd HH:mm:ss"); //note: time zone not in
format!
//print date in the original time zone
System.out.println(sdf.format(date));
//current time in London
sdf.setTimeZone(TimeZone.getTimeZone("Europe/London"));
System.out.println(sdf.format(date));
Output:
Central European Time
2016-07-21 22:50:56
2016-07-21 21:50:56
Convert java.util.Date to java.sql.Date
java.util.Date to java.sql.Date conversion is usually necessary when a Date object needs to be
written in a database.
java.sql.Date is a wrapper around millisecond value and is used by JDBC to identify an SQL DATE
type
In the below example, we use the java.util.Date() constructor, that creates a Date object and
initializes it to represent time to the nearest millisecond. This date is used in the
convert(java.util.Date utilDate) method to return a java.sql.Date object
Example
public class UtilToSqlConversion {
public static void main(String args[])
{
java.util.Date utilDate = new java.util.Date();
System.out.println("java.util.Date is : " + utilDate);
java.sql.Date sqlDate = convert(utilDate);
System.out.println("java.sql.Date is : " + sqlDate);
DateFormat df = new SimpleDateFormat("dd/MM/YYYY - hh:mm:ss");
System.out.println("dateFormated date is : " + df.format(utilDate));
}
private static java.sql.Date convert(java.util.Date uDate) {
java.sql.Date sDate = new java.sql.Date(uDate.getTime());
return sDate;
}
}
https://riptutorial.com/ 276](https://image.slidesharecdn.com/java-language-pdfroom-240812184155-f7515a4f/85/java-language-programacao-2-PDF-Room-pdf-344-320.jpg)

![Date and time with time zone information
ZoneId zoneId = ZoneId.of("UTC+2");
ZonedDateTime dateTime = ZonedDateTime.of(2016, Month.JULY, 27, 7, 0, 0, 235, zoneId);
ZonedDateTime composition = ZonedDateTime.of(localDate, localTime, zoneId);
ZonedDateTime now = ZonedDateTime.now(); // Default time zone
ZonedDateTime parsed = ZonedDateTime.parse("2016-07-27T07:00:00+01:00[Europe/Stockholm]");
Date and time with offset information (i.e. no DST changes taken into account)
ZoneOffset zoneOffset = ZoneOffset.ofHours(2);
OffsetDateTime dateTime = OffsetDateTime.of(2016, 7, 27, 7, 0, 0, 235, zoneOffset);
OffsetDateTime composition = OffsetDateTime.of(localDate, localTime, zoneOffset);
OffsetDateTime now = OffsetDateTime.now(); // Offset taken from the default ZoneId
OffsetDateTime parsed = OffsetDateTime.parse("2016-07-27T07:00:00+02:00");
Operations on dates and times
LocalDate tomorrow = LocalDate.now().plusDays(1);
LocalDateTime anHourFromNow = LocalDateTime.now().plusHours(1);
Long daysBetween = java.time.temporal.ChronoUnit.DAYS.between(LocalDate.now(),
LocalDate.now().plusDays(3)); // 3
Duration duration = Duration.between(Instant.now(), ZonedDateTime.parse("2016-07-
27T07:00:00+01:00[Europe/Stockholm]"))
Instant
Represents an instant in time. Can be thought of as a wrapper around a Unix timestamp.
Instant now = Instant.now();
Instant epoch1 = Instant.ofEpochMilli(0);
Instant epoch2 = Instant.parse("1970-01-01T00:00:00Z");
java.time.temporal.ChronoUnit.MICROS.between(epoch1, epoch2); // 0
Usage of various classes of Date Time API
Following example also have explanation required for understanding example within it.
import java.time.Clock;
import java.time.Duration;
import java.time.Instant;
import java.time.LocalDate;
import java.time.LocalDateTime;
import java.time.LocalTime;
import java.time.ZoneId;
import java.time.ZonedDateTime;
import java.util.TimeZone;
public class SomeMethodsExamples {
/**
* Has the methods of the class {@link LocalDateTime}
*/
public static void checkLocalDateTime() {
https://riptutorial.com/ 279](https://image.slidesharecdn.com/java-language-pdfroom-240812184155-f7515a4f/85/java-language-programacao-2-PDF-Room-pdf-347-320.jpg)
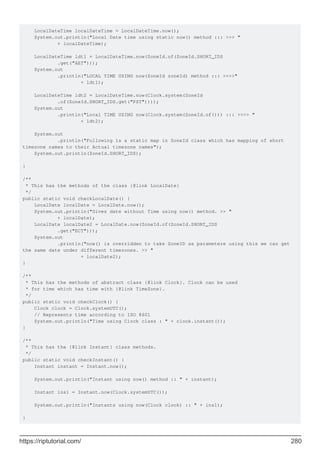
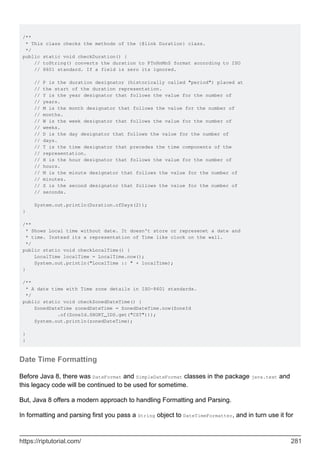
![formatting or parsing.
import java.time.*;
import java.time.format.*;
class DateTimeFormat
{
public static void main(String[] args) {
//Parsing
String pattern = "d-MM-yyyy HH:mm";
DateTimeFormatter dtF1 = DateTimeFormatter.ofPattern(pattern);
LocalDateTime ldp1 = LocalDateTime.parse("2014-03-25T01:30"), //Default format
ldp2 = LocalDateTime.parse("15-05-2016 13:55",dtF1); //Custom format
System.out.println(ldp1 + "n" + ldp2); //Will be printed in Default format
//Formatting
DateTimeFormatter dtF2 = DateTimeFormatter.ofPattern("EEE d, MMMM, yyyy HH:mm");
DateTimeFormatter dtF3 = DateTimeFormatter.ISO_LOCAL_DATE_TIME;
LocalDateTime ldtf1 = LocalDateTime.now();
System.out.println(ldtf1.format(dtF2) +"n"+ldtf1.format(dtF3));
}
}
An important notice, instead of using Custom patterns, it is good practice to use predefined
formatters. Your code look more clear and usage of ISO8061 will definitely help you in the long
run.
Calculate Difference between 2 LocalDates
Use LocalDate and ChronoUnit:
LocalDate d1 = LocalDate.of(2017, 5, 1);
LocalDate d2 = LocalDate.of(2017, 5, 18);
now, since the method between of the ChronoUnit enumerator takes 2 Temporals as parameters so
you can pass without a problem the LocalDate instances
long days = ChronoUnit.DAYS.between(d1, d2);
System.out.println( days );
Read Dates and Time (java.time.*) online: https://riptutorial.com/java/topic/4813/dates-and-time--
java-time---
https://riptutorial.com/ 282](https://image.slidesharecdn.com/java-language-pdfroom-240812184155-f7515a4f/85/java-language-programacao-2-PDF-Room-pdf-350-320.jpg)
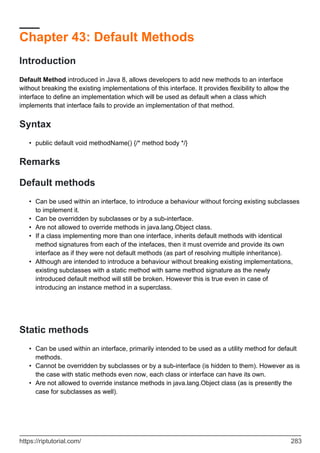
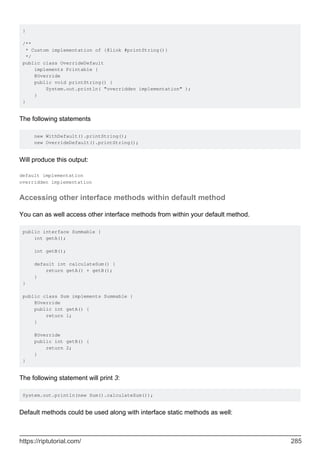
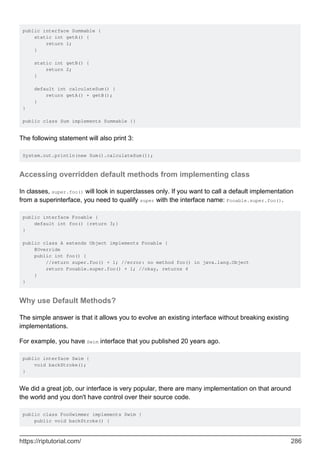
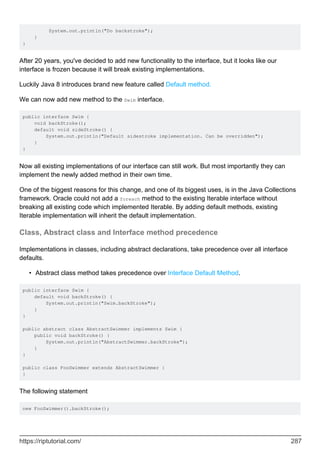
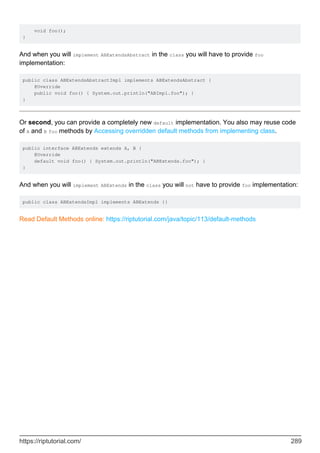

![Chapter 45: Disassembling and Decompiling
Syntax
javap [options] <classes>
•
Parameters
Name Description
<classes>
List of classes to disassemble. Can be in either
package1.package2.Classname format, or package1/package2/Classname format.
Do not include the .class extension.
-help, --help, -? Print this usage message
-version Version information
-v, -verbose Print additional information
-l Print line number and local variable tables
-public Show only public classes and members
-protected Show protected/public classes and members
-package Show package/protected/public classes and members (default)
-p, -private Show all classes and members
-c Disassemble the code
-s Print internal type signatures
-sysinfo Show system info (path, size, date, MD5 hash) of class being processed
-constants Show final constants
-classpath
<path> Specify where to find user class files
-cp <path> Specify where to find user class files
-bootclasspath
<path> Override location of bootstrap class files
Examples
https://riptutorial.com/ 292](https://image.slidesharecdn.com/java-language-pdfroom-240812184155-f7515a4f/85/java-language-programacao-2-PDF-Room-pdf-360-320.jpg)
![Viewing bytecode with javap
If you want to see the generated bytecode for a Java program, you can use the provided javap
command to view it.
Assuming that we have the following Java source file:
package com.stackoverflow.documentation;
import org.springframework.stereotype.Service;
import java.io.IOException;
import java.io.InputStream;
import java.util.List;
@Service
public class HelloWorldService {
public void sayHello() {
System.out.println("Hello, World!");
}
private Object[] pvtMethod(List<String> strings) {
return new Object[]{strings};
}
protected String tryCatchResources(String filename) throws IOException {
try (InputStream inputStream = getClass().getResourceAsStream(filename)) {
byte[] bytes = new byte[8192];
int read = inputStream.read(bytes);
return new String(bytes, 0, read);
} catch (IOException | RuntimeException e) {
e.printStackTrace();
throw e;
}
}
void stuff() {
System.out.println("stuff");
}
}
After compiling the source file, the most simple usage is:
cd <directory containing classes> (e.g. target/classes)
javap com/stackoverflow/documentation/SpringExample
Which produces the output
Compiled from "HelloWorldService.java"
public class com.stackoverflow.documentation.HelloWorldService {
public com.stackoverflow.documentation.HelloWorldService();
public void sayHello();
protected java.lang.String tryCatchResources(java.lang.String) throws java.io.IOException;
void stuff();
}
https://riptutorial.com/ 293](https://image.slidesharecdn.com/java-language-pdfroom-240812184155-f7515a4f/85/java-language-programacao-2-PDF-Room-pdf-361-320.jpg)

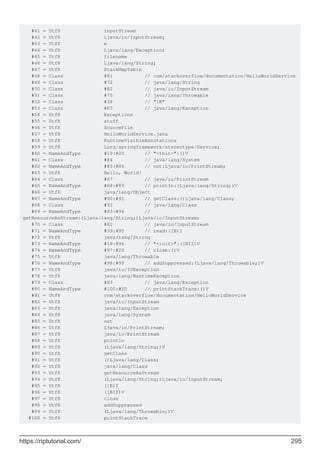
![{
public com.stackoverflow.documentation.HelloWorldService();
descriptor: ()V
flags: ACC_PUBLIC
Code:
stack=1, locals=1, args_size=1
0: aload_0
1: invokespecial #1 // Method java/lang/Object."<init>":()V
4: return
LineNumberTable:
line 10: 0
LocalVariableTable:
Start Length Slot Name Signature
0 5 0 this Lcom/stackoverflow/documentation/HelloWorldService;
public void sayHello();
descriptor: ()V
flags: ACC_PUBLIC
Code:
stack=2, locals=1, args_size=1
0: getstatic #2 // Field
java/lang/System.out:Ljava/io/PrintStream;
3: ldc #3 // String Hello, World!
5: invokevirtual #4 // Method
java/io/PrintStream.println:(Ljava/lang/String;)V
8: return
LineNumberTable:
line 13: 0
line 14: 8
LocalVariableTable:
Start Length Slot Name Signature
0 9 0 this Lcom/stackoverflow/documentation/HelloWorldService;
private java.lang.Object[] pvtMethod(java.util.List<java.lang.String>);
descriptor: (Ljava/util/List;)[Ljava/lang/Object;
flags: ACC_PRIVATE
Code:
stack=4, locals=2, args_size=2
0: iconst_1
1: anewarray #5 // class java/lang/Object
4: dup
5: iconst_0
6: aload_1
7: aastore
8: areturn
LineNumberTable:
line 17: 0
LocalVariableTable:
Start Length Slot Name Signature
0 9 0 this Lcom/stackoverflow/documentation/HelloWorldService;
0 9 1 strings Ljava/util/List;
LocalVariableTypeTable:
Start Length Slot Name Signature
0 9 1 strings Ljava/util/List<Ljava/lang/String;>;
Signature: #34 //
(Ljava/util/List<Ljava/lang/String;>;)[Ljava/lang/Object;
protected java.lang.String tryCatchResources(java.lang.String) throws java.io.IOException;
descriptor: (Ljava/lang/String;)Ljava/lang/String;
flags: ACC_PROTECTED
Code:
https://riptutorial.com/ 296](https://image.slidesharecdn.com/java-language-pdfroom-240812184155-f7515a4f/85/java-language-programacao-2-PDF-Room-pdf-364-320.jpg)

![110: invokevirtual #11 // Method java/io/InputStream.close:()V
113: aload 8
115: athrow
116: astore_2
117: aload_2
118: invokevirtual #16 // Method
java/lang/Exception.printStackTrace:()V
121: aload_2
122: athrow
Exception table:
from to target type
48 52 55 Class java/lang/Throwable
11 40 73 Class java/lang/Throwable
11 40 81 any
91 95 98 Class java/lang/Throwable
73 83 81 any
0 70 116 Class java/io/IOException
0 70 116 Class java/lang/RuntimeException
73 116 116 Class java/io/IOException
73 116 116 Class java/lang/RuntimeException
LineNumberTable:
line 21: 0
line 22: 11
line 23: 18
line 24: 26
line 25: 40
line 21: 73
line 25: 81
line 26: 117
line 27: 121
LocalVariableTable:
Start Length Slot Name Signature
18 55 4 bytes [B
26 47 5 read I
9 107 2 inputStream Ljava/io/InputStream;
117 6 2 e Ljava/lang/Exception;
0 123 0 this Lcom/stackoverflow/documentation/HelloWorldService;
0 123 1 filename Ljava/lang/String;
StackMapTable: number_of_entries = 9
frame_type = 255 /* full_frame */
offset_delta = 55
locals = [ class com/stackoverflow/documentation/HelloWorldService, class
java/lang/String, class java/io/InputStream, class java/lang/Throwable, class "[B", int, class
java/lang/String ]
stack = [ class java/lang/Throwable ]
frame_type = 10 /* same */
frame_type = 3 /* same */
frame_type = 255 /* full_frame */
offset_delta = 2
locals = [ class com/stackoverflow/documentation/HelloWorldService, class
java/lang/String, class java/io/InputStream, class java/lang/Throwable ]
stack = [ class java/lang/Throwable ]
frame_type = 71 /* same_locals_1_stack_item */
stack = [ class java/lang/Throwable ]
frame_type = 255 /* full_frame */
offset_delta = 16
locals = [ class com/stackoverflow/documentation/HelloWorldService, class
java/lang/String, class java/io/InputStream, class java/lang/Throwable, top, top, top, top,
class java/lang/Throwable ]
stack = [ class java/lang/Throwable ]
frame_type = 10 /* same */
https://riptutorial.com/ 298](https://image.slidesharecdn.com/java-language-pdfroom-240812184155-f7515a4f/85/java-language-programacao-2-PDF-Room-pdf-366-320.jpg)
![frame_type = 3 /* same */
frame_type = 255 /* full_frame */
offset_delta = 2
locals = [ class com/stackoverflow/documentation/HelloWorldService, class
java/lang/String ]
stack = [ class java/lang/Exception ]
Exceptions:
throws java.io.IOException
void stuff();
descriptor: ()V
flags:
Code:
stack=2, locals=1, args_size=1
0: getstatic #2 // Field
java/lang/System.out:Ljava/io/PrintStream;
3: ldc #17 // String stuff
5: invokevirtual #4 // Method
java/io/PrintStream.println:(Ljava/lang/String;)V
8: return
LineNumberTable:
line 32: 0
line 33: 8
LocalVariableTable:
Start Length Slot Name Signature
0 9 0 this Lcom/stackoverflow/documentation/HelloWorldService;
}
SourceFile: "HelloWorldService.java"
RuntimeVisibleAnnotations:
0: #59()
Read Disassembling and Decompiling online:
https://riptutorial.com/java/topic/2318/disassembling-and-decompiling
https://riptutorial.com/ 299](https://image.slidesharecdn.com/java-language-pdfroom-240812184155-f7515a4f/85/java-language-programacao-2-PDF-Room-pdf-367-320.jpg)
![*/ -- end of JavaDoc declaration
•
Remarks
Javadoc is a tool included with the JDK that allows in-code comments to be converted to an HTML
documentation. The Java API Specification was generated using Javadoc. The same is true for
much of the documentation of 3rd-party libraries.
Examples
Class Documentation
All Javadoc comments begin with a block comment followed by an asterisk (/**) and end when the
block comment does (*/). Optionally, each line can begin with arbitrary whitespace and a single
asterisk; these are ignored when the documentation files are generated.
/**
* Brief summary of this class, ending with a period.
*
* It is common to leave a blank line between the summary and further details.
* The summary (everything before the first period) is used in the class or package
* overview section.
*
* The following inline tags can be used (not an exhaustive list):
* {@link some.other.class.Documentation} for linking to other docs or symbols
* {@link some.other.class.Documentation Some Display Name} the link's appearance can be
* customized by adding a display name after the doc or symbol locator
* {@code code goes here} for formatting as code
* {@literal <>[]()foo} for interpreting literal text without converting to HTML markup
* or other tags.
*
* Optionally, the following tags may be used at the end of class documentation
* (not an exhaustive list):
*
* @author John Doe
* @version 1.0
* @since 5/10/15
* @see some.other.class.Documentation
* @deprecated This class has been replaced by some.other.package.BetterFileReader
*
* You can also have custom tags for displaying additional information.
* Using the @custom.<NAME> tag and the -tag custom.<NAME>:htmltag:"context"
* command line option, you can create a custom tag.
*
* Example custom tag and generation:
* @custom.updated 2.0
* Javadoc flag: -tag custom.updated:a:"Updated in version:"
* The above flag will display the value of @custom.updated under "Updated in version:"
*
*/
public class FileReader {
}
The same tags and format used for Classes can be used for Enums and Interfaces as well.
https://riptutorial.com/ 301](https://image.slidesharecdn.com/java-language-pdfroom-240812184155-f7515a4f/85/java-language-programacao-2-PDF-Room-pdf-369-320.jpg)
![Method Documentation
All Javadoc comments begin with a block comment followed by an asterisk (/**) and end when the
block comment does (*/). Optionally, each line can begin with arbitrary whitespace and a single
asterisk; these are ignored when the documentation files are generated.
/**
* Brief summary of method, ending with a period.
*
* Further description of method and what it does, including as much detail as is
* appropriate. Inline tags such as
* {@code code here}, {@link some.other.Docs}, and {@literal text here} can be used.
*
* If a method overrides a superclass method, {@inheritDoc} can be used to copy the
* documentation
* from the superclass method
*
* @param stream Describe this parameter. Include as much detail as is appropriate
* Parameter docs are commonly aligned as here, but this is optional.
* As with other docs, the documentation before the first period is
* used as a summary.
*
* @return Describe the return values. Include as much detail as is appropriate
* Return type docs are commonly aligned as here, but this is optional.
* As with other docs, the documentation before the first period is used as a
* summary.
*
* @throws IOException Describe when and why this exception can be thrown.
* Exception docs are commonly aligned as here, but this is
* optional.
* As with other docs, the documentation before the first period
* is used as a summary.
* Instead of @throws, @exception can also be used.
*
* @since 2.1.0
* @see some.other.class.Documentation
* @deprecated Describe why this method is outdated. A replacement can also be specified.
*/
public String[] read(InputStream stream) throws IOException {
return null;
}
Field Documentation
All Javadoc comments begin with a block comment followed by an asterisk (/**) and end when the
block comment does (*/). Optionally, each line can begin with arbitrary whitespace and a single
asterisk; these are ignored when the documentation files are generated.
/**
* Fields can be documented as well.
*
* As with other javadocs, the documentation before the first period is used as a
* summary, and is usually separated from the rest of the documentation by a blank
* line.
*
* Documentation for fields can use inline tags, such as:
https://riptutorial.com/ 302](https://image.slidesharecdn.com/java-language-pdfroom-240812184155-f7515a4f/85/java-language-programacao-2-PDF-Room-pdf-370-320.jpg)
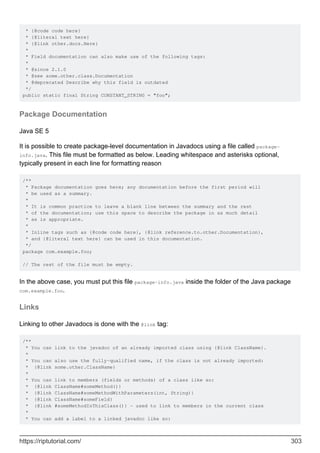
![The most basic usage of the tool is:
javadoc JavaFile.java
Which will generate HTML from the Javadoc comments in JavaFile.java.
A more practical use of the command line tool, which will recursively read all java files in [source-
directory], create documentation for [package.name] and all sub-packages, and place the
generated HTML in the [docs-directory] is:
javadoc -d [docs-directory] -subpackages -sourcepath [source-directory] [package.name]
Inline Code Documentation
Apart from the Javadoc documentation code can be documented inline.
Single Line comments are started by // and may be positioned after a statement on the same line,
but not before.
public void method() {
//single line comment
someMethodCall(); //single line comment after statement
}
Multi-Line comments are defined between /* and */. They can span multiple lines and may even
been positioned between statements.
public void method(Object object) {
/*
multi
line
comment
*/
object/*inner-line-comment*/.method();
}
JavaDocs are a special form of multi-line comments, starting with /**.
As too many inline comments may decrease readability of code, they should be used sparsely in
case the code isn't self-explanatory enough or the design decision isn't obvious.
An additional use case for single-line comments is the use of TAGs, which are short, convention
driven keywords. Some development environments recognize certain conventions for such single-
comments. Common examples are
//TODO
•
//FIXME
•
https://riptutorial.com/ 305](https://image.slidesharecdn.com/java-language-pdfroom-240812184155-f7515a4f/85/java-language-programacao-2-PDF-Room-pdf-373-320.jpg)
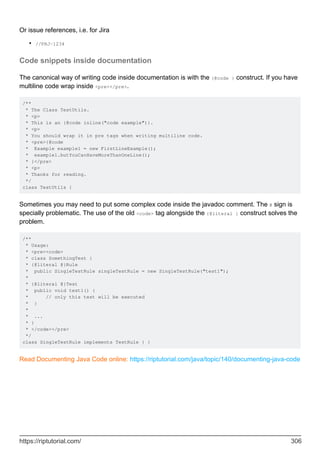
![System.out.println("Perform BootTime Scan");
}
protected void fnInternetSecutiry(){
System.out.println("Scan for Internet Security");
}
protected void fnRealTimeScan(){
System.out.println("Perform RealTime Scan");
}
protected void fnVirusMalwareScan(){
System.out.println("Detect Virus & Malware");
}
}
Overriding Abstract Method in Child Class :
import base.ClsVirusScanner;
//All the 3 child classes inherits the base class ClsVirusScanner
//Child Class 1
class ClsPaidVersion extends ClsVirusScanner{
@Override
public void fnStartScan() {
super.fnCheckForUpdateVersion();
super.fnBootTimeScan();
super.fnInternetSecutiry();
super.fnRealTimeScan();
super.fnVirusMalwareScan();
}
}; //ClsPaidVersion IS-A ClsVirusScanner
//Child Class 2
class ClsTrialVersion extends ClsVirusScanner{
@Override
public void fnStartScan() {
super.fnInternetSecutiry();
super.fnVirusMalwareScan();
}
}; //ClsTrialVersion IS-A ClsVirusScanner
//Child Class 3
class ClsFreeVersion extends ClsVirusScanner{
@Override
public void fnStartScan() {
super.fnVirusMalwareScan();
}
}; //ClsTrialVersion IS-A ClsVirusScanner
Dynamic/Late Binding leads to Dynamic method dispatch :
//Calling Class
public class ClsRunTheApplication {
public static void main(String[] args) {
final String VIRUS_SCANNER_VERSION = "TRIAL_VERSION";
//Parent Refers Null
https://riptutorial.com/ 308](https://image.slidesharecdn.com/java-language-pdfroom-240812184155-f7515a4f/85/java-language-programacao-2-PDF-Room-pdf-376-320.jpg)
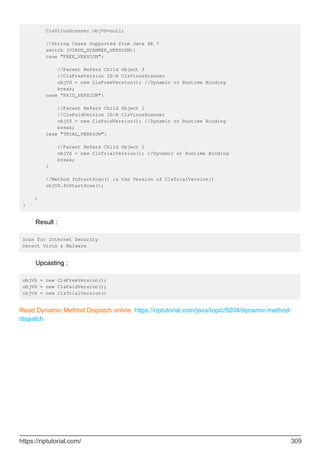
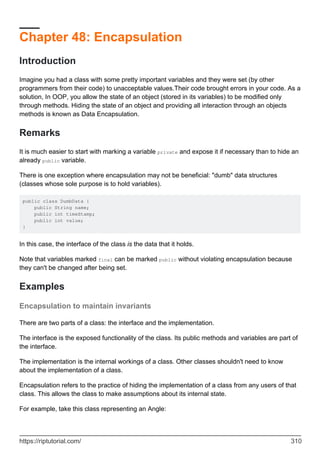
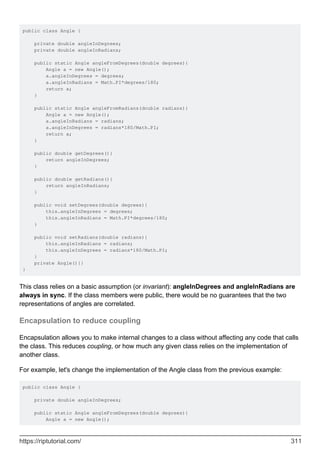
![Chapter 49: Enum Map
Introduction
Java EnumMap class is the specialized Map implementation for enum keys. It inherits Enum and
AbstractMap classes.
the Parameters for java.util.EnumMap class.
K: It is the type of keys maintained by this map. V: It is the type of mapped values.
Examples
Enum Map Book Example
import java.util.*;
class Book {
int id;
String name,author,publisher;
int quantity;
public Book(int id, String name, String author, String publisher, int quantity) {
this.id = id;
this.name = name;
this.author = author;
this.publisher = publisher;
this.quantity = quantity;
}
}
public class EnumMapExample {
// Creating enum
public enum Key{
One, Two, Three
};
public static void main(String[] args) {
EnumMap<Key, Book> map = new EnumMap<Key, Book>(Key.class);
// Creating Books
Book b1=new Book(101,"Let us C","Yashwant Kanetkar","BPB",8);
Book b2=new Book(102,"Data Communications & Networking","Forouzan","Mc Graw Hill",4);
Book b3=new Book(103,"Operating System","Galvin","Wiley",6);
// Adding Books to Map
map.put(Key.One, b1);
map.put(Key.Two, b2);
map.put(Key.Three, b3);
// Traversing EnumMap
for(Map.Entry<Key, Book> entry:map.entrySet()){
Book b=entry.getValue();
System.out.println(b.id+" "+b.name+" "+b.author+" "+b.publisher+" "+b.quantity);
}
}
}
Read Enum Map online: https://riptutorial.com/java/topic/10158/enum-map
https://riptutorial.com/ 313](https://image.slidesharecdn.com/java-language-pdfroom-240812184155-f7515a4f/85/java-language-programacao-2-PDF-Room-pdf-381-320.jpg)
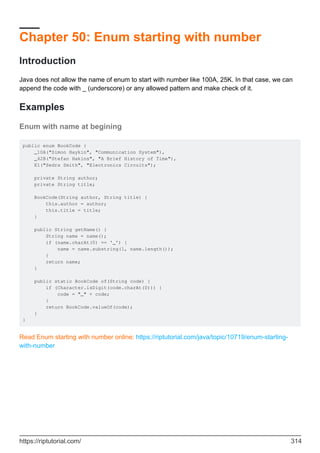
![Chapter 51: Enums
Introduction
Java enums (declared using the enum keyword) are shorthand syntax for sizable quantities of
constants of a single class.
Syntax
[public/protected/private] enum Enum_name { // Declare a new enum.
•
ENUM_CONSTANT_1[, ENUM_CONSTANT_2...]; // Declare the enum constants. This must
be the first line inside of the enum, and should be separated by commas, with a semicolon at
the end.
•
ENUM_CONSTANT_1(param)[, ENUM_CONSTANT_2(param)...]; // Declare enum
constants with parameters. The parameter types must match the constructor.
•
ENUM_CONSTANT_1 {...}[, ENUM_CONSTANT_2 {...}...]; // Declare enum constants with
overridden methods. This must be done if the enum contains abstract methods; all such
methods must be implemented.
•
ENUM_CONSTANT.name() // Returns a String with the name of the enum constant.
•
ENUM_CONSTANT.ordinal() // Returns the ordinal of this enumeration constant, its position
in its enum declaration, where the initial constant is assigned an ordinal of zero.
•
Enum_name.values() // Returns a new array (of type Enum_name[]) containing every
constant of that enum everytime it is called.
•
Enum_name.valueOf("ENUM_CONSTANT") // The inverse of ENUM_CONSTANT.name() --
returns the enum constant with the given name.
•
Enum.valueOf(Enum_name.class, "ENUM_CONSTANT") // A synonym of the previous one:
The inverse of ENUM_CONSTANT.name() -- returns the enum constant with the given
name.
•
Remarks
Restrictions
Enums always extend java.lang.Enum, so it is impossible for an enum to extend a class. However,
they can implement many interfaces.
Tips & Tricks
Because of their specialized representation, there are more efficient maps and sets that can be
used with enums as their keys. These will often run quicker than their non-specialized
counterparts.
https://riptutorial.com/ 315](https://image.slidesharecdn.com/java-language-pdfroom-240812184155-f7515a4f/85/java-language-programacao-2-PDF-Room-pdf-383-320.jpg)
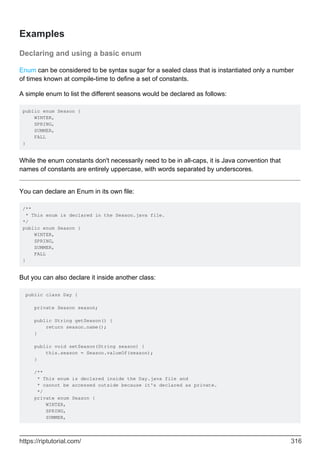
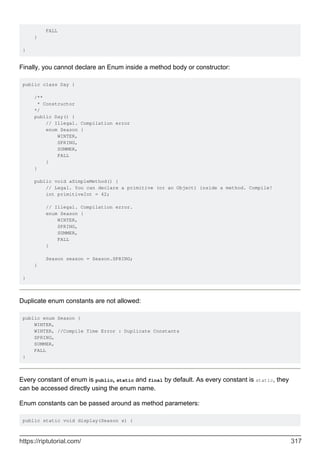
![System.out.println(s.name()); // name() is a built-in method that gets the exact name of
the enum constant
}
display(Season.WINTER); // Prints out "WINTER"
You can get an array of the enum constants using the values() method. The values are
guaranteed to be in declaration order in the returned array:
Season[] seasons = Season.values();
Note: this method allocates a new array of values each time it is called.
To iterate over the enum constants:
public static void enumIterate() {
for (Season s : Season.values()) {
System.out.println(s.name());
}
}
You can use enums in a switch statement:
public static void enumSwitchExample(Season s) {
switch(s) {
case WINTER:
System.out.println("It's pretty cold");
break;
case SPRING:
System.out.println("It's warming up");
break;
case SUMMER:
System.out.println("It's pretty hot");
break;
case FALL:
System.out.println("It's cooling down");
break;
}
}
You can also compare enum constants using ==:
Season.FALL == Season.WINTER // false
Season.SPRING == Season.SPRING // true
Another way to compare enum constants is by using equals() as below, which is considered bad
practice as you can easily fall into pitfalls as follows:
Season.FALL.equals(Season.FALL); // true
Season.FALL.equals(Season.WINTER); // false
Season.FALL.equals("FALL"); // false and no compiler error
https://riptutorial.com/ 318](https://image.slidesharecdn.com/java-language-pdfroom-240812184155-f7515a4f/85/java-language-programacao-2-PDF-Room-pdf-386-320.jpg)
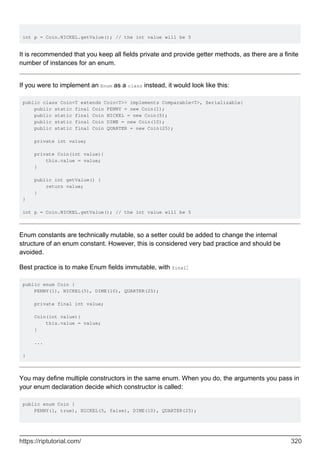

![public Direction getOpposite(){
return opposite;
}
static {
NORTH.opposite = SOUTH;
SOUTH.opposite = NORTH;
WEST.opposite = EAST;
EAST.opposite = WEST;
}
}
In this example, the opposite direction is stored in a private instance field opposite, which is
statically initialized the first time a Direction is used. In this particular case (because NORTH
references SOUTH and conversely), we cannot use Enums with constructors here (Constructors
NORTH(SOUTH), SOUTH(NORTH), EAST(WEST), WEST(EAST) would be more elegant and would allow
opposite to be declared final, but would be self-referential and therefore are not allowed).
Implements Interface
This is an enum that is also a callable function that tests String inputs against precompiled regular
expression patterns.
import java.util.function.Predicate;
import java.util.regex.Pattern;
enum RegEx implements Predicate<String> {
UPPER("[A-Z]+"), LOWER("[a-z]+"), NUMERIC("[+-]?[0-9]+");
private final Pattern pattern;
private RegEx(final String pattern) {
this.pattern = Pattern.compile(pattern);
}
@Override
public boolean test(final String input) {
return this.pattern.matcher(input).matches();
}
}
public class Main {
public static void main(String[] args) {
System.out.println(RegEx.UPPER.test("ABC"));
System.out.println(RegEx.LOWER.test("abc"));
System.out.println(RegEx.NUMERIC.test("+111"));
}
}
Each member of the enum can also implement the method:
import java.util.function.Predicate;
enum Acceptor implements Predicate<String> {
NULL {
@Override
https://riptutorial.com/ 322](https://image.slidesharecdn.com/java-language-pdfroom-240812184155-f7515a4f/85/java-language-programacao-2-PDF-Room-pdf-390-320.jpg)
![public boolean test(String s) { return s == null; }
},
EMPTY {
@Override
public boolean test(String s) { return s.equals(""); }
},
NULL_OR_EMPTY {
@Override
public boolean test(String s) { return NULL.test(s) || EMPTY.test(s); }
};
}
public class Main {
public static void main(String[] args) {
System.out.println(Acceptor.NULL.test(null)); // true
System.out.println(Acceptor.EMPTY.test("")); // true
System.out.println(Acceptor.NULL_OR_EMPTY.test(" ")); // false
}
}
Enum Polymorphism Pattern
When a method need to accept an "extensible" set of enum values, the programmer can apply
polymorphism like on a normal class by creating an interface which will be used anywere where
the enums shall be used:
public interface ExtensibleEnum {
String name();
}
This way, any enum tagged by (implementing) the interface can be used as a parameter, allowing
the programmer to create a variable amount of enums that will be accepted by the method. This can
be useful, for example, in APIs where there is a default (unmodifiable) enum and the user of these
APIs want to "extend" the enum with more values.
A set of default enum values can be defined as follows:
public enum DefaultValues implements ExtensibleEnum {
VALUE_ONE, VALUE_TWO;
}
Additional values can then be defined like this:
public enum ExtendedValues implements ExtensibleEnum {
VALUE_THREE, VALUE_FOUR;
}
Sample which shows how to use the enums - note how printEnum() accepts values from both enum
types:
private void printEnum(ExtensibleEnum val) {
System.out.println(val.name());
}
https://riptutorial.com/ 323](https://image.slidesharecdn.com/java-language-pdfroom-240812184155-f7515a4f/85/java-language-programacao-2-PDF-Room-pdf-391-320.jpg)
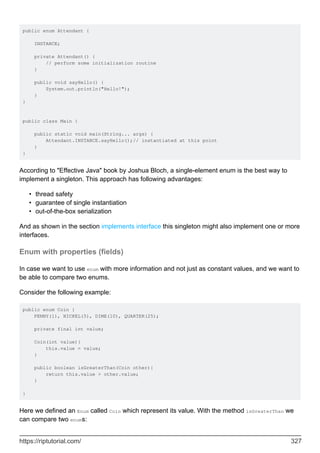
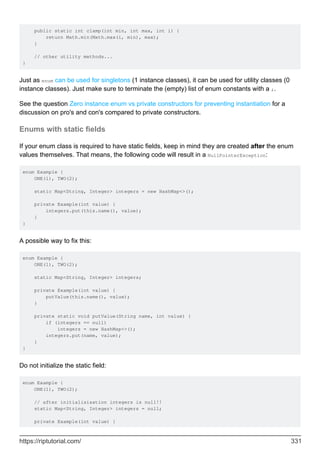
![putValue(this.name(), value);
}
private static void putValue(String name, int value) {
if (integers == null)
integers = new HashMap<>();
integers.put(name, value);
}
// !!this may lead to null poiner exception!!
public int getValue(){
return (Example.integers.get(this.name()));
}
}
initialisisation:
create the enum values
as side effect putValue() called that initializes integers
○
•
the static values are set
integers = null; // is executed after the enums so the content of integers is lost
○
•
Compare and Contains for Enum values
Enums contains only constants and can be compared directly with ==. So, only reference check is
needed, no need to use .equals method. Moreover, if .equals used incorrectly, may raise the
NullPointerException while that's not the case with == check.
enum Day {
GOOD, AVERAGE, WORST;
}
public class Test {
public static void main(String[] args) {
Day day = null;
if (day.equals(Day.GOOD)) {//NullPointerException!
System.out.println("Good Day!");
}
if (day == Day.GOOD) {//Always use == to compare enum
System.out.println("Good Day!");
}
}
}
To group, complement, range the enum values we have EnumSet class which contains different
methods.
EnumSet#range : To get subset of enum by range defined by two endpoints
•
EnumSet#of : Set of specific enums without any range. Multiple overloaded of methods are
there.
•
https://riptutorial.com/ 332](https://image.slidesharecdn.com/java-language-pdfroom-240812184155-f7515a4f/85/java-language-programacao-2-PDF-Room-pdf-400-320.jpg)
![EnumSet#complementOf : Set of enum which is complement of enum values provided in method
parameter
enum Page {
A1, A2, A3, A4, A5, A6, A7, A8, A9, A10
}
public class Test {
public static void main(String[] args) {
EnumSet<Page> range = EnumSet.range(Page.A1, Page.A5);
if (range.contains(Page.A4)) {
System.out.println("Range contains A4");
}
EnumSet<Page> of = EnumSet.of(Page.A1, Page.A5, Page.A3);
if (of.contains(Page.A1)) {
System.out.println("Of contains A1");
}
}
}
•
Read Enums online: https://riptutorial.com/java/topic/155/enums
https://riptutorial.com/ 333](https://image.slidesharecdn.com/java-language-pdfroom-240812184155-f7515a4f/85/java-language-programacao-2-PDF-Room-pdf-401-320.jpg)
![Chapter 52: EnumSet class
Introduction
Java EnumSet class is the specialized Set implementation for use with enum types. It inherits
AbstractSet class and implements the Set interface.
Examples
Enum Set Example
import java.util.*;
enum days {
SUNDAY, MONDAY, TUESDAY, WEDNESDAY, THURSDAY, FRIDAY, SATURDAY
}
public class EnumSetExample {
public static void main(String[] args) {
Set<days> set = EnumSet.of(days.TUESDAY, days.WEDNESDAY);
// Traversing elements
Iterator<days> iter = set.iterator();
while (iter.hasNext())
System.out.println(iter.next());
}
}
Read EnumSet class online: https://riptutorial.com/java/topic/10159/enumset-class
https://riptutorial.com/ 334](https://image.slidesharecdn.com/java-language-pdfroom-240812184155-f7515a4f/85/java-language-programacao-2-PDF-Room-pdf-402-320.jpg)
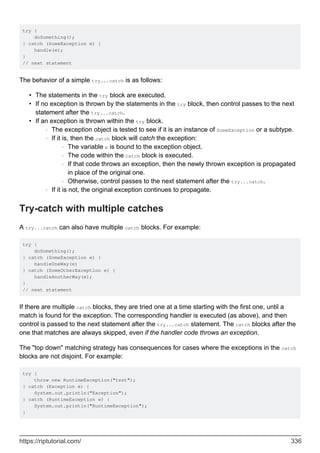
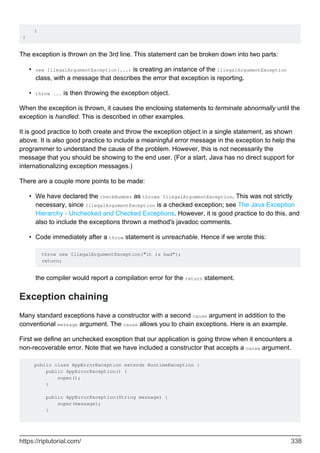
![Subclasses of Exception that are not also subclasses of RuntimeException are
checked exceptions
public class StringTooLongException extends RuntimeException {
// Exceptions can have methods and fields like other classes
// those can be useful to communicate information to pieces of code catching
// such an exception
public final String value;
public final int maximumLength;
public StringTooLongException(String value, int maximumLength){
super(String.format("String exceeds maximum Length of %s: %s", maximumLength, value));
this.value = value;
this.maximumLength = maximumLength;
}
}
Those can be used just as predefined exceptions:
void validateString(String value){
if (value.length() > 30){
throw new StringTooLongException(value, 30);
}
}
And the fields can be used where the exception is caught and handled:
void anotherMethod(String value){
try {
validateString(value);
} catch(StringTooLongException e){
System.out.println("The string '" + e.value +
"' was longer than the max of " + e.maximumLength );
}
}
Keep in mind that, according to Oracle's Java Documentation:
[...] If a client can reasonably be expected to recover from an exception, make it a
checked exception. If a client cannot do anything to recover from the exception, make it
an unchecked exception.
More:
Why does RuntimeException not require an explicit exception handling?
•
The try-with-resources statement
Java SE 7
As the try-catch-final statement example illustrates, resource cleanup using a finally clause
requires a significant amount of "boiler-plate" code to implement the edge-cases correctly. Java 7
provides a much simpler way to deal with this problem in the form of the try-with-resources
https://riptutorial.com/ 340](https://image.slidesharecdn.com/java-language-pdfroom-240812184155-f7515a4f/85/java-language-programacao-2-PDF-Room-pdf-408-320.jpg)
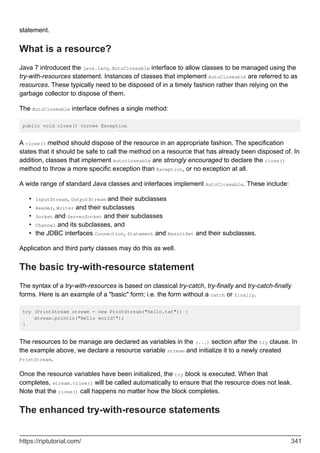

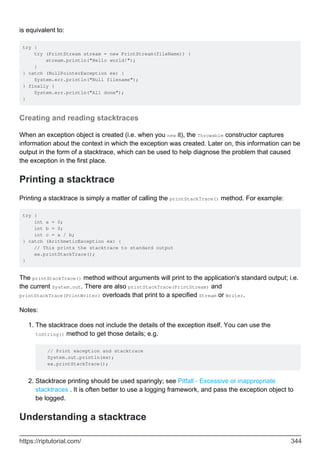
![Consider the following simple program consisting of two classes in two files. (We have shown the
filenames and added line numbers for illustration purposes.)
File: "Main.java"
1 public class Main {
2 public static void main(String[] args) {
3 new Test().foo();
4 }
5 }
File: "Test.java"
1 class Test {
2 public void foo() {
3 bar();
4 }
5
6 public int bar() {
7 int a = 1;
8 int b = 0;
9 return a / b;
10 }
When these files are compiled and run, we will get the following output.
Exception in thread "main" java.lang.ArithmeticException: / by zero
at Test.bar(Test.java:9)
at Test.foo(Test.java:3)
at Main.main(Main.java:3)
Let us read this one line at a time to figure out what it is telling us.
Line #1 tells us that the thread called "main" has terminated due to an uncaught exception. The full
name of the exception is java.lang.ArithmeticException, and the exception message is "/ by zero".
If we look up the javadocs for this exception, it says:
Thrown when an exceptional arithmetic condition has occurred. For example, an
integer "divide by zero" throws an instance of this class.
Indeed, the message "/ by zero" is a strong hint that the cause of the exception is that some code
has attempted to divide something by zero. But what?
The remaining 3 lines are the stack trace. Each line represents a method (or constructor) call on
the call stack, and each one tells us three things:
the name of the class and method that was being executed,
•
the source code filename,
•
the source code line number of the statement that was being executed
•
These lines of a stacktrace are listed with the frame for the current call at the top. The top frame in
our example above is in the Test.bar method, and at line 9 of the Test.java file. That is the
following line:
https://riptutorial.com/ 345](https://image.slidesharecdn.com/java-language-pdfroom-240812184155-f7515a4f/85/java-language-programacao-2-PDF-Room-pdf-413-320.jpg)
![return a / b;
If we look a couple of lines earlier in the file to where b is initialized, it is apparent that b will have
the value zero. We can say without any doubt that this is the cause of the exception.
If we needed to go further, we can see from the stacktrace that bar() was called from foo() at line
3 of Test.java, and that foo() was in turn called from Main.main().
Note: The class and method names in the stack frames are the internal names for the classes and
methods. You will need to recognize the following unusual cases:
A nested or inner class will look like "OuterClass$InnerClass".
•
An anonymous inner class will look like "OuterClass$1", "OuterClass$2", etcetera.
•
When code in a constructor, instance field initializer or an instance initializer block is being
executed, the method name will be "".
•
When code in a static field initializer or static initializer block is being executed, the method
name will be "".
•
(In some versions of Java, the stacktrace formatting code will detect and elide repeated
stackframe sequences, as can occur when an application fails due to excessive recursion.)
Exception chaining and nested stacktraces
Java SE 1.4
Exception chaining happens when a piece of code catches an exception, and then creates and
throws a new one, passing the first exception as the cause. Here is an example:
File: Test,java
1 public class Test {
2 int foo() {
3 return 0 / 0;
4 }
5
6 public Test() {
7 try {
8 foo();
9 } catch (ArithmeticException ex) {
10 throw new RuntimeException("A bad thing happened", ex);
11 }
12 }
13
14 public static void main(String[] args) {
15 new Test();
16 }
17 }
When the above class is compiled and run, we get the following stacktrace:
Exception in thread "main" java.lang.RuntimeException: A bad thing happened
at Test.<init>(Test.java:10)
at Test.main(Test.java:15)
https://riptutorial.com/ 346](https://image.slidesharecdn.com/java-language-pdfroom-240812184155-f7515a4f/85/java-language-programacao-2-PDF-Room-pdf-414-320.jpg)
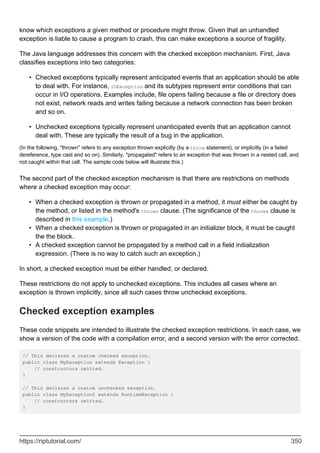

![public class Test {
private static final InputStream is;
static {
InputStream tmp = null;
try {
tmp = new FileInputStream("someFile.txt");
} catch (IOException ex) {
System.out.println("Cannot open file: " + ex.getMessage());
}
is = tmp;
}
}
Note that in this last case, we also have to deal with the problems that is cannot be assigned to
more than once, and yet also has to be assigned to, even in the case of an exception.
Introduction
Exceptions are errors which occur when a program is executing. Consider the Java program
below which divides two integers.
class Division {
public static void main(String[] args) {
int a, b, result;
Scanner input = new Scanner(System.in);
System.out.println("Input two integers");
a = input.nextInt();
b = input.nextInt();
result = a / b;
System.out.println("Result = " + result);
}
}
Now we compile and execute the above code, and see the output for an attempted division by
zero:
Input two integers
7 0
Exception in thread "main" java.lang.ArithmeticException: / by zero
at Division.main(Disivion.java:14)
Division by zero is an invalid operation that would produce a value that cannot be represented as
an integer. Java deals with this by throwing an exception. In this case, the exception is an
instance of the ArithmeticException class.
Note: The example on creating and reading stack traces explains what the output after the two
numbers means.
The utility of an exception is the flow control that it allows. Without using exceptions, a typical
https://riptutorial.com/ 352](https://image.slidesharecdn.com/java-language-pdfroom-240812184155-f7515a4f/85/java-language-programacao-2-PDF-Room-pdf-420-320.jpg)
![solution to this problem may be to first check if b == 0:
class Division {
public static void main(String[] args) {
int a, b, result;
Scanner input = new Scanner(System.in);
System.out.println("Input two integers");
a = input.nextInt();
b = input.nextInt();
if (b == 0) {
System.out.println("You cannot divide by zero.");
return;
}
result = a / b;
System.out.println("Result = " + result);
}
}
This prints the message You cannot divide by zero. to the console and quits the program in a
graceful way when the user tries to divide by zero. An equivalent way of dealing with this problem
via exception handling would be to replace the if flow control with a try-catch block:
...
a = input.nextInt();
b = input.nextInt();
try {
result = a / b;
}
catch (ArithmeticException e) {
System.out.println("An ArithmeticException occurred. Perhaps you tried to divide by
zero.");
return;
}
...
A try catch block is executed as follows:
Begin executing the code in the try block.
1.
If an exception occurs in the try block, immediately abort and check to see if this exception is
caught by the catch block (in this case, when the Exception is an instance of
ArithmeticException).
2.
If the exception is caught, it is assigned to the variable e and the catch block is executed.
3.
If either the try or catch block is completed (i.e. no uncaught exceptions occur during code
execution) then continue to execute code below the try-catch block.
4.
It is generally considered good practice to use exception handling as part of the normal flow
https://riptutorial.com/ 353](https://image.slidesharecdn.com/java-language-pdfroom-240812184155-f7515a4f/85/java-language-programacao-2-PDF-Room-pdf-421-320.jpg)
![control of an application where behavior would otherwise be undefined or unexpected. For
instance, instead of returning null when a method fails, it is usually better practice to throw an
exception so that the application making use of the method can define its own flow control for the
situation via exception handling of the kind illustrated above. In some sense, this gets around the
problem of having to return a particular type, as any one of multiple kinds of exceptions may be
thrown to indicate the specific problem that occurred.
For more advice on how and how not to use exceptions, refer to Java Pitfalls - Exception usage
Return statements in try catch block
Although it's bad practice, it's possible to add multiple return statements in a exception handling
block:
public static int returnTest(int number){
try{
if(number%2 == 0) throw new Exception("Exception thrown");
else return x;
}
catch(Exception e){
return 3;
}
finally{
return 7;
}
}
This method will always return 7 since the finally block associated with the try/catch block is
executed before anything is returned. Now, as finally has return 7;, this value supersedes the
try/catch return values.
If the catch block returns a primitive value and that primitive value is subsequently changed in the
finally block, the value returned in the catch block will be returned and the changes from the finally
block will be ignored.
The example below will print "0", not "1".
public class FinallyExample {
public static void main(String[] args) {
int n = returnTest(4);
System.out.println(n);
}
public static int returnTest(int number) {
int returnNumber = 0;
try {
if (number % 2 == 0)
throw new Exception("Exception thrown");
else
return returnNumber;
https://riptutorial.com/ 354](https://image.slidesharecdn.com/java-language-pdfroom-240812184155-f7515a4f/85/java-language-programacao-2-PDF-Room-pdf-422-320.jpg)
![} catch (Exception e) {
return returnNumber;
} finally {
returnNumber = 1;
}
}
}
Advanced features of Exceptions
This example covers some advanced features and use-cases for Exceptions.
Examining the callstack programmatically
Java SE 1.4
The primary use of exception stacktraces is to provide information about an application error and
its context so that the programmer can diagnose and fix the problem. Sometimes it can be used
for other things. For example, a SecurityManager class may need to examine the call stack to
decide whether the code that is making a call should be trusted.
You can use exceptions to examine the call stack programatically as follows:
Exception ex = new Exception(); // this captures the call stack
StackTraceElement[] frames = ex.getStackTrace();
System.out.println("This method is " + frames[0].getMethodName());
System.out.println("Called from method " + frames[1].getMethodName());
There are some important caveats on this:
The information available in a StackTraceElement is limited. There is no more information
available than is displayed by printStackTrace. (The values of the local variables in the frame
are not available.)
1.
The javadocs for getStackTrace() state that a JVM is permitted to leave out frames:
Some virtual machines may, under some circumstances, omit one or more stack
frames from the stack trace. In the extreme case, a virtual machine that has no
stack trace information concerning this throwable is permitted to return a zero-
length array from this method.
2.
Optimizing exception construction
As mentioned elsewhere, constructing an exception is rather expensive because it entails
capturing and recording information about all stack frames on the current thread. Sometimes, we
know that that information is never going to be used for a given exception; e.g. the stacktrace will
never be printed. In that case, there is an implementation trick that we can use in a custom
exception to cause the information to not be captured.
https://riptutorial.com/ 355](https://image.slidesharecdn.com/java-language-pdfroom-240812184155-f7515a4f/85/java-language-programacao-2-PDF-Room-pdf-423-320.jpg)
![The stack frame information needed for stacktraces, is captured when the Throwable constructors
call the Throwable.fillInStackTrace() method. This method is public, which means that a subclass
can override it. The trick is to override the method inherited from Throwable with one that does
nothing; e.g.
public class MyException extends Exception {
// constructors
@Override
public void fillInStackTrace() {
// do nothing
}
}
The problem with this approach is that an exception that overrides fillInStackTrace() can never
capture the stacktrace, and is useless in scenarios where you need one.
Erasing or replacing the stacktrace
Java SE 1.4
In some situations, the stacktrace for an exception created in the normal way contains either
incorrect information, or information that the developer does not want to reveal to the user. For
these scenarios, the Throwable.setStackTrace can be used to replace the array of StackTraceElement
objects that holds the information.
For example, the following can be used to discard an exception's stack information:
exception.setStackTrace(new StackTraceElement[0]);
Suppressed exceptions
Java SE 7
Java 7 introduced the try-with-resources construct, and the associated concept of exception
suppression. Consider the following snippet:
try (Writer w = new BufferedWriter(new FileWriter(someFilename))) {
// do stuff
int temp = 0 / 0; // throws an ArithmeticException
}
When the exception is thrown, the try will call close() on the w which will flush any buffered output
and then close the FileWriter. But what happens if an IOException is thrown while flushing the
output?
What happens is that any exception that is thrown while cleaning up a resource is suppressed.
The exception is caught, and added to the primary exception's suppressed exception list. Next the
try-with-resources will continue with the cleanup of the other resources. Finally, primary exception
https://riptutorial.com/ 356](https://image.slidesharecdn.com/java-language-pdfroom-240812184155-f7515a4f/85/java-language-programacao-2-PDF-Room-pdf-424-320.jpg)

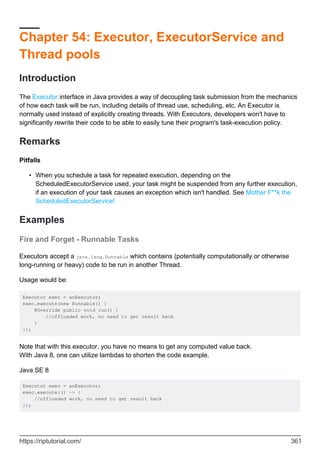

![You can as well implement your own behavior by extending RejectedExecutionHandler interface:
void rejectedExecution(Runnable r, ThreadPoolExecutor executor)
submit() vs execute() exception handling differences
Generally execute() command is used for fire and forget calls (without need of analyzing the
result) and submit() command is used for analyzing the result of Future object.
We should be aware of key difference of Exception Handling mechanisms between these two
commands.
Exceptions from submit() are swallowed by framework if you did not catch them.
Code example to understand the difference:
Case 1: submit the Runnable with execute() command, which reports the Exception.
import java.util.concurrent.*;
import java.util.*;
public class ExecuteSubmitDemo {
public ExecuteSubmitDemo() {
System.out.println("creating service");
ExecutorService service = Executors.newFixedThreadPool(2);
//ExtendedExecutor service = new ExtendedExecutor();
for (int i = 0; i < 2; i++){
service.execute(new Runnable(){
public void run(){
int a = 4, b = 0;
System.out.println("a and b=" + a + ":" + b);
System.out.println("a/b:" + (a / b));
System.out.println("Thread Name in Runnable after divide by
zero:"+Thread.currentThread().getName());
}
});
}
service.shutdown();
}
public static void main(String args[]){
ExecuteSubmitDemo demo = new ExecuteSubmitDemo();
}
}
class ExtendedExecutor extends ThreadPoolExecutor {
public ExtendedExecutor() {
super(1, 1, 60, TimeUnit.SECONDS, new ArrayBlockingQueue<Runnable>(100));
}
// ...
protected void afterExecute(Runnable r, Throwable t) {
super.afterExecute(r, t);
if (t == null && r instanceof Future<?>) {
try {
Object result = ((Future<?>) r).get();
} catch (CancellationException ce) {
https://riptutorial.com/ 366](https://image.slidesharecdn.com/java-language-pdfroom-240812184155-f7515a4f/85/java-language-programacao-2-PDF-Room-pdf-434-320.jpg)
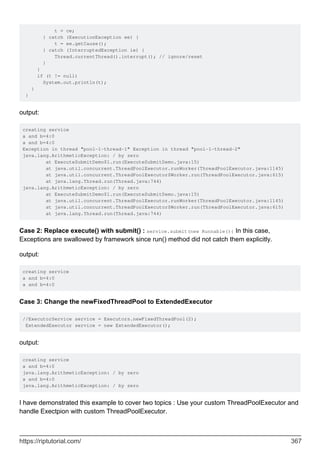
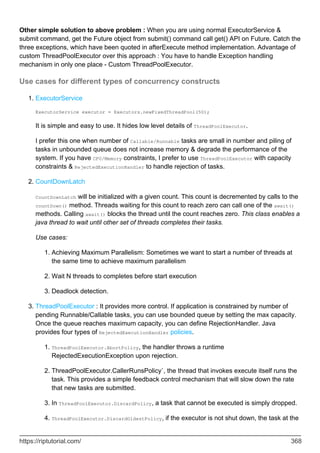
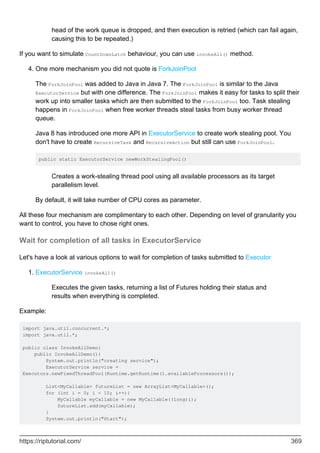
![try{
List<Future<Long>> futures = service.invokeAll(futureList);
} catch(Exception err){
err.printStackTrace();
}
System.out.println("Completed");
service.shutdown();
}
public static void main(String args[]){
InvokeAllDemo demo = new InvokeAllDemo();
}
class MyCallable implements Callable<Long>{
Long id = 0L;
public MyCallable(Long val){
this.id = val;
}
public Long call(){
// Add your business logic
return id;
}
}
}
CountDownLatch
A synchronization aid that allows one or more threads to wait until a set of
operations being performed in other threads completes.
A CountDownLatch is initialized with a given count. The await methods block
until the current count reaches zero due to invocations of the countDown() method,
after which all waiting threads are released and any subsequent invocations of
await return immediately. This is a one-shot phenomenon -- the count cannot be
reset. If you need a version that resets the count, consider using a CyclicBarrier.
2.
ForkJoinPool or newWorkStealingPool() in Executors
3.
Iterate through all Future objects created after submitting to ExecutorService
4.
Recommended way of shutdown from oracle documentation page of ExecutorService:
void shutdownAndAwaitTermination(ExecutorService pool) {
pool.shutdown(); // Disable new tasks from being submitted
try {
// Wait a while for existing tasks to terminate
if (!pool.awaitTermination(60, TimeUnit.SECONDS)) {
pool.shutdownNow(); // Cancel currently executing tasks
// Wait a while for tasks to respond to being cancelled
if (!pool.awaitTermination(60, TimeUnit.SECONDS))
System.err.println("Pool did not terminate");
}
} catch (InterruptedException ie) {
// (Re-)Cancel if current thread also interrupted
pool.shutdownNow();
// Preserve interrupt status
Thread.currentThread().interrupt();
}
5.
https://riptutorial.com/ 370](https://image.slidesharecdn.com/java-language-pdfroom-240812184155-f7515a4f/85/java-language-programacao-2-PDF-Room-pdf-438-320.jpg)
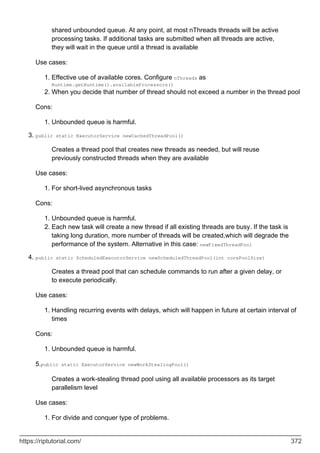
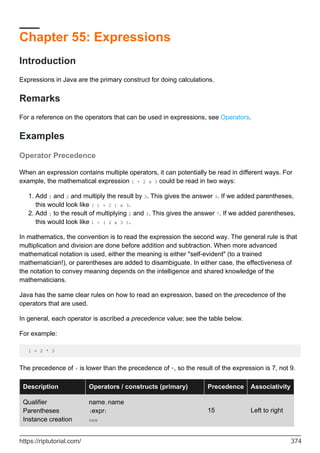
![Description Operators / constructs (primary) Precedence Associativity
Field access
Array access
Method invocation
Method reference
primary.name
primary[expr]
primary(expr, ...)
primary::name
Post increment expr++, expr-- 14 -
Pre increment
Unary
Cast1
++expr, --expr,
+expr, -expr, ~expr, !expr,
(type)expr
13
-
Right to left
Right to left
Multiplicative * / % 12 Left to right
Additive + - 11 Left to right
Shift << >> >>> 10 Left to right
Relational < > <= >= instanceof 9 Left to right
Equality == != 8 Left to right
Bitwise AND & 7 Left to right
Bitwise exclusive
OR
^ 6 Left to right
Bitwise inclusive OR | 5 Left to right
Logical AND && 4 Left to right
Logical OR || 3 Left to right
Conditional1 ? : 2 Right to left
Assignment
Lambda1
= *= /= %= += -= <<= >>= >>>= &= ^=
|=
->
1 Right to left
1 Lambda expression precedence is complex, as it can also occur after a cast, or as the third part
of the conditional ternary operator.
Constant Expressions
A constant expression is an expression that yields a primitive type or a String, and whose value
can be evaluated at compile time to a literal. The expression must evaluate without throwing an
exception, and it must be composed of only the following:
Primitive and String literals.
•
https://riptutorial.com/ 375](https://image.slidesharecdn.com/java-language-pdfroom-240812184155-f7515a4f/85/java-language-programacao-2-PDF-Room-pdf-443-320.jpg)
![while (flag) {
doSomething(); // OK
}
(Note that this does not apply if statements. The Java compiler allows the then or else block of an
if statement to be unreachable. This is the Java analog of conditional compilation in C and C++.)
Finally, static final fields in an class or interface with constant expression initializers are
initialized eagerly. Thus, it is guaranteed that these constants will be observed in the initialized
state, even when there is a cycle in the class initialization dependency graph.
For more information, refer to JLS 15.28. Constant Expressions.
Expression evaluation order
Java expressions are evaluated following the following rules:
Operands are evaluated from left to right.
•
The operands of an operator are evaluated before the operator.
•
Operators are evaluated according to operator precedence
•
Argument lists are evaluated from left to right.
•
Simple Example
In the following example:
int i = method1() + method2();
the order of evaluation is:
The left operand of = operator is evaluated to the address of i.
1.
The left operand of the + operator (method1()) is evaluated.
2.
The right operand of the + operator (method2()) is evaluated.
3.
The + operation is evaluated.
4.
The = operation is evaluated, assigning the result of the addition to i.
5.
Note that if the effects of the calls are observable, you will be able to observe that the call to
method1 occurs before the call to method2.
Example with an operator which has a side-effect
In the following example:
int i = 1;
intArray[i] = ++i + 1;
the order of evaluation is:
https://riptutorial.com/ 377](https://image.slidesharecdn.com/java-language-pdfroom-240812184155-f7515a4f/85/java-language-programacao-2-PDF-Room-pdf-445-320.jpg)
![The left operand of = operator is evaluated. This gives the address of intArray[1].
1.
The pre-increment is evaluated. This adds 1 to i, and evaluates to 2.
2.
The right hand operand of the + is evaluated.
3.
The + operation is evaluated to: 2 + 1 -> 3.
4.
The = operation is evaluated, assigning 3 to intArray[1].
5.
Note that since the left-hand operand of the = is evaluated first, it is not influenced by the side-
effect of the ++i subexpression.
Reference:
JLS 15.7 - Evaluation Order
•
Expression Basics
Expressions in Java are the primary construct for doing calculations. Here are some examples:
1 // A simple literal is an expression
1 + 2 // A simple expression that adds two numbers
(i + j) / k // An expression with multiple operations
(flag) ? c : d // An expression using the "conditional" operator
(String) s // A type-cast is an expression
obj.test() // A method call is an expression
new Object() // Creation of an object is an expression
new int[] // Creation of an object is an expression
In general, an expression consists of the following forms:
Expression names which consist of:
Simple identifiers; e.g. someIdentifier
○
Qualified identifiers; e.g. MyClass.someField
○
•
Primaries which consist of:
Literals; e.g. 1, 1.0, 'X', "hello", false and null
○
Class literal expressions; e.g. MyClass.class
○
this and <TypeName> . this
○
Parenthesized expressions; e.g. ( a + b )
○
Class instance creation expressions; e.g. new MyClass(1, 2, 3)
○
Array instance creation expressions; e.g. new int[3]
○
Field access expressions; e.g. obj.someField or this.someField
○
Array access expressions; e.g. vector[21]
○
Method invocations; e.g. obj.doIt(1, 2, 3)
○
Method references (Java 8 and later); e.g. MyClass::doIt
○
•
Unary operator expressions; e.g. !a or i++
•
Binary operator expressions; e.g. a + b or obj == null
•
Ternary operator expressions; e.g. (obj == null) ? 1 : obj.getCount()
•
Lambda expressions (Java 8 and later); e.g. obj -> obj.getCount()
•
The details of the different forms of expressions may be found in other Topics.
The Operators topic covers unary, binary and ternary operator expressions.
•
https://riptutorial.com/ 378](https://image.slidesharecdn.com/java-language-pdfroom-240812184155-f7515a4f/85/java-language-programacao-2-PDF-Room-pdf-446-320.jpg)
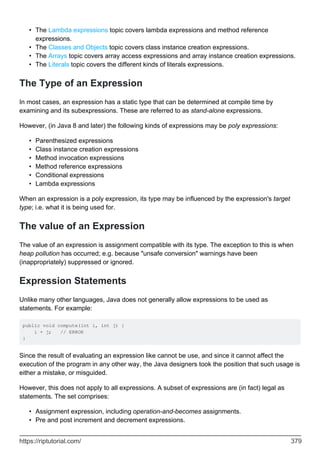

![Chapter 56: File I/O
Introduction
Java I/O (Input and Output) is used to process the input and produce the output. Java uses the
concept of stream to make I/O operation fast. The java.io package contains all the classes
required for input and output operations. Handling files is also done in java by Java I/O API.
Examples
Reading all bytes to a byte[]
Java 7 introduced the very useful Files class
Java SE 7
import java.nio.file.Files;
import java.nio.file.Paths;
import java.nio.file.Path;
Path path = Paths.get("path/to/file");
try {
byte[] data = Files.readAllBytes(path);
} catch(IOException e) {
e.printStackTrace();
}
Reading an image from a file
import java.awt.Image;
import javax.imageio.ImageIO;
...
try {
Image img = ImageIO.read(new File("~/Desktop/cat.png"));
} catch (IOException e) {
e.printStackTrace();
}
Writing a byte[] to a file
Java SE 7
byte[] bytes = { 0x48, 0x65, 0x6c, 0x6c, 0x6f };
try(FileOutputStream stream = new FileOutputStream("Hello world.txt")) {
stream.write(bytes);
} catch (IOException ioe) {
https://riptutorial.com/ 381](https://image.slidesharecdn.com/java-language-pdfroom-240812184155-f7515a4f/85/java-language-programacao-2-PDF-Room-pdf-449-320.jpg)
![// Handle I/O Exception
ioe.printStackTrace();
}
Java SE 7
byte[] bytes = { 0x48, 0x65, 0x6c, 0x6c, 0x6f };
FileOutputStream stream = null;
try {
stream = new FileOutputStream("Hello world.txt");
stream.write(bytes);
} catch (IOException ioe) {
// Handle I/O Exception
ioe.printStackTrace();
} finally {
if (stream != null) {
try {
stream.close();
} catch (IOException ignored) {}
}
}
Most java.io file APIs accept both Strings and Files as arguments, so you could as well use
File file = new File("Hello world.txt");
FileOutputStream stream = new FileOutputStream(file);
Stream vs Writer/Reader API
Streams provide the most direct access to the binary content, so any InputStream / OutputStream
implementations always operate on ints and bytes.
// Read a single byte from the stream
int b = inputStream.read();
if (b >= 0) { // A negative value represents the end of the stream, normal values are in the
range 0 - 255
// Write the byte to another stream
outputStream.write(b);
}
// Read a chunk
byte[] data = new byte[1024];
int nBytesRead = inputStream.read(data);
if (nBytesRead >= 0) { // A negative value represents end of stream
// Write the chunk to another stream
outputStream.write(data, 0, nBytesRead);
}
There are some exceptions, probably most notably the PrintStream which adds the "ability to print
representations of various data values conveniently". This allows to use System.out both as a
binary InputStream and as a textual output using methods such as System.out.println().
Also, some stream implementations work as an interface to higher-level contents such as Java
objects (see Serialization) or native types, e.g. DataOutputStream / DataInputStream.
https://riptutorial.com/ 382](https://image.slidesharecdn.com/java-language-pdfroom-240812184155-f7515a4f/85/java-language-programacao-2-PDF-Room-pdf-450-320.jpg)
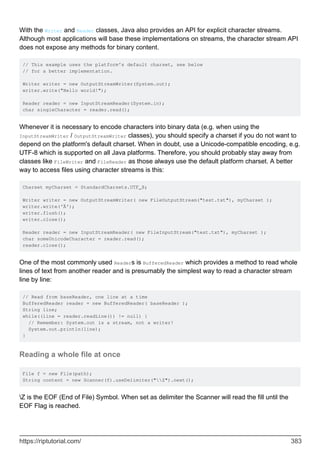
![Reading a file with a Scanner
Reading a file line by line
public class Main {
public static void main(String[] args) {
try {
Scanner scanner = new Scanner(new File("example.txt"));
while(scanner.hasNextLine())
{
String line = scanner.nextLine();
//do stuff
}
} catch (FileNotFoundException e) {
e.printStackTrace();
}
}
}
word by word
public class Main {
public static void main(String[] args) {
try {
Scanner scanner = new Scanner(new File("example.txt"));
while(scanner.hasNext())
{
String line = scanner.next();
//do stuff
}
} catch (FileNotFoundException e) {
e.printStackTrace();
}
}
}
and you can also change the delimeter by using scanner.useDelimeter() method
Iterating over a directory and filter by file extension
public void iterateAndFilter() throws IOException {
Path dir = Paths.get("C:/foo/bar");
PathMatcher imageFileMatcher =
FileSystems.getDefault().getPathMatcher(
"regex:.*(?i:jpg|jpeg|png|gif|bmp|jpe|jfif)");
try (DirectoryStream<Path> stream = Files.newDirectoryStream(dir,
entry -> imageFileMatcher.matches(entry.getFileName()))) {
for (Path path : stream) {
System.out.println(path.getFileName());
}
}
}
https://riptutorial.com/ 384](https://image.slidesharecdn.com/java-language-pdfroom-240812184155-f7515a4f/85/java-language-programacao-2-PDF-Room-pdf-452-320.jpg)

![if (file.exists()) {
boolean deleted = file.delete();
if (!deleted) {
throw new IOException("Unable to delete file");
}
}
// -> NIO
Files.deleteIfExists(path);
Write to a file via an OutputStream
There are several ways to write and read from a file using NIO for different performance and
memory constraints, readability and use cases, such as FileChannel, Files.write(Path path,
byte[] bytes, OpenOption... options)... In this example, only OutputStream is covered, but you are
strongly encouraged to learn about memory-mapped files and the various static methods available
in java.nio.file.Files.
List<String> lines = Arrays.asList(
String.valueOf(Calendar.getInstance().getTimeInMillis()),
"line one",
"line two");
// -> IO
if (file.exists()) {
// Note: Not atomic
throw new IOException("File already exists");
}
try (FileOutputStream outputStream = new FileOutputStream(file)) {
for (String line : lines) {
outputStream.write((line + System.lineSeparator()).getBytes(StandardCharsets.UTF_8));
}
}
// -> NIO
try (OutputStream outputStream = Files.newOutputStream(path, StandardOpenOption.CREATE_NEW)) {
for (String line : lines) {
outputStream.write((line + System.lineSeparator()).getBytes(StandardCharsets.UTF_8));
}
}
Iterating on each file within a folder
// -> IO
for (File selectedFile : folder.listFiles()) {
// Note: Depending on the number of files in the directory folder.listFiles() may take a
long time to return
System.out.println((selectedFile.isDirectory() ? "d" : "f") + " " +
selectedFile.getAbsolutePath());
}
// -> NIO
Files.walkFileTree(directory, EnumSet.noneOf(FileVisitOption.class), 1, new
https://riptutorial.com/ 386](https://image.slidesharecdn.com/java-language-pdfroom-240812184155-f7515a4f/85/java-language-programacao-2-PDF-Room-pdf-454-320.jpg)
![String filepath ="C:test.txt";
FileOutputStream fos = null;
try {
fos = new FileOutputStream(filepath);
byte[] buffer = "This will be written in test.txt".getBytes();
fos.write(buffer, 0, buffer.length);
fos.close();
} catch (FileNotFoundException e) {
e.printStackTrace();
} catch (IOException e) {
e.printStackTrace();
} finally{
if(fos != null)
fos.close();
}
Read from file test.txt:
String filepath ="C:test.txt";
FileInputStream fis = null;
try {
fis = new FileInputStream(filepath);
int length = (int) new File(filepath).length();
byte[] buffer = new byte[length];
fis.read(buffer, 0, length);
} catch (FileNotFoundException e) {
e.printStackTrace();
} catch (IOException e) {
e.printStackTrace();
} finally{
if(fis != null)
fis.close();
}
Note, that since Java 1.7 the try-with-resources statement was introduced what made
implementation of readingwriting operation much simpler:
Write to a file test.txt:
String filepath ="C:test.txt";
try (FileOutputStream fos = new FileOutputStream(filepath)){
byte[] buffer = "This will be written in test.txt".getBytes();
fos.write(buffer, 0, buffer.length);
} catch (FileNotFoundException e) {
e.printStackTrace();
} catch (IOException e) {
e.printStackTrace();
}
Read from file test.txt:
String filepath ="C:test.txt";
try (FileInputStream fis = new FileInputStream(filepath)){
int length = (int) new File(filepath).length();
byte[] buffer = new byte[length];
fis.read(buffer, 0, length);
} catch (FileNotFoundException e) {
https://riptutorial.com/ 388](https://image.slidesharecdn.com/java-language-pdfroom-240812184155-f7515a4f/85/java-language-programacao-2-PDF-Room-pdf-456-320.jpg)
![e.printStackTrace();
} catch (IOException e) {
e.printStackTrace();
}
Reading from a binary file
You can read an a binary file using this piece of code in all recent versions of Java:
Java SE 1.4
File file = new File("path_to_the_file");
byte[] data = new byte[(int) file.length()];
DataInputStream stream = new DataInputStream(new FileInputStream(file));
stream.readFully(data);
stream.close();
If you are using Java 7 or later, there is a simpler way using the nio API:
Java SE 7
Path path = Paths.get("path_to_the_file");
byte [] data = Files.readAllBytes(path);
Locking
A file can be locked using the FileChannel API that can be acquired from Input Output streams and
readers
Example with streams
// Open a file stream FileInputStream ios = new FileInputStream(filename);
// get underlying channel
FileChannel channel = ios.getChannel();
/*
* try to lock the file. true means whether the lock is shared or not i.e. multiple
processes can acquire a
* shared lock (for reading only) Using false with readable channel only will generate an
exception. You should
* use a writable channel (taken from FileOutputStream) when using false. tryLock will
always return immediately
*/
FileLock lock = channel.tryLock(0, Long.MAX_VALUE, true);
if (lock == null) {
System.out.println("Unable to acquire lock");
} else {
System.out.println("Lock acquired successfully");
}
// you can also use blocking call which will block until a lock is acquired.
channel.lock();
https://riptutorial.com/ 389](https://image.slidesharecdn.com/java-language-pdfroom-240812184155-f7515a4f/85/java-language-programacao-2-PDF-Room-pdf-457-320.jpg)
![When we call the read method of the Channel, it fills up the buffer using data.
5.
If we need to read the data from the ByteBuffer, we need to flip the buffer to change its mode
to write-only to read-only mode and then keep reading data from the buffer.
6.
When there is no longer data to read, the read() method of channel returns 0 or -1.
7.
import java.io.File;
import java.io.FileInputStream;
import java.io.IOException;
import java.nio.ByteBuffer;
import java.nio.channels.FileChannel;
public class FileChannelRead {
public static void main(String[] args) {
File inputFile = new File("hello.txt");
if (!inputFile.exists()) {
System.out.println("The input file doesn't exit.");
return;
}
try {
FileInputStream fis = new FileInputStream(inputFile);
FileChannel fileChannel = fis.getChannel();
ByteBuffer buffer = ByteBuffer.allocate(1024);
while (fileChannel.read(buffer) > 0) {
buffer.flip();
while (buffer.hasRemaining()) {
byte b = buffer.get();
System.out.print((char) b);
}
buffer.clear();
}
fileChannel.close();
} catch (IOException e) {
e.printStackTrace();
}
}
}
Copying a file using Channel
We can use Channel to copy file content faster. To do so, we can use transferTo() method of
FileChannel .
import java.io.File;
import java.io.FileInputStream;
import java.io.FileOutputStream;
import java.io.IOException;
import java.nio.channels.FileChannel;
public class FileCopier {
public static void main(String[] args) {
https://riptutorial.com/ 391](https://image.slidesharecdn.com/java-language-pdfroom-240812184155-f7515a4f/85/java-language-programacao-2-PDF-Room-pdf-459-320.jpg)
![File sourceFile = new File("hello.txt");
File sinkFile = new File("hello2.txt");
copy(sourceFile, sinkFile);
}
public static void copy(File sourceFile, File destFile) {
if (!sourceFile.exists() || !destFile.exists()) {
System.out.println("Source or destination file doesn't exist");
return;
}
try (FileChannel srcChannel = new FileInputStream(sourceFile).getChannel();
FileChannel sinkChanel = new FileOutputStream(destFile).getChannel()) {
srcChannel.transferTo(0, srcChannel.size(), sinkChanel);
} catch (IOException e) {
e.printStackTrace();
}
}
}
Reading a file using BufferedInputStream
Reading file using a BufferedInputStream generally faster than FileInputStream because it maintains
an internal buffer to store bytes read from the underlying input stream.
import java.io.BufferedInputStream;
import java.io.FileInputStream;
import java.io.IOException;
public class FileReadingDemo {
public static void main(String[] args) {
String source = "hello.txt";
try (BufferedInputStream bis = new BufferedInputStream(new FileInputStream(source))) {
byte data;
while ((data = (byte) bis.read()) != -1) {
System.out.println((char) data);
}
} catch (IOException e) {
e.printStackTrace();
}
}
}
Writing a file using Channel and Buffer
To write data to a file using Channel we need to have the following steps:
First, we need to get an object of FileOutputStream
1.
Acquire FileChannel calling the getChannel() method from the FileOutputStream
2.
Create a ByteBuffer and then fill it with data
3.
https://riptutorial.com/ 392](https://image.slidesharecdn.com/java-language-pdfroom-240812184155-f7515a4f/85/java-language-programacao-2-PDF-Room-pdf-460-320.jpg)
![Then we have to call the flip() method of the ByteBuffer and pass it as an argument of the
write() method of the FileChannel
4.
Once we are done writing, we have to close the resource
5.
import java.io.*;
import java.nio.*;
public class FileChannelWrite {
public static void main(String[] args) {
File outputFile = new File("hello.txt");
String text = "I love Bangladesh.";
try {
FileOutputStream fos = new FileOutputStream(outputFile);
FileChannel fileChannel = fos.getChannel();
byte[] bytes = text.getBytes();
ByteBuffer buffer = ByteBuffer.wrap(bytes);
fileChannel.write(buffer);
fileChannel.close();
} catch (java.io.IOException e) {
e.printStackTrace();
}
}
}
Writing a file using PrintStream
We can use PrintStream class to write a file. It has several methods that let you print any data type
values. println() method appends a new line. Once we are done printing, we have to flush the
PrintStream.
import java.io.FileNotFoundException;
import java.io.PrintStream;
import java.time.LocalDate;
public class FileWritingDemo {
public static void main(String[] args) {
String destination = "file1.txt";
try(PrintStream ps = new PrintStream(destination)){
ps.println("Stackoverflow documentation seems fun.");
ps.println();
ps.println("I love Java!");
ps.printf("Today is: %1$tm/%1$td/%1$tY", LocalDate.now());
ps.flush();
} catch (FileNotFoundException e) {
e.printStackTrace();
}
}
}
Iterate over a directory printing subdirectories in it
https://riptutorial.com/ 393](https://image.slidesharecdn.com/java-language-pdfroom-240812184155-f7515a4f/85/java-language-programacao-2-PDF-Room-pdf-461-320.jpg)
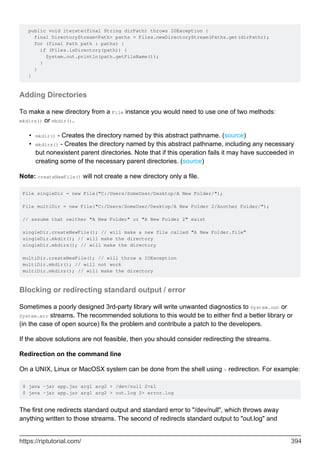

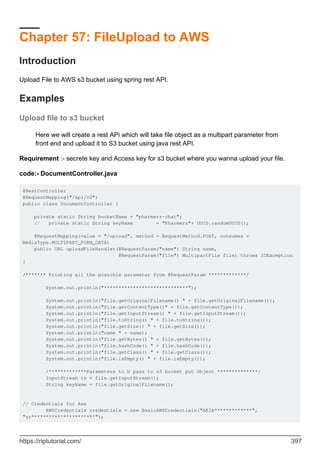

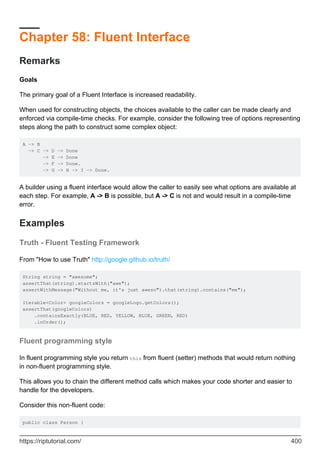
![private String firstName;
private String lastName;
public String getFirstName() {
return firstName;
}
public void setFirstName(String firstName) {
this.firstName = firstName;
}
public String getLastName() {
return lastName;
}
public void setLastName(String lastName) {
this.lastName = lastName;
}
public String whoAreYou() {
return "I am " + firstName + " " + lastName;
}
public static void main(String[] args) {
Person person = new Person();
person.setFirstName("John");
person.setLastName("Doe");
System.out.println(person.whoAreYou());
}
}
As the setter methods don't return anything, we need 4 instructions in the mainmethod to
instantiate a Person with some data and print it. With a fluent style this code can be changed to:
public class Person {
private String firstName;
private String lastName;
public String getFirstName() {
return firstName;
}
public Person withFirstName(String firstName) {
this.firstName = firstName;
return this;
}
public String getLastName() {
return lastName;
}
public Person withLastName(String lastName) {
this.lastName = lastName;
return this;
}
public String whoAreYou() {
return "I am " + firstName + " " + lastName;
}
https://riptutorial.com/ 401](https://image.slidesharecdn.com/java-language-pdfroom-240812184155-f7515a4f/85/java-language-programacao-2-PDF-Room-pdf-469-320.jpg)
![public static void main(String[] args) {
System.out.println(new Person().withFirstName("John")
.withLastName("Doe").whoAreYou());
}
}
The idea is to always return some object to enable building of a method call chain and to use
method names which reflect natural speaking. This fluent style makes the code more readable.
Read Fluent Interface online: https://riptutorial.com/java/topic/5090/fluent-interface
https://riptutorial.com/ 402](https://image.slidesharecdn.com/java-language-pdfroom-240812184155-f7515a4f/85/java-language-programacao-2-PDF-Room-pdf-470-320.jpg)
![Chapter 59: FTP (File Transfer Protocol)
Syntax
FTPClient connect(InetAddress host, int port)
•
FTPClient login(String username, String password)
•
FTPClient disconnect()
•
FTPReply getReplyStrings()
•
boolean storeFile(String remote, InputStream local)
•
OutputStream storeFileStream(String remote)
•
boolean setFileType(int fileType)
•
boolean completePendingCommand()
•
Parameters
Parameters Details
host Either the host name or IP address of the FTP server
port The FTP server port
username The FTP server username
password The FTP server password
Examples
Connecting and Logging Into a FTP Server
To start using FTP with Java, you will need to create a new FTPClient and then connect and login
to the server using .connect(String server, int port) and .login(String username, String password)
.
import java.io.IOException;
import org.apache.commons.net.ftp.FTPClient;
import org.apache.commons.net.ftp.FTPReply;
//Import all the required resource for this project.
public class FTPConnectAndLogin {
public static void main(String[] args) {
// SET THESE TO MATCH YOUR FTP SERVER //
String server = "www.server.com"; //Server can be either host name or IP address.
int port = 21;
String user = "Username";
String pass = "Password";
FTPClient ftp = new FTPClient;
https://riptutorial.com/ 403](https://image.slidesharecdn.com/java-language-pdfroom-240812184155-f7515a4f/85/java-language-programacao-2-PDF-Room-pdf-471-320.jpg)
![boolean success = ftp.login(user, pass);
This will not just attempt to login to the FTP server, it will also store the result as a boolean.
showServerReply(ftp);
This will check if the server sent us any messages, but we will first need to create the function in
the next step.
if (!success) {
System.out.println("Failed to log into the server");
return;
} else {
System.out.println("LOGGED IN SERVER");
}
This statement will check if we logged in successfully; if so, it will print "LOGGED IN SERVER",
otherwise it will print "Failed to log into the server". This is our script so far:
import java.io.IOException;
import org.apache.commons.net.ftp.FTPClient;
import org.apache.commons.net.ftp.FTPReply;
public class FTPConnectAndLogin {
public static void main(String[] args) {
// SET THESE TO MATCH YOUR FTP SERVER //
String server = "www.server.com";
int port = 21;
String user = "username"
String pass = "password"
FTPClient ftp = new FTPClient
try {
ftp.connect(server, port)
showServerReply(ftp);
int replyCode = ftpClient.getReplyCode();
if (!FTPReply.isPositiveCompletion(replyCode)) {
System.out.println("Operation failed. Server reply code: " + replyCode);
return;
}
boolean success = ftp.login(user, pass);
showServerReply(ftp);
if (!success) {
System.out.println("Failed to log into the server");
return;
} else {
System.out.println("LOGGED IN SERVER");
}
} catch {
}
}
}
Now next let's create complete the Catch block in case we run into any errors with the whole
process.
https://riptutorial.com/ 405](https://image.slidesharecdn.com/java-language-pdfroom-240812184155-f7515a4f/85/java-language-programacao-2-PDF-Room-pdf-473-320.jpg)
![} catch (IOException ex) {
System.out.println("Oops! Something went wrong.");
ex.printStackTrace();
}
The completed catch block will now print "Oops! Something went wrong." and the stacktrace if
there is an error. Now our final step is to create the showServerReply() we have been using for a
while now.
private static void showServerReply(FTPClient ftp) {
String[] replies = ftp.getReplyStrings();
if (replies != null && replies.length > 0) {
for (String aReply : replies) {
System.out.println("SERVER: " + aReply);
}
}
}
This function takes an FTPClient as a variable, and calls it "ftp". After that it stores any server
replies from the server in a string array. Next it checks if any messages were stored. If there is
any, it prints each of them as "SERVER: [reply]". Now that we have that function done, this is the
completed script:
import java.io.IOException;
import org.apache.commons.net.ftp.FTPClient;
import org.apache.commons.net.ftp.FTPReply;
public class FTPConnectAndLogin {
private static void showServerReply(FTPClient ftp) {
String[] replies = ftp.getReplyStrings();
if (replies != null && replies.length > 0) {
for (String aReply : replies) {
System.out.println("SERVER: " + aReply);
}
}
}
public static void main(String[] args) {
// SET THESE TO MATCH YOUR FTP SERVER //
String server = "www.server.com";
int port = 21;
String user = "username"
String pass = "password"
FTPClient ftp = new FTPClient
try {
ftp.connect(server, port)
showServerReply(ftp);
int replyCode = ftpClient.getReplyCode();
if (!FTPReply.isPositiveCompletion(replyCode)) {
System.out.println("Operation failed. Server reply code: " + replyCode);
return;
}
boolean success = ftp.login(user, pass);
showServerReply(ftp);
if (!success) {
System.out.println("Failed to log into the server");
https://riptutorial.com/ 406](https://image.slidesharecdn.com/java-language-pdfroom-240812184155-f7515a4f/85/java-language-programacao-2-PDF-Room-pdf-474-320.jpg)
![return;
} else {
System.out.println("LOGGED IN SERVER");
}
} catch (IOException ex) {
System.out.println("Oops! Something went wrong.");
ex.printStackTrace();
}
}
}
We first need to create a new FTPClient and try connecting to the server it and logging into it using
.connect(String server, int port) and .login(String username, String password). It is important to
connect and login using a try/catch block in case our code fails to connect with the server. We will
also need to create a function that checks and displays any messages we may receive from the
server as we try connecting and logging in. We will call this function "showServerReply(FTPClient
ftp)".
import java.io.IOException;
import org.apache.commons.net.ftp.FTPClient;
import org.apache.commons.net.ftp.FTPReply;
public class FTPConnectAndLogin {
private static void showServerReply(FTPClient ftp) {
if (replies != null && replies.length > 0) {
for (String aReply : replies) {
System.out.println("SERVER: " + aReply);
}
}
}
public static void main(String[] args) {
// SET THESE TO MATCH YOUR FTP SERVER //
String server = "www.server.com";
int port = 21;
String user = "username"
String pass = "password"
FTPClient ftp = new FTPClient
try {
ftp.connect(server, port)
showServerReply(ftp);
int replyCode = ftpClient.getReplyCode();
if (!FTPReply.isPositiveCompletion(replyCode)) {
System.out.println("Operation failed. Server reply code: " + replyCode);
return;
}
boolean success = ftp.login(user, pass);
showServerReply(ftp);
if (!success) {
System.out.println("Failed to log into the server");
return;
} else {
System.out.println("LOGGED IN SERVER");
}
} catch (IOException ex) {
System.out.println("Oops! Something went wrong.");
ex.printStackTrace();
https://riptutorial.com/ 407](https://image.slidesharecdn.com/java-language-pdfroom-240812184155-f7515a4f/85/java-language-programacao-2-PDF-Room-pdf-475-320.jpg)

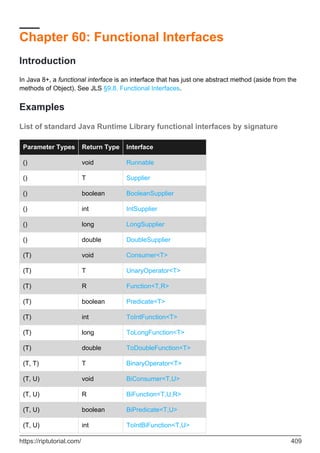


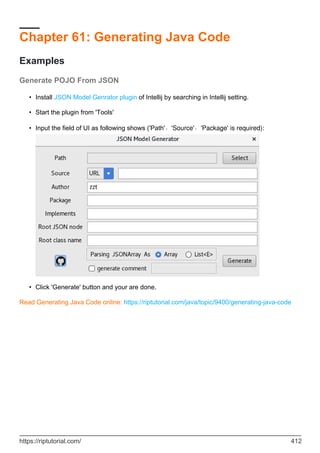
![private T value;
public T getValue() {
return value;
}
public void setValue(T value) {
this.value = value;
}
}
To instantiate this class, provide a type argument in place of T. For example, Integer:
Param<Integer> integerParam = new Param<Integer>();
The type argument can be any reference type, including arrays and other generic types:
Param<String[]> stringArrayParam;
Param<int[][]> int2dArrayParam;
Param<Param<Object>> objectNestedParam;
In Java SE 7 and later, the type argument can be replaced with an empty set of type arguments (
<>) called the diamond:
Java SE 7
Param<Integer> integerParam = new Param<>();
Unlike other identifiers, type parameters have no naming constraints. However their names are
commonly the first letter of their purpose in upper case. (This is true even throughout the official
JavaDocs.)
Examples include T for "type", E for "element" and K/V for "key"/"value".
Extending a generic class
public abstract class AbstractParam<T> {
private T value;
public T getValue() {
return value;
}
public void setValue(T value) {
this.value = value;
}
}
AbstractParam is an abstract class declared with a type parameter of T. When extending this class,
that type parameter can be replaced by a type argument written inside <>, or the type parameter
can remain unchanged. In the first and second examples below, String and Integer replace the
https://riptutorial.com/ 414](https://image.slidesharecdn.com/java-language-pdfroom-240812184155-f7515a4f/85/java-language-programacao-2-PDF-Room-pdf-482-320.jpg)
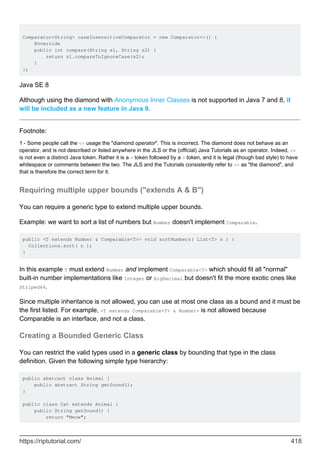
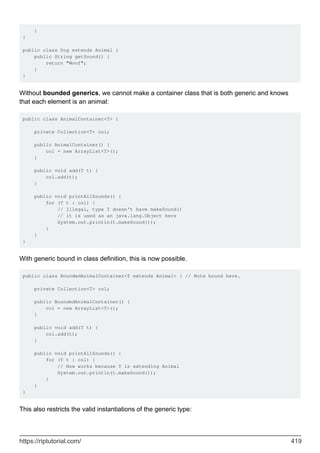
![// Legal
AnimalContainer<Cat> a = new AnimalContainer<Cat>();
// Legal
AnimalContainer<String> a = new AnimalContainer<String>();
// Legal because Cat extends Animal
BoundedAnimalContainer<Cat> b = new BoundedAnimalContainer<Cat>();
// Illegal because String doesn't extends Animal
BoundedAnimalContainer<String> b = new BoundedAnimalContainer<String>();
Deciding between `T`, `? super T`, and `? extends T`
The syntax for Java generics bounded wildcards, representing the unknown type by ? is:
? extends T represents an upper bounded wildcard. The unknown type represents a type that
must be a subtype of T, or type T itself.
•
? super T represents a lower bounded wildcard. The unknown type represents a type that
must be a supertype of T, or type T itself.
•
As a rule of thumb, you should use
? extends T if you only need "read" access ("input")
•
? super T if you need "write" access ("output")
•
T if you need both ("modify")
•
Using extends or super is usually better because it makes your code more flexible (as in: allowing
the use of subtypes and supertypes), as you will see below.
class Shoe {}
class IPhone {}
interface Fruit {}
class Apple implements Fruit {}
class Banana implements Fruit {}
class GrannySmith extends Apple {}
public class FruitHelper {
public void eatAll(Collection<? extends Fruit> fruits) {}
public void addApple(Collection<? super Apple> apples) {}
}
The compiler will now be able to detect certain bad usage:
public class GenericsTest {
public static void main(String[] args){
FruitHelper fruitHelper = new FruitHelper() ;
List<Fruit> fruits = new ArrayList<Fruit>();
fruits.add(new Apple()); // Allowed, as Apple is a Fruit
fruits.add(new Banana()); // Allowed, as Banana is a Fruit
fruitHelper.addApple(fruits); // Allowed, as "Fruit super Apple"
https://riptutorial.com/ 420](https://image.slidesharecdn.com/java-language-pdfroom-240812184155-f7515a4f/85/java-language-programacao-2-PDF-Room-pdf-488-320.jpg)
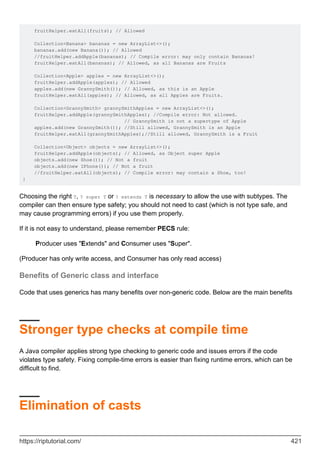
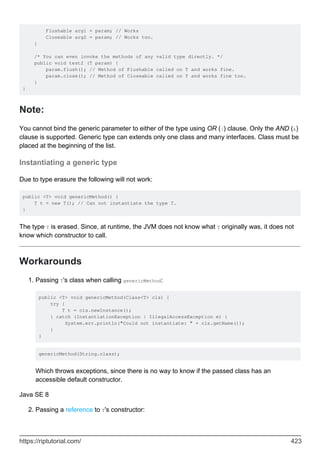
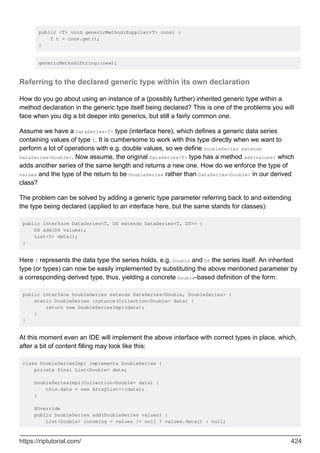
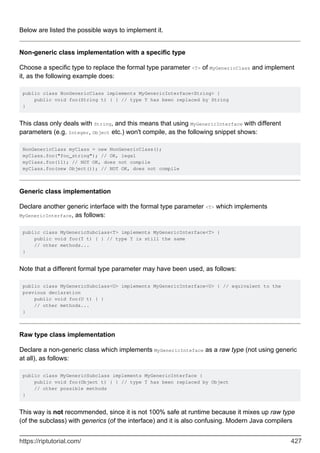

![code that depends on access to type without having to thread type information through every call.
Background
Generic parameterization on a class can be inspected by creating an anonymous inner class. This
class will capture the type information. In general this mechanism is referred to as super type
tokens, which are detailed in Neal Gafter's blog post.
Implementations
Three common implementations in Java are:
Guava's TypeToken
•
Spring's ParameterizedTypeReference
•
Jackson's TypeReference
•
Example usage
public class DataService<MODEL_TYPE> {
private final DataDao dataDao = new DataDao();
private final Class<MODEL_TYPE> type = (Class<MODEL_TYPE>) new TypeToken<MODEL_TYPE>
(getClass()){}.getRawType();
public List<MODEL_TYPE> getAll() {
return dataDao.getAllOfType(type);
}
}
// the subclass definitively binds the parameterization to User
// for all instances of this class, so that information can be
// recovered at runtime
public class UserService extends DataService<User> {}
public class Main {
public static void main(String[] args) {
UserService service = new UserService();
List<User> users = service.getAll();
}
}
Read Generics online: https://riptutorial.com/java/topic/92/generics
https://riptutorial.com/ 429](https://image.slidesharecdn.com/java-language-pdfroom-240812184155-f7515a4f/85/java-language-programacao-2-PDF-Room-pdf-497-320.jpg)
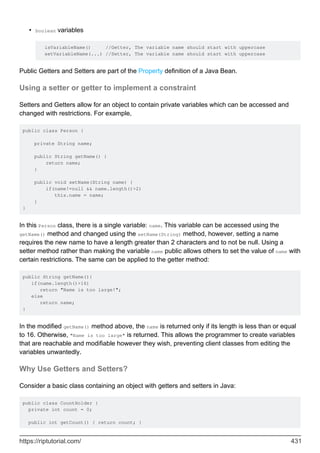

![Chapter 64: Hashtable
Introduction
Hashtable is a class in Java collections which implements Map interface and extends the
Dictionary Class
Contains only unique elements and its synchronized
Examples
Hashtable
import java.util.*;
public class HashtableDemo {
public static void main(String args[]) {
// create and populate hash table
Hashtable<Integer, String> map = new Hashtable<Integer, String>();
map.put(101,"C Language");
map.put(102, "Domain");
map.put(104, "Databases");
System.out.println("Values before remove: "+ map);
// Remove value for key 102
map.remove(102);
System.out.println("Values after remove: "+ map);
}
}
Read Hashtable online: https://riptutorial.com/java/topic/10709/hashtable
https://riptutorial.com/ 434](https://image.slidesharecdn.com/java-language-pdfroom-240812184155-f7515a4f/85/java-language-programacao-2-PDF-Room-pdf-502-320.jpg)
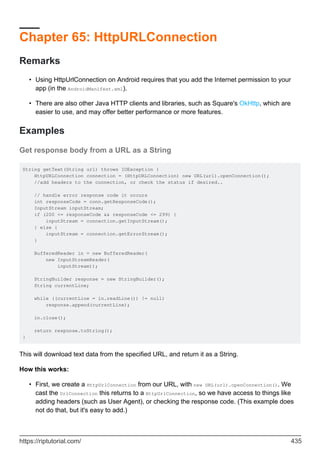
![Then, create InputStream basing on the response code (for error handling)
•
Then, create a BufferedReader which allows us to read text from InputStream we get from the
connection.
•
Now, we append the text to a StringBuilder, line by line.
•
Close the InputStream, and return the String we now have.
•
Notes:
This method will throw an IoException in case of failure (such as a network error, or no
internet connection), and it will also throw an unchecked MalformedUrlException if the given
URL is not valid.
•
It can be used for reading from any URL which returns text, such as webpages (HTML),
REST APIs which return JSON or XML, etc.
•
See also: Read URL to String in few lines of Java code.
•
Usage:
Is very simple:
String text = getText(”http://example.com");
//Do something with the text from example.com, in this case the HTML.
POST data
public static void post(String url, byte [] data, String contentType) throws IOException {
HttpURLConnection connection = null;
OutputStream out = null;
InputStream in = null;
try {
connection = (HttpURLConnection) new URL(url).openConnection();
connection.setRequestProperty("Content-Type", contentType);
connection.setDoOutput(true);
out = connection.getOutputStream();
out.write(data);
out.close();
in = connection.getInputStream();
BufferedReader reader = new BufferedReader(new InputStreamReader(in));
String line = null;
while ((line = reader.readLine()) != null) {
System.out.println(line);
}
in.close();
} finally {
if (connection != null) connection.disconnect();
if (out != null) out.close();
https://riptutorial.com/ 436](https://image.slidesharecdn.com/java-language-pdfroom-240812184155-f7515a4f/85/java-language-programacao-2-PDF-Room-pdf-504-320.jpg)
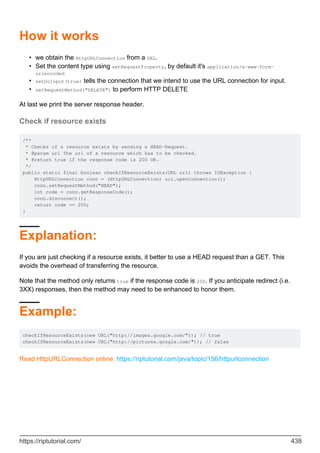
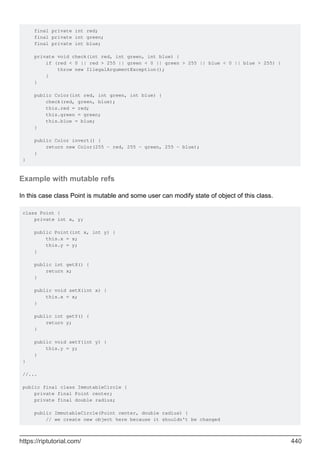

![Chapter 67: Immutable Objects
Remarks
Immutable objects have fixed state (no setters), so all state must be known at object creation time.
Although not technically required, it is best practice to make all fields final. This will make the
immutable class thread-safe (cf. Java Concurrency in Practice, 3.4.1).
The examples show several patterns that can assist with achieving this.
Examples
Creating an immutable version of a type using defensive copying.
Some basic types and classes in Java are fundamentally mutable. For example, all array types are
mutable, and so are classes like java.util.Data. This can be awkward in situations where an
immutable type is mandated.
One way to deal with this is to create an immutable wrapper for the mutable type. Here is a simple
wrapper for an array of integers
public class ImmutableIntArray {
private final int[] array;
public ImmutableIntArray(int[] array) {
this.array = array.clone();
}
public int[] getValue() {
return this.clone();
}
}
This class works by using defensive copying to isolate the mutable state (the int[]) from any code
that might mutate it:
The constructor uses clone() to create a distinct copy of the parameter array. If the caller of
the constructor subsequent changed the parameter array, it would not affect the state of the
ImmutableIntArray.
•
The getValue() method also uses clone() to create the array that is returned. If the caller
were to change the result array, it would not affect the state of the ImmutableIntArray.
•
We could also add methods to ImmutableIntArray to perform read-only operations on the wrapped
array; e.g. get its length, get the value at a particular index, and so on.
Note that an immutable wrapper type implemented this way is not type compatible with the original
https://riptutorial.com/ 442](https://image.slidesharecdn.com/java-language-pdfroom-240812184155-f7515a4f/85/java-language-programacao-2-PDF-Room-pdf-510-320.jpg)
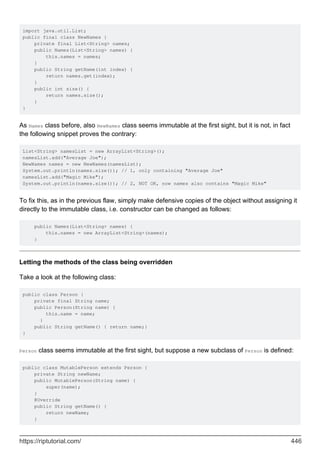

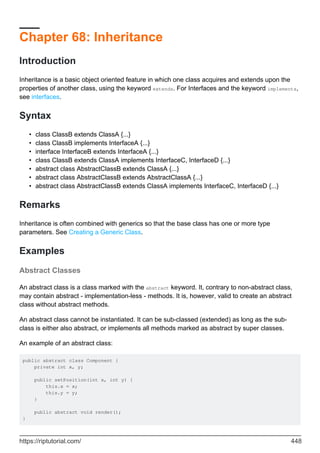

![methods.
Java SE 8
Java 8 allows interfaces to contain default methods, usually implemented using the other methods
of the interface, making interfaces and abstract classes equally powerful in this regard.
Anonymous subclasses of Abstract Classes
As a convenience java allows for instantiation of anonymous instances of subclasses of abstract
classes, which provide implementations for the abstract methods upon creating the new object.
Using the above example this could look like this:
Component myAnonymousComponent = new Component() {
@Override
public void render() {
// render a quick 1-time use component
}
}
Static Inheritance
Static method can be inherited similar to normal methods, however unlike normal methods it is
impossible to create "abstract" methods in order to force static method overriding. Writing a
method with the same signature as a static method in a super class appears to be a form of
overriding, but really this simply creates a new function hides the other.
public class BaseClass {
public static int num = 5;
public static void sayHello() {
System.out.println("Hello");
}
public static void main(String[] args) {
BaseClass.sayHello();
System.out.println("BaseClass's num: " + BaseClass.num);
SubClass.sayHello();
//This will be different than the above statement's output, since it runs
//A different method
SubClass.sayHello(true);
StaticOverride.sayHello();
System.out.println("StaticOverride's num: " + StaticOverride.num);
}
}
public class SubClass extends BaseClass {
//Inherits the sayHello function, but does not override it
public static void sayHello(boolean test) {
System.out.println("Hey");
}
https://riptutorial.com/ 450](https://image.slidesharecdn.com/java-language-pdfroom-240812184155-f7515a4f/85/java-language-programacao-2-PDF-Room-pdf-518-320.jpg)
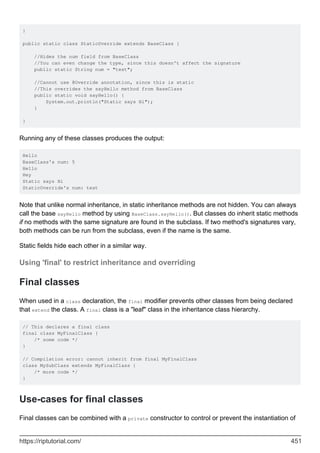
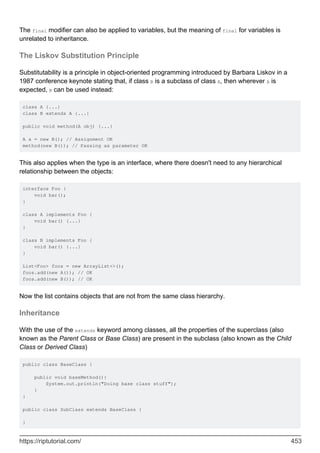
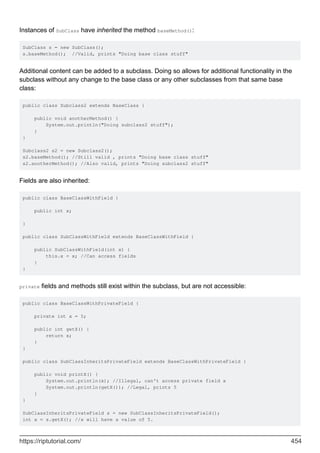
![In Java, each class may extend at most one other class.
public class A{}
public class B{}
public class ExtendsTwoClasses extends A, B {} //Illegal
This is known as multiple inheritance, and while it is legal in some languages, Java does not
permit it with classes.
As a result of this, every class has an unbranching ancestral chain of classes leading to Object,
from which all classes descend.
Inheritance and Static Methods
In Java, parent and child class both can have static methods with the same name. But in such
cases implementation of static method in child is hiding parent class' implementation, it's not
method overriding. For example:
class StaticMethodTest {
// static method and inheritance
public static void main(String[] args) {
Parent p = new Child();
p.staticMethod(); // prints Inside Parent
((Child) p).staticMethod(); // prints Inside Child
}
static class Parent {
public static void staticMethod() {
System.out.println("Inside Parent");
}
}
static class Child extends Parent {
public static void staticMethod() {
System.out.println("Inside Child");
}
}
}
Static methods are bind to a class not to an instance and this method binding happens at compile
time. Since in the first call to staticMethod(), parent class reference p was used, Parent's version of
staticMethod() is invoked. In second case, we did cast p into Child class, Child's staticMethod()
executed.
Variable shadowing
Variables are SHADOWED and methods are OVERRIDDEN. Which variable will be used depends
on the class that the variable is declared of. Which method will be used depends on the actual
class of the object that is referenced by the variable.
class Car {
https://riptutorial.com/ 455](https://image.slidesharecdn.com/java-language-pdfroom-240812184155-f7515a4f/85/java-language-programacao-2-PDF-Room-pdf-523-320.jpg)
![public int gearRatio = 8;
public String accelerate() {
return "Accelerate : Car";
}
}
class SportsCar extends Car {
public int gearRatio = 9;
public String accelerate() {
return "Accelerate : SportsCar";
}
public void test() {
}
public static void main(String[] args) {
Car car = new SportsCar();
System.out.println(car.gearRatio + " " + car.accelerate());
// will print out 8 Accelerate : SportsCar
}
}
Narrowing and Widening of object references
Casting an instance of a base class to a subclass as in : b = (B) a; is called narrowing (as you are
trying to narrow the base class object to a more specific class object) and needs an explicit type-
cast.
Casting an instance of a subclass to a base class as in: A a = b; is called widening and does not
need a type-cast.
To illustrate, consider the following class declarations, and test code:
class Vehicle {
}
class Car extends Vehicle {
}
class Truck extends Vehicle {
}
class MotorCycle extends Vehicle {
}
class Test {
public static void main(String[] args) {
Vehicle vehicle = new Car();
Car car = new Car();
https://riptutorial.com/ 456](https://image.slidesharecdn.com/java-language-pdfroom-240812184155-f7515a4f/85/java-language-programacao-2-PDF-Room-pdf-524-320.jpg)
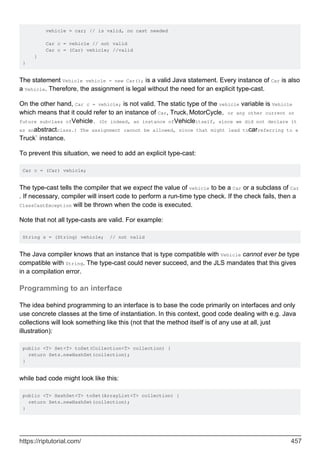
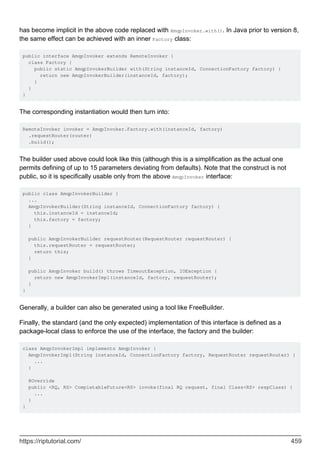
![Meanwhile, this pattern proved to be very efficient in developing all our new code not matter how
simple or complex the functionality is.
Abstract class and Interface usage: "Is-a" relation vs "Has-a" capability
When to use abstract classes: To implement the same or different behaviour among multiple
related objects
When to use interfaces: to implement a contract by multiple unrelated objects
Abstract classes create "is a" relations while interfaces provide "has a" capability.
This can be seen in the code below:
public class InterfaceAndAbstractClassDemo{
public static void main(String args[]){
Dog dog = new Dog("Jack",16);
Cat cat = new Cat("Joe",20);
System.out.println("Dog:"+dog);
System.out.println("Cat:"+cat);
dog.remember();
dog.protectOwner();
Learn dl = dog;
dl.learn();
cat.remember();
cat.protectOwner();
Climb c = cat;
c.climb();
Man man = new Man("Ravindra",40);
System.out.println(man);
Climb cm = man;
cm.climb();
Think t = man;
t.think();
Learn l = man;
l.learn();
Apply a = man;
a.apply();
}
}
abstract class Animal{
String name;
int lifeExpentency;
public Animal(String name,int lifeExpentency ){
this.name = name;
this.lifeExpentency=lifeExpentency;
}
public abstract void remember();
public abstract void protectOwner();
https://riptutorial.com/ 460](https://image.slidesharecdn.com/java-language-pdfroom-240812184155-f7515a4f/85/java-language-programacao-2-PDF-Room-pdf-528-320.jpg)
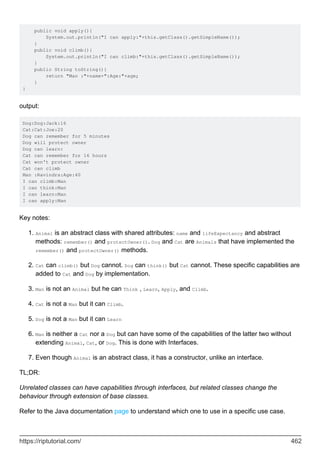
![Consider using abstract classes if...
You want to share code among several closely related classes.
1.
You expect that classes that extend your abstract class have many common methods or
fields, or require access modifiers other than public (such as protected and private).
2.
You want to declare non-static or non-final fields.
3.
Consider using interfaces if...
You expect that unrelated classes would implement your interface. For example, many
unrelated objects can implement the Serializable interface.
1.
You want to specify the behaviour of a particular data type but are not concerned about who
implements its behaviour.
2.
You want to take advantage of multiple inheritance of type.
3.
Overriding in Inheritance
Overriding in Inheritance is used when you use a already defined method from a super class in a
sub class, but in a different way than how the method was originally designed in the super class.
Overriding allows the user to reuse code by using existing material and modifying it to suit the
user's needs better.
The following example demonstrates how ClassB overrides the functionality of ClassA by changing
what gets sent out through the printing method:
Example:
public static void main(String[] args) {
ClassA a = new ClassA();
ClassA b = new ClassB();
a.printing();
b.printing();
}
class ClassA {
public void printing() {
System.out.println("A");
}
}
class ClassB extends ClassA {
public void printing() {
System.out.println("B");
}
}
Output:
A
B
https://riptutorial.com/ 463](https://image.slidesharecdn.com/java-language-pdfroom-240812184155-f7515a4f/85/java-language-programacao-2-PDF-Room-pdf-531-320.jpg)

![Chapter 69: InputStreams and OutputStreams
Syntax
int read(byte[] b) throws IOException
•
Remarks
Note that most of the time you do NOT use InputStreams directly but use BufferedStreams, or
similar. This is because InputStream reads from the source every time the read method is called.
This can cause significant CPU usage in context switches into and out of the kernel.
Examples
Reading InputStream into a String
Sometimes you may wish to read byte-input into a String. To do this you will need to find
something that converts between byte and the "native Java" UTF-16 Codepoints used as char.
That is done with a InputStreamReader.
To speed the process up a bit, it's "usual" to allocate a buffer, so that we don't have too much
overhead when reading from Input.
Java SE 7
public String inputStreamToString(InputStream inputStream) throws Exception {
StringWriter writer = new StringWriter();
char[] buffer = new char[1024];
try (Reader reader = new BufferedReader(new InputStreamReader(inputStream, "UTF-8"))) {
int n;
while ((n = reader.read(buffer)) != -1) {
// all this code does is redirect the output of `reader` to `writer` in
// 1024 byte chunks
writer.write(buffer, 0, n);
}
}
return writer.toString();
}
Transforming this example to Java SE 6 (and lower)-compatible code is left out as an exercise for
the reader.
Writing bytes to an OutputStream
Writing bytes to an OutputStream one byte at a time
OutputStream stream = object.getOutputStream();
https://riptutorial.com/ 465](https://image.slidesharecdn.com/java-language-pdfroom-240812184155-f7515a4f/85/java-language-programacao-2-PDF-Room-pdf-533-320.jpg)
![byte b = 0x00;
stream.write( b );
Writing a byte array
byte[] bytes = new byte[] { 0x00, 0x00 };
stream.write( bytes );
Writing a section of a byte array
int offset = 1;
int length = 2;
byte[] bytes = new byte[] { 0xFF, 0x00, 0x00, 0xFF };
stream.write( bytes, offset, length );
Closing Streams
Most streams must be closed when you are done with them, otherwise you could introduce a
memory leak or leave a file open. It is important that streams are closed even if an exception is
thrown.
Java SE 7
try(FileWriter fw = new FileWriter("outfilename");
BufferedWriter bw = new BufferedWriter(fw);
PrintWriter out = new PrintWriter(bw))
{
out.println("the text");
//more code
out.println("more text");
//more code
} catch (IOException e) {
//handle this however you
}
Remember: try-with-resources guarantees, that the resources have been closed when the block is
exited, whether that happens with the usual control flow or because of an exception.
Java SE 6
Sometimes, try-with-resources is not an option, or maybe you're supporting older version of Java 6
or earlier. In this case, proper handling is to use a finally block:
FileWriter fw = null;
BufferedWriter bw = null;
PrintWriter out = null;
try {
fw = new FileWriter("myfile.txt");
bw = new BufferedWriter(fw);
out = new PrintWriter(bw);
https://riptutorial.com/ 466](https://image.slidesharecdn.com/java-language-pdfroom-240812184155-f7515a4f/85/java-language-programacao-2-PDF-Room-pdf-534-320.jpg)
![out.println("the text");
out.close();
} catch (IOException e) {
//handle this however you want
}
finally {
try {
if(out != null)
out.close();
} catch (IOException e) {
//typically not much you can do here...
}
}
Note that closing a wrapper stream will also close its underlying stream. This means you cannot
wrap a stream, close the wrapper and then continue using the original stream.
Copying Input Stream to Output Stream
This function copies data between two streams -
void copy(InputStream in, OutputStream out) throws IOException {
byte[] buffer = new byte[8192];
while ((bytesRead = in.read(buffer)) > 0) {
out.write(buffer, 0, bytesRead);
}
}
Example -
// reading from System.in and writing to System.out
copy(System.in, System.out);
Wrapping Input/Output Streams
OutputStream and InputStream have many different classes, each of them with a unique
functionality. By wrapping a stream around another, you gain the functionality of both streams.
You can wrap a stream any number of times, just take note of the ordering.
Useful combinations
Writing characters to a file while using a buffer
File myFile = new File("targetFile.txt");
PrintWriter writer = new PrintWriter(new BufferedOutputStream(new FileOutputStream(myFile)));
Compressing and encrypting data before writing to a file while using a buffer
Cipher cipher = ... // Initialize cipher
https://riptutorial.com/ 467](https://image.slidesharecdn.com/java-language-pdfroom-240812184155-f7515a4f/85/java-language-programacao-2-PDF-Room-pdf-535-320.jpg)
![File myFile = new File("targetFile.enc");
BufferedOutputStream outputStream = new BufferedOutputStream(new DeflaterOutputStream(new
CipherOutputStream(new FileOutputStream(myFile), cipher)));
List of Input/Output Stream wrappers
Wrapper Description
BufferedOutputStream/
BufferedInputStream
While OutputStream writes data one byte at a time,
BufferedOutputStream writes data in chunks. This reduces the
number of system calls, thus improving performance.
DeflaterOutputStream/
DeflaterInputStream
Performs data compression.
InflaterOutputStream/
InflaterInputStream
Performs data decompression.
CipherOutputStream/
CipherInputStream
Encrypts/Decrypts data.
DigestOutputStream/
DigestInputStream
Generates Message Digest to verify data integrity.
CheckedOutputStream/
CheckedInputStream
Generates a CheckSum. CheckSum is a more trivial version
of Message Digest.
DataOutputStream/
DataInputStream
Allows writing of primitive data types and Strings. Meant for
writing bytes. Platform independent.
PrintStream
Allows writing of primitive data types and Strings. Meant for
writing bytes. Platform dependent.
OutputStreamWriter
Converts a OutputStream into a Writer. An OutputStream
deals with bytes while Writers deals with characters
PrintWriter
Automatically calls OutputStreamWriter. Allows writing of
primitive data types and Strings. Strictly for writing characters
and best for writing characters
DataInputStream Example
package com.streams;
import java.io.*;
public class DataStreamDemo {
public static void main(String[] args) throws IOException {
InputStream input = new FileInputStream("D:datastreamdemo.txt");
DataInputStream inst = new DataInputStream(input);
https://riptutorial.com/ 468](https://image.slidesharecdn.com/java-language-pdfroom-240812184155-f7515a4f/85/java-language-programacao-2-PDF-Room-pdf-536-320.jpg)
![int count = input.available();
byte[] arr = new byte[count];
inst.read(arr);
for (byte byt : arr) {
char ki = (char) byt;
System.out.print(ki+"-");
}
}
}
Read InputStreams and OutputStreams online: https://riptutorial.com/java/topic/110/inputstreams-
and-outputstreams
https://riptutorial.com/ 469](https://image.slidesharecdn.com/java-language-pdfroom-240812184155-f7515a4f/85/java-language-programacao-2-PDF-Room-pdf-537-320.jpg)
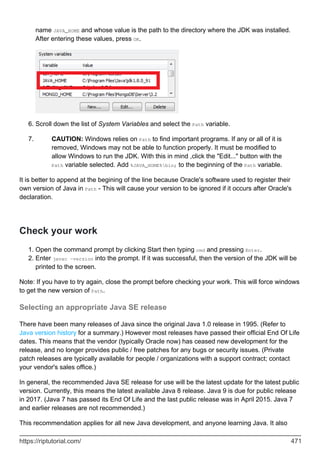

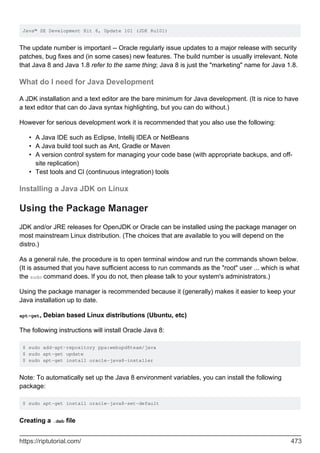
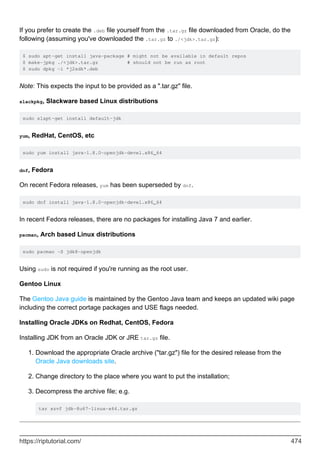
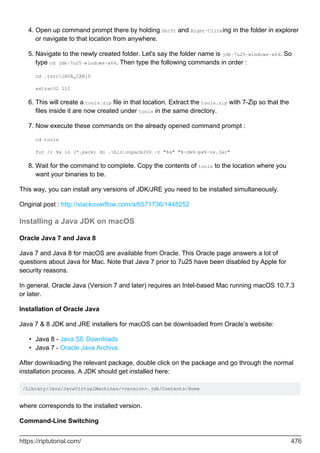
![When Java is installed, the installed version is automatically set as the default. To switch between
different, use:
export JAVA_HOME=/usr/libexec/java_home -v 1.6 #Or 1.7 or 1.8
The following functions can be added to the ~/.bash_profile (If you use the default Bash shell) for
ease of use:
function java_version {
echo 'java -version';
}
function java_set {
if [[ $1 == "6" ]]
then
export JAVA_HOME='/usr/libexec/java_home -v 1.6';
echo "Setting Java to version 6..."
echo "$JAVA_HOME"
elif [[ $1 == "7" ]]
then
export JAVA_HOME='/usr/libexec/java_home -v 1.7';
echo "Setting Java to version 7..."
echo "$JAVA_HOME"
elif [[ $1 == "8" ]]
then
export JAVA_HOME='/usr/libexec/java_home -v 1.8';
echo "Setting Java to version 8..."
echo "$JAVA_HOME"
fi
}
Apple Java 6 on macOS
On older versions of macOS (10.11 El Capitan and earlier), Apple's release of Java 6 comes pre-
installed. If installed, it can be be found at this location:
/System/Library/Java/JavaVirtualMachines/1.6.0.jdk/Contents/Home
Note that Java 6 passed its end-of-life long ago, so upgrading to a newer version is
recommended. There is more information on reinstalling Apple Java 6 on the Oracle website.
Configuring and switching Java versions on Linux using alternatives
Using Alternatives
Many Linux distributions use the alternatives command for switching between different versions of
a command. You can use this for switching between different versions of Java installed on a
machine.
In a command shell, set $JDK to the pathname of a newly installed JDK; e.g.
1.
https://riptutorial.com/ 477](https://image.slidesharecdn.com/java-language-pdfroom-240812184155-f7515a4f/85/java-language-programacao-2-PDF-Room-pdf-545-320.jpg)
![$ JDK=/Data/jdk1.8.0_67
Use alternatives --install to add the commands in the Java SDK to alternatives:
$ sudo alternatives --install /usr/bin/java java $JDK/bin/java 2
$ sudo alternatives --install /usr/bin/javac javac $JDK/bin/javac 2
$ sudo alternatives --install /usr/bin/jar jar $JDK/bin/jar 2
And so on.
2.
Now you can switch between different versions of a Java command as follows:
$ sudo alternatives --config javac
There is 1 program that provides 'javac'.
Selection Command
-----------------------------------------------
*+ 1 /usr/lib/jvm/java-1.8.0-openjdk-1.8.0.101-1.b14.fc23.x86_64/bin/javac
2 /Data/jdk1.8.0_67/bin/javac
Enter to keep the current selection[+], or type selection number: 2
$
For more information on using alternatives, refer to the alternatives(8) manual entry.
Arch based installs
Arch Linux based installs come with the command archlinux-java to switch java versions.
Listing installed environments
$ archlinux-java status
Available Java environments:
java-7-openjdk (default)
java-8-openjdk/jre
Switching current environment
# archlinux-java set <JAVA_ENV_NAME>
Eg:
# archlinux-java set java-8-openjdk/jre
More information can be found on the Arch Linux Wiki
https://riptutorial.com/ 478](https://image.slidesharecdn.com/java-language-pdfroom-240812184155-f7515a4f/85/java-language-programacao-2-PDF-Room-pdf-546-320.jpg)
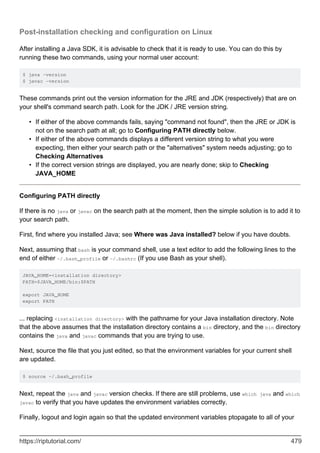
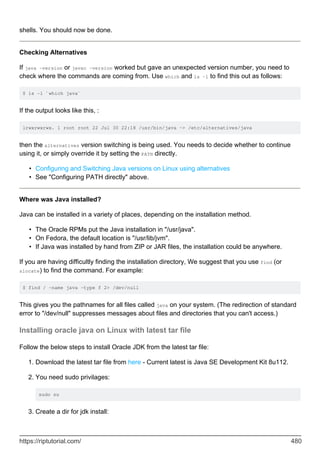
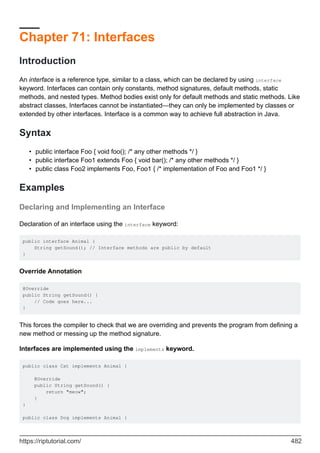
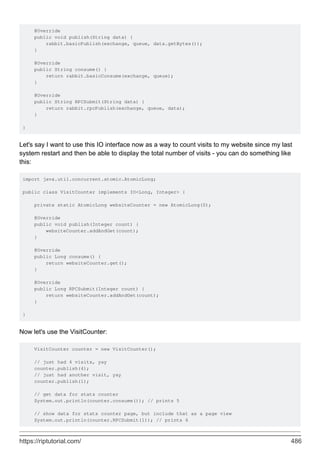
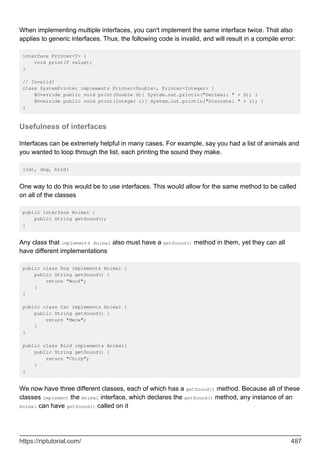
![Animal dog = new Dog();
Animal cat = new Cat();
Animal bird = new Bird();
dog.getSound(); // "Woof"
cat.getSound(); // "Meow"
bird.getSound(); // "Chirp"
Because each of these is an Animal, we could even put the animals in a list, loop through them,
and print out their sounds
Animal[] animals = { new Dog(), new Cat(), new Bird() };
for (Animal animal : animals) {
System.out.println(animal.getSound());
}
Because the order of the array is Dog, Cat, and then Bird, "Woof Meow Chirp" will be printed to the
console.
Interfaces can also be used as the return value for functions. For example, returning a Dog if the
input is "dog", Cat if the input is "cat", and Bird if it is "bird", and then printing the sound of that
animal could be done using
public Animal getAnimalByName(String name) {
switch(name.toLowerCase()) {
case "dog":
return new Dog();
case "cat":
return new Cat();
case "bird":
return new Bird();
default:
return null;
}
}
public String getAnimalSoundByName(String name){
Animal animal = getAnimalByName(name);
if (animal == null) {
return null;
} else {
return animal.getSound();
}
}
String dogSound = getAnimalSoundByName("dog"); // "Woof"
String catSound = getAnimalSoundByName("cat"); // "Meow"
String birdSound = getAnimalSoundByName("bird"); // "Chirp"
String lightbulbSound = getAnimalSoundByName("lightbulb"); // null
Interfaces are also useful for extensibility, because if you want to add a new type of Animal, you
wouldn't need to change anything with the operations you perform on them.
Implementing interfaces in an abstract class
https://riptutorial.com/ 488](https://image.slidesharecdn.com/java-language-pdfroom-240812184155-f7515a4f/85/java-language-programacao-2-PDF-Room-pdf-556-320.jpg)
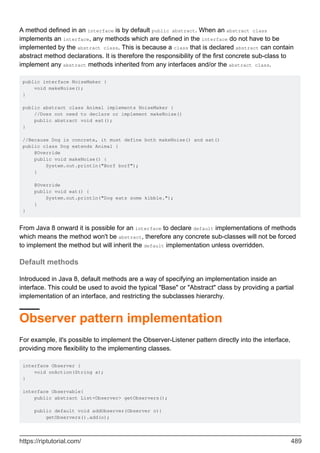
![}
public default void notify(String something ){
for( Observer l : getObservers() ){
l.onAction(something);
}
}
}
Now, any class can be made "Observable" just by implementing the Observable interface, while
being free to be part of a different class hierarchy.
abstract class Worker{
public abstract void work();
}
public class MyWorker extends Worker implements Observable {
private List<Observer> myObservers = new ArrayList<Observer>();
@Override
public List<Observer> getObservers() {
return myObservers;
}
@Override
public void work(){
notify("Started work");
// Code goes here...
notify("Completed work");
}
public static void main(String[] args) {
MyWorker w = new MyWorker();
w.addListener(new Observer() {
@Override
public void onAction(String a) {
System.out.println(a + " (" + new Date() + ")");
}
});
w.work();
}
}
Diamond problem
The compiler in Java 8 is aware of the diamond problem which is caused when a class is
implementing interfaces containing a method with the same signature.
In order to solve it, an implementing class must override the shared method and provide its own
implementation.
https://riptutorial.com/ 490](https://image.slidesharecdn.com/java-language-pdfroom-240812184155-f7515a4f/85/java-language-programacao-2-PDF-Room-pdf-558-320.jpg)
![interface InterfaceA {
public default String getName(){
return "a";
}
}
interface InterfaceB {
public default String getName(){
return "b";
}
}
public class ImpClass implements InterfaceA, InterfaceB {
@Override
public String getName() {
//Must provide its own implementation
return InterfaceA.super.getName() + InterfaceB.super.getName();
}
public static void main(String[] args) {
ImpClass c = new ImpClass();
System.out.println( c.getName() ); // Prints "ab"
System.out.println( ((InterfaceA)c).getName() ); // Prints "ab"
System.out.println( ((InterfaceB)c).getName() ); // Prints "ab"
}
}
There's still the issue of having methods with the same name and parameters with different return
types, which will not compile.
Use default methods to resolve compatibility
issues
The default method implementations come in very handy if a method is added to an interface in an
existing system where the interfaces is used by several classes.
To avoid breaking up the entire system, you can provide a default method implementation when
you add a method to an interface. This way, the system will still compile and the actual
implementations can be done step by step.
For more information, see the Default Methods topic.
Modifiers in Interfaces
The Oracle Java Style Guide states:
Modifiers should not be written out when they are implicit.
(See Modifiers in Oracle Official Code Standard for the context and a link to the actual Oracle
https://riptutorial.com/ 491](https://image.slidesharecdn.com/java-language-pdfroom-240812184155-f7515a4f/85/java-language-programacao-2-PDF-Room-pdf-559-320.jpg)

![Chapter 72: Iterator and Iterable
Introduction
The java.util.Iterator is the standard Java SE interface for object that implement the Iterator
design pattern. The java.lang.Iterable interface is for objects that can provide an iterator.
Remarks
It is possible to iterate over an array using the for-each loop, though java arrays do not implement
Iterable; iterating is done by JVM using a non-accessible index in the background.
Examples
Using Iterable in for loop
Classes implementing Iterable<> interface can be used in for loops. This is actually only syntactic
sugar for getting an iterator from the object and using it to get all elements sequentially; it makes
code clearer, faster to write end less error-prone.
public class UsingIterable {
public static void main(String[] args) {
List<Integer> intList = Arrays.asList(1,2,3,4,5,6,7);
// List extends Collection, Collection extends Iterable
Iterable<Integer> iterable = intList;
// foreach-like loop
for (Integer i: iterable) {
System.out.println(i);
}
// pre java 5 way of iterating loops
for(Iterator<Integer> i = iterable.iterator(); i.hasNext(); ) {
Integer item = i.next();
System.out.println(item);
}
}
}
Using the raw iterator
While using the foreach loop (or "extended for loop") is simple, it's sometimes beneficial to use the
iterator directly. For example, if you want to output a bunch of comma-separated values, but don't
want the last item to have a comma:
List<String> yourData = //...
https://riptutorial.com/ 494](https://image.slidesharecdn.com/java-language-pdfroom-240812184155-f7515a4f/85/java-language-programacao-2-PDF-Room-pdf-562-320.jpg)
![Iterator<String> iterator = yourData.iterator();
while (iterator.hasNext()){
// next() "moves" the iterator to the next entry and returns it's value.
String entry = iterator.next();
System.out.print(entry);
if (iterator.hasNext()){
// If the iterator has another element after the current one:
System.out.print(",");
}
}
This is much easier and clearer than having a isLastEntry variable or doing calculations with the
loop index.
Creating your own Iterable.
To create your own Iterable as with any interface you just implement the abstract methods in the
interface. For Iterable there is only one which is called iterator(). But its return type Iterator is
itself an interface with three abstract methods. You can return an iterator associated with some
collection or create your own custom implementation:
public static class Alphabet implements Iterable<Character> {
@Override
public Iterator<Character> iterator() {
return new Iterator<Character>() {
char letter = 'a';
@Override
public boolean hasNext() {
return letter <= 'z';
}
@Override
public Character next() {
return letter++;
}
@Override
public void remove() {
throw new UnsupportedOperationException("Doesn't make sense to remove a
letter");
}
};
}
}
To use:
public static void main(String[] args) {
for(char c : new Alphabet()) {
System.out.println("c = " + c);
}
}
https://riptutorial.com/ 495](https://image.slidesharecdn.com/java-language-pdfroom-240812184155-f7515a4f/85/java-language-programacao-2-PDF-Room-pdf-563-320.jpg)
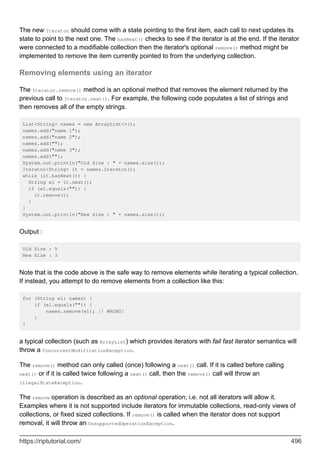

![Chapter 73: Java Agents
Examples
Modifying classes with agents
Firstly, make sure that the agent being used has the following attributes in the Manifest.mf:
Can-Redefine-Classes: true
Can-Retransform-Classes: true
Starting a java agent will let the agent access the class Instrumentation. With Instrumentation you
can call addTransformer(ClassFileTransformer transformer). ClassFileTransformers will let you
rewrite the bytes of classes. The class has only a single method which supplies the ClassLoader
that loads the class, the class's name, a java.lang.Class instance of it, it's ProtectionDomain, and
lastly the bytes of the class itself.
It looks like this:
byte[] transform(ClassLoader loader, String className, Class<?> classBeingRedefined,
ProtectionDomain protectionDomain, byte[] classfileBuffer)
Modifying a class purely from bytes can take ages. To remedy this there are libraries that can be
used to convert the class bytes into something more usable.
In this example I'll be using ASM, but other alternatives like Javassist and BCEL have similar
features.
ClassNode getNode(byte[] bytes) {
// Create a ClassReader that will parse the byte array into a ClassNode
ClassReader cr = new ClassReader(bytes);
ClassNode cn = new ClassNode();
try {
// This populates the ClassNode
cr.accept(cn, ClassReader.EXPAND_FRAMES);
cr = null;
} catch (Exception e) {
e.printStackTrace();
}
return cn;
}
From here changes can be made to the ClassNode object. This makes changing field/method
access incredibly easy. Plus with ASM's Tree API modifying the bytecode of methods is a breeze.
Once the edits are finished you can convert the ClassNode back into bytes with the following
method and return them in the transform method:
public static byte[] getNodeBytes(ClassNode cn, boolean useMaxs) {
https://riptutorial.com/ 498](https://image.slidesharecdn.com/java-language-pdfroom-240812184155-f7515a4f/85/java-language-programacao-2-PDF-Room-pdf-566-320.jpg)
![ClassWriter cw = new ClassWriter(useMaxs ? ClassWriter.COMPUTE_MAXS :
ClassWriter.COMPUTE_FRAMES);
cn.accept(cw);
byte[] b = cw.toByteArray();
return b;
}
Adding an agent at runtime
Agents can be added to a JVM at runtime. To load an agent you will need to use the Attach API's
VirtualMachine.attatch(String id). You can then load a compiled agent jar with the following
method:
public static void loadAgent(String agentPath) {
String vmName = ManagementFactory.getRuntimeMXBean().getName();
int index = vmName.indexOf('@');
String pid = vmName.substring(0, index);
try {
File agentFile = new File(agentPath);
VirtualMachine vm = VirtualMachine.attach(pid);
vm.loadAgent(agentFile.getAbsolutePath(), "");
VirtualMachine.attach(vm.id());
} catch (Exception e) {
throw new RuntimeException(e);
}
}
This will not call premain((String agentArgs, Instrumentation inst) in the loaded agent, but instead
will call agentmain(String agentArgs, Instrumentation inst). This requires Agent-Class to be set in
the agent Manifest.mf.
Setting up a basic agent
The Premain class will contain the method "premain(String agentArgs Instrumentation inst)"
Here is an example:
import java.lang.instrument.Instrumentation;
public class PremainExample {
public static void premain(String agentArgs, Instrumentation inst) {
System.out.println(agentArgs);
}
}
When compiled into a jar file open the Manifest and ensure that it has the Premain-Class attribute.
Here is an example:
Premain-Class: PremainExample
To use the agent with another java program "myProgram" you must define the agent in the JVM
https://riptutorial.com/ 499](https://image.slidesharecdn.com/java-language-pdfroom-240812184155-f7515a4f/85/java-language-programacao-2-PDF-Room-pdf-567-320.jpg)

![Chapter 74: Java Compiler - 'javac'
Remarks
The javac command is used for compiling Java source files to bytecode files. Bytecode files are
platform independent. This means that you can compile your code on one kind of hardware and
operating system, and then run the code on any other platform that supports Java.
The javac command is included in the Java Development Kit (JDK) distributions.
The Java compiler and the rest of the standard Java toolchain places the following restrictions on
the code:
Source code is held in files with the suffix ".java"
•
Bytecodes are held in files with the suffix ".class"
•
For source and bytecode files in the file system, the file pathnames must reflect the package
and class naming.
•
Note: The javac compiler should not be confused with the Just in Time (JIT) compiler which
compiles bytecodes to native code.
Examples
The 'javac' command - getting started
Simple example
Assuming that the "HelloWorld.java" contains the following Java source:
public class HelloWorld {
public static void main(String[] args) {
System.out.println("Hello world!");
}
}
(For an explanation of the above code, please refer to Getting started with Java Language .)
We can compile the above file using this command:
$ javac HelloWorld.java
This produces a file called "HelloWorld.class", which we can then run as follows:
$ java HelloWorld
Hello world!
https://riptutorial.com/ 501](https://image.slidesharecdn.com/java-language-pdfroom-240812184155-f7515a4f/85/java-language-programacao-2-PDF-Room-pdf-569-320.jpg)
![The key points to note from this example are:
The source filename "HelloWorld.java" must match the class name in the source file ... which
is HelloWorld. If they don't match, you will get a compilation error.
1.
The bytecode filename "HelloWorld.class" corresponds to the classname. If you were to
rename the "HelloWorld.class", you would get an error when your tried to run it.
2.
When running a Java application using java, you supply the classname NOT the bytecode
filename.
3.
Example with packages
Most practical Java code uses packages to organize the namespace for classes and reduce the
risk of accidental class name collision.
If we wanted to declare the HelloWorld class in a package call com.example, the "HelloWorld.java"
would contain the following Java source:
package com.example;
public class HelloWorld {
public static void main(String[] args) {
System.out.println("Hello world!");
}
}
This source code file needs to stored in a directory tree whose structure corresponds to the
package naming.
. # the current directory (for this example)
|
----com
|
----example
|
----HelloWorld.java
We can compile the above file using this command:
$ javac com/example/HelloWorld.java
This produces a file called "com/example/HelloWorld.class"; i.e. after compilation, the file structure
should look like this:
. # the current directory (for this example)
|
----com
|
----example
|
----HelloWorld.java
----HelloWorld.class
https://riptutorial.com/ 502](https://image.slidesharecdn.com/java-language-pdfroom-240812184155-f7515a4f/85/java-language-programacao-2-PDF-Room-pdf-570-320.jpg)

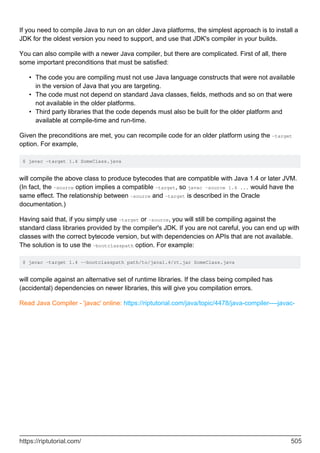
![public class HelloWorld {
public static void main(String[] args) {
JFrame f = new JFrame("Hello, World");
JLabel label = new JLabel("Hello, World");
Container cont = f.getContentPane();
cont.add(label);
f.setSize(400,100);
f.setVisible(true);
f.setDefaultCloseOperation(JFrame.EXIT_ON_CLOSE);
}
}
It has been named HelloWorld.java
Next, we want to compile this program.
You may use any program you want to do this. To run from the command line, see the
documentation on compiling and running your first java program.
Once you have HelloWorld.class, make a new folder and call it whatever you want.
Make another file called manifest.txt and paste into it
Main-Class: HelloWorld
Class-Path: HelloWorld.jar
Put it in the same folder with HelloWorld.class
Use the command line to make your current directory (cd C:YourFolderPathHere on windows)
your folder.
Use Terminal and change directory to the directory (cd /Users/user/Documents/Java/jarfolder on
Mac) your folder
When that is done, type in jar -cvfm HelloWorld.jar manifest.txt HelloWorld.class and press
enter. This makes a jar file (in the folder with your manifest and HelloWorld.class) using the .class
files specified and named HelloWorld.jar. See the Syntax section for information about the options
(like -m and -v).
After these steps, go to your directory with the manifest file and you should find HelloWorld.jar
Clicking on it should display Hello, World in a text box.
Creating JAR, WAR and EAR files
The JAR, WAR and EAR files types are fundamentally ZIP files with a "manifest" file and (for WAR
and EAR files) a particular internal directory / file structure.
The recommended way to create these files is to use a Java-specific build tool which
"understands" the requirements for the respective file types. If you don't use a build tool, then IDE
"export" is the next option to try.
https://riptutorial.com/ 507](https://image.slidesharecdn.com/java-language-pdfroom-240812184155-f7515a4f/85/java-language-programacao-2-PDF-Room-pdf-575-320.jpg)
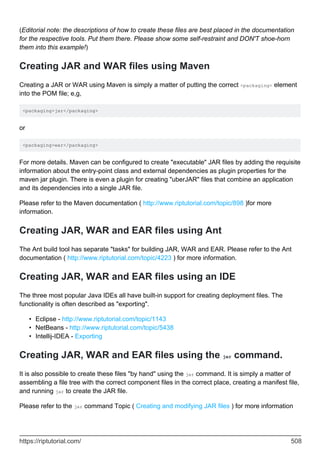
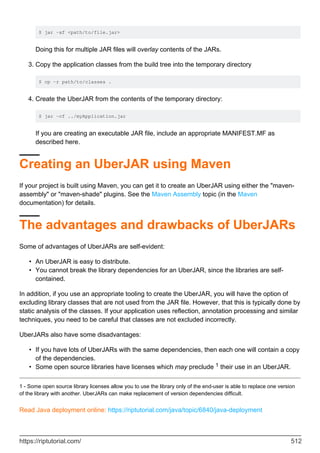

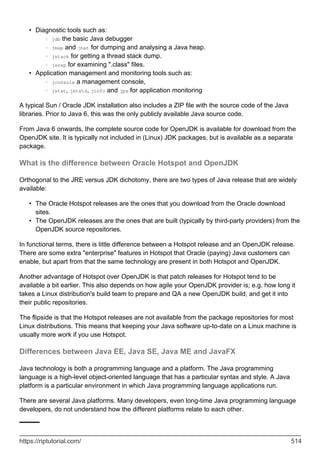
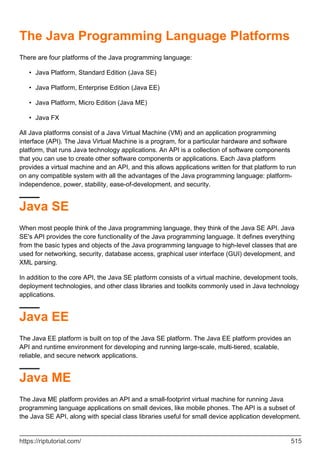
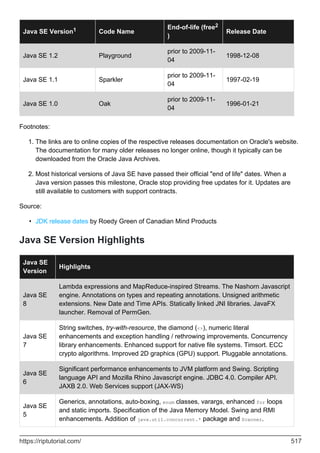

![Chapter 77: Java Floating Point Operations
Introduction
Floating-point numbers are numbers that have fractional parts (usually expressed with a decimal
point). In Java, there is two primitive types for floating-point numbers which are float (uses 4
bytes), and double (uses 8 bytes). This documentation page is for detailing with examples
operations that can be done on floating points in Java.
Examples
Comparing floating point values
You should be careful when comparing floating-point values (float or double) using relational
operators: ==, !=, < and so on. These operators give results according to the binary representations
of the floating point values. For example:
public class CompareTest {
public static void main(String[] args) {
double oneThird = 1.0 / 3.0;
double one = oneThird * 3;
System.out.println(one == 1.0); // prints "false"
}
}
The calculation oneThird has introduced a tiny rounding error, and when we multiply oneThird by 3
we get a result that is slightly different to 1.0.
This problem of inexact representations is more stark when we attempt to mix double and float in
calculations. For example:
public class CompareTest2 {
public static void main(String[] args) {
float floatVal = 0.1f;
double doubleVal = 0.1;
double doubleValCopy = floatVal;
System.out.println(floatVal); // 0.1
System.out.println(doubleVal); // 0.1
System.out.println(doubleValCopy); // 0.10000000149011612
System.out.println(floatVal == doubleVal); // false
System.out.println(doubleVal == doubleValCopy); // false
}
}
The floating point representations used in Java for the float and double types have limited number
of digits of precision. For the float type, the precision is 23 binary digits or about 8 decimal digits.
For the double type, it is 52 bits or about 15 decimal digits. On top of that, some arithmetical
https://riptutorial.com/ 519](https://image.slidesharecdn.com/java-language-pdfroom-240812184155-f7515a4f/85/java-language-programacao-2-PDF-Room-pdf-587-320.jpg)
![operations will introduce rounding errors. Therefore, when a program compares floating point
values, it standard practice to define an acceptable delta for the comparison. If the difference
between the two numbers is less than the delta, they are deemed to be equal. For example
if (Math.abs(v1 - v2) < delta)
Delta compare example:
public class DeltaCompareExample {
private static boolean deltaCompare(double v1, double v2, double delta) {
// return true iff the difference between v1 and v2 is less than delta
return Math.abs(v1 - v2) < delta;
}
public static void main(String[] args) {
double[] doubles = {1.0, 1.0001, 1.0000001, 1.000000001, 1.0000000000001};
double[] deltas = {0.01, 0.00001, 0.0000001, 0.0000000001, 0};
// loop through all of deltas initialized above
for (int j = 0; j < deltas.length; j++) {
double delta = deltas[j];
System.out.println("delta: " + delta);
// loop through all of the doubles initialized above
for (int i = 0; i < doubles.length - 1; i++) {
double d1 = doubles[i];
double d2 = doubles[i + 1];
boolean result = deltaCompare(d1, d2, delta);
System.out.println("" + d1 + " == " + d2 + " ? " + result);
}
System.out.println();
}
}
}
Result:
delta: 0.01
1.0 == 1.0001 ? true
1.0001 == 1.0000001 ? true
1.0000001 == 1.000000001 ? true
1.000000001 == 1.0000000000001 ? true
delta: 1.0E-5
1.0 == 1.0001 ? false
1.0001 == 1.0000001 ? false
1.0000001 == 1.000000001 ? true
1.000000001 == 1.0000000000001 ? true
delta: 1.0E-7
1.0 == 1.0001 ? false
1.0001 == 1.0000001 ? false
1.0000001 == 1.000000001 ? true
https://riptutorial.com/ 520](https://image.slidesharecdn.com/java-language-pdfroom-240812184155-f7515a4f/85/java-language-programacao-2-PDF-Room-pdf-588-320.jpg)
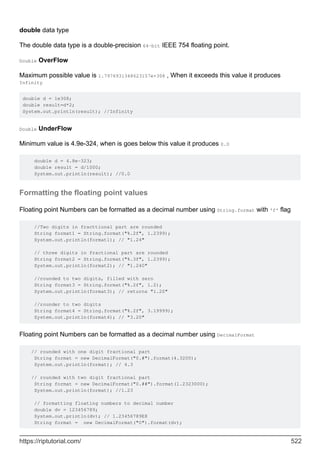
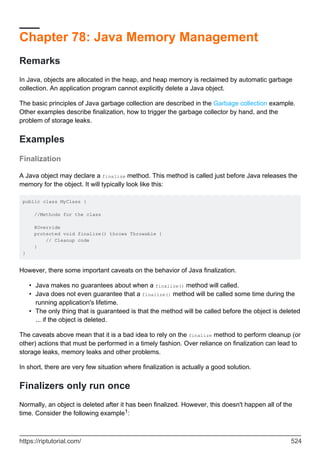
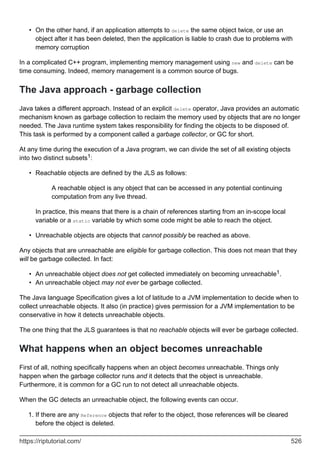
![If the object is finalizable, then it will be finalized. This happens before the object is deleted.
2.
The object can be deleted, and the memory it occupies can be reclaimed.
3.
Note that there is a clear sequence in which the above events can occur, but nothing requires the
garbage collector to perform the final deletion of any specific object in any specific time-frame.
Examples of reachable and unreachable objects
Consider the following example classes:
// A node in simple "open" linked-list.
public class Node {
private static int counter = 0;
public int nodeNumber = ++counter;
public Node next;
}
public class ListTest {
public static void main(String[] args) {
test(); // M1
System.out.prinln("Done"); // M2
}
private static void test() {
Node n1 = new Node(); // T1
Node n2 = new Node(); // T2
Node n3 = new Node(); // T3
n1.next = n2; // T4
n2 = null; // T5
n3 = null; // T6
}
}
Let us examine what happens when test() is called. Statements T1, T2 and T3 create Node
objects, and the objects are all reachable via the n1, n2 and n3 variables respectively. Statement T4
assigns the reference to the 2nd Node object to the next field of the first one. When that is done, the
2nd Node is reachable via two paths:
n2 -> Node2
n1 -> Node1, Node1.next -> Node2
In statement T5, we assign null to n2. This breaks the first of the reachability chains for Node2, but
the second one remains unbroken, so Node2 is still reachable.
In statement T6, we assign null to n3. This breaks the only reachability chain for Node3, which
makes Node3 unreachable. However, Node1 and Node2 are both still reachable via the n1 variable.
Finally, when the test() method returns, its local variables n1, n2 and n3 go out of scope, and
therefore cannot be accessed by anything. This breaks the remaining reachability chains for Node1
and Node2, and all of the Node objects are nor unreachable and eligible for garbage collection.
https://riptutorial.com/ 527](https://image.slidesharecdn.com/java-language-pdfroom-240812184155-f7515a4f/85/java-language-programacao-2-PDF-Room-pdf-595-320.jpg)
![The output of the above commands will resemble the following:
uintx InitialHeapSize := 20655360 {product}
uintx MaxHeapSize := 331350016 {product}
uintx PermSize = 21757952 {pd product}
uintx MaxPermSize = 85983232 {pd product}
intx ThreadStackSize = 1024 {pd product}
The sizes are given in bytes.
Memory leaks in Java
In the Garbage collection example, we implied that Java solves the problem of memory leaks. This
is not actually true. A Java program can leak memory, though the causes of the leaks are rather
different.
Reachable objects can leak
Consider the following naive stack implementation.
public class NaiveStack {
private Object[] stack = new Object[100];
private int top = 0;
public void push(Object obj) {
if (top >= stack.length) {
throw new StackException("stack overflow");
}
stack[top++] = obj;
}
public Object pop() {
if (top <= 0) {
throw new StackException("stack underflow");
}
return stack[--top];
}
public boolean isEmpty() {
return top == 0;
}
}
When you push an object and then immediately pop it, there will still be a reference to the object in
the stack array.
The logic of the stack implementation means that that reference cannot be returned to a client of
the API. If an object has been popped then we can prove that it cannot "be accessed in any
potential continuing computation from any live thread". The problem is that a current generation
JVM cannot prove this. Current generation JVMs do not consider the logic of the program in
determining whether references are reachable. (For a start, it is not practical.)
But setting aside the issue of what reachability really means, we clearly have a situation here
https://riptutorial.com/ 529](https://image.slidesharecdn.com/java-language-pdfroom-240812184155-f7515a4f/85/java-language-programacao-2-PDF-Room-pdf-597-320.jpg)
![where the NaiveStack implementation is "hanging onto" objects that ought to be reclaimed. That is
a memory leak.
In this case, the solution is straightforward:
public Object pop() {
if (top <= 0) {
throw new StackException("stack underflow");
}
Object popped = stack[--top];
stack[top] = null; // Overwrite popped reference with null.
return popped;
}
Caches can be memory leaks
A common strategy for improving service performance is to cache results. The idea is that you
keep a record of common requests and their results in an in-memory data structure known as a
cache. Then, each time a request is made, you lookup the request in the cache. If the lookup
succeeds, you return the corresponding saved results.
This strategy can be very effective if implemented properly. However, if implemented incorrectly, a
cache can be a memory leak. Consider the following example:
public class RequestHandler {
private Map<Task, Result> cache = new HashMap<>();
public Result doRequest(Task task) {
Result result = cache.get(task);
if (result == null) {
result == doRequestProcessing(task);
cache.put(task, result);
}
return result;
}
}
The problem with this code is that while any call to doRequest could add a new entry to the cache,
there is nothing to remove them. If the service is continually getting different tasks, then the cache
will eventually consume all available memory. This is a form of memory leak.
One approach to solving this is to use a cache with a maximum size, and throw out old entries
when the cache exceeds the maximum. (Throwing out the least recently used entry is a good
strategy.) Another approach is to build the cache using WeakHashMap so that the JVM can evict
cache entries if the heap starts getting too full.
Read Java Memory Management online: https://riptutorial.com/java/topic/2804/java-memory-
management
https://riptutorial.com/ 530](https://image.slidesharecdn.com/java-language-pdfroom-240812184155-f7515a4f/85/java-language-programacao-2-PDF-Room-pdf-598-320.jpg)
![Chapter 79: Java Memory Model
Remarks
The Java Memory Model is the section of the JLS that specifies the conditions under which one
thread is guaranteed to see the effects of memory writes made by another thread. The relevant
section in recent editions is "JLS 17.4 Memory Model" (in Java 8, Java 7, Java 6)
There was a major overhaul of the Java Memory Model in Java 5 which (among other things)
changed the way that volatile worked. Since then, the memory model been essentially
unchanged.
Examples
Motivation for the Memory Model
Consider the following example:
public class Example {
public int a, b, c, d;
public void doIt() {
a = b + 1;
c = d + 1;
}
}
If this class is used is a single-threaded application, then the observable behavior will be exactly
as you would expect. For instance:
public class SingleThreaded {
public static void main(String[] args) {
Example eg = new Example();
System.out.println(eg.a + ", " + eg.c);
eg.doIt();
System.out.println(eg.a + ", " + eg.c);
}
}
will output:
0, 0
1, 1
As far as the "main" thread can tell, the statements in the main() method and the doIt() method
will be executed in the order that they are written in the source code. This is a clear requirement of
the Java Language Specification (JLS).
https://riptutorial.com/ 531](https://image.slidesharecdn.com/java-language-pdfroom-240812184155-f7515a4f/85/java-language-programacao-2-PDF-Room-pdf-599-320.jpg)
![Now consider the same class used in a multi-threaded application.
public class MultiThreaded {
public static void main(String[] args) {
final Example eg = new Example();
new Thread(new Runnable() {
public void run() {
while (true) {
eg.doIt();
}
}
}).start();
while (true) {
System.out.println(eg.a + ", " + eg.c);
}
}
}
What will this print?
In fact, according to the JLS it is not possible to predict that this will print:
You will probably see a few lines of 0, 0 to start with.
•
Then you probably see lines like N, N or N, N + 1.
•
You might see lines like N + 1, N.
•
In theory, you might even see that the 0, 0 lines continue forever1.
•
1 - In practice the presence of the println statements is liable to cause some serendipitous synchronization and
memory cache flushing. That is likely to hide some of the effects that would cause the above behavior.
So how can we explain these?
Reordering of assignments
One possible explanation for unexpected results is that the JIT compiler has changed the order of
the assignments in the doIt() method. The JLS requires that statements appear to execute in
order from the perspective of the current thread. In this case, nothing in the code of the doIt()
method can observe the effect of a (hypothetical) reordering of those two statement. This means
that the JIT compiler would be permitted to do that.
Why would it do that?
On typical modern hardware, machine instructions are executed using a instruction pipeline which
allows a sequence of instructions to be in different stages. Some phases of instruction execution
take longer than others, and memory operations tend to take a longer time. A smart compiler can
optimize the instruction throughput of the pipeline by ordering the instructions to maximize the
amount of overlap. This may lead to executing parts of statements out of order. The JLS permits
this provided that not affect the result of the computation from the perspective of the current thread
.
Effects of memory caches
https://riptutorial.com/ 532](https://image.slidesharecdn.com/java-language-pdfroom-240812184155-f7515a4f/85/java-language-programacao-2-PDF-Room-pdf-600-320.jpg)
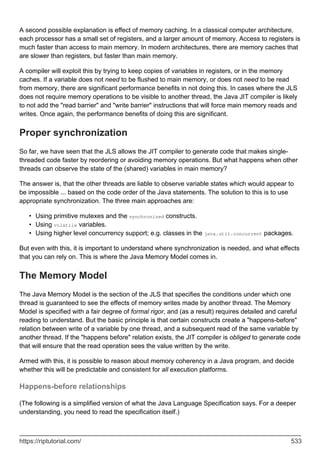
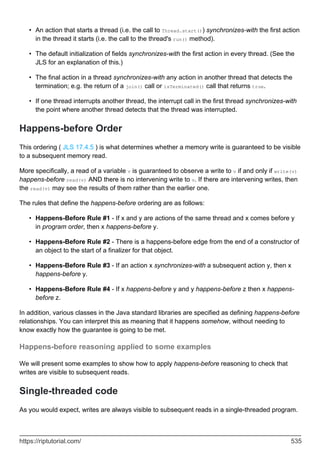

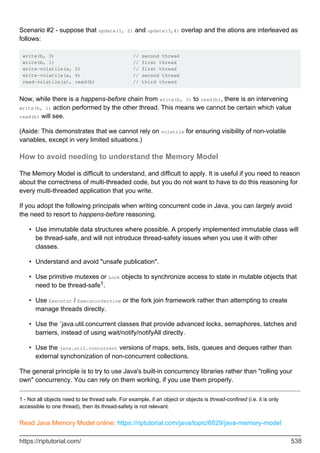
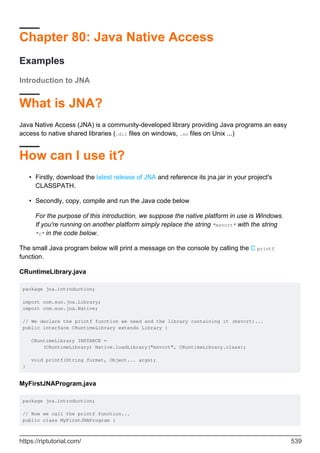
![public static void main(String args[]) {
CRuntimeLibrary.INSTANCE.printf("Hello World from JNA !");
}
}
Where to go now?
Jump into another topic here or jump to the official site.
Read Java Native Access online: https://riptutorial.com/java/topic/5244/java-native-access
https://riptutorial.com/ 540](https://image.slidesharecdn.com/java-language-pdfroom-240812184155-f7515a4f/85/java-language-programacao-2-PDF-Room-pdf-608-320.jpg)
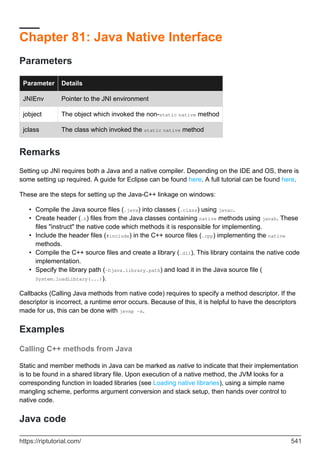
![/*** com/example/jni/JNIJava.java **/
package com.example.jni;
public class JNIJava {
static {
System.loadLibrary("libJNI_CPP");
}
// Obviously, native methods may not have a body defined in Java
public native void printString(String name);
public static native double average(int[] nums);
public static void main(final String[] args) {
JNIJava jniJava = new JNIJava();
jniJava.printString("Invoked C++ 'printString' from Java");
double d = average(new int[]{1, 2, 3, 4, 7});
System.out.println("Got result from C++ 'average': " + d);
}
}
C++ code
Header files containing native function declarations should be generated using the javah tool on
target classes. Running the following command at the build directory :
javah -o com_example_jni_JNIJava.hpp com.example.jni.JNIJava
... produces the following header file (comments stripped for brevity) :
// com_example_jni_JNIJava.hpp
/* DO NOT EDIT THIS FILE - it is machine generated */
#include <jni.h> // The JNI API declarations
#ifndef _Included_com_example_jni_JNIJava
#define _Included_com_example_jni_JNIJava
#ifdef __cplusplus
extern "C" { // This is absolutely required if using a C++ compiler
#endif
JNIEXPORT void JNICALL Java_com_example_jni_JNIJava_printString
(JNIEnv *, jobject, jstring);
JNIEXPORT jdouble JNICALL Java_com_example_jni_JNIJava_average
(JNIEnv *, jclass, jintArray);
#ifdef __cplusplus
}
#endif
#endif
Here is an example implementation :
https://riptutorial.com/ 542](https://image.slidesharecdn.com/java-language-pdfroom-240812184155-f7515a4f/85/java-language-programacao-2-PDF-Room-pdf-610-320.jpg)
![// com_example_jni_JNIJava.cpp
#include <iostream>
#include "com_example_jni_JNIJava.hpp"
using namespace std;
JNIEXPORT void JNICALL Java_com_example_jni_JNIJava_printString(JNIEnv *env, jobject jthis,
jstring string) {
const char *stringInC = env->GetStringUTFChars(string, NULL);
if (NULL == stringInC)
return;
cout << stringInC << endl;
env->ReleaseStringUTFChars(string, stringInC);
}
JNIEXPORT jdouble JNICALL Java_com_example_jni_JNIJava_average(JNIEnv *env, jclass jthis,
jintArray intArray) {
jint *intArrayInC = env->GetIntArrayElements(intArray, NULL);
if (NULL == intArrayInC)
return -1;
jsize length = env->GetArrayLength(intArray);
int sum = 0;
for (int i = 0; i < length; i++) {
sum += intArrayInC[i];
}
env->ReleaseIntArrayElements(intArray, intArrayInC, 0);
return (double) sum / length;
}
Output
Running the example class above yields the following output :
Invoked C++ 'printString' from Java
Got result from C++ 'average': 3.4
Calling Java methods from C++ (callback)
Calling a Java method from native code is a two-step process :
obtain a method pointer with the GetMethodID JNI function, using the method name and
descriptor ;
1.
call one of the Call*Method functions listed here.
2.
Java code
/*** com.example.jni.JNIJavaCallback.java ***/
package com.example.jni;
public class JNIJavaCallback {
static {
System.loadLibrary("libJNI_CPP");
https://riptutorial.com/ 543](https://image.slidesharecdn.com/java-language-pdfroom-240812184155-f7515a4f/85/java-language-programacao-2-PDF-Room-pdf-611-320.jpg)
![}
public static void main(String[] args) {
new JNIJavaCallback().callback();
}
public native void callback();
public static void printNum(int i) {
System.out.println("Got int from C++: " + i);
}
public void printFloat(float i) {
System.out.println("Got float from C++: " + i);
}
}
C++ code
// com_example_jni_JNICppCallback.cpp
#include <iostream>
#include "com_example_jni_JNIJavaCallback.h"
using namespace std;
JNIEXPORT void JNICALL Java_com_example_jni_JNIJavaCallback_callback(JNIEnv *env, jobject
jthis) {
jclass thisClass = env->GetObjectClass(jthis);
jmethodID printFloat = env->GetMethodID(thisClass, "printFloat", "(F)V");
if (NULL == printFloat)
return;
env->CallVoidMethod(jthis, printFloat, 5.221);
jmethodID staticPrintInt = env->GetStaticMethodID(thisClass, "printNum", "(I)V");
if (NULL == staticPrintInt)
return;
env->CallVoidMethod(jthis, staticPrintInt, 17);
}
Output
Got float from C++: 5.221
Got int from C++: 17
Getting the descriptor
Descriptors (or internal type signatures) are obtained using the javap program on the compiled
.class file. Here is the output of javap -p -s com.example.jni.JNIJavaCallback :
Compiled from "JNIJavaCallback.java"
public class com.example.jni.JNIJavaCallback {
https://riptutorial.com/ 544](https://image.slidesharecdn.com/java-language-pdfroom-240812184155-f7515a4f/85/java-language-programacao-2-PDF-Room-pdf-612-320.jpg)
![static {};
descriptor: ()V
public com.example.jni.JNIJavaCallback();
descriptor: ()V
public static void main(java.lang.String[]);
descriptor: ([Ljava/lang/String;)V
public native void callback();
descriptor: ()V
public static void printNum(int);
descriptor: (I)V // <---- Needed
public void printFloat(float);
descriptor: (F)V // <---- Needed
}
Loading native libraries
The common idiom for loading shared library files in Java is the following :
public class ClassWithNativeMethods {
static {
System.loadLibrary("Example");
}
public native void someNativeMethod(String arg);
...
Calls to System.loadLibrary are almost always static so as to occur during class loading, ensuring
that no native method can execute before the shared library has been loaded. However the
following is possible :
public class ClassWithNativeMethods {
// Call this before using any native method
public static void prepareNativeMethods() {
System.loadLibrary("Example");
}
...
This allows to defer shared library loading until necessary, but requires extra care to avoid
java.lang.UnsatisfiedLinkErrors.
Target file lookup
Shared library files are searched for in the paths defined by the java.library.path system property,
which can be overriden using the -Djava.library.path= JVM argument at runtime :
java -Djava.library.path=path/to/lib/:path/to/other/lib MainClassWithNativeMethods
https://riptutorial.com/ 545](https://image.slidesharecdn.com/java-language-pdfroom-240812184155-f7515a4f/85/java-language-programacao-2-PDF-Room-pdf-613-320.jpg)

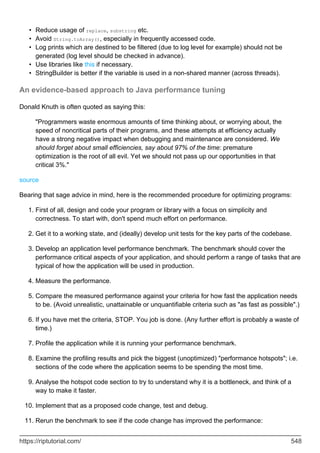
![The problem with catching too broad a set of exceptions is that the handler typically cannot handle
all of them appropriately. In the case of the Exception and so on, it is difficult for the programmer to
predict what could be caught; i.e. what to expect.
In general, the correct solution is to deal with the exceptions that are thrown. For example, you
can catch them and handle them in situ:
try {
InputStream is = new FileInputStream(fileName);
// process the input
} catch (FileNotFoundException ex) {
System.out.println("Could not open file " + fileName);
}
or you can declare them as thrown by the enclosing method.
There are very few situations where catching Exception is appropriate. The only one that arises
commonly is something like this:
public static void main(String[] args) {
try {
// do stuff
} catch (Exception ex) {
System.err.println("Unfortunately an error has occurred. " +
"Please report this to X Y Z");
// Write stacktrace to a log file.
System.exit(1);
}
}
Here we genuinely want to deal with all exceptions, so catching Exception (or even Throwable) is
correct.
1 - Also known as Pokemon Exception Handling.
Pitfall - Throwing Throwable, Exception, Error or RuntimeException
While catching the Throwable, Exception, Error and RuntimeException exceptions is bad, throwing
them is even worse.
The basic problem is that when your application needs to handle exceptions, the presence of the
top level exceptions make it hard to discriminate between different error conditions. For example
try {
InputStream is = new FileInputStream(someFile); // could throw IOException
...
if (somethingBad) {
throw new Exception(); // WRONG
}
} catch (IOException ex) {
System.err.println("cannot open ...");
https://riptutorial.com/ 552](https://image.slidesharecdn.com/java-language-pdfroom-240812184155-f7515a4f/85/java-language-programacao-2-PDF-Room-pdf-620-320.jpg)
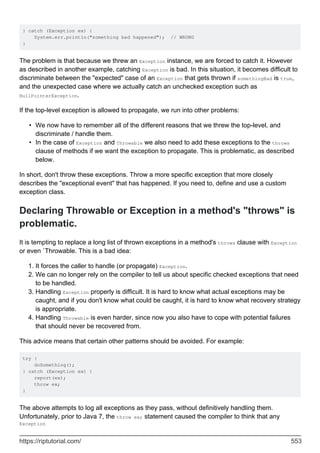

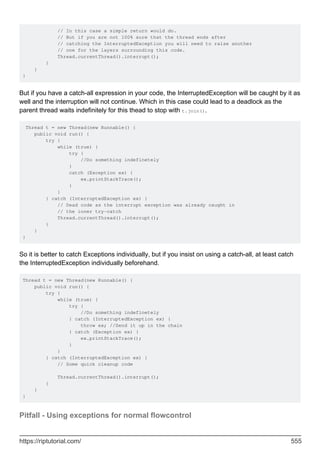
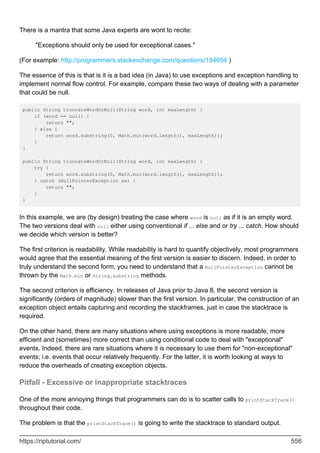
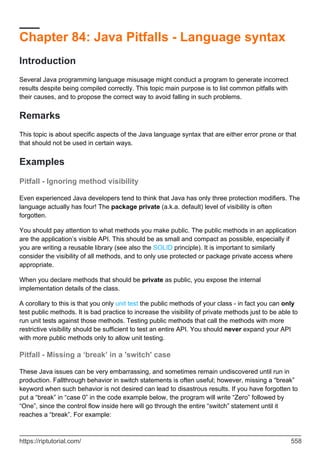
![public static void switchCasePrimer() {
int caseIndex = 0;
switch (caseIndex) {
case 0:
System.out.println("Zero");
case 1:
System.out.println("One");
break;
case 2:
System.out.println("Two");
break;
default:
System.out.println("Default");
}
}
In most cases, the cleaner solution would be to use interfaces and move code with specific
behaviour into separate implementations (composition over inheritance)
If a switch-statement is unavoidable it is recommended to document "expected" fallthroughs if they
occur. That way you show fellow developers that you are aware of the missing break, and that this
is expected behaviour.
switch(caseIndex) {
[...]
case 2:
System.out.println("Two");
// fallthrough
default:
System.out.println("Default");
Pitfall - Misplaced semicolons and missing braces
This is a mistake that causes real confusion for Java beginners, at least the first time that they do
it. Instead of writing this:
if (feeling == HAPPY)
System.out.println("Smile");
else
System.out.println("Frown");
they accidentally write this:
if (feeling == HAPPY);
System.out.println("Smile");
else
System.out.println("Frown");
and are puzzled when the Java compiler tells them that the else is misplaced. The Java compiler
with interpret the above as follows:
if (feeling == HAPPY)
/*empty statement*/ ;
https://riptutorial.com/ 559](https://image.slidesharecdn.com/java-language-pdfroom-240812184155-f7515a4f/85/java-language-programacao-2-PDF-Room-pdf-627-320.jpg)
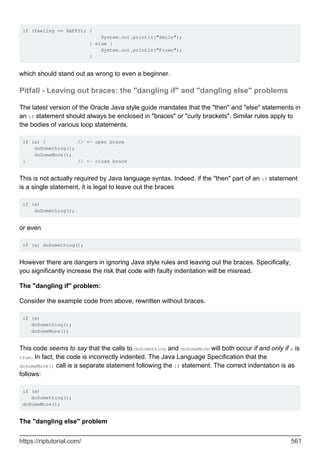
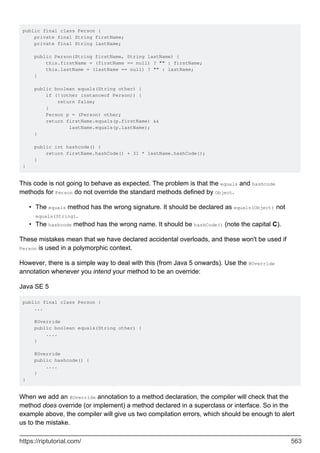
![Pitfall - Octal literals
Consider the following code snippet:
// Print the sum of the numbers 1 to 10
int count = 0;
for (int i = 1; i < 010; i++) { // Mistake here ....
count = count + i;
}
System.out.println("The sum of 1 to 10 is " + count);
A Java beginner might be surprised to know that the above program prints the wrong answer. It
actually prints the sum of the numbers 1 to 8.
The reason is that an integer literal that starts with the digit zero ('0') is interpreted by the Java
compiler as an octal literal, not a decimal literal as you might expect. Thus, 010 is the octal number
10, which is 8 in decimal.
Pitfall - Declaring classes with the same names as standard classes
Sometimes, programmers who are new to Java make the mistake of defining a class with a name
that is the same as a widely used class. For example:
package com.example;
/**
* My string utilities
*/
public class String {
....
}
Then they wonder why they get unexpected errors. For example:
package com.example;
public class Test {
public static void main(String[] args) {
System.out.println("Hello world!");
}
}
If you compile and then attempt to run the above classes you will get an error:
$ javac com/example/*.java
$ java com.example.Test
Error: Main method not found in class test.Test, please define the main method as:
public static void main(String[] args)
or a JavaFX application class must extend javafx.application.Application
Someone looking at the code for the Test class would see the declaration of main and look at its
signature and wonder what the java command is complaining about. But in fact, the java command
https://riptutorial.com/ 564](https://image.slidesharecdn.com/java-language-pdfroom-240812184155-f7515a4f/85/java-language-programacao-2-PDF-Room-pdf-632-320.jpg)
![is telling the truth.
When we declare a version of String in the same package as Test, this version takes precedence
over the automatic import of java.lang.String. Thus, the signature of the Test.main method is
actually
void main(com.example.String[] args)
instead of
void main(java.lang.String[] args)
and the java command will not recognize that as an entrypoint method.
Lesson: Do not define classes that have the same name as existing classes in java.lang, or other
commonly used classes in the Java SE library. If you do that, you are setting yourself open for all
sorts of obscure errors.
Pitfall - Using '==' to test a boolean
Sometimes a new Java programmer will write code like this:
public void check(boolean ok) {
if (ok == true) { // Note 'ok == true'
System.out.println("It is OK");
}
}
An experienced programmer would spot that as being clumsy and want to rewrite it as:
public void check(boolean ok) {
if (ok) {
System.out.println("It is OK");
}
}
However, there is more wrong with ok == true than simple clumsiness. Consider this variation:
public void check(boolean ok) {
if (ok = true) { // Oooops!
System.out.println("It is OK");
}
}
Here the programmer has mistyped == as = ... and now the code has a subtle bug. The expression
x = true unconditionally assigns true to x and then evaluates to true. In other words, the check
method will now print "It is OK" no matter what the parameter was.
The lesson here is to get out of the habit of using == false and == true. In addition to being
verbose, they make your coding more error prone.
https://riptutorial.com/ 565](https://image.slidesharecdn.com/java-language-pdfroom-240812184155-f7515a4f/85/java-language-programacao-2-PDF-Room-pdf-633-320.jpg)
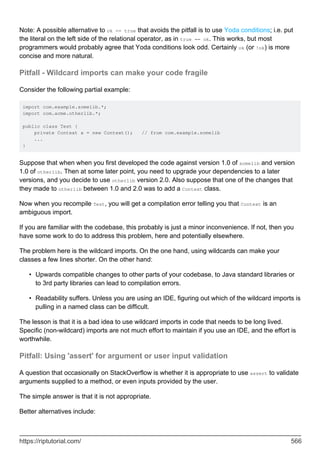
![Throwing an IllegalArgumentException using custom code.
•
Using the Preconditions methods available in Google Guava library.
•
Using the Validate methods available in Apache Commons Lang3 library.
•
This is what the Java Language Specification (JLS 14.10, for Java 8) advises on this matter:
Typically, assertion checking is enabled during program development and testing, and
disabled for deployment, to improve performance.
Because assertions may be disabled, programs must not assume that the expressions
contained in assertions will be evaluated. Thus, these boolean expressions should
generally be free of side effects. Evaluating such a boolean expression should not
affect any state that is visible after the evaluation is complete. It is not illegal for a
boolean expression contained in an assertion to have a side effect, but it is generally
inappropriate, as it could cause program behavior to vary depending on whether
assertions were enabled or disabled.
In light of this, assertions should not be used for argument checking in public methods.
Argument checking is typically part of the contract of a method, and this contract must
be upheld whether assertions are enabled or disabled.
A secondary problem with using assertions for argument checking is that erroneous
arguments should result in an appropriate run-time exception (such as
IllegalArgumentException, ArrayIndexOutOfBoundsException, or NullPointerException). An
assertion failure will not throw an appropriate exception. Again, it is not illegal to use
assertions for argument checking on public methods, but it is generally inappropriate. It
is intended that AssertionError never be caught, but it is possible to do so, thus the
rules for try statements should treat assertions appearing in a try block similarly to the
current treatment of throw statements.
Pitfall of Auto-Unboxing Null Objects into Primitives
public class Foobar {
public static void main(String[] args) {
// example:
Boolean ignore = null;
if (ignore == false) {
System.out.println("Do not ignore!");
}
}
}
The pitfall here is that null is compared to false. Since we're comparing a primitive boolean against
a Boolean, Java attempts to unbox the the Boolean Object into a primitive equivalent, ready for
comparison. However, since that value is null, a NullPointerException is thrown.
Java is incapable of comparing primitive types against null values, which causes a
NullPointerException at runtime. Consider the primitive case of the condition false == null; this
would generate a compile time error incomparable types: int and <null>.
https://riptutorial.com/ 567](https://image.slidesharecdn.com/java-language-pdfroom-240812184155-f7515a4f/85/java-language-programacao-2-PDF-Room-pdf-635-320.jpg)


![* Sum the values in an array of integers.
* @arg values the array to be summed
* @return the sum
**/
public int sum(int[] values) {
int sum = 0;
for (int value : values) {
sum += value;
}
return sum;
}
The second version is how you need to code the method if you are in the habit of using null to
represent an empty array.
/**
* Sum the values in an array of integers.
* @arg values the array to be summed, or null.
* @return the sum, or zero if the array is null.
**/
public int sum(int[] values) {
int sum = 0;
if (values != null) {
for (int value : values) {
sum += value;
}
}
return sum;
}
As you can see, the code is a bit more complicated. This is directly attributable to the decision to
use null in this way.
Now consider if this array that might be a null is used in lots of places. At each place where you
use it, you need to consider whether you need to test for null. If you miss a null test that needs to
be there, you risk a NullPointerException. Hence, the strategy of using null in this way leads to
your application being more fragile; i.e. more vulnerable to the consequences of programmer
errors.
The lesson here is to use empty arrays and empty lists when that is what you mean.
int[] values = new int[0]; // always empty
List<Integer> list = new ArrayList(); // initially empty
List<Integer> list = Collections.emptyList(); // always empty
The space overhead is small, and there are other ways to minimize it if this this is a worthwhile
thing to do.
Pitfall - "Making good" unexpected nulls
On StackOverflow, we often see code like this in Answers:
https://riptutorial.com/ 571](https://image.slidesharecdn.com/java-language-pdfroom-240812184155-f7515a4f/85/java-language-programacao-2-PDF-Room-pdf-639-320.jpg)
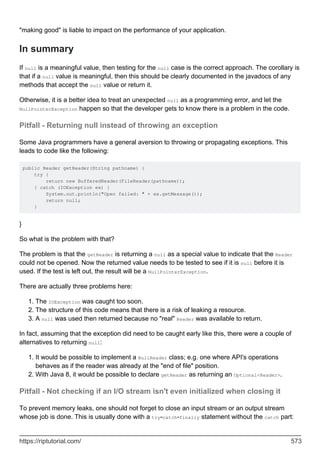


![This works very well as long as all parameters can be converted to strings using
String.valueOf(Object). If the log message compuation is more complex, the log level can be
checked before logging:
if (LOG.isDebugEnabled()) {
// Argument expression evaluated only when DEBUG is enabled
LOG.debug("Request coming from {}, parameters: {}", myInetAddress,
Arrays.toString(veryLongParamArray);
}
Here, LOG.debug() with the costly Arrays.toString(Obect[]) computation is processed only when
DEBUG is actually enabled.
Pitfall - String concatenation in a loop does not scale
Consider the following code as an illustration:
public String joinWords(List<String> words) {
String message = "";
for (String word : words) {
message = message + " " + word;
}
return message;
}
Unfortunate this code is inefficient if the words list is long. The root of the problem is this statement:
message = message + " " + word;
For each loop iteration, this statement creates a new message string containing a copy of all
characters in the original message string with extra characters appended to it. This generates a lot
of temporary strings, and does a lot of copying.
When we analyse joinWords, assuming that there are N words with an average length of M, we find
that O(N) temporary strings are created and O(M.N2) characters will be copied in the process. The
N2 component is particularly troubling.
The recommended approach for this kind of problem1 is to use a StringBuilder instead of string
concatenation as follows:
public String joinWords2(List<String> words) {
StringBuilder message = new StringBuilder();
for (String word : words) {
message.append(" ").append(word);
}
return message.toString();
}
The analysis of joinWords2 needs to take account of the overheads of "growing" the StringBuilder
backing array that holds the builder's characters. However, it turns out that the number of new
objects created is O(logN) and that the number of characters copied is O(M.N) characters. The
https://riptutorial.com/ 577](https://image.slidesharecdn.com/java-language-pdfroom-240812184155-f7515a4f/85/java-language-programacao-2-PDF-Room-pdf-645-320.jpg)
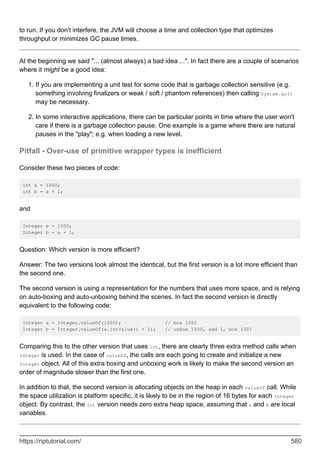
![Another big reason why primitives are faster then their boxed equivalent is how their respective
array types are laid out in memory.
If you take int[] and Integer[] as an example, in the case of an int[] the int values are
contiguously laid out in memory. But in the case of an Integer[] it's not the values that are laid out,
but references (pointers) to Integer objects, which in turn contain the actual int values.
Besides being an extra level of indirection, this can be a big tank when it comes to cache locality
when iterating over the values. In the case of an int[] the CPU could fetch all the values in the
array, into it's cache at once, because they are contiguous in memory. But in the case of an
Integer[] the CPU potentially has to do an additional memory fetch for each element, since the
array only contains references to the actual values.
In short, using primitive wrapper types is relatively expensive in both CPU and memory resources.
Using them unnecessarily is in efficient.
Pitfall - Iterating a Map's keys can be inefficient
The following example code is slower than it needs to be :
Map<String, String> map = new HashMap<>();
for (String key : map.keySet()) {
String value = map.get(key);
// Do something with key and value
}
That is because it requires a map lookup (the get() method) for each key in the map. This lookup
may not be efficient (in a HashMap, it entails calling hashCode on the key, then looking up the
correct bucket in internal data structures, and sometimes even calling equals). On a large map, this
may not be a trivial overhead.
The correct way of avoiding this is to iterate on the map's entries, which is detailed in the
Collections topic
Pitfall - Using size() to test if a collection is empty is inefficient.
The Java Collections Framework provides two related methods for all Collection objects:
size() returns the number of entries in a Collection, and
•
isEmpty() method returns true if (and only if) the Collection is empty.
•
Both methods can be used to test for collection emptiness. For example:
Collection<String> strings = new ArrayList<>();
boolean isEmpty_wrong = strings.size() == 0; // Avoid this
boolean isEmpty = strings.isEmpty(); // Best
While these approaches look the same, some collection implementations do not store the size. For
such a collection, the implementation of size() needs to calculate the size each time it is called.
https://riptutorial.com/ 581](https://image.slidesharecdn.com/java-language-pdfroom-240812184155-f7515a4f/85/java-language-programacao-2-PDF-Room-pdf-649-320.jpg)
![For instance:
A simple linked list class (but not the java.util.LinkedList) might need to traverse the list to
count the elements.
•
The ConcurrentHashMap class needs to sum the entries in all of the map's "segments".
•
A lazy implementation of a collection might need to realize the entire collection in memory in
order to count the elements.
•
By contrast, an isEmpty() method only needs to test if there is at least one element in the
collection. This does not entail counting the elements.
While size() == 0 is not always less efficient that isEmpty(), it is inconceivable for a properly
implemented isEmpty() to be less efficient than size() == 0. Hence isEmpty() is preferred.
Pitfall - Efficiency concerns with regular expressions
Regular expression matching is a powerful tool (in Java, and in other contexts) but it does have
some drawbacks. One of these that regular expressions tends to be rather expensive.
Pattern and Matcher instances should be reused
Consider the following example:
/**
* Test if all strings in a list consist of English letters and numbers.
* @param strings the list to be checked
* @return 'true' if an only if all strings satisfy the criteria
* @throws NullPointerException if 'strings' is 'null' or a 'null' element.
*/
public boolean allAlphanumeric(List<String> strings) {
for (String s : strings) {
if (!s.matches("[A-Za-z0-9]*")) {
return false;
}
}
return true;
}
This code is correct, but it is inefficient. The problem is in the matches(...) call. Under the hood,
s.matches("[A-Za-z0-9]*") is equivalent to this:
Pattern.matches(s, "[A-Za-z0-9]*")
which is in turn equivalent to
Pattern.compile("[A-Za-z0-9]*").matcher(s).matches()
The Pattern.compile("[A-Za-z0-9]*") call parses the regular expression, analyze it, and construct a
Pattern object that holds the data structure that will be used by the regex engine. This is a non-
trivial computation. Then a Matcher object is created to wrap the s argument. Finally we call match()
https://riptutorial.com/ 582](https://image.slidesharecdn.com/java-language-pdfroom-240812184155-f7515a4f/85/java-language-programacao-2-PDF-Room-pdf-650-320.jpg)
![to do the actual pattern matching.
The problem is that this work is all repeated for each loop iteration. The solution is to restructure
the code as follows:
private static Pattern ALPHA_NUMERIC = Pattern.compile("[A-Za-z0-9]*");
public boolean allAlphanumeric(List<String> strings) {
Matcher matcher = ALPHA_NUMERIC.matcher("");
for (String s : strings) {
matcher.reset(s);
if (!matcher.matches()) {
return false;
}
}
return true;
}
Note that the javadoc for Pattern states:
Instances of this class are immutable and are safe for use by multiple concurrent
threads. Instances of the Matcher class are not safe for such use.
Don't use match() when you should use find()
Suppose you want to test if a string s contains three or more digits in a row. You cn express this in
various ways including:
if (s.matches(".*[0-9]{3}.*")) {
System.out.println("matches");
}
or
if (Pattern.compile("[0-9]{3}").matcher(s).find()) {
System.out.println("matches");
}
The first one is more concise, but it is also likely to be less efficient. On the face of it, the first
version is going to try to match the entire string against the pattern. Furthermore, since ".*" is a
"greedy" pattern, the pattern matcher is likely to advance "eagerly" try to the end of the string, and
backtrack until it finds a match.
By contrast, the second version will search from left to right and will stop searching as soon as it
finds the 3 digits in a row.
Use more efficient alternatives to regular expressions
Regular expressions are a powerful tool, but they should not be your only tool. A lot of tasks can
be done more efficiently in other ways. For example:
https://riptutorial.com/ 583](https://image.slidesharecdn.com/java-language-pdfroom-240812184155-f7515a4f/85/java-language-programacao-2-PDF-Room-pdf-651-320.jpg)
![a version of Java where the hashtable size is tunable and make sure that you tune the size it
appropriately. Otherwise, the performance of intern is liable to degrade as the pool gets larger.
Interning as a potential denial of service vector
The hashcode algorithm for strings is well-known. If you intern strings supplied by malicious users
or applications, this could be used as part of a denial of service (DoS) attack. If the malicious
agent arranges that all of the strings it provides have the same hash code, this could lead to an
unbalanced hash table and O(N) performance for intern ... where N is the number of collided
strings.
(There are simpler / more effective ways to launch a DoS attack against a service. However, this
vector could be used if the goal of the DoS attack is to break security, or to evade first-line DoS
defences.)
Pitfall - Small reads / writes on unbuffered streams are inefficient
Consider the following code to copy one file to another:
import java.io.*;
public class FileCopy {
public static void main(String[] args) throws Exception {
try (InputStream is = new FileInputStream(args[0]);
OutputStream os = new FileOutputStream(args[1])) {
int octet;
while ((octet = is.read()) != -1) {
os.write(octet);
}
}
}
}
(We have deliberated omitted normal argument checking, error reporting and so on because they
are not relevant to point of this example.)
If you compile the above code and use it to copy a huge file, you will notice that it is very slow. In
fact, it will be at least a couple of orders of magnitude slower than the standard OS file copy
utilities.
(Add actual performance measurements here!)
The primary reason that the example above is slow (in the large file case) is that it is performing
one-byte reads and one-byte writes on unbuffered byte streams. The simple way to improve
performance is to wrap the streams with buffered streams. For example:
import java.io.*;
public class FileCopy {
https://riptutorial.com/ 587](https://image.slidesharecdn.com/java-language-pdfroom-240812184155-f7515a4f/85/java-language-programacao-2-PDF-Room-pdf-655-320.jpg)
![public static void main(String[] args) throws Exception {
try (InputStream is = new BufferedInputStream(
new FileInputStream(args[0]));
OutputStream os = new BufferedOutputStream(
new FileOutputStream(args[1]))) {
int octet;
while ((octet = is.read()) != -1) {
os.write(octet);
}
}
}
}
These small changes will improve data copy rate by at least a couple of orders of magnitude,
depending on various platform-related factors. The buffered stream wrappers cause the data to be
read and written in larger chunks. The instances both have buffers implemented as byte arrays.
With is, data is read from the file into the buffer a few kilobytes at a time. When read() is
called, the implementation will typically return a byte from the buffer. It will only read from the
underlying input stream if the buffer has been emptied.
•
The behavior for os is analogous. Calls to os.write(int) write single bytes into the buffer.
Data is only written to the output stream when the buffer is full, or when os is flushed or
closed.
•
What about character-based streams?
As you should be aware, Java I/O provides different APIs for reading and writing binary and text
data.
InputStream and OutputStream are the base APIs for stream-based binary I/O
•
Reader and Writer are the base APIs for stream-based text I/O.
•
For text I/O, BufferedReader and BufferedWriter are the equivalents for BufferedInputStream and
BufferedOutputStream.
Why do buffered streams make this much difference?
The real reason that buffered streams help performance is to do with the way that an application
talks to the operating system:
Java method in a Java application, or native procedure calls in the JVM's native runtime
libraries are fast. They typically take a couple of machine instructions and have minimal
performance impact.
•
By contrast, JVM runtime calls to the operating system are not fast. They involve something
known as a "syscall". The typical pattern for a syscall is as follows:
Put the syscall arguments into registers.
1.
Execute a SYSENTER trap instruction.
2.
•
https://riptutorial.com/ 588](https://image.slidesharecdn.com/java-language-pdfroom-240812184155-f7515a4f/85/java-language-programacao-2-PDF-Room-pdf-656-320.jpg)
![The trap handler switched to privileged state and changes the virtual memory
mappings. Then it dispatches to the code to handle the specific syscall.
3.
The syscall handler checks the arguments, taking care that it isn't being told to access
memory that the user process should not see.
4.
The syscall specific work is performed. In the case of a read syscall, this may involve:
checking that there is data to be read at the file descriptor's current position
1.
calling the file system handler to fetch the required data from disk (or wherever it
is stored) into the buffer cache,
2.
copying data from the buffer cache to the JVM-supplied address
3.
adjusting thstream pointerse file descriptor position
4.
5.
Return from the syscall. This entails changing VM mappings again and switching out of
privileged state.
6.
As you can imagine, performing a single syscall can thousands of machine instructions.
Conservatively, at least two orders of magnitude longer than a regular method call. (Probably
three or more.)
Given this, the reason that buffered streams make a big difference is that they drastically reduce
the number of syscalls. Instead of doing a syscall for each read() call, the buffered input stream
reads a large amount of data into a buffer as required. Most read() calls on the buffered stream do
some simple bounds checking and return a byte that was read previously. Similar reasoning
applies in the output stream case, and also the character stream cases.
(Some people think that buffered I/O performance comes from the mismatch between the read
request size and the size of a disk block, disk rotational latency and things like that. In fact, a
modern OS uses a number of strategies to ensure that the application typically doesn't need to
wait for the disk. This is not the real explanation.)
Are buffered streams always a win?
Not always. Buffered streams are definitely a win if your application is going to do lots of "small"
reads or writes. However, if your application only needs to perform large reads or writes to / from a
large byte[] or char[], then buffered streams will give you no real benefits. Indeed there might
even be a (tiny) performance penalty.
Is this the fastest way to copy a file in Java?
No it isn't. When you use Java's stream-based APIs to copy a file, you incur the cost of at least
one extra memory-to-memory copy of the data. It is possible to avoid this if your use the NIO
ByteBuffer and Channel APIs. (Add a link to a separate example here.)
Read Java Pitfalls - Performance Issues online: https://riptutorial.com/java/topic/5455/java-pitfalls--
-performance-issues
https://riptutorial.com/ 589](https://image.slidesharecdn.com/java-language-pdfroom-240812184155-f7515a4f/85/java-language-programacao-2-PDF-Room-pdf-657-320.jpg)
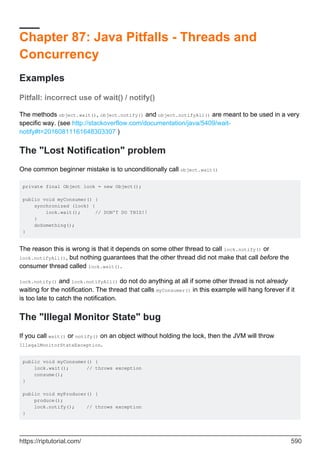
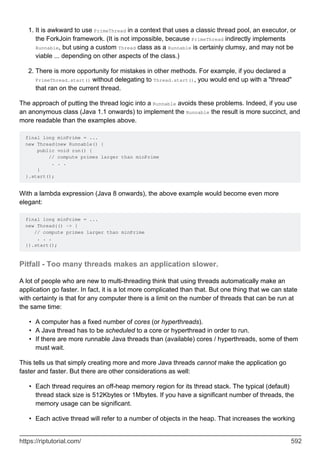
![set of reachable objects, which impacts on garbage collection and on physical memory
usage.
The overheads of switching between threads is non-trivial. It typically entails a switch into the
OS kernel space to make a thread scheduling decision.
•
The overheads of thread synchronization and inter-thread signaling (e.g. wait(), notify() /
notifyAll) can be significant.
•
Depending on the details of your application, these factors generally mean that there is a "sweet
spot" for the number of threads. Beyond that, adding more threads gives minimal performance
improvement, and can make performance worse.
If your application create for each new task, then an unexpected increase in the workload (e.g. a
high request rate) can lead to catastrophic behavior.
A better way to deal with this is to use bounded thread pool whose size you can control (statically
or dynamically). When there is too much work to do, the application needs to queue the requests.
If you use an ExecutorService, it will take care of the thread pool management and task queuing.
Pitfall - Thread creation is relatively expensive
Consider these two micro-benchmarks:
The first benchmark simply creates, starts and joins threads. The thread's Runnable does no work.
public class ThreadTest {
public static void main(String[] args) throws Exception {
while (true) {
long start = System.nanoTime();
for (int i = 0; i < 100_000; i++) {
Thread t = new Thread(new Runnable() {
public void run() {
}});
t.start();
t.join();
}
long end = System.nanoTime();
System.out.println((end - start) / 100_000.0);
}
}
}
$ java ThreadTest
34627.91355
33596.66021
33661.19084
33699.44895
33603.097
33759.3928
33671.5719
33619.46809
33679.92508
33500.32862
33409.70188
https://riptutorial.com/ 593](https://image.slidesharecdn.com/java-language-pdfroom-240812184155-f7515a4f/85/java-language-programacao-2-PDF-Room-pdf-661-320.jpg)
![33475.70541
33925.87848
33672.89529
^C
On a typical modern PC running Linux with 64bit Java 8 u101, this benchmark shows an average
time taken to create, start and join thread of between 33.6 and 33.9 microseconds.
The second benchmark does the equivalent to the first but using an ExecutorService to submit
tasks and a Future to rendezvous with the end of the task.
import java.util.concurrent.*;
public class ExecutorTest {
public static void main(String[] args) throws Exception {
ExecutorService exec = Executors.newCachedThreadPool();
while (true) {
long start = System.nanoTime();
for (int i = 0; i < 100_000; i++) {
Future<?> future = exec.submit(new Runnable() {
public void run() {
}
});
future.get();
}
long end = System.nanoTime();
System.out.println((end - start) / 100_000.0);
}
}
}
$ java ExecutorTest
6714.66053
5418.24901
5571.65213
5307.83651
5294.44132
5370.69978
5291.83493
5386.23932
5384.06842
5293.14126
5445.17405
5389.70685
^C
As you can see, the averages are between 5.3 and 5.6 microseconds.
While the actual times will depend on a variety of factors, the difference between these two results
is significant. It is clearly faster to use a thread pool to recycle threads than it is to create new
threads.
Pitfall: Shared variables require proper synchronization
Consider this example:
https://riptutorial.com/ 594](https://image.slidesharecdn.com/java-language-pdfroom-240812184155-f7515a4f/85/java-language-programacao-2-PDF-Room-pdf-662-320.jpg)
![public class ThreadTest implements Runnable {
private boolean stop = false;
public void run() {
long counter = 0;
while (!stop) {
counter = counter + 1;
}
System.out.println("Counted " + counter);
}
public static void main(String[] args) {
ThreadTest tt = new ThreadTest();
new Thread(tt).start(); // Create and start child thread
Thread.sleep(1000);
tt.stop = true; // Tell child thread to stop.
}
}
The intent of this program is intended to start a thread, let it run for 1000 milliseconds, and then
cause it to stop by setting the stop flag.
Will it work as intended?
Maybe yes, may be no.
An application does not necessarily stop when the main method returns. If another thread has been
created, and that thread has not been marked as a daemon thread, then the application will
continue to run after the main thread has ended. In this example, that means that the application
will keep running until child thread ends. That should happens when tt.stop is set to true.
But that is actually not strictly true. In fact, the child thread will stop after it has observed stop with
the value true. Will that happen? Maybe yes, maybe no.
The Java Language Specification guarantees that memory reads and writes made in a thread are
visible to that thread, as per the order of the statements in the source code. However, in general,
this is NOT guaranteed when one thread writes and another thread (subsequently) reads. To get
guaranteed visibility, there needs to be a chain of happens-before relations between a write and a
subsequent read. In the example above, there is no such chain for the update to the stop flag, and
therefore it is not guaranteed that the child thread will see stop change to true.
(Note to authors: There should be a separate Topic on the Java Memory Model to go into the deep
technical details.)
How do we fix the problem?
In this case, there are two simple ways to ensure that the stop update is visible:
Declare stop to be volatile; i.e.
1.
https://riptutorial.com/ 595](https://image.slidesharecdn.com/java-language-pdfroom-240812184155-f7515a4f/85/java-language-programacao-2-PDF-Room-pdf-663-320.jpg)
![private volatile boolean stop = false;
For a volatile variable, the JLS specifies that there is a happens-before relation between a
write by one thread and a later read by a second thread.
Use a mutex to synchronize as follows:
2.
public class ThreadTest implements Runnable {
private boolean stop = false;
public void run() {
long counter = 0;
while (true) {
synchronize (this) {
if (stop) {
break;
}
}
counter = counter + 1;
}
System.out.println("Counted " + counter);
}
public static void main(String[] args) {
ThreadTest tt = new ThreadTest();
new Thread(tt).start(); // Create and start child thread
Thread.sleep(1000);
synchronize (tt) {
tt.stop = true; // Tell child thread to stop.
}
}
}
In addition to ensuring that there is mutual exclusion, the JLS specifies that there is a happens-
before relation between the releasing a mutex in one thread and gaining the same mutex in a
second thread.
But isn't assignment atomic?
Yes it is!
However, that fact does not mean that the effects of update will be visible simultaneously to all
threads. Only a proper chain of happens-before relations will guarantee that.
Why did they do this?
Programmers doing multi-threaded programming in Java for the first time find the Memory Model
is challenging. Programs behave in an unintuitive way because the natural expectation is that
writes are visible uniformly. So why the Java designers design the Memory Model this way.
It actually comes down to a compromise between performance and ease of use (for the
https://riptutorial.com/ 596](https://image.slidesharecdn.com/java-language-pdfroom-240812184155-f7515a4f/85/java-language-programacao-2-PDF-Room-pdf-664-320.jpg)

![Chapter 88: Java plugin system
implementations
Remarks
If you use an IDE and/or build system, it is much easier to set up this kind of project. You create a
main application module, then API module, then create a plugin module and make it dependent on
the API module or both. Next, you configure where the project artifacts are to be put - in our case
the compiled plugin jars can be sent straight to 'plugins' directory, thus avoiding doing manual
movement.
Examples
Using URLClassLoader
There are several ways to implement a plugin system for a Java application. One of the simplest is
to use URLClassLoader. The following example will involve a bit of JavaFX code.
Suppose we have a module of a main application. This module is supposed to load plugins in form
of Jars from 'plugins' folder. Initial code:
package main;
public class MainApplication extends Application
{
@Override
public void start(Stage primaryStage) throws Exception
{
File pluginDirectory=new File("plugins"); //arbitrary directory
if(!pluginDirectory.exists())pluginDirectory.mkdir();
VBox loadedPlugins=new VBox(6); //a container to show the visual info later
Rectangle2D screenbounds=Screen.getPrimary().getVisualBounds();
Scene scene=new
Scene(loadedPlugins,screenbounds.getWidth()/2,screenbounds.getHeight()/2);
primaryStage.setScene(scene);
primaryStage.show();
}
public static void main(String[] a)
{
launch(a);
}
}
Then, we create an interface which will represent a plugin.
package main;
public interface Plugin
{
https://riptutorial.com/ 599](https://image.slidesharecdn.com/java-language-pdfroom-240812184155-f7515a4f/85/java-language-programacao-2-PDF-Room-pdf-667-320.jpg)
![default void initialize()
{
System.out.println("Initialized "+this.getClass().getName());
}
default String name(){return getClass().getSimpleName();}
}
We want to load classes which implement this interface, so first we need to filter files which have a
'.jar' extension:
File[] files=pluginDirectory.listFiles((dir, name) -> name.endsWith(".jar"));
If there are any files, we need to create collections of URLs and class names:
if(files!=null && files.length>0)
{
ArrayList<String> classes=new ArrayList<>();
ArrayList<URL> urls=new ArrayList<>(files.length);
for(File file:files)
{
JarFile jar=new JarFile(file);
jar.stream().forEach(jarEntry -> {
if(jarEntry.getName().endsWith(".class"))
{
classes.add(jarEntry.getName());
}
});
URL url=file.toURI().toURL();
urls.add(url);
}
}
Let's add a static HashSet to MainApplication which will hold loaded plugins:
static HashSet<Plugin> plugins=new HashSet<>();
Next, we instantiate a URLClassLoader, and iterate over class names, instantiating classes which
implement Plugin interface:
URLClassLoader urlClassLoader=new URLClassLoader(urls.toArray(new URL[urls.size()]));
classes.forEach(className->{
try
{
Class
cls=urlClassLoader.loadClass(className.replaceAll("/",".").replace(".class",""));
//transforming to binary name
Class[] interfaces=cls.getInterfaces();
for(Class intface:interfaces)
{
if(intface.equals(Plugin.class)) //checking presence of Plugin interface
{
Plugin plugin=(Plugin) cls.newInstance(); //instantiating the Plugin
plugins.add(plugin);
break;
https://riptutorial.com/ 600](https://image.slidesharecdn.com/java-language-pdfroom-240812184155-f7515a4f/85/java-language-programacao-2-PDF-Room-pdf-668-320.jpg)
![}
}
}
catch (Exception e){e.printStackTrace();}
});
Then, we can call plugin's methods, for example, to initialize them:
if(!plugins.isEmpty())loadedPlugins.getChildren().add(new Label("Loaded plugins:"));
plugins.forEach(plugin -> {
plugin.initialize();
loadedPlugins.getChildren().add(new Label(plugin.name()));
});
The final code of MainApplication:
package main;
public class MainApplication extends Application
{
static HashSet<Plugin> plugins=new HashSet<>();
@Override
public void start(Stage primaryStage) throws Exception
{
File pluginDirectory=new File("plugins");
if(!pluginDirectory.exists())pluginDirectory.mkdir();
File[] files=pluginDirectory.listFiles((dir, name) -> name.endsWith(".jar"));
VBox loadedPlugins=new VBox(6);
loadedPlugins.setAlignment(Pos.CENTER);
if(files!=null && files.length>0)
{
ArrayList<String> classes=new ArrayList<>();
ArrayList<URL> urls=new ArrayList<>(files.length);
for(File file:files)
{
JarFile jar=new JarFile(file);
jar.stream().forEach(jarEntry -> {
if(jarEntry.getName().endsWith(".class"))
{
classes.add(jarEntry.getName());
}
});
URL url=file.toURI().toURL();
urls.add(url);
}
URLClassLoader urlClassLoader=new URLClassLoader(urls.toArray(new
URL[urls.size()]));
classes.forEach(className->{
try
{
Class
cls=urlClassLoader.loadClass(className.replaceAll("/",".").replace(".class",""));
Class[] interfaces=cls.getInterfaces();
for(Class intface:interfaces)
{
if(intface.equals(Plugin.class))
{
Plugin plugin=(Plugin) cls.newInstance();
plugins.add(plugin);
break;
https://riptutorial.com/ 601](https://image.slidesharecdn.com/java-language-pdfroom-240812184155-f7515a4f/85/java-language-programacao-2-PDF-Room-pdf-669-320.jpg)
![}
}
}
catch (Exception e){e.printStackTrace();}
});
if(!plugins.isEmpty())loadedPlugins.getChildren().add(new Label("Loaded
plugins:"));
plugins.forEach(plugin -> {
plugin.initialize();
loadedPlugins.getChildren().add(new Label(plugin.name()));
});
}
Rectangle2D screenbounds=Screen.getPrimary().getVisualBounds();
Scene scene=new
Scene(loadedPlugins,screenbounds.getWidth()/2,screenbounds.getHeight()/2);
primaryStage.setScene(scene);
primaryStage.show();
}
public static void main(String[] a)
{
launch(a);
}
}
Let's create two plugins. Obviously, the plugin's source should be in a separate module.
package plugins;
import main.Plugin;
public class FirstPlugin implements Plugin
{
//this plugin has default behaviour
}
Second plugin:
package plugins;
import main.Plugin;
public class AnotherPlugin implements Plugin
{
@Override
public void initialize() //overrided to show user's home directory
{
System.out.println("User home directory: "+System.getProperty("user.home"));
}
}
These plugins have to be packaged into standard Jars - this process depends on your IDE or
other tools.
When Jars will be put into 'plugins' directly, MainApplication will detect them and instantiate
appropriate classes.
Read Java plugin system implementations online: https://riptutorial.com/java/topic/7160/java-
https://riptutorial.com/ 602](https://image.slidesharecdn.com/java-language-pdfroom-240812184155-f7515a4f/85/java-language-programacao-2-PDF-Room-pdf-670-320.jpg)

![Chapter 89: Java Print Service
Introduction
The Java Print Service API provides functionalities to discover print services and send print
requests for them.
It includes extensible print attributes based on the standard attributes specified in the Internet
Printing Protocol (IPP) 1.1 from the IETF Specification, RFC 2911.
Examples
Discovering the available print services
To discovery all the available print services, we can use the PrintServiceLookup class. Let's see
how:
import javax.print.PrintService;
import javax.print.PrintServiceLookup;
public class DiscoveringAvailablePrintServices {
public static void main(String[] args) {
discoverPrintServices();
}
public static void discoverPrintServices() {
PrintService[] allPrintServices = PrintServiceLookup.lookupPrintServices(null, null);
for (Printservice printService : allPrintServices) {
System.out.println("Print service name: " + printService.getName());
}
}
}
This program, when executed on a Windows environment, will print something like this:
Print service name: Fax
Print service name: Microsoft Print to PDF
Print service name: Microsoft XPS Document Viewer
Discovering the default print service
To discovery the default print service, we can use the PrintServiceLookup class. Let's see how::
import javax.print.PrintService;
import javax.print.PrintServiceLookup;
public class DiscoveringDefaultPrintService {
https://riptutorial.com/ 604](https://image.slidesharecdn.com/java-language-pdfroom-240812184155-f7515a4f/85/java-language-programacao-2-PDF-Room-pdf-672-320.jpg)
![public static void main(String[] args) {
discoverDefaultPrintService();
}
public static void discoverDefaultPrintService() {
PrintService defaultPrintService = PrintServiceLookup.lookupDefaultPrintService();
System.out.println("Default print service name: " + defaultPrintService.getName());
}
}
Creating a print job from a print service
A print job is a request of printing something in a specific print service. It consists, basically, by:
the data that will be printed (see Building the Doc that will be printed)
•
a set of attributes
•
After picking-up the right print service instance, we can request the creation of a print job:
DocPrintJob printJob = printService.createPrintJob();
The DocPrintJob interface provide us the print method:
printJob.print(doc, pras);
The doc argument is a Doc: the data that will be printed.
And the pras argument is a PrintRequestAttributeSet interface: a set of PrintRequestAttribute. Are
examples of print request attributes:
amount of copies (1, 2 etc),
•
orientation (portrait or landscape)
•
chromacity (monochrome, color)
•
quality (draft, normal, high)
•
sides (one-sided, two-sided etc)
•
and so on...
•
The print method may throw a PrintException.
Building the Doc that will be printed
Doc is an interface and the Java Print Service API provide a simple implementation called SimpleDoc
.
Every Doc instance is basically made of two aspects:
the print data content itself (an E-mail, an image, a document etc)
•
the print data format, called DocFlavor (MIME type + Representation class).
•
https://riptutorial.com/ 605](https://image.slidesharecdn.com/java-language-pdfroom-240812184155-f7515a4f/85/java-language-programacao-2-PDF-Room-pdf-673-320.jpg)
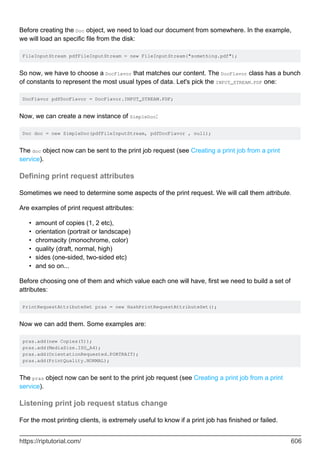

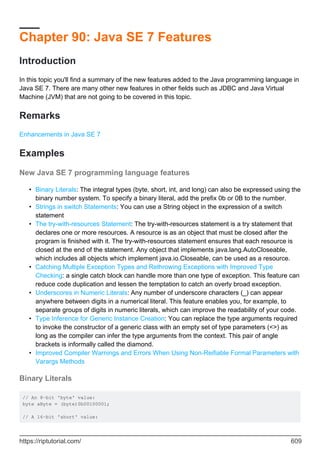

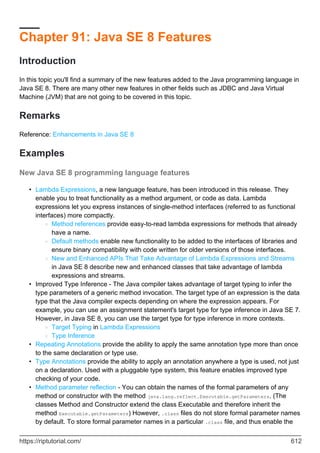

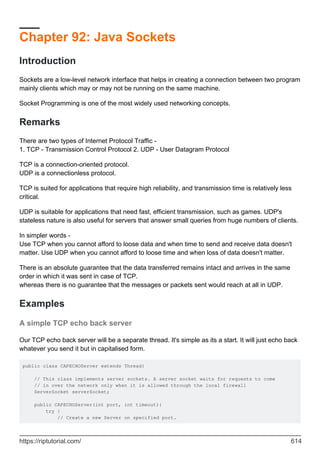
![serverSocket = new ServerSocket(port);
// SoTimeout is basiacally the socket timeout.
// timeout is the time until socket timeout in milliseconds
serverSocket.setSoTimeout(timeout);
} catch (IOException ex) {
Logger.getLogger(CAPECHOServer.class.getName()).log(Level.SEVERE, null, ex);
}
}
@Override
public void run(){
try {
// We want the server to continuously accept connections
while(!Thread.interrupted()){
}
// Close the server once done.
serverSocket.close();
} catch (IOException ex) {
Logger.getLogger(CAPECHOServer.class.getName()).log(Level.SEVERE, null, ex);
}
}
}
Now to accept connections. Let's update the run method.
@Override
public void run(){
while(!Thread.interrupted()){
try {
// Log with the port number and machine ip
Logger.getLogger((this.getClass().getName())).log(Level.INFO, "Listening for
Clients at {0} on {1}", new Object[]{serverSocket.getLocalPort(),
InetAddress.getLocalHost().getHostAddress()});
Socket client = serverSocket.accept(); // Accept client conncetion
// Now get DataInputStream and DataOutputStreams
DataInputStream istream = new DataInputStream(client.getInputStream()); // From
client's input stream
DataOutputStream ostream = new DataOutputStream(client.getOutputStream());
// Important Note
/*
The server's input is the client's output
The client's input is the server's output
*/
// Send a welcome message
ostream.writeUTF("Welcome!");
// Close the connection
istream.close();
ostream.close();
client.close();
} catch (IOException ex) {
Logger.getLogger(CAPECHOServer.class.getName()).log(Level.SEVERE, null, ex);
}
}
// Close the server once done
try {
https://riptutorial.com/ 615](https://image.slidesharecdn.com/java-language-pdfroom-240812184155-f7515a4f/85/java-language-programacao-2-PDF-Room-pdf-683-320.jpg)
![import java.io.File;
import javax.xml.bind.JAXB;
public class XMLCreator {
public static void main(String[] args) {
User user = new User();
user.setName("Jon Skeet");
user.setUserID(8884321);
try {
JAXB.marshal(user, new File("UserDetails.xml"));
} catch (Exception e) {
System.err.println("Exception occurred while writing in XML!");
} finally {
System.out.println("XML created");
}
}
}
marshal() is used to write the object's content into an XML file. Here userobject and a new File
object are passed as arguments to the marshal().
On successful execution, this creates an XML file named UserDetails.xml in the class-path with the
below content.
<?xml version="1.0" encoding="UTF-8" standalone="yes"?>
<user>
<name>Jon Skeet</name>
<userID>8884321</userID>
</user>
Reading an XML file (unmarshalling)
To read an XML file named UserDetails.xml with the below content
<?xml version="1.0" encoding="UTF-8" standalone="yes"?>
<user>
<name>Jon Skeet</name>
<userID>8884321</userID>
</user>
We need a POJO class named User.java as below
import javax.xml.bind.annotation.XmlRootElement;
@XmlRootElement
public class User {
private long userID;
private String name;
// getters and setters
}
Here we have created the variables and class name according to the XML nodes. To map them,
https://riptutorial.com/ 622](https://image.slidesharecdn.com/java-language-pdfroom-240812184155-f7515a4f/85/java-language-programacao-2-PDF-Room-pdf-690-320.jpg)
![we use the annotation XmlRootElement on the class.
public class XMLReader {
public static void main(String[] args) {
try {
User user = JAXB.unmarshal(new File("UserDetails.xml"), User.class);
System.out.println(user.getName()); // prints Jon Skeet
System.out.println(user.getUserID()); // prints 8884321
} catch (Exception e) {
System.err.println("Exception occurred while reading the XML!");
}
}
}
Here unmarshal() method is used to parse the XML file. It takes the XML file name and the class
type as two arguments. Then we can use the getter methods of the object to print the data.
Using XmlAdapter to generate desired xml format
When desired XML format differs from Java object model, an XmlAdapter implementation can be
used to transform model object into xml-format object and vice versa. This example demonstrates
how to put a field's value into an attribute of an element with field's name.
public class XmlAdapterExample {
@XmlAccessorType(XmlAccessType.FIELD)
public static class NodeValueElement {
@XmlAttribute(name="attrValue")
String value;
public NodeValueElement() {
}
public NodeValueElement(String value) {
super();
this.value = value;
}
public String getValue() {
return value;
}
public void setValue(String value) {
this.value = value;
}
}
public static class ValueAsAttrXmlAdapter extends XmlAdapter<NodeValueElement, String> {
@Override
public NodeValueElement marshal(String v) throws Exception {
return new NodeValueElement(v);
}
@Override
public String unmarshal(NodeValueElement v) throws Exception {
https://riptutorial.com/ 623](https://image.slidesharecdn.com/java-language-pdfroom-240812184155-f7515a4f/85/java-language-programacao-2-PDF-Room-pdf-691-320.jpg)
![if (v==null) return "";
return v.getValue();
}
}
@XmlRootElement(name="DataObject")
@XmlAccessorType(XmlAccessType.FIELD)
public static class DataObject {
String elementWithValue;
@XmlJavaTypeAdapter(value=ValueAsAttrXmlAdapter.class)
String elementWithAttribute;
}
public static void main(String[] args) {
DataObject data = new DataObject();
data.elementWithValue="value1";
data.elementWithAttribute ="value2";
ByteArrayOutputStream baos = new ByteArrayOutputStream();
JAXB.marshal(data, baos);
String xmlString = new String(baos.toByteArray(), StandardCharsets.UTF_8);
System.out.println(xmlString);
}
}
Automatic field/property XML mapping configuration (@XmlAccessorType)
Annotation @XmlAccessorType determines whether fields/properties will be automatically serialized to
XML. Note, that field and method annotations @XmlElement, @XmlAttribute or @XmlTransient take
precedence over the default settings.
public class XmlAccessTypeExample {
@XmlAccessorType(XmlAccessType.FIELD)
static class AccessorExampleField {
public String field="value1";
public String getGetter() {
return "getter";
}
public void setGetter(String value) {}
}
@XmlAccessorType(XmlAccessType.NONE)
static class AccessorExampleNone {
public String field="value1";
public String getGetter() {
return "getter";
}
public void setGetter(String value) {}
}
https://riptutorial.com/ 624](https://image.slidesharecdn.com/java-language-pdfroom-240812184155-f7515a4f/85/java-language-programacao-2-PDF-Room-pdf-692-320.jpg)
![@XmlAccessorType(XmlAccessType.PROPERTY)
static class AccessorExampleProperty {
public String field="value1";
public String getGetter() {
return "getter";
}
public void setGetter(String value) {}
}
@XmlAccessorType(XmlAccessType.PUBLIC_MEMBER)
static class AccessorExamplePublic {
public String field="value1";
public String getGetter() {
return "getter";
}
public void setGetter(String value) {}
}
public static void main(String[] args) {
try {
System.out.println("nField:");
JAXB.marshal(new AccessorExampleField(), System.out);
System.out.println("nNone:");
JAXB.marshal(new AccessorExampleNone(), System.out);
System.out.println("nProperty:");
JAXB.marshal(new AccessorExampleProperty(), System.out);
System.out.println("nPublic:");
JAXB.marshal(new AccessorExamplePublic(), System.out);
} catch (Exception e) {
System.err.println("Exception occurred while writing in XML!");
}
}
} // outer class end
Output
Field:
<?xml version="1.0" encoding="UTF-8" standalone="yes"?>
<accessorExampleField>
<field>value1</field>
</accessorExampleField>
None:
<?xml version="1.0" encoding="UTF-8" standalone="yes"?>
<accessorExampleNone/>
Property:
<?xml version="1.0" encoding="UTF-8" standalone="yes"?>
<accessorExampleProperty>
<getter>getter</getter>
</accessorExampleProperty>
Public:
<?xml version="1.0" encoding="UTF-8" standalone="yes"?>
https://riptutorial.com/ 625](https://image.slidesharecdn.com/java-language-pdfroom-240812184155-f7515a4f/85/java-language-programacao-2-PDF-Room-pdf-693-320.jpg)
![<accessorExamplePublic>
<field>value1</field>
<getter>getter</getter>
</accessorExamplePublic>
Manual field/property XML mapping configuration
Annotations @XmlElement, @XmlAttribute or @XmlTransient and other in package
javax.xml.bind.annotation allow the programmer to specify which and how marked fields or
properties should be serialized.
@XmlAccessorType(XmlAccessType.NONE) // we want no automatic field/property marshalling
public class ManualXmlElementsExample {
@XmlElement
private String field="field value";
@XmlAttribute
private String attribute="attr value";
@XmlAttribute(name="differentAttribute")
private String oneAttribute="other attr value";
@XmlElement(name="different name")
private String oneName="different name value";
@XmlTransient
private String transientField = "will not get serialized ever";
@XmlElement
public String getModifiedTransientValue() {
return transientField.replace(" ever", ", unless in a getter");
}
public void setModifiedTransientValue(String val) {} // empty on purpose
public static void main(String[] args) {
try {
JAXB.marshal(new ManualXmlElementsExample(), System.out);
} catch (Exception e) {
System.err.println("Exception occurred while writing in XML!");
}
}
}
Specifying a XmlAdapter instance to (re)use existing data
Sometimes specific instances of data should be used. Recreation is not desired and referencing
static data would have a code smell.
It is possible to specify a XmlAdapter instance the Unmarshaller should use, which allows the user to
use XmlAdapters with no zero-arg constructor and/or pass data to the adapter.
https://riptutorial.com/ 626](https://image.slidesharecdn.com/java-language-pdfroom-240812184155-f7515a4f/85/java-language-programacao-2-PDF-Room-pdf-694-320.jpg)
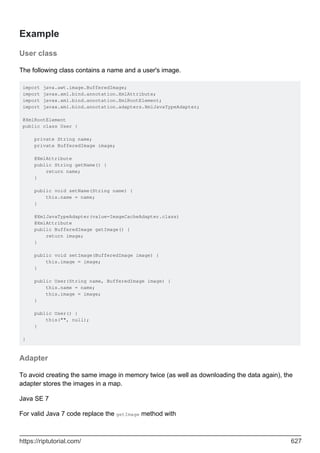

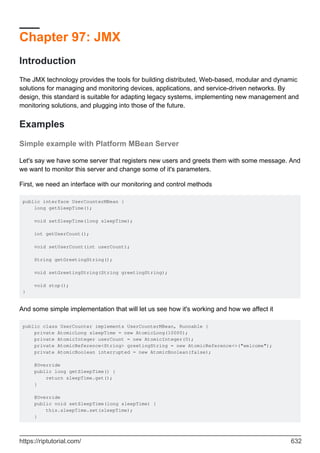
![@Override
public int getUserCount() {
return userCount.get();
}
@Override
public void setUserCount(int userCount) {
this.userCount.set(userCount);
}
@Override
public String getGreetingString() {
return greetingString.get();
}
@Override
public void setGreetingString(String greetingString) {
this.greetingString.set(greetingString);
}
@Override
public void stop() {
this.interrupted.set(true);
}
@Override
public void run() {
while (!interrupted.get()) {
try {
System.out.printf("User %d, %s%n", userCount.incrementAndGet(),
greetingString.get());
Thread.sleep(sleepTime.get());
} catch (InterruptedException ignored) {
}
}
}
}
For simple example with local or remote management, we need to register our MBean:
import javax.management.InstanceAlreadyExistsException;
import javax.management.MBeanRegistrationException;
import javax.management.MBeanServer;
import javax.management.MalformedObjectNameException;
import javax.management.NotCompliantMBeanException;
import javax.management.ObjectName;
import java.lang.management.ManagementFactory;
public class Main {
public static void main(String[] args) throws MalformedObjectNameException,
NotCompliantMBeanException, InstanceAlreadyExistsException, MBeanRegistrationException,
InterruptedException {
final UserCounter userCounter = new UserCounter();
final MBeanServer mBeanServer = ManagementFactory.getPlatformMBeanServer();
final ObjectName objectName = new ObjectName("ServerManager:type=UserCounter");
mBeanServer.registerMBean(userCounter, objectName);
final Thread thread = new Thread(userCounter);
thread.start();
https://riptutorial.com/ 633](https://image.slidesharecdn.com/java-language-pdfroom-240812184155-f7515a4f/85/java-language-programacao-2-PDF-Room-pdf-701-320.jpg)
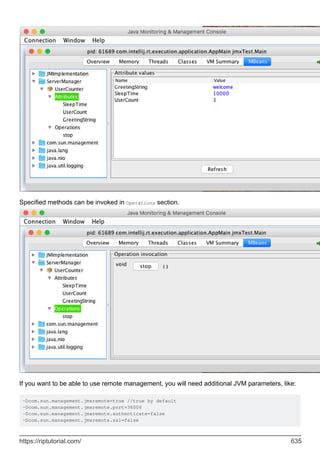

![ctx.bind(name, obj);
}
public static void unbindJNDI(String name) throws NamingException {
ctx.unbind(name);
}
public static void unInitJNDI() throws NamingException {
ctx.close();
}
public static void main(String[] args) throws NamingException, IOException {
initJNDI();
NMessage msg = new NMessage("Just A Message");
bindJNDI("/neohope/jndi/test01", msg);
System.in.read();
unbindJNDI("/neohope/jndi/test01");
unInitJNDI();
}
}
Client.java(the JNDI client)
package com.neohope.jndi.test;
import javax.naming.Context;
import javax.naming.InitialContext;
import javax.naming.NamingException;
import java.util.Hashtable;
/**
* 1.init context
* 2.lookup registry for the service
* 3.use the service
* 4.end
*/
public class Client {
public static void main(String[] args) throws NamingException {
final Hashtable jndiProperties = new Hashtable();
jndiProperties.put(Context.INITIAL_CONTEXT_FACTORY,
"com.sun.jndi.rmi.registry.RegistryContextFactory");
jndiProperties.put(Context.PROVIDER_URL, "rmi://localhost:1234");
InitialContext ctx = new InitialContext(jndiProperties);
NMessage msg = (NeoMessage) ctx.lookup("/neohope/jndi/test01");
System.out.println(msg.message);
ctx.close();
}
}
2.
NMessage.java (RMI server class)
package com.neohope.jndi.test;
import java.io.Serializable;
import java.rmi.Remote;
/**
3.
https://riptutorial.com/ 638](https://image.slidesharecdn.com/java-language-pdfroom-240812184155-f7515a4f/85/java-language-programacao-2-PDF-Room-pdf-706-320.jpg)
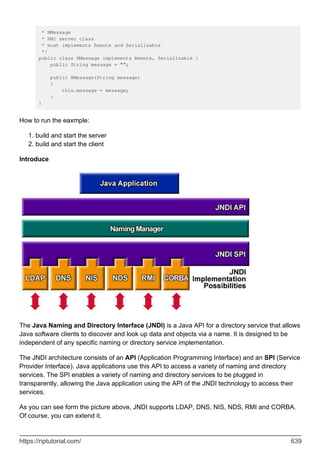

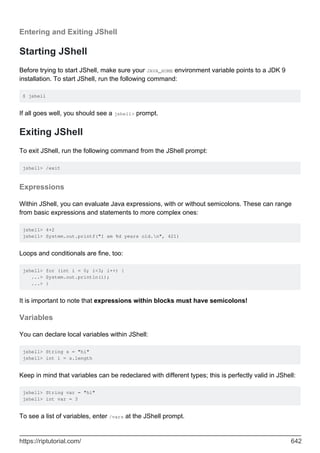
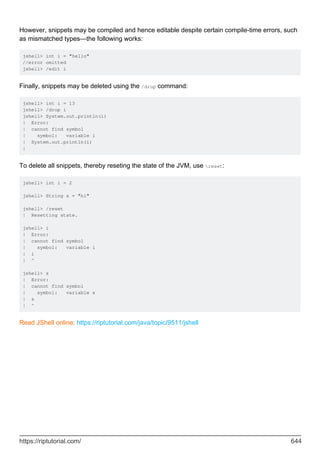
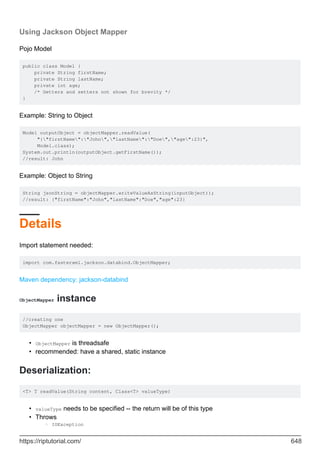


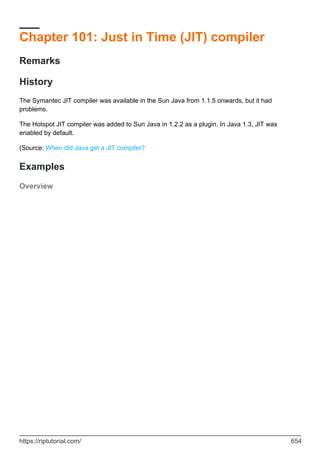
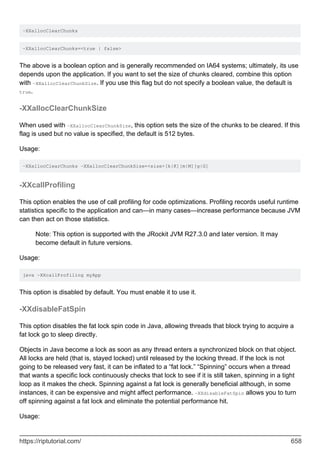

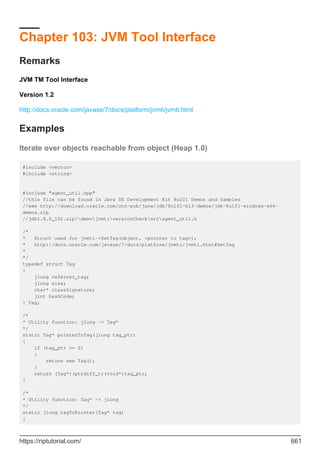
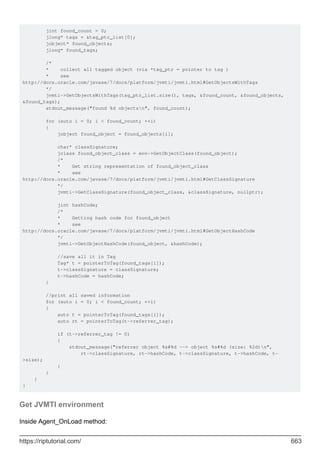
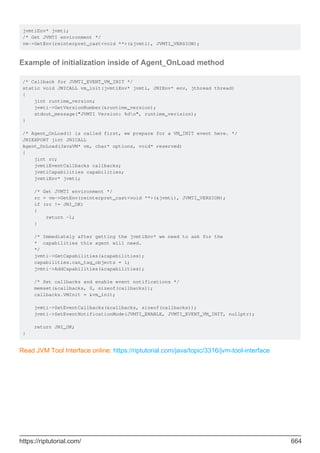
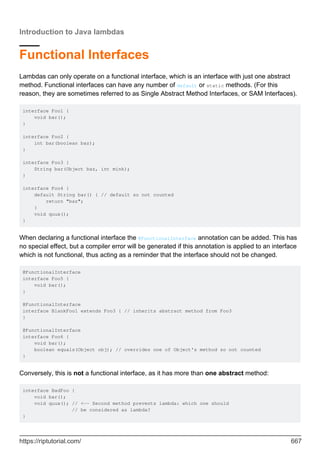
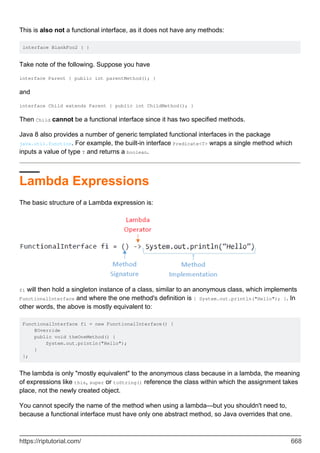

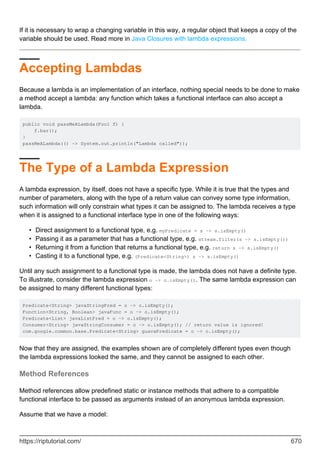
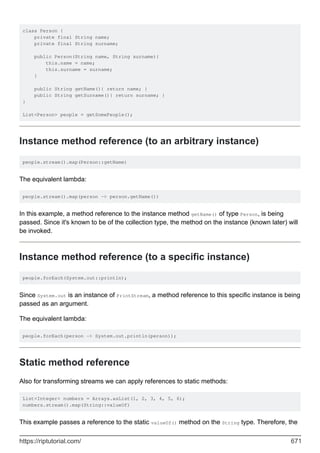
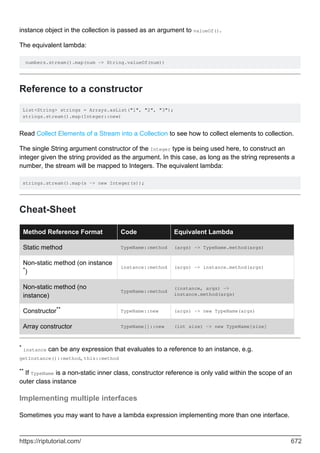
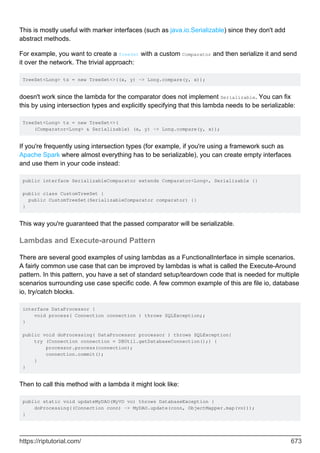
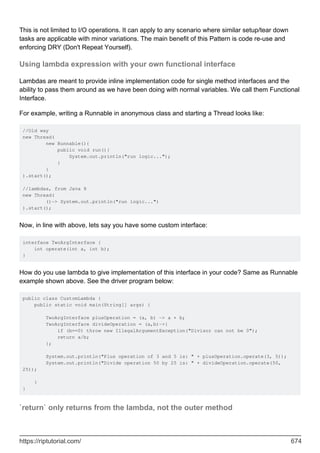
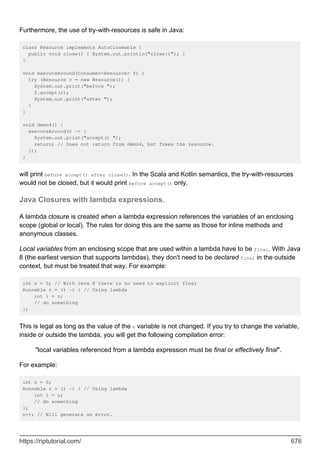
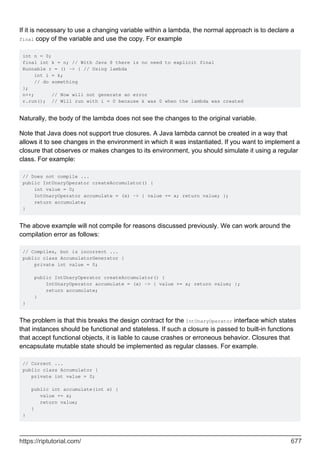
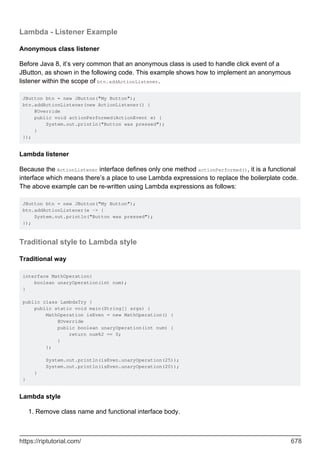
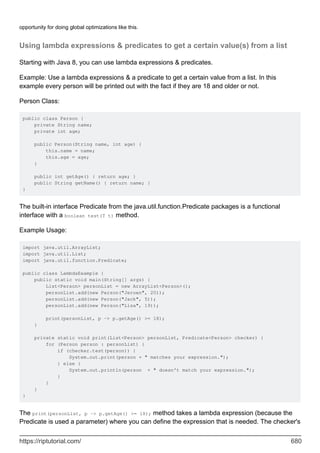

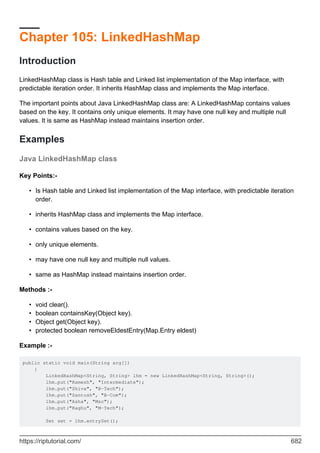

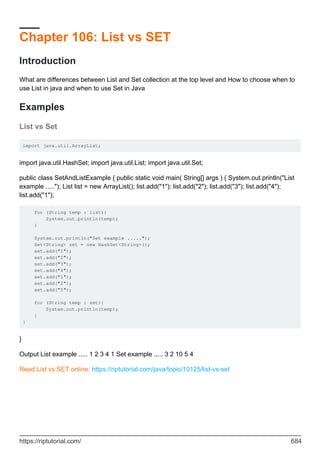
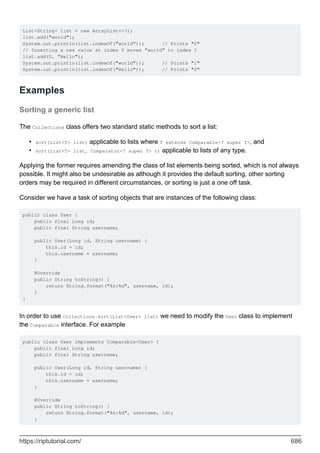

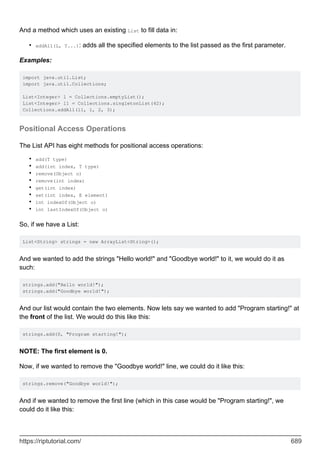
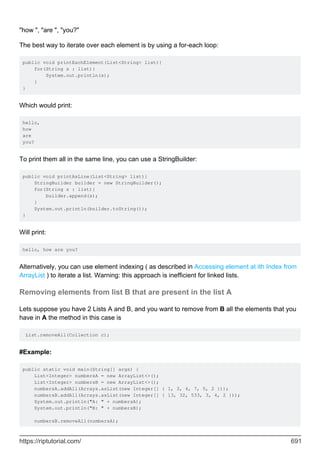
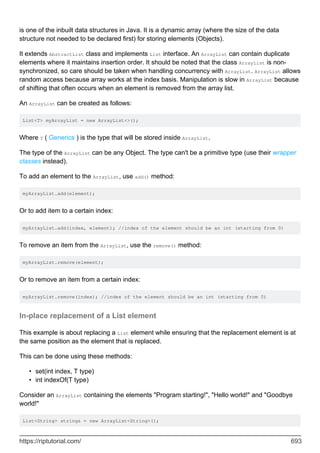
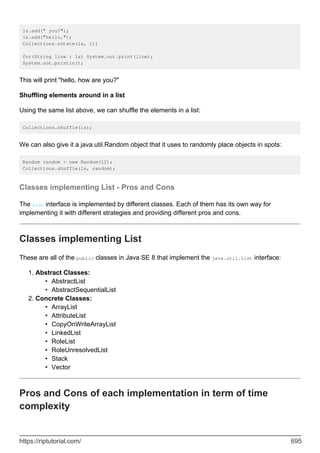
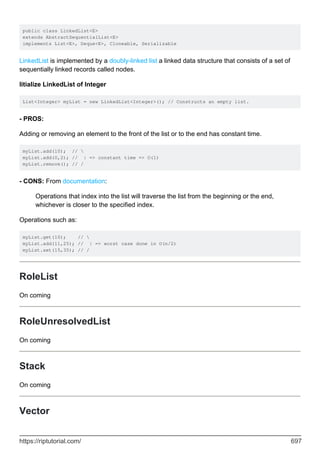


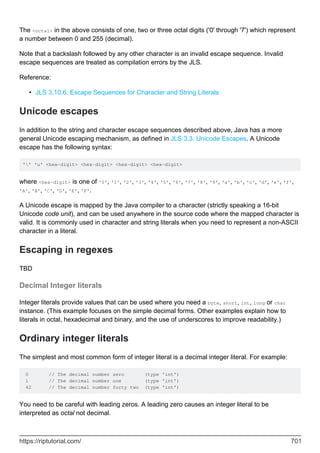
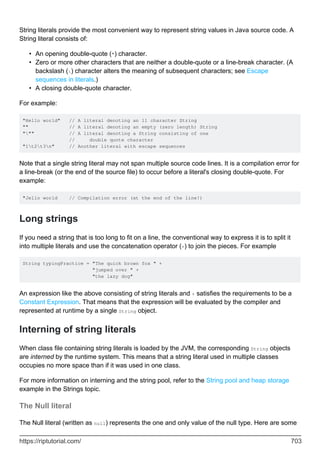
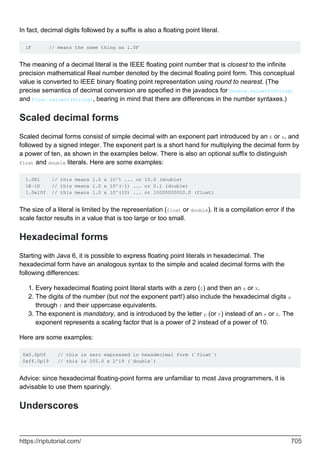
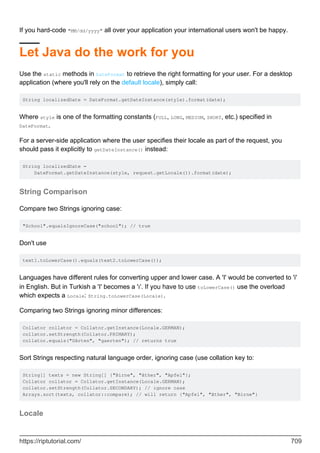

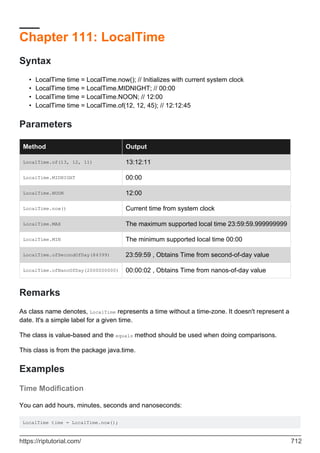
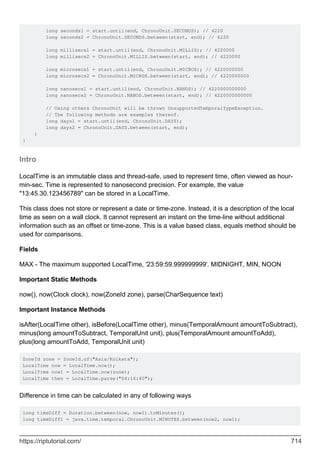

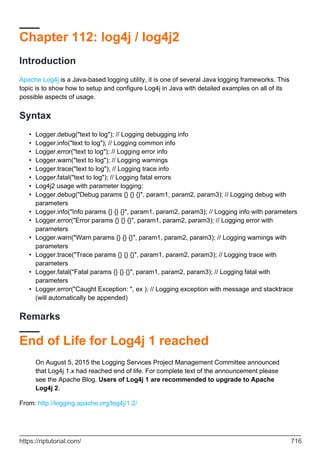
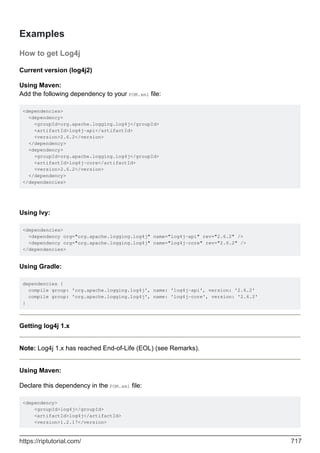
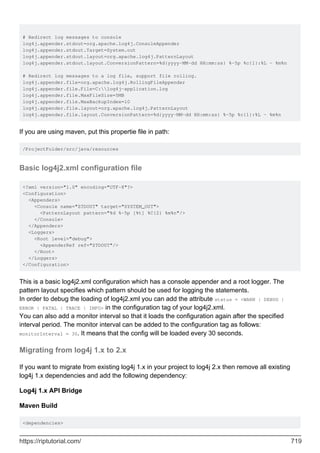


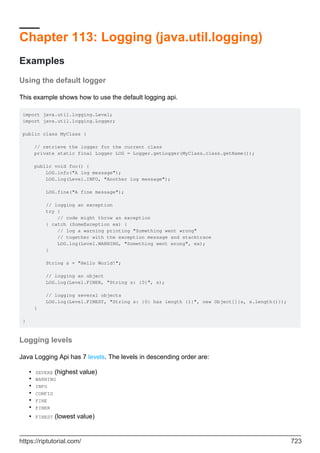
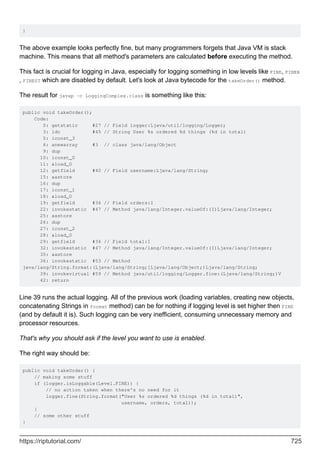

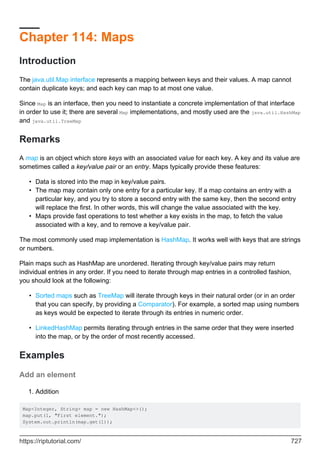
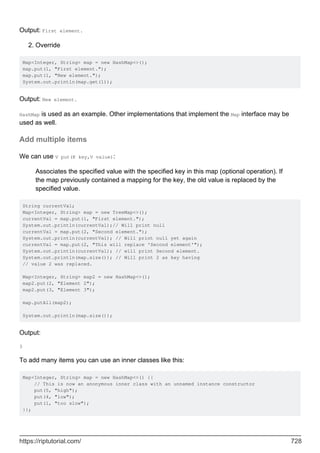
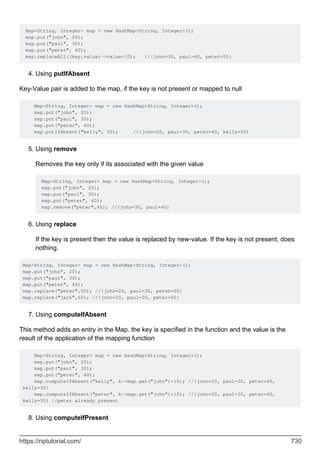
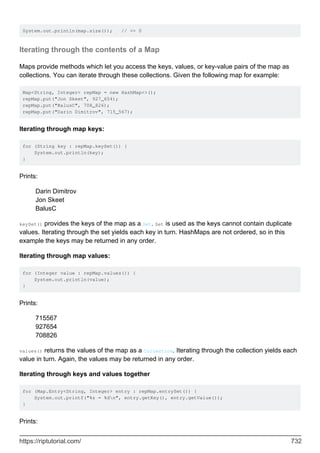
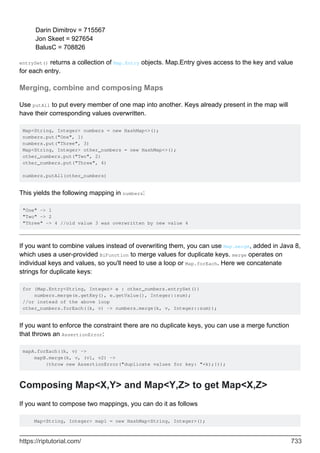
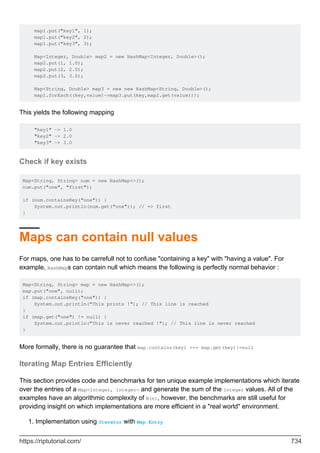
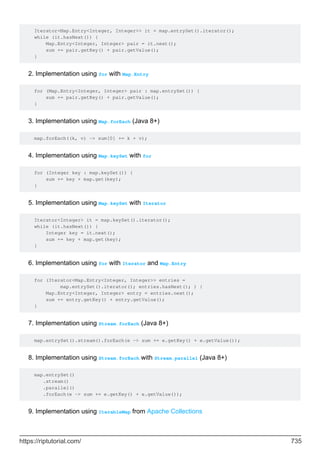
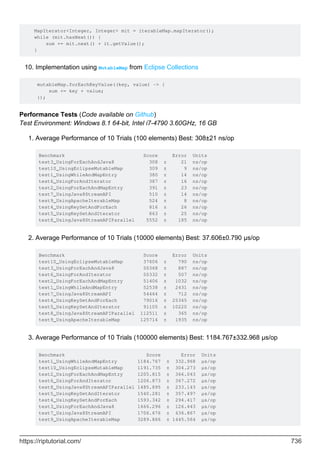


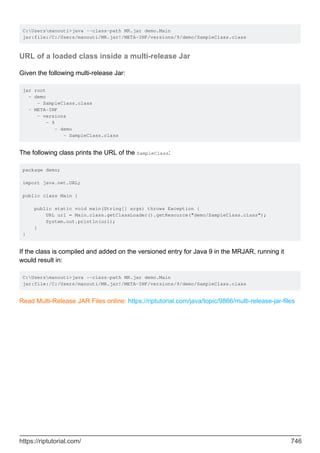
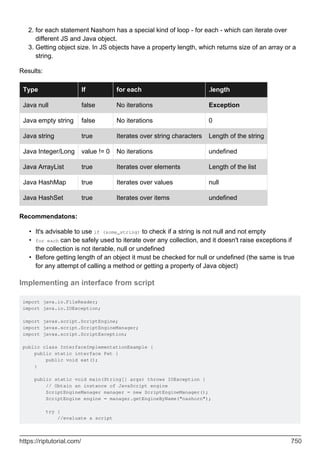
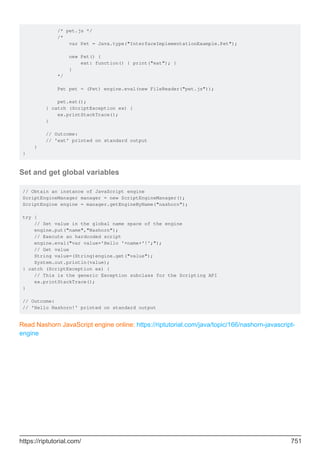
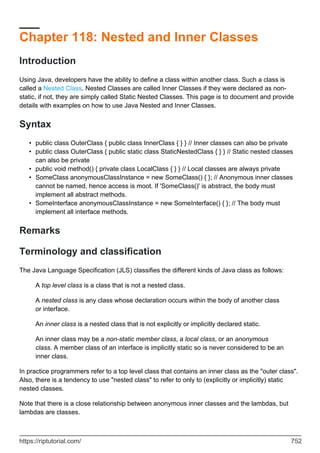

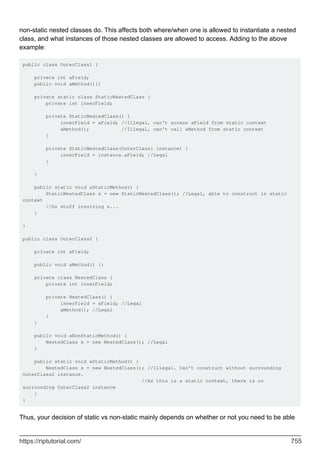
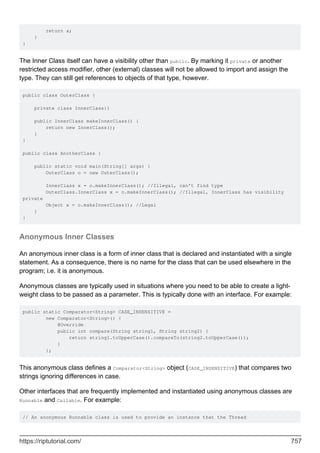
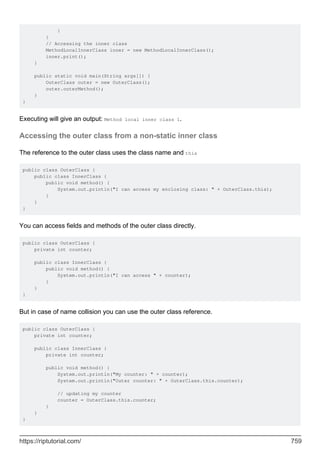
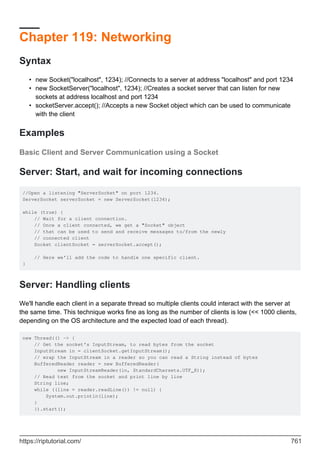

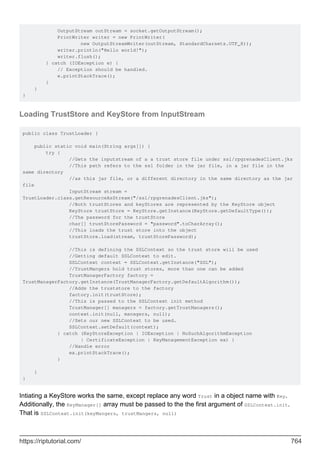
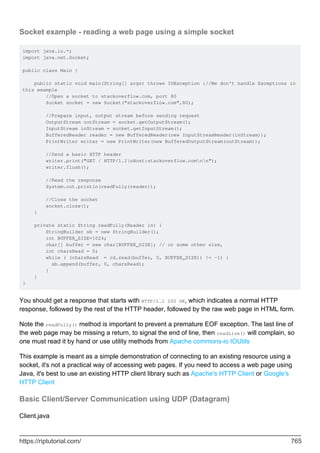
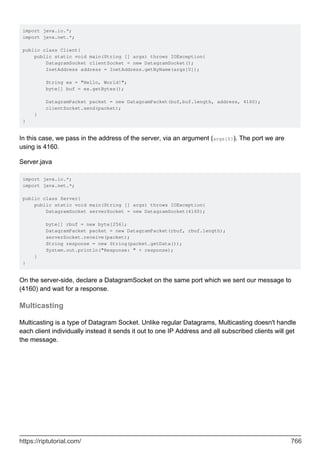
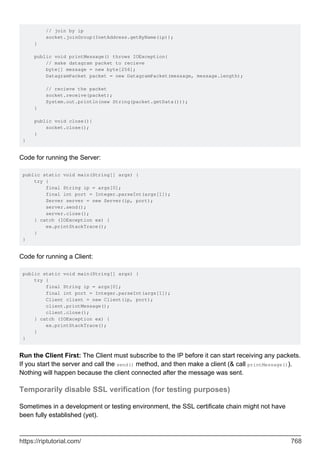
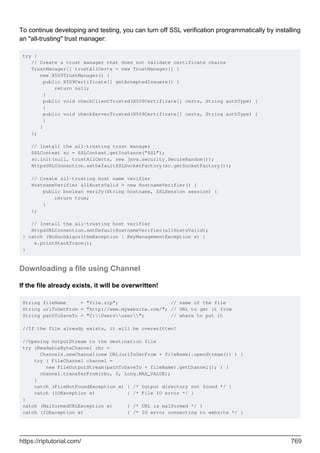

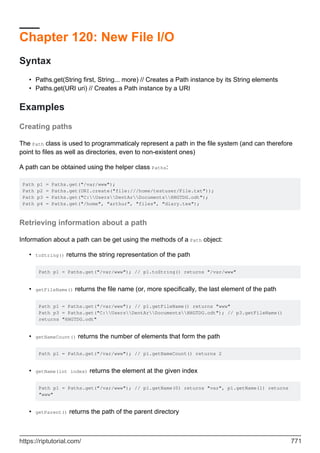
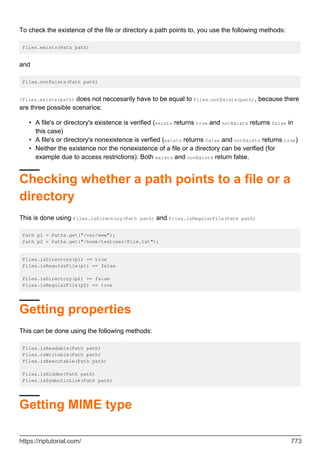
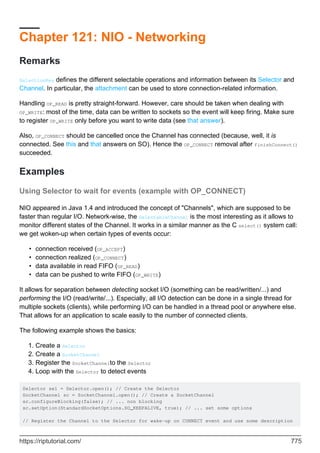

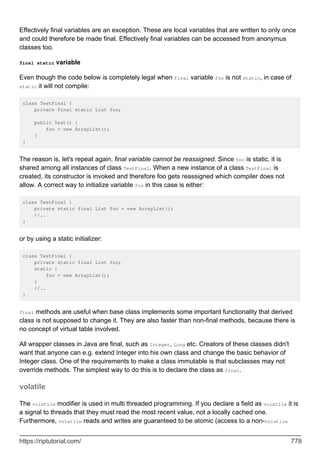
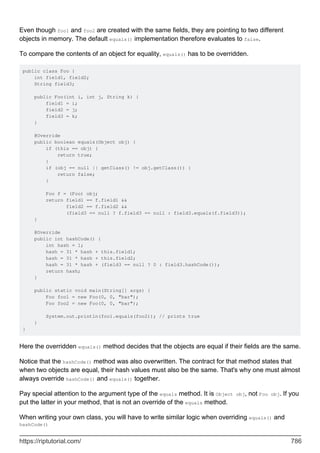
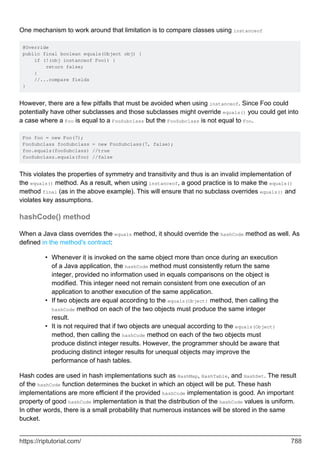


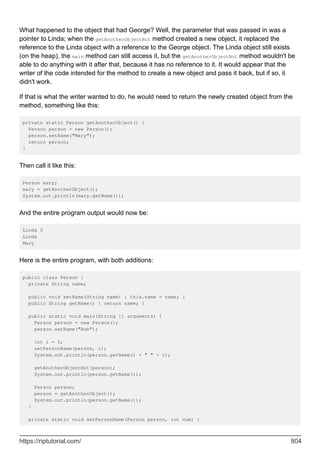

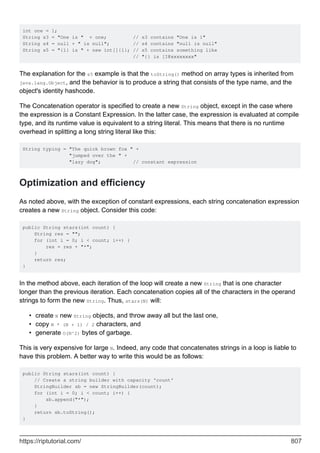

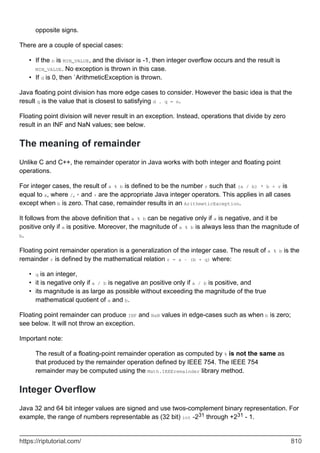
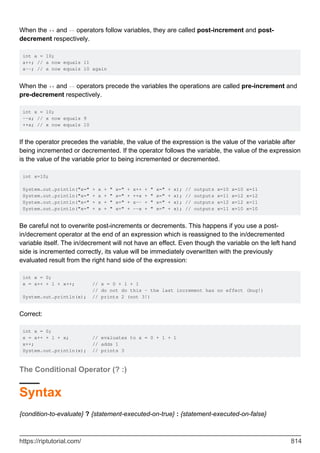
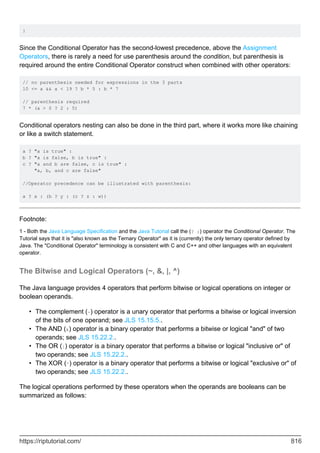
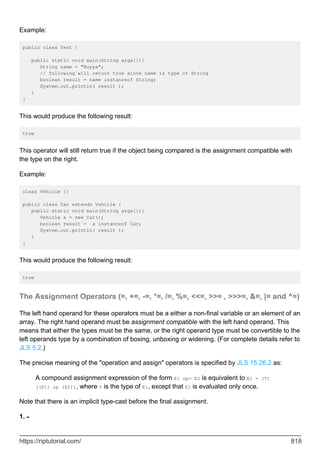

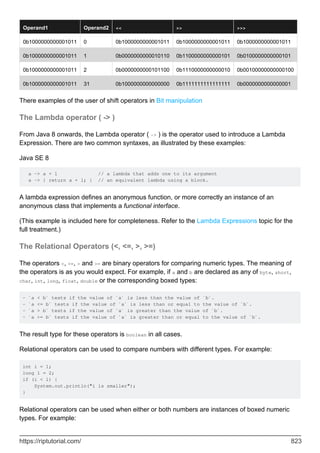

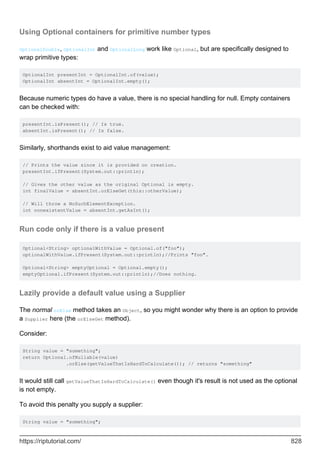
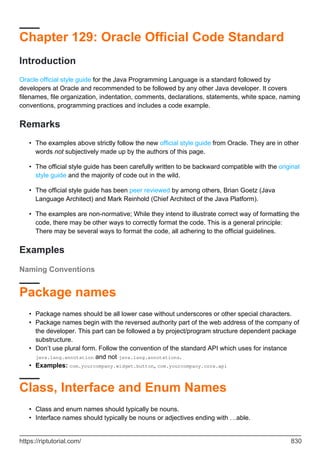
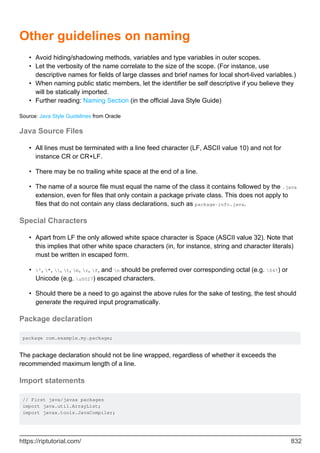
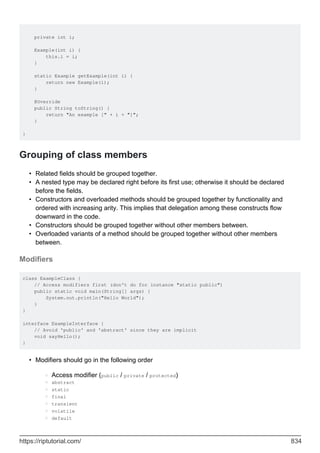
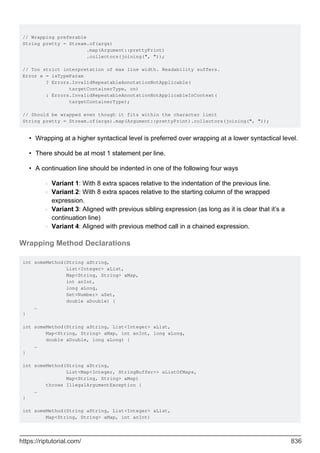
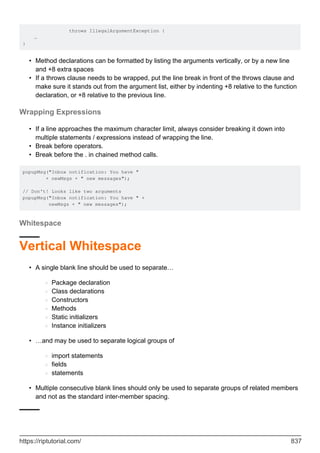

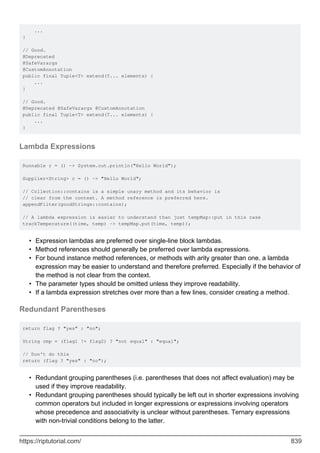

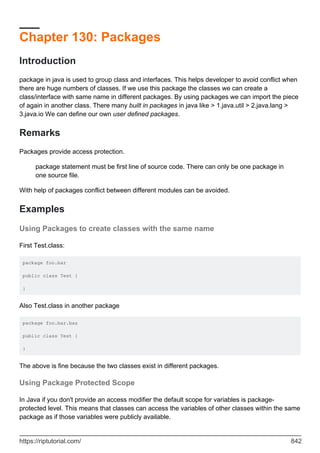

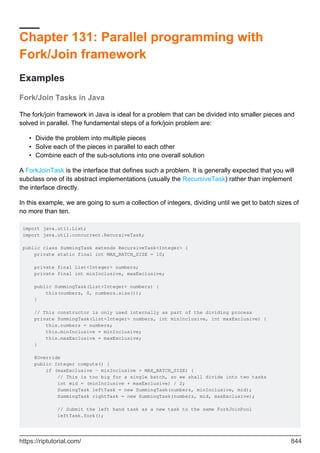
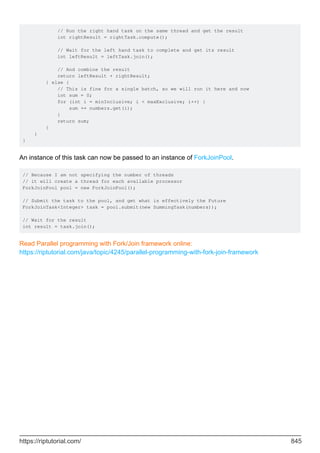

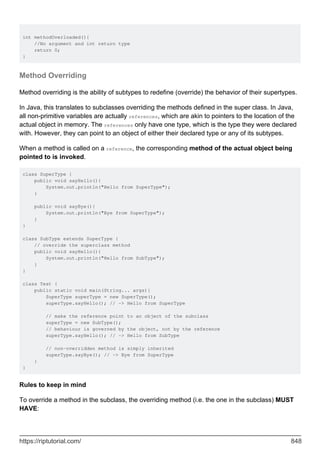


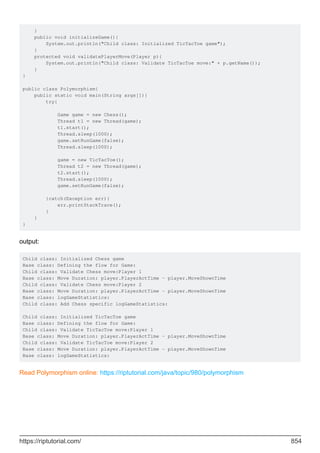
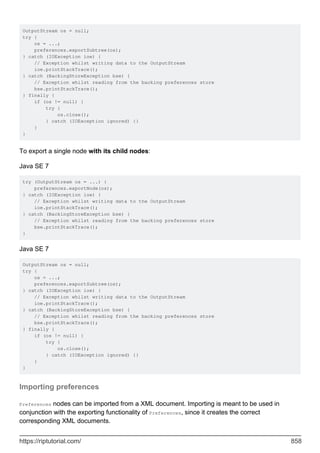
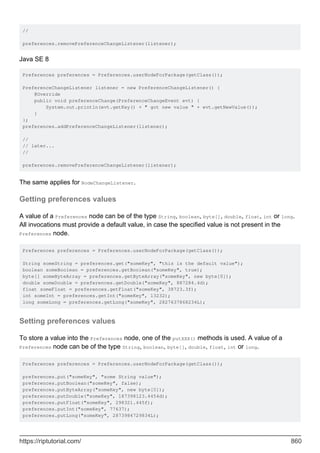
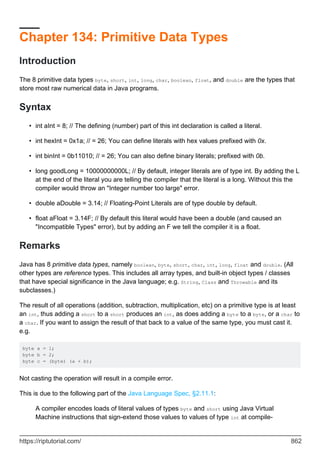
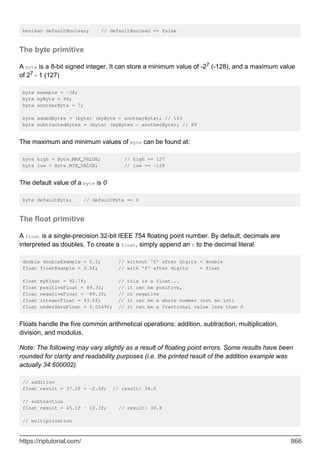

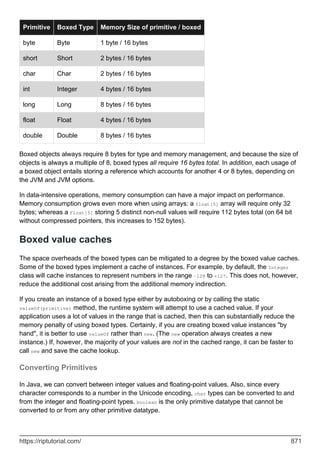
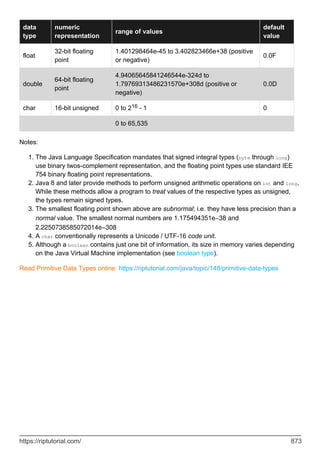

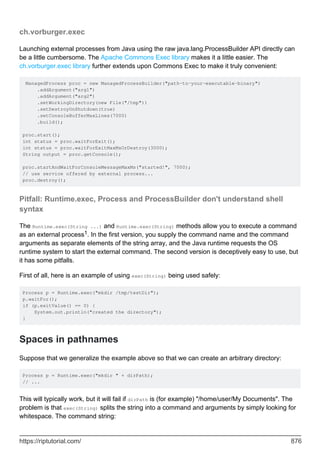
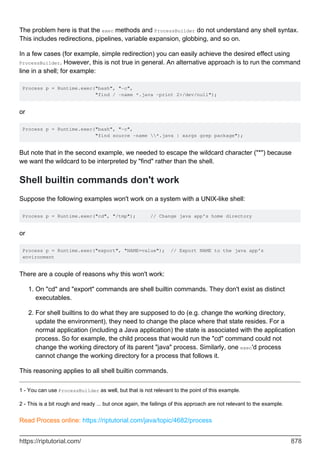
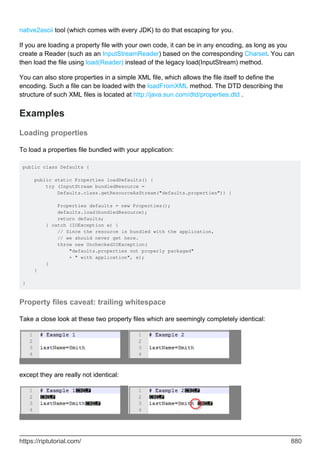
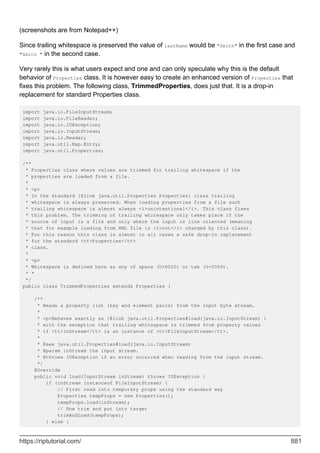


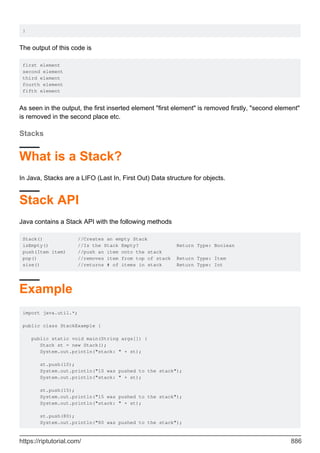
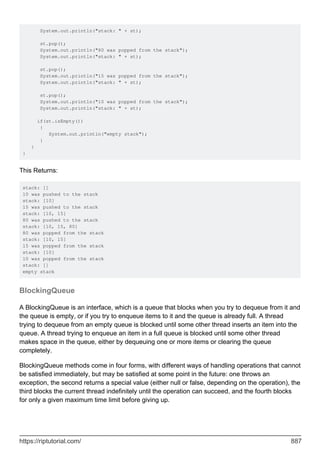
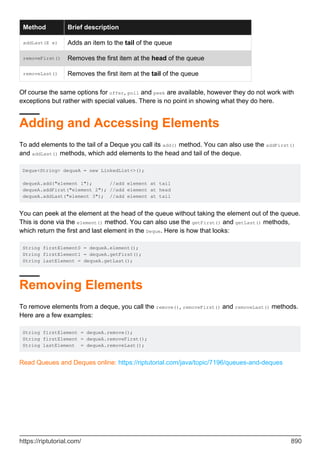
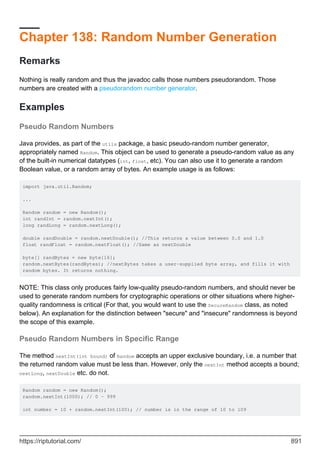
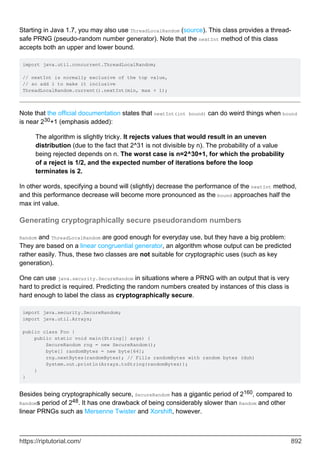
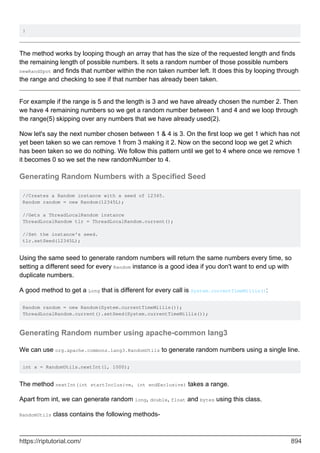


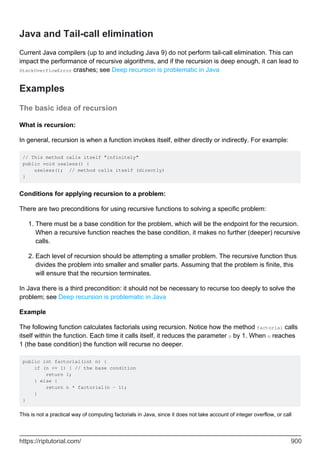
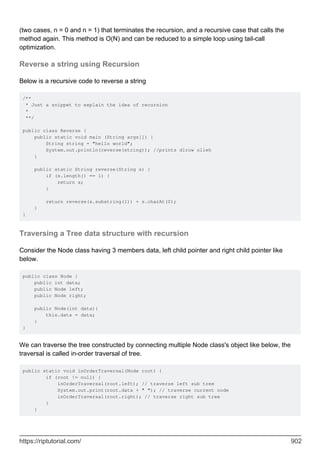
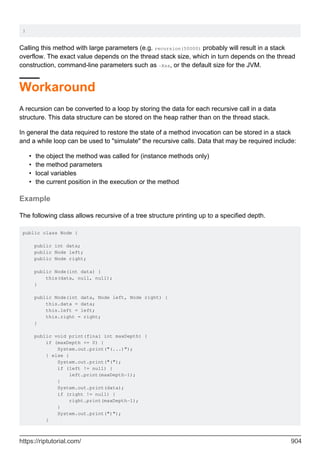


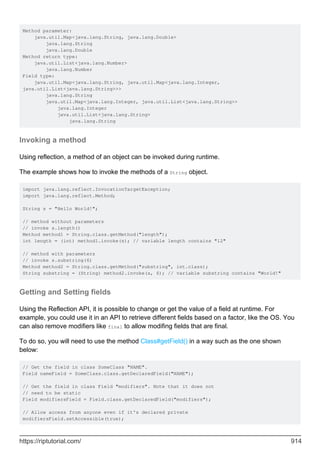
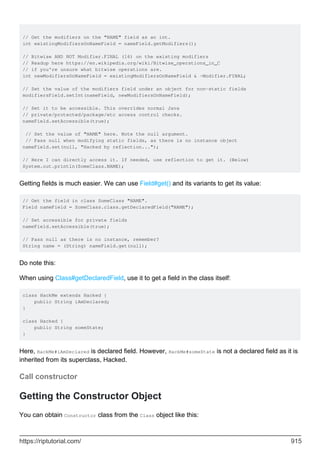
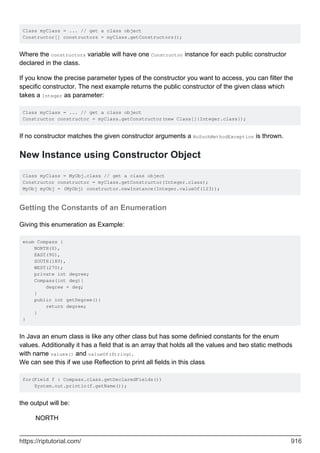
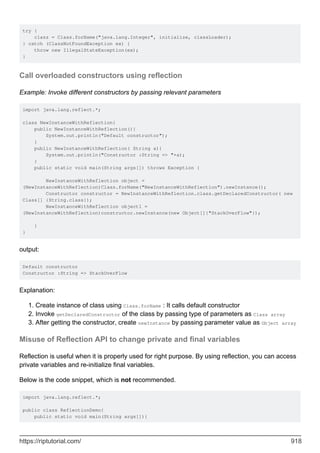
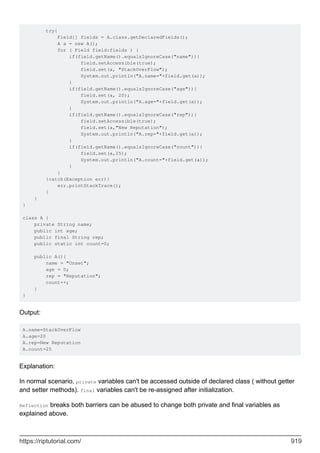
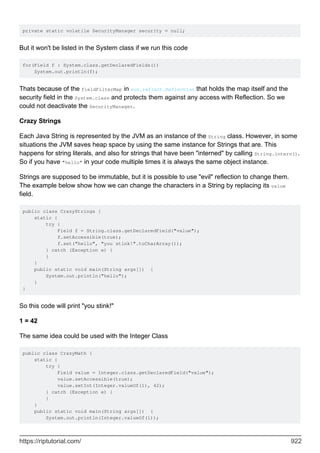

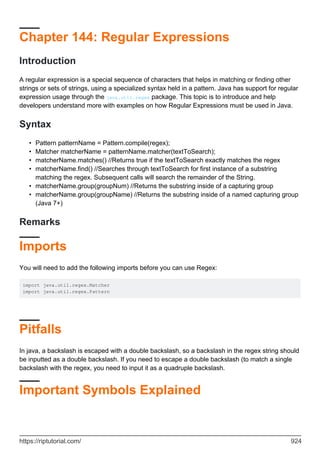
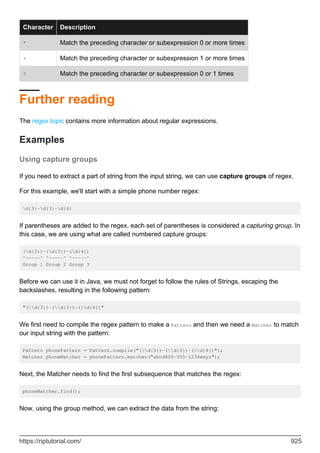
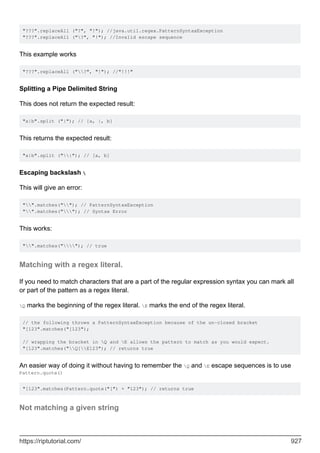
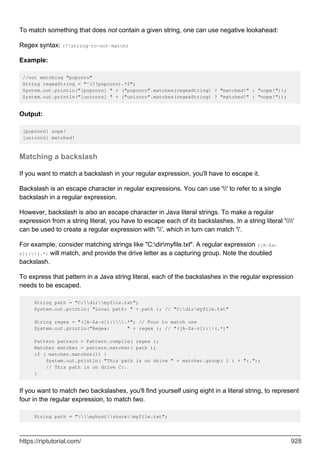

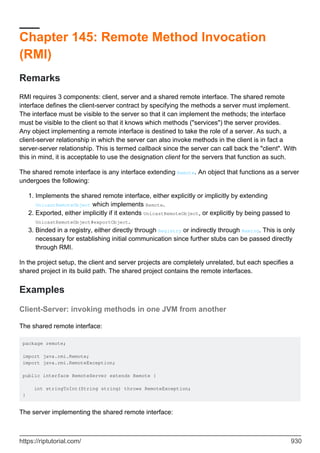
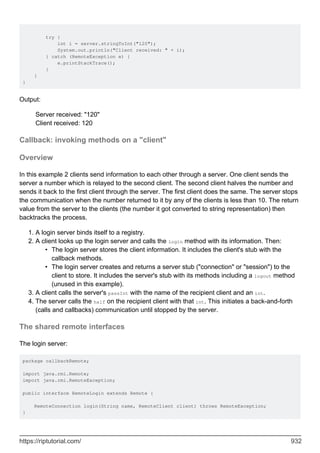
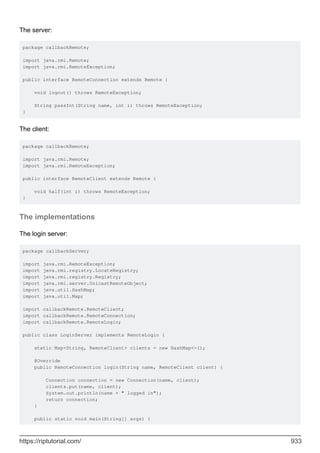
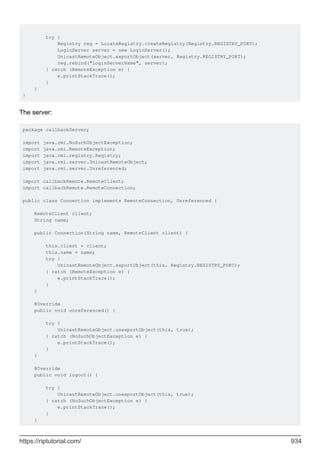
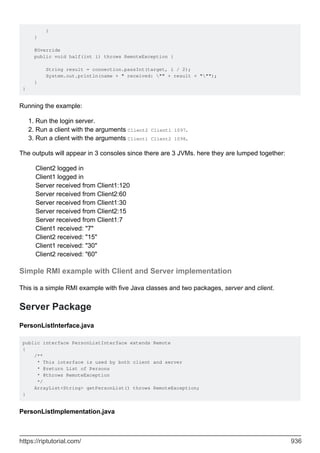

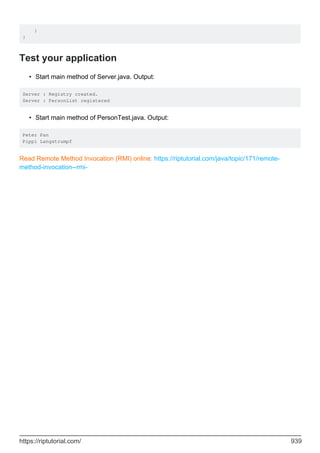

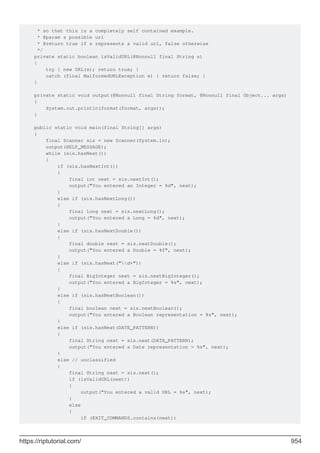
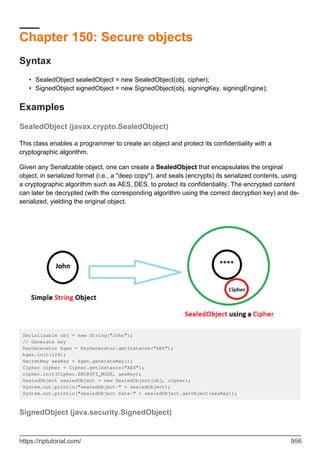
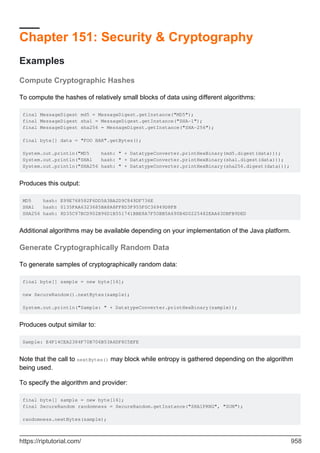
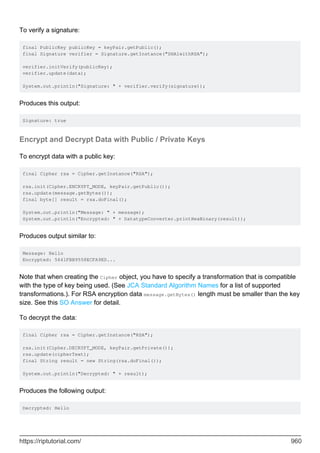

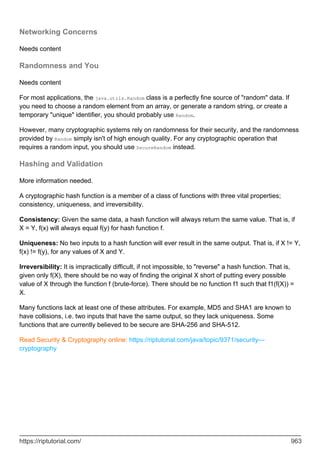
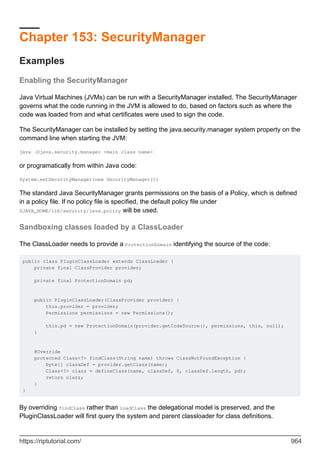
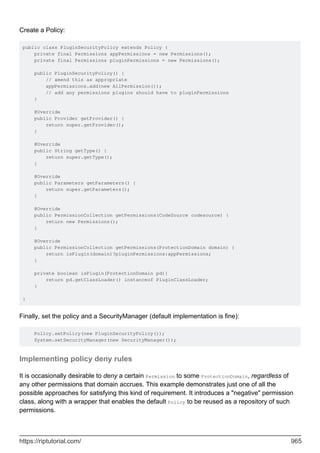

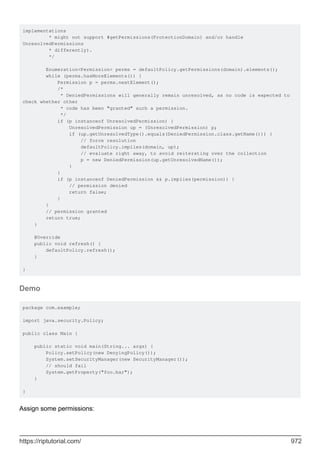

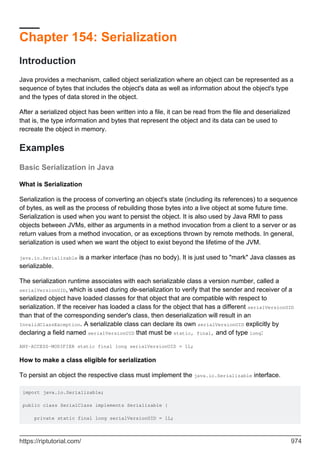
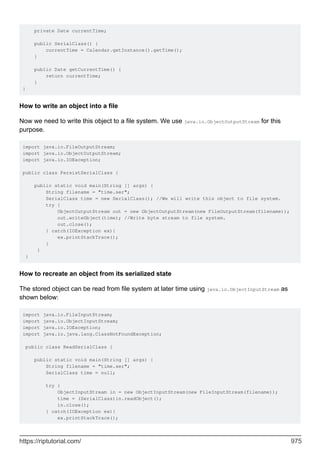
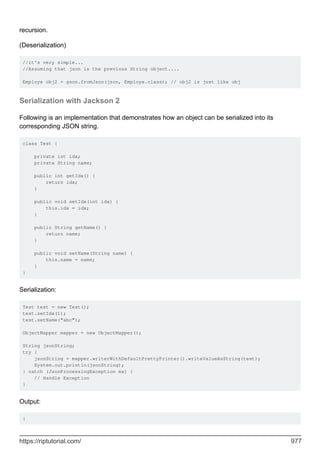
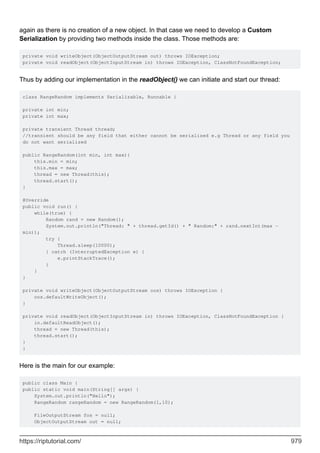
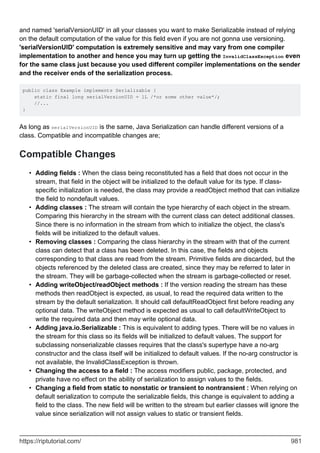
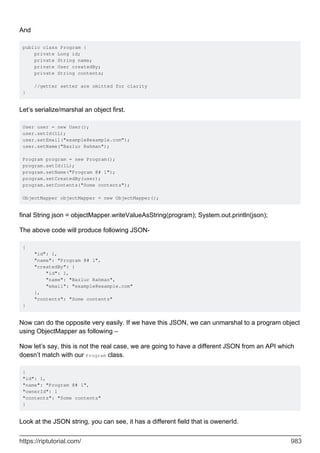
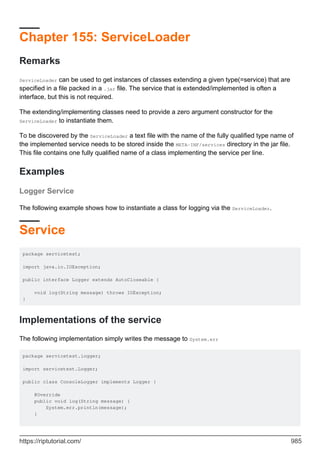
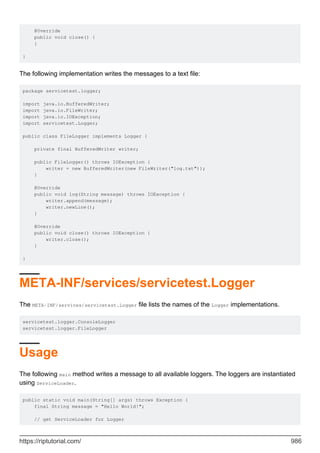
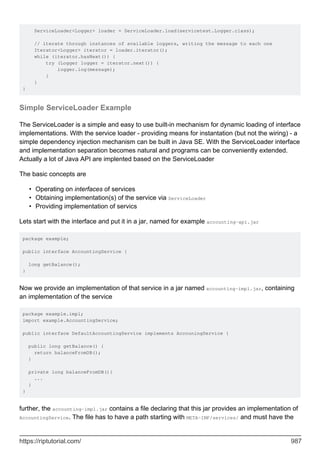
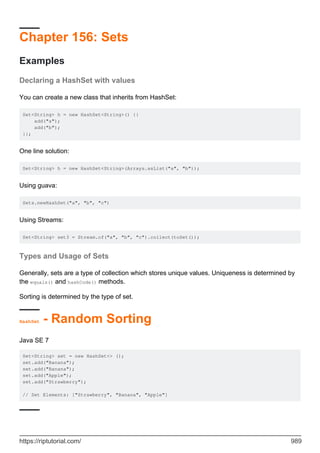
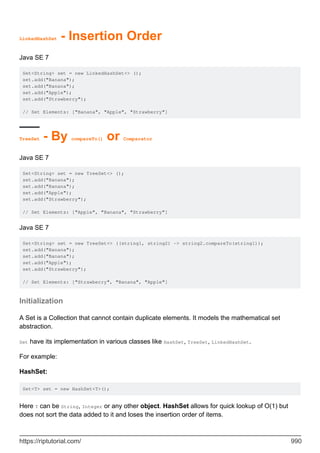
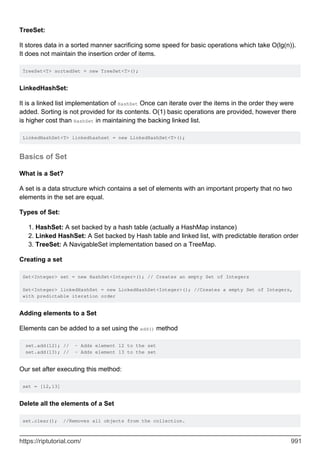
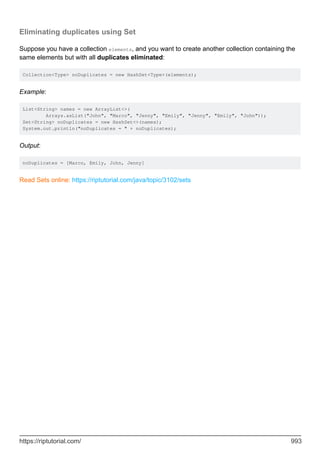
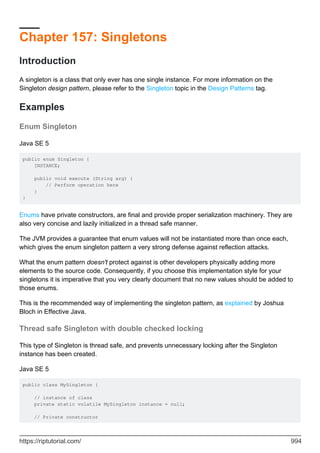


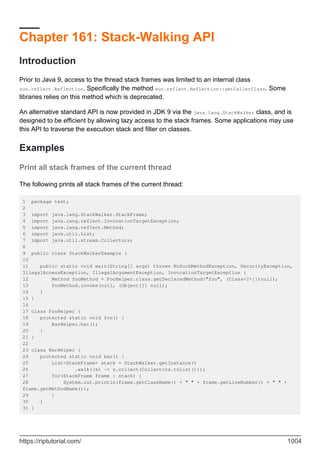
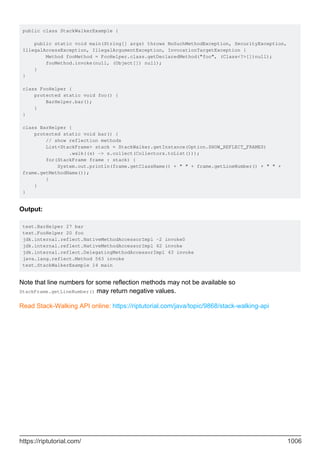
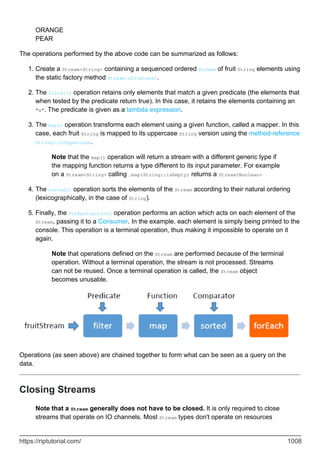
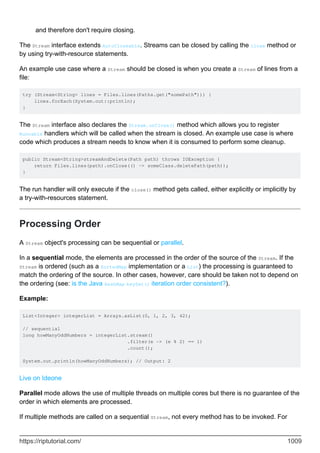
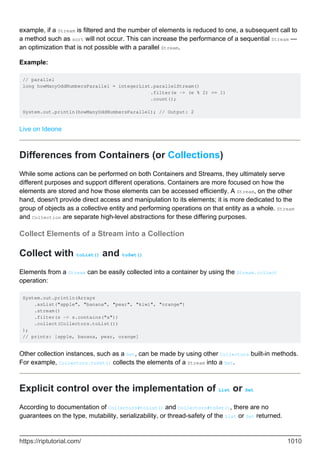
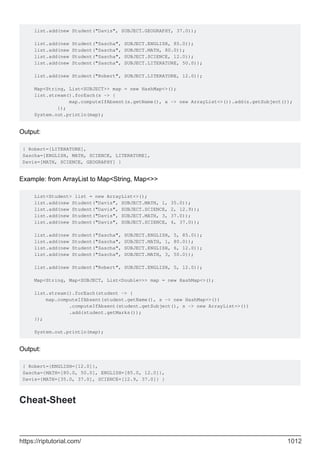
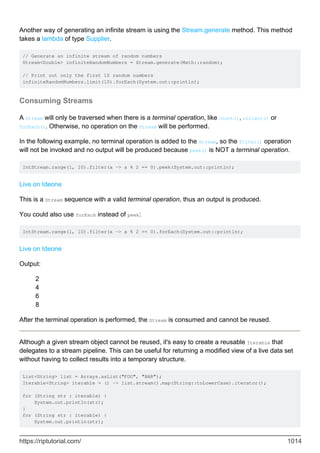
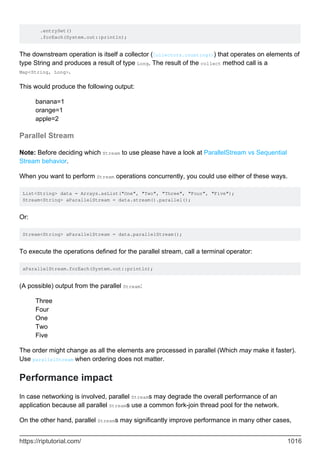
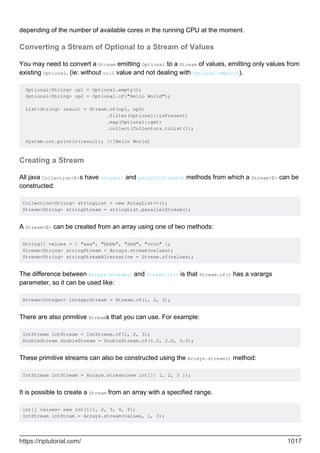
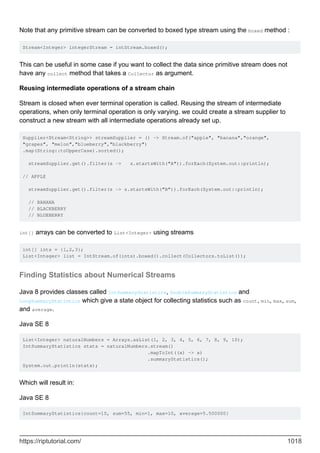
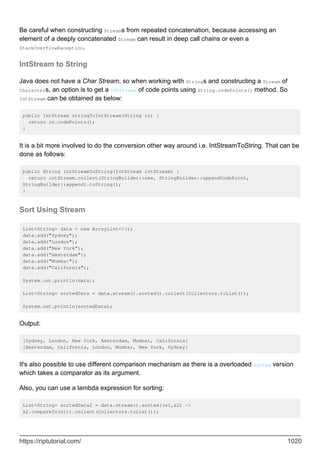
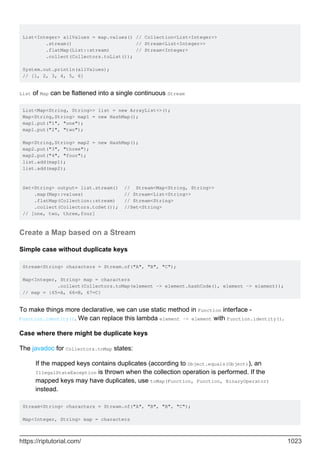
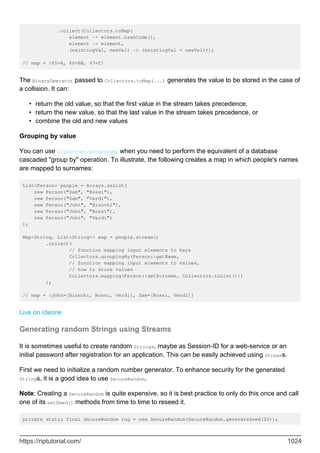
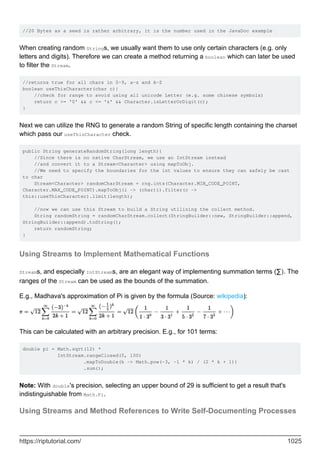
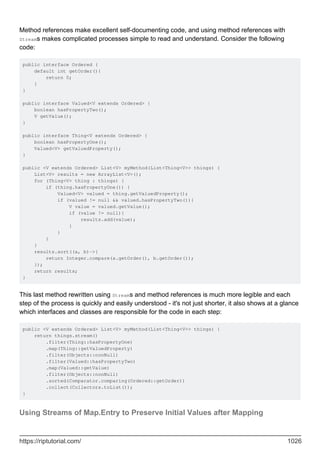
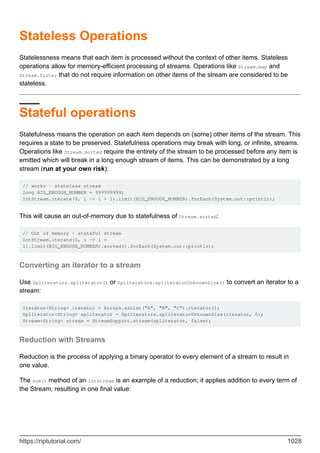
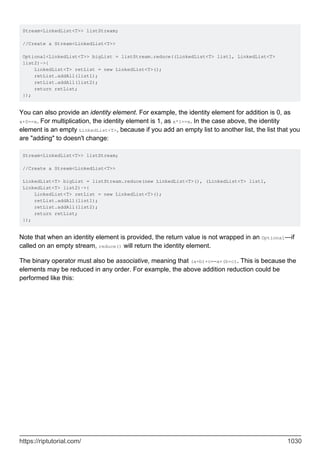

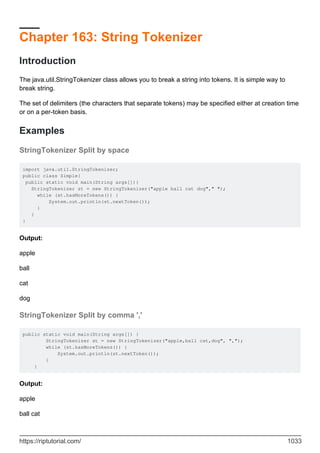


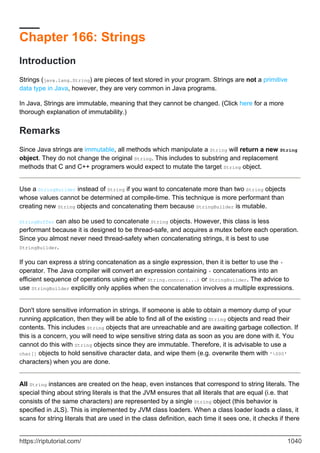
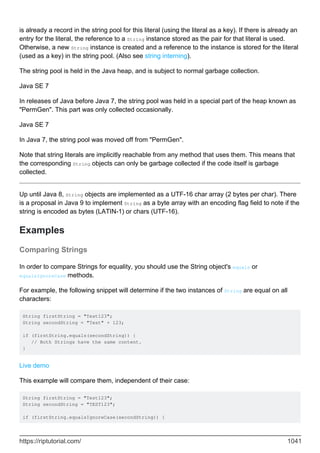
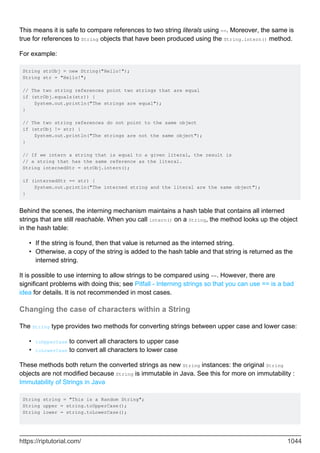
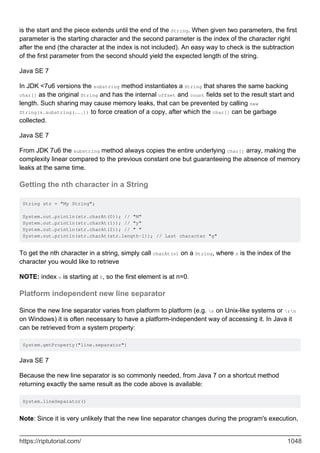
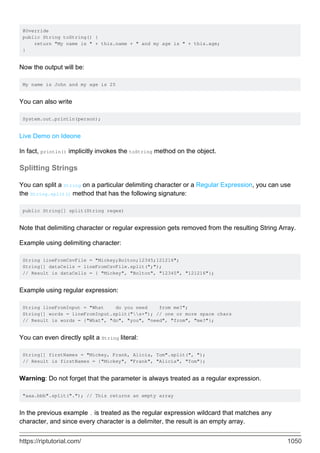
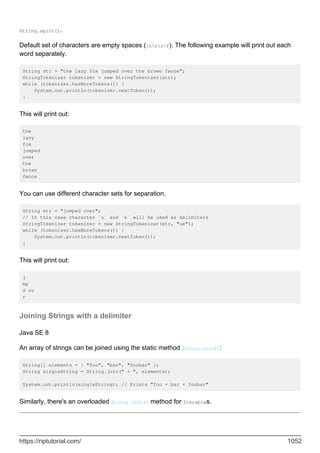
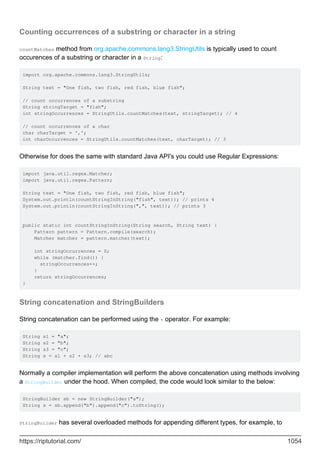
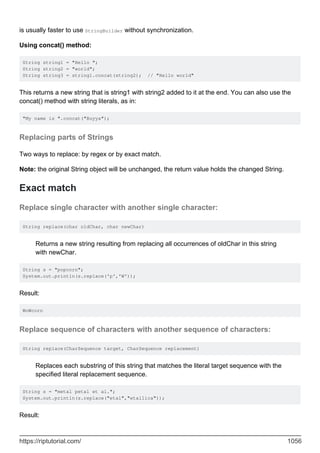
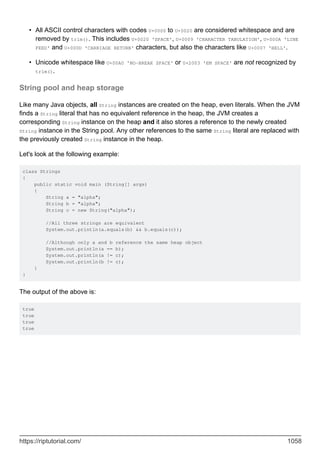
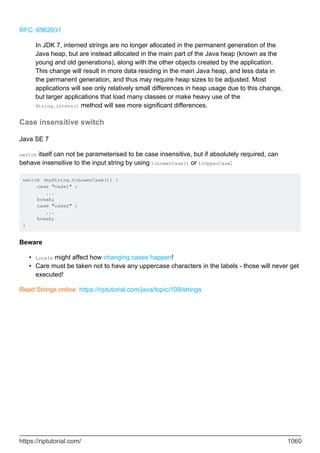
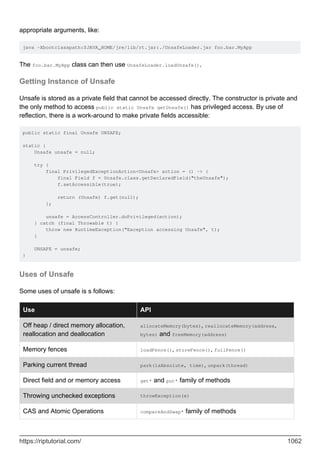
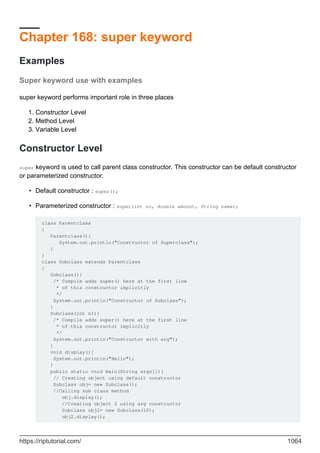


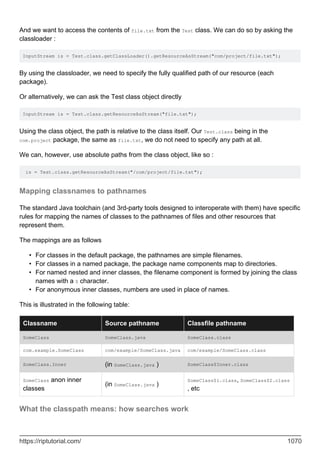

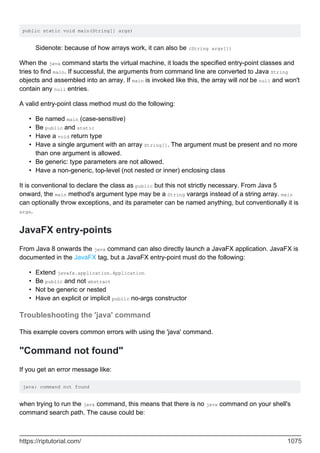
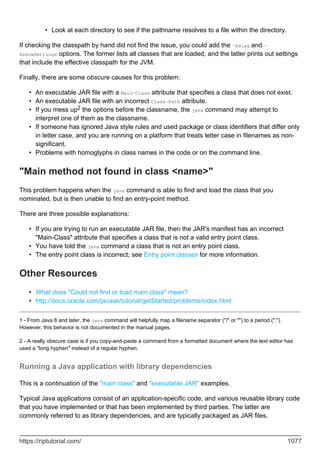
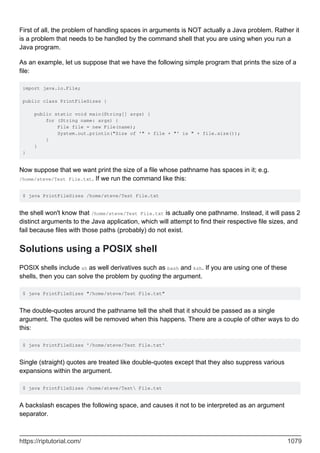
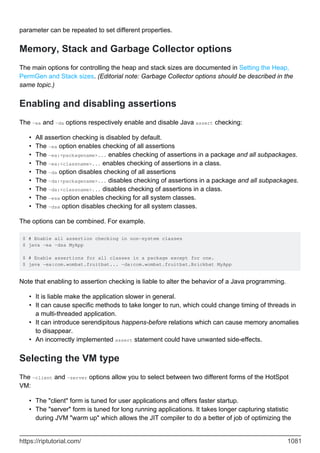

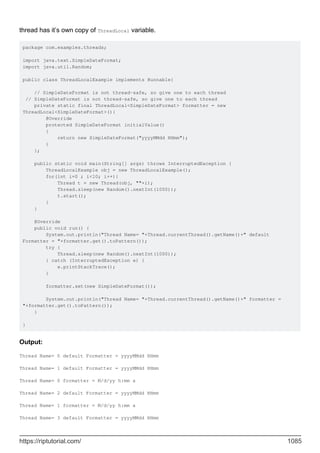

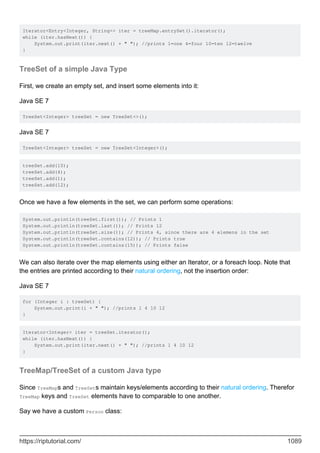
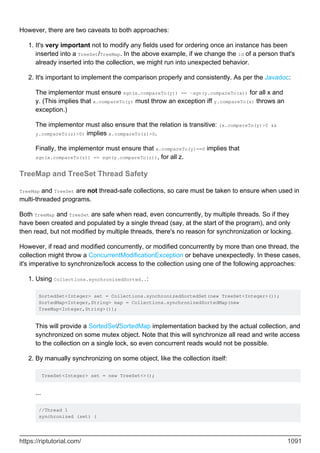

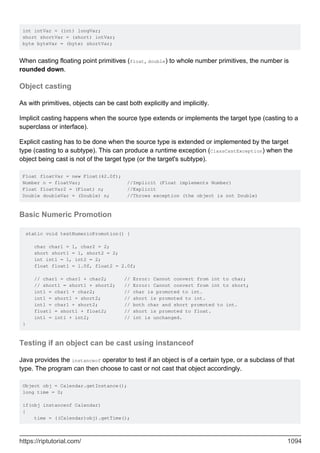


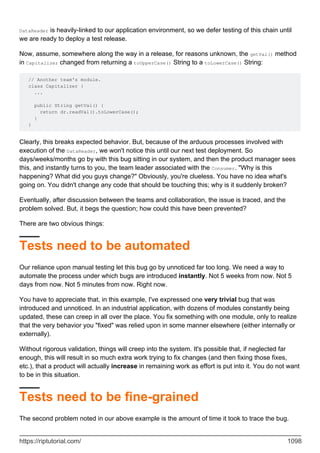

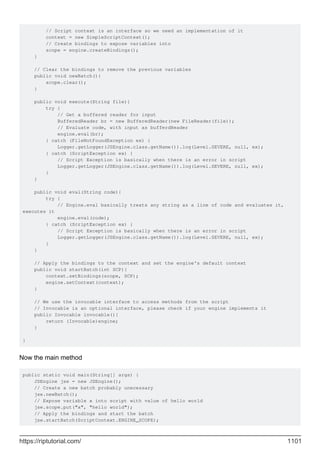
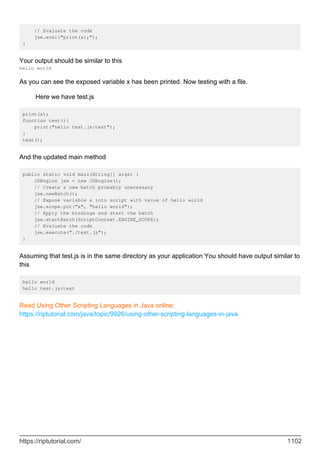
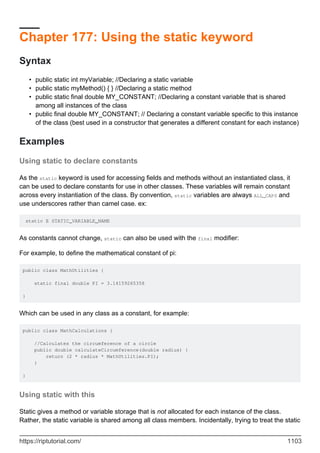

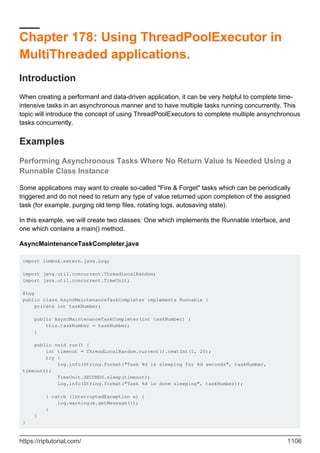
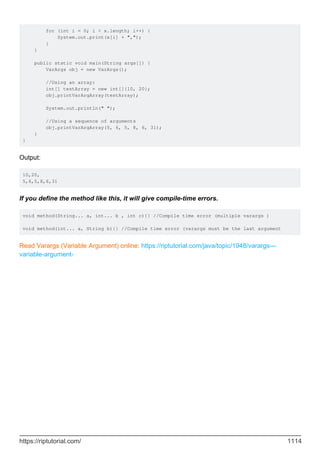
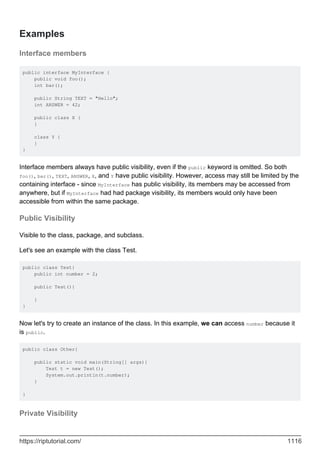
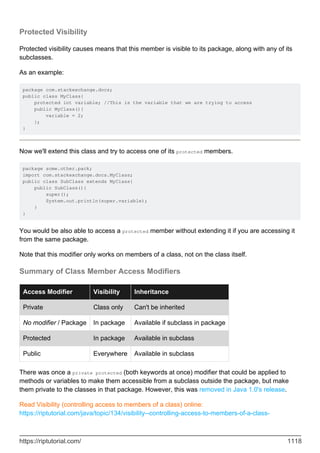

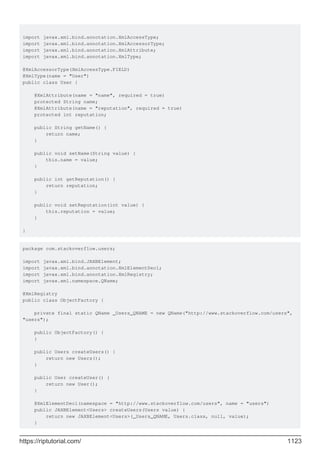

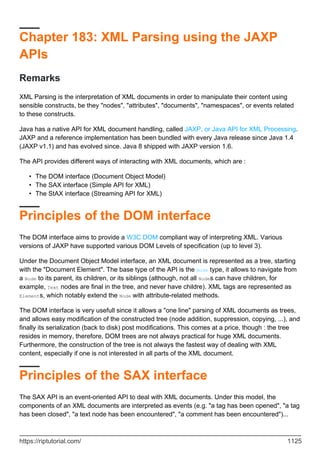


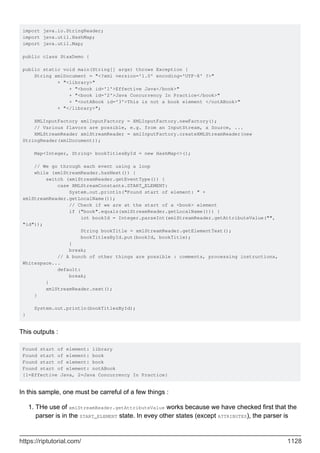

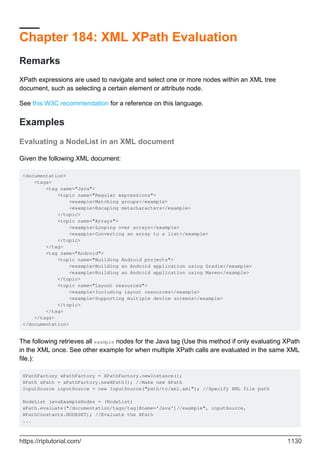
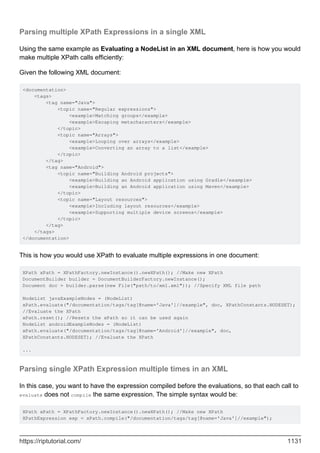

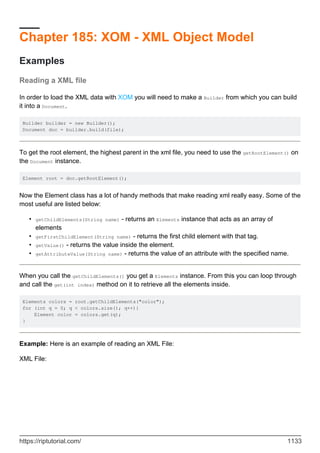
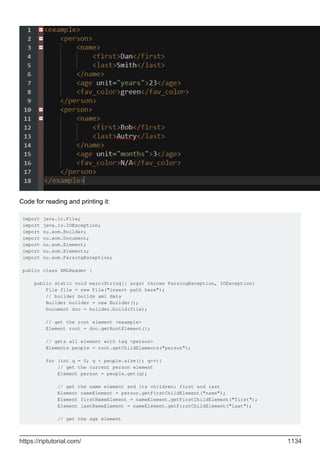
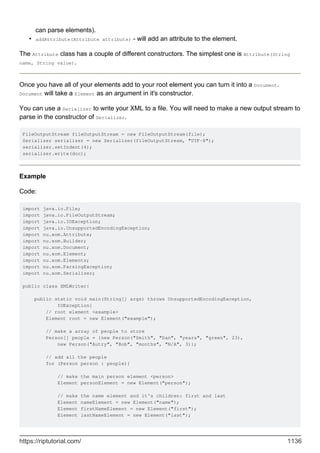


![谷歌留痕技术教程[ 𝙩𝙤𝙥 𝟮𝟯𝟯. 𝙘 𝙤𝙢 ]](https://cdn.slidesharecdn.com/ss_thumbnails/top233-260130173900-2eb784f9-thumbnail.jpg?width=640&height=640&fit=bounds)


