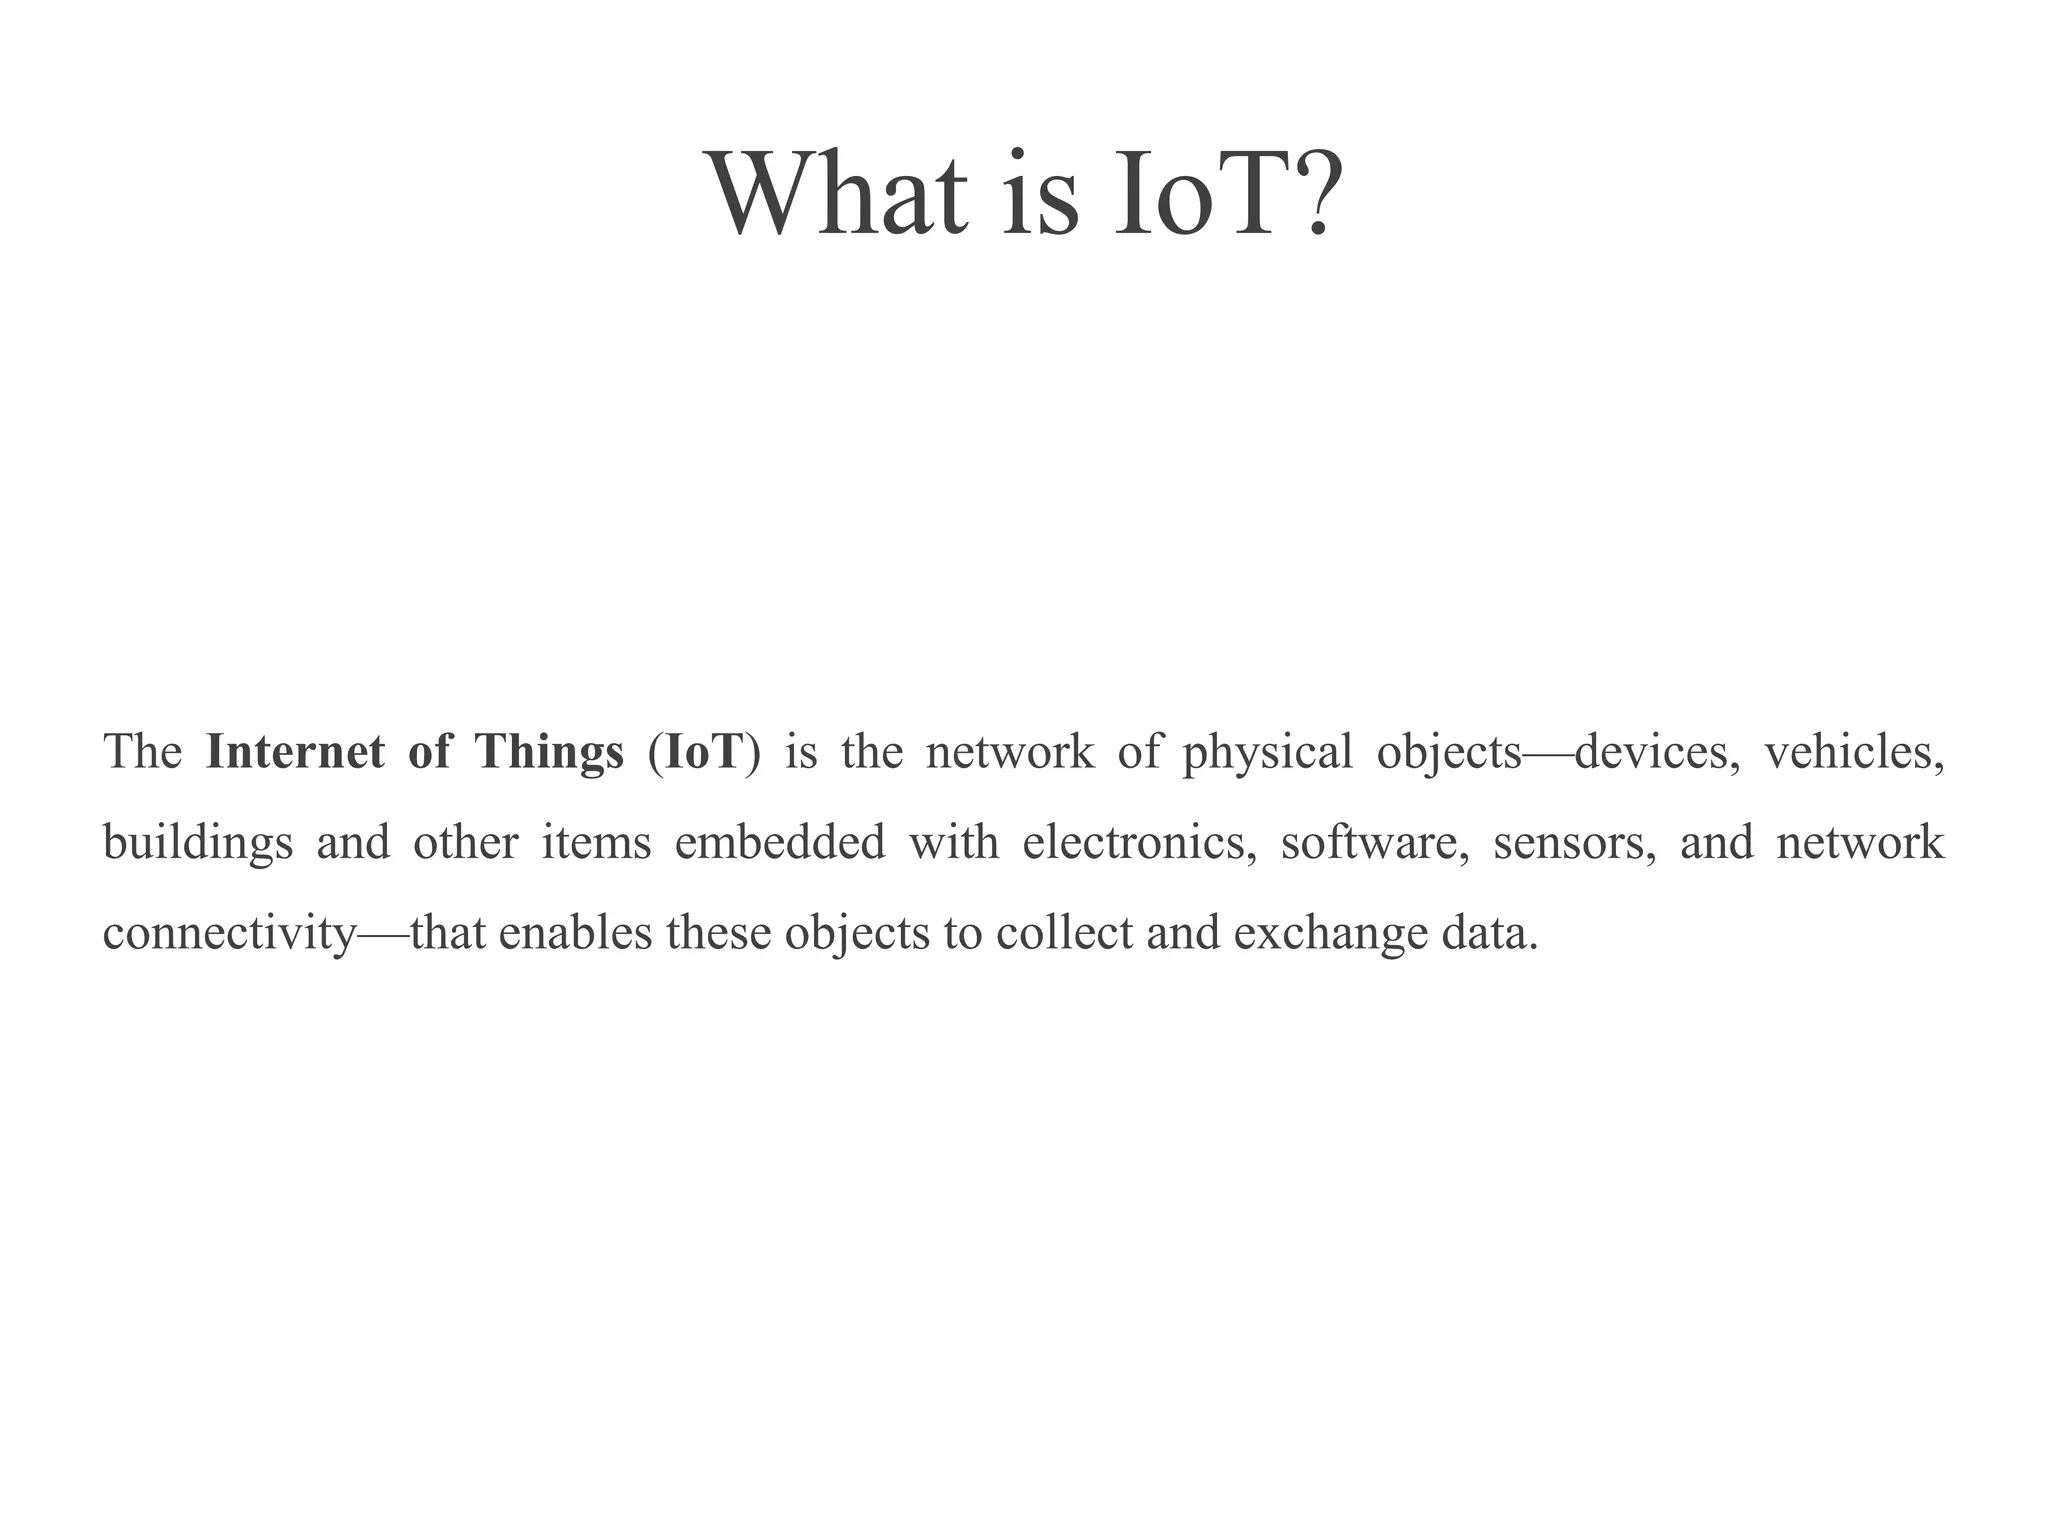
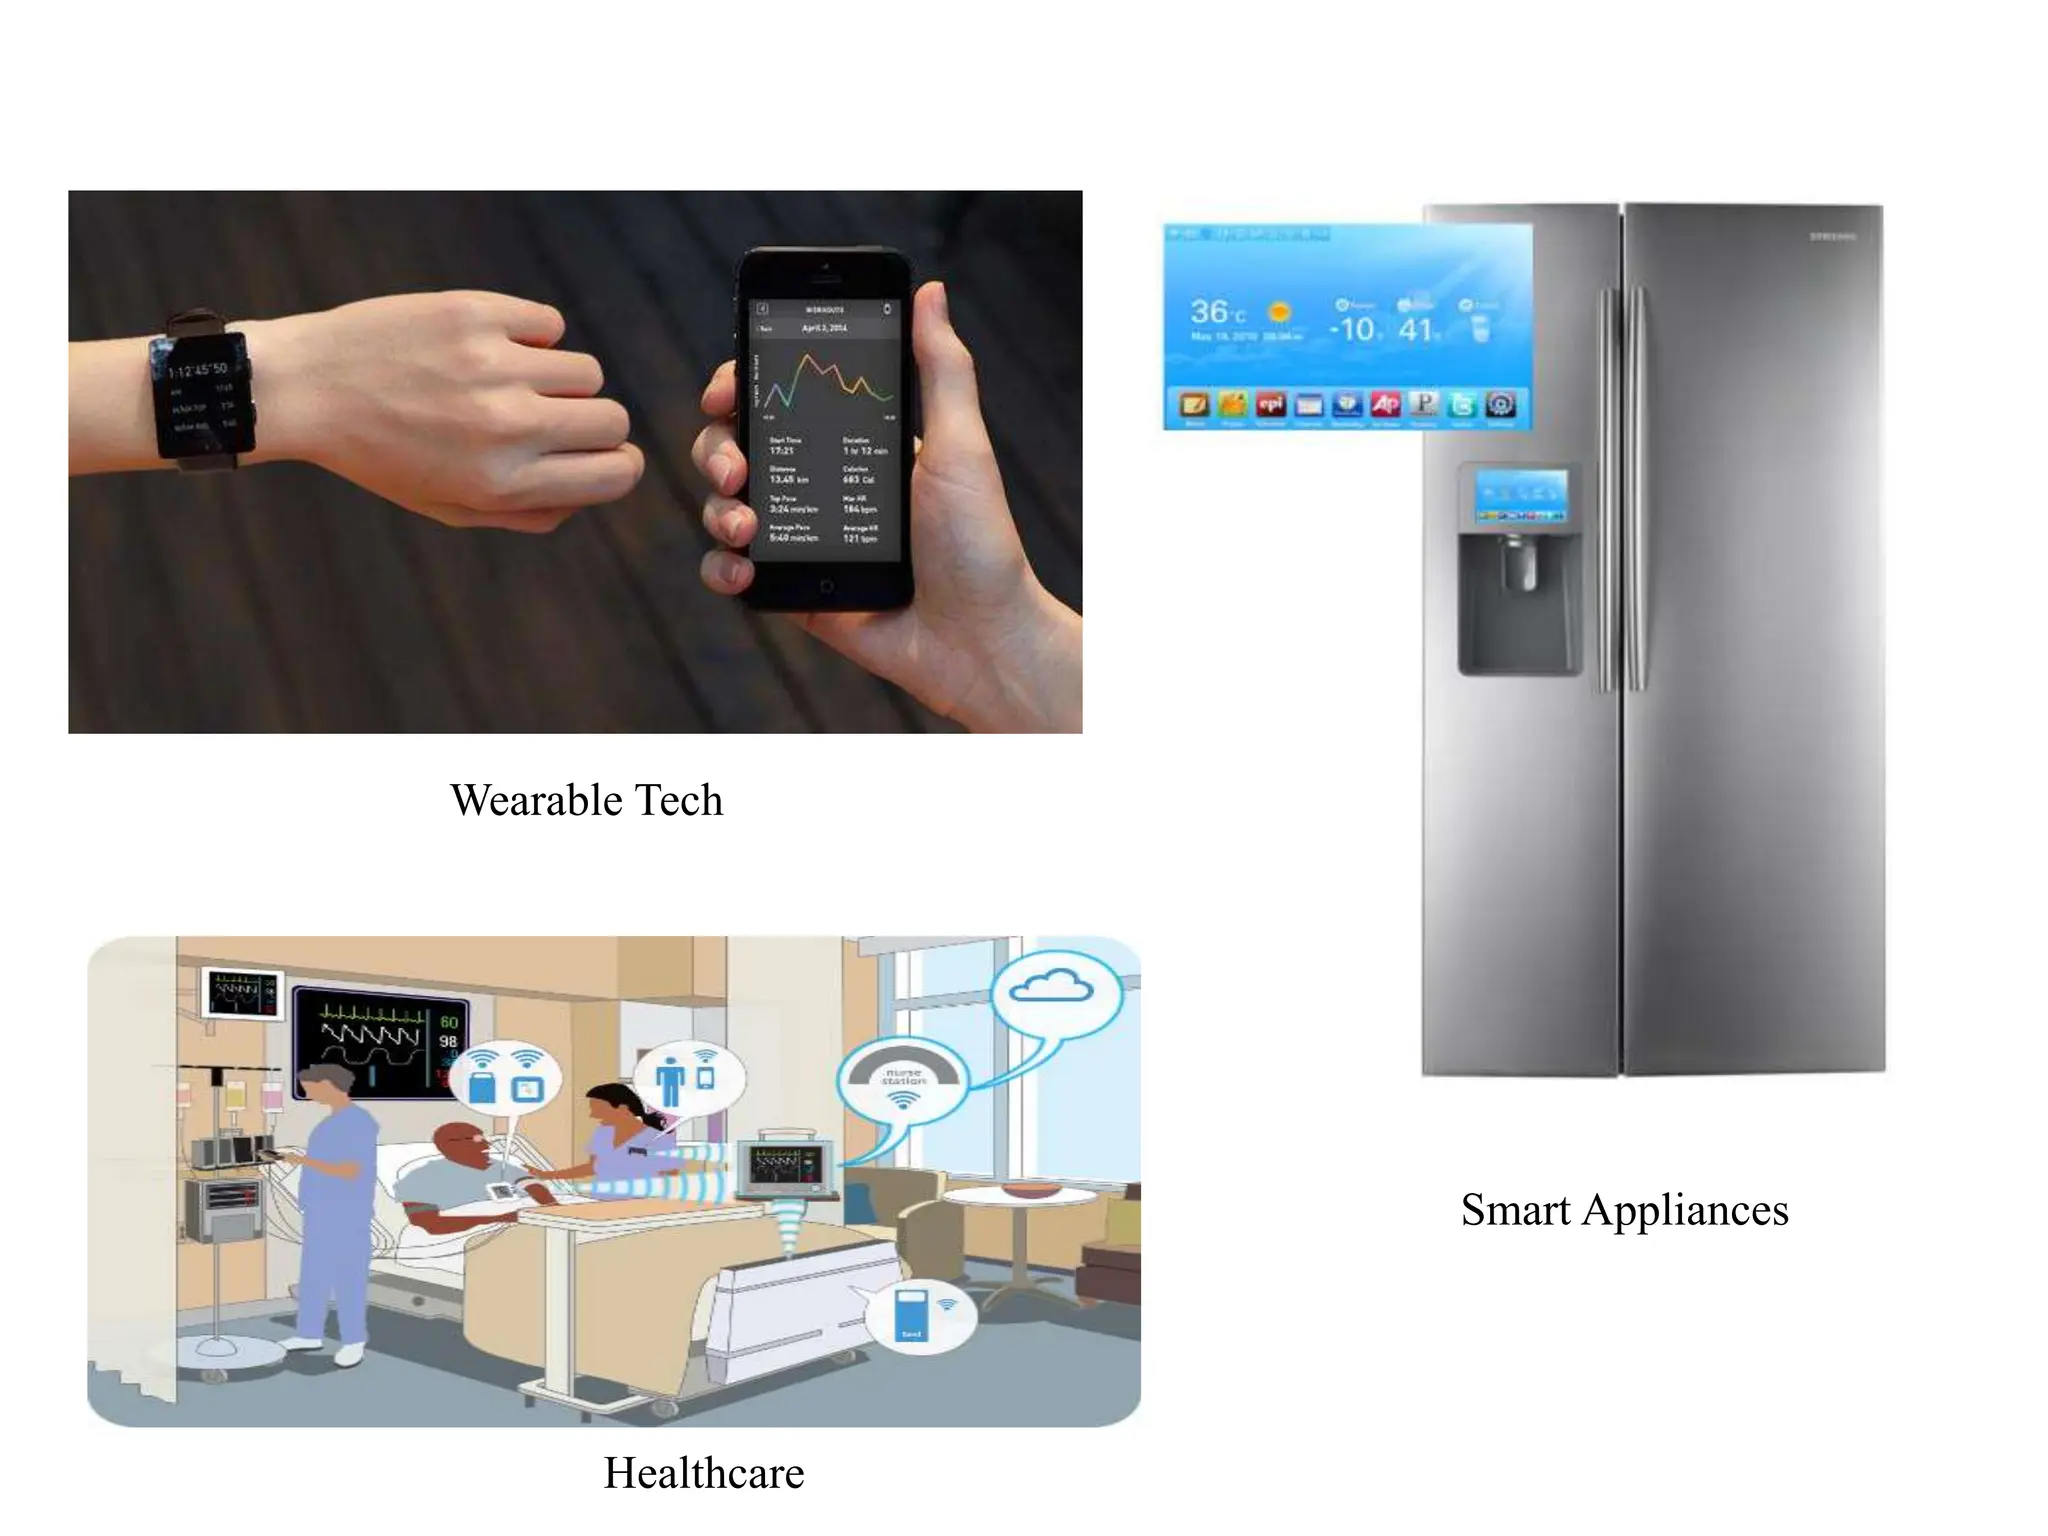
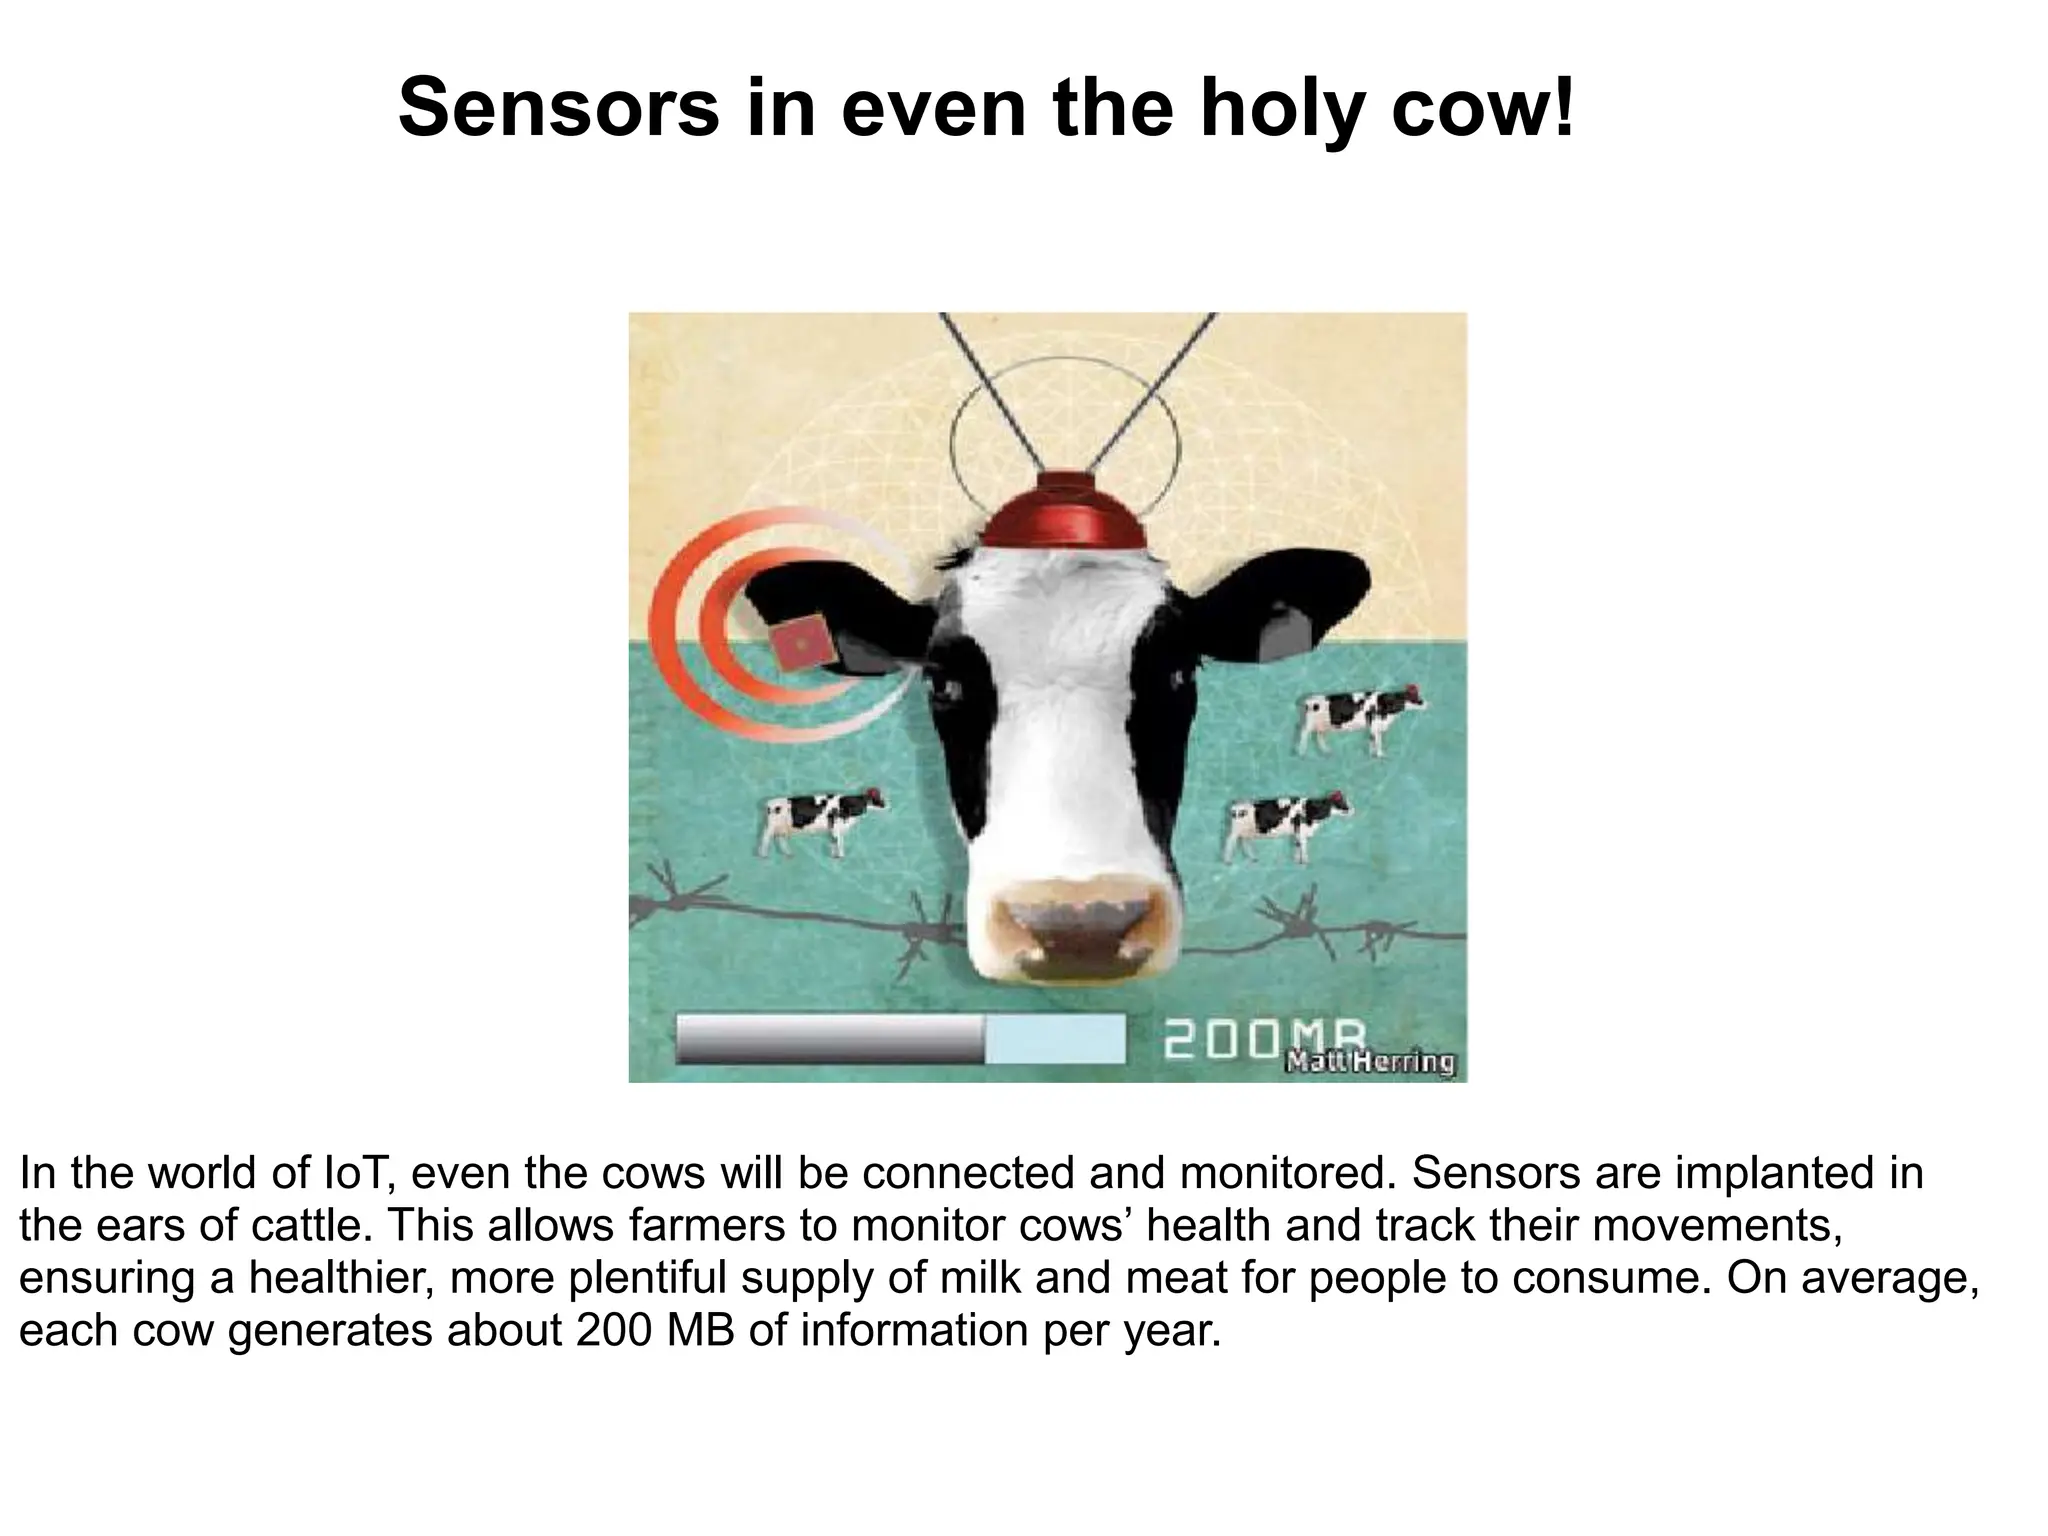
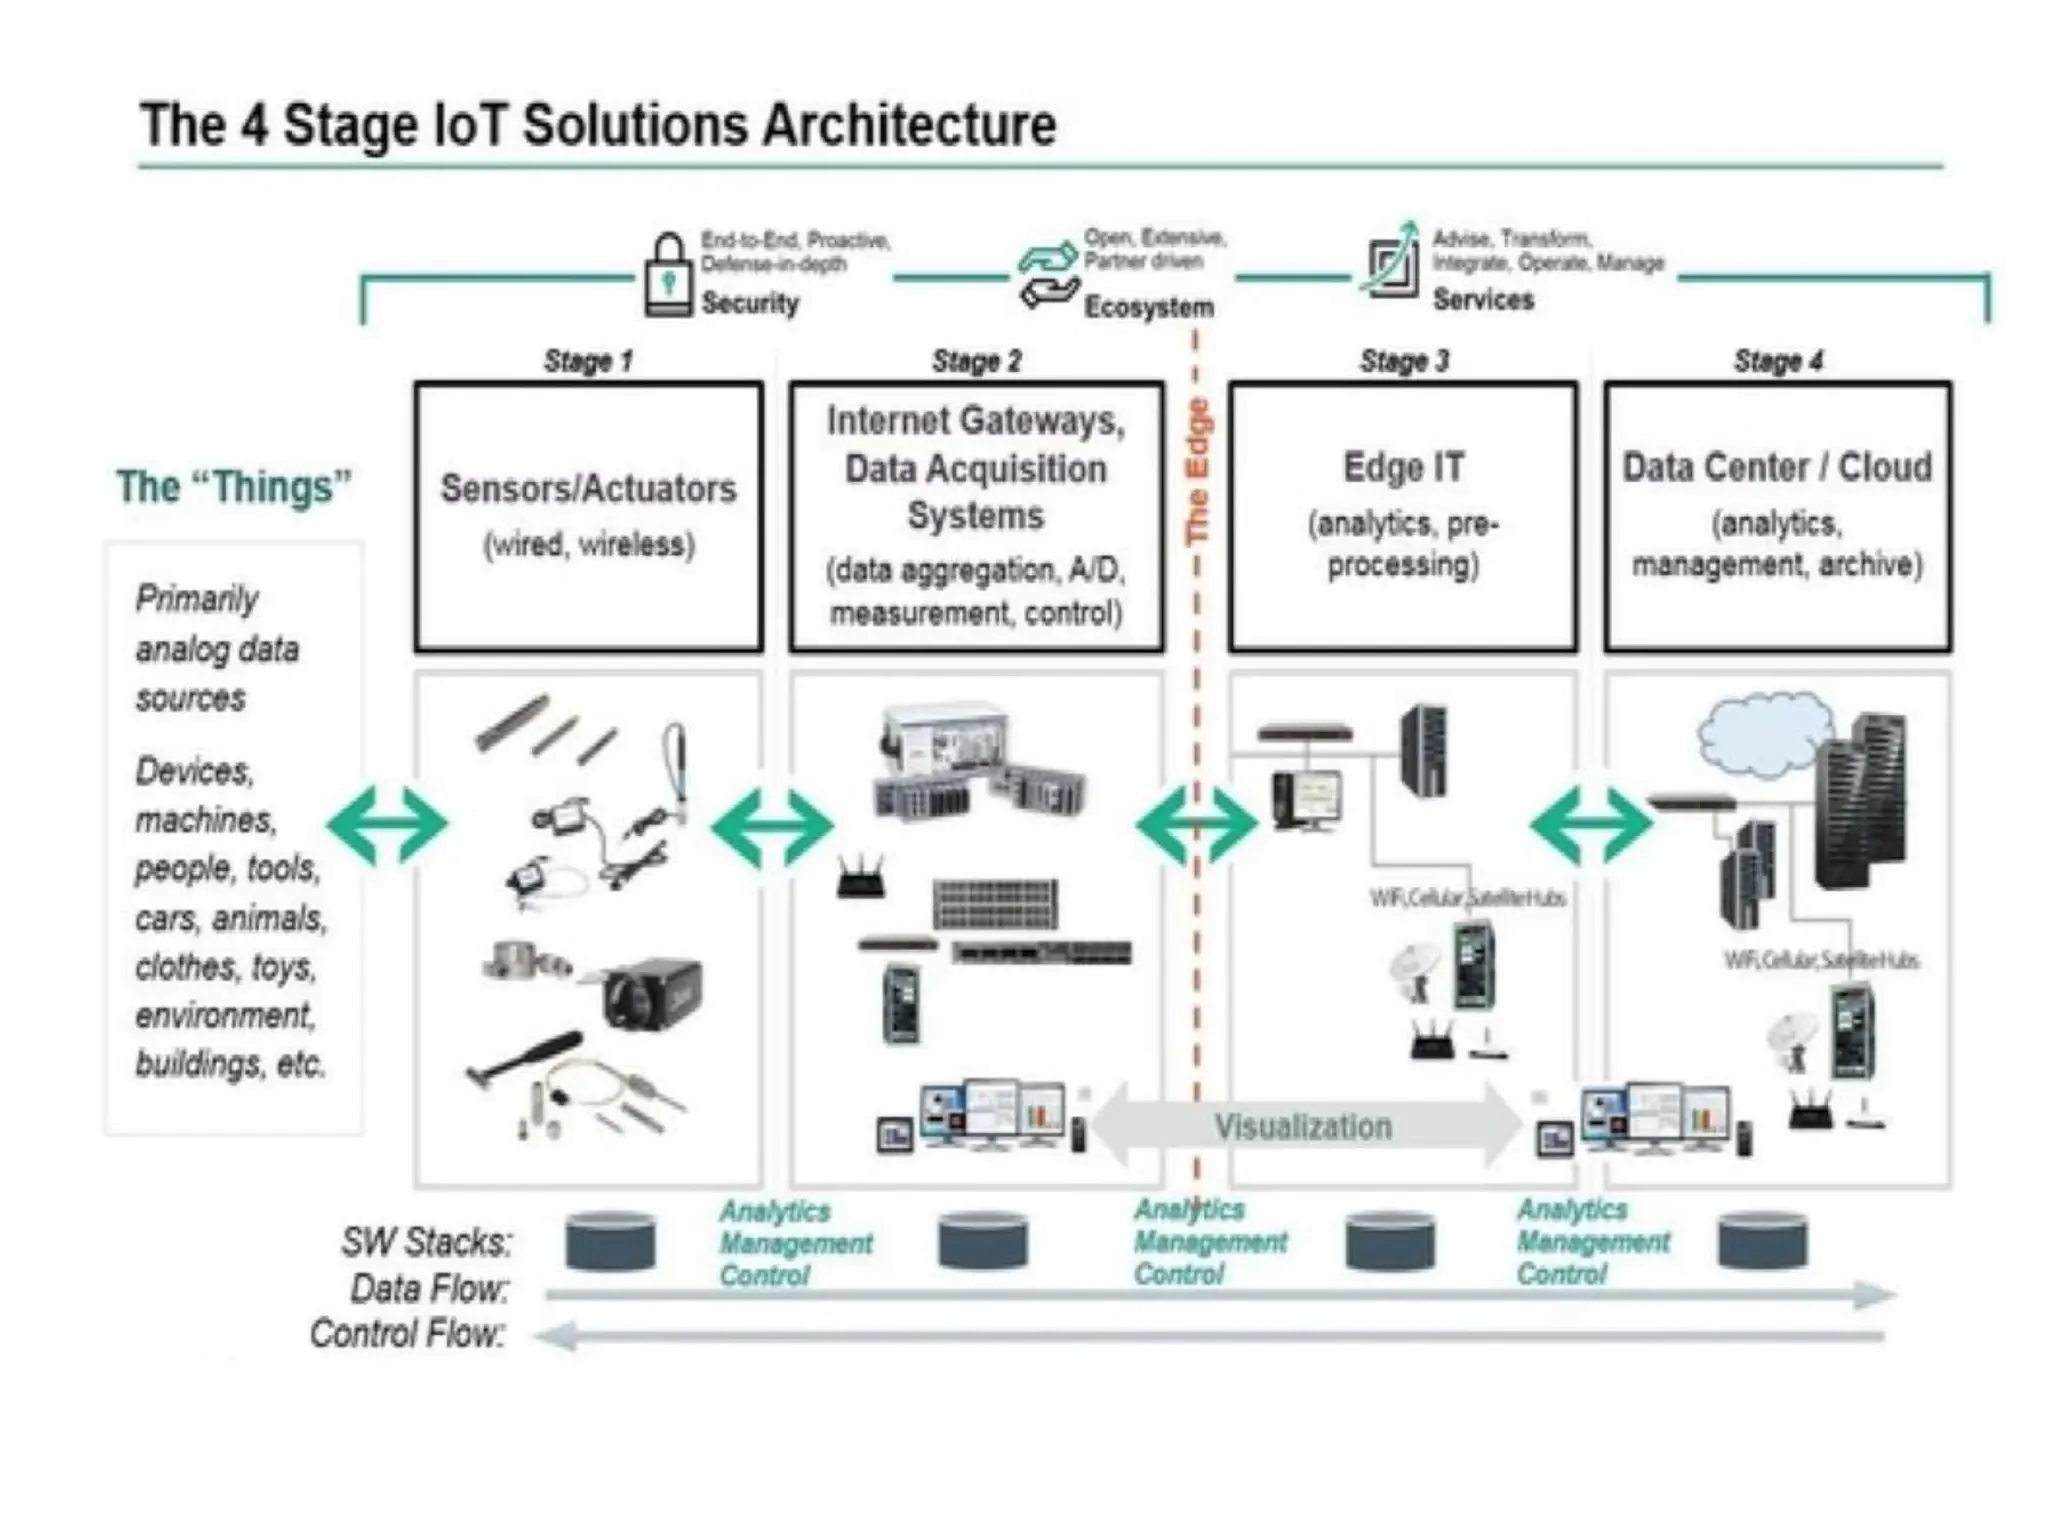
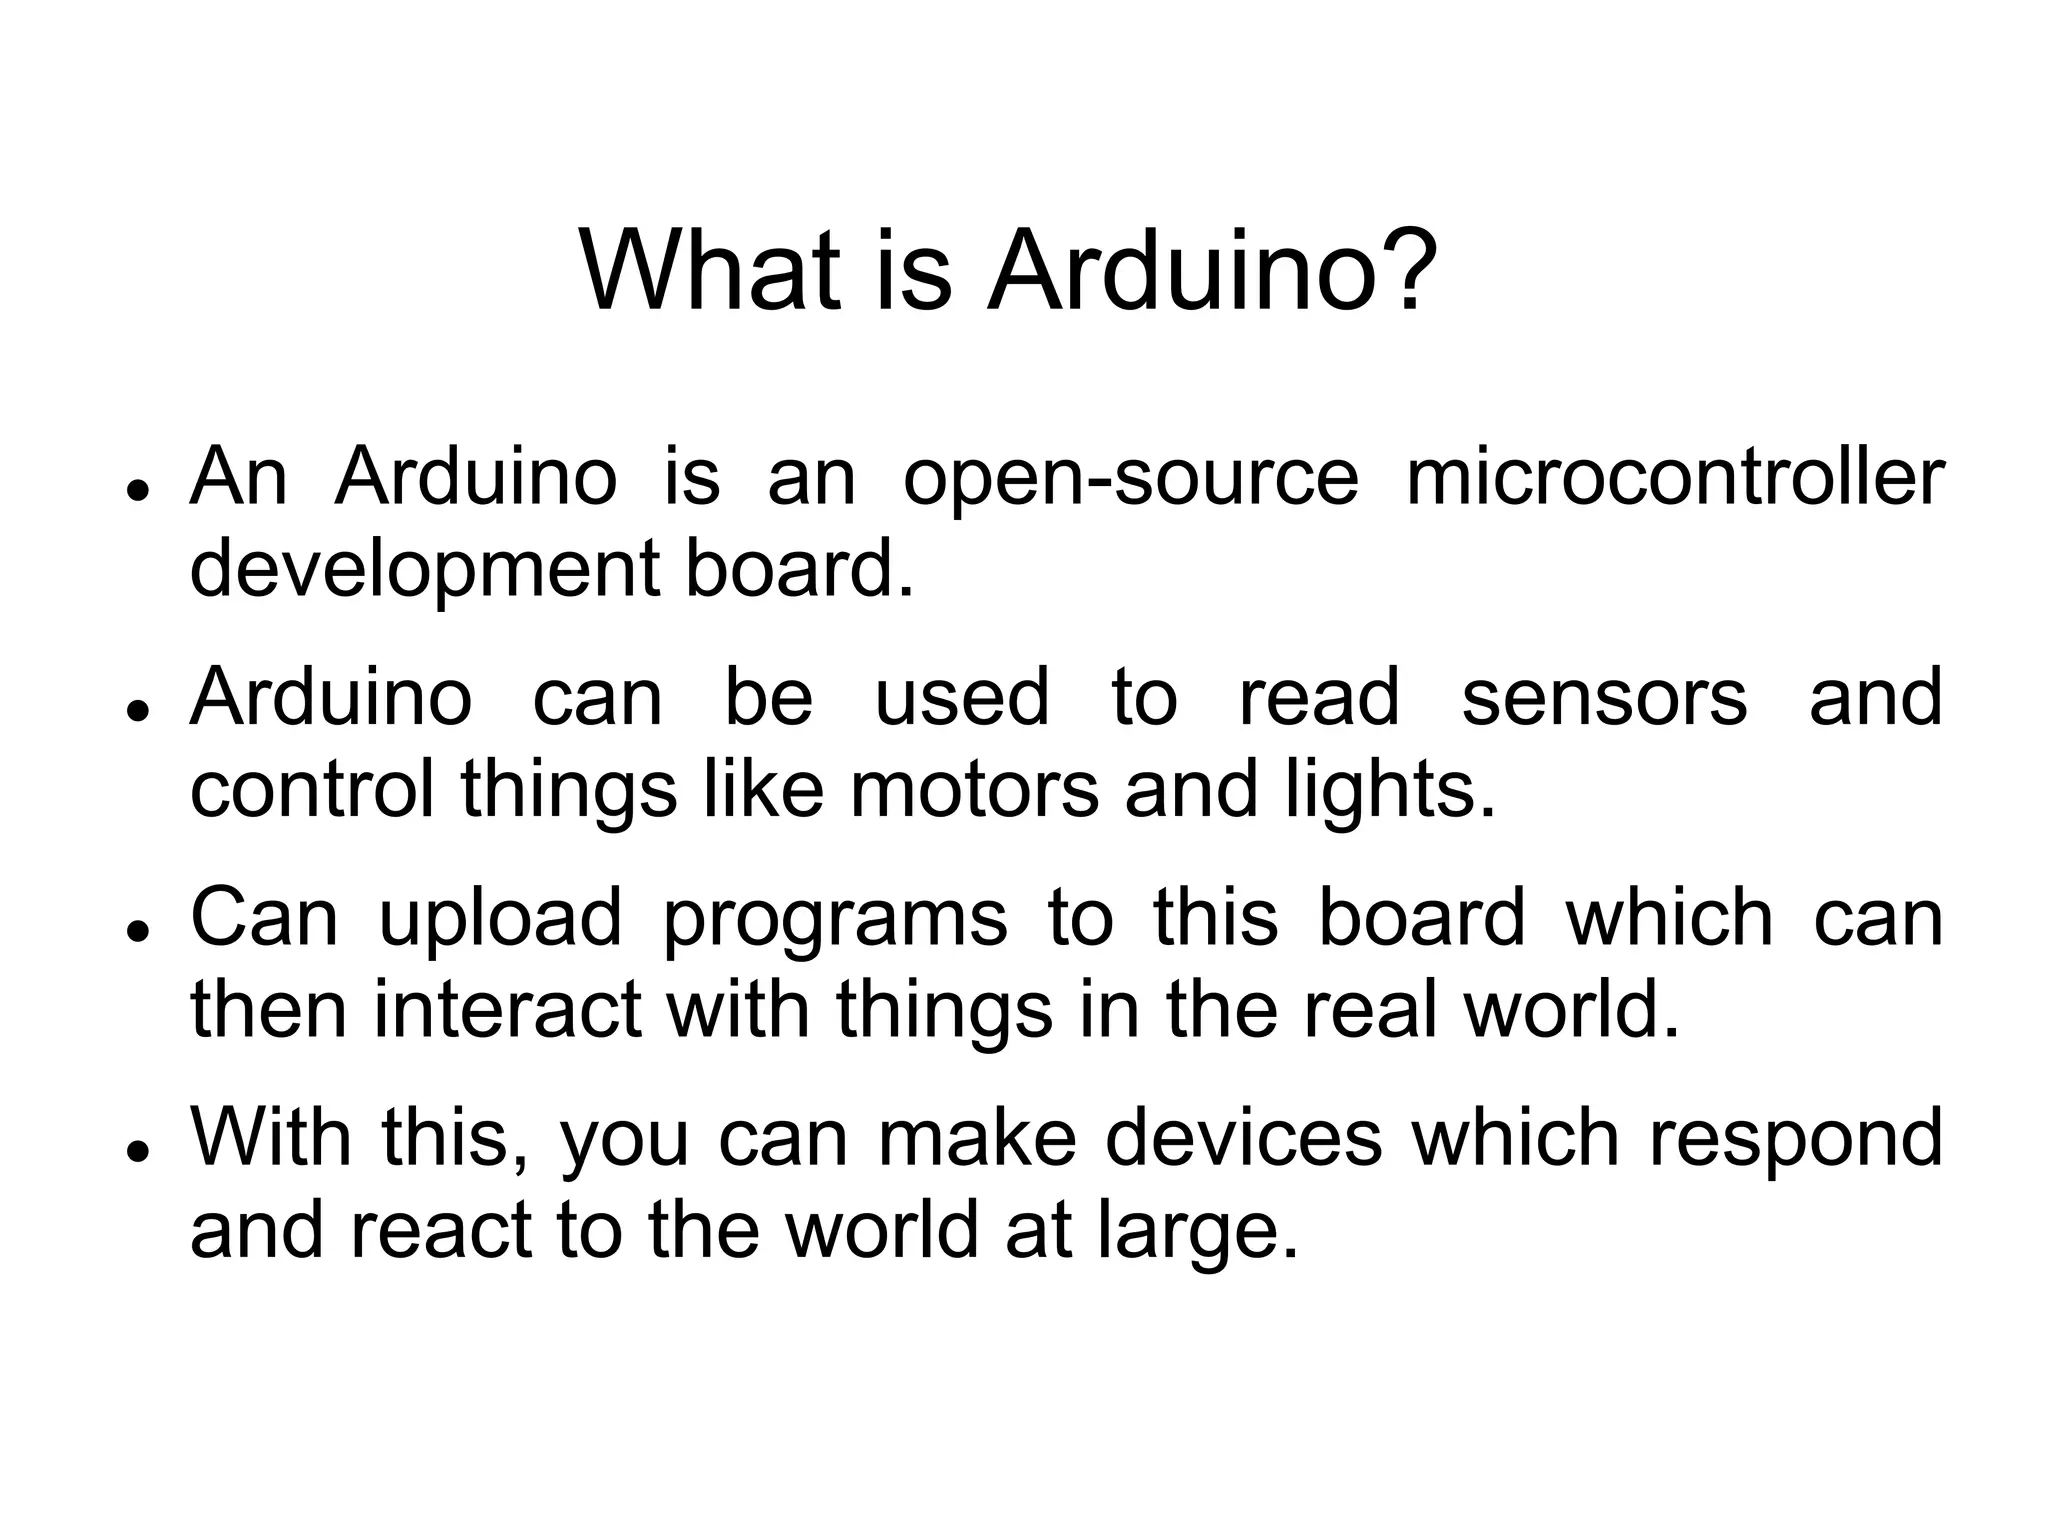
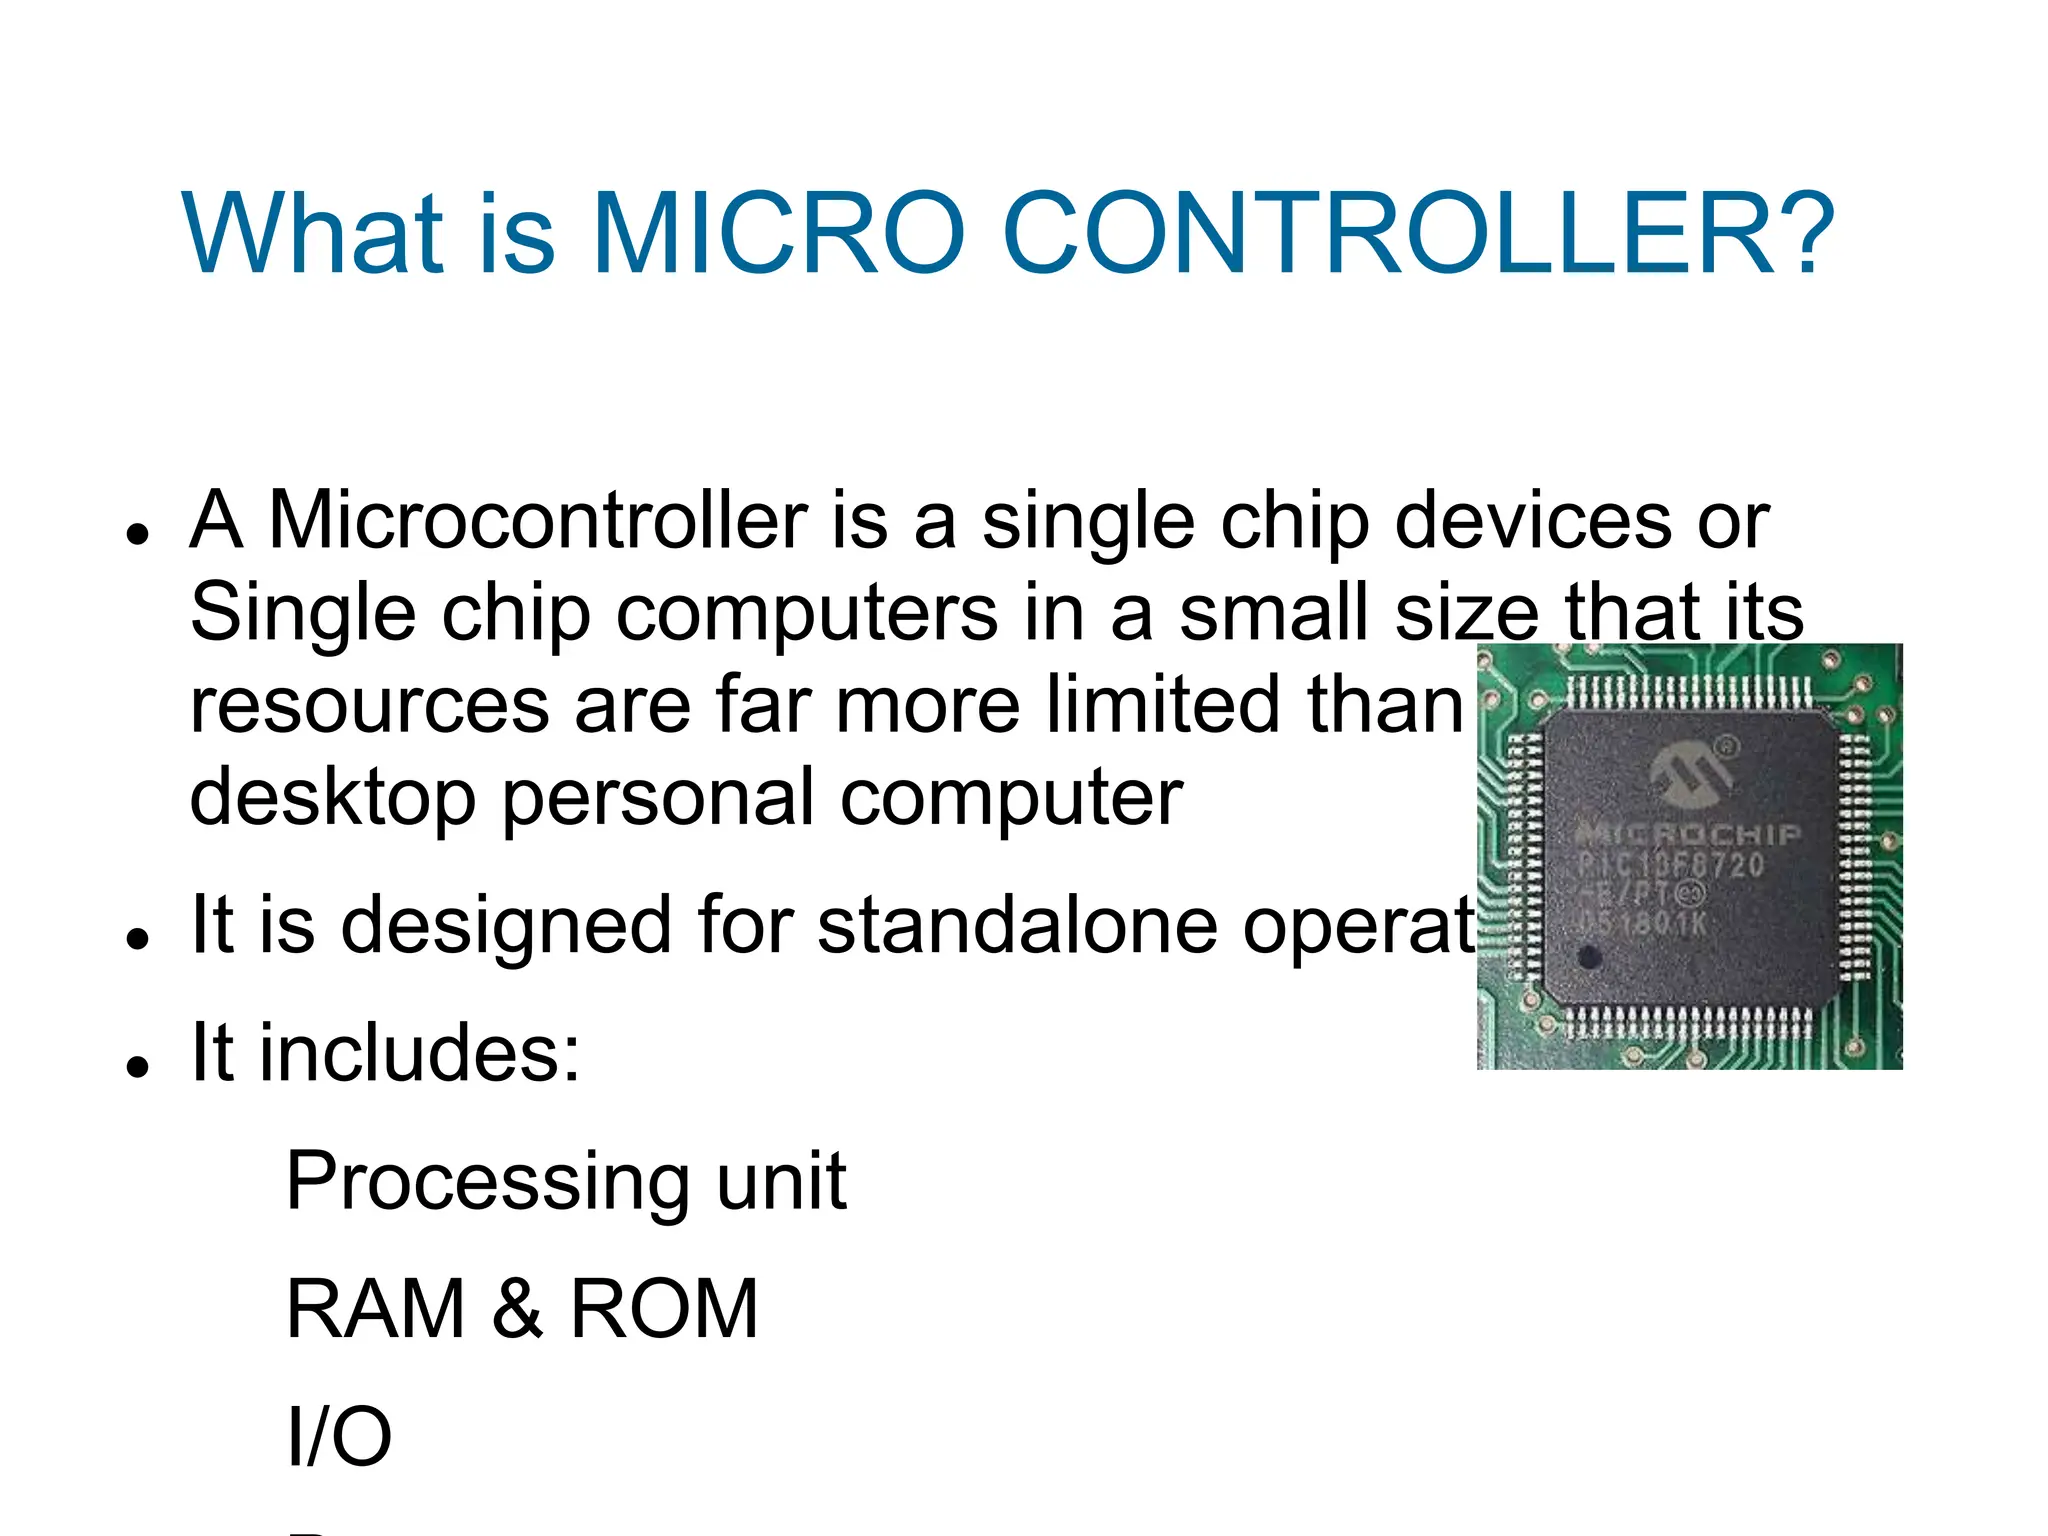
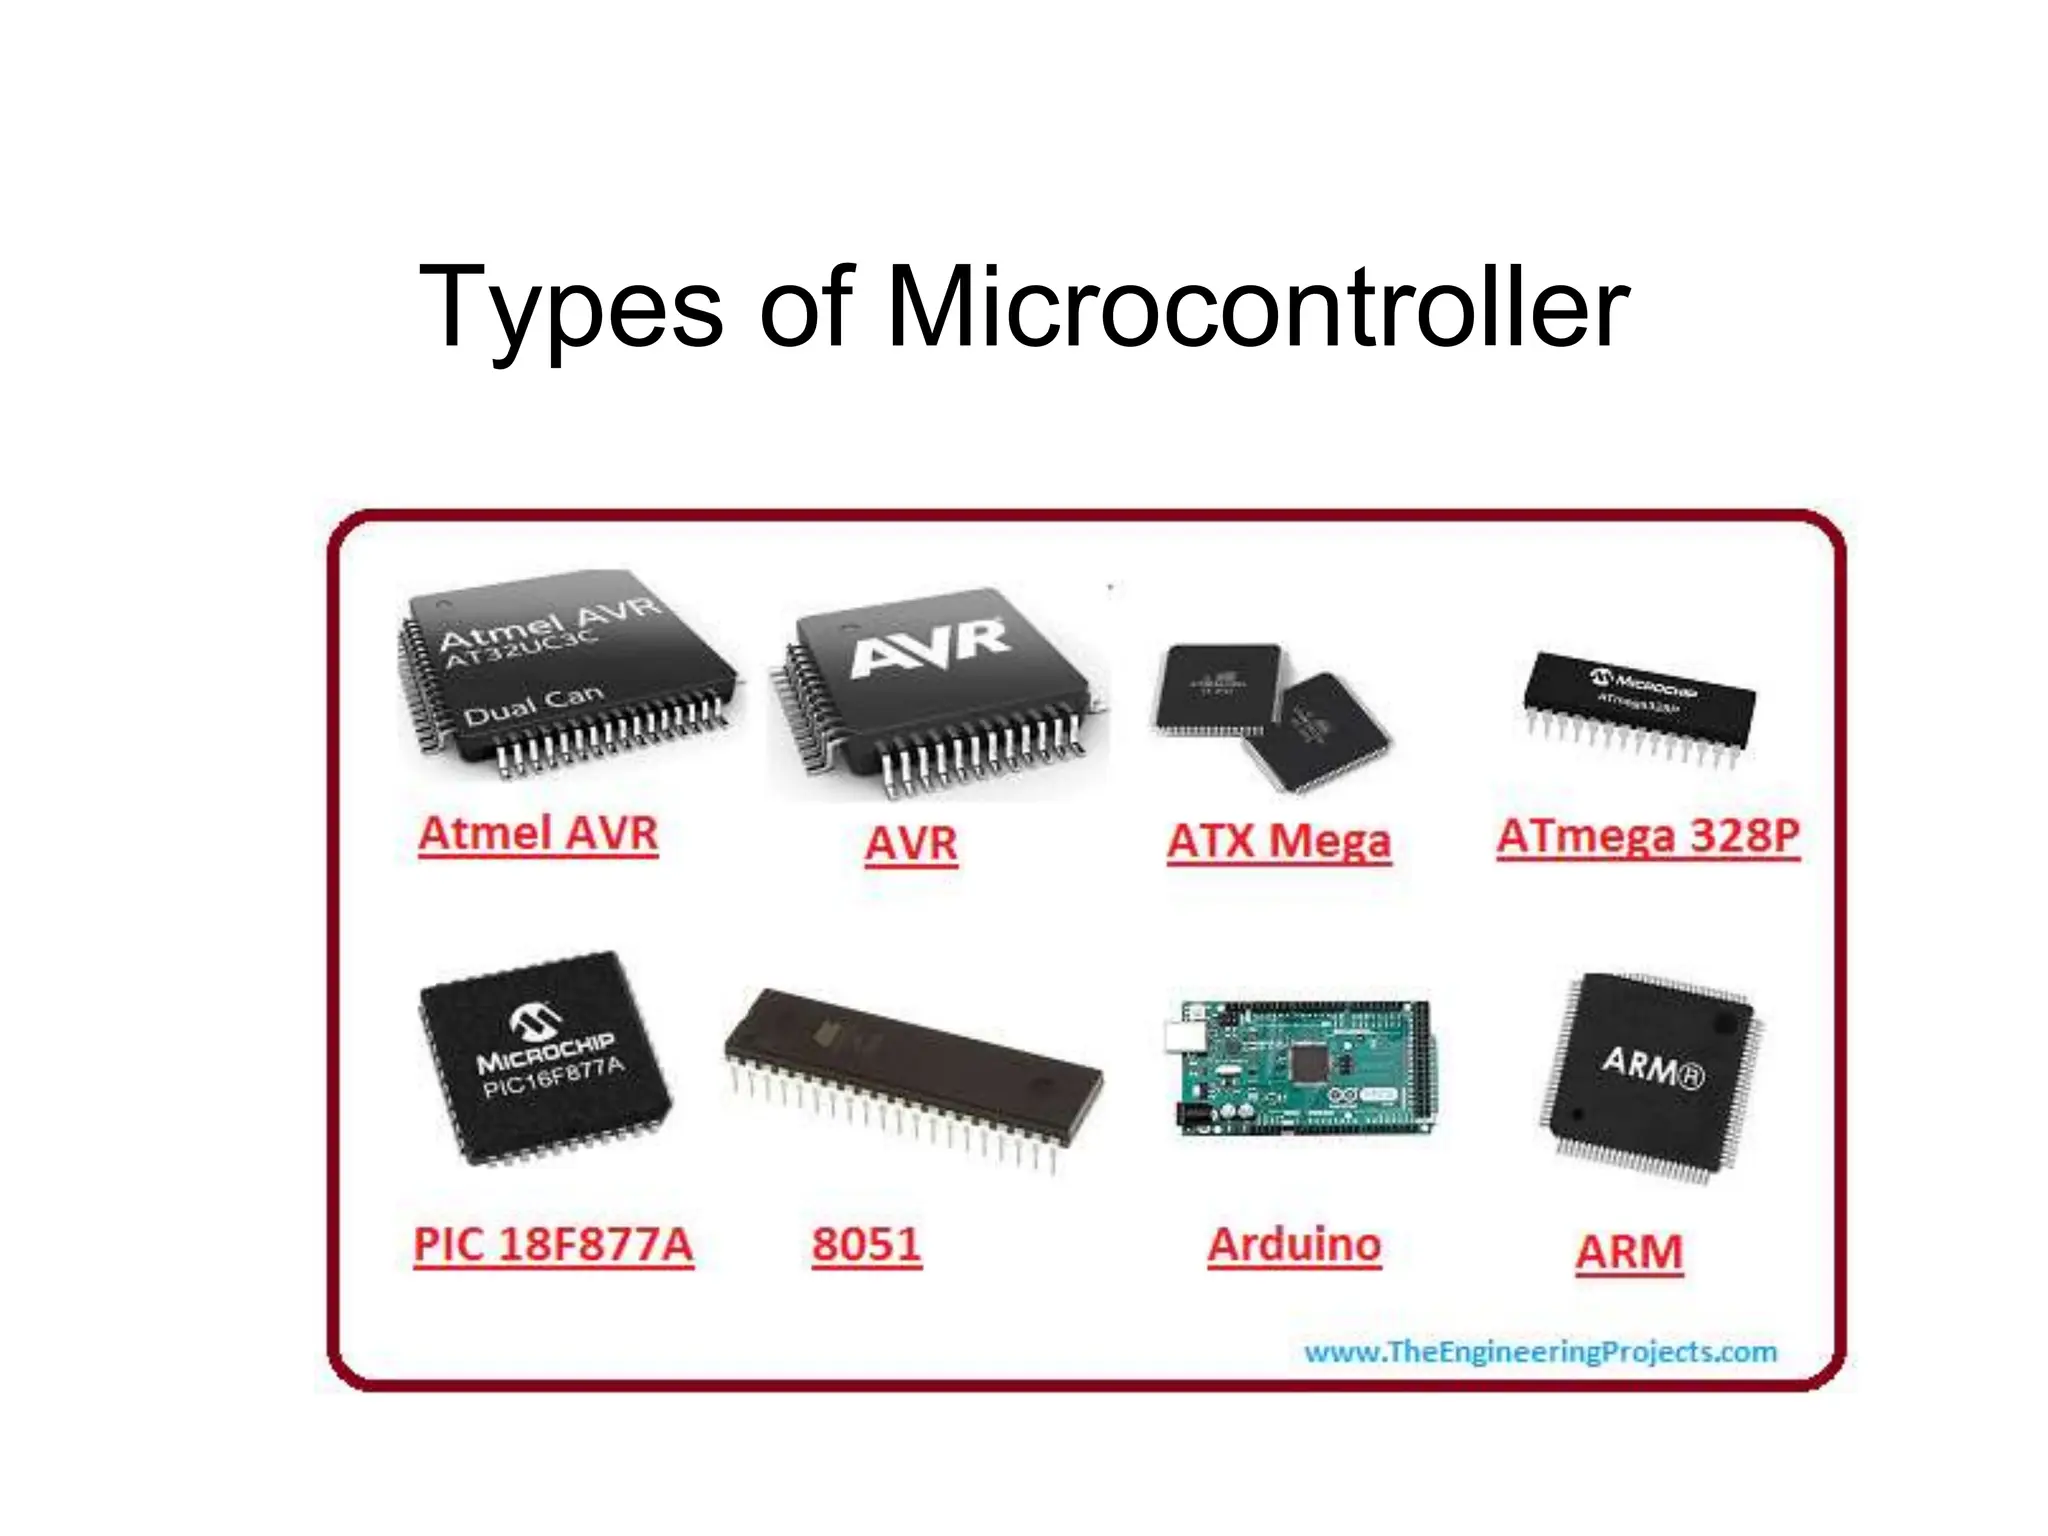
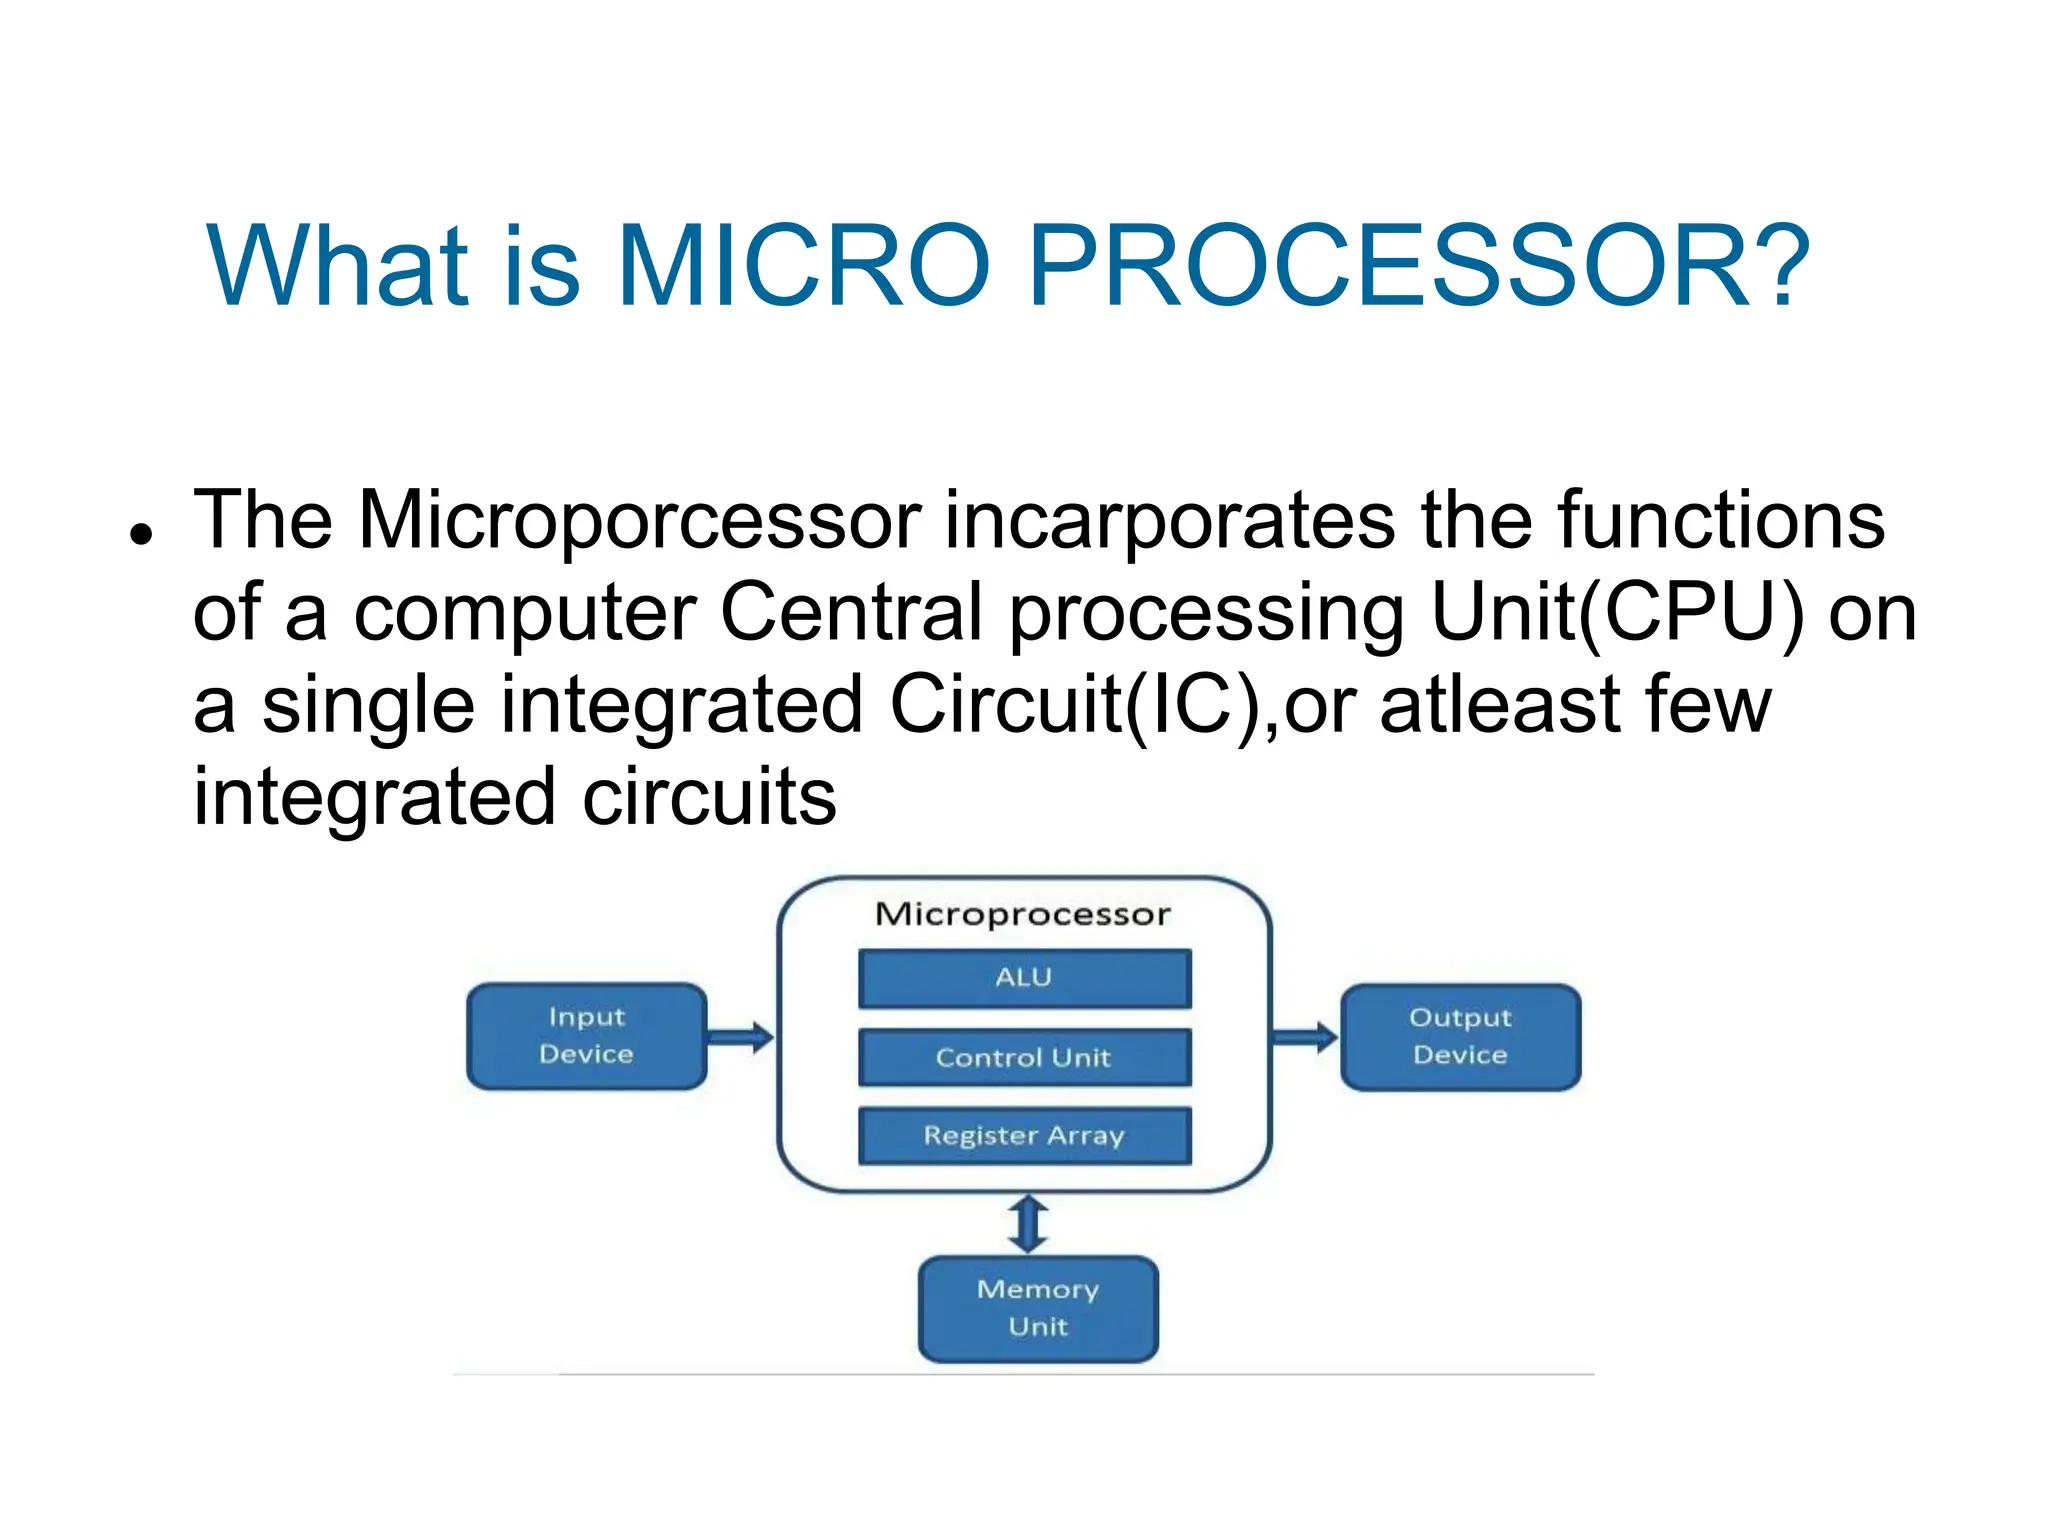
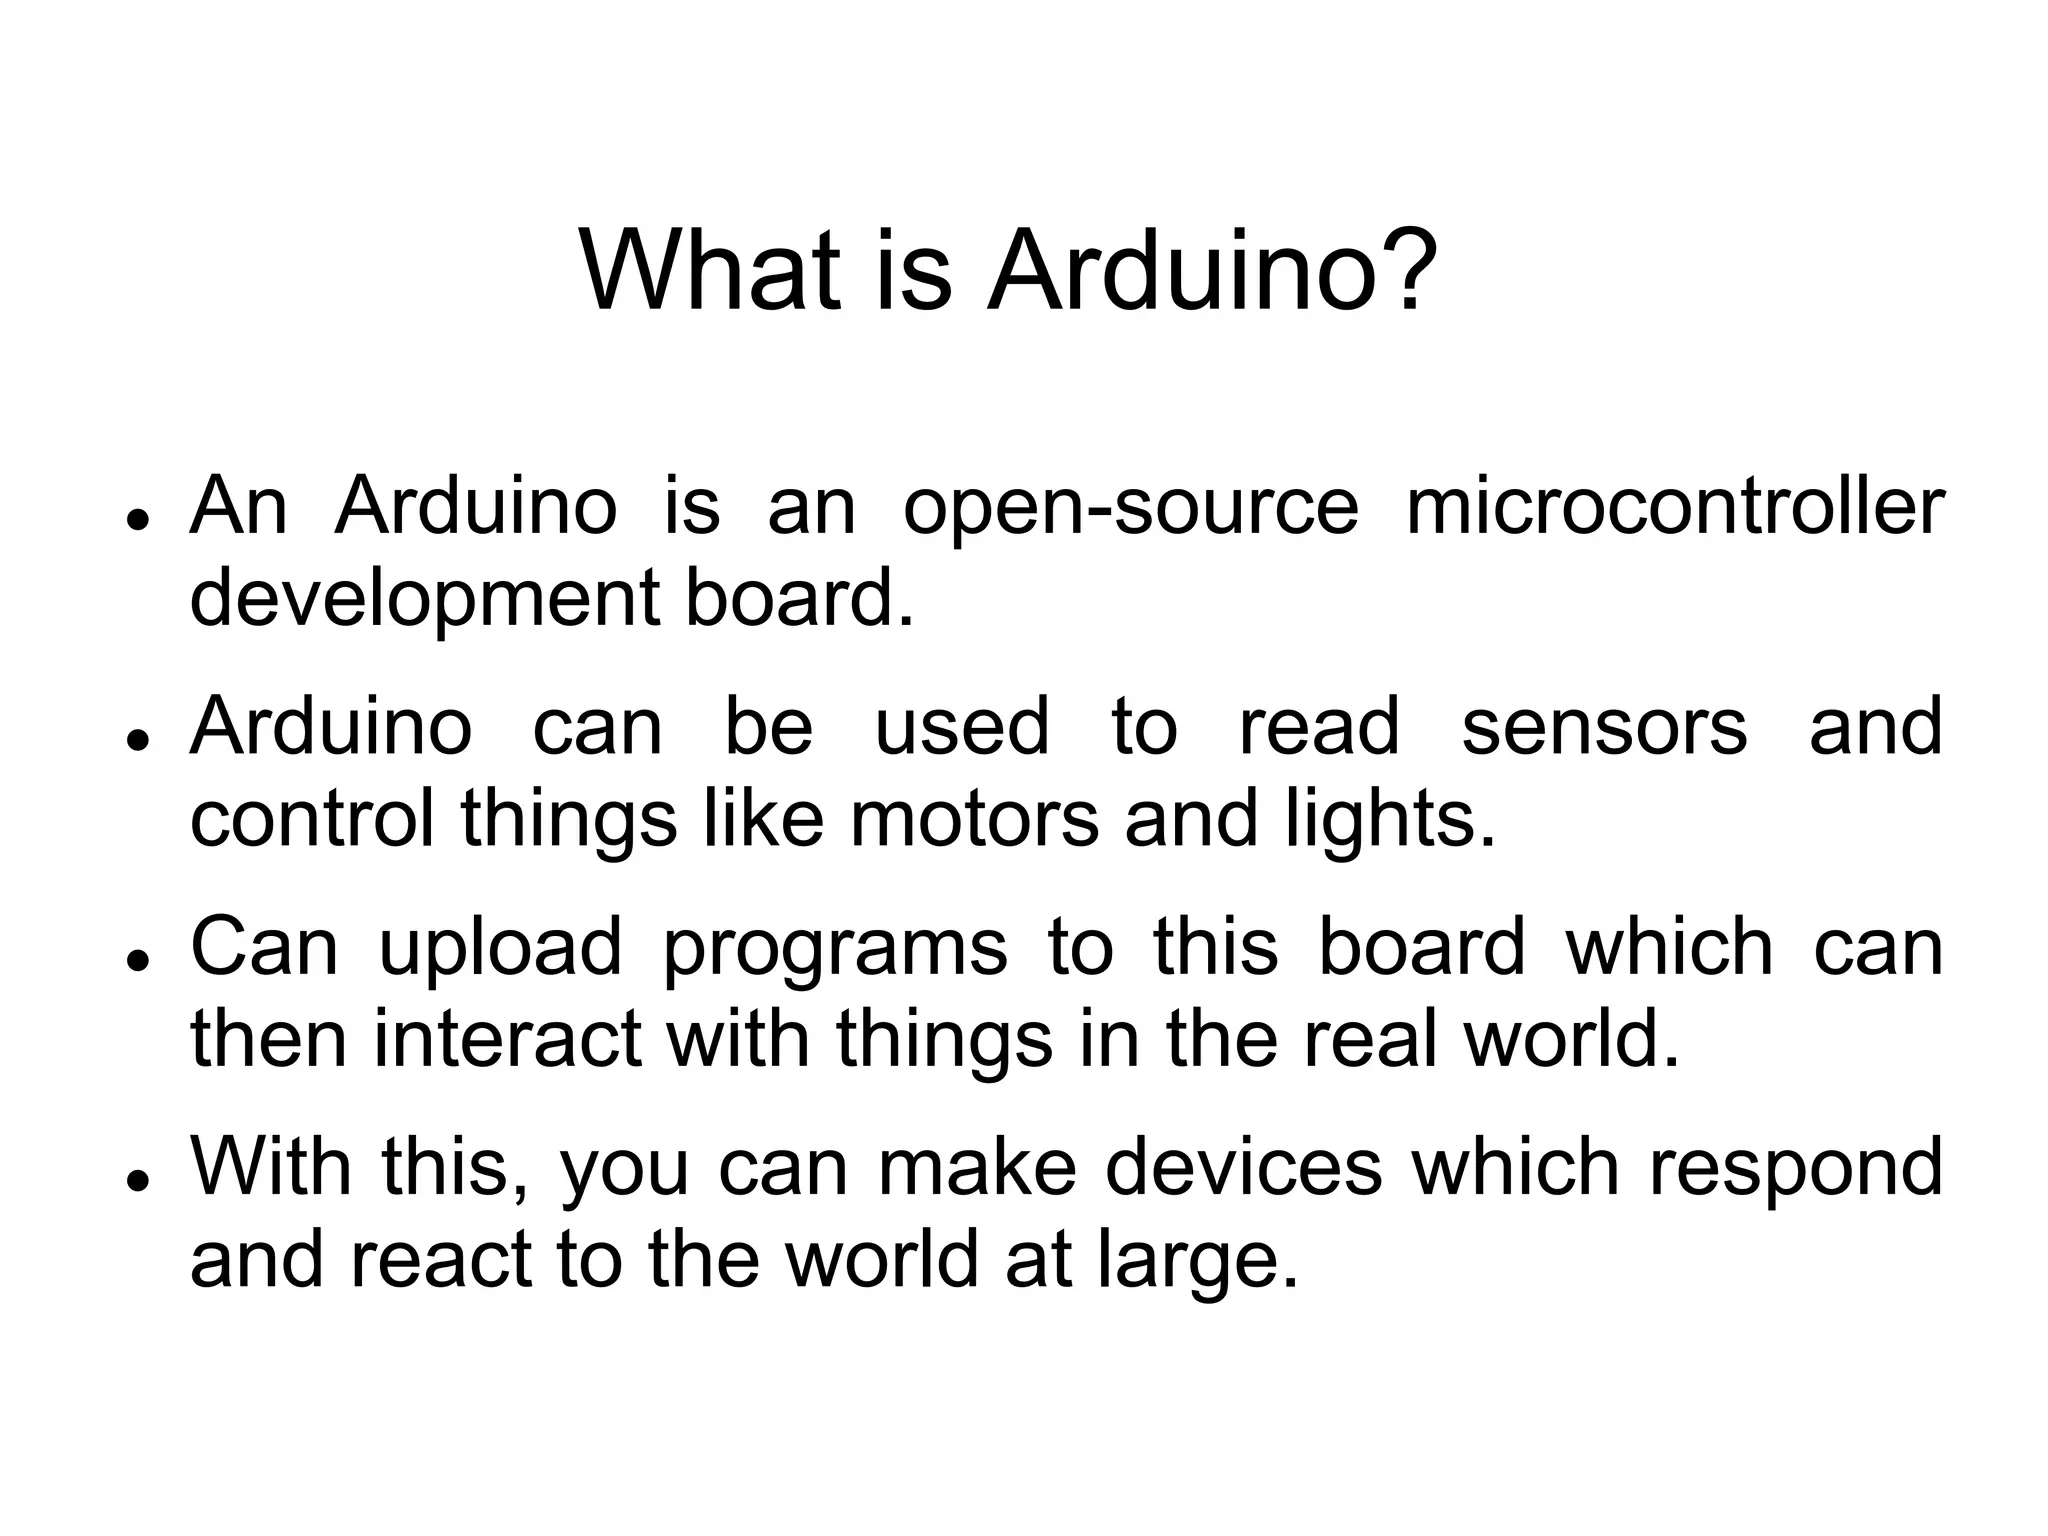
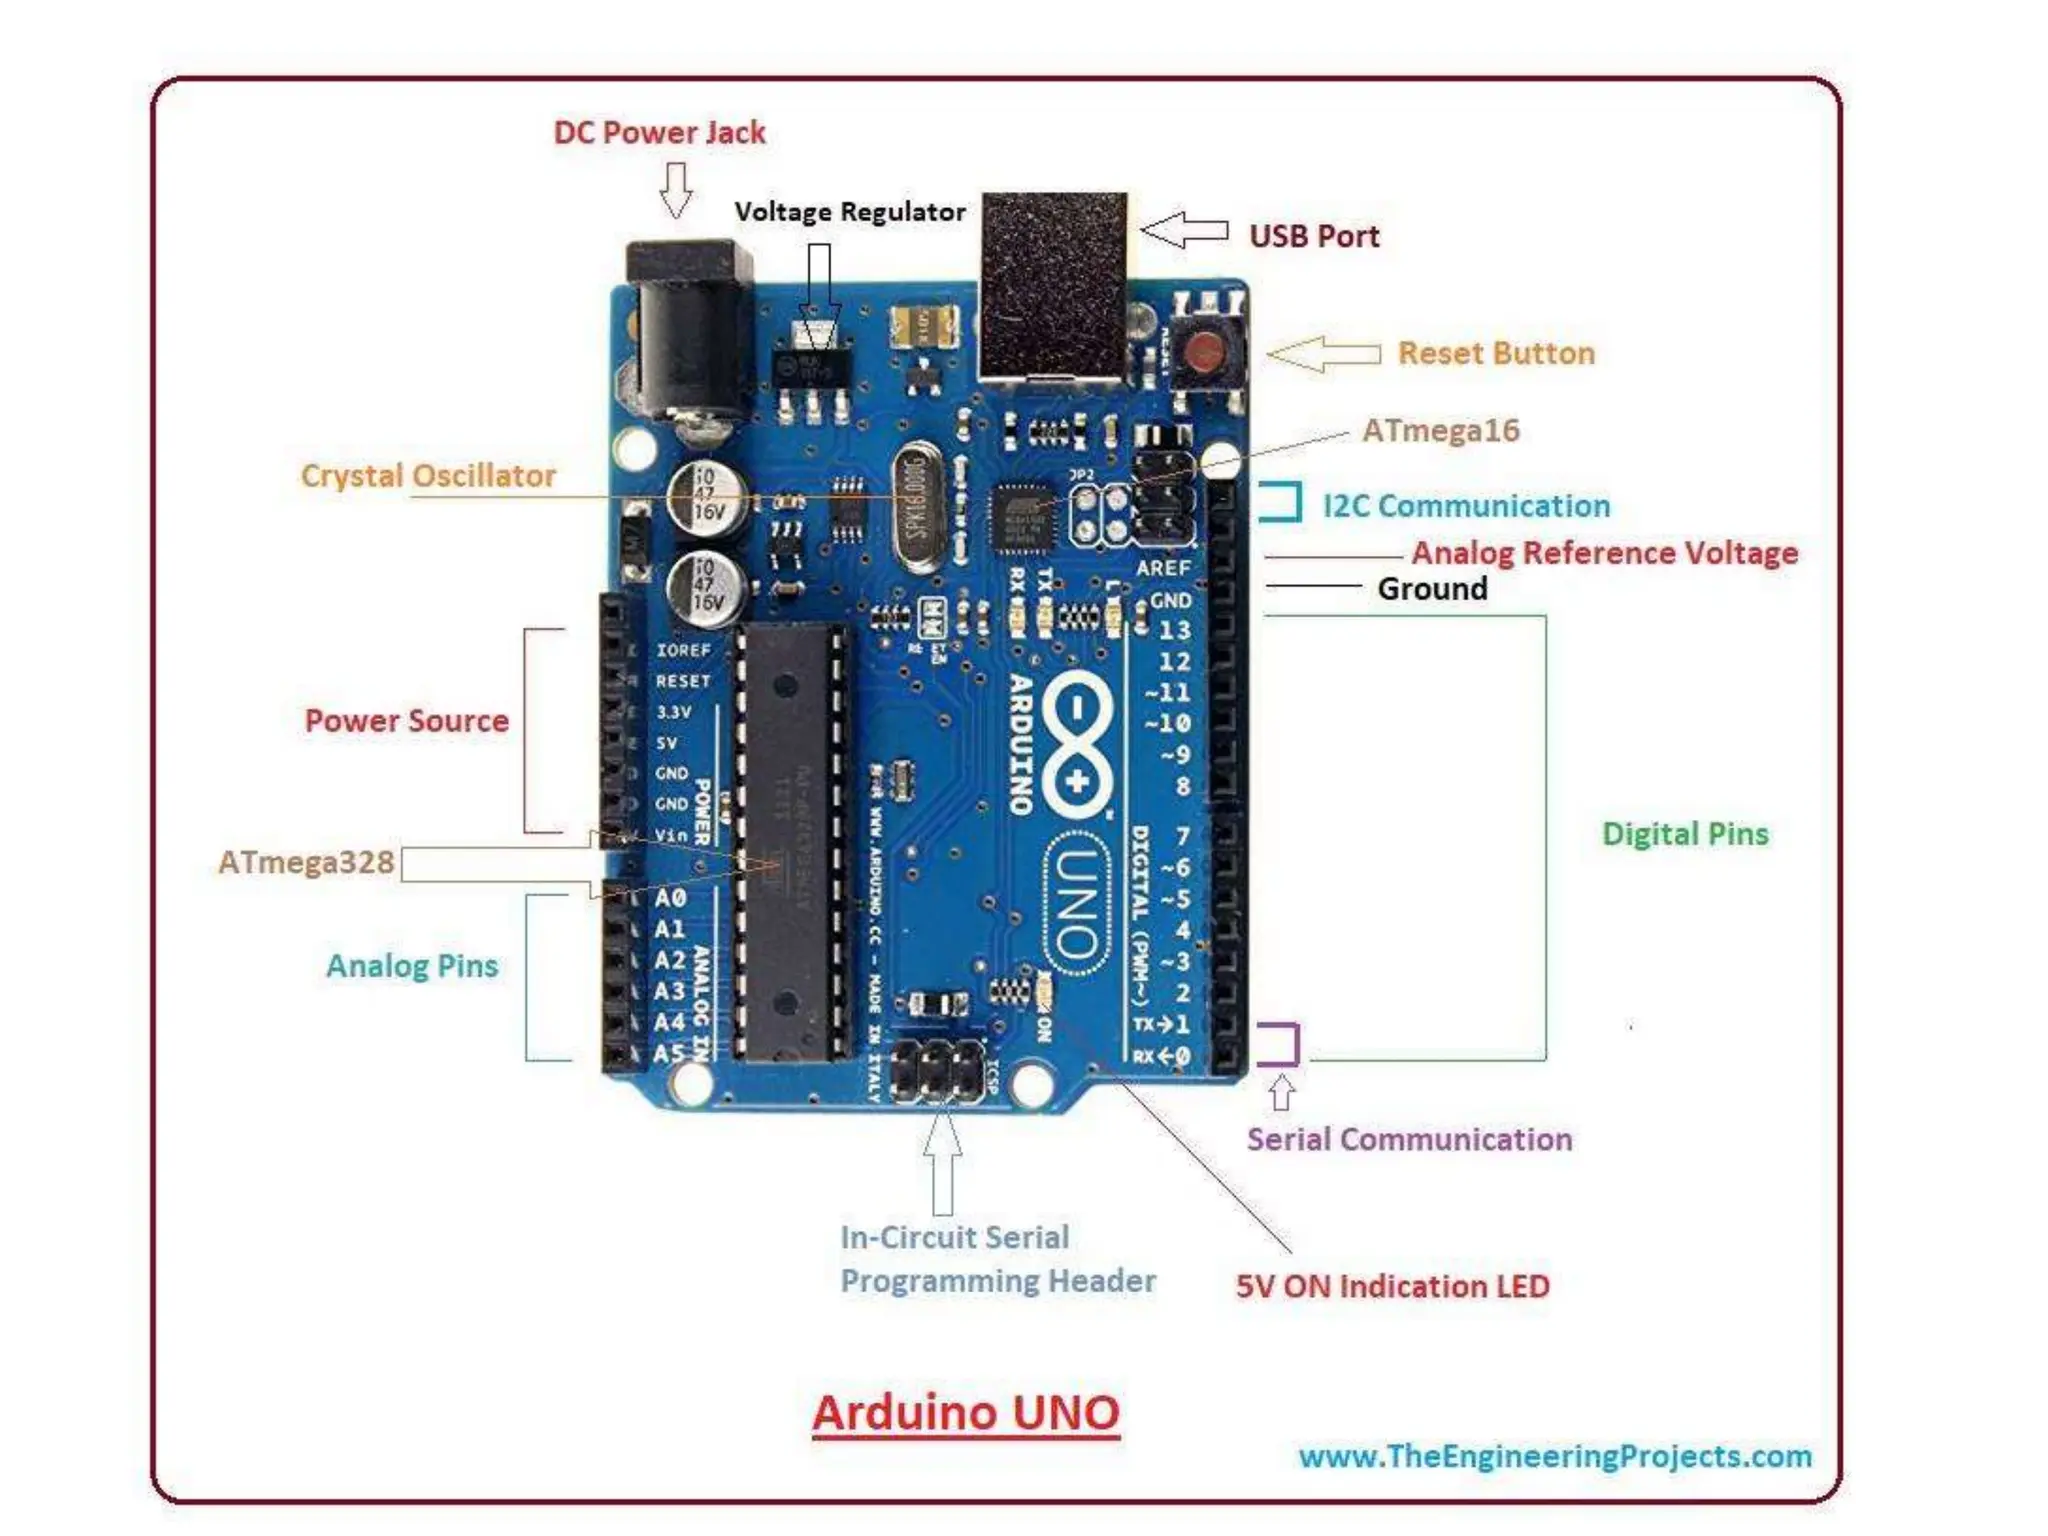
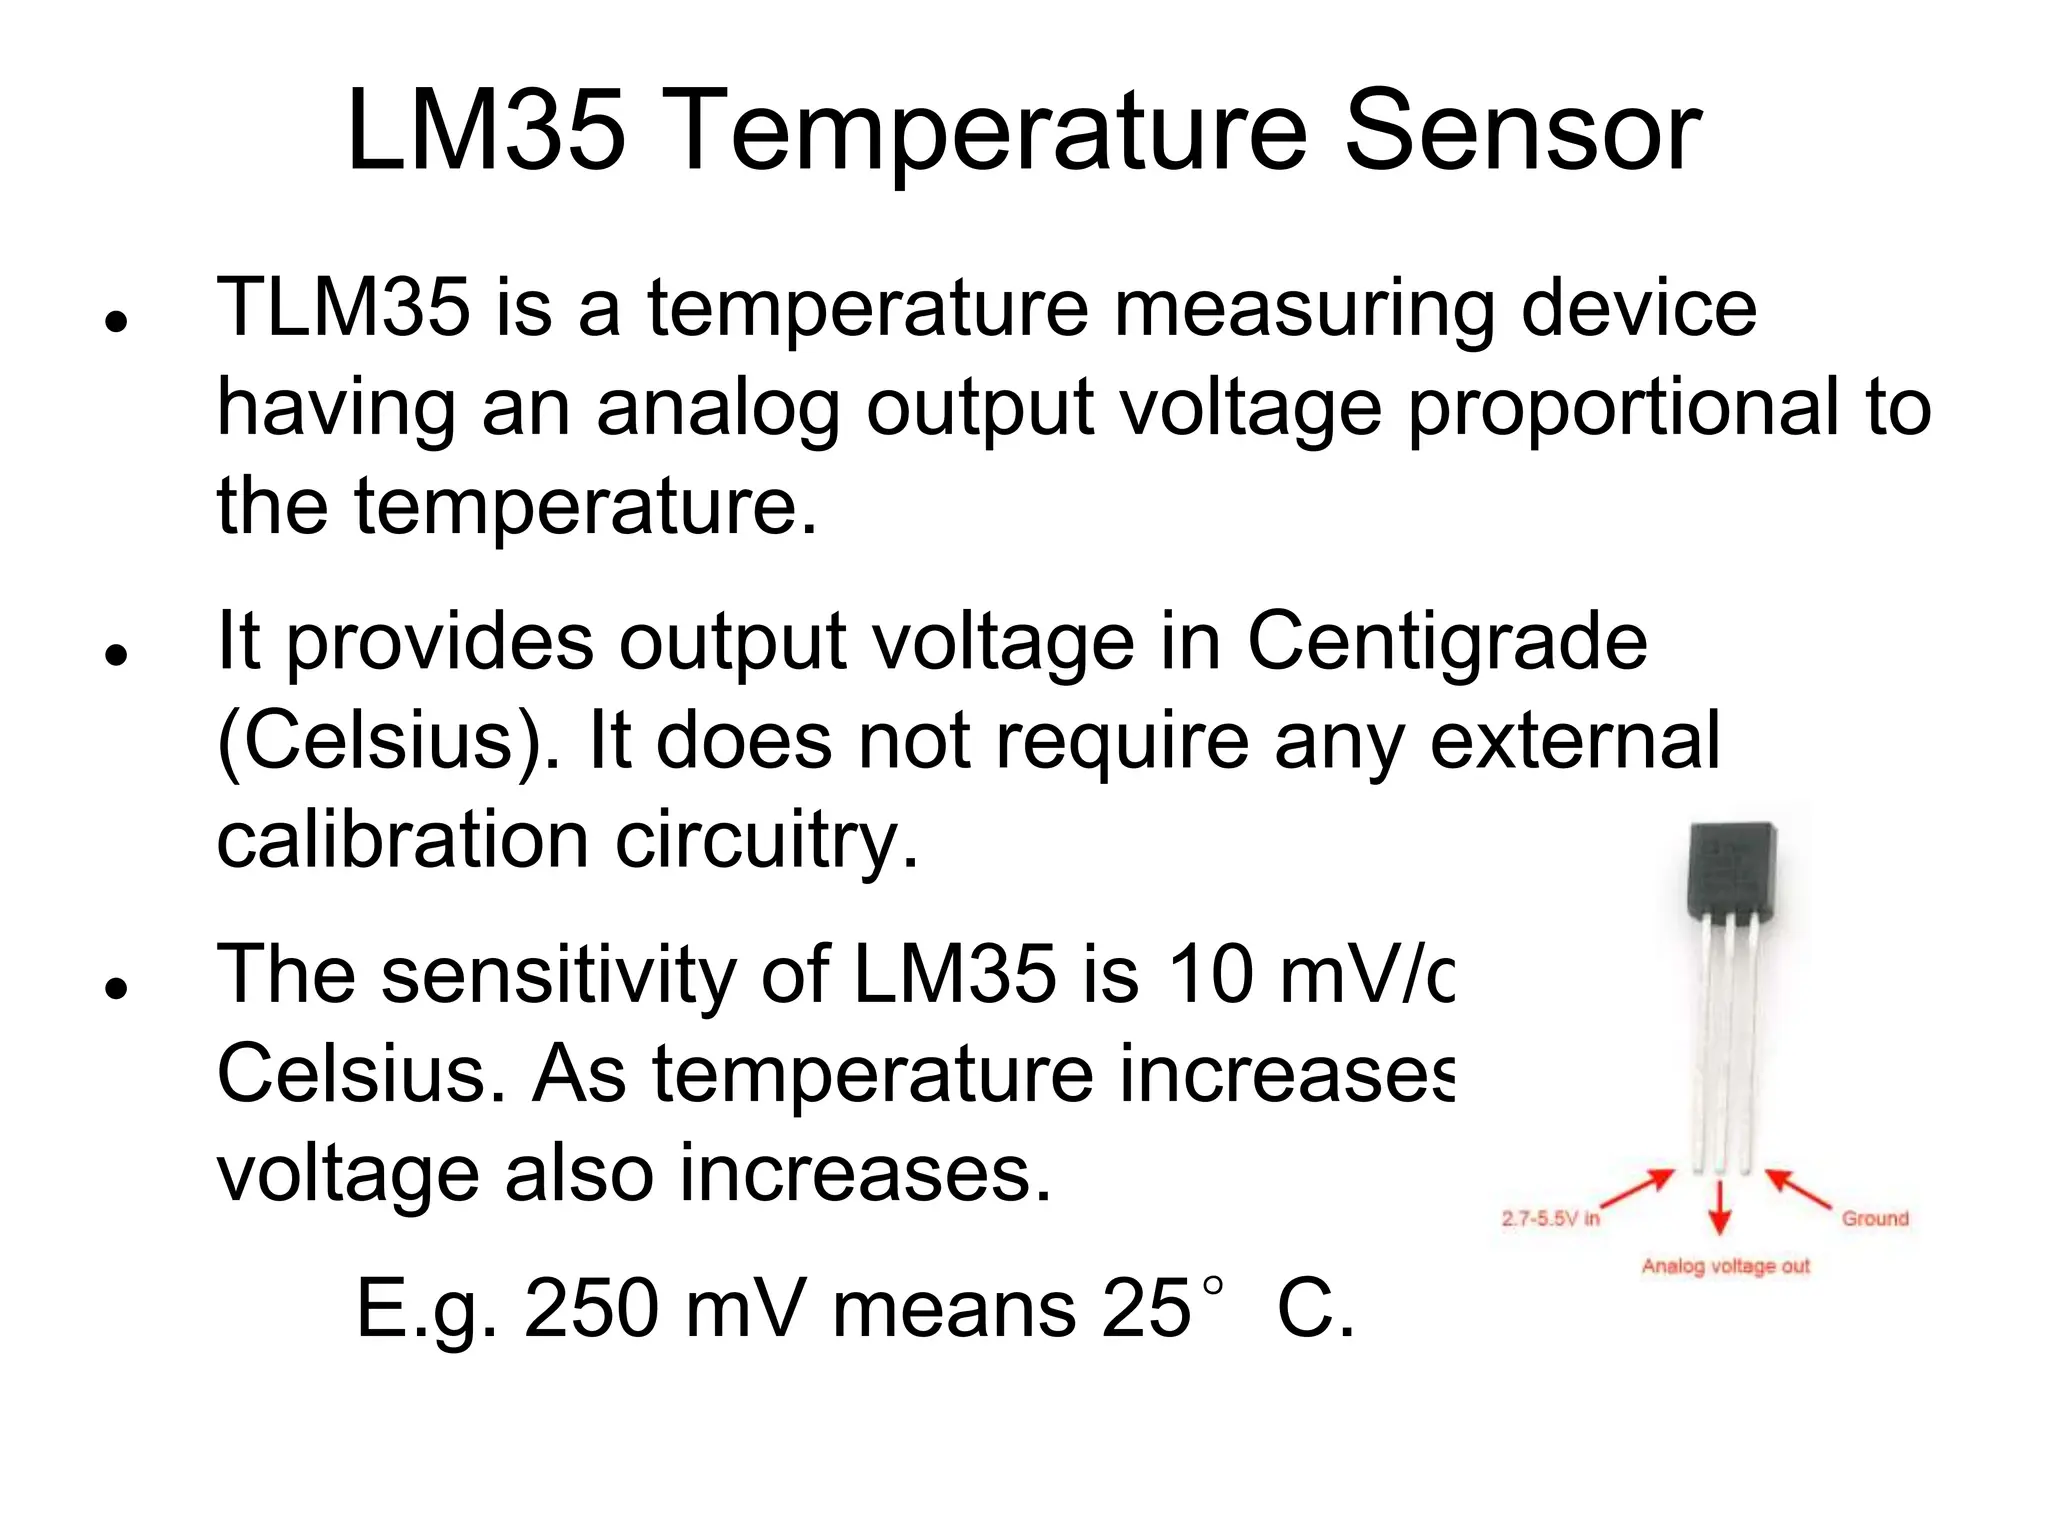
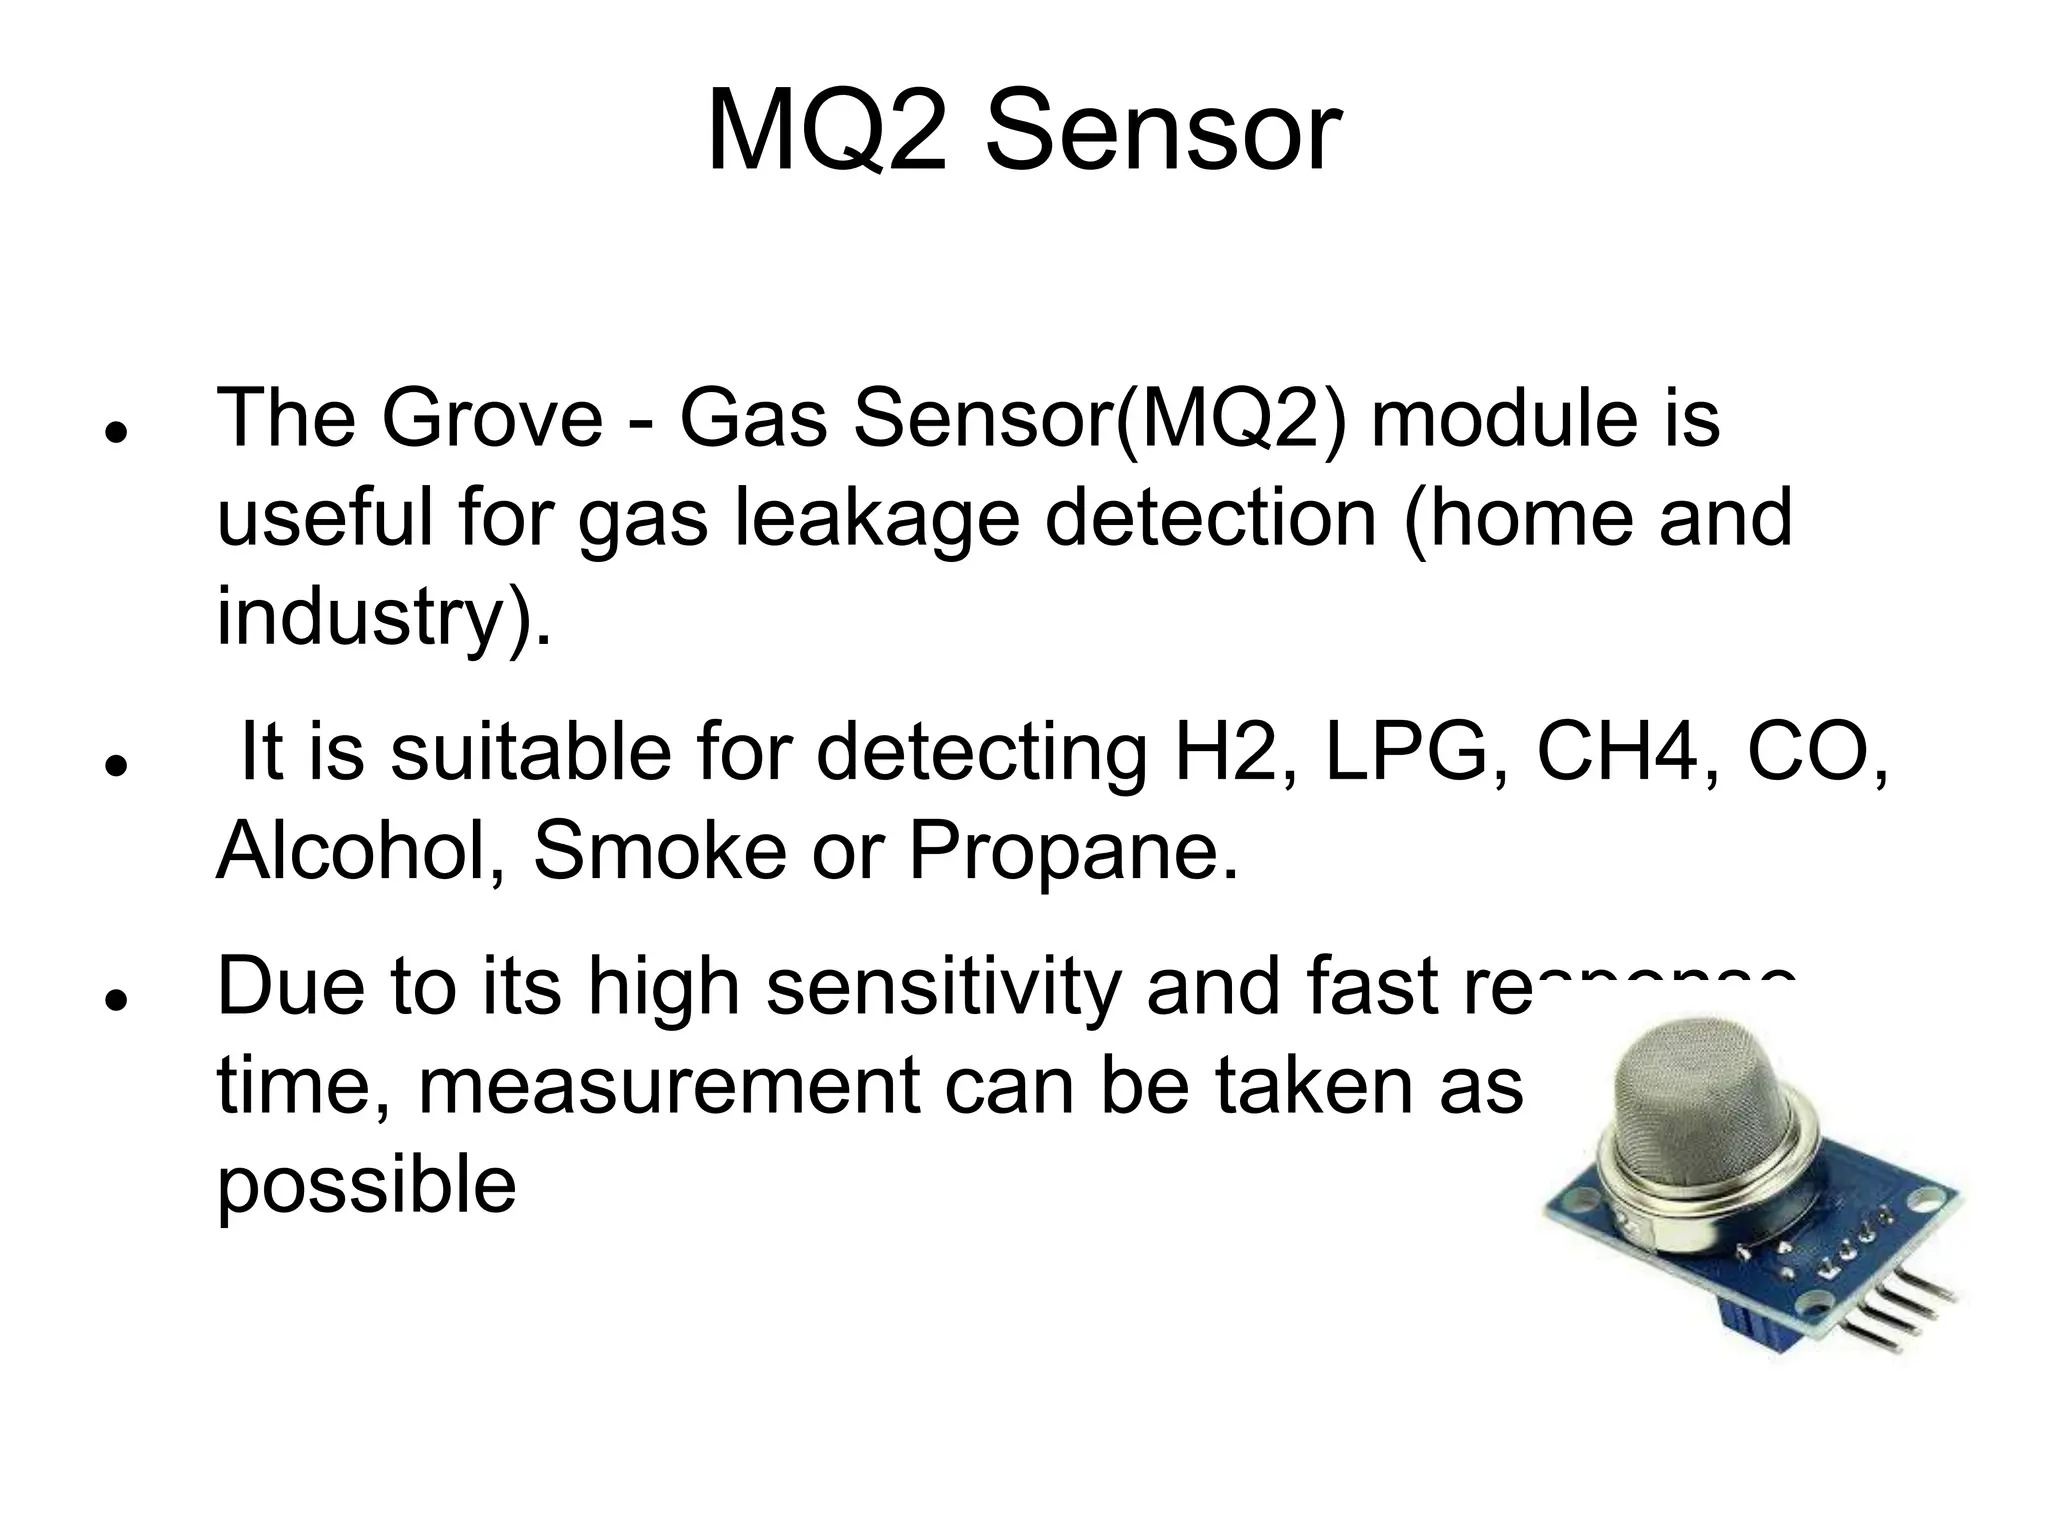
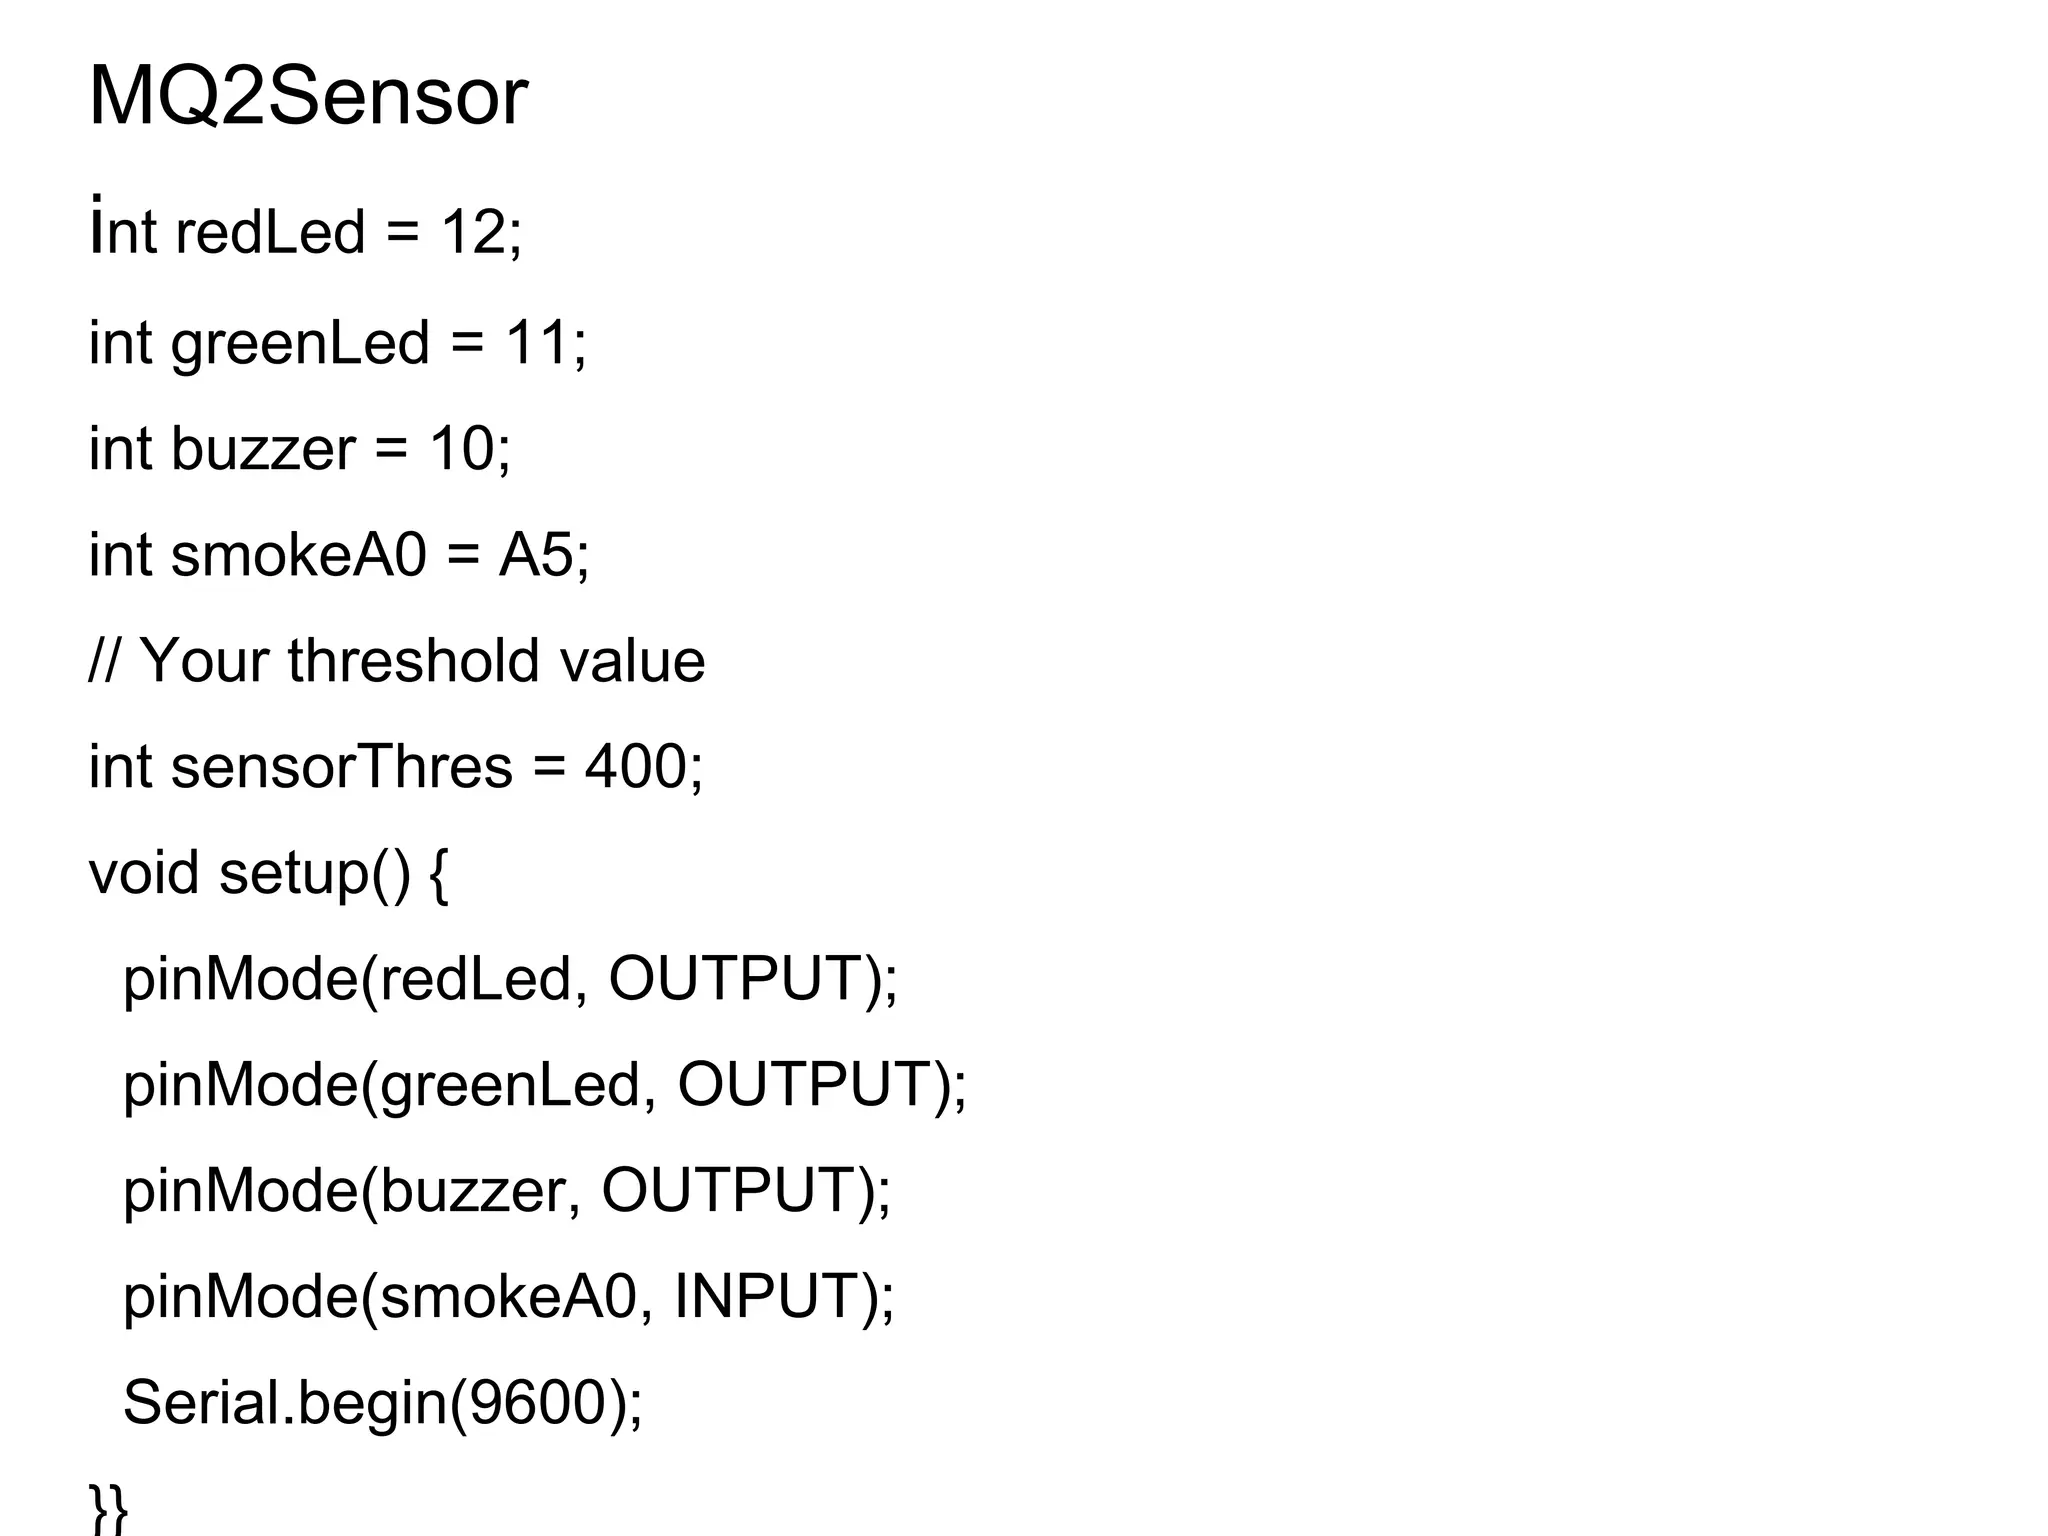
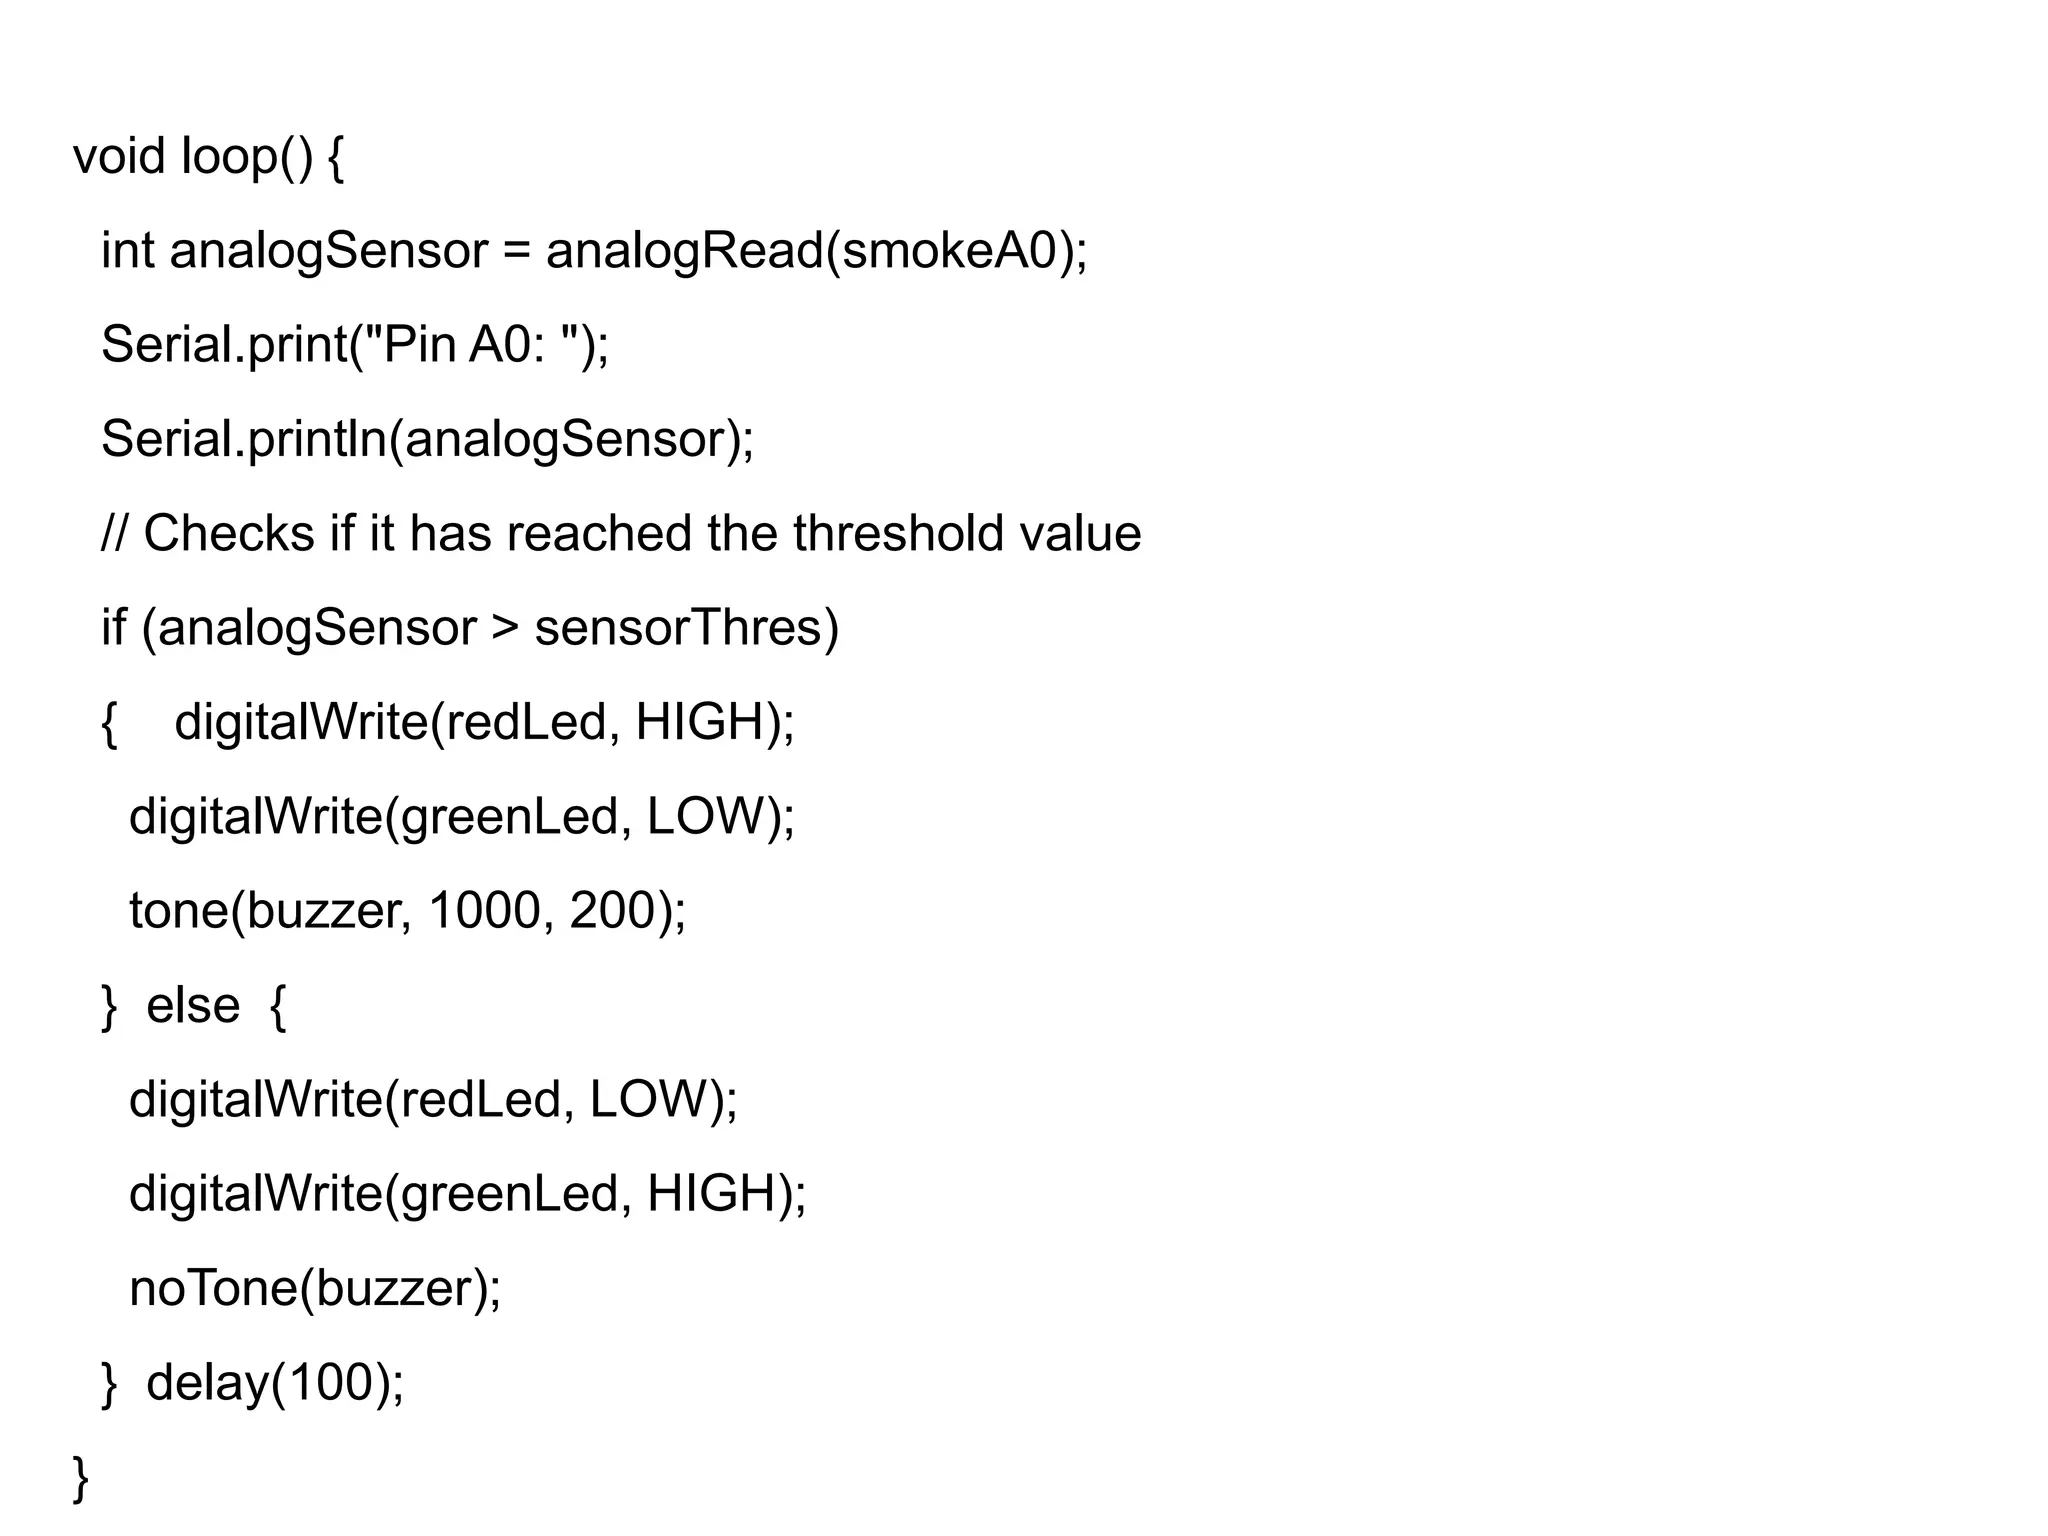
WELCOME
To
One Day Workshop
On
IoT and Hands on session on Embedded System
Date:29/01/2020-30/01/2020 Venue :511
What is IoT?
The Internet of Things (IoT) is the network of physical objects—devices, vehicles,
buildings and other items embedded with electronics, software, sensors, and network
connectivity—that enables these objects to collect and exchange data.
Where is IoT?
It’s everywhere!
Wearable Tech
Healthcare
Smart Appliances
Applications of IoT in Industry, Home & Smart Cities
 Building and Home automation
 Manufacturing
 Medical and Healthcare systems
 Media
 Environmental monitoring
 Infrastructure management
 Energy management
 Transportation
 Better quality of life for elderly
In the world of IoT, even the cows will be connected and monitored. Sensors are implanted in
the ears of cattle. This allows farmers to monitor cows’ health and track their movements,
ensuring a healthier, more plentiful supply of milk and meat for people to consume. On average,
each cow generates about 200 MB of information per year.
Sensors in even the holy cow!
What is Arduino?
 An Arduino is an open-source microcontroller
development board.
 Arduino can be used to read sensors and
control things like motors and lights.
 Can upload programs to this board which can
then interact with things in the real world.
 With this, you can make devices which respond
and react to the world at large.
Introduction to Arduino
What is MICRO CONTROLLER?
 A Microcontroller is a single chip devices or
Single chip computers in a small size that its
resources are far more limited than those of a
desktop personal computer
 It is designed for standalone operations
 It includes:
Processing unit
RAM & ROM
I/O
Types of Microcontroller
What is MICRO PROCESSOR?
 The Microporcessor incarporates the functions
of a computer Central processing Unit(CPU) on
a single integrated Circuit(IC),or atleast few
integrated circuits
What is Arduino?
 An Arduino is an open-source microcontroller
development board.
 Arduino can be used to read sensors and
control things like motors and lights.
 Can upload programs to this board which can
then interact with things in the real world.
 With this, you can make devices which respond
and react to the world at large.
 Reset Button – This will restart any code that is
loaded to the Arduino board
 AREF – Stands for “Analog Reference” and is
used to set an external reference voltage
 Ground Pin – There are a few ground pins on
the Arduino and they all work the same
 Digital Input/Output – Pins 0-13 can be used
for digital input or output
 PWM – The pins marked with the (~) symbol
can simulate analog output
 USB Connection – Used for powering up your
Arduino and uploading sketches
 TX/RX – Transmit and receive data indication
LEDs
 ATmega Microcontroller – This is the brains
and is where the programs are stored
 Power LED Indicator – This LED lights up
anytime the board is plugged in a power source
 Voltage Regulator – This controls the amount of
voltage going into the Arduino board
 DC Power Barrel Jack – This is used for
powering your Arduino with a power supply
 3.3V Pin – This pin supplies 3.3 volts of power
to your projects
 5V Pin – This pin supplies 5 volts of power to
your projects
 Ground Pins – There are a few ground pins on
the Arduino and they all work the same
 Analog Pins – These pins can read the signal
rom an analog sensor and convert it to digital
Why Arduino?
 It is flexible, easy-to-use hardware and software
 Arduino Uno uses a different USB chip which
makes installation of the Arduino software lot
easier.
 Has higher speeds of communication with the
computer.
 Comes equipped with the ATmega328
Microcontroller, which has more memory.
 The processor can be easily replaced if
damaged.
LM35 Temperature Sensor
 TLM35 is a temperature measuring device
having an analog output voltage proportional to
the temperature.
 It provides output voltage in Centigrade
(Celsius). It does not require any external
calibration circuitry.
 The sensitivity of LM35 is 10 mV/degree
Celsius. As temperature increases, output
voltage also increases.
E.g. 250 mV means 25°C.
MQ2 Sensor
 The Grove - Gas Sensor(MQ2) module is
useful for gas leakage detection (home and
industry).
 It is suitable for detecting H2, LPG, CH4, CO,
Alcohol, Smoke or Propane.
 Due to its high sensitivity and fast response
time, measurement can be taken as soon as
possible
Breadboard
Breadboard
 This device allows you to prototype your
Arduino project without having to permanently
solder the circuit together.
 Using a breadboard allows you to create
temporary prototypes and experiment with
different circuit designs.
 Inside the holes (tie points) of the plastic
housing, are metal clips which are connected to
each other by strips of conductive material.
Jumper Wires
 Jumper wires are simply wires that have connector pins at each
end, allowing them to be used to connect two points to each
other without soldering.
Programming with Arduino
A basic sketch consists of 3 parts
1. Declaration of Variables
2. Initialization: It is written in the setup () function.
3. Control code: It is written in the loop () function.
void setup() {
// put your setup code here, to run once:
}
void loop() {
// put your main code here, to run repeatedly:
}
Sample code for LED Blink
void setup() {
// initialize digital pin LED_BUILTIN as an output.
pinMode(LED_BUILTIN, OUTPUT);
}
// the loop function runs over and over again forever
void loop() {
digitalWrite(LED_BUILTIN, HIGH); // turn the LED on (HIGH is the voltage
level) delay(1000); // wait for a second
digitalWrite(LED_BUILTIN, LOW); // turn the LED off by making the voltage
LOW
delay(1000); // wait for a second
}
LM35
const int lm35_pin = A1; /* LM35 O/P pin */
void setup() {
Serial.begin(9600);
}
void loop() {
int temp_adc_val;
float temp_val;
temp_adc_val = analogRead(lm35_pin);
temp_val = (temp_adc_val * 4.88); /* Convert adc
value to equivalent voltage */
temp_val = (temp_val/10); /* LM35 gives output
of 10mv/°C */
Serial.print("Temperature = ");
Serial.print(temp_val);
Serial.print(" Degree Celsiusn");
delay(1000);
}
LM 35 with Buzzer
const int lm35_pin = A1; /* LM35 O/P pin */
void setup() {
Serial.begin(9600);
pinMode(8, OUTPUT);
}
void loop() {
int temp_adc_val;
float temp_val;
temp_adc_val = analogRead(lm35_pin); /* Read
Temperature */
temp_val = (temp_adc_val * 4.88); /* Convert adc value
to equivalent voltage */
temp_val = (temp_val/10); /* LM35 gives output of
10mv/°C */
Serial.print("Temperature = ");
Serial.print(temp_val);
Serial.print(" Degree Celsiusn");
delay(1000);
if(temp_val>30)
{
digitalWrite(8, HIGH); // turn the LED on (HIGH
is the voltage level)
delay(1005); // wait for a second
digitalWrite(8, LOW); // turn the LED off by
making the voltage LOW
delay(1005);
}
}
MQ2Sensor
int redLed = 12;
int greenLed = 11;
int buzzer = 10;
int smokeA0 = A5;
// Your threshold value
int sensorThres = 400;
void setup() {
pinMode(redLed, OUTPUT);
pinMode(greenLed, OUTPUT);
pinMode(buzzer, OUTPUT);
pinMode(smokeA0, INPUT);
Serial.begin(9600);
}}
void loop() {
int analogSensor = analogRead(smokeA0);
Serial.print("Pin A0: ");
Serial.println(analogSensor);
// Checks if it has reached the threshold value
if (analogSensor > sensorThres)
{ digitalWrite(redLed, HIGH);
digitalWrite(greenLed, LOW);
tone(buzzer, 1000, 200);
} else {
digitalWrite(redLed, LOW);
digitalWrite(greenLed, HIGH);
noTone(buzzer);
} delay(100);
}
Thank You

IoT Basics with few Embedded System Connections for sensors

  • 1.
    WELCOME To One Day Workshop On IoTand Hands on session on Embedded System Date:29/01/2020-30/01/2020 Venue :511
  • 2.
    What is IoT? TheInternet of Things (IoT) is the network of physical objects—devices, vehicles, buildings and other items embedded with electronics, software, sensors, and network connectivity—that enables these objects to collect and exchange data.
  • 3.
  • 4.
  • 5.
    Applications of IoTin Industry, Home & Smart Cities  Building and Home automation  Manufacturing  Medical and Healthcare systems  Media  Environmental monitoring  Infrastructure management  Energy management  Transportation  Better quality of life for elderly
  • 9.
    In the worldof IoT, even the cows will be connected and monitored. Sensors are implanted in the ears of cattle. This allows farmers to monitor cows’ health and track their movements, ensuring a healthier, more plentiful supply of milk and meat for people to consume. On average, each cow generates about 200 MB of information per year. Sensors in even the holy cow!
  • 12.
    What is Arduino? An Arduino is an open-source microcontroller development board.  Arduino can be used to read sensors and control things like motors and lights.  Can upload programs to this board which can then interact with things in the real world.  With this, you can make devices which respond and react to the world at large.
  • 13.
  • 14.
    What is MICROCONTROLLER?  A Microcontroller is a single chip devices or Single chip computers in a small size that its resources are far more limited than those of a desktop personal computer  It is designed for standalone operations  It includes: Processing unit RAM & ROM I/O
  • 15.
  • 16.
    What is MICROPROCESSOR?  The Microporcessor incarporates the functions of a computer Central processing Unit(CPU) on a single integrated Circuit(IC),or atleast few integrated circuits
  • 17.
    What is Arduino? An Arduino is an open-source microcontroller development board.  Arduino can be used to read sensors and control things like motors and lights.  Can upload programs to this board which can then interact with things in the real world.  With this, you can make devices which respond and react to the world at large.
  • 19.
     Reset Button– This will restart any code that is loaded to the Arduino board  AREF – Stands for “Analog Reference” and is used to set an external reference voltage  Ground Pin – There are a few ground pins on the Arduino and they all work the same  Digital Input/Output – Pins 0-13 can be used for digital input or output  PWM – The pins marked with the (~) symbol can simulate analog output
  • 20.
     USB Connection– Used for powering up your Arduino and uploading sketches  TX/RX – Transmit and receive data indication LEDs  ATmega Microcontroller – This is the brains and is where the programs are stored  Power LED Indicator – This LED lights up anytime the board is plugged in a power source  Voltage Regulator – This controls the amount of voltage going into the Arduino board
  • 21.
     DC PowerBarrel Jack – This is used for powering your Arduino with a power supply  3.3V Pin – This pin supplies 3.3 volts of power to your projects  5V Pin – This pin supplies 5 volts of power to your projects  Ground Pins – There are a few ground pins on the Arduino and they all work the same  Analog Pins – These pins can read the signal rom an analog sensor and convert it to digital
  • 22.
    Why Arduino?  Itis flexible, easy-to-use hardware and software  Arduino Uno uses a different USB chip which makes installation of the Arduino software lot easier.  Has higher speeds of communication with the computer.  Comes equipped with the ATmega328 Microcontroller, which has more memory.  The processor can be easily replaced if damaged.
  • 23.
    LM35 Temperature Sensor TLM35 is a temperature measuring device having an analog output voltage proportional to the temperature.  It provides output voltage in Centigrade (Celsius). It does not require any external calibration circuitry.  The sensitivity of LM35 is 10 mV/degree Celsius. As temperature increases, output voltage also increases. E.g. 250 mV means 25°C.
  • 24.
    MQ2 Sensor  TheGrove - Gas Sensor(MQ2) module is useful for gas leakage detection (home and industry).  It is suitable for detecting H2, LPG, CH4, CO, Alcohol, Smoke or Propane.  Due to its high sensitivity and fast response time, measurement can be taken as soon as possible
  • 25.
  • 26.
    Breadboard  This deviceallows you to prototype your Arduino project without having to permanently solder the circuit together.  Using a breadboard allows you to create temporary prototypes and experiment with different circuit designs.  Inside the holes (tie points) of the plastic housing, are metal clips which are connected to each other by strips of conductive material.
  • 27.
    Jumper Wires  Jumperwires are simply wires that have connector pins at each end, allowing them to be used to connect two points to each other without soldering.
  • 28.
    Programming with Arduino Abasic sketch consists of 3 parts 1. Declaration of Variables 2. Initialization: It is written in the setup () function. 3. Control code: It is written in the loop () function. void setup() { // put your setup code here, to run once: } void loop() { // put your main code here, to run repeatedly: }
  • 29.
    Sample code forLED Blink void setup() { // initialize digital pin LED_BUILTIN as an output. pinMode(LED_BUILTIN, OUTPUT); } // the loop function runs over and over again forever void loop() { digitalWrite(LED_BUILTIN, HIGH); // turn the LED on (HIGH is the voltage level) delay(1000); // wait for a second digitalWrite(LED_BUILTIN, LOW); // turn the LED off by making the voltage LOW delay(1000); // wait for a second }
  • 30.
    LM35 const int lm35_pin= A1; /* LM35 O/P pin */ void setup() { Serial.begin(9600); } void loop() { int temp_adc_val; float temp_val; temp_adc_val = analogRead(lm35_pin);
  • 31.
    temp_val = (temp_adc_val* 4.88); /* Convert adc value to equivalent voltage */ temp_val = (temp_val/10); /* LM35 gives output of 10mv/°C */ Serial.print("Temperature = "); Serial.print(temp_val); Serial.print(" Degree Celsiusn"); delay(1000); }
  • 32.
    LM 35 withBuzzer const int lm35_pin = A1; /* LM35 O/P pin */ void setup() { Serial.begin(9600); pinMode(8, OUTPUT); }
  • 33.
    void loop() { inttemp_adc_val; float temp_val; temp_adc_val = analogRead(lm35_pin); /* Read Temperature */ temp_val = (temp_adc_val * 4.88); /* Convert adc value to equivalent voltage */ temp_val = (temp_val/10); /* LM35 gives output of 10mv/°C */ Serial.print("Temperature = "); Serial.print(temp_val); Serial.print(" Degree Celsiusn"); delay(1000);
  • 34.
    if(temp_val>30) { digitalWrite(8, HIGH); //turn the LED on (HIGH is the voltage level) delay(1005); // wait for a second digitalWrite(8, LOW); // turn the LED off by making the voltage LOW delay(1005); } }
  • 35.
    MQ2Sensor int redLed =12; int greenLed = 11; int buzzer = 10; int smokeA0 = A5; // Your threshold value int sensorThres = 400; void setup() { pinMode(redLed, OUTPUT); pinMode(greenLed, OUTPUT); pinMode(buzzer, OUTPUT); pinMode(smokeA0, INPUT); Serial.begin(9600); }}
  • 36.
    void loop() { intanalogSensor = analogRead(smokeA0); Serial.print("Pin A0: "); Serial.println(analogSensor); // Checks if it has reached the threshold value if (analogSensor > sensorThres) { digitalWrite(redLed, HIGH); digitalWrite(greenLed, LOW); tone(buzzer, 1000, 200); } else { digitalWrite(redLed, LOW); digitalWrite(greenLed, HIGH); noTone(buzzer); } delay(100); }
  • 37.