Download as PDF, PPTX


![Как показать контроллер, чтобы он
выехал снизу вверх?
[self presentViewController:vc
animated:YES
completion:nil];](https://image.slidesharecdn.com/intuit5-140317072141-phpapp02/75/iOS-5-Views-6-2048.jpg)


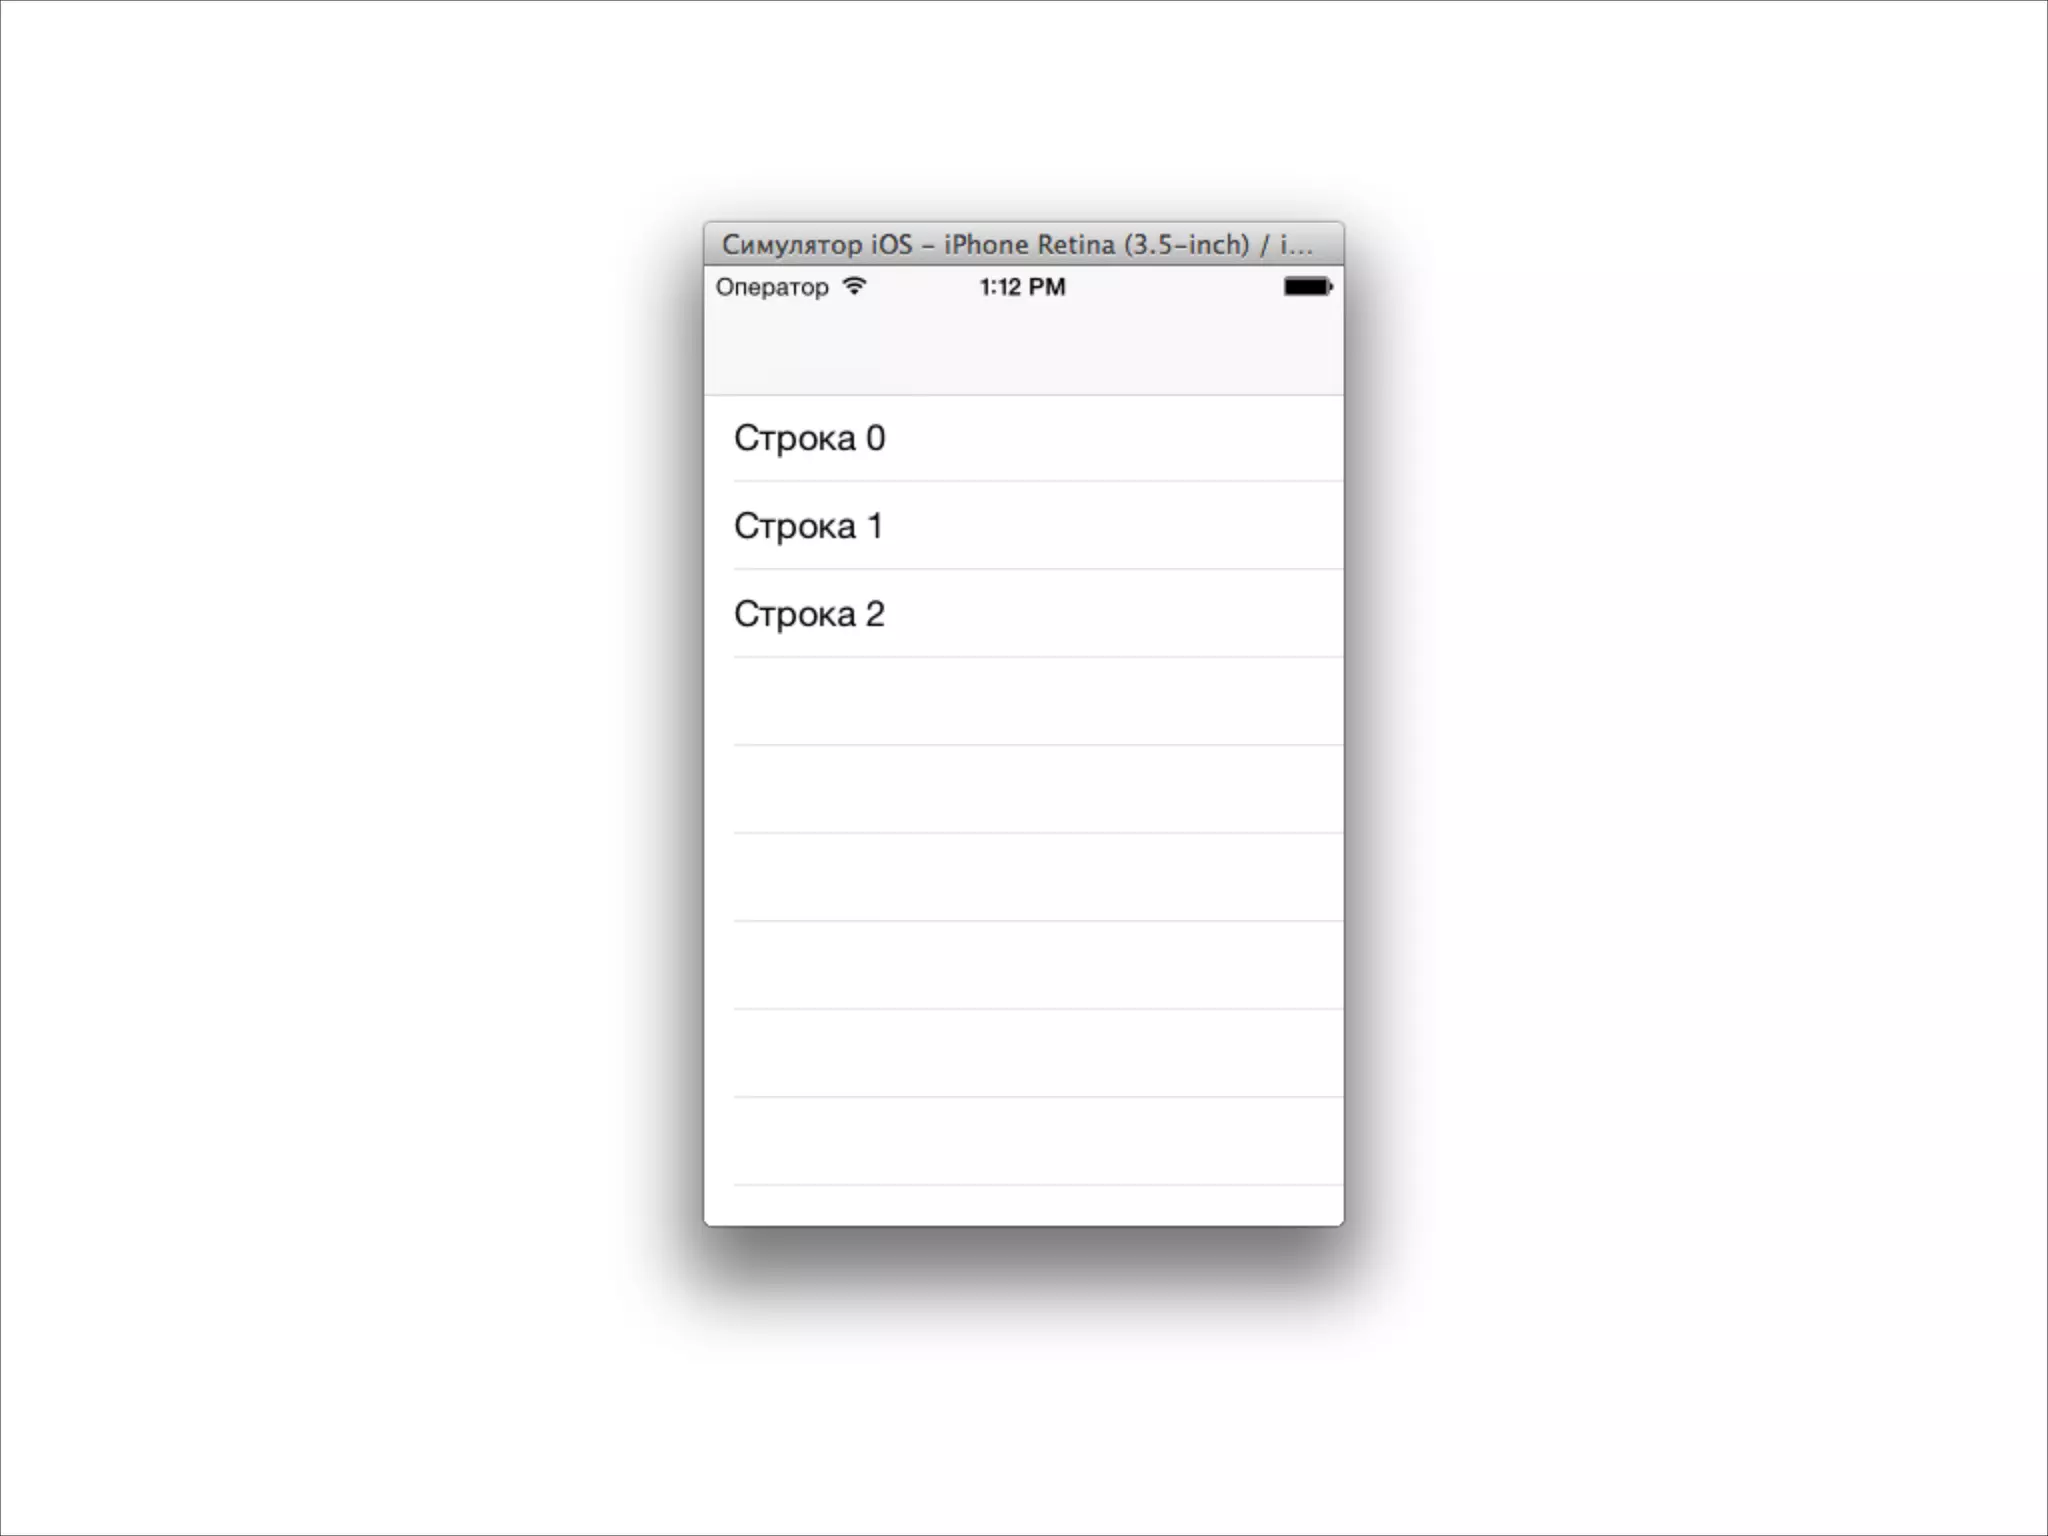
![@interface MyViewController : UIViewController<UITableViewDataSource>
!
@property (strong, nonatomic) UITableView *tableView;
!
@end
- (void)viewDidLoad
{
[super viewDidLoad];
self.tableView = [[UITableView alloc] init];
self.tableView.frame = CGRectMake(0, 0,
self.view.frame.size.width,
self.view.frame.size.height);
self.tableView.dataSource = self;
[self.view addSubview:self.tableView];
}
UITableView в контроллере](https://image.slidesharecdn.com/intuit5-140317072141-phpapp02/75/iOS-5-Views-25-2048.jpg)
![- (NSInteger)tableView:(UITableView *)tableView
numberOfRowsInSection:(NSInteger)section
{
return 3;
}
!
- (UITableViewCell *)tableView:(UITableView *)tableView
cellForRowAtIndexPath:(NSIndexPath *)indexPath
{
NSString *text = [NSString stringWithFormat:@"Строка %d", indexPath.row];
UITableViewCell *cell = [[UITableViewCell alloc]
initWithStyle:UITableViewCellStyleDefault
reuseIdentifier:nil];
cell.textLabel.text = text;
return cell;
}
Настраиваем какие строки показывать](https://image.slidesharecdn.com/intuit5-140317072141-phpapp02/75/iOS-5-Views-26-2048.jpg)
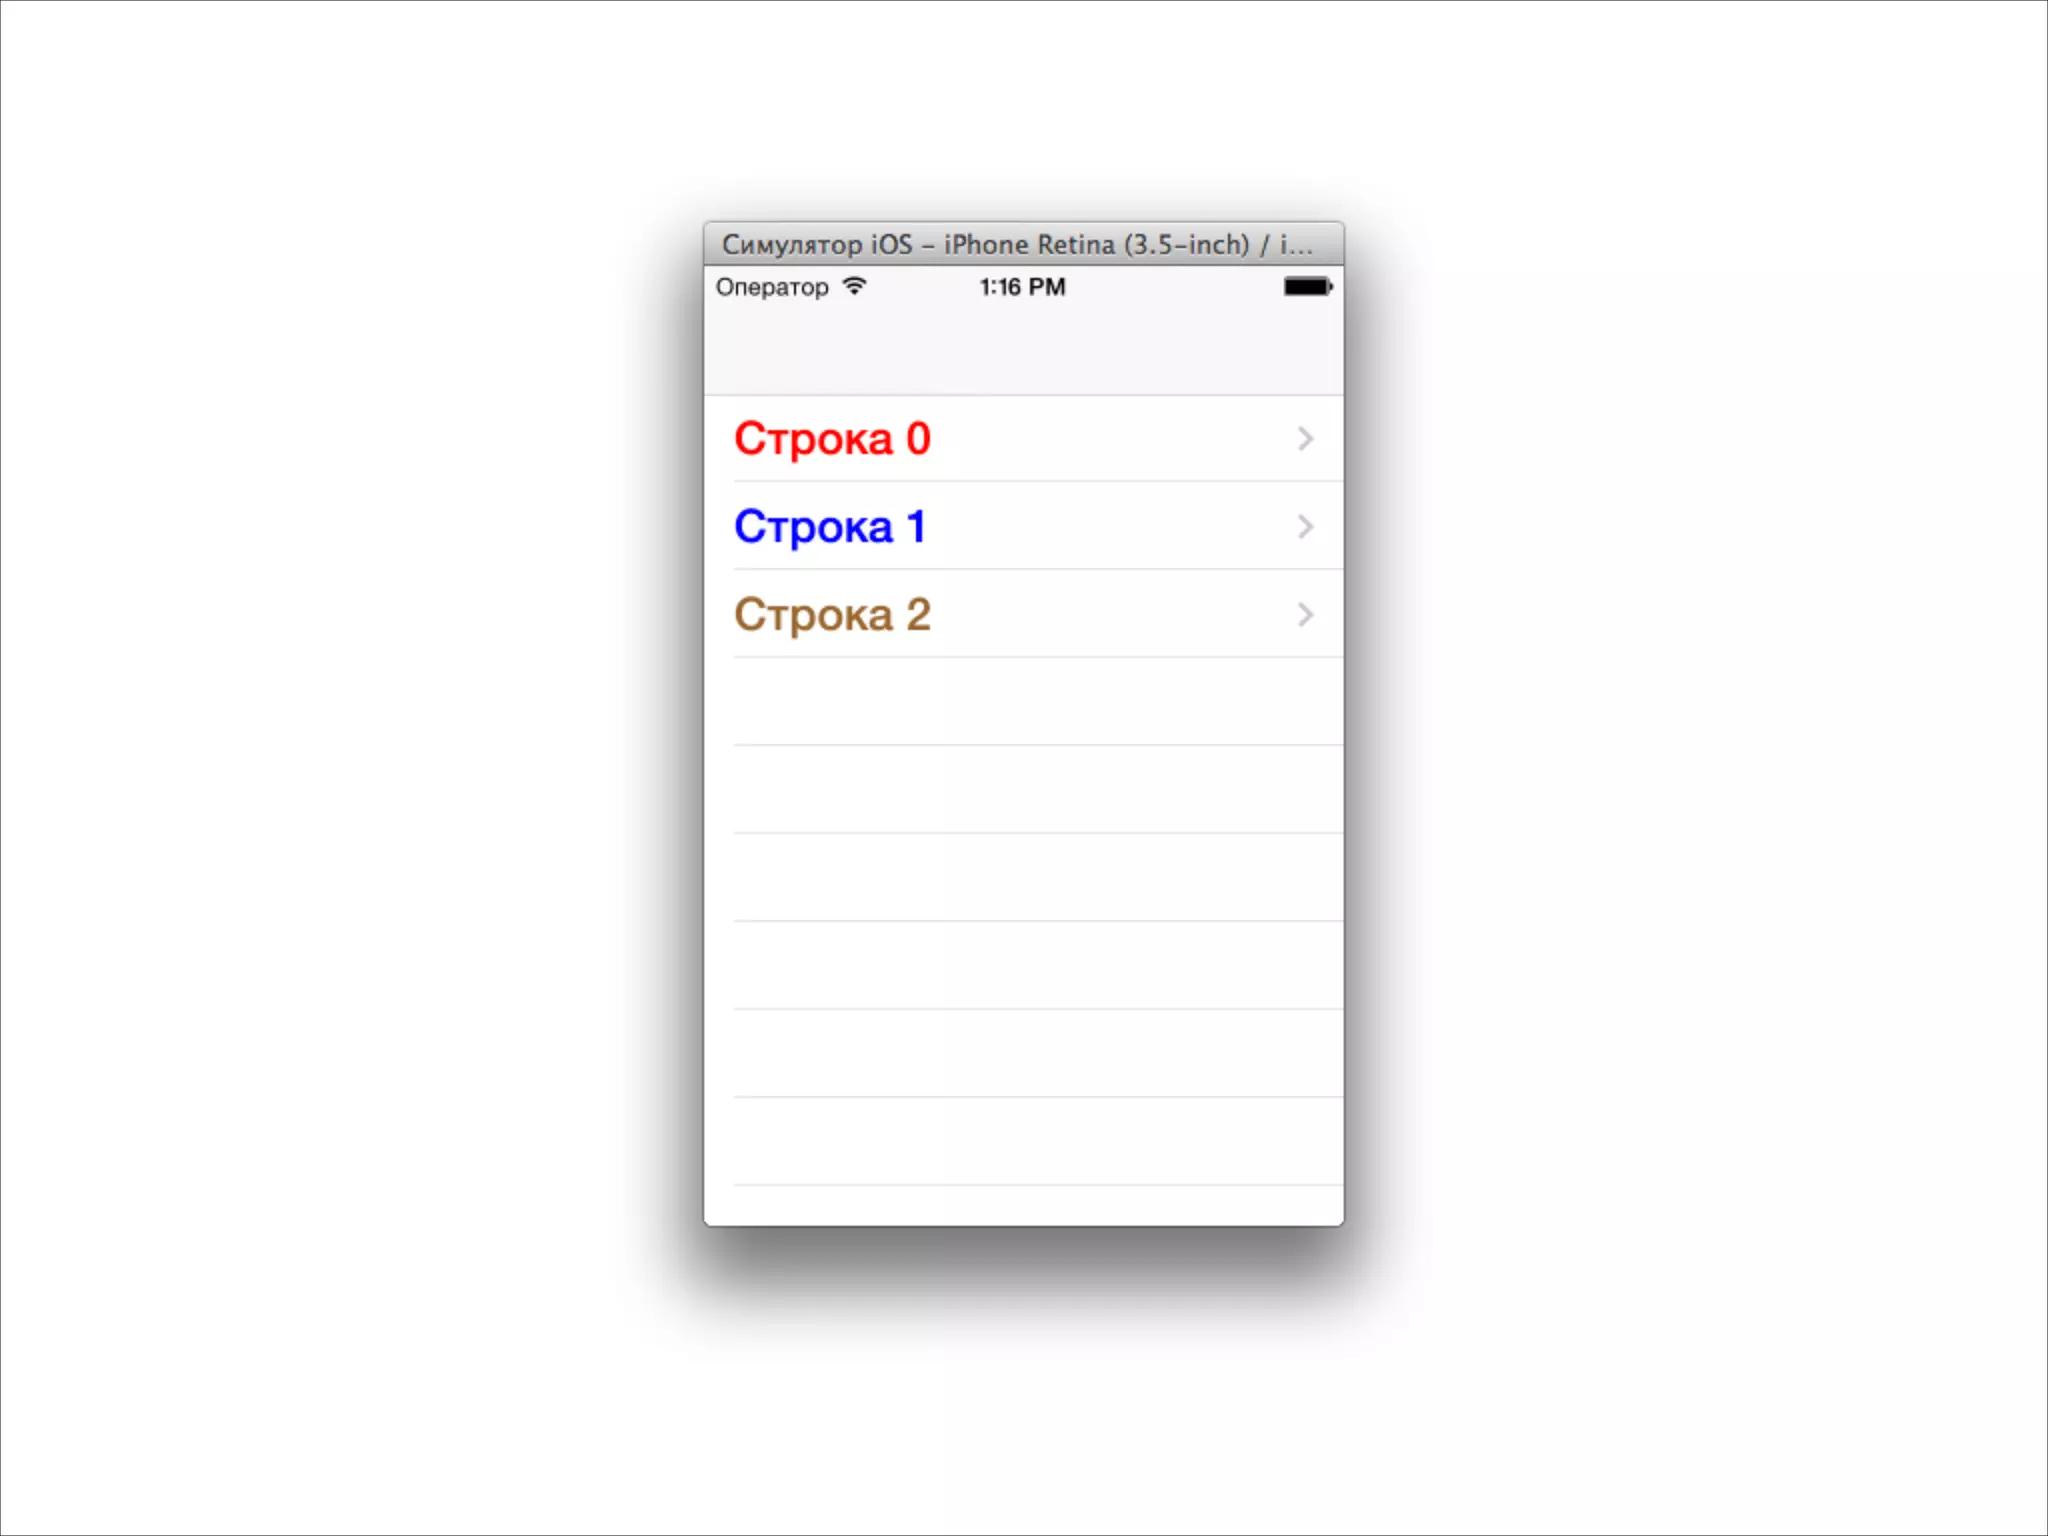
![- (UITableViewCell *)tableView:(UITableView *)tableView
cellForRowAtIndexPath:(NSIndexPath *)indexPath
{
NSString *text = [NSString stringWithFormat:@"Строка %d", indexPath.row];
UITableViewCell *cell = [[UITableViewCell alloc]
initWithStyle:UITableViewCellStyleDefault
reuseIdentifier:nil];
if (indexPath.row == 0)
{
cell.textLabel.textColor = [UIColor redColor];
}
else if (indexPath.row == 1)
{
cell.textLabel.textColor = [UIColor blueColor];
}
else if (indexPath.row == 2)
{
cell.textLabel.textColor = [UIColor brownColor];
}
cell.textLabel.font = [UIFont boldSystemFontOfSize:23];
cell.textLabel.text = text;
cell.accessoryType = UITableViewCellAccessoryDisclosureIndicator;
return cell;
}
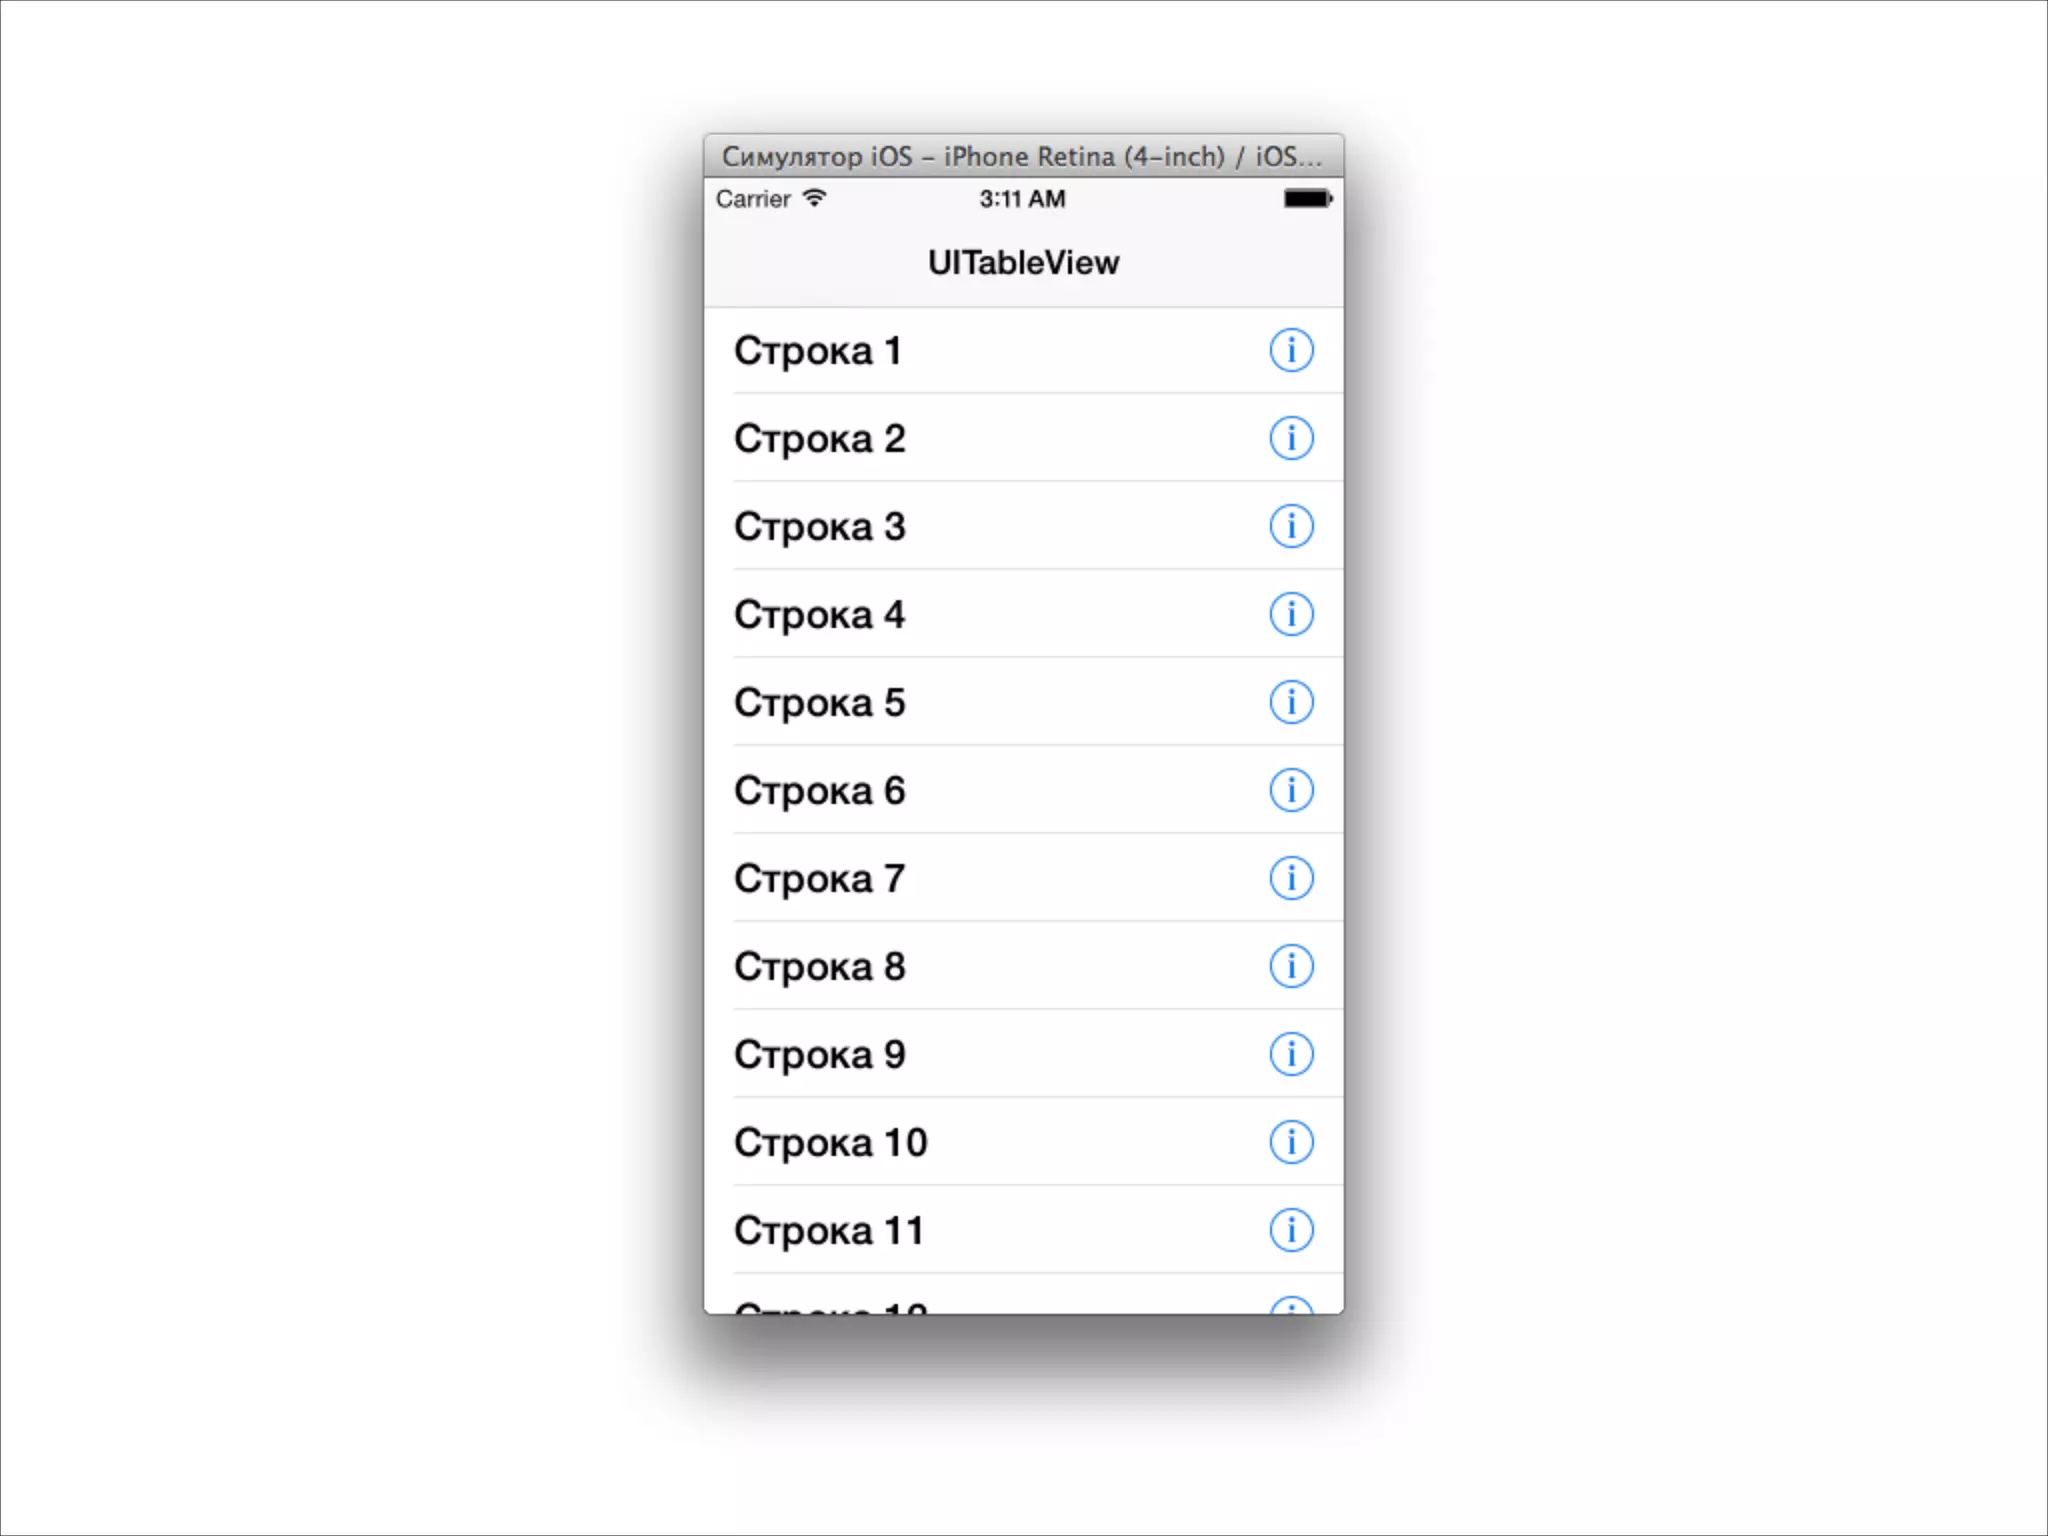
Настройка ячеек](https://image.slidesharecdn.com/intuit5-140317072141-phpapp02/75/iOS-5-Views-28-2048.jpg)
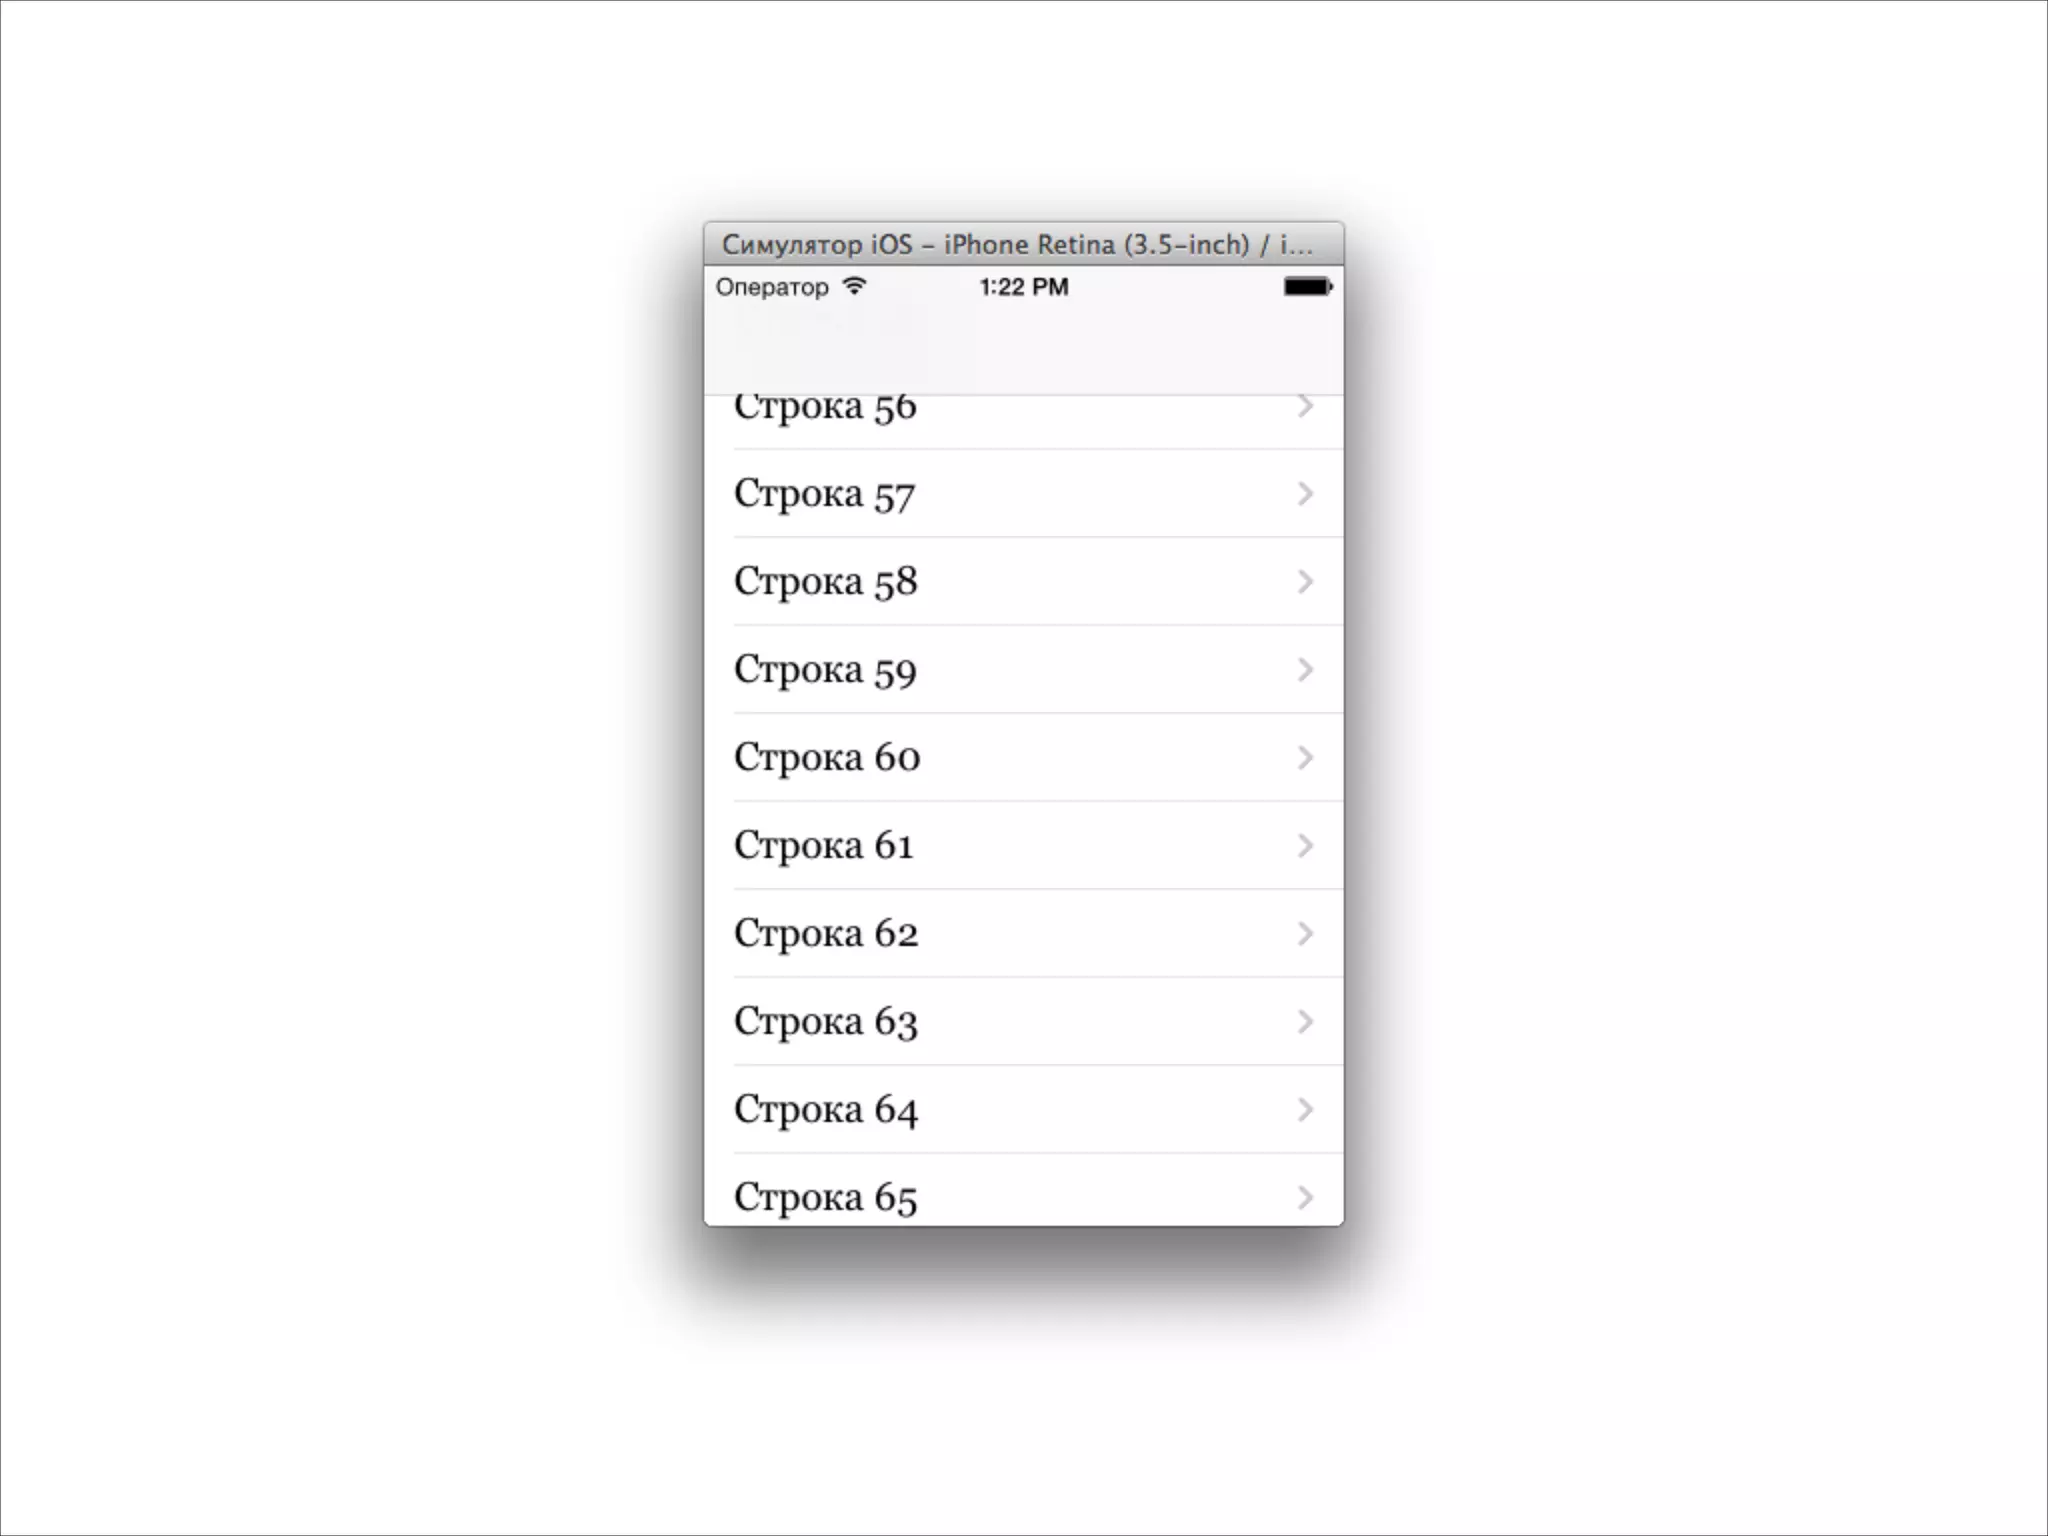
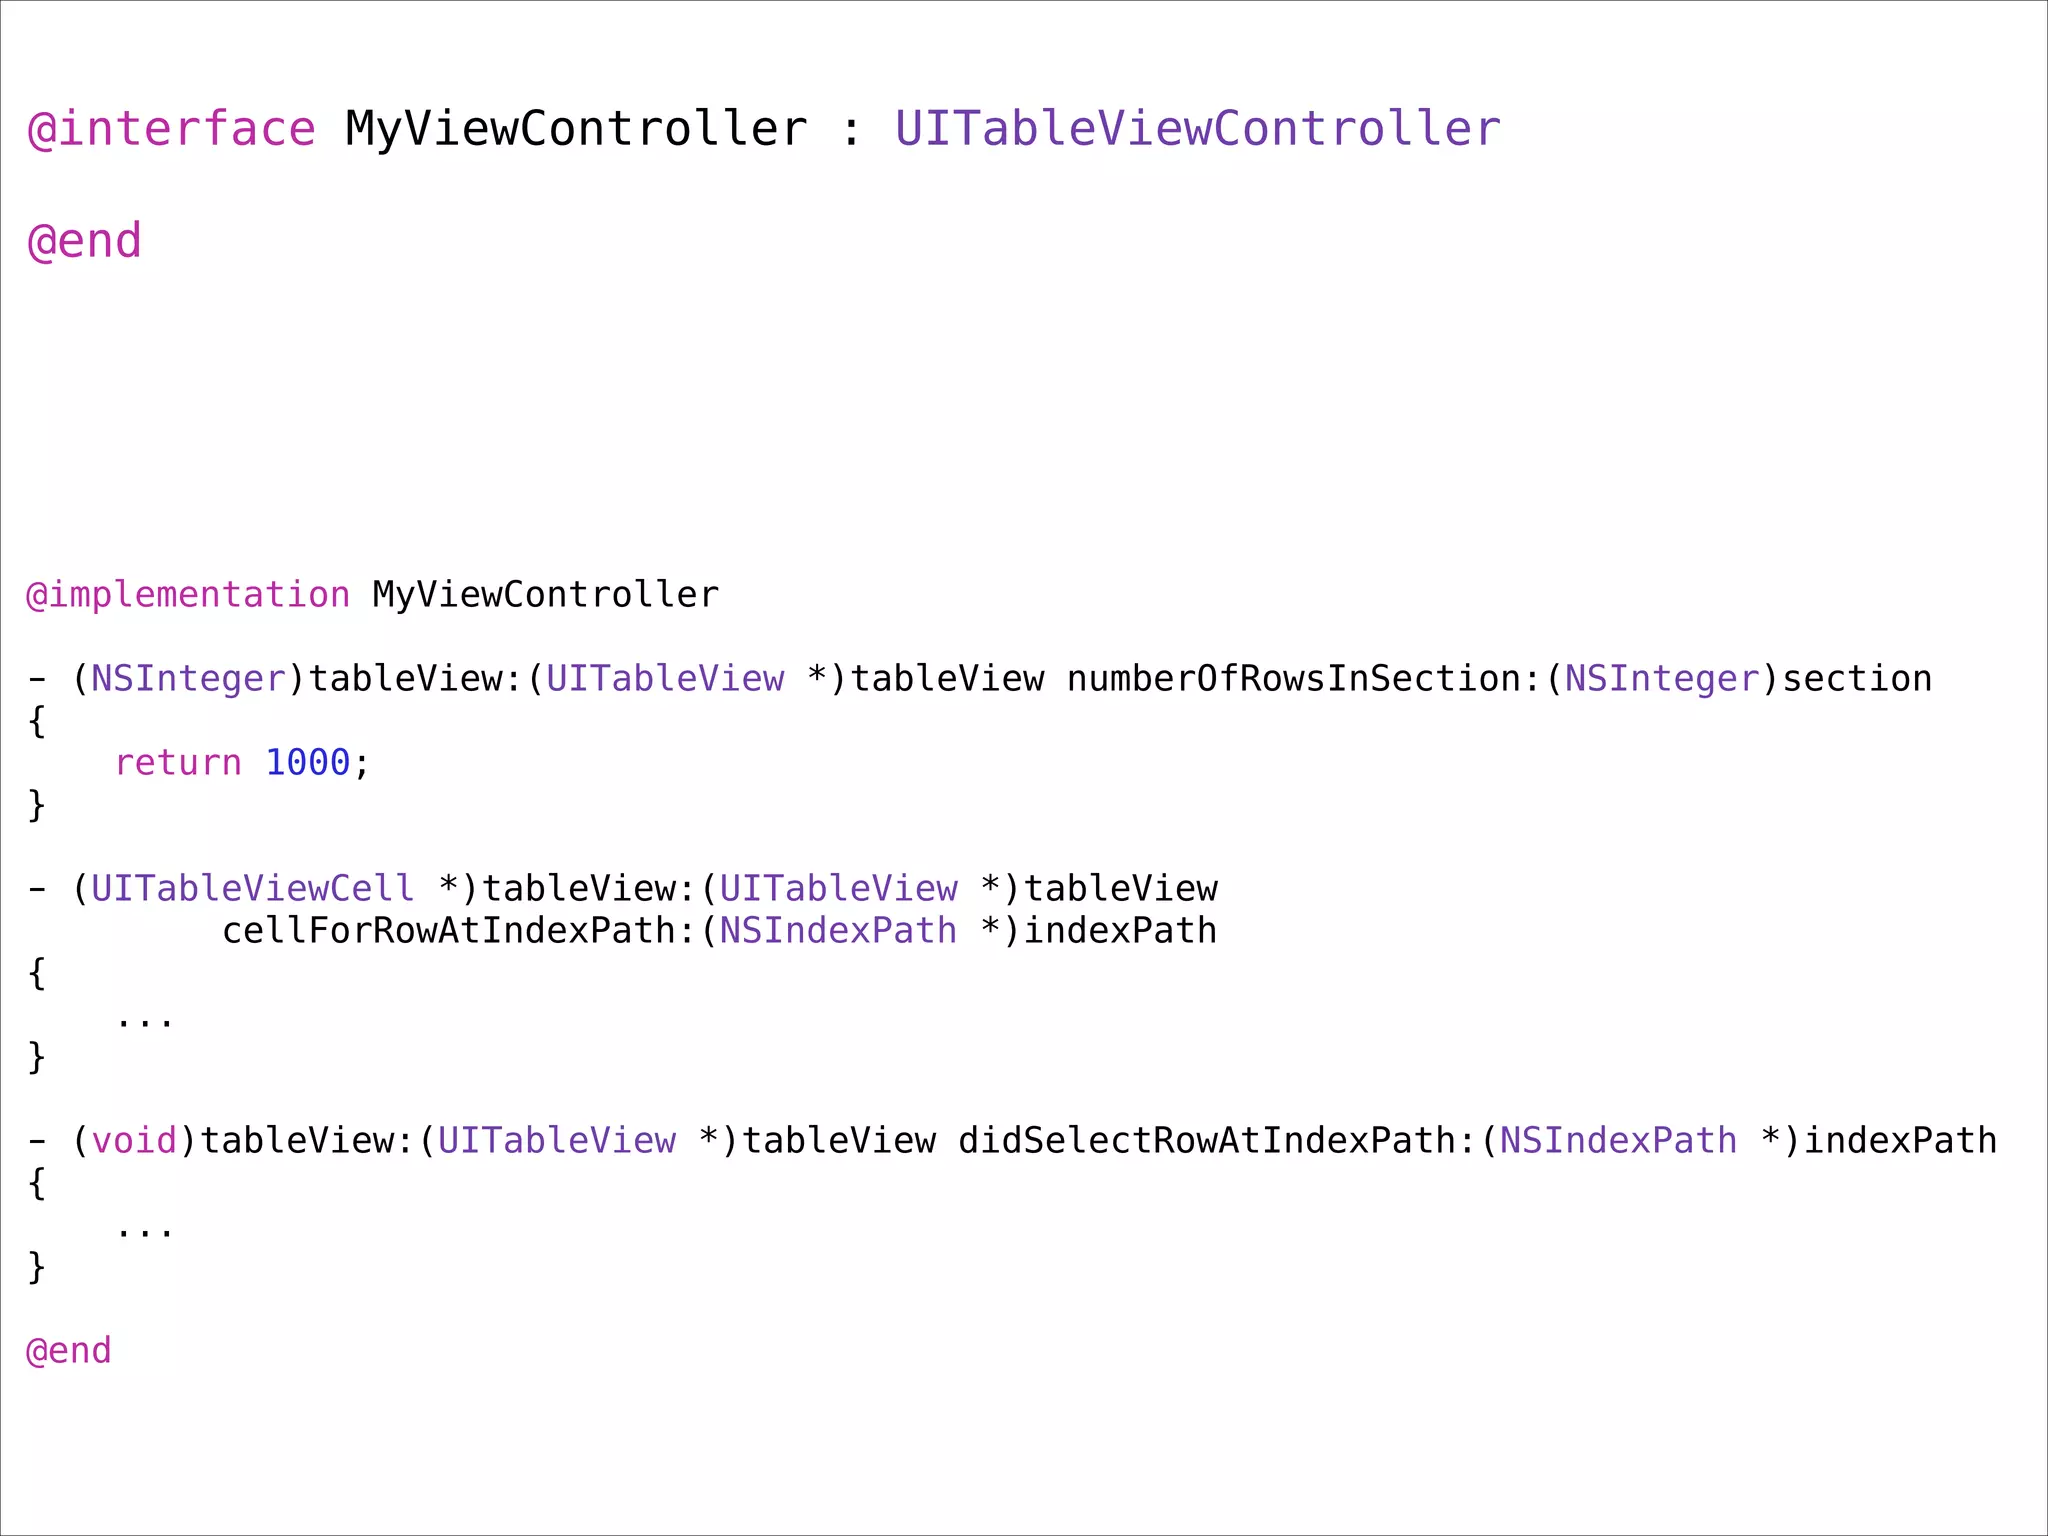
![- (NSInteger)tableView:(UITableView *)tableView numberOfRowsInSection:(NSInteger)section
{
return 1000;
}
- (UITableViewCell *)tableView:(UITableView *)tableView
cellForRowAtIndexPath:(NSIndexPath *)indexPath
{
NSString *identifier = @"cell";
UITableViewCell *cell = [tableView dequeueReusableCellWithIdentifier:identifier];
if (!cell)
{
cell = [[UITableViewCell alloc] initWithStyle:UITableViewCellStyleDefault
reuseIdentifier:identifier];
cell.accessoryType = UITableViewCellAccessoryDisclosureIndicator;
cell.textLabel.font = [UIFont fontWithName:@"Baskerville" size:20];
}
NSString *text = [NSString stringWithFormat:@"Строка %d", indexPath.row];
cell.textLabel.text = text;
return cell;
}
Если много ячеек — надо их переиспользовать](https://image.slidesharecdn.com/intuit5-140317072141-phpapp02/75/iOS-5-Views-30-2048.jpg)
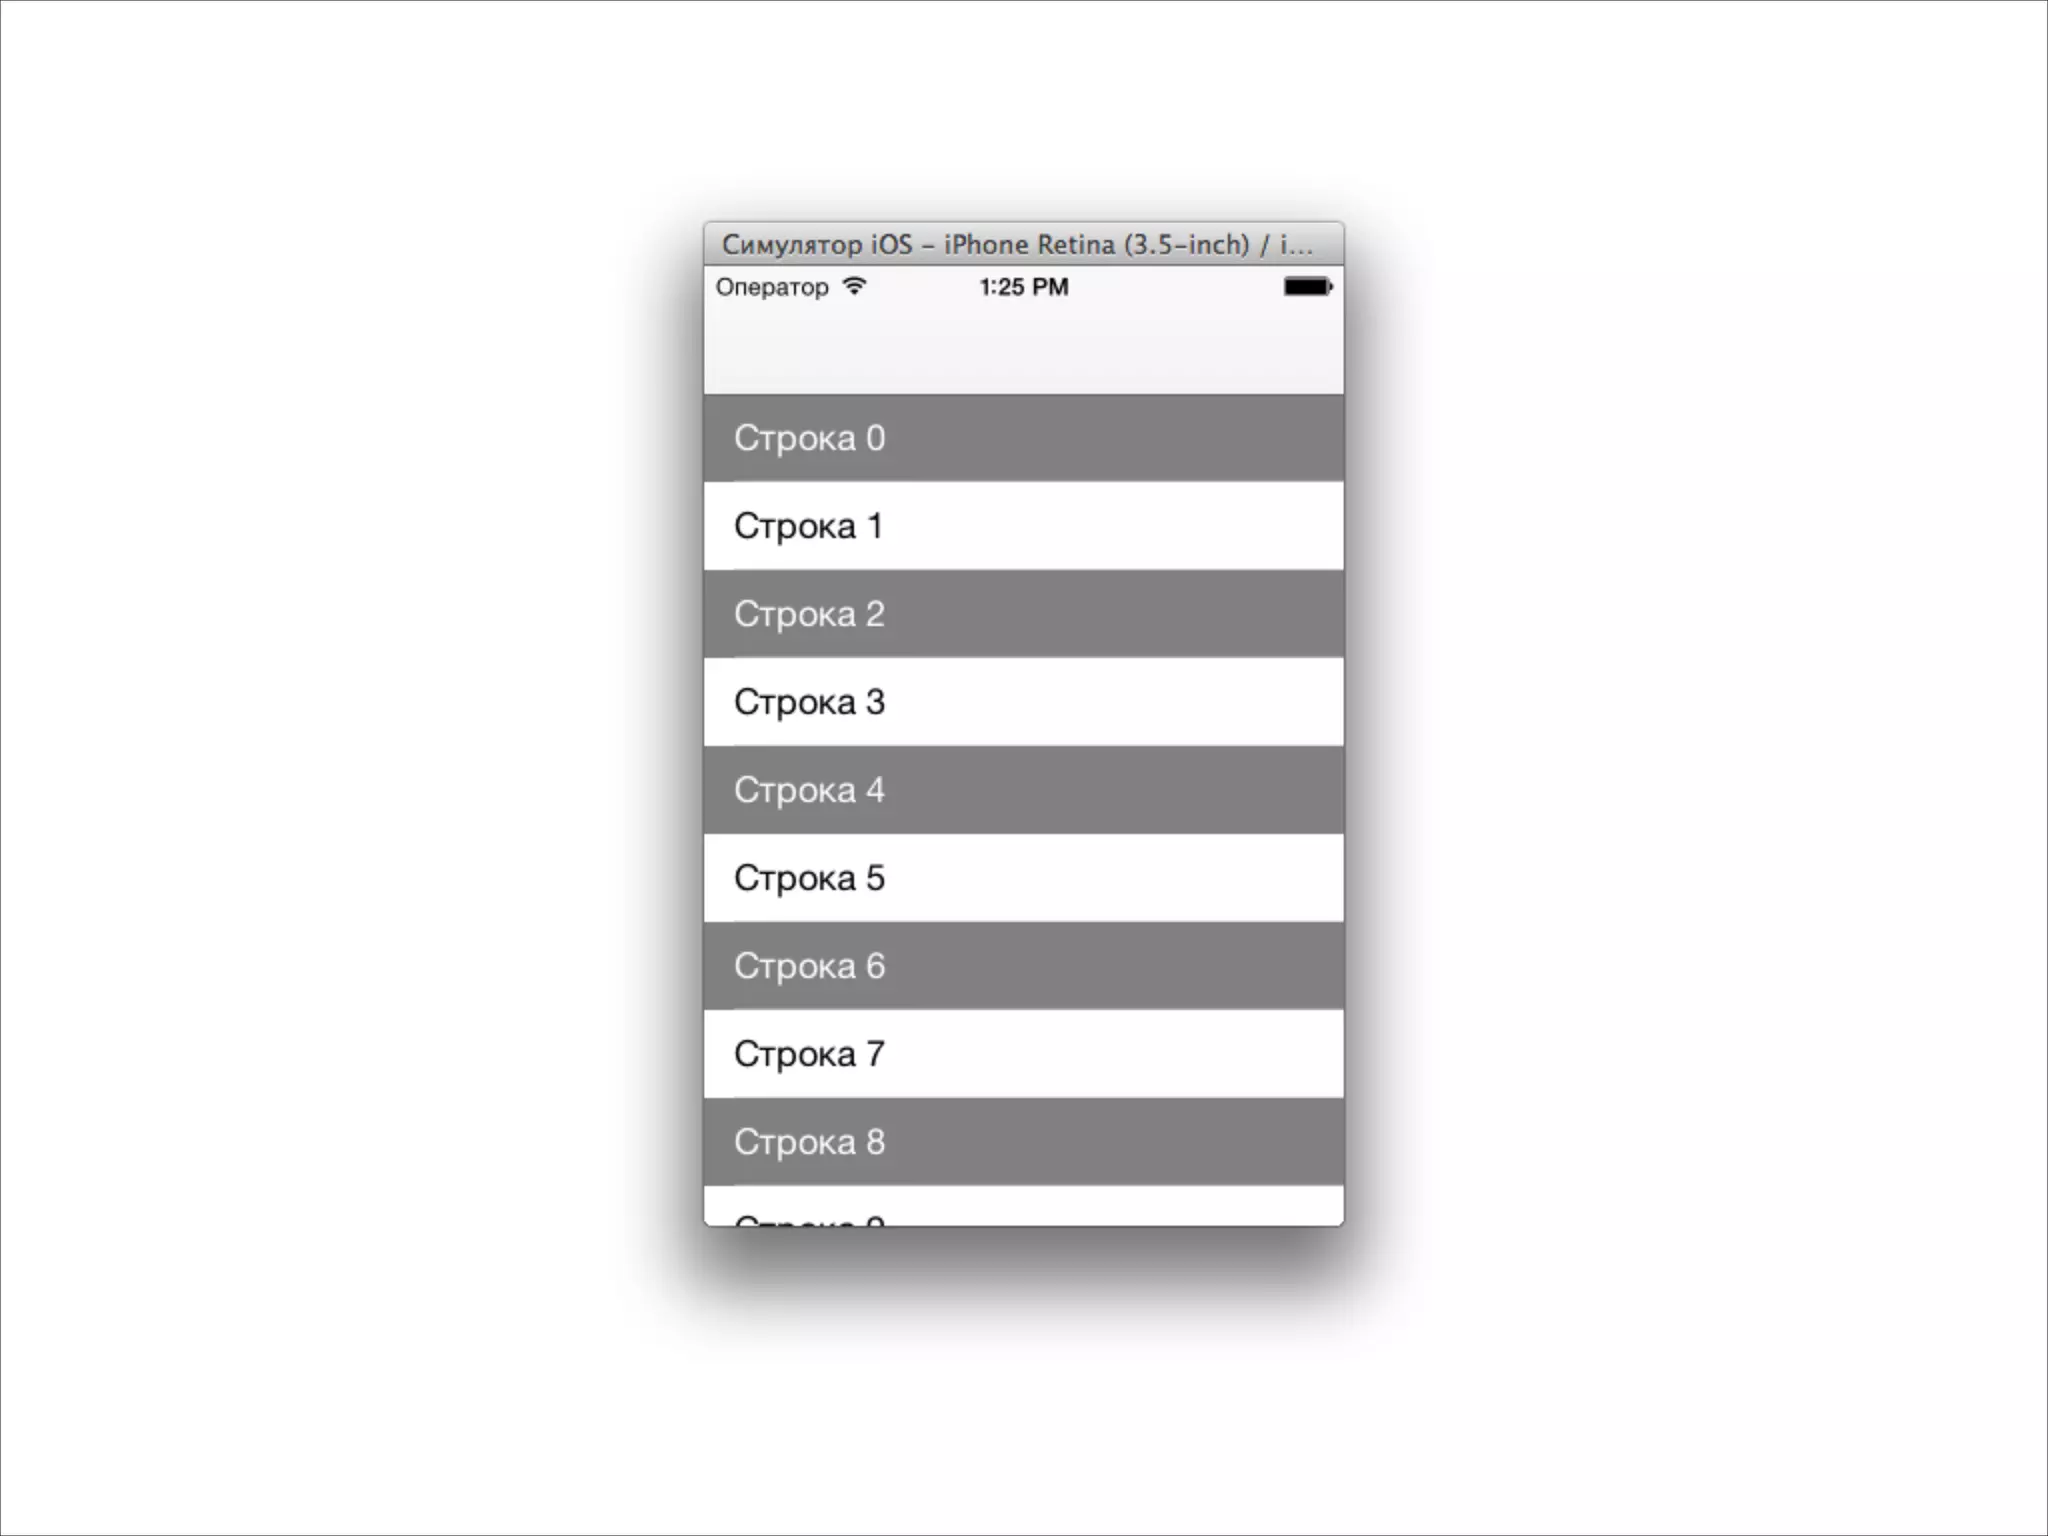
![- (UITableViewCell *)tableView:(UITableView *)tableView
cellForRowAtIndexPath:(NSIndexPath *)indexPath
{
BOOL dark = (indexPath.row % 2) == 0;
NSString *identifier = dark ? @"cell_dark" : @"cell_light";
UITableViewCell *cell = [tableView dequeueReusableCellWithIdentifier:identifier];
if (!cell)
{
cell = [[UITableViewCell alloc] initWithStyle:UITableViewCellStyleDefault
reuseIdentifier:identifier];
if (dark)
{
cell.backgroundColor = [UIColor grayColor];
cell.textLabel.textColor = [UIColor whiteColor];
}
else
{
cell.backgroundColor = [UIColor whiteColor];
cell.textLabel.textColor = [UIColor blackColor];
}
}
NSString *text = [NSString stringWithFormat:@"Строка %d", indexPath.row];
cell.textLabel.text = text;
return cell;
}
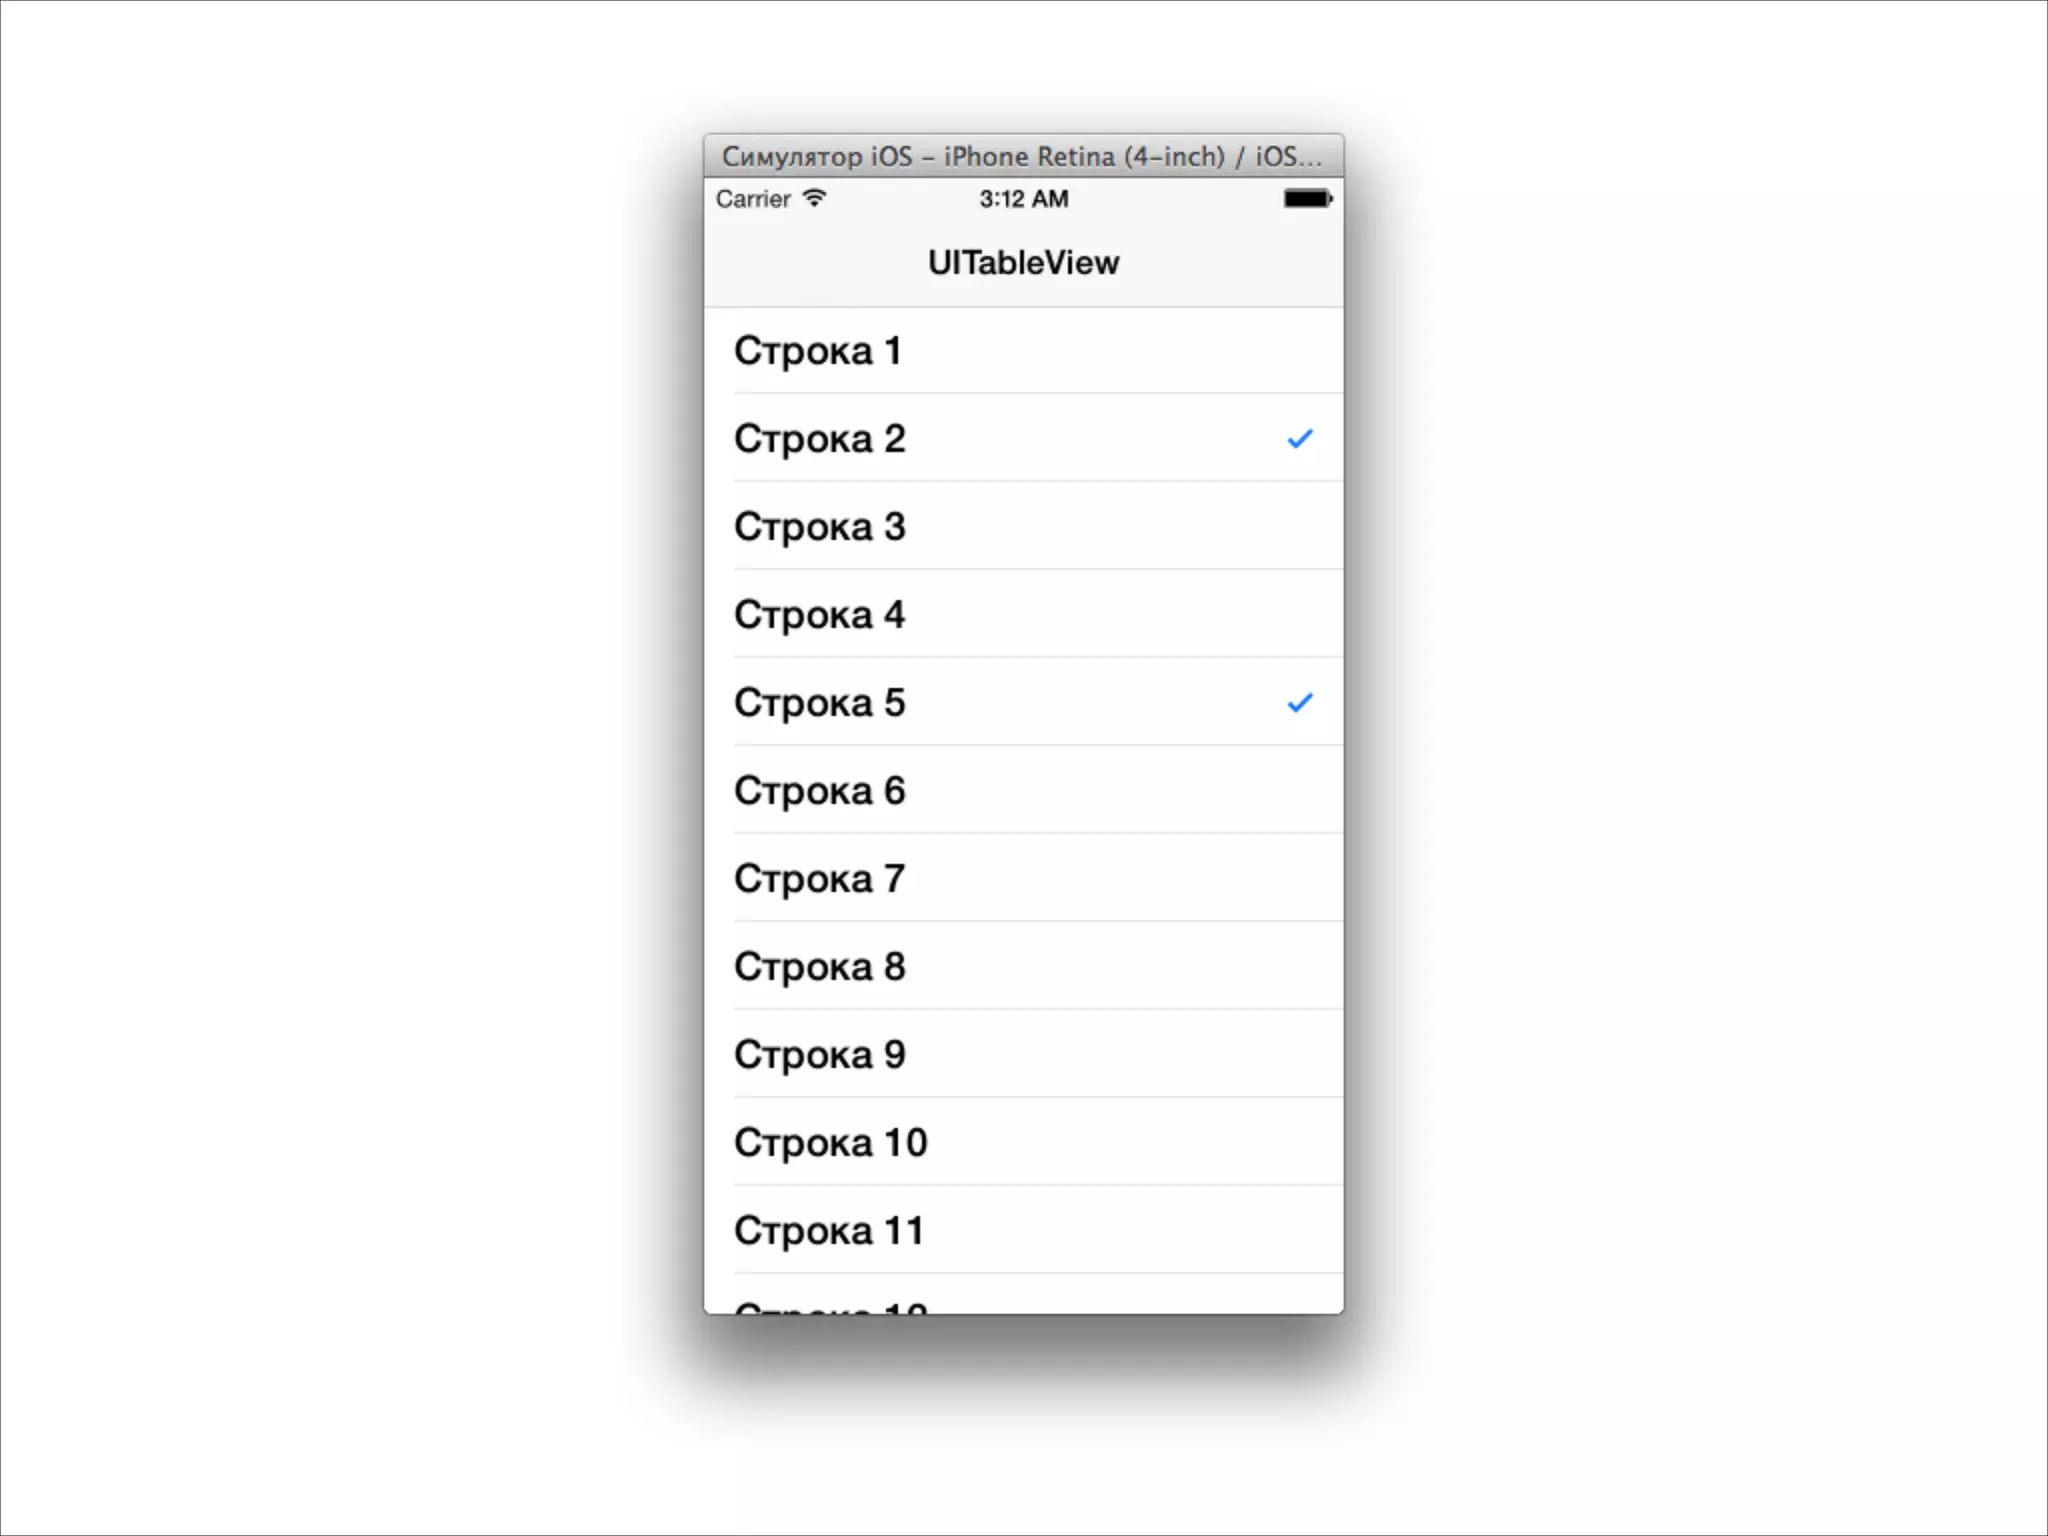
Если несколько типов ячеек - разные identifier](https://image.slidesharecdn.com/intuit5-140317072141-phpapp02/75/iOS-5-Views-32-2048.jpg)
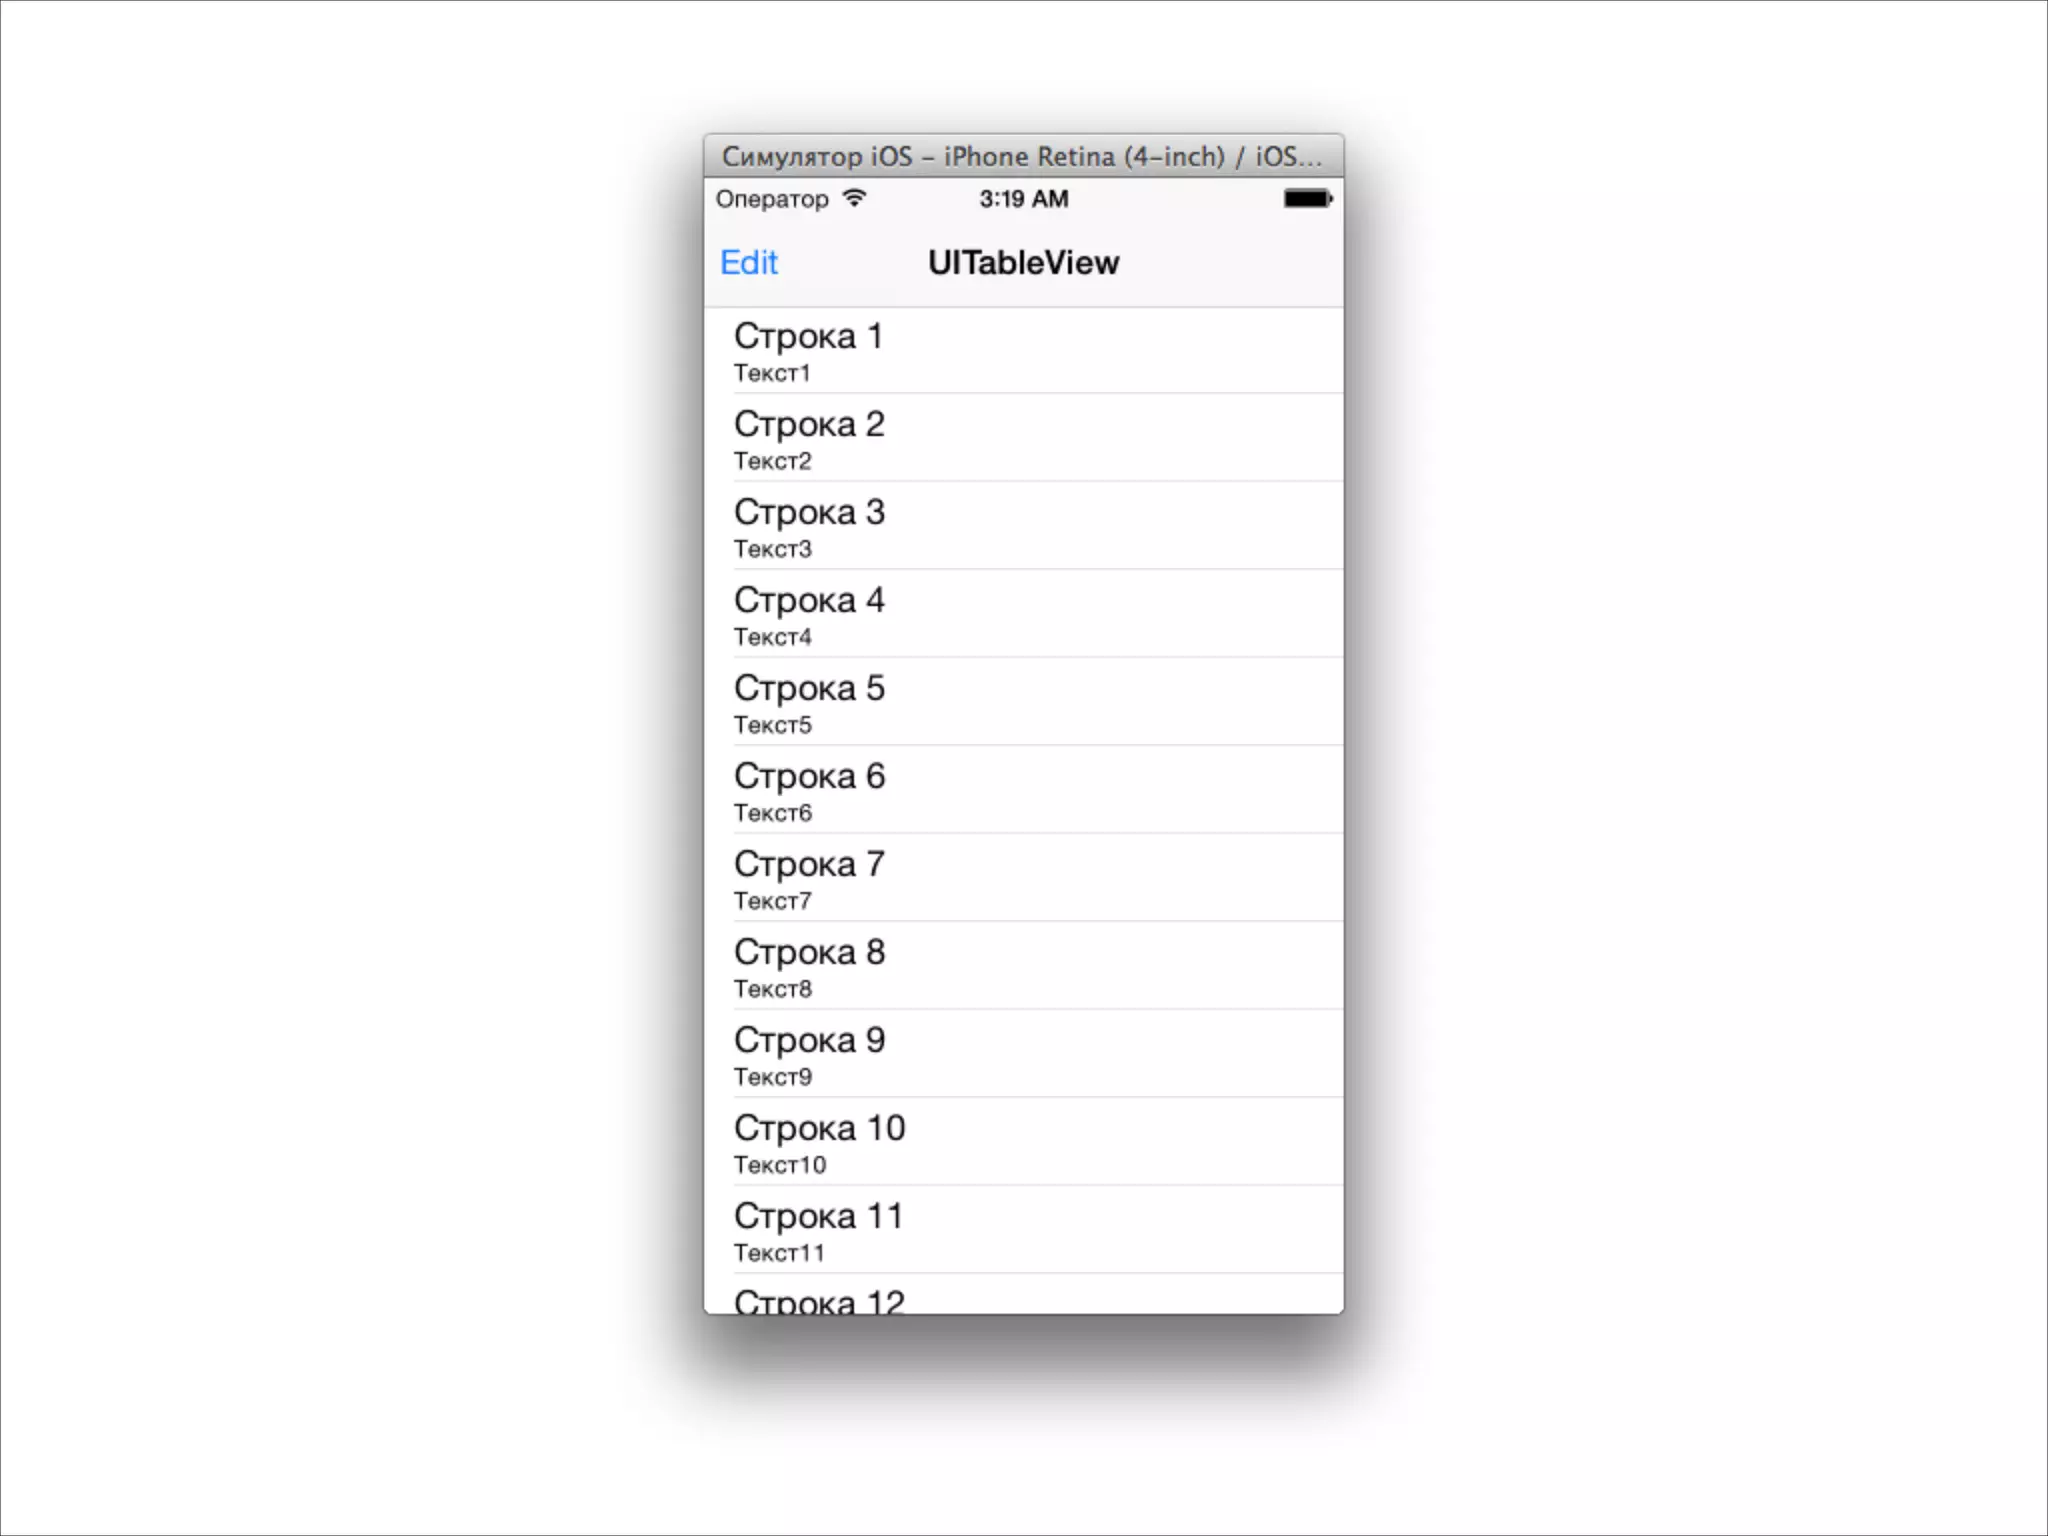
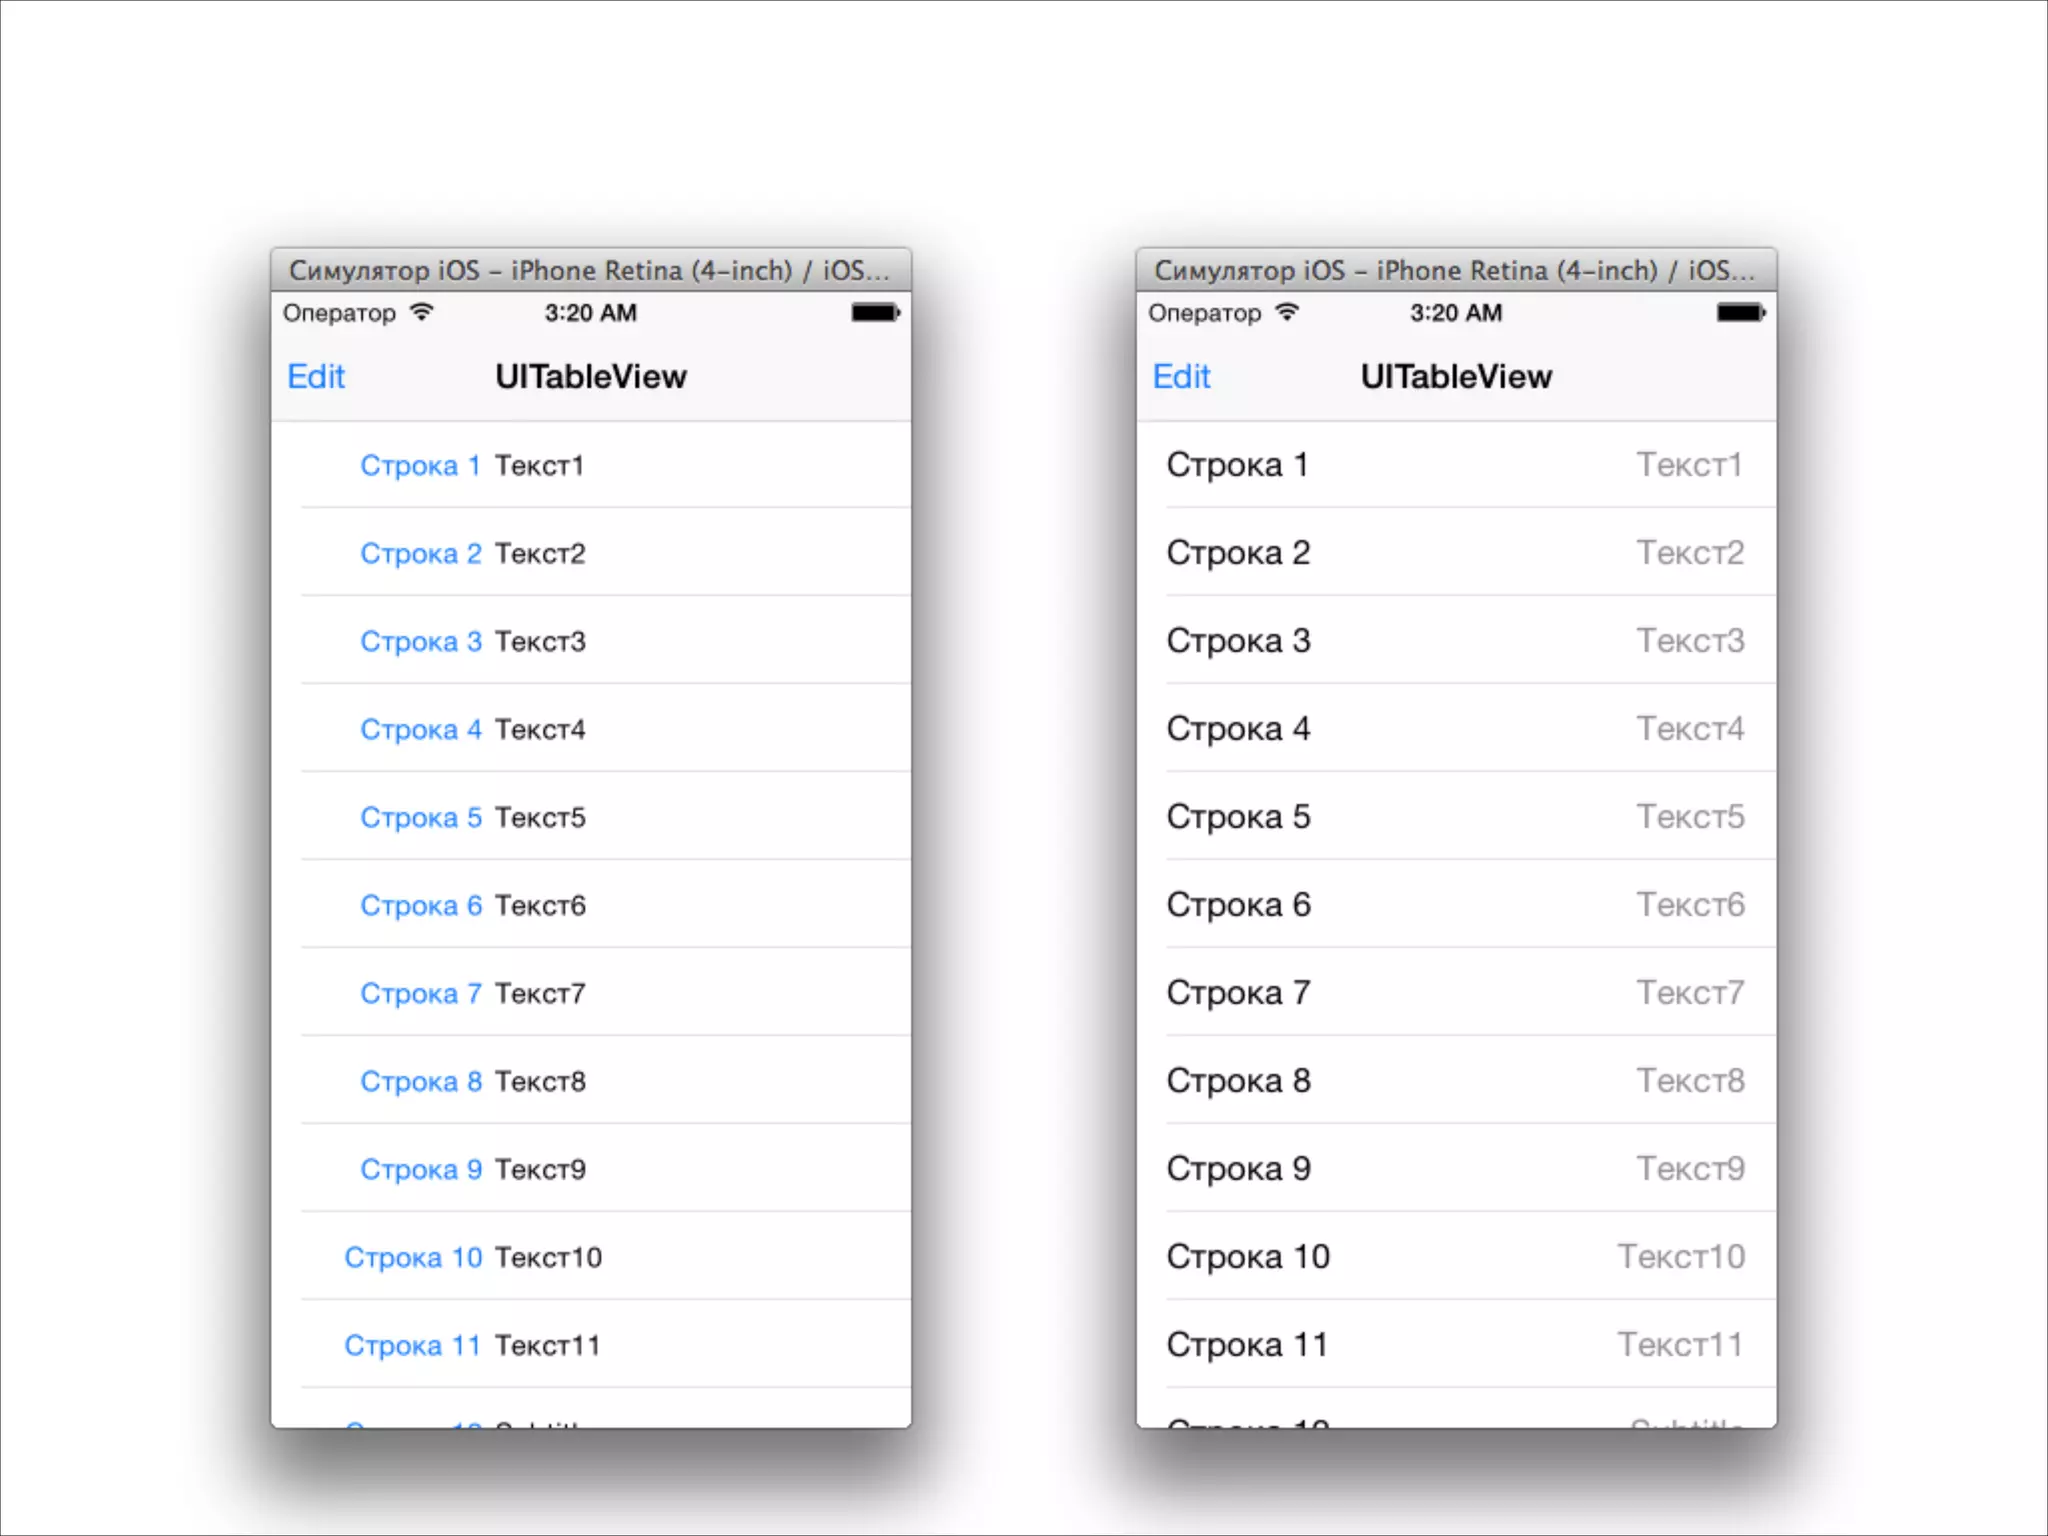
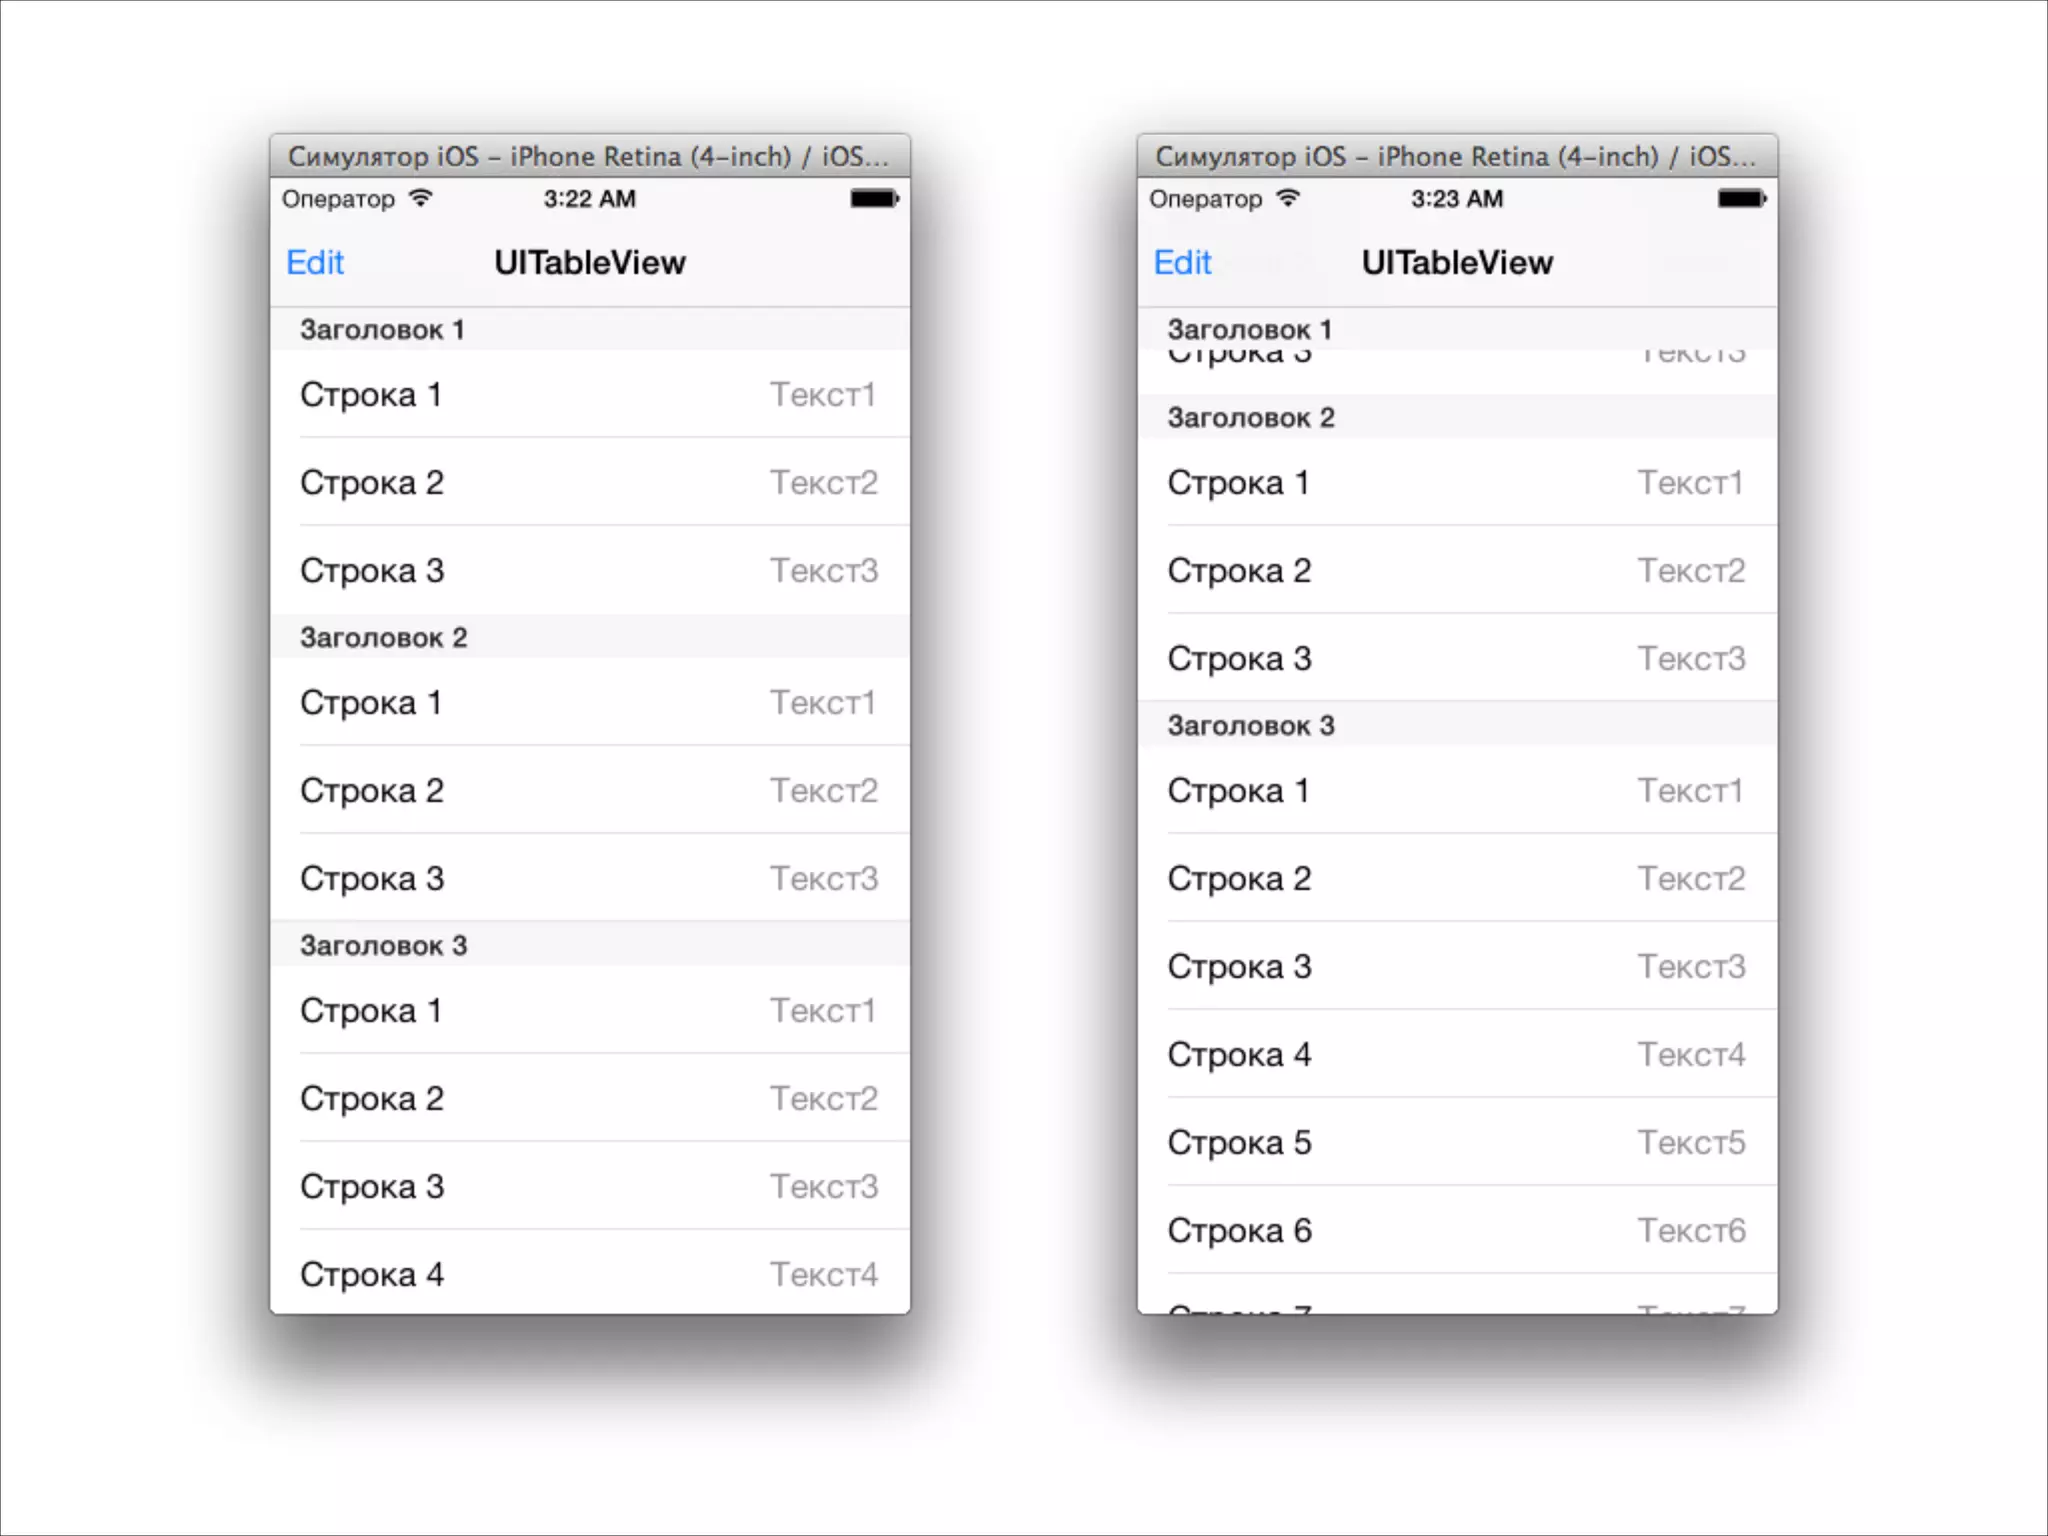
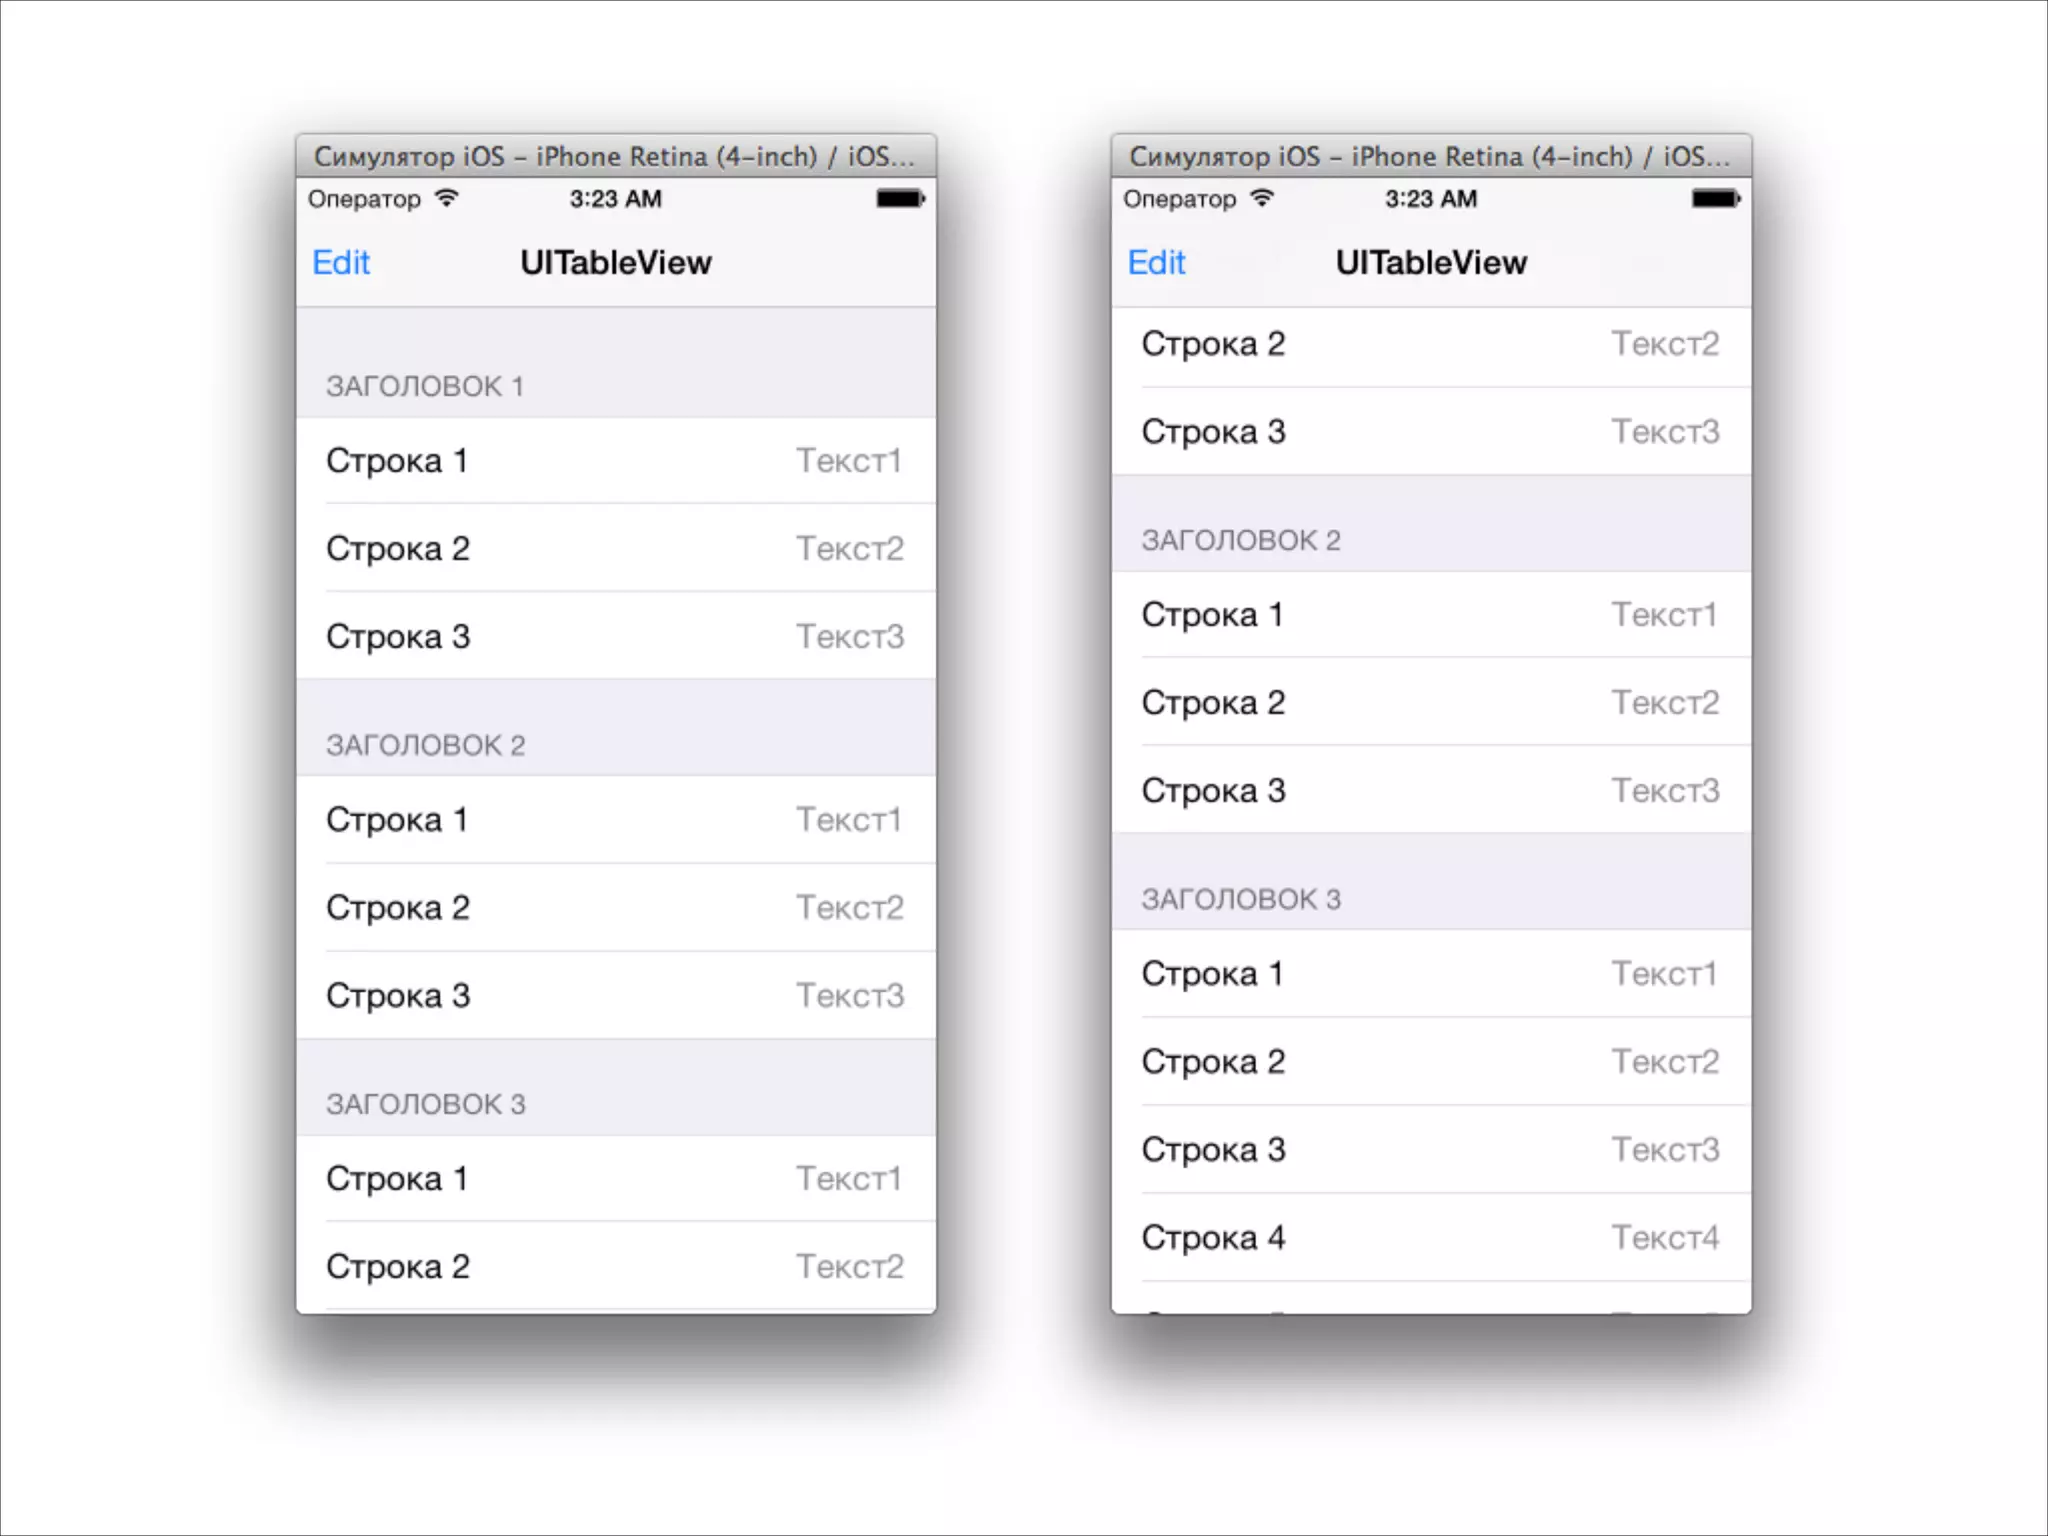
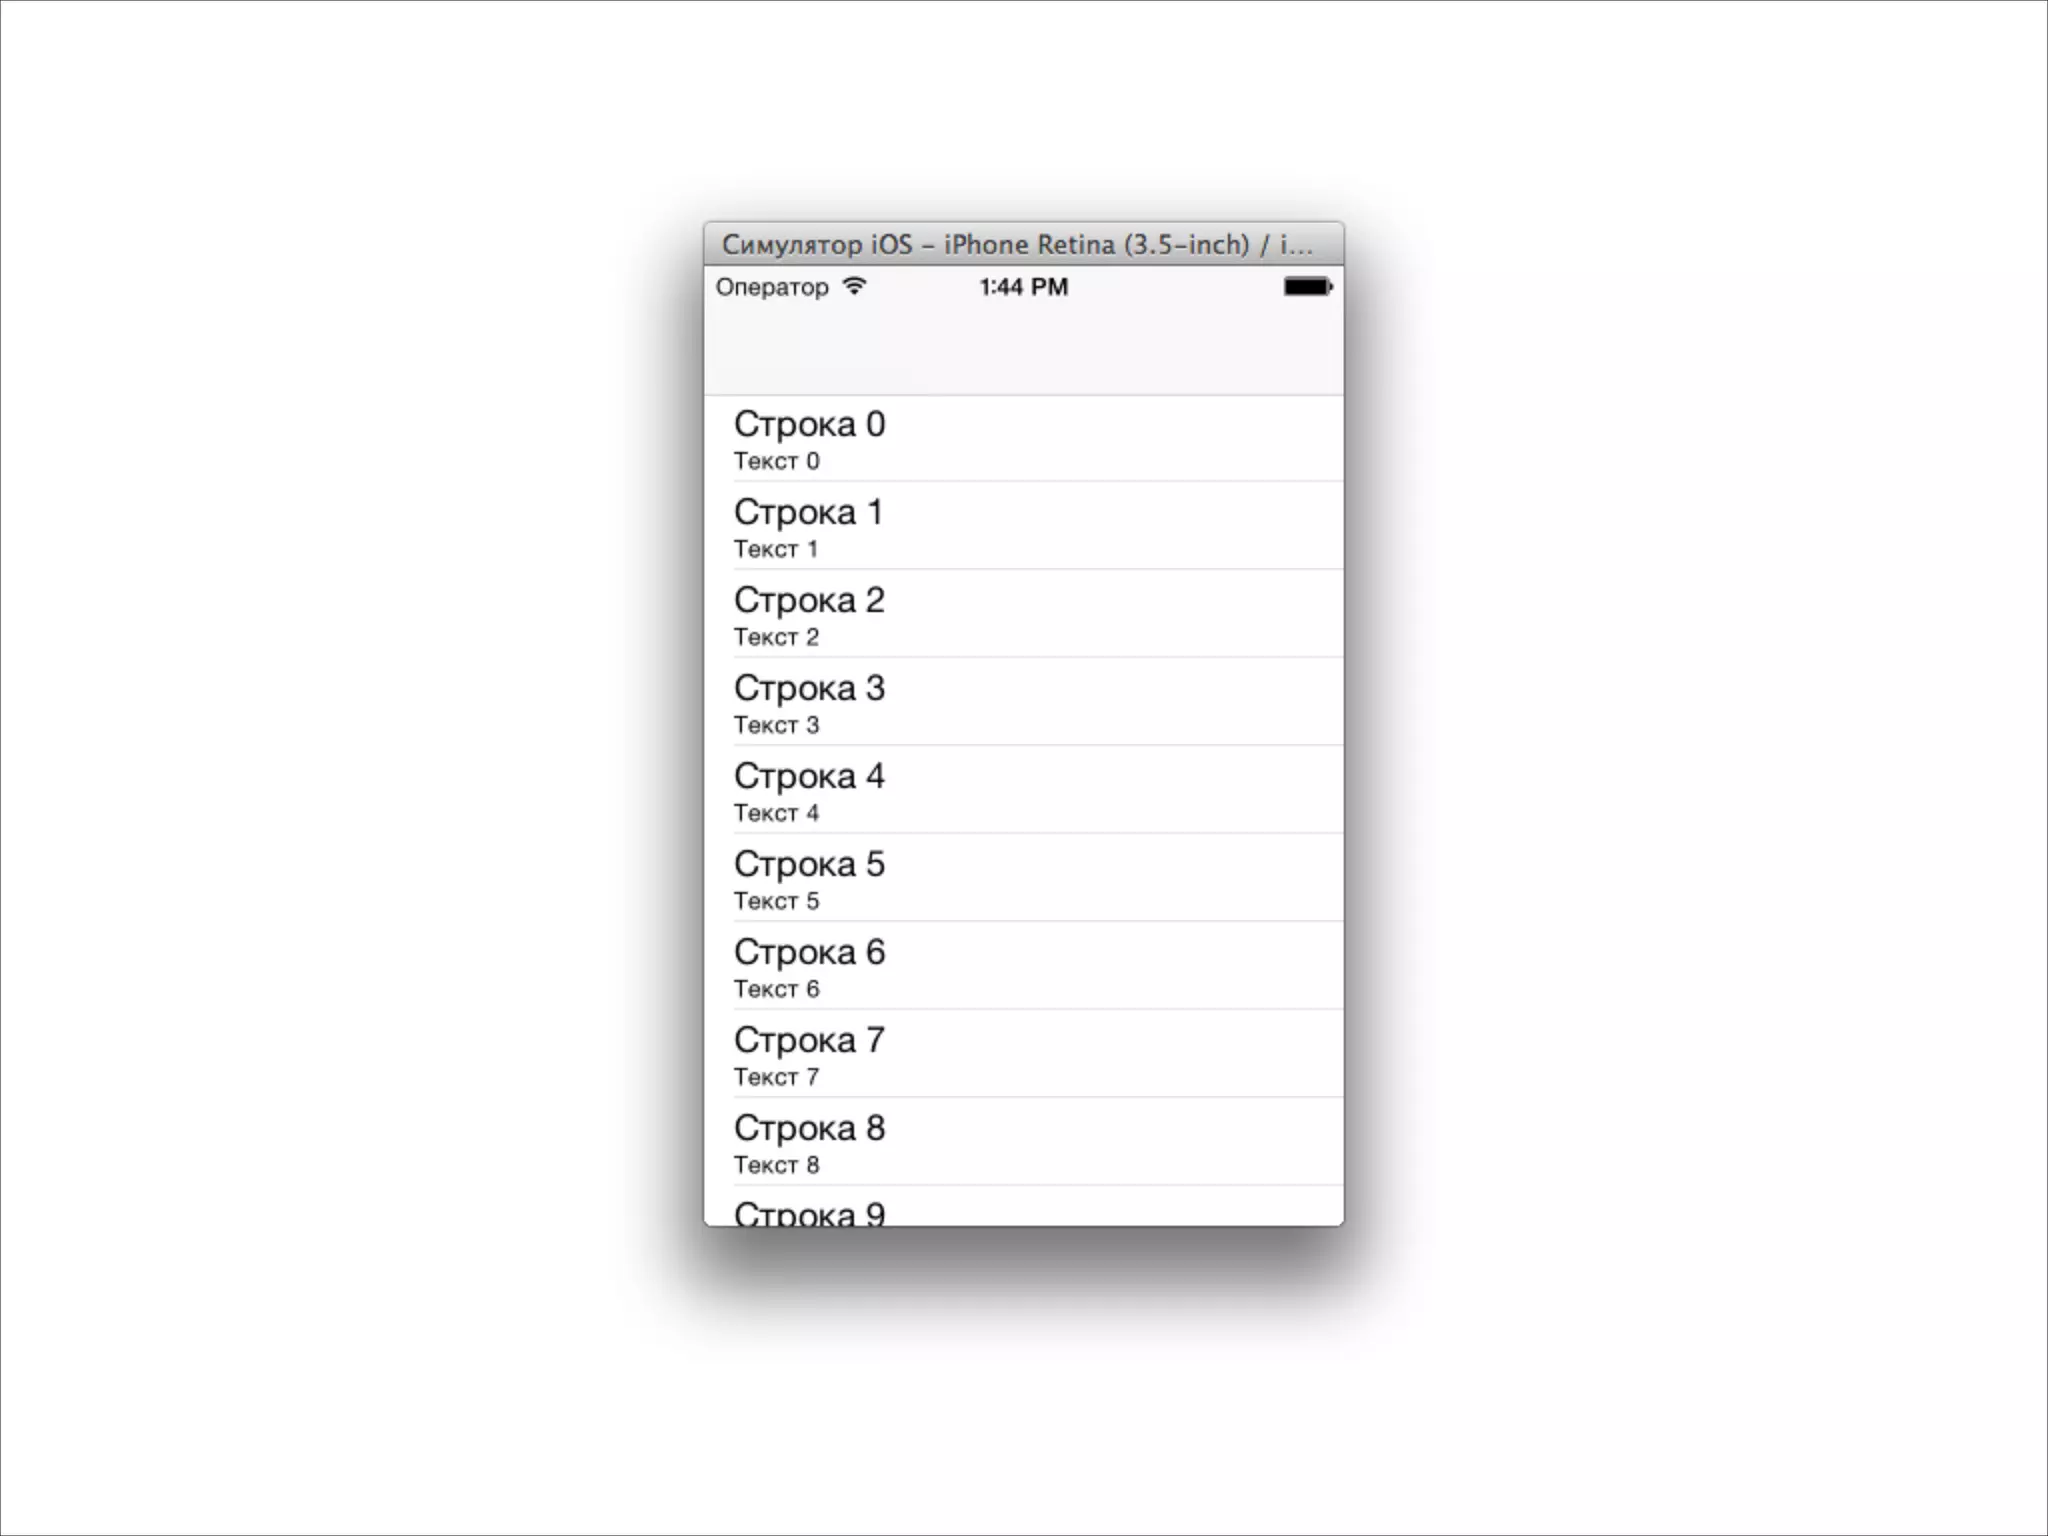
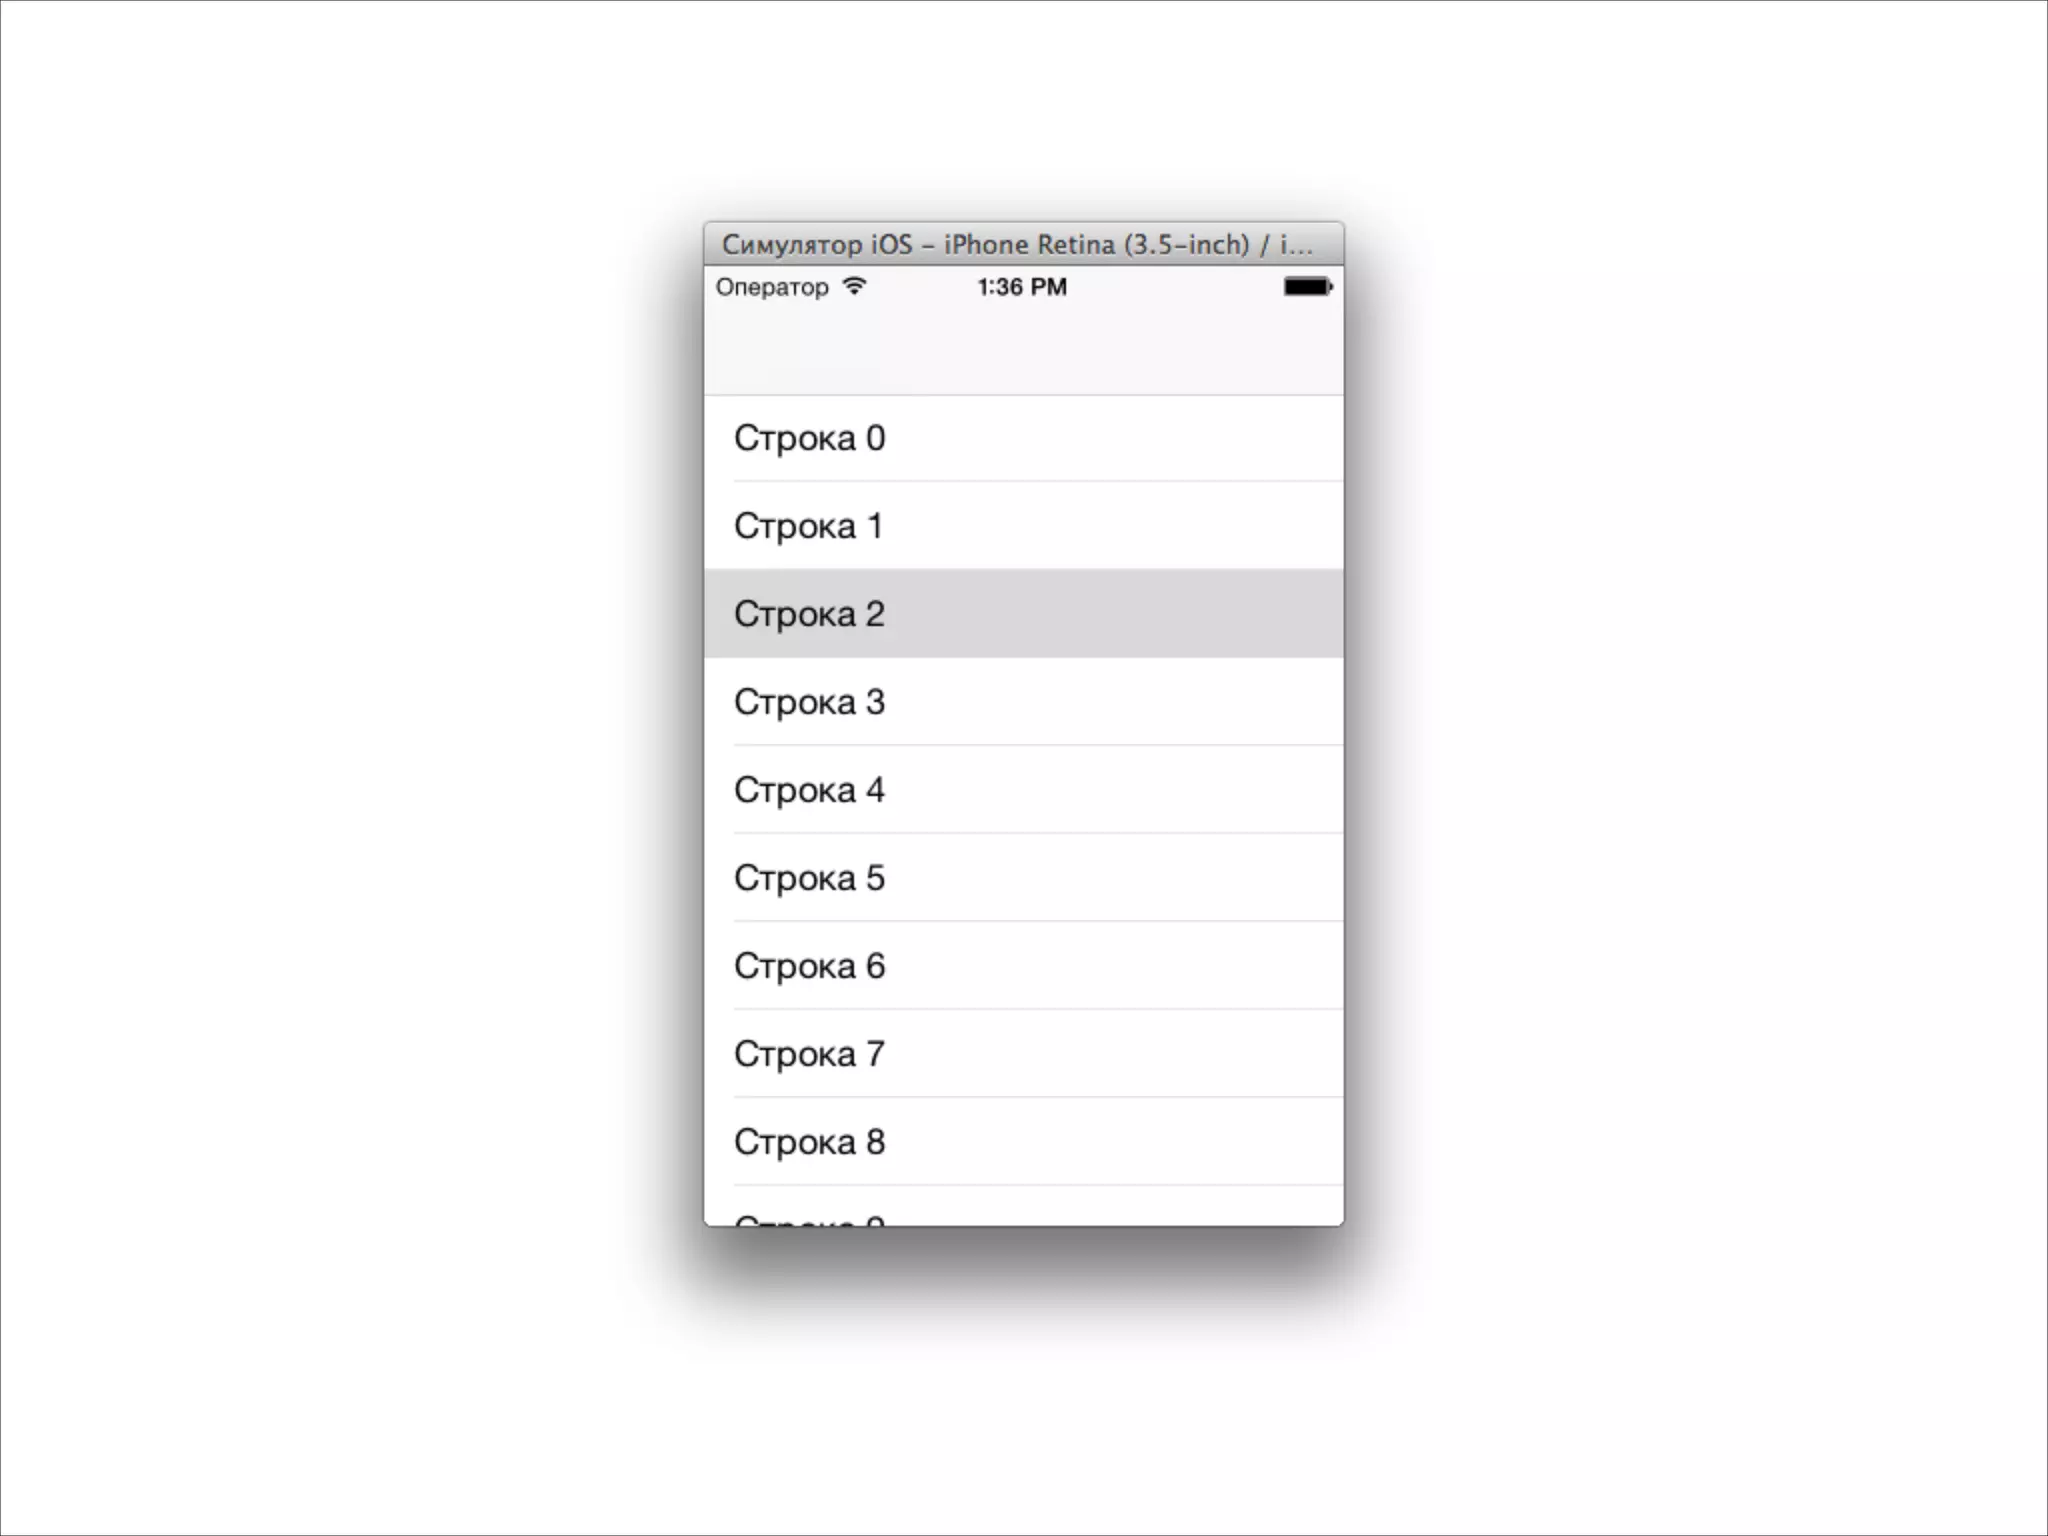
![Разные типы ячеек
- (UITableViewCell *)tableView:(UITableView *)tableView
cellForRowAtIndexPath:(NSIndexPath *)indexPath
{
NSString *identifier = @"cell";
UITableViewCell *cell = [tableView dequeueReusableCellWithIdentifier:identifier];
if (!cell)
{
cell = [[UITableViewCell alloc] initWithStyle:UITableViewCellStyleSubtitle
reuseIdentifier:identifier];
}
NSString *text = [NSString stringWithFormat:@"Строка %d", indexPath.row];
NSString *detailText = [NSString stringWithFormat:@"Текст %d", indexPath.row];
cell.textLabel.text = text;
cell.detailTextLabel.text = detailText;
return cell;
}](https://image.slidesharecdn.com/intuit5-140317072141-phpapp02/75/iOS-5-Views-34-2048.jpg)
![Как реагировать на нажатие
@interface MyViewController : UIViewController<UITableViewDataSource, UITableViewDelegate>
!
@property (strong, nonatomic) UITableView *tableView;
!
@end
- (void)viewDidLoad
{
[super viewDidLoad];
self.tableView = [[UITableView alloc] init];
self.tableView.frame = self.view.bounds;
self.tableView.dataSource = self;
self.tableView.delegate = self;
[self.view addSubview:self.tableView];
}](https://image.slidesharecdn.com/intuit5-140317072141-phpapp02/75/iOS-5-Views-36-2048.jpg)
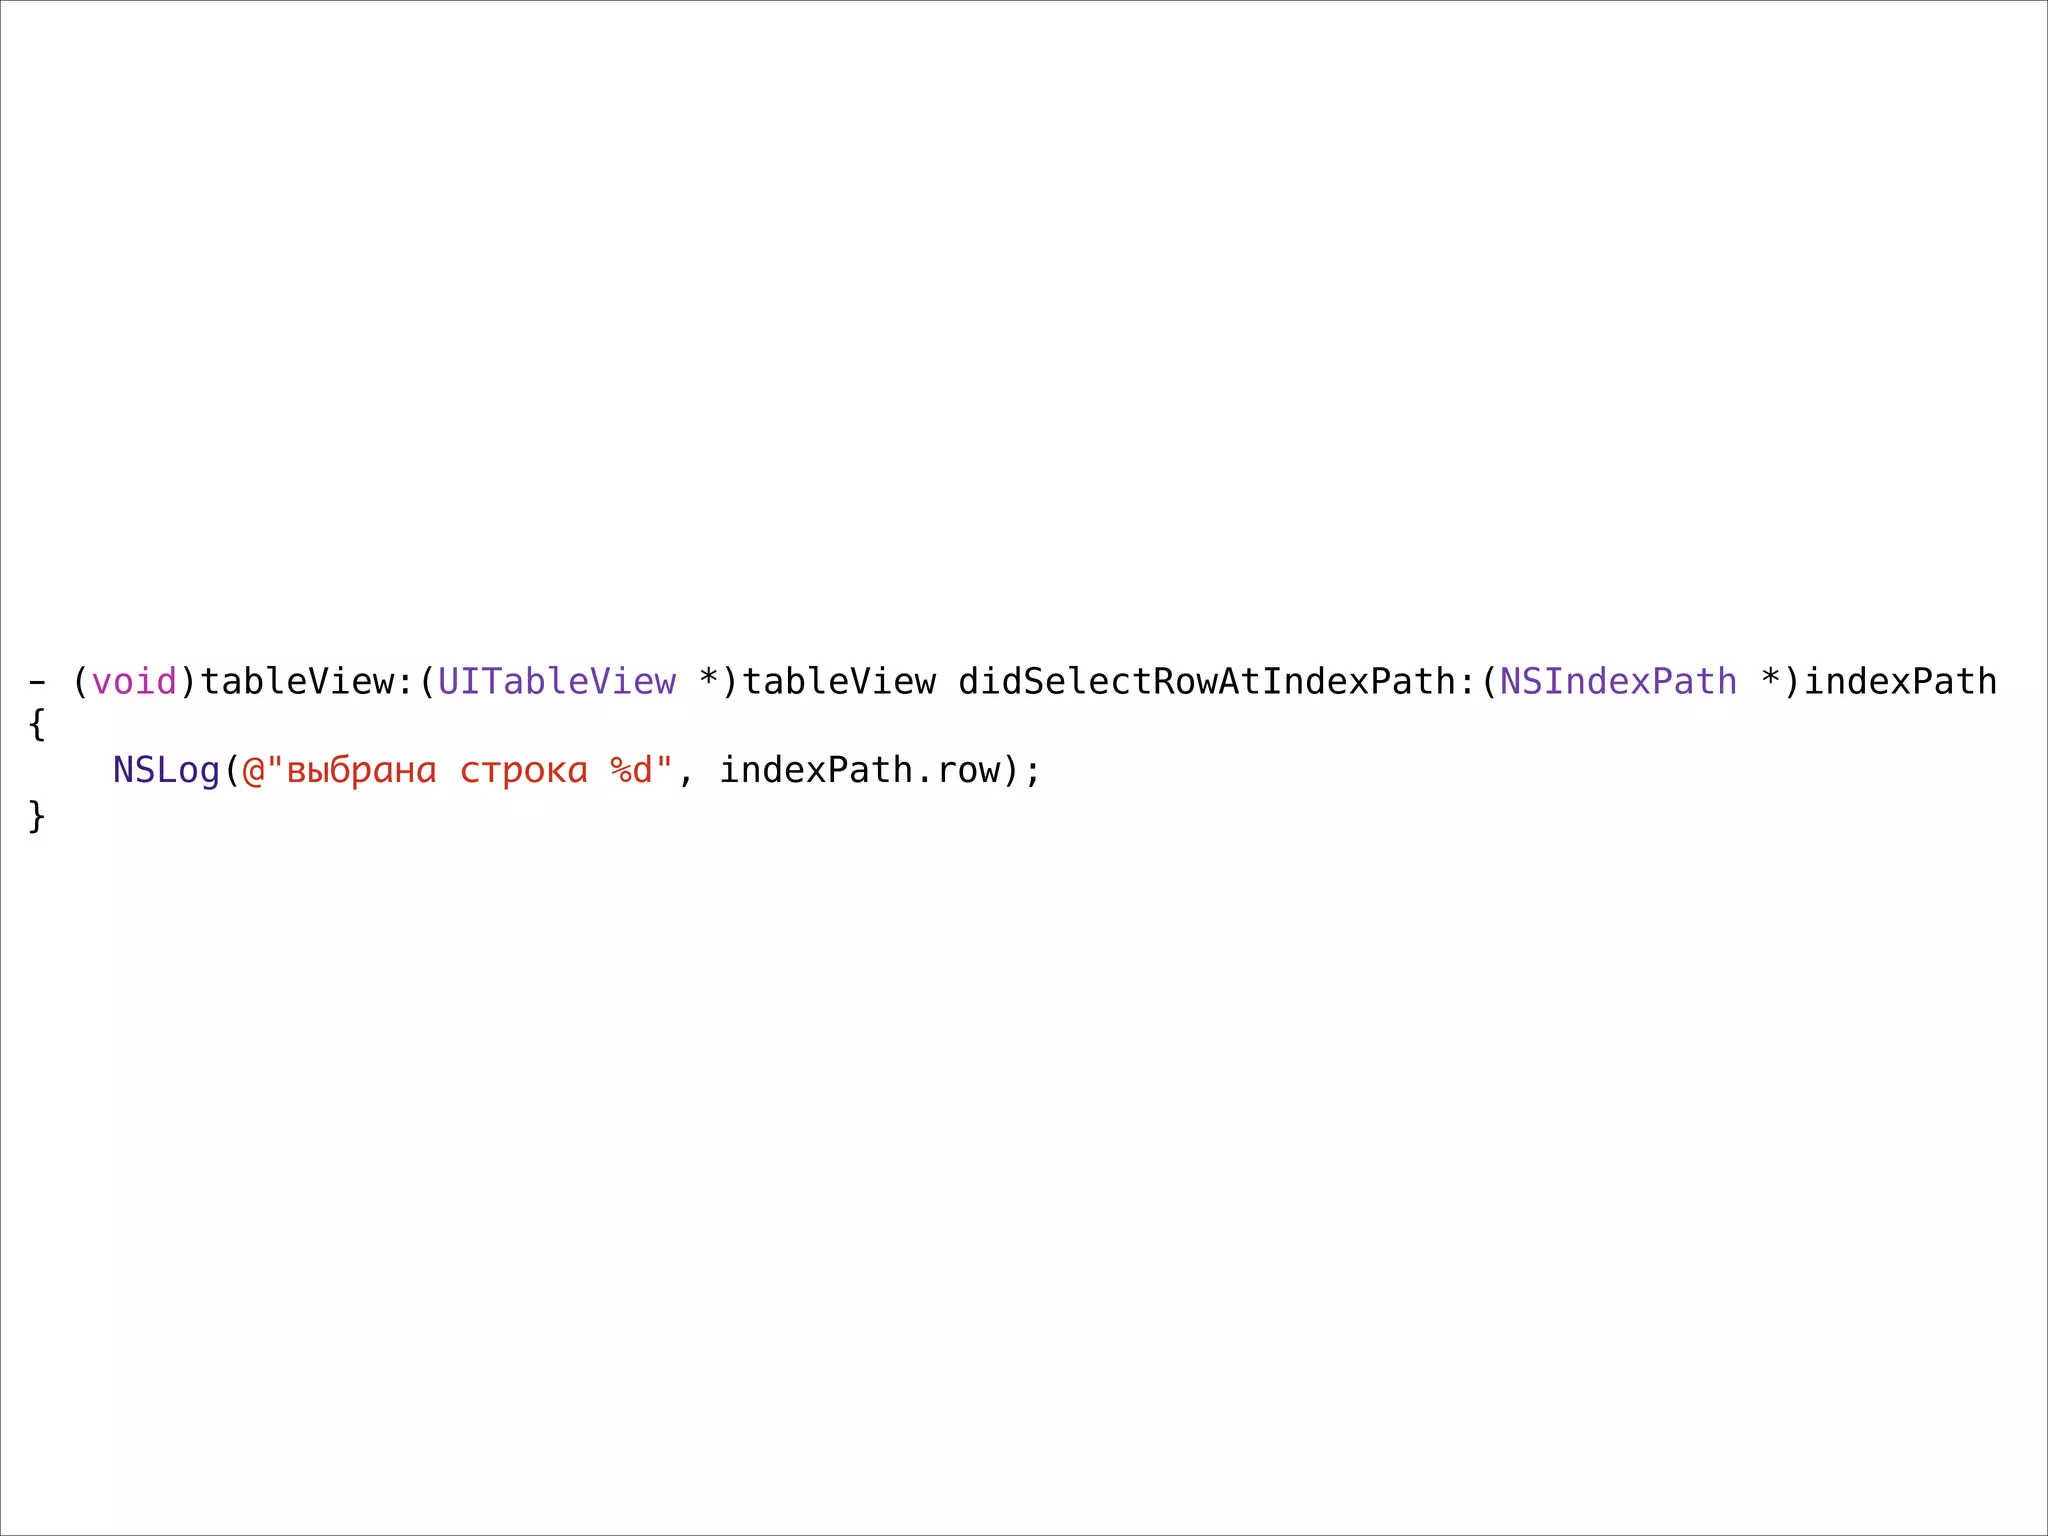
![- (void)tableView:(UITableView *)tableView didSelectRowAtIndexPath:(NSIndexPath *)indexPath
{
SecondViewController *s = [[SecondViewController alloc] init];
[self.navigationController pushViewController:s animated:YES];
}](https://image.slidesharecdn.com/intuit5-140317072141-phpapp02/75/iOS-5-Views-39-2048.jpg)
![- (void)tableView:(UITableView *)tableView didSelectRowAtIndexPath:(NSIndexPath *)indexPath
{
ShopViewController *svc = [[ShopViewController alloc] init];
Shop *shop = self.shops[indexPath.row];
svc.shop = shop;
[self.navigationController pushViewController:svc animated:YES];
}](https://image.slidesharecdn.com/intuit5-140317072141-phpapp02/75/iOS-5-Views-40-2048.jpg)


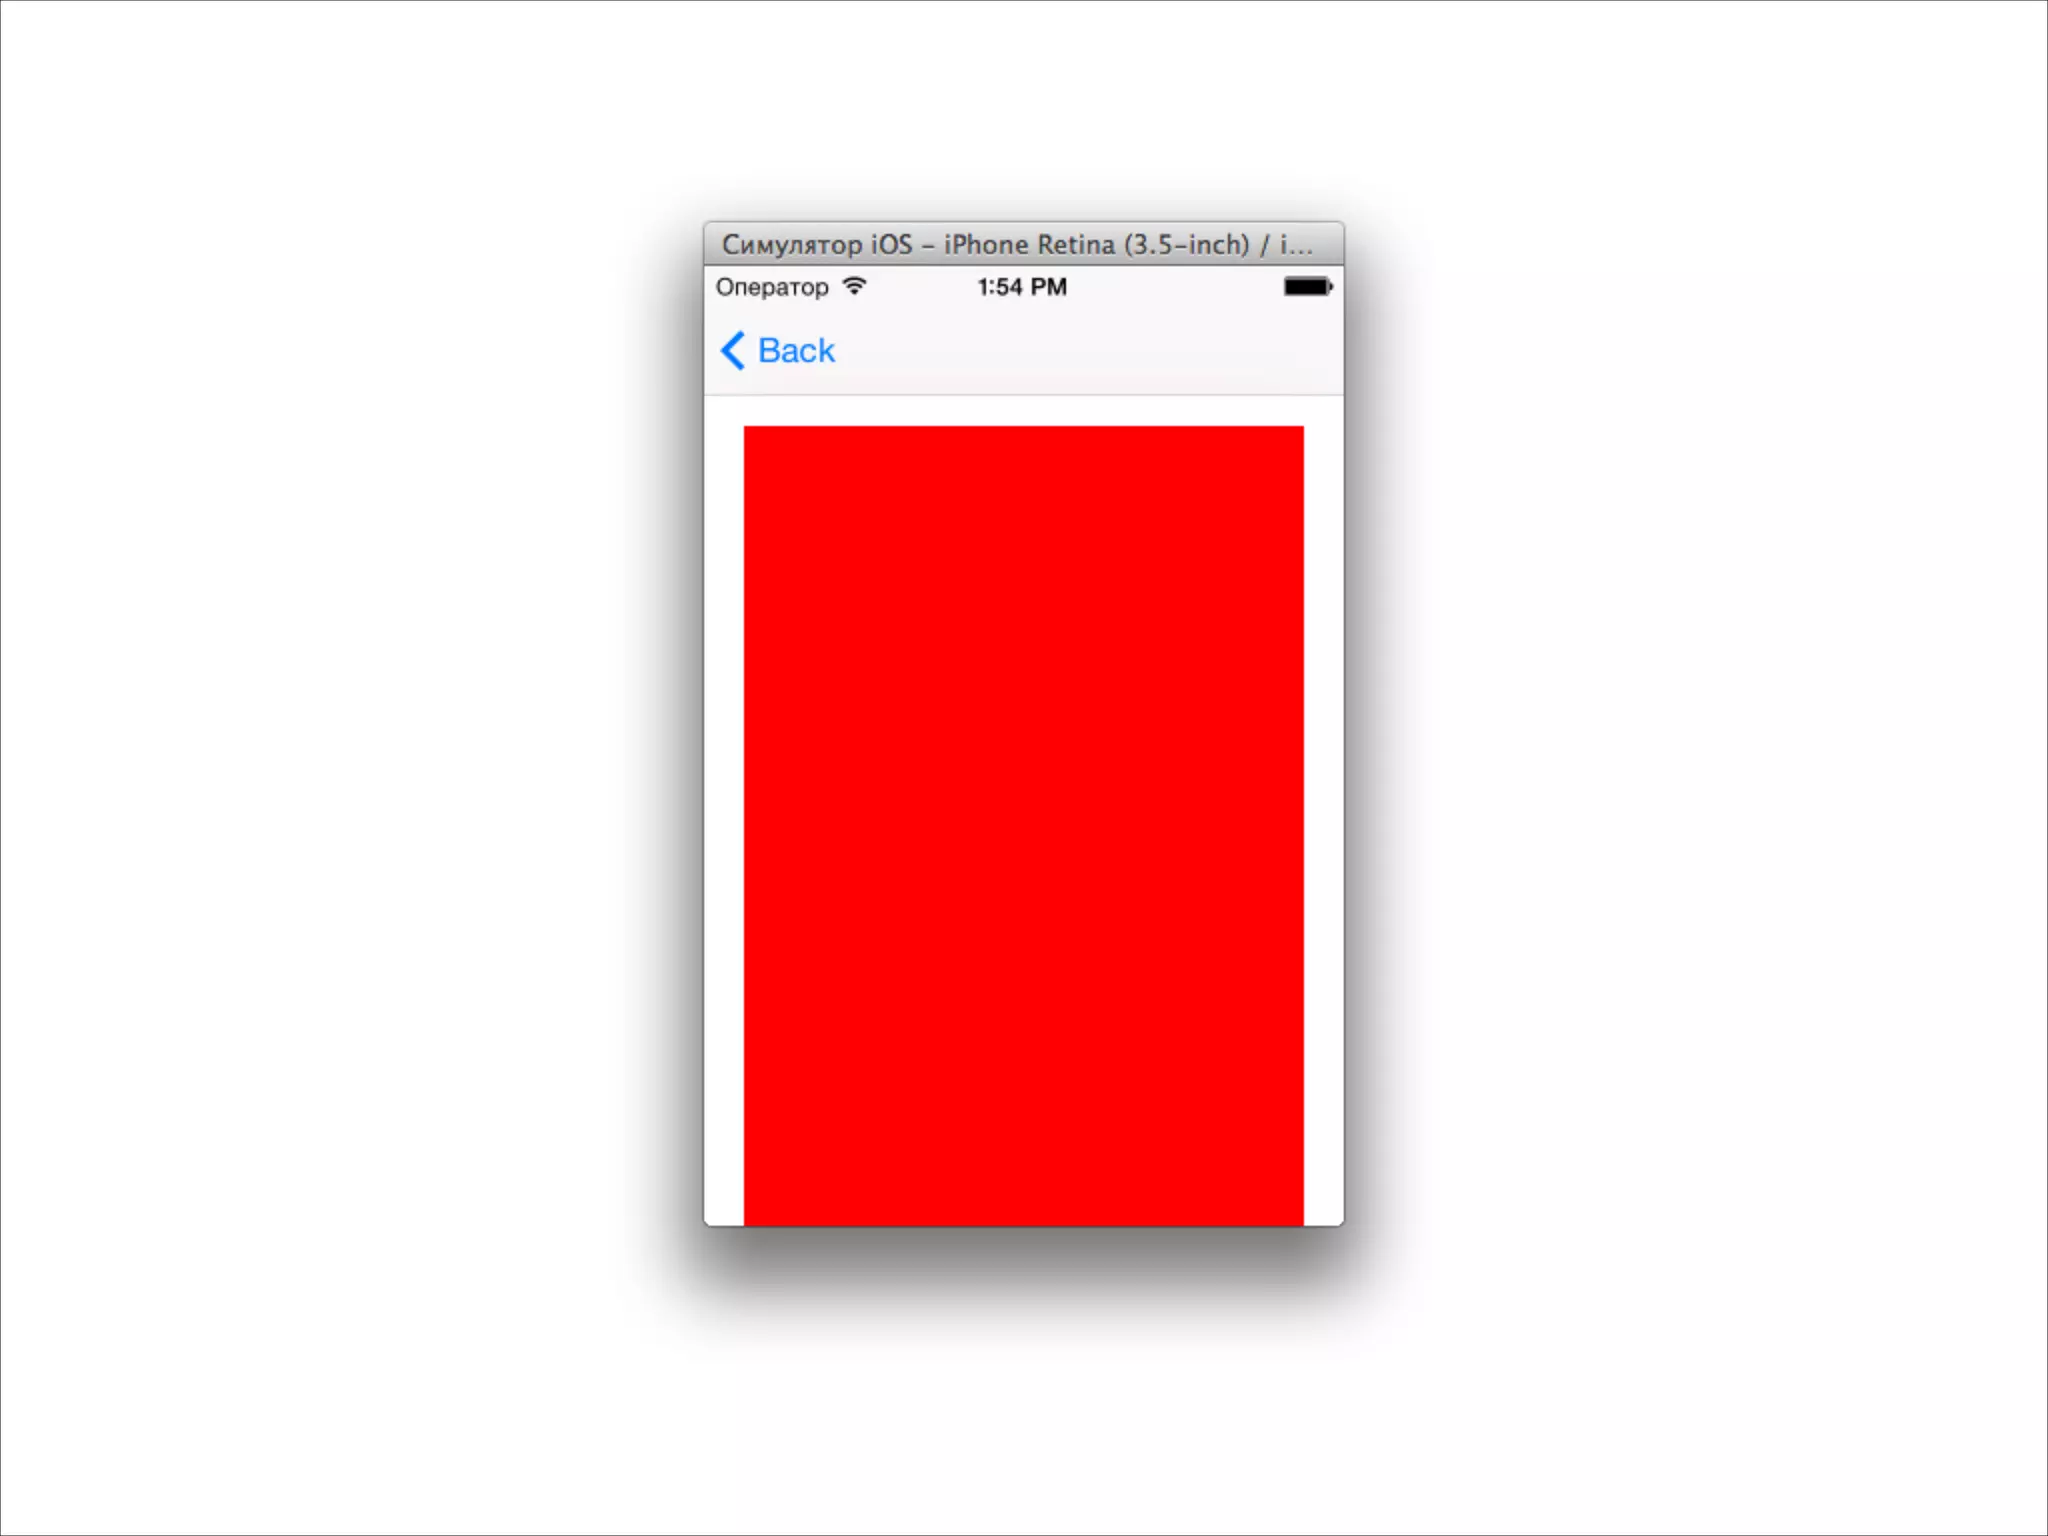
![- (void)viewDidLoad
{
[super viewDidLoad];
UIView *v1 = [[UIView alloc] init];
v1.frame = CGRectMake(20, 80, 280, 800);
v1.backgroundColor = [UIColor redColor];
[self.view addSubview:v1];
}
Если интерфейс не помещается по высоте](https://image.slidesharecdn.com/intuit5-140317072141-phpapp02/75/iOS-5-Views-44-2048.jpg)
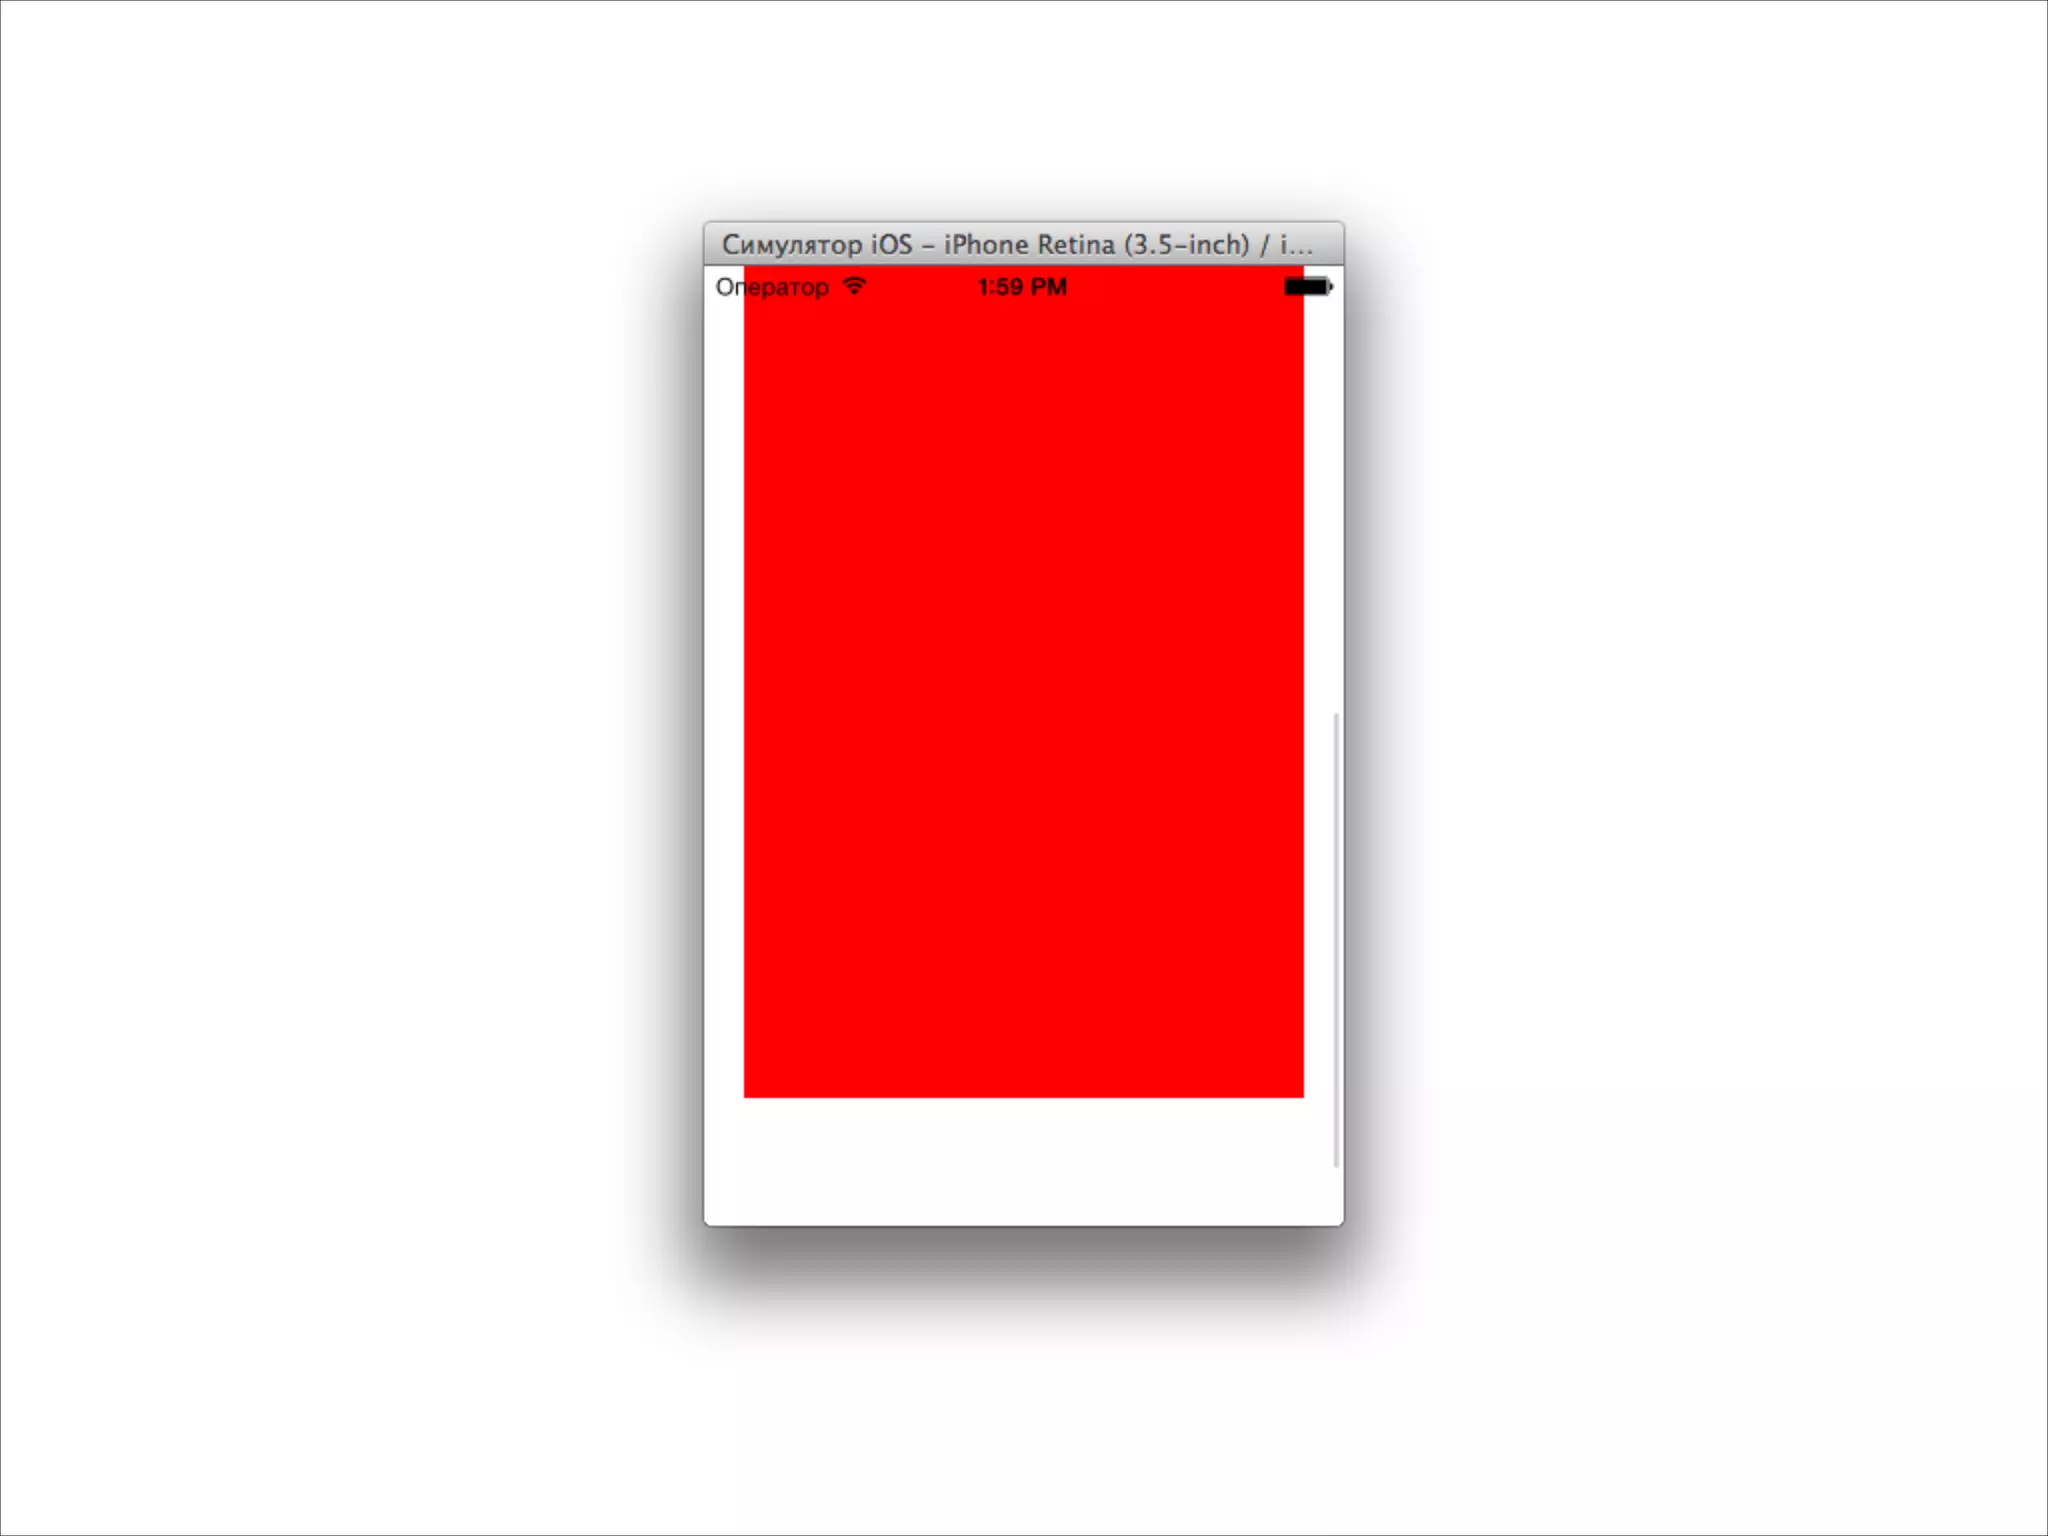
![- (void)viewDidLoad
{
[super viewDidLoad];
UIView *v1 = [[UIView alloc] init];
v1.frame = CGRectMake(20, 80, 280, 800);
v1.backgroundColor = [UIColor redColor];
UIScrollView *scrollView = [[UIScrollView alloc] init];
scrollView.frame = self.view.bounds;
scrollView.contentSize = CGSizeMake(320, 1000);
[scrollView addSubview:v1];
[self.view addSubview:scrollView];
}
Создаем UIScrollView](https://image.slidesharecdn.com/intuit5-140317072141-phpapp02/75/iOS-5-Views-46-2048.jpg)

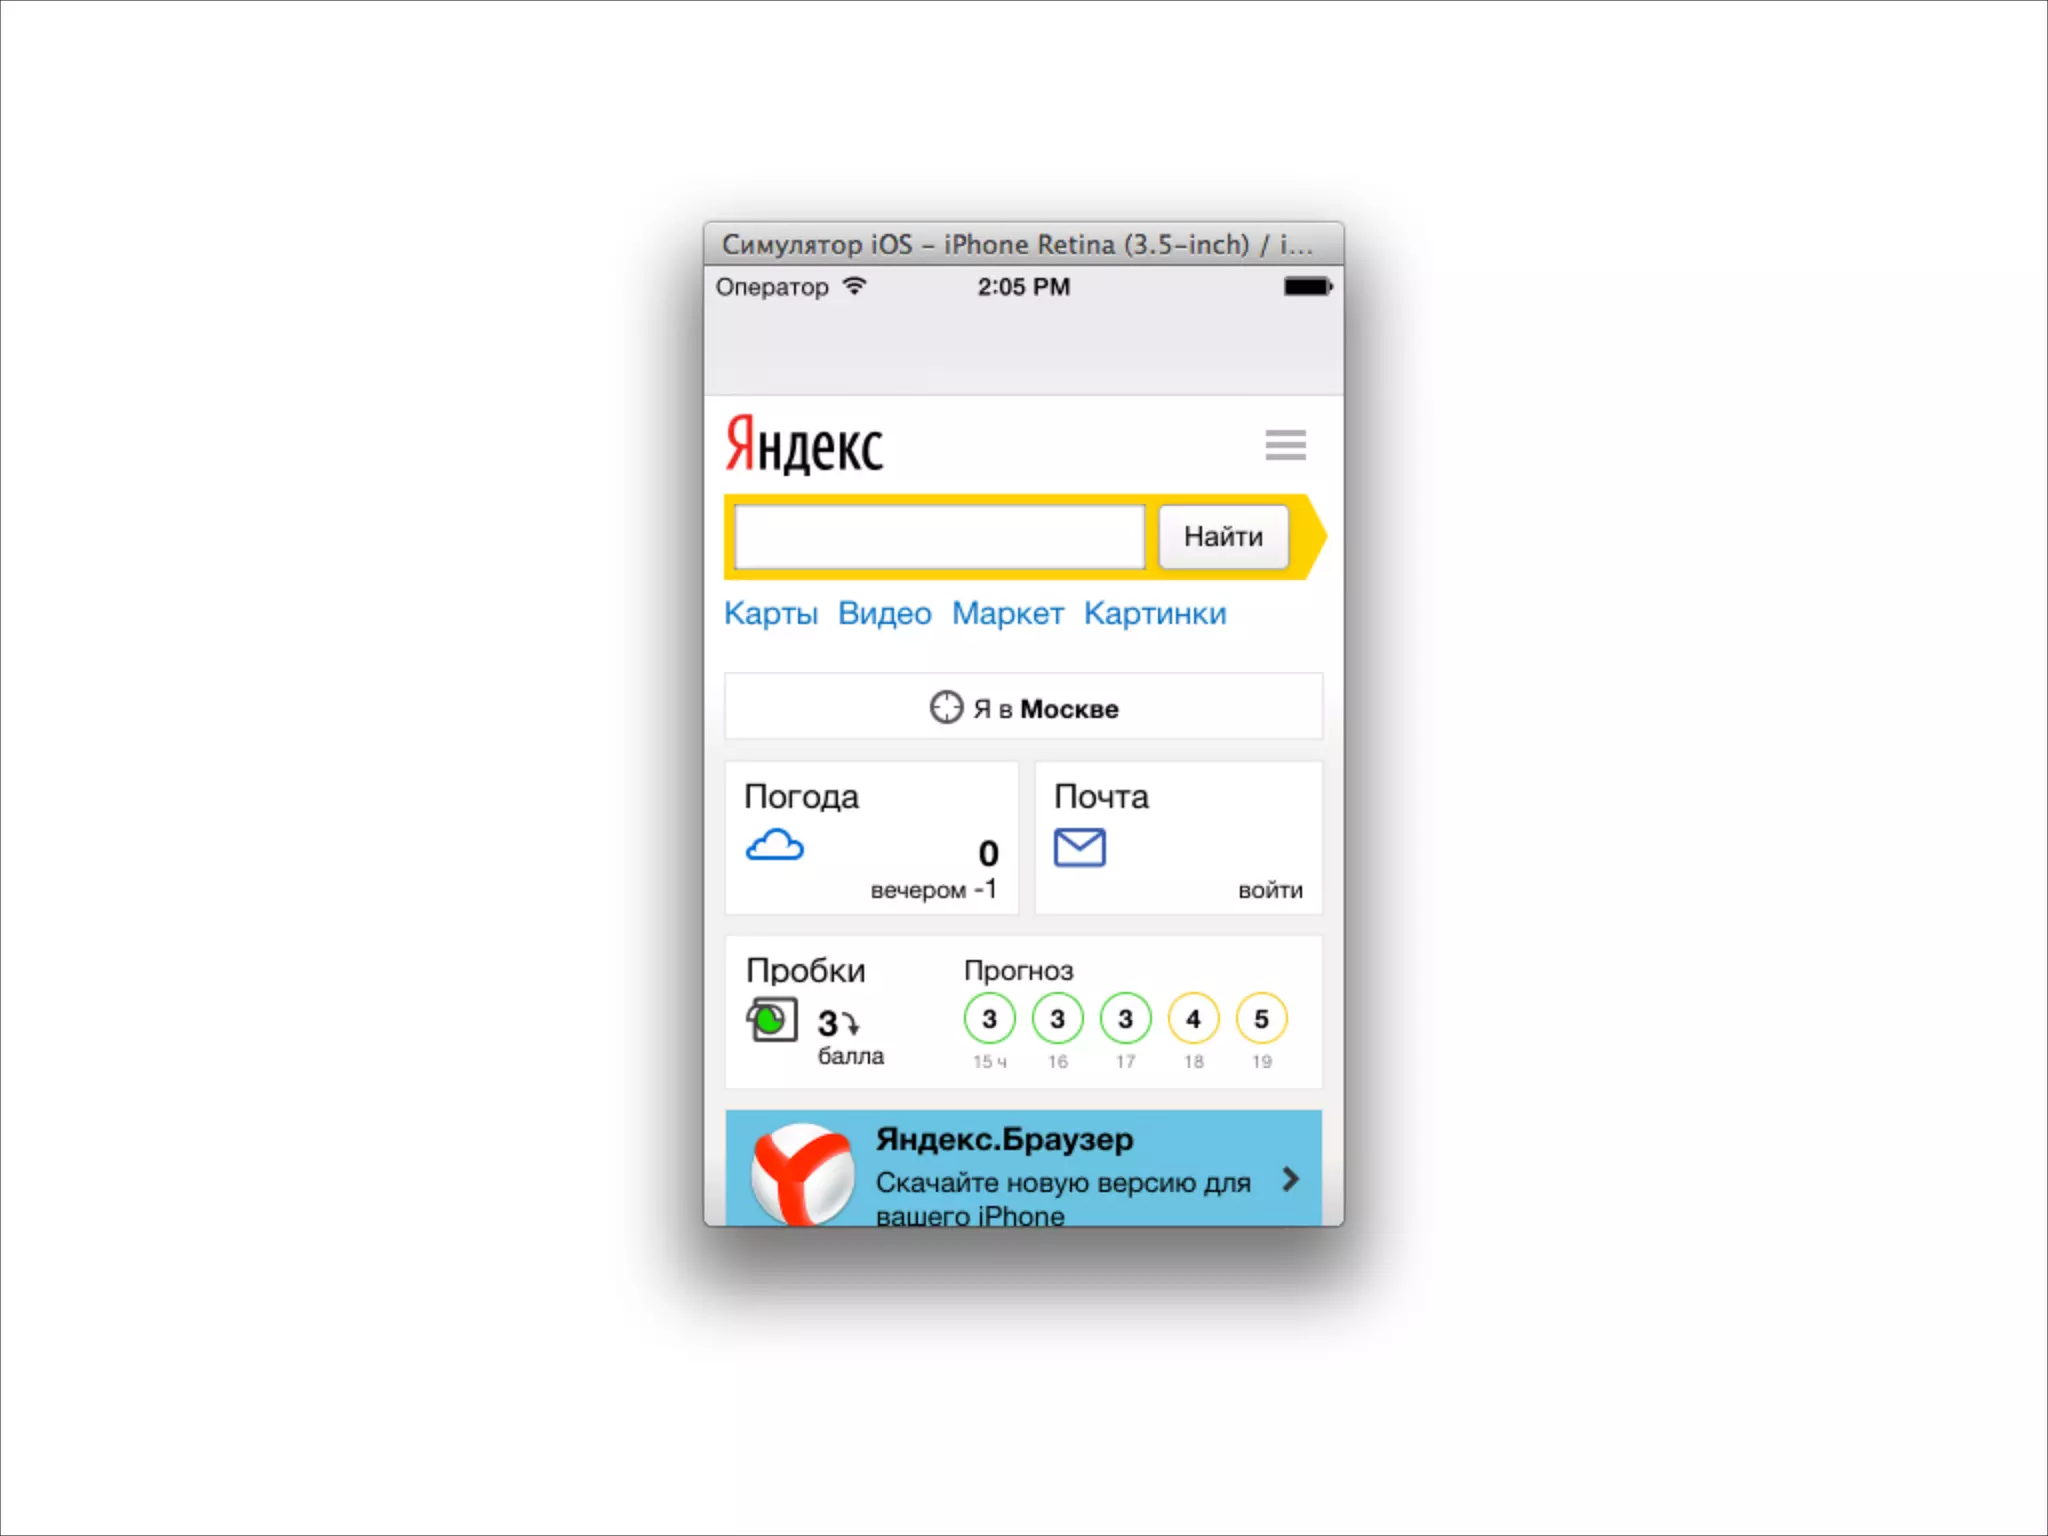
![- (void)viewDidLoad
{
[super viewDidLoad];
UIWebView *webView = [[UIWebView alloc] init];
webView.frame = self.view.bounds;
[self.view addSubview:webView];
NSURL *url = [NSURL URLWithString:@"http://yandex.ru"];
NSURLRequest *request = [NSURLRequest requestWithURL:url];
[webView loadRequest:request];
}
Открываем внешний сайт](https://image.slidesharecdn.com/intuit5-140317072141-phpapp02/75/iOS-5-Views-50-2048.jpg)
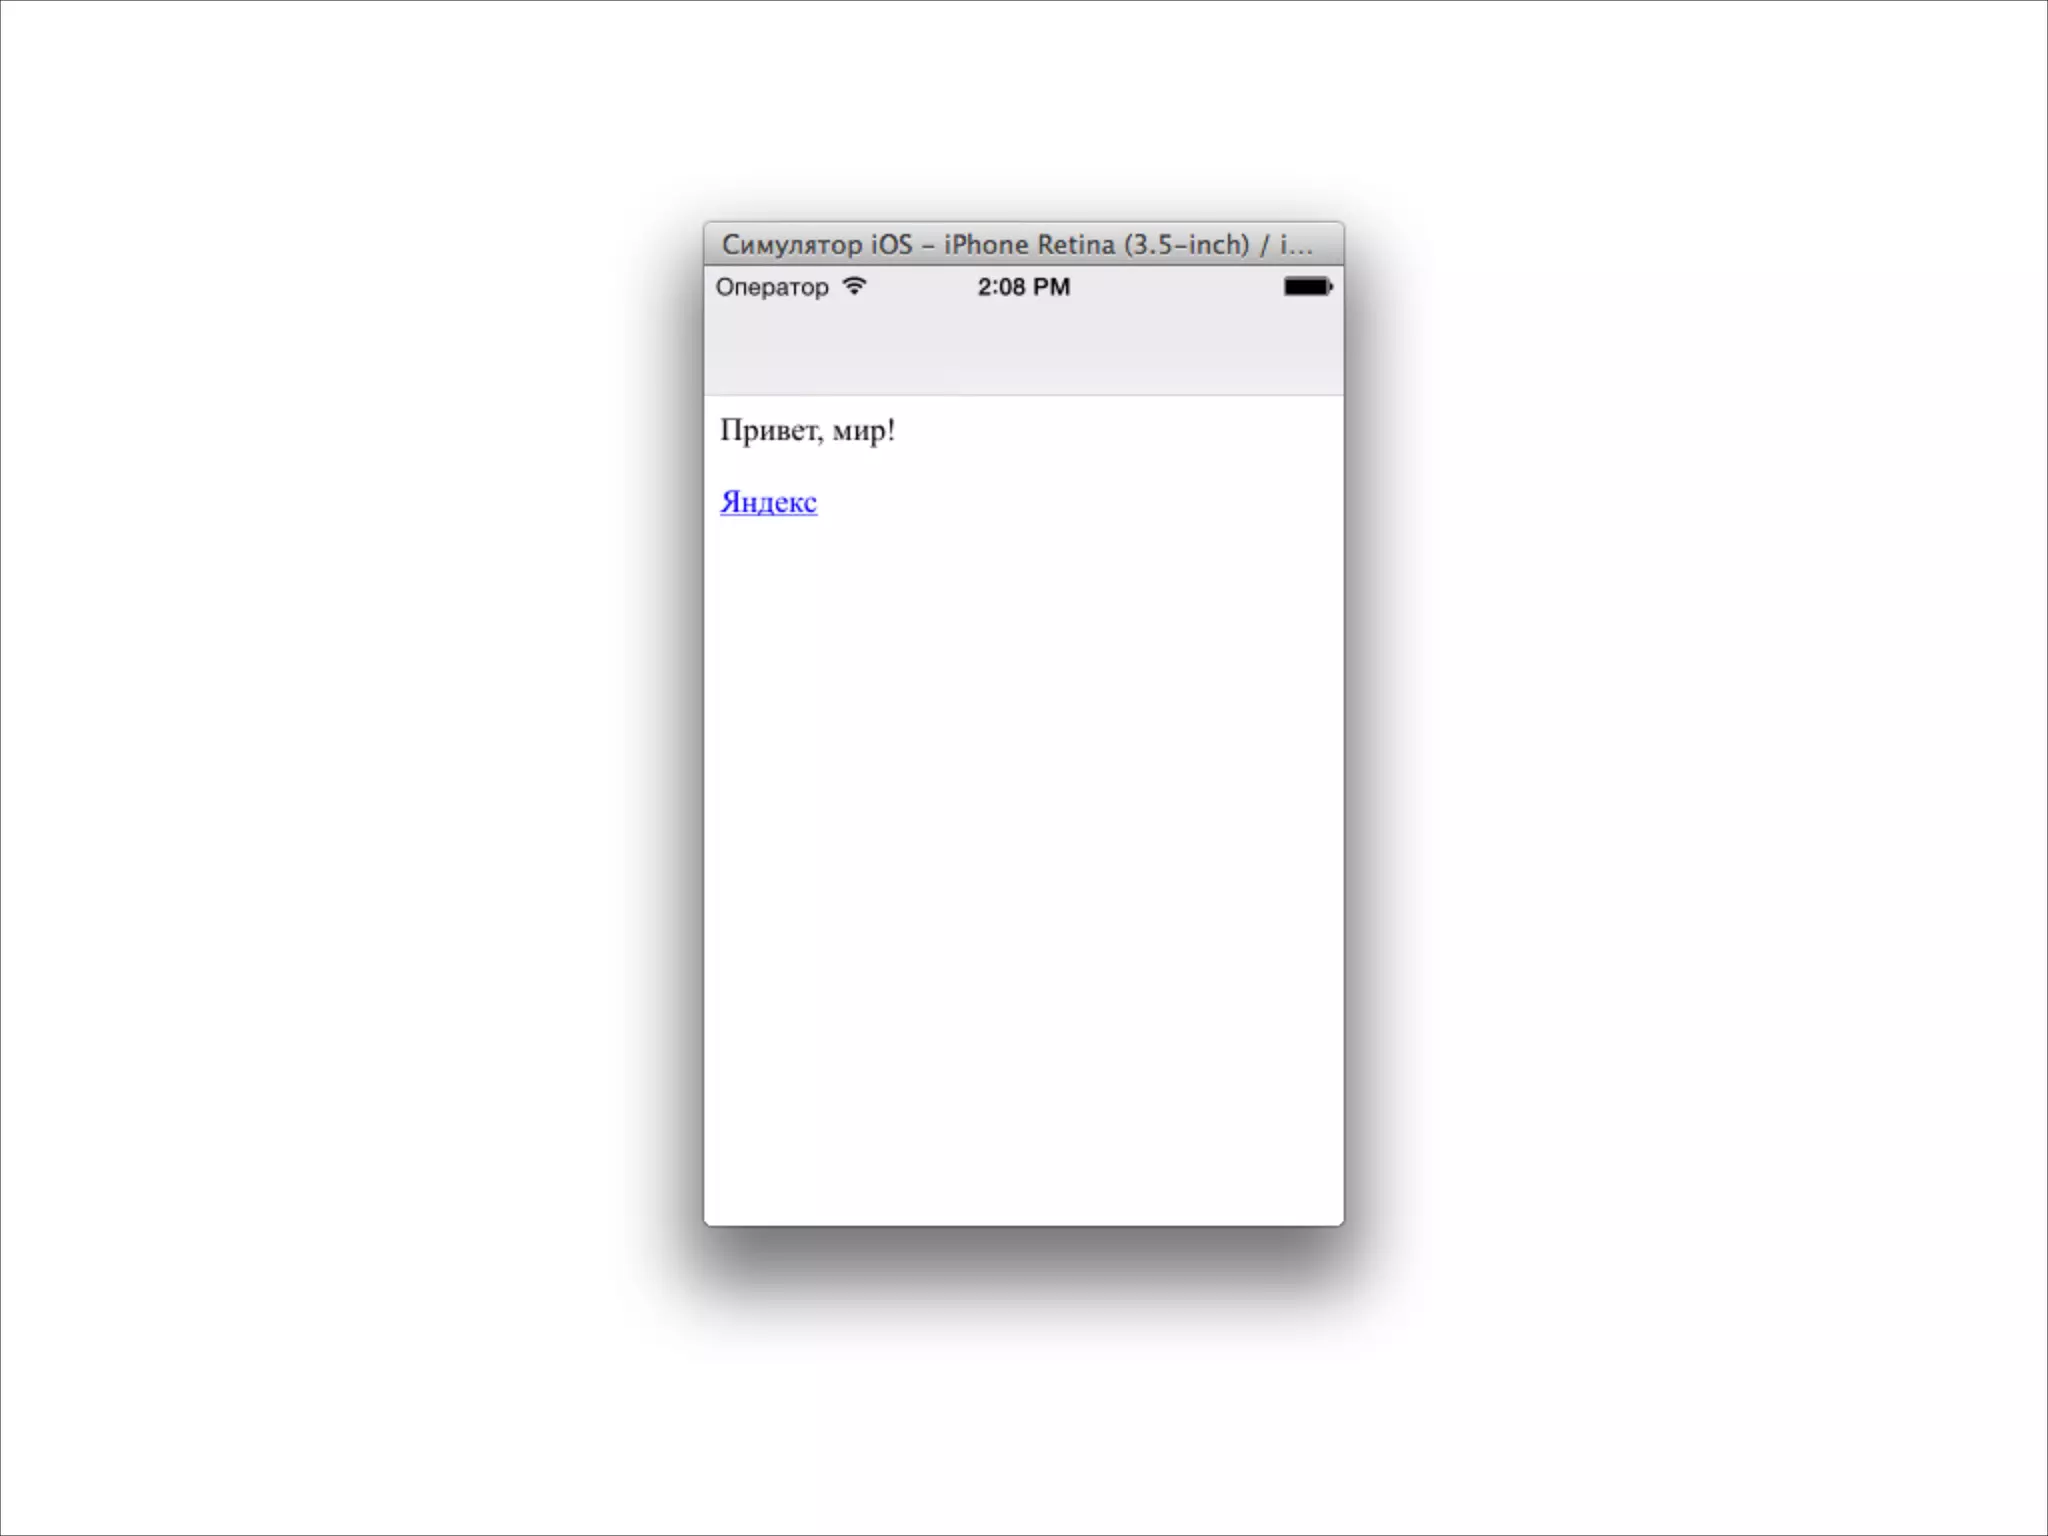
![- (void)viewDidLoad
{
[super viewDidLoad];
UIWebView *webView = [[UIWebView alloc] init];
webView.frame = self.view.bounds;
[self.view addSubview:webView];
NSString *html = @"<p>Привет, мир!</p><p><a href="http://yandex.ru">Яндекс</a></p>";
[webView loadHTMLString:html baseURL:nil];
}
Открываем произвольный html](https://image.slidesharecdn.com/intuit5-140317072141-phpapp02/75/iOS-5-Views-52-2048.jpg)

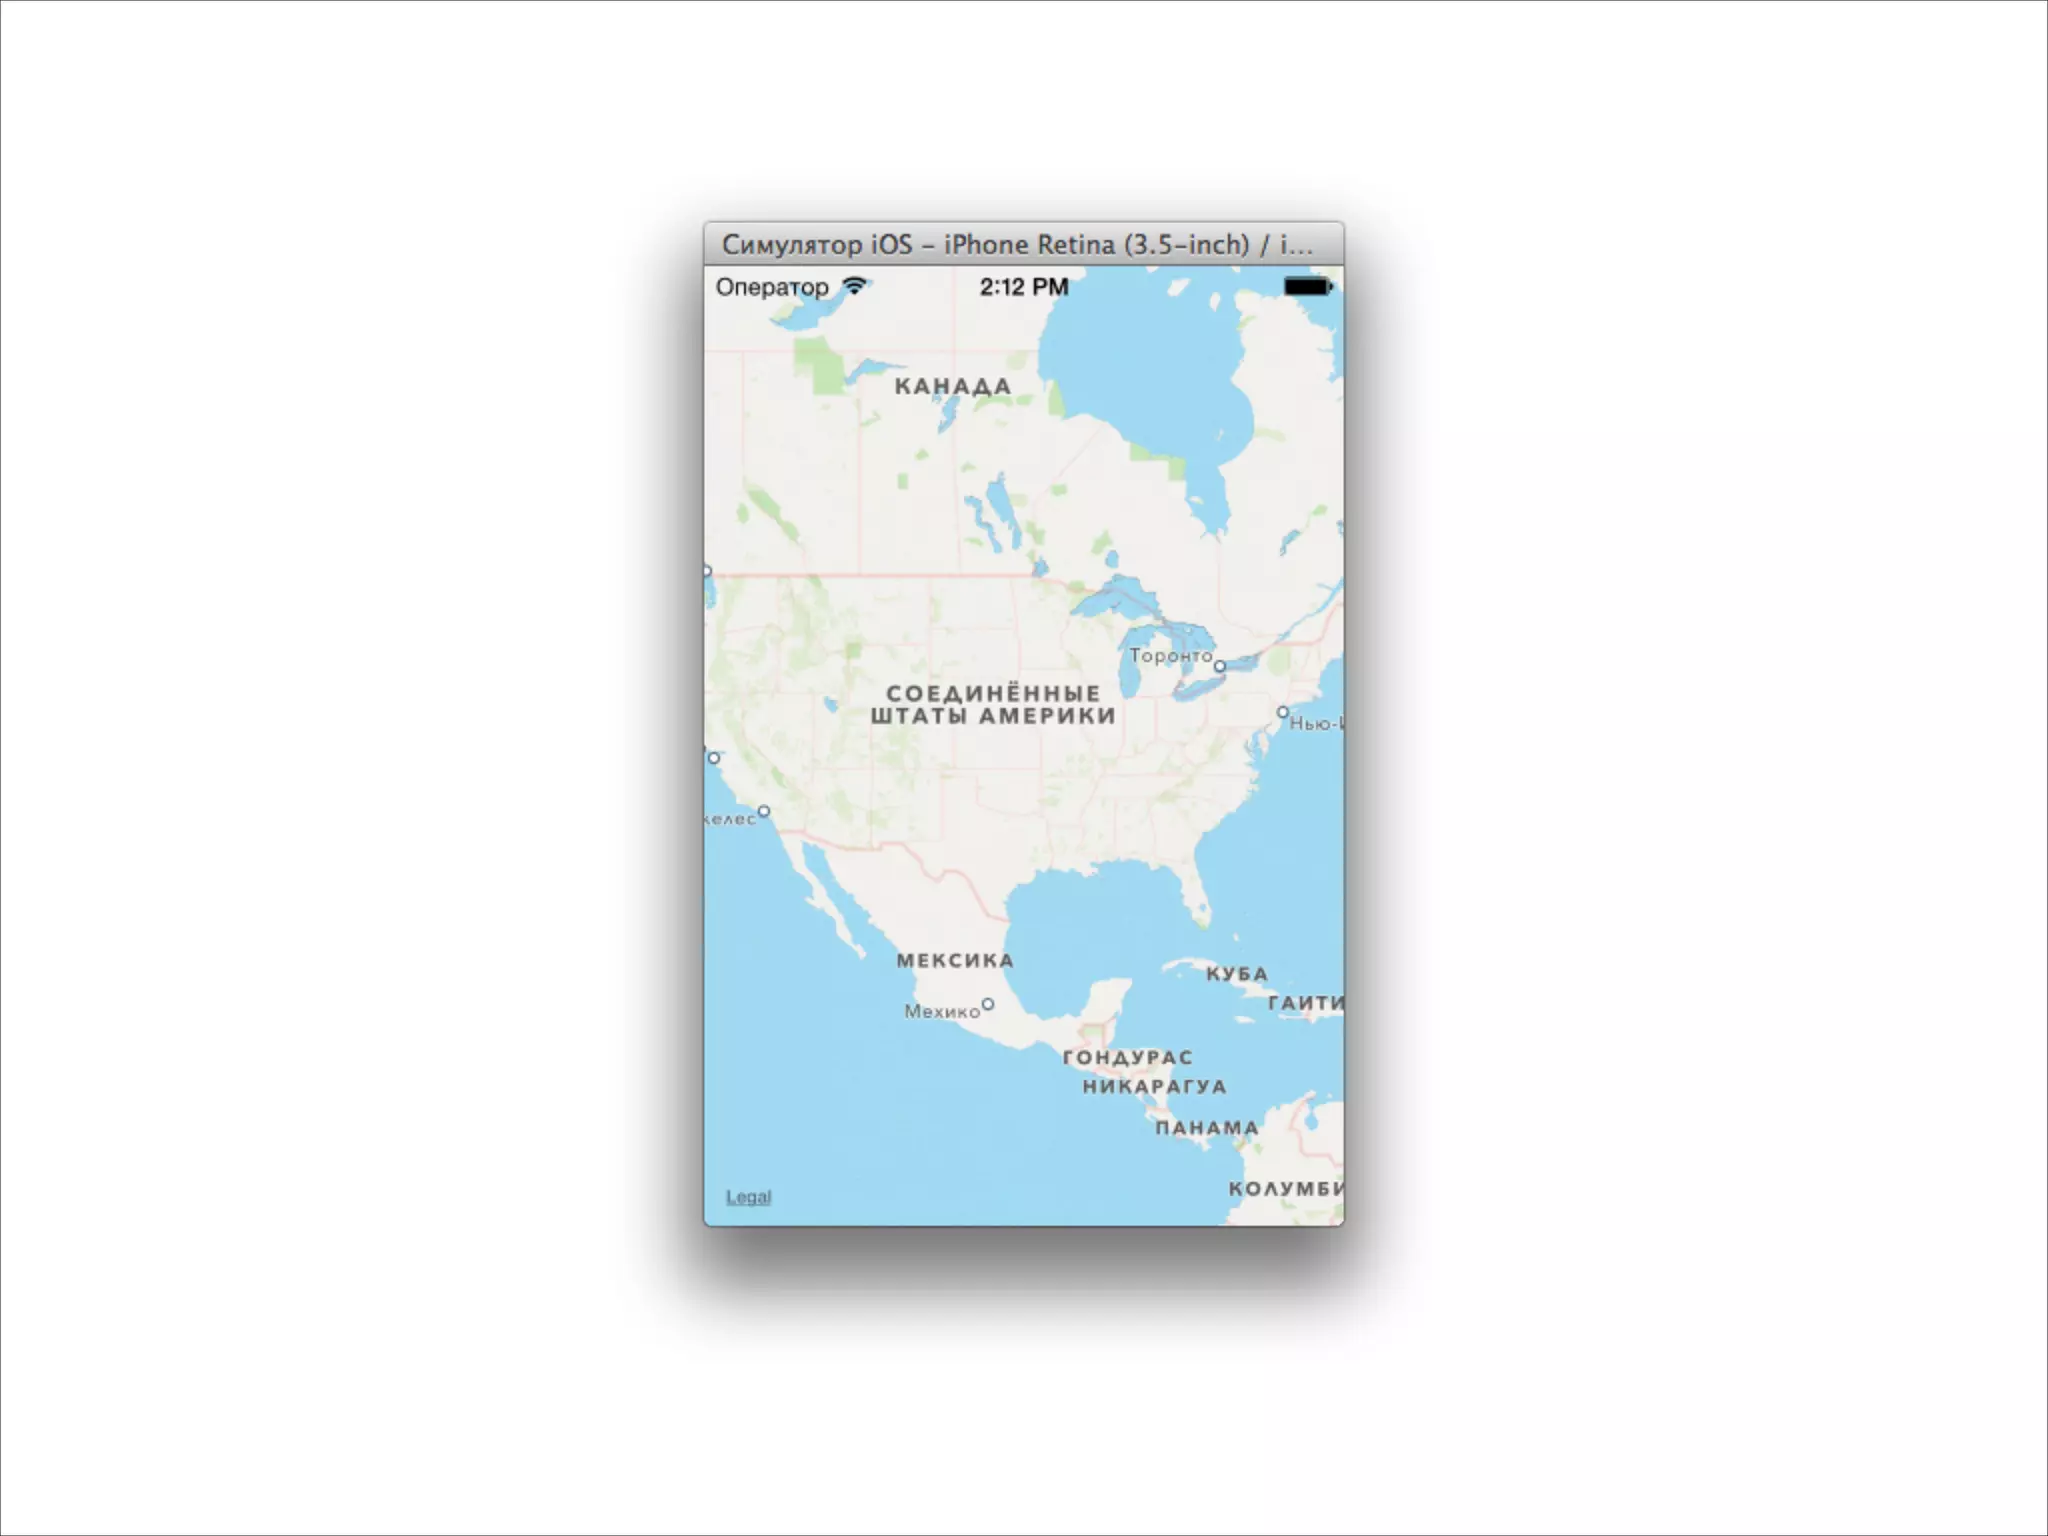
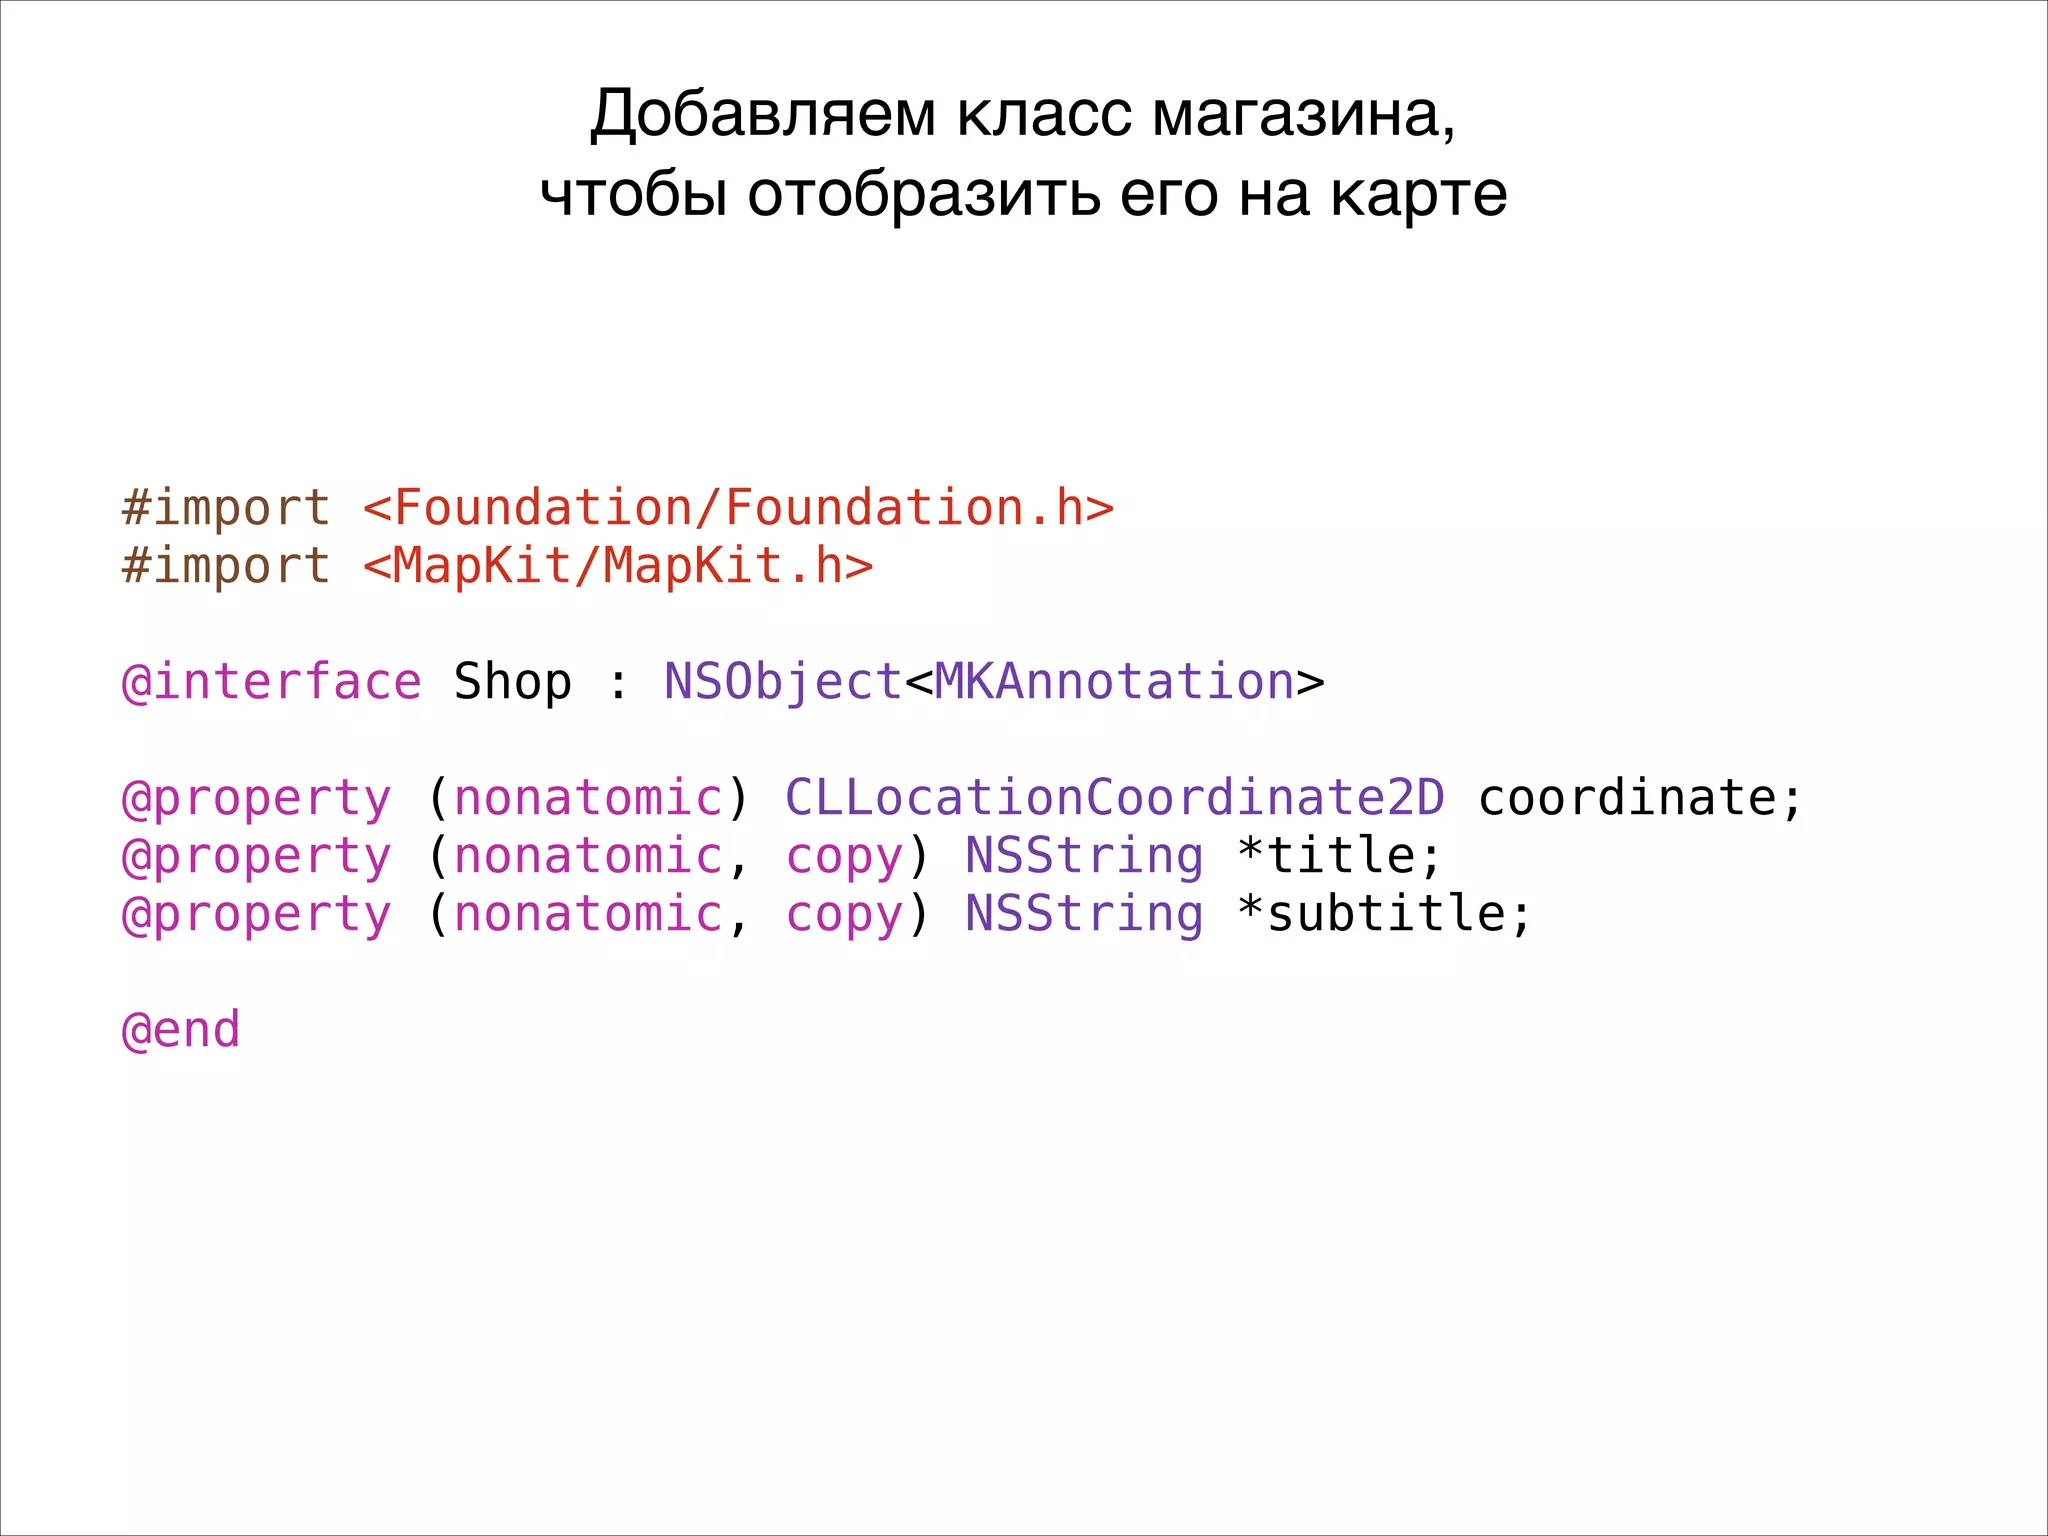
![#import "MyViewController.h"
#import <MapKit/MapKit.h>
!
@implementation MyViewController
!
- (void)viewDidLoad
{
[super viewDidLoad];
MKMapView *mapView = [[MKMapView alloc] init];
mapView.frame = self.view.bounds;
[self.view addSubview:mapView];
}
!
!
@end
Добавляем карту](https://image.slidesharecdn.com/intuit5-140317072141-phpapp02/75/iOS-5-Views-55-2048.jpg)
![- (void)viewDidLoad
{
[super viewDidLoad];
MKMapView *mapView = [[MKMapView alloc] init];
mapView.frame = self.view.bounds;
CLLocationCoordinate2D coord = CLLocationCoordinate2DMake(55.7720304,
37.5744999);
MKCoordinateSpan span = MKCoordinateSpanMake(0.001, 0.001);
MKCoordinateRegion region = MKCoordinateRegionMake(coord, span);
[mapView setRegion:region];
[self.view addSubview:mapView];
}
Ставим координату и масштаб](https://image.slidesharecdn.com/intuit5-140317072141-phpapp02/75/iOS-5-Views-57-2048.jpg)
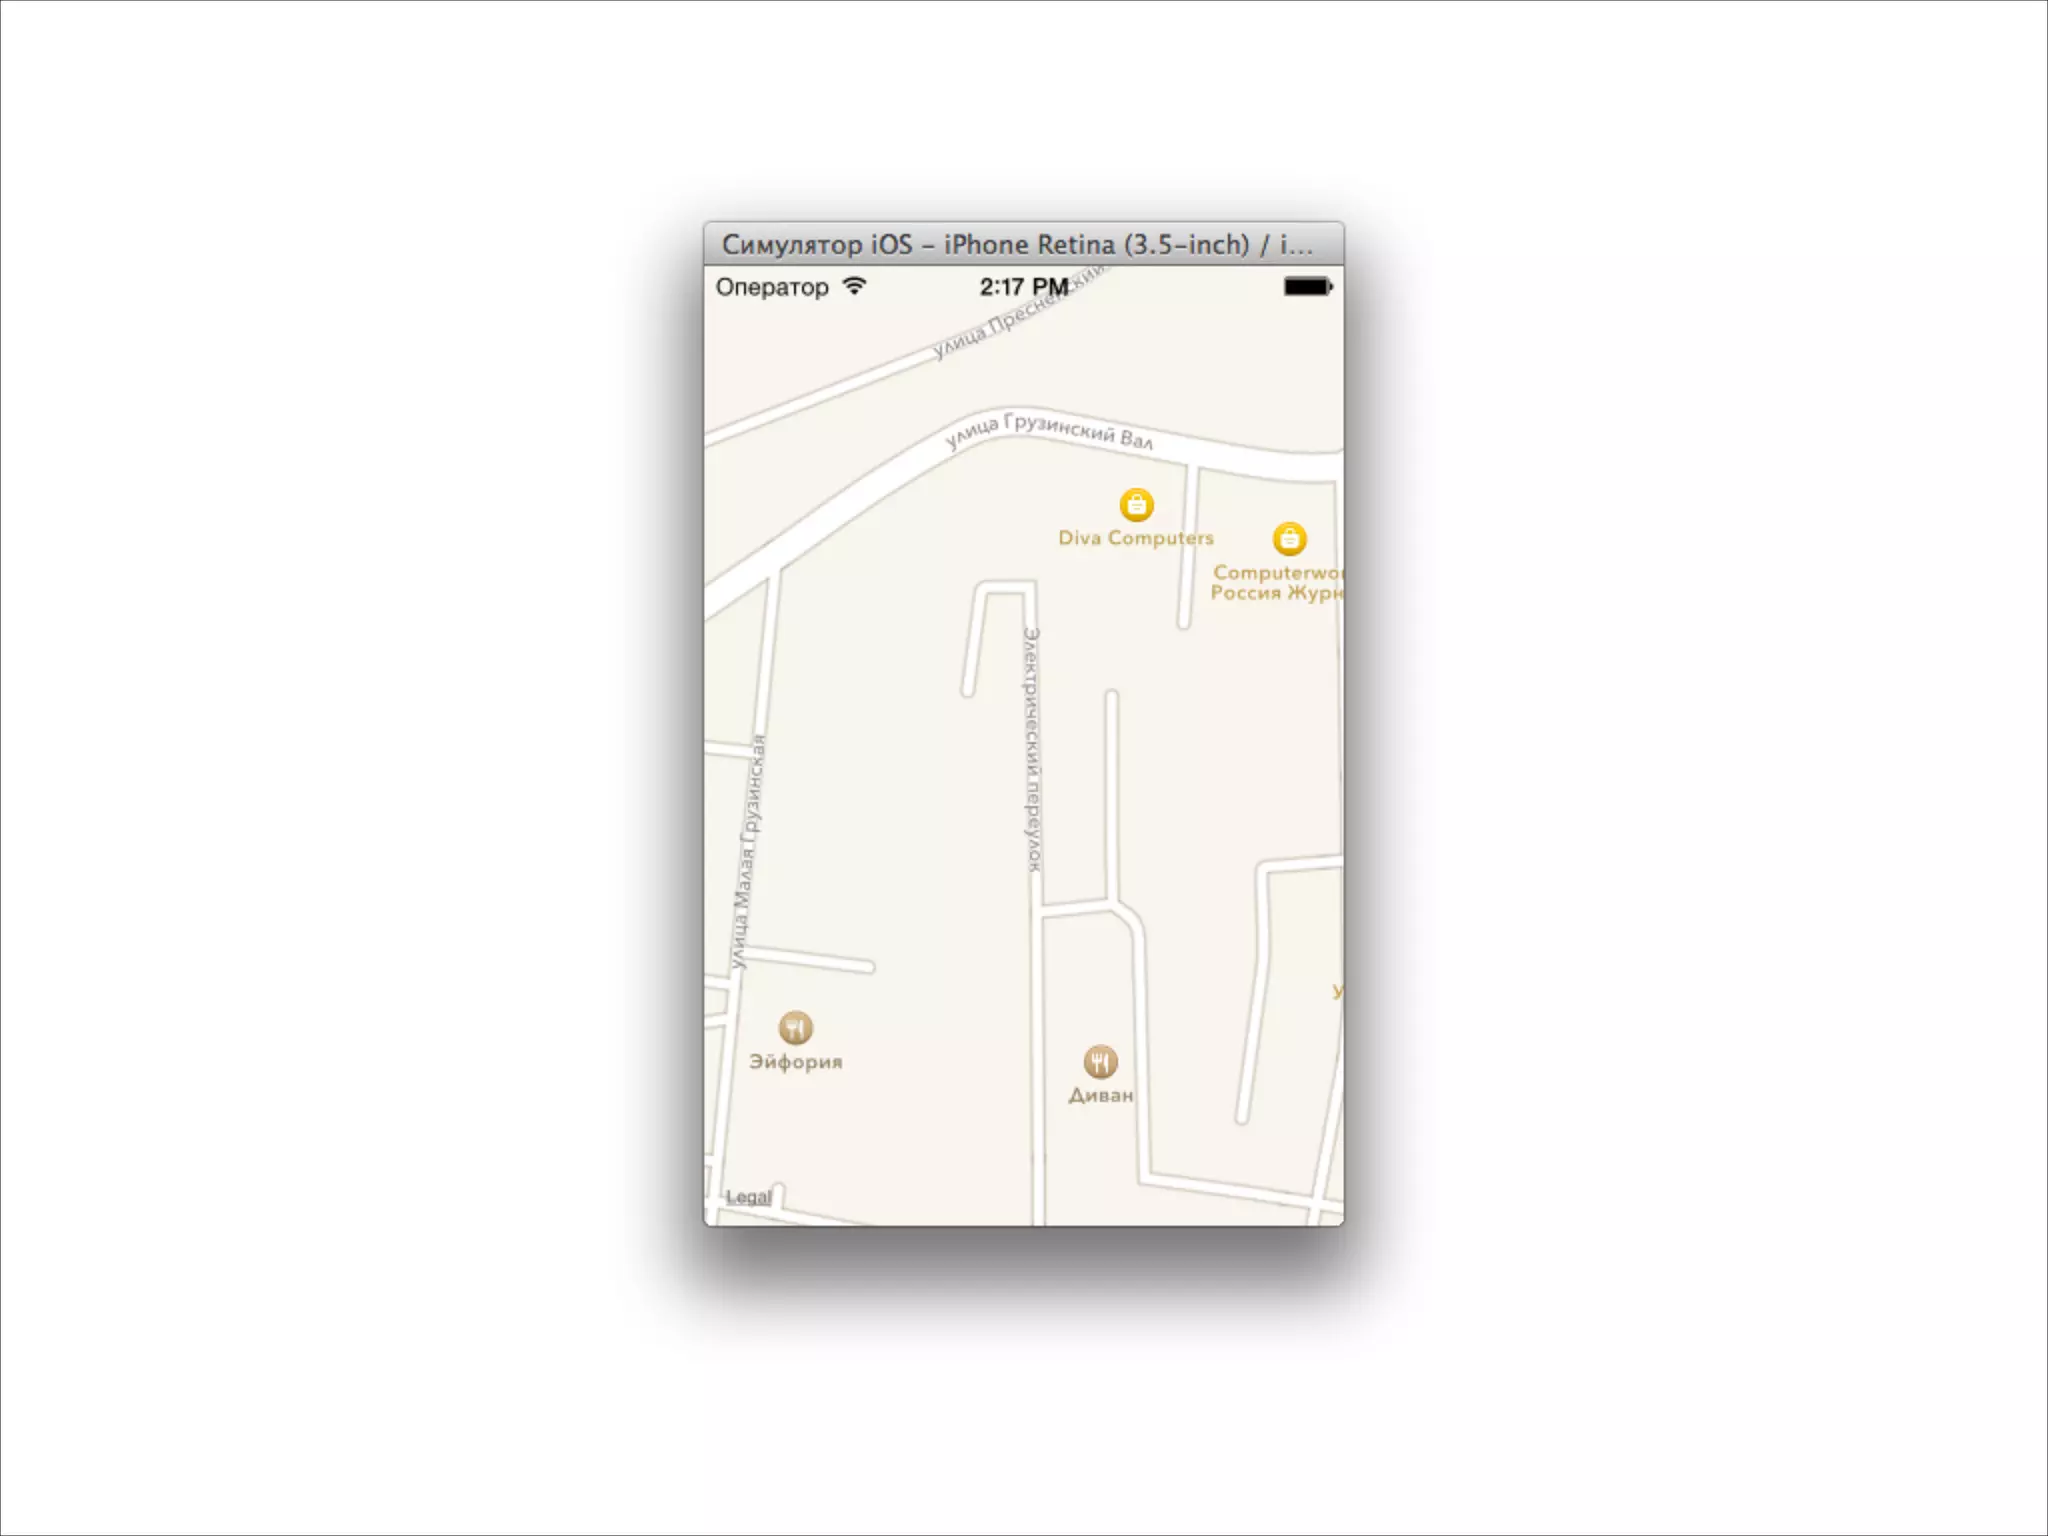
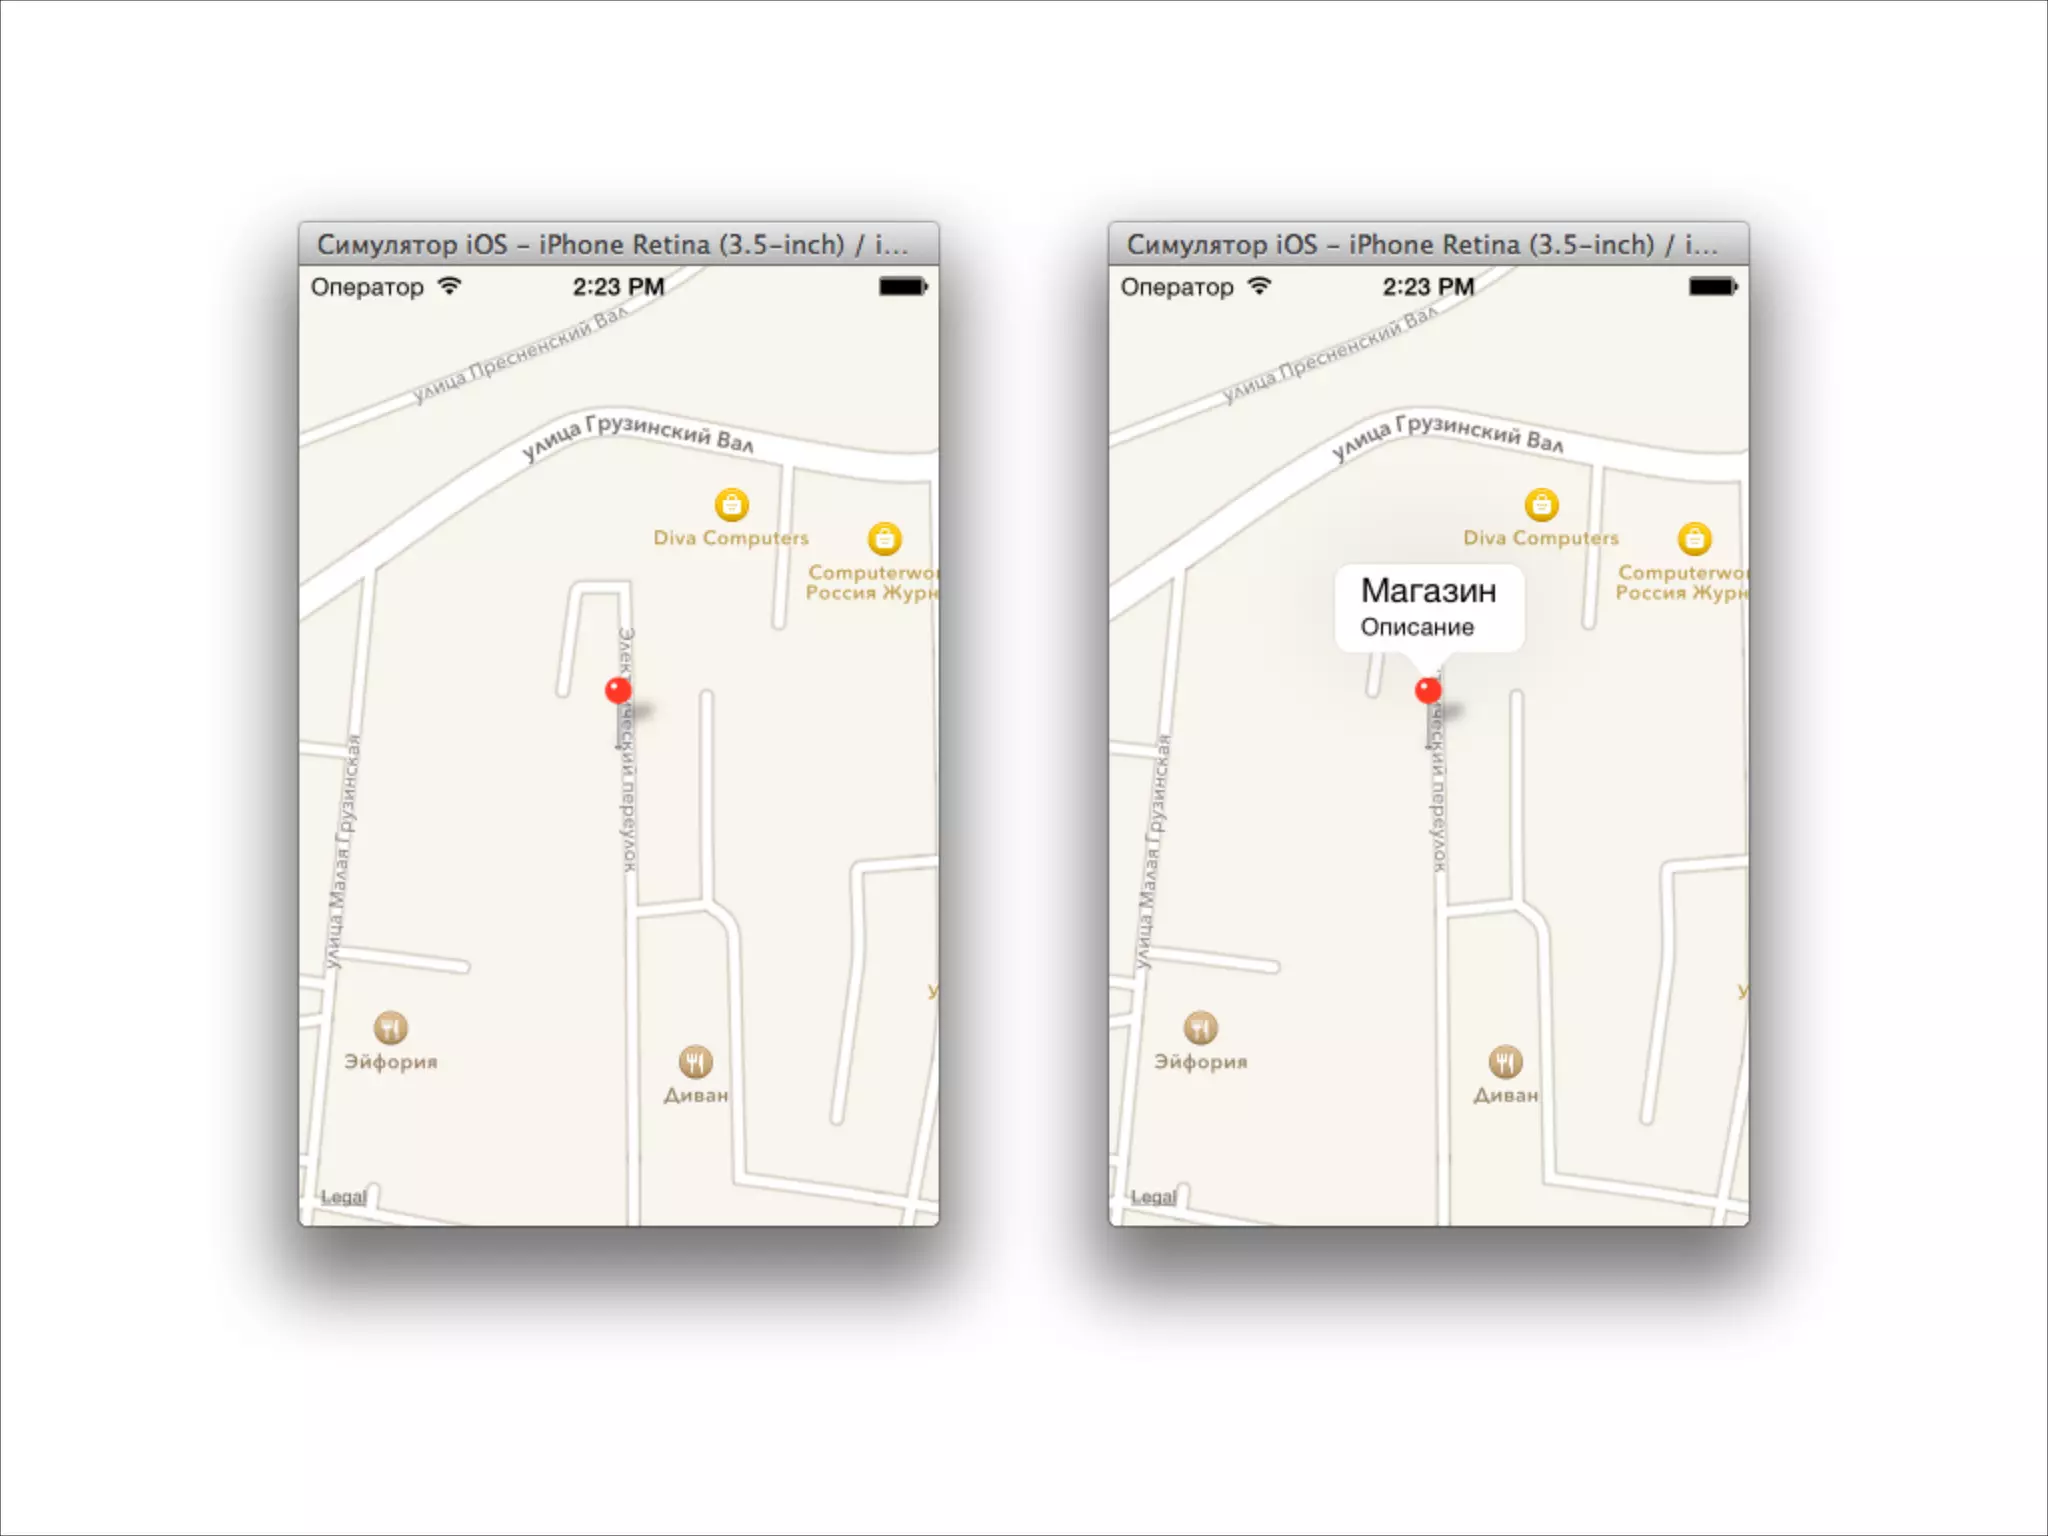
![- (void)viewDidLoad
{
[super viewDidLoad];
MKMapView *mapView = [[MKMapView alloc] init];
mapView.frame = self.view.bounds;
CLLocationCoordinate2D coord = CLLocationCoordinate2DMake(55.7720304,
37.5744999);
MKCoordinateSpan span = MKCoordinateSpanMake(0.001, 0.001);
MKCoordinateRegion region = MKCoordinateRegionMake(coord, span);
[mapView setRegion:region];
Shop *s = [[Shop alloc] init];
s.title = @"Магазин";
s.subtitle = @"Описание";
s.coordinate = CLLocationCoordinate2DMake(55.7720304, 37.5744999);
[mapView addAnnotation:s];
[self.view addSubview:mapView];
}
Показываем булавку](https://image.slidesharecdn.com/intuit5-140317072141-phpapp02/75/iOS-5-Views-60-2048.jpg)


Документ представляет собой лекцию по разработке приложений для iOS, охватывающую различные темы, включая навигацию, создание таблиц, обработку ячеек и интеграцию элементов интерфейса, таких как webview и карты. Обсуждаются примеры кода для реализации UITableView, UIScrollView и MKMapView, а также советы по работе с контроллерами и отображению данных. В конце документа приведены задания для самостоятельной работы.