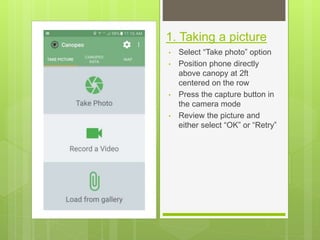
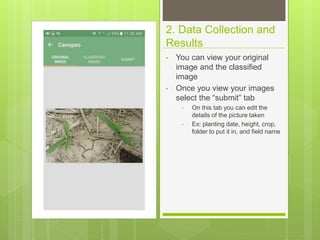
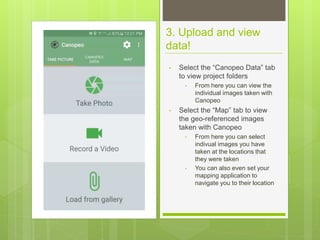
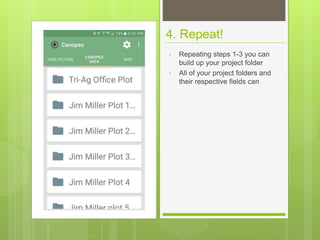
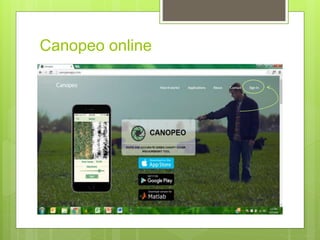
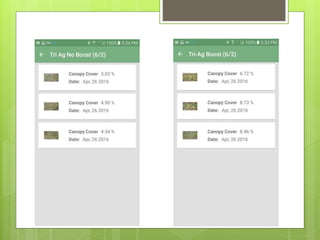
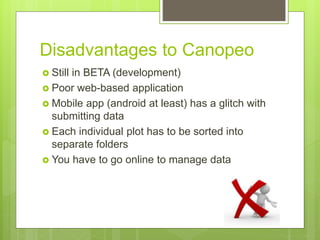
Introduction to
Canopeo
By: Eric Ortman
What is Canopeo?
 Canopeo is a mobile/web based application
that utilizes the camera on your smart phone
to figure out accurate readings of green
canopy cover
CANOPEO
How does it work?
1. Taking a picture
• Select “Take photo” option
• Position phone directly
above canopy at 2ft
centered on the row
• Press the capture button in
the camera mode
• Review the picture and
either select “OK” or “Retry”
2. Data Collection and
Results
• You can view your original
image and the classified
image
• Once you view your images
select the “submit” tab
• On this tab you can edit the
details of the picture taken
• Ex: planting date, height, crop,
folder to put it in, and field name
3. Upload and view
data!
• Select the “Canopeo Data” tab
to view project folders
• From here you can view the
individual images taken with
Canopeo
• Select the “Map” tab to view
the geo-referenced images
taken with Canopeo
• From here you can select
indivual images you have
taken at the locations that
they were taken
• You can also even set your
mapping application to
navigate you to their location
4. Repeat!
• Repeating steps 1-3 you can
build up your project folder
• All of your project folders and
their respective fields can
Canopeo online
Viewing your pictures online
Advantages to Canopeo
 Effective way to measure and monitor canopy
development through the growing season all
the way up to 36” crop or total canopy closure
 Has a “share” function via multiple platforms
 Super easy to use
Disadvantages to Canopeo
 Still in BETA (development)
 Poor web-based application
 Mobile app (android at least) has a glitch with
submitting data
 Each individual plot has to be sorted into
separate folders
 You have to go online to manage data

Introduction to Canopeo

  • 1.
  • 2.
    What is Canopeo? Canopeo is a mobile/web based application that utilizes the camera on your smart phone to figure out accurate readings of green canopy cover CANOPEO
  • 3.
  • 4.
    1. Taking apicture • Select “Take photo” option • Position phone directly above canopy at 2ft centered on the row • Press the capture button in the camera mode • Review the picture and either select “OK” or “Retry”
  • 5.
    2. Data Collectionand Results • You can view your original image and the classified image • Once you view your images select the “submit” tab • On this tab you can edit the details of the picture taken • Ex: planting date, height, crop, folder to put it in, and field name
  • 6.
    3. Upload andview data! • Select the “Canopeo Data” tab to view project folders • From here you can view the individual images taken with Canopeo • Select the “Map” tab to view the geo-referenced images taken with Canopeo • From here you can select indivual images you have taken at the locations that they were taken • You can also even set your mapping application to navigate you to their location
  • 7.
    4. Repeat! • Repeatingsteps 1-3 you can build up your project folder • All of your project folders and their respective fields can
  • 8.
  • 9.
  • 10.
    Advantages to Canopeo Effective way to measure and monitor canopy development through the growing season all the way up to 36” crop or total canopy closure  Has a “share” function via multiple platforms  Super easy to use
  • 12.
    Disadvantages to Canopeo Still in BETA (development)  Poor web-based application  Mobile app (android at least) has a glitch with submitting data  Each individual plot has to be sorted into separate folders  You have to go online to manage data