Instruction Manual | Primary Arms PLX5 6-30x56 FFP with DEKA MIL reticle riflescope | Optics Trade
•
0 likes•330 views

https://www.optics-trade.eu/en/primary-arms-platinum-series-6-30x56-ffp.html
![INTRODUCING THE 6-30X56 FFP DEKA AMS
The DEKA AMS is an advanced Mil-based optic designed for extremely precise range
finding abilities at long range. Wrong range estimation is the number one reason shots
are missed in the field! The DEKA MIL reticle features clear .1 Mil subtensions, which
combine with up to 30x magnification to create unprecedented opportunities for quick
and correct ranging. The PA6-30x56 FFP DEKA AMS is very fast at 6x magnification
and extremely accurate at 30x magnification, remaining true in all magnifications.
ACHIEVING A CLEAR RETICLE PICTURE
Your 6-30x56 FFP DEKA AMS scope comes with an adjustable diopter ring that must
be set to match your eye. Located at the rear of the eyepiece, the diopter ring changes
the focus of the reticle as you see it inside the scope. It does not change the focus
of objects that you look at through the scope. Setting the diopter is the critical first
step to successful precision shooting. You can set the diopter before you have even
mounted the scope in its rings.
2
P L A T I N U M S E R I E S
3
P L A T I N U M S E R I E S
1. Turn the Power Ring to a high setting, between 20-30x, and point the scope at a
bright, featureless background such as blue sky or a blank white wall.
2. Turn the Parallax Adjust, on the left side of the optic, to infinity [∞].
3. With your head in position behind the scope, look at the wall or sky instead. If you
look through prescription glasses when shooting, wear them now too. After 5 or 6
seconds, close your eyes.
4. Now open your eye, glance through the scope and immediately see if the reticle is
sharp or blurry. If you notice that the reticle seems blurry at first and then suddenly
sharpens, your eyes have focused on the reticle itself instead of looking through
the scope. You must adjust the diopter ring and try again.
5. If the reticle was blurry, turn the diopter ring and repeat the process again. The
process will take multiple adjustments. Each time you repeat the process, ask
yourself if the reticle was sharper or more blurry than before. The final adjustments
may be very fine. If your eyes get watery or tired, walk away for a bit and come
back to this later.
6. Once the reticle appears sharp as soon as you glance through the scope, the
diopter is set for your eyes. Everyone’s eyes are slightly different, so the ideal
adjustment changes from person to person. Many shooters will mark their correct
diopter position with a little dab of paint or fingernail polish across the ring and
the scope body, in case the ring gets turned accidentally later on. Others will apply
electrical tape around the diameter of the ring to hold it in place.
ADJUSTING PARALLAX
The Parallax Adjust is located on the left side of the scope, closer to the scope
tube than the Illumination Knob control, marked with ranges from 35 yards to
infinity. Although it is often referred to as a “side focus”, parallax and focus are not
the same thing. Parallax error occurs when the target’s image and the reticle are
not aligned on the same focal plane inside the scope. Think of a mechanical car
speedometer that seems to indicate a slightly different speed when you look at it
from the passenger seat. Because the needle is positioned between you and the dial
numbers, moving your head around changes where it seems to point. This creates
an inconsistent picture depending on your point of view. Adjusting the Parallax Adjust
eliminates parallax error at different ranges by bringing the reticle into the same focal
plane as the target, like a digital speedometer displayed on a flat screen. Parallax
error is most noticeable at high magnifications. Adjustment is much easier with your
rifle secured by sandbags or a bipod.
1. Turn the Parallax Adjust until the target appears to be in focus. This will get you
close to the correct adjustment.
2. Looking through the scope at the target, move your head just slightly from side to
side. If you lose the sight picture you are moving too much. Go slowly, and see if
the reticle appears to move relative to your target. A target that appears to be
floating around the reticle as you move your head indicates parallax error.
3. If the target appears to move in the opposite direction of your head, turn the
Parallax Adjust clockwise. If the target appears to move in the same direction as
your head, turn the Parallax Adjust counterclockwise. These adjustments are very
small. Move the Side Focus Knob just a little bit at a time and re-check.
4. Once the reticle and target hold their positions as you move your head from side
to side, parallax error is eliminated for targets at this range. Normally this
adjustment will also keep the target nicely in focus. However, to gain the most
consistent hits on target, it is more important to eliminate parallax error than to
have the target perfectly in focus.](data:image/gif;base64,R0lGODlhAQABAIAAAAAAAP///yH5BAEAAAAALAAAAAABAAEAAAIBRAA7)
Recommended
Recommended
More Related Content
What's hot
What's hot (20)
Similar to Instruction Manual | Primary Arms PLX5 6-30x56 FFP with DEKA MIL reticle riflescope | Optics Trade
Similar to Instruction Manual | Primary Arms PLX5 6-30x56 FFP with DEKA MIL reticle riflescope | Optics Trade (20)
More from Optics-Trade
More from Optics-Trade (20)
Recently uploaded
Recently uploaded (20)
Instruction Manual | Primary Arms PLX5 6-30x56 FFP with DEKA MIL reticle riflescope | Optics Trade
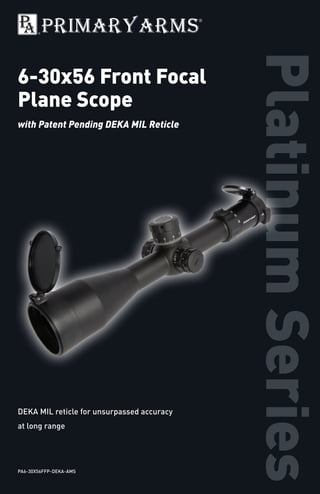
- 1. PlatinumSeries 6-30x56 Front Focal Plane Scope with Patent Pending DEKA MIL Reticle DEKA MIL reticle for unsurpassed accuracy at long range PA6-30X56FFP-DEKA-AMS
- 2. INTRODUCING THE 6-30X56 FFP DEKA AMS The DEKA AMS is an advanced Mil-based optic designed for extremely precise range finding abilities at long range. Wrong range estimation is the number one reason shots are missed in the field! The DEKA MIL reticle features clear .1 Mil subtensions, which combine with up to 30x magnification to create unprecedented opportunities for quick and correct ranging. The PA6-30x56 FFP DEKA AMS is very fast at 6x magnification and extremely accurate at 30x magnification, remaining true in all magnifications. ACHIEVING A CLEAR RETICLE PICTURE Your 6-30x56 FFP DEKA AMS scope comes with an adjustable diopter ring that must be set to match your eye. Located at the rear of the eyepiece, the diopter ring changes the focus of the reticle as you see it inside the scope. It does not change the focus of objects that you look at through the scope. Setting the diopter is the critical first step to successful precision shooting. You can set the diopter before you have even mounted the scope in its rings. 2 P L A T I N U M S E R I E S 3 P L A T I N U M S E R I E S 1. Turn the Power Ring to a high setting, between 20-30x, and point the scope at a bright, featureless background such as blue sky or a blank white wall. 2. Turn the Parallax Adjust, on the left side of the optic, to infinity [∞]. 3. With your head in position behind the scope, look at the wall or sky instead. If you look through prescription glasses when shooting, wear them now too. After 5 or 6 seconds, close your eyes. 4. Now open your eye, glance through the scope and immediately see if the reticle is sharp or blurry. If you notice that the reticle seems blurry at first and then suddenly sharpens, your eyes have focused on the reticle itself instead of looking through the scope. You must adjust the diopter ring and try again. 5. If the reticle was blurry, turn the diopter ring and repeat the process again. The process will take multiple adjustments. Each time you repeat the process, ask yourself if the reticle was sharper or more blurry than before. The final adjustments may be very fine. If your eyes get watery or tired, walk away for a bit and come back to this later. 6. Once the reticle appears sharp as soon as you glance through the scope, the diopter is set for your eyes. Everyone’s eyes are slightly different, so the ideal adjustment changes from person to person. Many shooters will mark their correct diopter position with a little dab of paint or fingernail polish across the ring and the scope body, in case the ring gets turned accidentally later on. Others will apply electrical tape around the diameter of the ring to hold it in place. ADJUSTING PARALLAX The Parallax Adjust is located on the left side of the scope, closer to the scope tube than the Illumination Knob control, marked with ranges from 35 yards to infinity. Although it is often referred to as a “side focus”, parallax and focus are not the same thing. Parallax error occurs when the target’s image and the reticle are not aligned on the same focal plane inside the scope. Think of a mechanical car speedometer that seems to indicate a slightly different speed when you look at it from the passenger seat. Because the needle is positioned between you and the dial numbers, moving your head around changes where it seems to point. This creates an inconsistent picture depending on your point of view. Adjusting the Parallax Adjust eliminates parallax error at different ranges by bringing the reticle into the same focal plane as the target, like a digital speedometer displayed on a flat screen. Parallax error is most noticeable at high magnifications. Adjustment is much easier with your rifle secured by sandbags or a bipod. 1. Turn the Parallax Adjust until the target appears to be in focus. This will get you close to the correct adjustment. 2. Looking through the scope at the target, move your head just slightly from side to side. If you lose the sight picture you are moving too much. Go slowly, and see if the reticle appears to move relative to your target. A target that appears to be floating around the reticle as you move your head indicates parallax error. 3. If the target appears to move in the opposite direction of your head, turn the Parallax Adjust clockwise. If the target appears to move in the same direction as your head, turn the Parallax Adjust counterclockwise. These adjustments are very small. Move the Side Focus Knob just a little bit at a time and re-check. 4. Once the reticle and target hold their positions as you move your head from side to side, parallax error is eliminated for targets at this range. Normally this adjustment will also keep the target nicely in focus. However, to gain the most consistent hits on target, it is more important to eliminate parallax error than to have the target perfectly in focus.
- 3. RETICLE ILLUMINATION The Illumination Knob control on the left side of the scope is marked with numbers of increasing brightness from 1 to 11. Between each number is an OFF setting. Settings 1 and 2 are night vision compatible and cannot be seen by the human eye. The knob cap unscrews counter-clockwise, holding a CR2032 battery with the positive (+) side facing towards the cap. Reticle illumination at the lower settings is useful in low light situations like sunrise and sunset. At the higher settings reticle illumination provides a quick aiming point even in daylight, especially at low magnification. UNDERSTANDING THE DEKA MIL RETICLE The DEKA MIL is an advanced ranging reticle using the Milliradian angular unit of measure. The exact center of the reticle is a chevron measuring .2 Mil across from its tip to each corner, and .2 Mil down from its tip to the bottom of its legs. Using a chevron tip instead of a dot gives the shooter an infinitely precise point of aim while assuring the target is never obscured by the reticle itself. The DEKA MIL crosshairs are subtended with large hash marks designating 1 Mil increments, and smaller hash marks halfway between them designating .5 Mil increments. Near the center, the crosshairs give way to .1 Mil marks with .1 Mil spaces between them. The DEKA MIL makes extremely accurate range estimation possible at long range and high magnification. Because the 6-30x56 FFP DEKA MIL is a front focal plane scope, the reticle is true at all magnifications. Ranging accurately in .10 Mil increments is best done at the highest magnifications, with your rifle well supported using a bipod, tripod or sand bags. P L A T I N U M S E R I E S 4 P L A T I N U M S E R I E S 5 DEKA AMS RETICLE Target at 277 yards The Mil System How to “Mil”, or range estimate, using the Mil marks on your DEKA MIL reticle Step 1 Enter the size of the target in inches. For example, our green box below is 10” wide, so we use the number 10. Step 2 Multiply your target size by 27.778 Step 3 Take that number and divide it by how many Mils cover the target when looking through the scope. For example, if the 10” target appears 1 Mil wide, then 10 x 27.778 divide by 1 = target range 277 yards.
- 4. P L A T I N U M S E R I E S 6 P L A T I N U M S E R I E S 7 Milling in .1Mil Increments In this example, our same 10” wide target box is much more distant. Looking through the optic at high magnification with our rifle well supported, we see that it covers the distance between the tip of the chevron and the center of the .5 Mil mark. 10 x 27.778 divide by .5 = target range 555.56 yards. 3. After Zeroing Your Rifle Remove the elevation knob as before by unscrewing the 3 set screws and pulling straight up. Replace the zero stop ring on the central shaft as before, and turn it clockwise until it stops. You can see two tiny protruding screws touching each other between the zero stop ring and the turret base. With the zero stop ring in this position, secure it in place using its 3 set screws. Now replace the elevation knob by pressing it straight down on the central shaft, being careful to align the “0” marking on the knob with the centerline mark on the scope body. Secure the elevation knob using its 3 set screws. Now your 100 yard zero is marked “0” on the elevation knob and the zero stop ring will physically halt the central shaft from turning past that point. SPECIFICATIONS & FEATURES ACCESSORIES AND MORE INFORMATION The included Primary Arms sun shade is a useful addition to your 6-30x56 FFP DEKA AMS scope. The sun shade can prevent glare when shooting in bright sunlight at certain angles, and can keep water away from the objective lens in the rain. The sun shade easily screws into the objective bell of the scope with no tools needed. The included flip-cap scope covers keep dust, debris, and water away from your optic’s glass when not in use. When ready to look through the scope, simply press the tabs to pop the caps away from the objective and ocular. • Tube diameter: 34 mm • Magnification: 6-30X • Objective diameter: 56 mm • Ocular diameter: 43.6 mm • Exit pupil: 8.2 mm at 6X, 1.9 mm at 30X • Eye relief: 4.0 in. at 6X, 3.3 in. at 30X • Field of view: 16.6 feet @ 100 yards at 6X 3.3 feet @ 100 yards at 30X • Click value: 0.1 Mil • Length: 15.6 in. • Net weight: 38.4 oz. • Red partial illumination • Uses 1x CR2032 battery (included) • Zero-stop elevation turret • Fast focus eyepiece • Front focal plane • Waterproof • Nitrogen purged • Fog resistant • Fully multi-coated • A6061-T6 aluminum • High quality flip up scope caps included • Sun shade included • Made in Japan • Limited Lifetime Warranty SETTING THE ZERO STOP ELEVATION TURRET The Zero Stop allows you to mechanically prevent the elevation turret from dialing below a point which you choose. When shooting at extended ranges where your elevation turret might be hundreds of clicks away from zero, you can simply spin the elevation knob back down without counting clicks, knowing that when it stops you are back at your rifle’s 100 yard zero. This saves precious time so you can begin counting clicks back up to the next firing solution more quickly. 1. Before Zeroing Your Rifle Unscrew the 3 set screws positioned around the elevation knob using the included 1.5mm Allen wrench. Remove the elevation knob by pulling it straight up. Unscrew the three set screws holding the black metal zero stop ring in position around the central shaft and remove it by pulling straight up. Replace the elevation knob on the central shaft by pressing straight down, and secure it using its 3 set screws. Do not overtighten these tiny set screws! 2. Zero Your Rifle Zero your rifle at 100 yards or whatever zero range your requirements demand. The position of the numbers on the elevation knob is totally irrelevant at this stage; just get the point of aim and point of impact to coincide at the range you choose. Target at 555 yards
- 5. WARRANTY Your new scope has a limited lifetime warranty against manufacturer defects. If you have any questions, please email or call. Email: info@PrimaryArms.com 713-344-9600 www.primaryarms.com P L A T I N U M S E R I E S