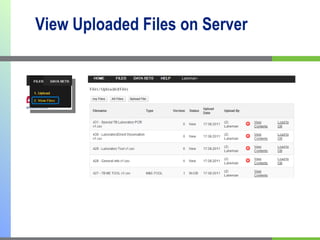
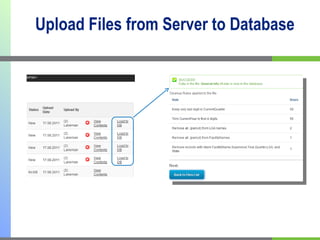
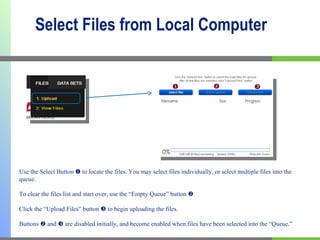
The document provides instructions for uploading files to a database server through a web interface. It describes selecting files from a local computer, queuing them for upload, removing files from the queue, and uploading the files to the server. Once uploaded, the files can be viewed on the server and accessed from the database.


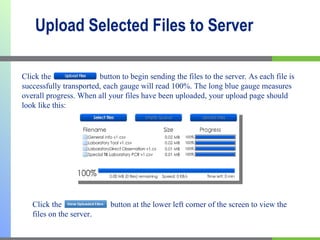
![Upload Selected Files to Server Select multiple files by pressing and holding down the control [ctrl] key while clicking on the each file. The image above is an example of selecting 4 files at once.](https://image.slidesharecdn.com/howtouploadandviewdata-111123153820-phpapp01/85/How-to-upload-and-view-data-8-320.jpg)