Download to read offline

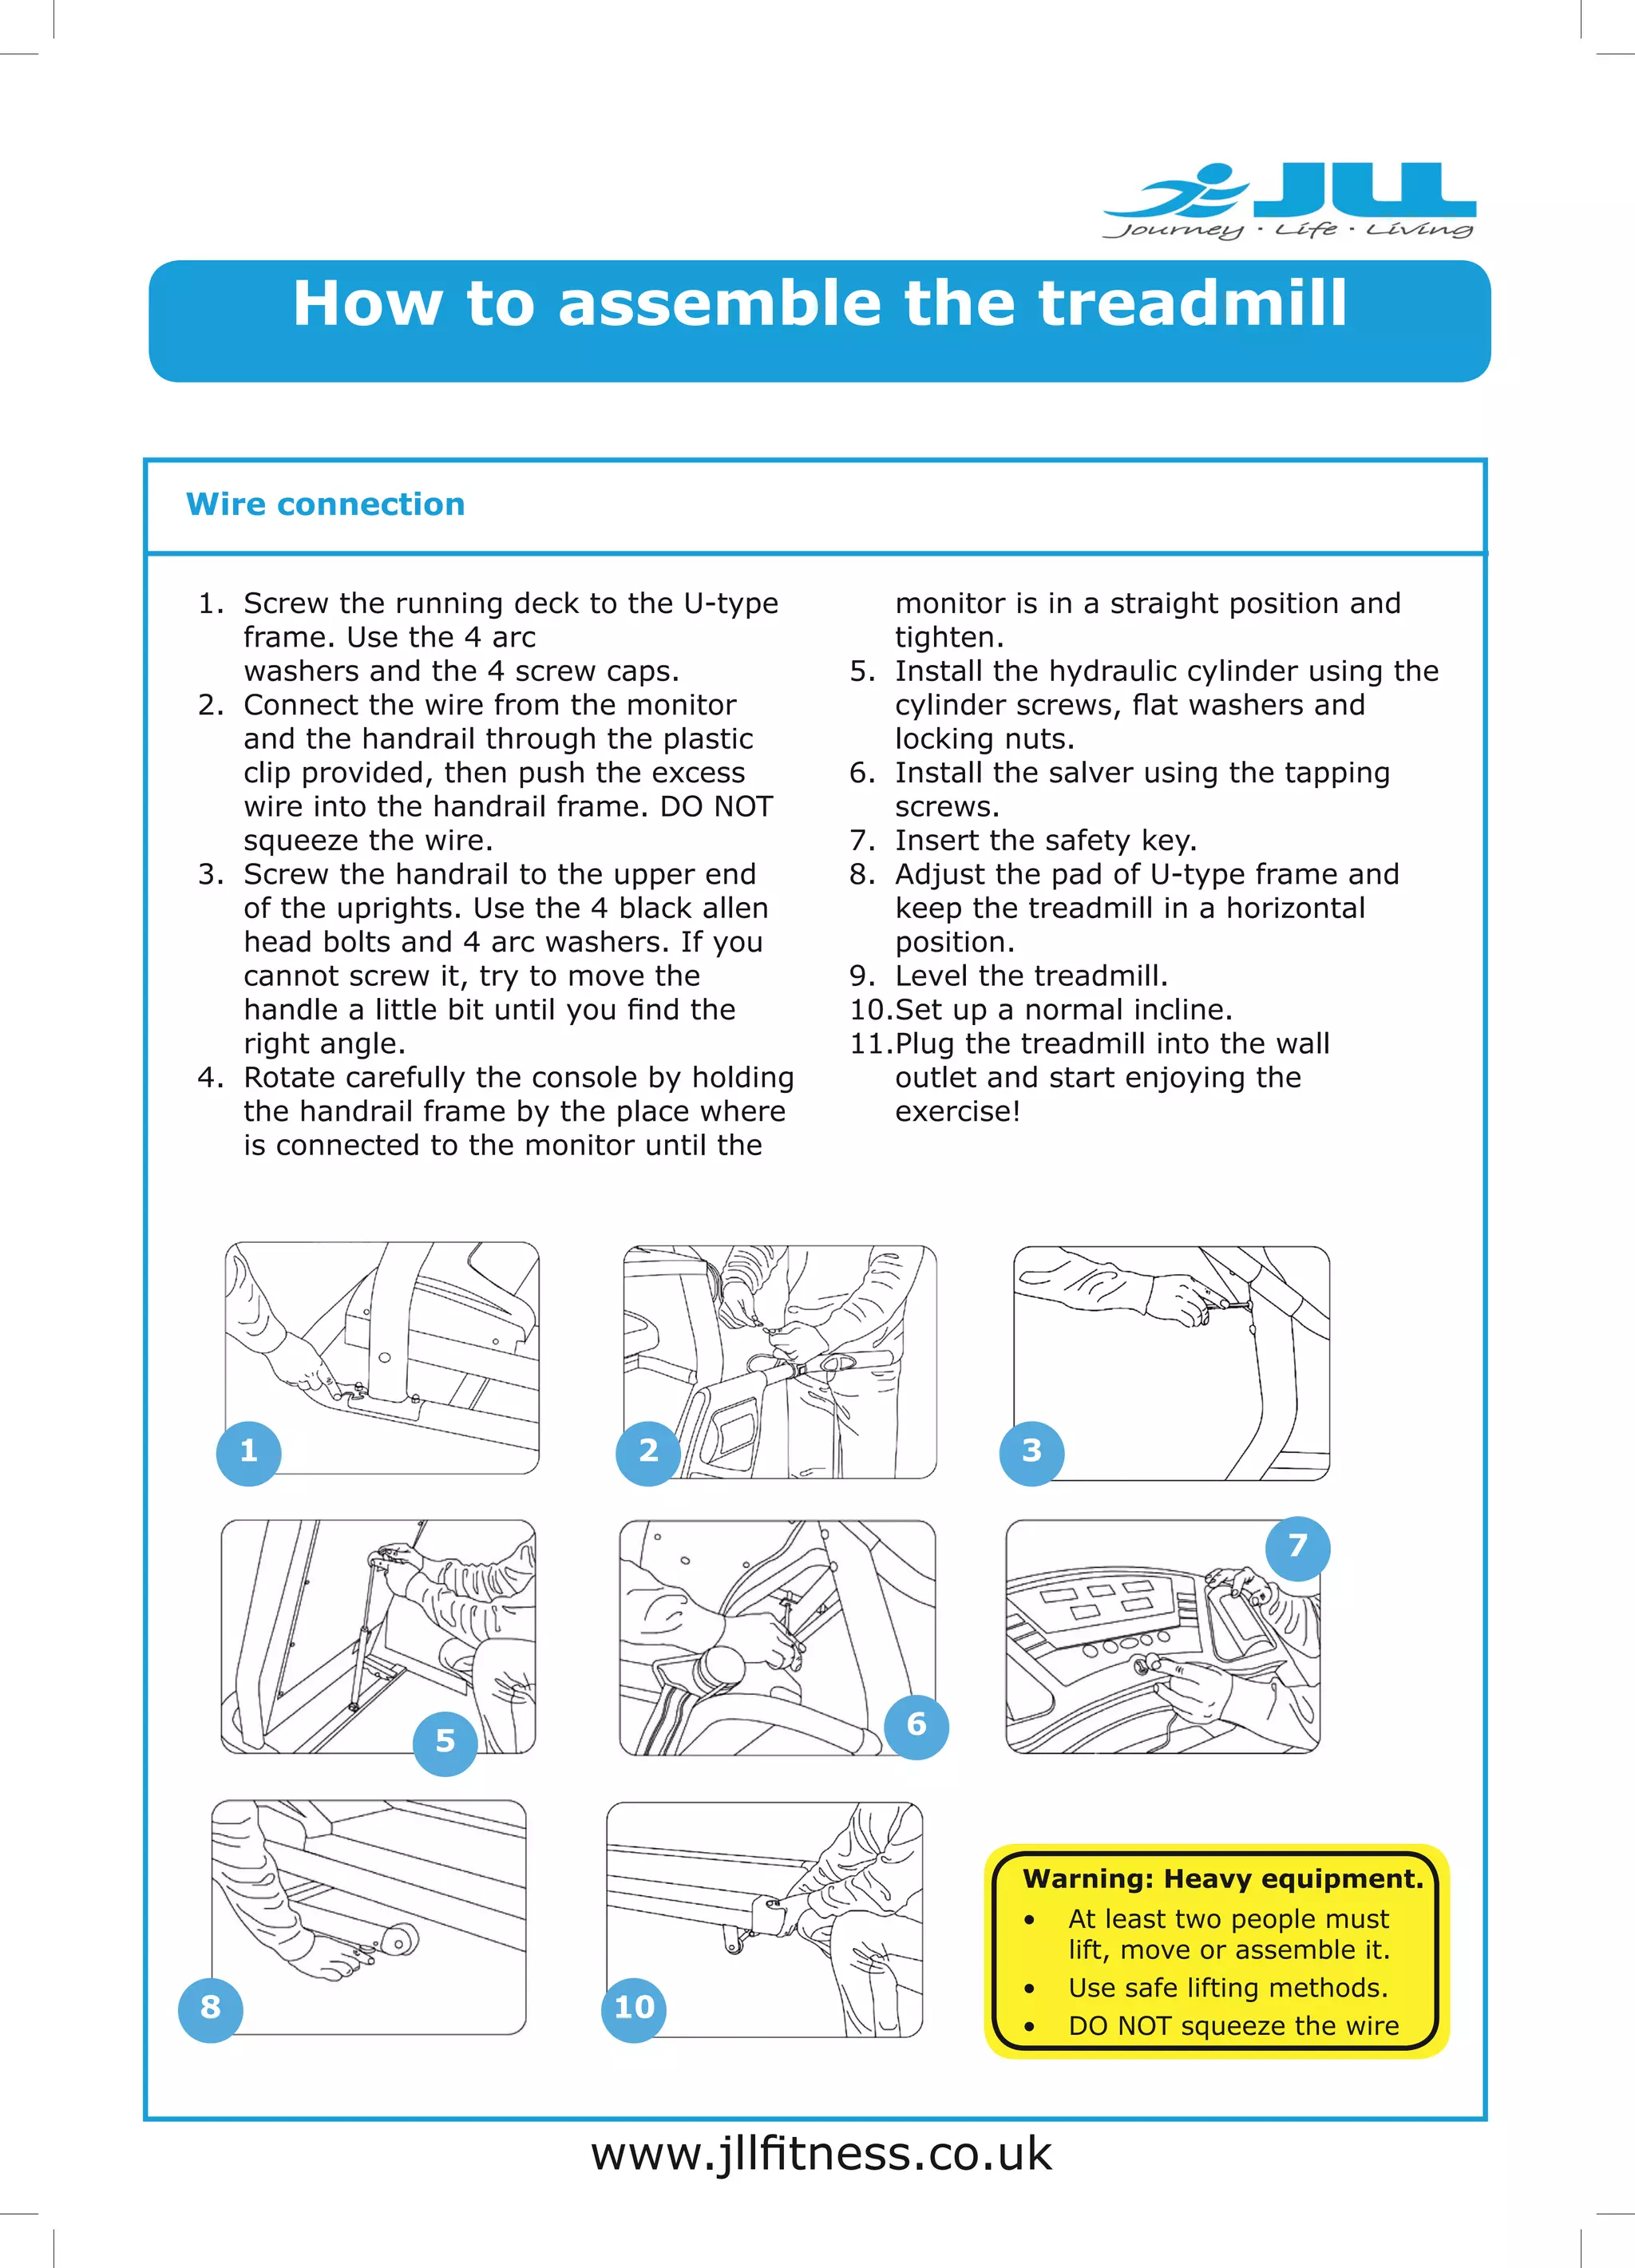

To assemble the treadmill, screw the running deck to the U-frame using washers and caps. Connect the monitor wire through the handrail clip without squeezing. Screw the handrail to the uprights using bolts, washers and adjusting the angle if needed. Rotate and tighten the console by holding the handrail frame. Install the cylinder, salver, safety key and keep the treadmill level and at a normal incline. Plug in and enjoy your exercise.


