2. Create backup copies of your research and pictures.
Share your research and make multiple copies for family
members.
Eliminate clutter and paper.
It is still advised to keep a paper copy of your research.
Preserve your original work
and archive your pictures.
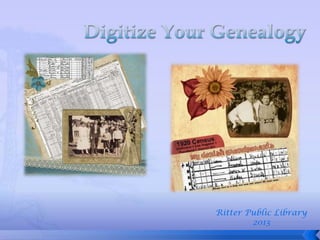
2
3. Your pictures and original documents will be safe.
They won’t get scratched, bent or folded …
Photos can be fixed – scratches removed, colors
adjusted, and you can even remove an old boyfriend!
3
4. Start with a plan.
What is the purpose of your album?
What size will you make it?
What do you want to include?
Make an outline of people / events to include.
Will all pages have the same background or be
different?
Browse the internet for
examples to get ideas.
4
5. Holiday traditions
Family occupations
Emigration
Locations
Military
Ancestors who have inspired you
Family vacations
Involvement in news events
Treasures and collections
Pioneer ancestors
Family reunions
Special days (births, deaths, baptisms, weddings…)
Folklore
Namesakes
Clubs or hobbies
5
6. Ancestral Charts
Family Group Sheets
Census Charts
Certificates of birth, marriage,
baptismal, naturalization…
Pictures
Letters
Family recipes
Bibles (scan family tree section)
Photos of beloved objects or
collectibles (china patterns,
patterned fabric)
6
7. If you don’t have any photos try doing one of these:
Draw a picture
Write a story about the ancestor
Take a picture of a location, building
or event you are scrapbooking.
Feature an object that was from an ancestor or
event. (i.e. fabric, china pattern…)
7
8. • Scan and save items in jpg format.
• Remember older pictures are fragile, handle them
with care.
• If you have photos that are mounted in an album
and can’t be easily removed,
scan the whole album page.
• You could also take a close
up photo of the page.
8
9. Store your photos in a cool/cold location, but not
too humid. Heat accelerates the aging process.
Keep your photos in a fire and water-proof box.
Keep your photos above ground to avoid floods.
Never display or frame an original photo; instead,
make a copy and display the copy.
Never use albums with adhesive pages. The
plastic eventually sticks to the photos and
chemically reacts with the plastic sheet.
9
10. Copy documents found online using
ScreenHunter or any screen capture program.
You can also use Alt + Print Screen keys on
your keyboard to copy an image online.
Manage your pictures and scanned items with
Picasa or another photo editing program.
Embellish your pages with backgrounds, fonts,
clip art and frames found on digital
scrapbooking websites.
10
11. This is a free program that will let you copy a
specific section of a picture or document online
and save it as a jpeg.
Google “ScreenHunter Free” to download it.
11
13. Picasa – free from Google
http://picasa.google.com
Picasa gives you the ability to give any picture
an antique look by changing it to sepia or
black and white.
Picasa helps you organize your pictures as well
back them up online.
13
15. 15
Original – notice all
the white spots.
Using Picasa’s
retouch tool,
I could remove
many of the white
spots from the
original.
16. Enables you to layer items quickly and easily.
Photos must be edited first – before you
import them.
Complete pages can be saved as jpegs.
Many websites will host your pages or sell you
space.
Easy to get commercially printed.
16
17. Starts around $100
Not necessary for the
hobbyist, but may be
worth it if you’re investing
a lot of time and energy
into your projects.
Allows you much more
flexibility in photo editing
– you can “erase” people
and backgrounds.
You can edit photos and
create layered pages in the
same place.
17
18. You can make simple pages without having to
purchase scrapbooking software.
Pages can be saved as jpegs. This makes it easy
to share online or get commercially printed.
There is a cost to purchase it, but it’s free at the
library.
18
19. File > Page Setup to select
finished size.
File > Download as >
select JPEG image.
Add background,
embellishments, scans,
photos, etc.
19
20. Avoid anything too bold or busy. Your content
should be the focus.
Fun backgrounds to try:
enlarging a handwriting sample
enlarge a photo (house, landscape, fabric) and use
editing tools to make it transparent or faded
20
21. You can find lots of decorative digital frames
to enhance your photos.
Use digital photo corners to create the look of
an old fashioned photo album.
Digital ribbons, flowers, clips, buttons can all
enhance a photo.
21
23. This is the most important part! Share all you know!
Select a font that is easy to read for the bulk of your
text. Headings and labels can be fancier or even
done in block letters.
Many different fonts are available for free on the
internet.
Journal boxes can be
downloaded that will give
your text more interest.
23
24. 24
Simply add a text box to your page.
Select no fill and no line.
Move box over the journal area.
25. If you choose to make your album 8x10, it will
be easy to get printed at any photo processing
place or print at home.
If you choose to make it 12x12, you’ll need to
order prints online and they’re much more
expensive.
25
26. Look at galleries on any of the
scrapbooking websites for
ideas.
Most websites that print
photos and photo gifts have
the option of photo books.
26
27. Any books or magazines related to scrapbooking or
genealogy will have ideas for you:
Digital Scrapbooking for Dummies
Scrapbooking for Dummies
Family Tree Maker for Dummies
Genealogy Online for Dummies
Scrapbooking Your Family History
Creating Heritage Scrapbooks
Scrapbooking Your Family Heritage
27