Downloaded 119 times


![Updating database of manual pages ...
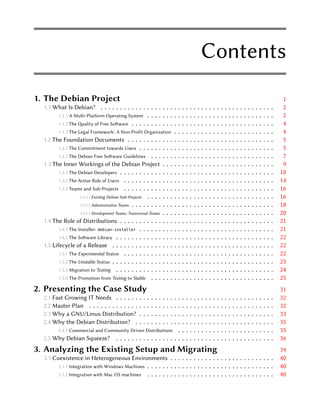
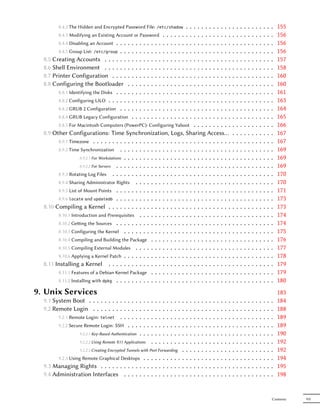
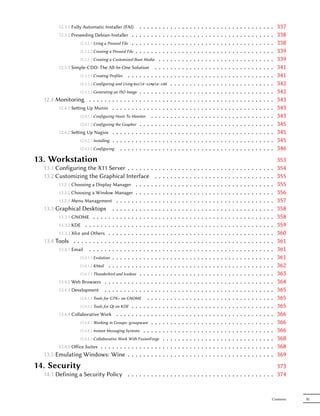
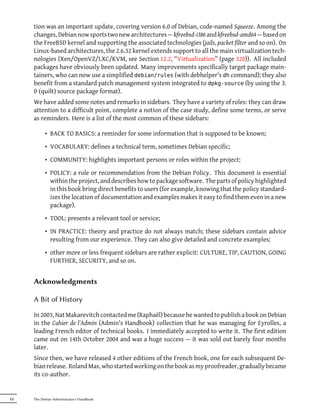
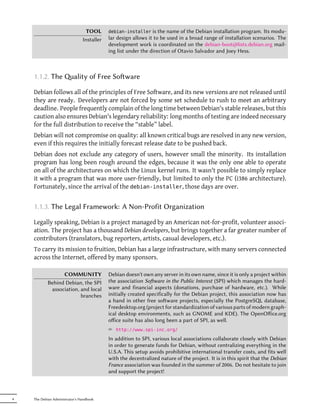
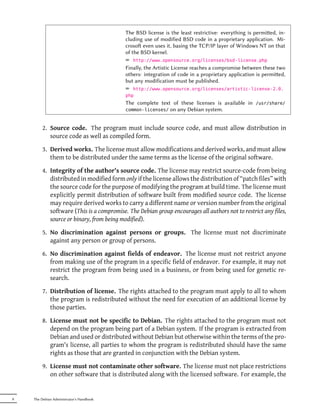
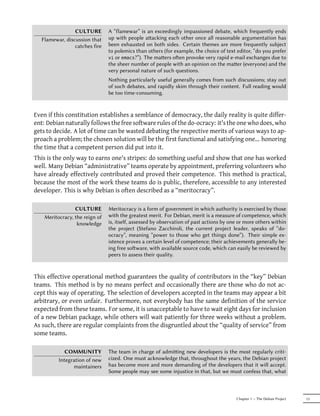
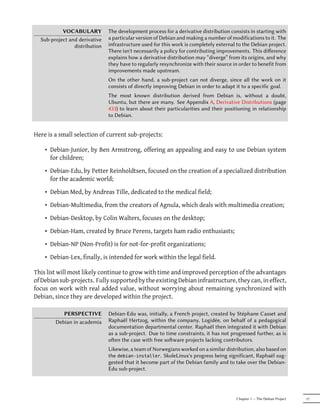
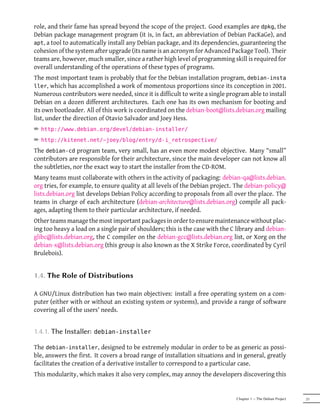
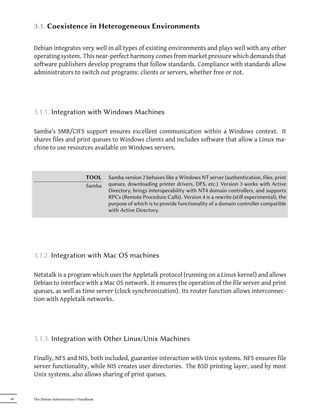
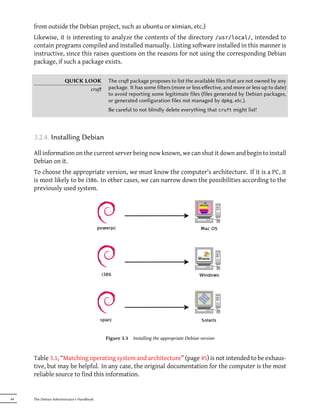
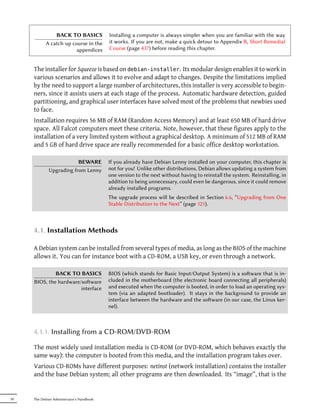
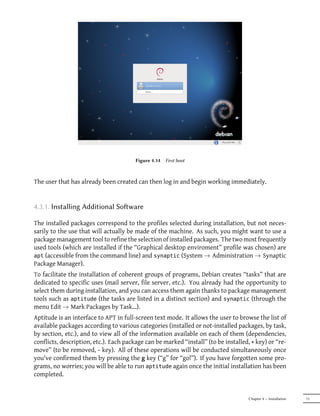
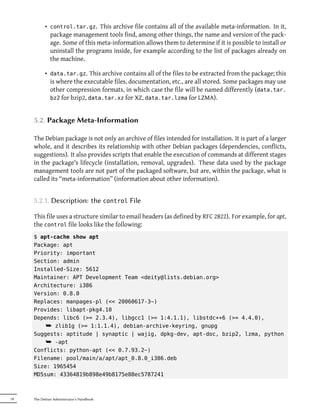
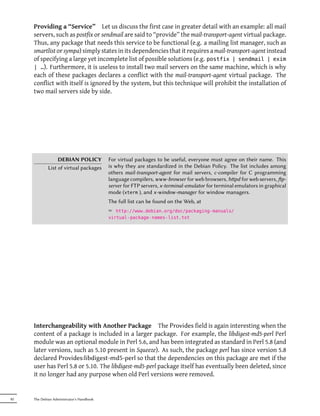
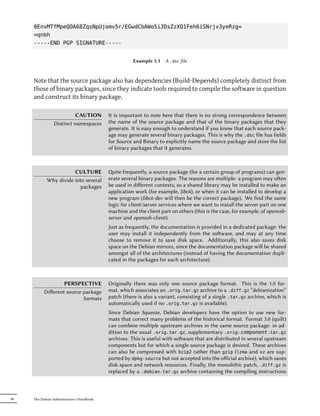
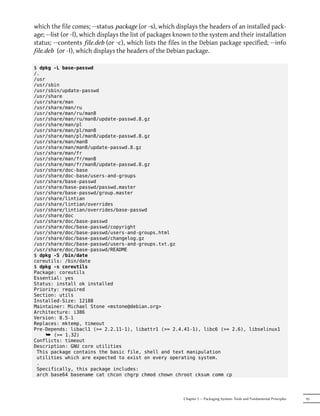
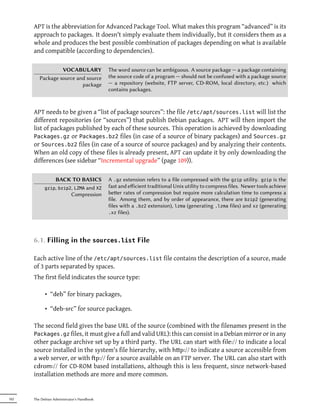
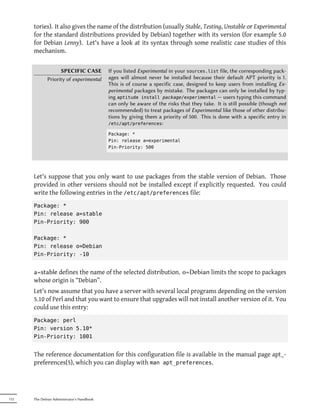
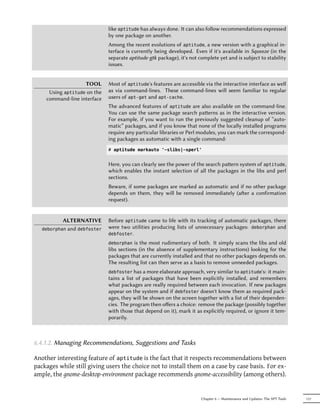
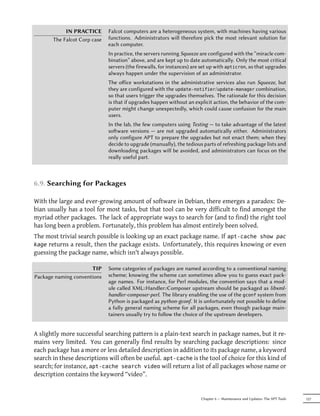
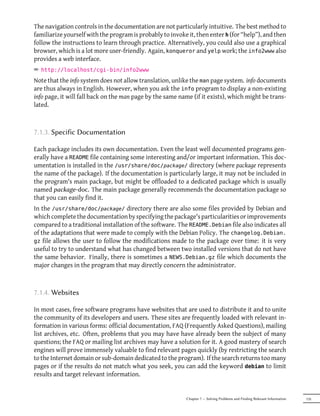
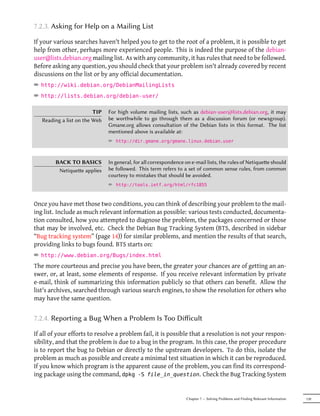
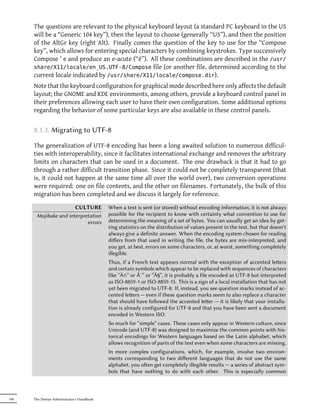
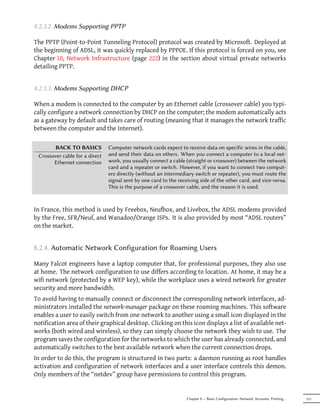
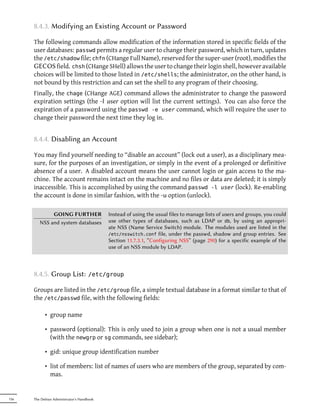
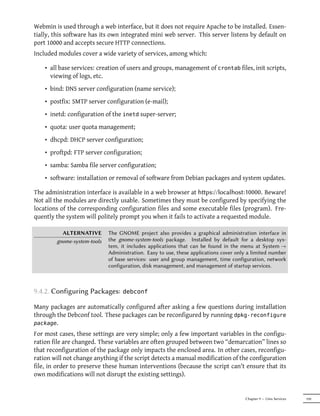
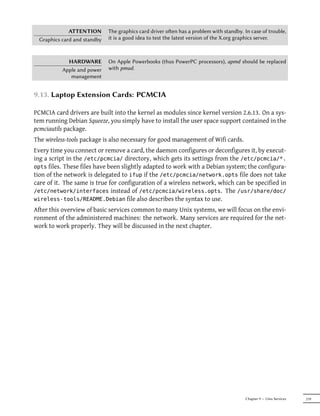
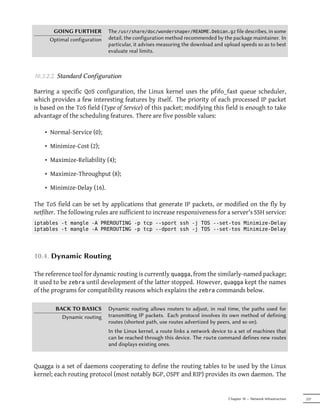
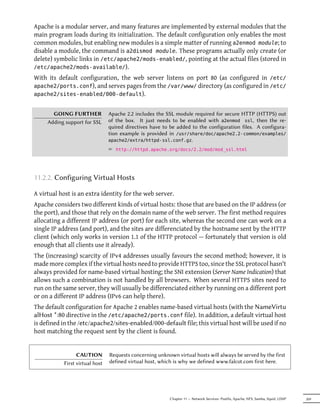
Example 5.3 Separate unpacking and configuration
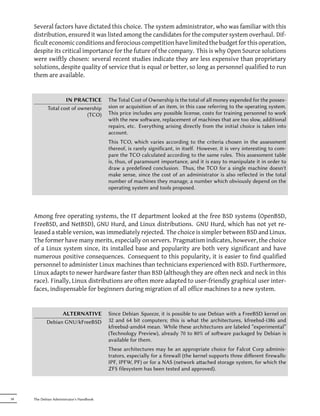
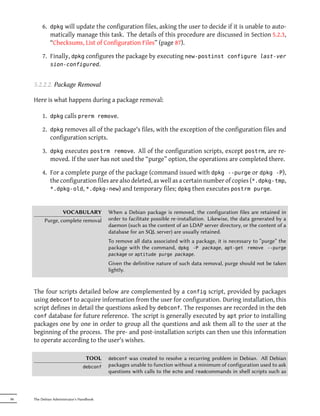
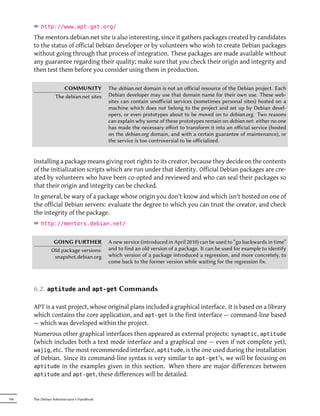
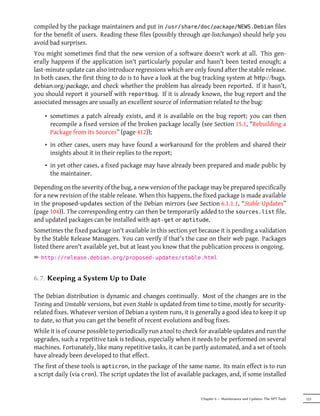
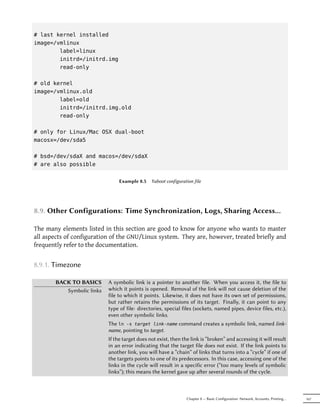
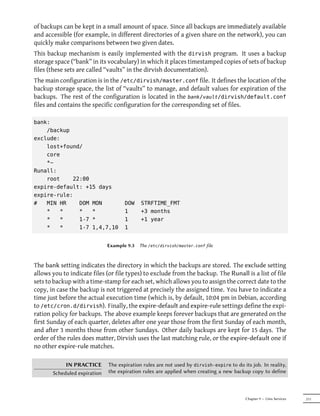
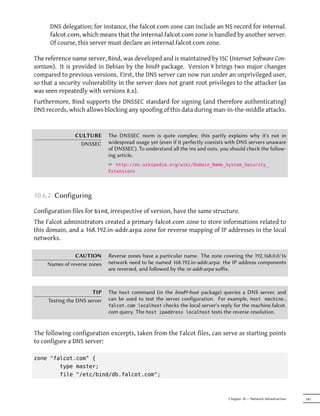
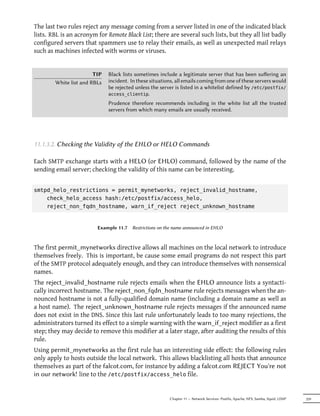
Sometimes dpkg will fail to install a package and return an error; if the user orders it to ignore
this, it will only issue a warning; it is for this reason that we have the different --force-* options.
The dpkg --force-help command, or documentation of this command, will give a complete
list of these options. The most frequent error, which you are bound to encounter sooner or later,
is a file collision. When a package contains a file that is already installed by another package,
dpkg will refuse to install it. The following messages will then appear:
Unpacking libisc52 (from .../libisc52_1%3a9.6.ESV.R1+dfsg-0+lenny2_amd64.deb)
¯ ...
dpkg : error processing /var/cache/apt/archives/libisc52_1%3a9.6.ESV.R1+dfsg
¯ -0+lenny2_amd64.deb (--unpack) :
trying to overwrite "/usr/lib/libisc.so.50", which is also in package
¯ libisc50 1:9.6.1.dfsg.P1-3
In this case, if you think that replacing this file is not a significant risk to the stability of your
system (which is usually the case), you can use the option --force-overwrite, which tells dpkg
to ignore this error and overwrite the file.
While there are many available --force-* options, only --force-overwrite is likely to be used
regularly. These options only exist for exceptional situations, and it is better to leave them
alone as much as possible in order to respect the rules imposed by the packaging mechanism.
Do not forget, these rules ensure the consistency and stability of your system.
CAUTION If you are not careful, the use of an option --force-* can lead to a system
Effective use of --force-* where the APT family of commands will refuse to function. In effect, some
of these options allow installation of a package when a dependency is not
met, or when there is a conflict. The result is an inconsistent system from the
point of view of dependencies, and the APT commands will refuse to execute
any action unless the action enables it to return the system to a consistent
state (this oen consists of installing the missing dependency or removing a
problematic package). This oen results in a message like this one, obtained
aer installing a new version of rdesktop while ignoring its dependency on a
newer version of the libc6:
# apt-get dist-upgrade
[...]
You can run "apt-get -f install" to correct these problems.
The following packages contain unmet dependencies:
rdesktop: Depends on: libc6 (>= 2.5) but 2.3.6.ds1-13etch7 is
¯ installed
E: missing dependencies. Try to use the option -f.
A courageous administrator who is certain of the correctness of their analysis
may choose to ignore a dependency or conflict and use the corresponding -
Chapter 5 — Packaging System: Tools and Fundamental Principles 93](https://image.slidesharecdn.com/debian-handbook-120527093323-phpapp02/85/Debian-Handbook-119-320.jpg)
![csplit cut date dd df dir dircolors dirname du echo env expand expr
factor false flock fmt fold groups head hostid id install join link ln
logname ls md5sum mkdir mkfifo mknod mktemp mv nice nl nohup nproc od
paste pathchk pinky pr printenv printf ptx pwd readlink rm rmdir runcon
sha*sum seq shred sleep sort split stat stty sum sync tac tail tee test
timeout touch tr true truncate tsort tty uname unexpand uniq unlink
users vdir wc who whoami yes
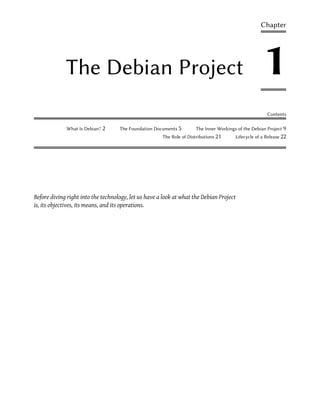
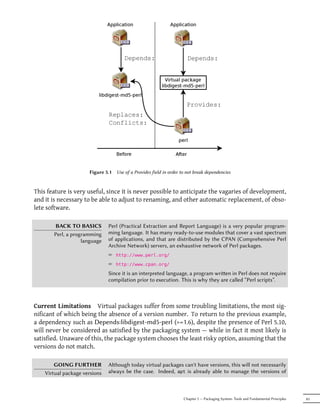
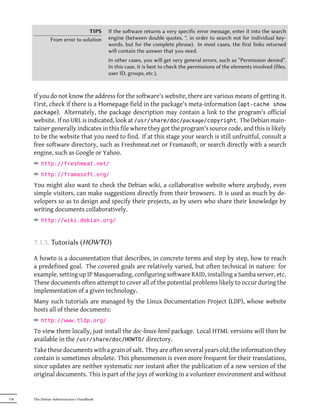
Homepage: http://gnu.org/software/coreutils
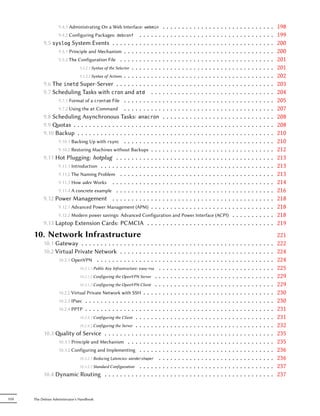
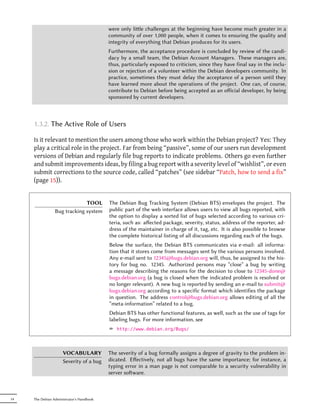
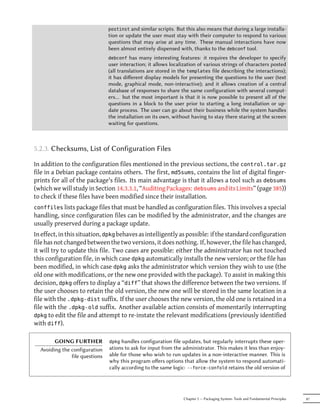
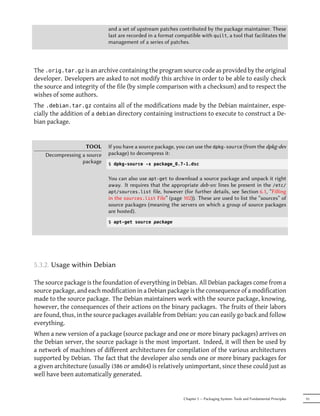
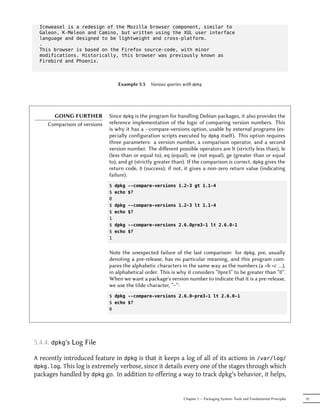
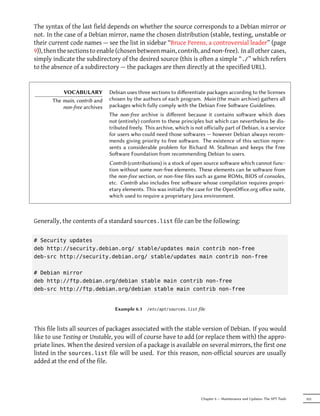
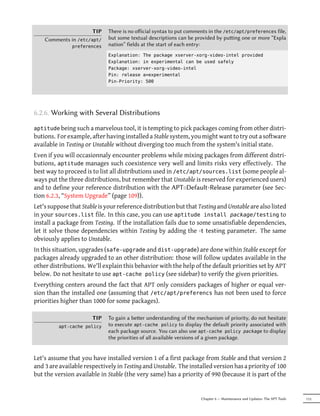
$ dpkg -l 'b*' | head
Desired=Unknown/Install/Remove/Purge/Hold
| Status=Not/Inst/Conf-files/Unpacked/halF-conf/Half-inst/trig-aWait/Trig-pend
|/ Err?=(none)/Reinst-required (Status,Err: uppercase=bad)
||/ Name Version Description
+++-===================-==========-============================================
un backupninja <none> (no description available)
un base <none> (no description available)
un base-config <none> (no description available)
ii base-files 4 Debian base system miscellaneous files
ii base-passwd 3.5.11 Debian base system master password and group
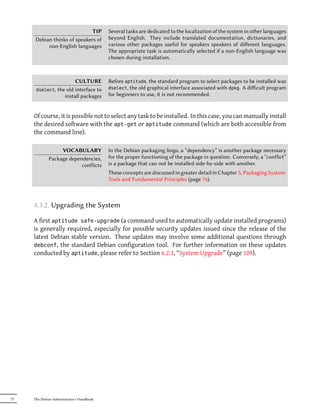
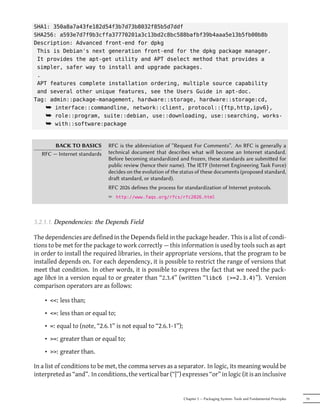
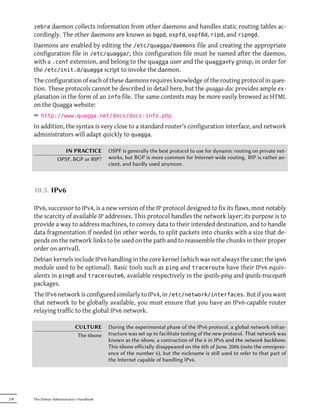
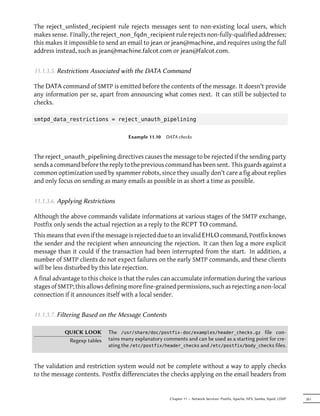
$ dpkg -c /var/cache/apt/archives/iceweasel_2.0.0.18-0etch1_i386.deb
drwxr-xr-x root/root 0 2008-11-23 23:18 ./
drwxr-xr-x root/root 0 2008-11-23 23:16 ./etc/
drwxr-xr-x root/root 0 2008-11-23 23:18 ./etc/iceweasel/
drwxr-xr-x root/root 0 2008-11-23 23:18 ./etc/iceweasel/profile/
-rw-r--r-- root/root 7138 2006-08-19 08:04 ./etc/iceweasel/profile/bookmarks.html
-rw-r--r-- root/root 153 2006-09-14 19:13 ./etc/iceweasel/profile/localstore.rdf
-rw-r--r-- root/root 3287 2005-02-01 18:36 ./etc/iceweasel/profile/search.rdf
-rw-r--r-- root/root 287 2004-11-30 22:26 ./etc/iceweasel/profile/mimeTypes.rdf
drwxr-xr-x root/root 0 2008-11-23 23:18 ./etc/iceweasel/profile/chrome/
-rw-r--r-- root/root 1078 2004-11-30 22:26 ./etc/iceweasel/profile/chrome/userChrome
¯ -example.css
-rw-r--r-- root/root 663 2004-11-30 22:26 ./etc/iceweasel/profile/chrome/
¯ userContent-example.css
-rw-r--r-- root/root 347 2004-07-28 23:20 ./etc/iceweasel/profile/prefs.js
-rw-r--r-- root/root 53 2008-11-23 22:43 ./etc/iceweasel/iceweaselrc
[...]
$ dpkg -I /var/cache/apt/archives/iceweasel_2.0.0.18-0etch1_i386.deb
new Debian package, version 2.0.
size 9126828 bytes : control file = 37297 bytes.
346 bytes, 9 lines conffiles
1255 bytes, 20 lines control
122920 bytes, 1249 lines md5sums
1267 bytes, 37 lines * postinst #!/bin/sh
293 bytes, 8 lines * postrm #!/bin/sh
2763 bytes, 70 lines * preinst #!/bin/sh
274 bytes, 12 lines * prerm #!/bin/sh
Package: iceweasel
Version: 2.0.0.18-0etch1
Section: web
Priority: optional
Architecture: i386
Depends: fontconfig, psmisc, debianutils (>= 1.16), libatk1.0-0 (>= 1.12.2), libc6 (>=
¯ 2.3.6-6)...
Suggests: iceweasel-gnome-support (= 2.0.0.18-0etch1), latex-xft-fonts, xprint,
¯ mozplugger, libkrb53
Conflicts: mozilla-firefox (<< 1.5.dfsg-1), firefox (<< 2.0+dfsg-1)
Replaces: mozilla-firefox, firefox (<< 2.0+dfsg-1)
Provides: www-browser
Installed-Size: 26364
Maintainer: Eric Dorland <eric@debian.org>
Description: lightweight web browser based on Mozilla
96 The Debian Administrator's Handbook](https://image.slidesharecdn.com/debian-handbook-120527093323-phpapp02/85/Debian-Handbook-122-320.jpg)


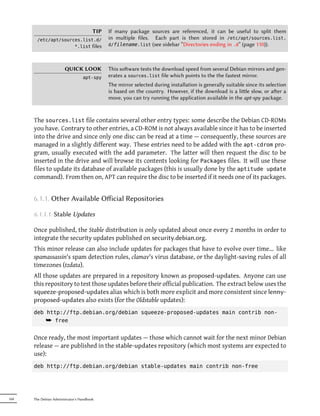
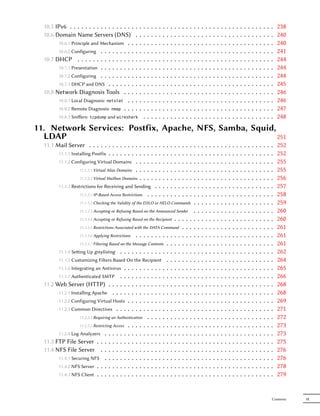
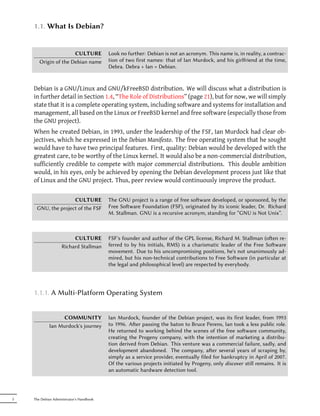
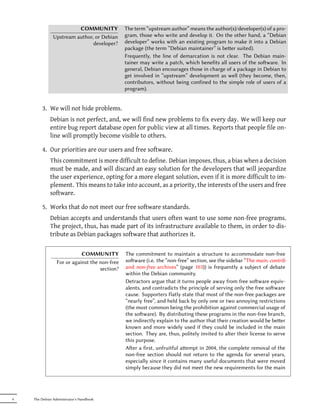
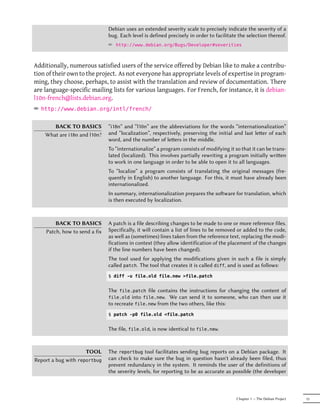
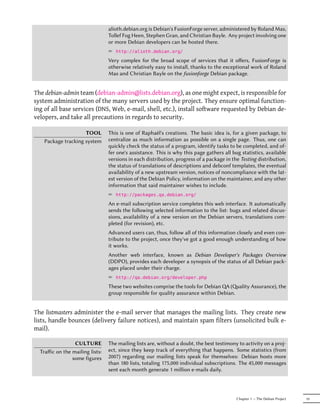
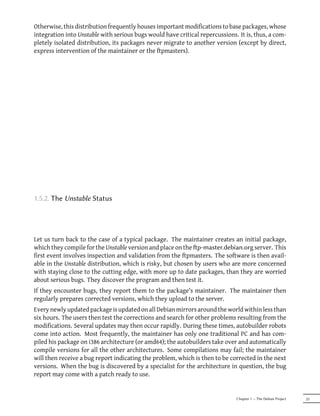
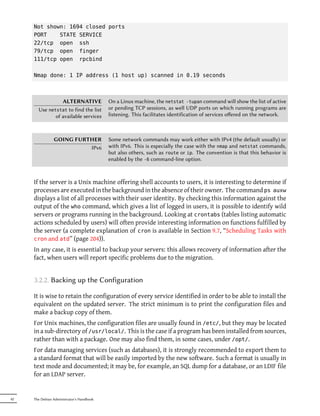
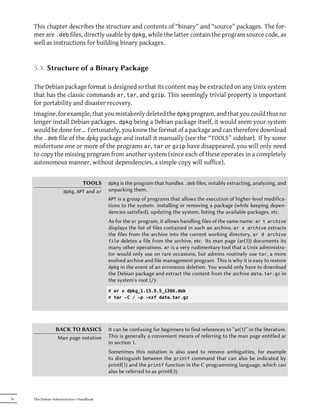
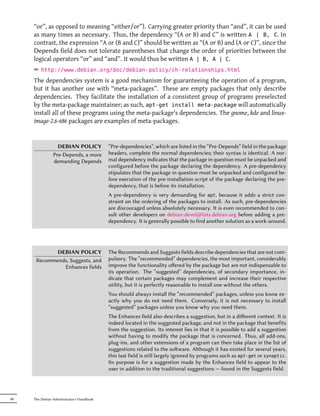
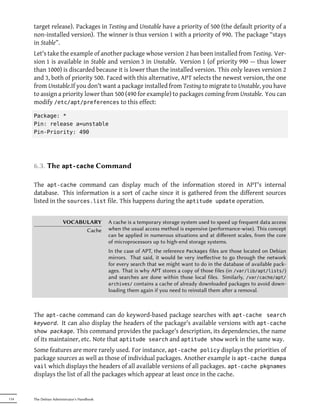
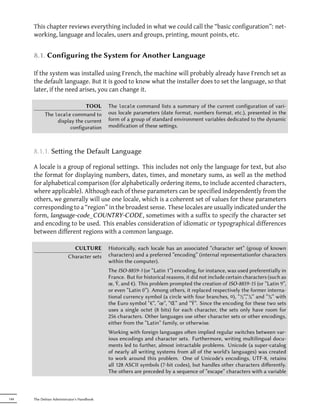
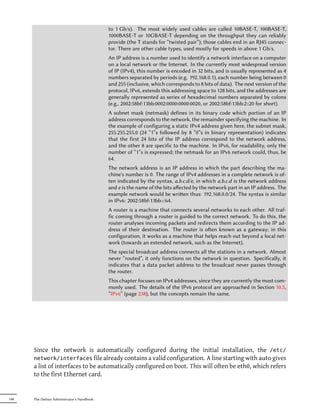
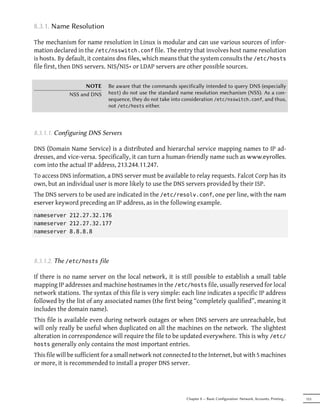
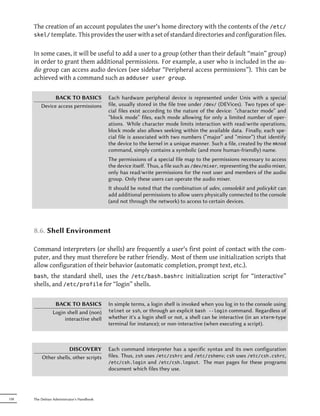
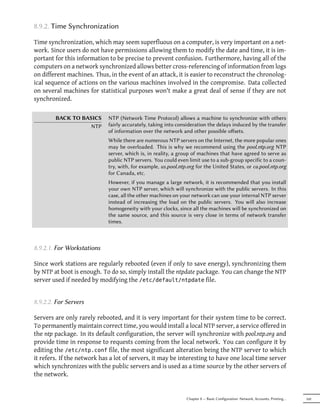
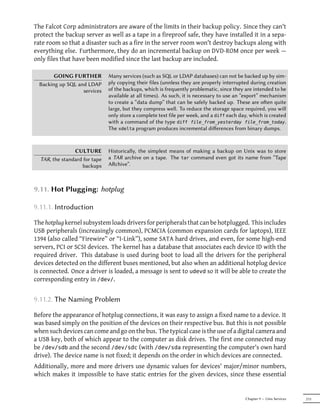
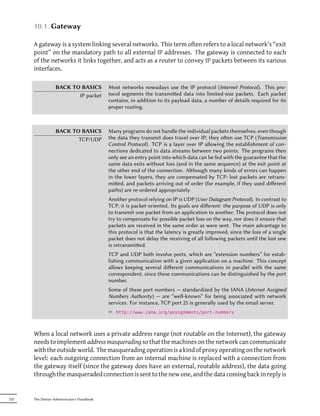
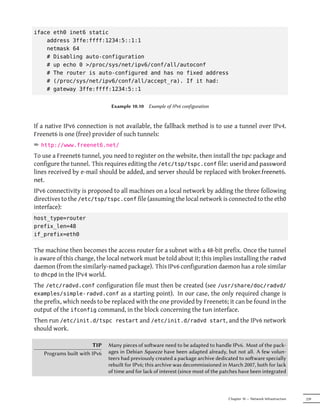
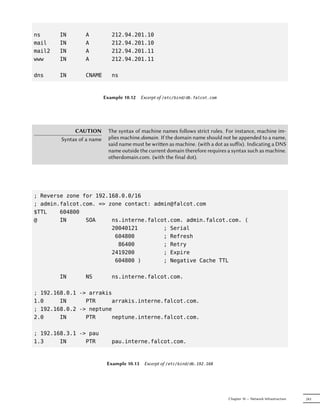
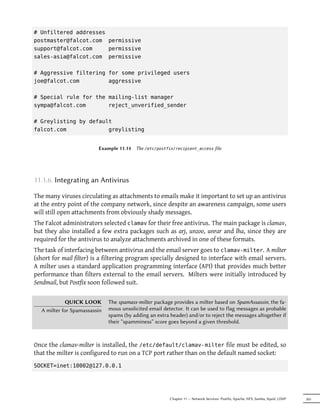
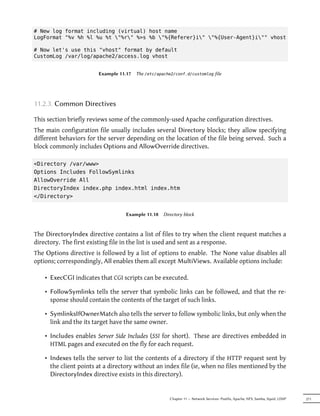
![6.2.1. Initialization
For any work with APT, the list of available packages needs to be updated; this can be done
simply through aptitude update. Depending on the speed of your connection, the operation
can take a while since it involves downloading a certain number of Packages.(gz|bz2) files
(or even Sources.(gz|bz2)), which have gradually become bigger and bigger as Debian has
developed (more than 8 MB for the largest Packages.gz — from the main section). Of course,
installing from a CD-ROM set does not require any downloading — in this case, the operation is
very fast.
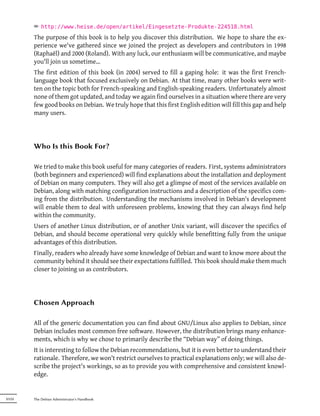
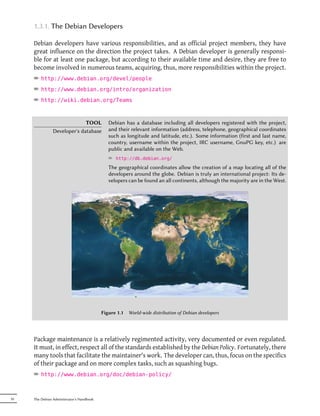
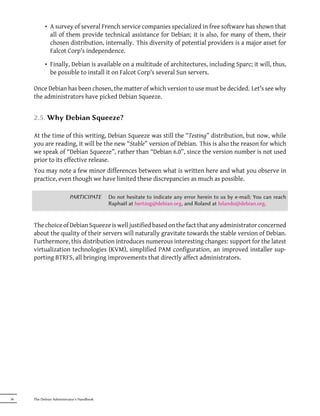
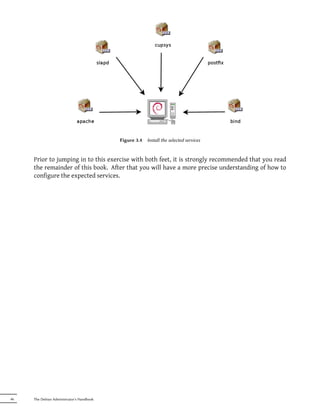
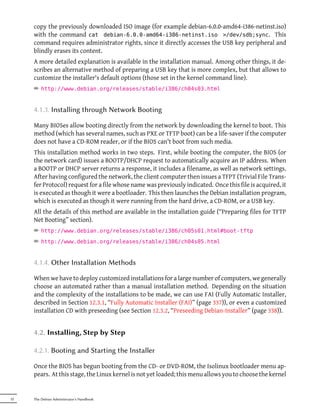
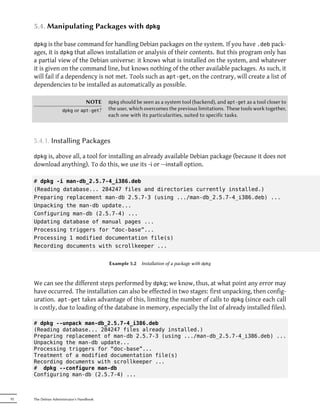
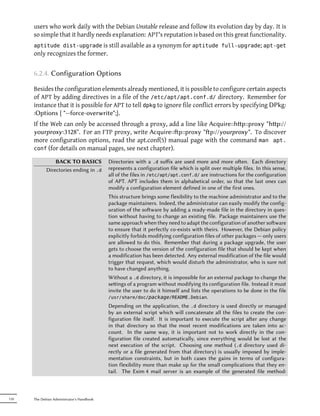
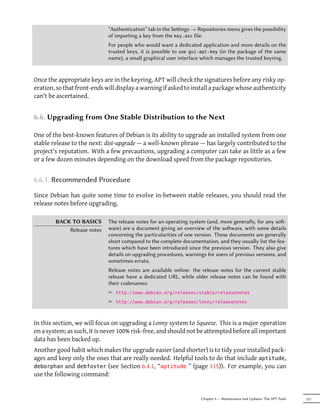
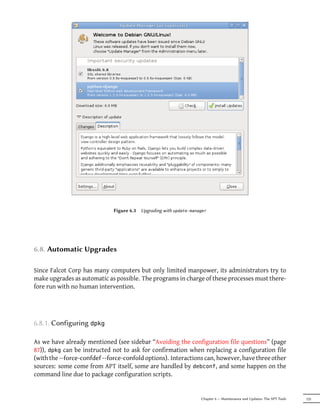
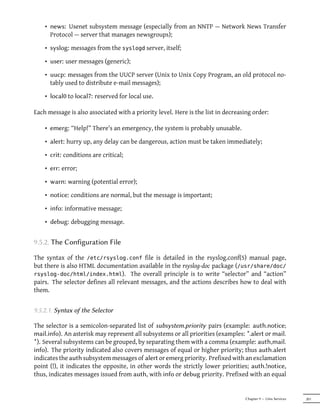
6.2.2. Installing and Removing
With APT, packages can be added or removed from the system, respectively with aptitude
install package and aptitude remove package. In both cases, APT will automatically install
the necessary dependencies or delete the packages which depend on the package that is being
removed. The aptitude purge package or apt-get purge package commands involve a
complete uninstallation — the configuration files are also deleted.
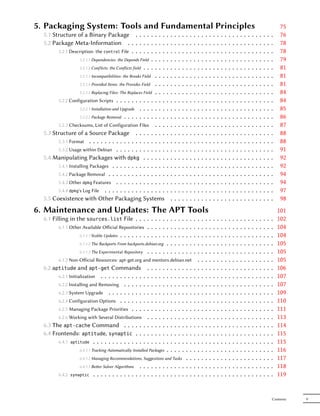
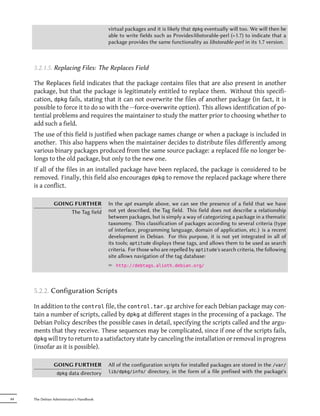
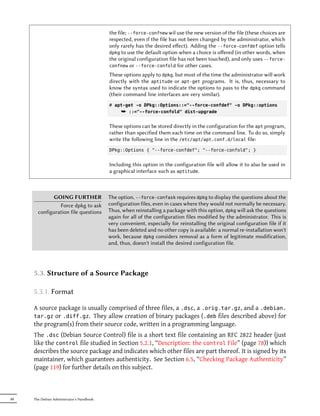
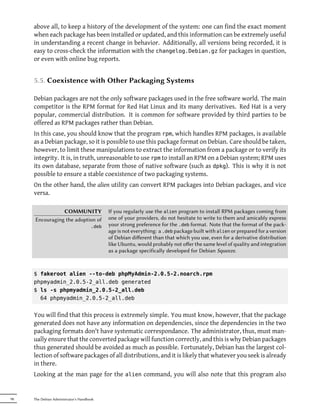
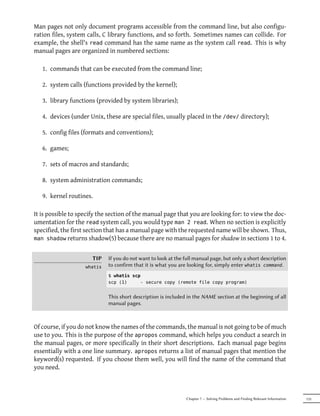
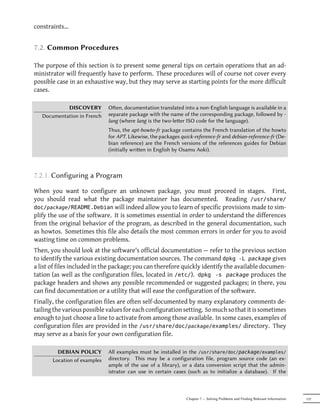
TIP It can be useful to systematically install the same list of packages on several
Installing the same selection computers. This can be done quite easily.
of packages several times First, retrieve the list of packages installed on the computer which will serve
as the “model” to copy.
$ dpkg --get-selections >pkg-list
The pkg-list file then contains the list of installed packages. Next, transfer
the pkg-list file on the computers you want to update and use the following
commands:
# dpkg --set-selections <pkg-list
# apt-get dselect-upgrade
The first command registers the list of packages you wish to install, then the
apt-get invocation executes the required operations! aptitude does not have
this command.
TIP It is possible to ask aptitude (or apt-get) to install certain packages and
Removing and installing at remove others on the same command line by adding a suffix. With an apti
the same time tude install command, add “-” to the names of the packages you wish to
remove. With an aptitude remove command, add “+” to the names of the
packages you wish to install.
The next example shows two different ways to install package1 and to remove
package2.
# aptitude install package1 package2-
[...]
Chapter 6 — Maintenance and Updates: The APT Tools 107](https://image.slidesharecdn.com/debian-handbook-120527093323-phpapp02/85/Debian-Handbook-133-320.jpg)
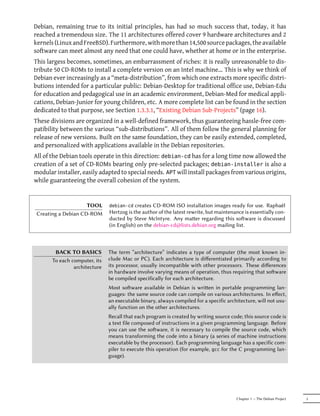
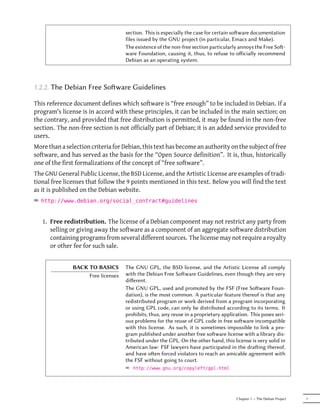
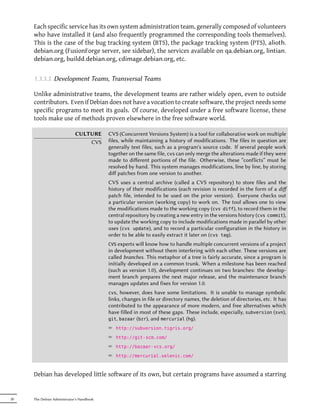
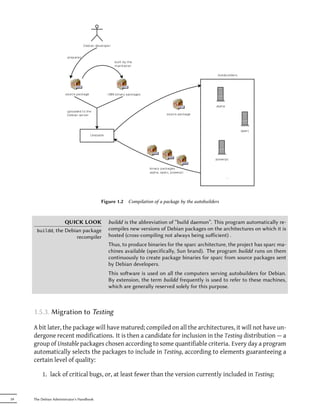
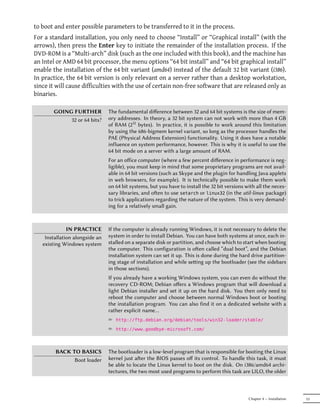
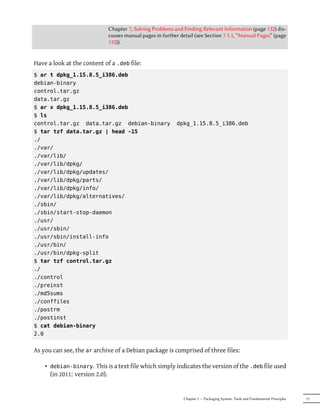
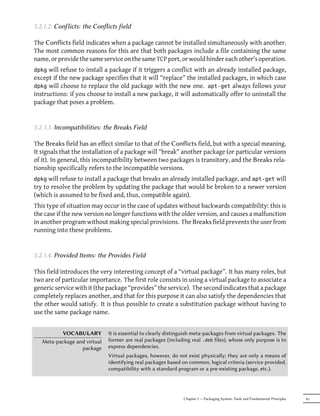
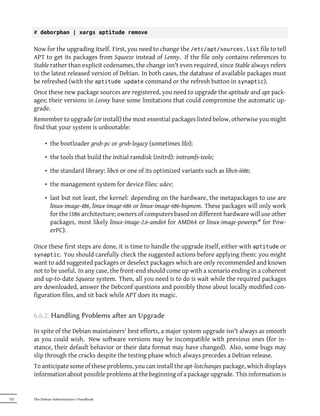
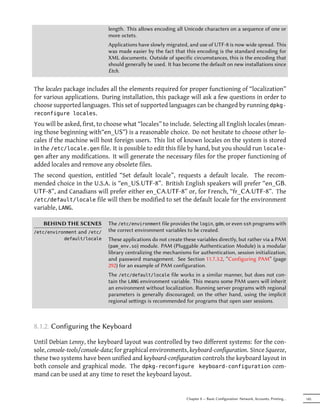
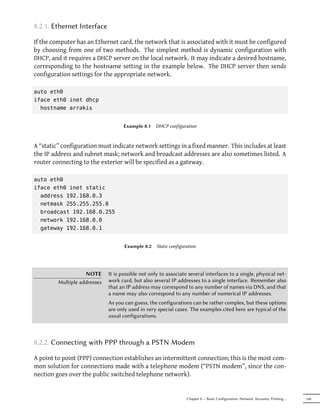
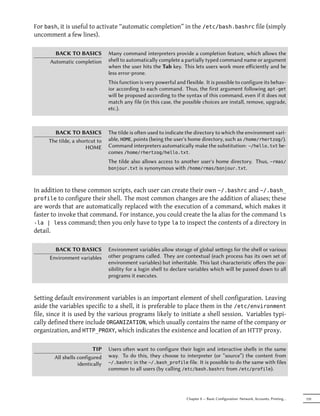
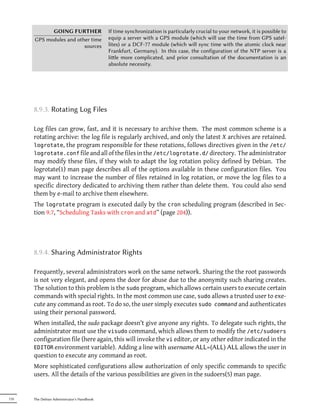
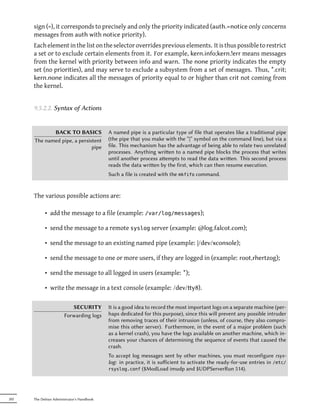
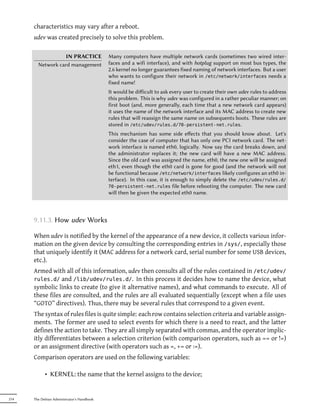
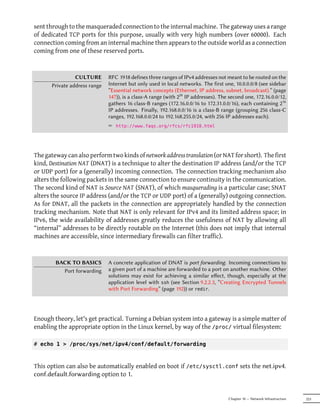
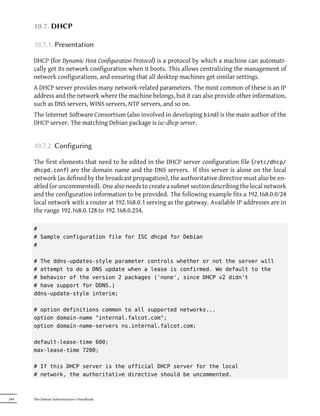
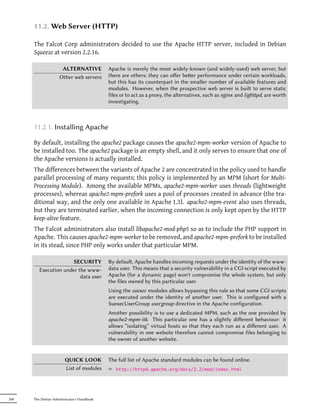
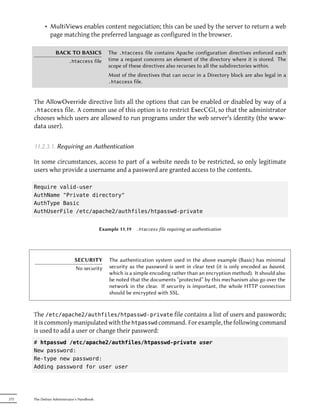
![# aptitude remove package1+ package2
[...]
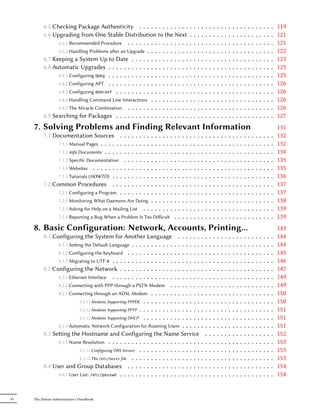
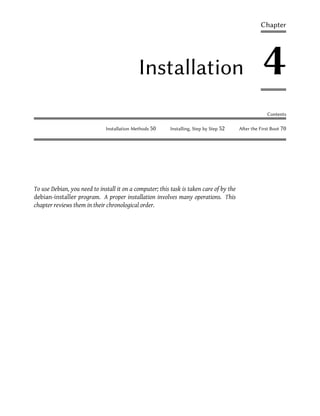
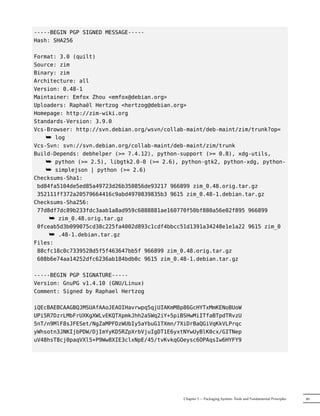
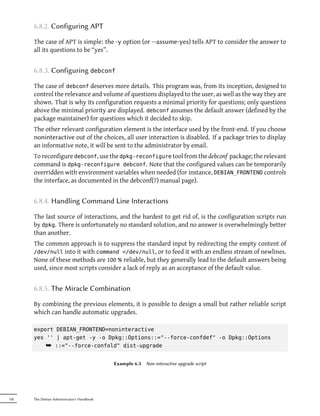
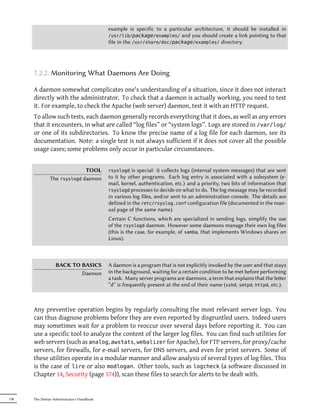
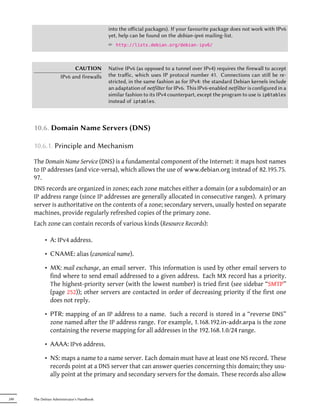
TIP The system can sometimes be damaged aer the removal or modification of
apt-get --reinstall and files in a package. The easiest way to retrieve these files is to reinstall the
aptitude reinstall affected package. Unfortunately, the packaging system finds that the laer
is already installed and politely refuses to reinstall it; to avoid this, use the --
reinstall option of the apt-get command. The following command reinstalls
postfix even if it is already present:
# apt-get --reinstall install postfix
The aptitude command line is slightly different, but achieves the same result
with aptitude reinstall postfix.
The problem does not arise with dpkg, but the administrator rarely uses it
directly.
Be careful, using apt-get --reinstall to restore packages modified during
an aack certainly cannot recover the system as it was. Section 14.6, “Dealing
with a Compromised Machine” (page 404) details the necessary steps to take
with a hacked system.
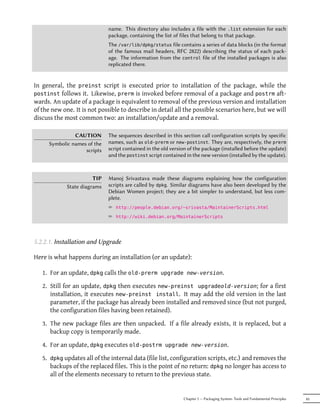
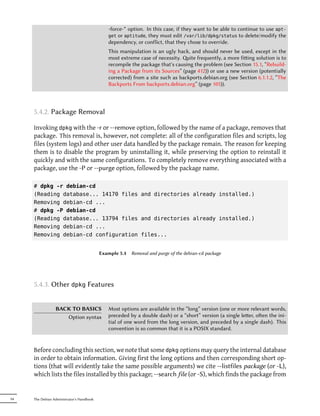
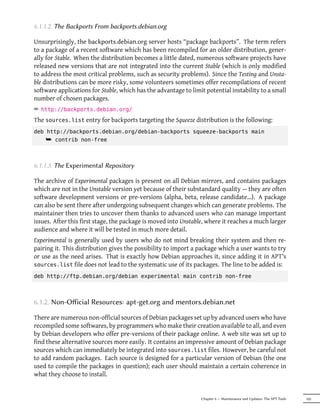
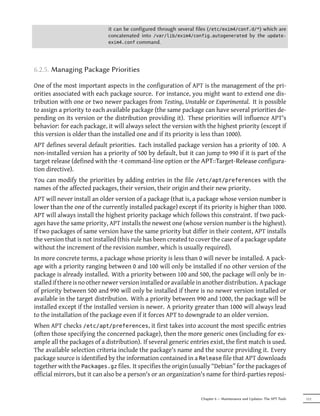
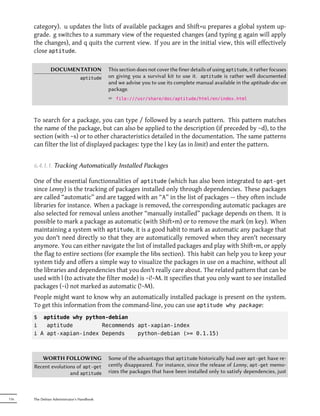
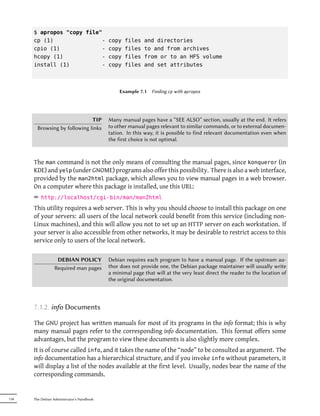
If the file sources.list mentions several distributions, it is possible to give the version of the
package to install. A specific version number can be requested with aptitude install pack
age=version, but indicating its distribution of origin (Stable, Testing or Unstable) — with aptitu
de install package/distribution — is usually preferred. With this command, it is possible
to go back to an older version of a package (if for instance you know that it works well), provided
that it is still available in one of the sources referenced by the sources.list file. Otherwise
the snapshot.debian.org archive can come to the rescue (see sidebar “Old package versions:
snapshot.debian.org” (page 106)).
# aptitude install spamassassin/unstable
Example 6.2 Installation of the unstable version of spamassassin
GOING FURTHER APT keeps a copy of each downloaded .deb file in the directory /var/cache/
The cache of .deb files apt/archives/. In case of frequent updates, this directory can quickly take a
lot of disk space with several versions of each package; you should regularly
sort through them. Two commands can be used: aptitude clean entirely
empties the directory; aptitude autoclean only removes packages which
cannot be downloaded (because they have disappeared from the Debian mir-
ror) and are therefore clearly useless (the configuration parameter APT::Clean-
Installed can prevent the removal of .deb files that are currently installed).
108 The Debian Administrator's Handbook](https://image.slidesharecdn.com/debian-handbook-120527093323-phpapp02/85/Debian-Handbook-134-320.jpg)
![6.4. Frontends: aptitude, synaptic
APT is a C++ program whose code mainly resides in the libapt-pkg shared library. Using a
shared library facilitates the creation of user interfaces (front-ends), since the code contained
in the library can easily be reused. Historically, apt-get was only designed as a test front-end
for libapt-pkg but its success tends to obscure this fact.
6.4.1. aptitude
aptitude is an interactive program that can be used in semi-graphical mode on the console. You
can browse the list of installed and available packages, look up all the available information,
and select packages to install or remove. The program is designed specifically to be used by
administrators, so that its default behaviors are much more intelligent than apt-get's, and its
interface much easier to understand.
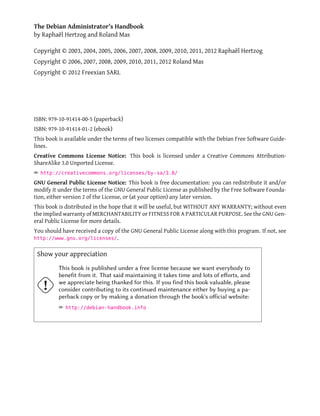
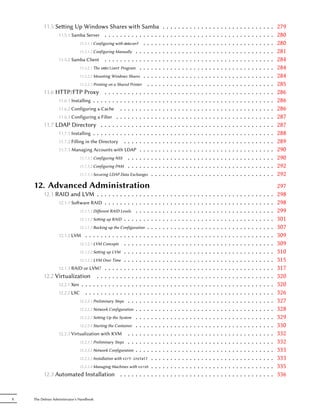
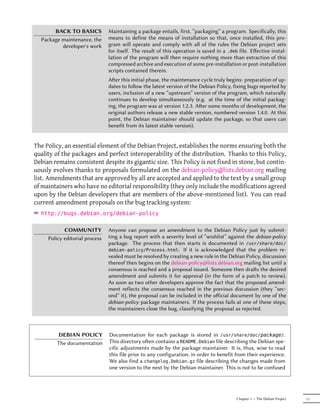
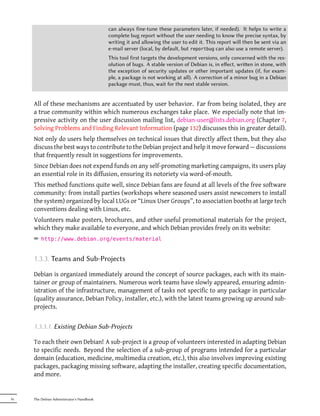
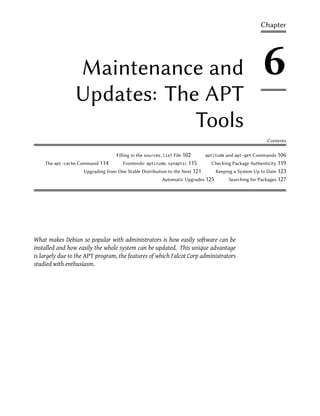
Figure 6.1 The aptitude package manager
When it starts, aptitude shows a list of packages sorted by state (installed, non-installed, or
installed but not available on the mirrors — other sections display tasks, virtual packages, and
new packages that appeared recently on mirrors). To facilitate thematic browsing, other views
are available. In all cases, aptitude displays a list combining categories and packages on the
screen. Categories are organized through a tree structure, whose branches can respectively
be unfolded or closed with the Enter, [ and ] keys. + should be used to mark a package for in-
stallation, - to mark it for removal and _ to purge it (note than these keys can also be used for
categories, in which case the corresponding actions will be applied to all the packages of the
Chapter 6 — Maintenance and Updates: The APT Tools 115](https://image.slidesharecdn.com/debian-handbook-120527093323-phpapp02/85/Debian-Handbook-141-320.jpg)

![provides a tamper-proof seal to guarantee — at install time — that a package really comes from
its official maintainer and hasn't been modified by a third party.
The seal works with a chain of cryptographical hashes and a signature. The signed file is the
Release file, provided by the Debian mirrors. It contains a list of the Packages files (including
their compressed forms, Packages.gz and Packages.bz2, and the incremental versions), along
with their MD5, SHA1 and SHA256 hashes, which ensures that the files haven't been tampered
with. These Packages files contain a list of the Debian packages available on the mirror, along
with their hashes, which ensures in turn that the contents of the packages themselves haven't
been altered either.
The trusted keys are managed with the apt-key command found in the apt package. This pro-
gram maintains a keyring of GnuPG public keys, which are used to verify signatures in the
Release.gpg files available on the mirrors. It can be used to add new keys manually (when
non-official mirrors are needed). Generally however, only the official Debian keys are needed.
These keys are automatically kept up-to-date by the debian-archive-keyring package (which in-
vokes apt-key when it is installed or upgraded). However, the first installation of this particu-
lar package requires caution: even if the package is signed like any other, the signature cannot
be verified externally. Cautious administrators should therefore check the fingerprints of im-
ported keys before trusting them to install new packages:
# apt-key fingerprint
/etc/apt/trusted.gpg
--------------------
pub 1024D/F42584E6 2008-04-06 [expires: 2012-05-15]
Key fingerprint = 7F5A 4445 4C72 4A65 CBCD 4FB1 4D27 0D06 F425 84E6
uid Lenny Stable Release Key <debian-release@lists.debian.org>
pub 4096R/55BE302B 2009-01-27 [expires: 2012-12-31]
Key fingerprint = 150C 8614 919D 8446 E01E 83AF 9AA3 8DCD 55BE 302B
uid Debian Archive Automatic Signing Key (5.0/lenny) <ftpmaster@debian.org>
pub 2048R/6D849617 2009-01-24 [expires: 2013-01-23]
Key fingerprint = F6CF DE30 6133 3CE2 A43F DAF0 DFD9 9330 6D84 9617
uid Debian-Volatile Archive Automatic Signing Key (5.0/lenny)
pub 4096R/B98321F9 2010-08-07 [expires: 2017-08-05]
Key fingerprint = 0E4E DE2C 7F3E 1FC0 D033 800E 6448 1591 B983 21F9
uid Squeeze Stable Release Key <debian-release@lists.debian.org>
pub 4096R/473041FA 2010-08-27 [expires: 2018-03-05]
Key fingerprint = 9FED 2BCB DCD2 9CDF 7626 78CB AED4 B06F 4730 41FA
uid Debian Archive Automatic Signing Key (6.0/squeeze) <ftpmaster@debian.org>
IN PRACTICE When a third-party package source is added to the sources.list file, APT
Adding trusted keys needs to be told about the corresponding GPG trusted key (otherwise it will
keep complaining that it can't ensure the authenticity of the packages coming
from that repository). The first step is of course to get the public key. More
oen than not, the key will be provided as a small text file, which we'll call
key.asc in the following examples.
To add the key to the trusted keyring, the administrator can run apt-key a
dd < key.asc. Another way is to use the synaptic graphical interface: its
120 The Debian Administrator's Handbook](https://image.slidesharecdn.com/debian-handbook-120527093323-phpapp02/85/Debian-Handbook-146-320.jpg)
![For more complex searches, a more powerful tool such as aptitude is required. aptitude al-
lows you to search according to a logical expression based on the package's meta-data fields.
For instance, the following command searches for packages whose name contains kino, whose
description contains video and whose maintainer's name contains paul:
$ aptitude search kino~dvideo~mpaul
p kino - Non-linear editor for Digital Video data
$ aptitude show kino
Package: kino
State: not installed
Version: 1.3.4-1+b1
Priority: extra
Section: video
Maintainer: Paul Brossier <piem@debian.org>
Uncompressed Size: 9519k
Depends: libasound2 (> 1.0.18), libatk1.0-0 (>= 1.20.0),
libavc1394-0 (>= 0.5.3), libavcodec52 (>= 4:0.5+svn20090706-3) |
libavcodec-extra-52 (>= 4:0.5+svn20090706-3), libavformat52
[…]
Recommends: ffmpeg, gawk | mawk, curl
Suggests: udev | hotplug, vorbis-tools, sox, mjpegtools, lame, ffmpeg2theora
Conflicts: kino-dvtitler, kino-timfx, kinoplus
Replaces: kino-dvtitler, kino-timfx, kinoplus
Provides: kino-dvtitler, kino-timfx, kinoplus
Description: Non-linear editor for Digital Video data
Kino allows you to record, create, edit, and play movies recorded with
DV camcorders. This program uses many keyboard commands for fast
navigating and editing inside the movie.
The kino-timfx, kino-dvtitler and kinoplus sets of plugins, formerly
distributed as separate packages, are now provided with Kino.
Homepage: http://www.kinodv.org/
Tags: hardware::camera, implemented-in::c, implemented-in::c++,
interface::x11, role::program, scope::application,
suite::gnome, uitoolkit::gtk, use::editing,
works-with::video, x11::application
The search only returns one package, kino, which satisfies all three criteria.
Even these multi-criteria searches are rather unwieldy, which explains why they are not used as
much as they could. A new tagging system has therefore been developed, and it provides a new
approach to searching. Packages are given tags that provide a thematical classification along
several strands, known as a “facet-based classification”. In the case of kino above, the package's
tags indicate that Kino is a Gnome-based software that works on video data and whose main
128 The Debian Administrator's Handbook](https://image.slidesharecdn.com/debian-handbook-120527093323-phpapp02/85/Debian-Handbook-154-320.jpg)


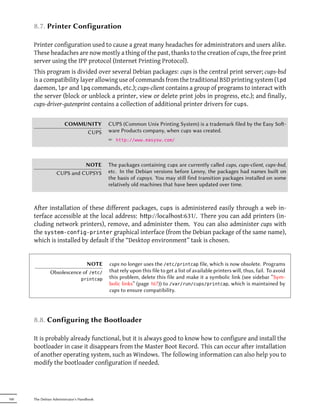
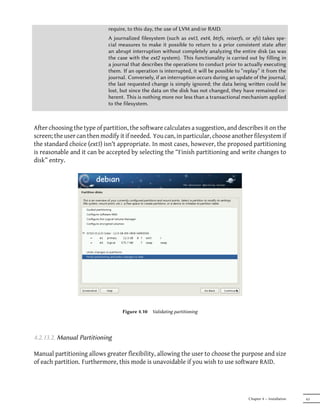
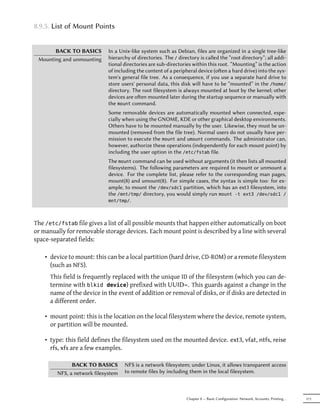
![Configuration of the bootloader must identify the different hard drives and their partitions.
Linux uses a special filesystem (in “block” mode) stored in the /dev/ directory, for this purpose.
Historically, /dev/hda was the master disk on the first IDE controller, and /dev/hdb its first
slave, /dev/hdc and /dev/hdd being, respectively, the master and slave disks on the second IDE
controller, and so on down for any others. /dev/sda corresponded to the first SCSI drive, /dev/
sdb being the second, etc. This naming scheme has been unified with the Linux kernel present
in Squeeze, and all hard drives (IDE/PATA, SATA, SCSI, USB, IEEE 1394) are now represented by
/dev/sd*.
Each partition is represented by its number on the disk on which it resides: for instance, /dev/
sda1 is the first partition on the first disk, and /dev/sdb3 is the third partition on the second
disk.
The PC architecture (or “i386”) is limited to four “primary” partitions per disk. To go beyond
this limitation, one of them must be created as an “extended” partition, and it can then contain
additional “secondary” partitions. These secondary partitions must be numbered from 5. Thus
the first secondary partition could be /dev/sda5, followed by /dev/sda6, etc.
It is not always easy to remember what disk is connected to which SATA controller, or in third
position in the SCSI chain, especially since the naming of hotplugged hard drives (which in-
cludes among others most SATA disks and external disks) can change from one boot to another.
Fortunately, udev creates, in addition to /dev/sd*, symbolic links with a fixed name, which you
could then use if you wished to identify a hard drive in a non-ambiguous manner. These sym-
bolic links are stored in /dev/disk/by-id. On a machine with two physical disks, for example,
one could find the following:
mirexpress:/dev/disk/by-id# ls -l
total 0
lrwxrwxrwx 1 root root 9 23 jul. 08:58 ata-STM3500418AS_9VM3L3KP -> ../../
¯ sda
lrwxrwxrwx 1 root root 10 23 jul. 08:58 ata-STM3500418AS_9VM3L3KP-part1 ->
¯ ../../sda1
lrwxrwxrwx 1 root root 10 23 jul. 08:58 ata-STM3500418AS_9VM3L3KP-part2 ->
¯ ../../sda2
[...]
lrwxrwxrwx 1 root root 9 23 jul. 08:58 ata-WDC_WD5001AALS-00L3B2_WD-
¯ WCAT00241697 -> ../../sdb
lrwxrwxrwx 1 root root 10 23 jul. 08:58 ata-WDC_WD5001AALS-00L3B2_WD-
¯ WCAT00241697-part1 -> ../../sdb1
lrwxrwxrwx 1 root root 10 23 jul. 08:58 ata-WDC_WD5001AALS-00L3B2_WD-
¯ WCAT00241697-part2 -> ../../sdb2
[...]
lrwxrwxrwx 1 root root 9 23 jul. 08:58 scsi-SATA_STM3500418AS_9VM3L3KP ->
¯ ../../sda
lrwxrwxrwx 1 root root 10 23 jul. 08:58 scsi-SATA_STM3500418AS_9VM3L3KP-part1
¯ -> ../../sda1
162 The Debian Administrator's Handbook](https://image.slidesharecdn.com/debian-handbook-120527093323-phpapp02/85/Debian-Handbook-188-320.jpg)
![lrwxrwxrwx 1 root root 10 23 jul. 08:58 scsi-SATA_STM3500418AS_9VM3L3KP-part2
¯ -> ../../sda2
[...]
lrwxrwxrwx 1 root root 9 23 jul. 08:58 scsi-SATA_WDC_WD5001AALS-_WD-
¯ WCAT00241697 -> ../../sdb
lrwxrwxrwx 1 root root 10 23 jul. 08:58 scsi-SATA_WDC_WD5001AALS-_WD-
¯ WCAT00241697-part1 -> ../../sdb1
lrwxrwxrwx 1 root root 10 23 jul. 08:58 scsi-SATA_WDC_WD5001AALS-_WD-
¯ WCAT00241697-part2 -> ../../sdb2
[...]
lrwxrwxrwx 1 root root 9 23 jul. 16:48 usb-LaCie_iamaKey_3ed00e26ccc11a-0:0
¯ -> ../../sdc
lrwxrwxrwx 1 root root 10 23 jul. 16:48 usb-LaCie_iamaKey_3ed00e26ccc11a-0:0-
¯ part1 -> ../../sdc1
lrwxrwxrwx 1 root root 10 23 jul. 16:48 usb-LaCie_iamaKey_3ed00e26ccc11a-0:0-
¯ part2 -> ../../sdc2
[...]
lrwxrwxrwx 1 root root 9 23 jul. 08:58 wwn-0x5000c50015c4842f -> ../../sda
lrwxrwxrwx 1 root root 10 23 jul. 08:58 wwn-0x5000c50015c4842f-part1 ->
¯ ../../sda1
[...]
mirexpress:/dev/disk/by-id#
Note that some disks are listed several times (because they behave simultaneously as ATA disks
and SCSI disks), but the relevant information is mainly in the model and serial numbers of the
disks, from which you can find the peripheral file.
The example configuration files given in the following sections are based on the same setup: a
single master IDE disk, where the first partition is an old Windows installation and the second
contains Debian GNU/Linux.
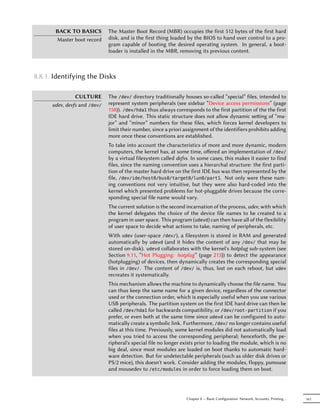
8.8.2. Configuring LILO
LILO (LInux LOader) is the oldest bootloader — solid but rustic. It writes the physical address of
the kernel to boot on the MBR, which is why each update to LILO (or its configuration file) must
be followed by the command lilo. Forgetting to do so will render a system unable to boot if
the old kernel was removed or replaced as the new one will not be in the same location on the
disk.
LILO's configuration file is /etc/lilo.conf; a simple file for standard configuration is illus-
trated in the example below.
# The disk on which LILO should be installed.
# By indicating the disk and not a partition.
# you order LILO to be installed on the MBR.
Chapter 8 — Basic Configuration: Network, Accounts, Printing… 163](https://image.slidesharecdn.com/debian-handbook-120527093323-phpapp02/85/Debian-Handbook-189-320.jpg)

![the choices saved in the .config file. If there is no such file, it behaves like make config, a text
interface that asks all questions (hundreds of them) one a time. If the .config file already exists
but doesn't mention all the existing options, then this method will only ask questions for which
the file has no saved answer.
TIP make-kpkg can be told to use configuration methods other than make oldco
make-kpkg --config nfig, by indicating the target (menuconfig, xconfig or gconfig) in the make-
kpkg invocation with the --config option.
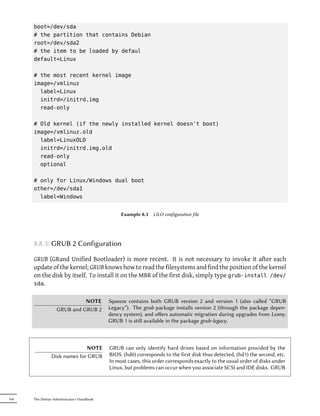
8.10.4. Compiling and Building the Package
NOTE If you have already compiled once in the directory and wish to recompile with
Clean up before rebuilding new sources, you must run fakeroot make-kpkg clean. Additionally, this
allows generating a package with a new name (different --append-to-version
seing).
TIP make-kpkg uses information contained in the /etc/kernel-pkg.conf file to
Kernel package headers generate headers for the Debian kernel package. It is recommended to edit
this file with correct information if you wish to publish your kernel package.
Once the kernel configuration is ready, the make-pkg command provided by Debian compiles
the kernel, then generates the corresponding Debian package (or packages). Just like make,
make-pkg takes the name of a target to execute as an argument: kernel-image generates a com-
piled kernel package, kernel-doc a package containing the documentation included with the
kernel, kernel-headers a package of kernel header files (.h files for the kernel in the include/
directory, which is useful for compilation of some external modules), and kernel-source creates
a package containing the kernel sources.
make-kpkg also accepts several parameters: --append-to-version suffix appends suffix to the
name of the kernel; the suffix is also included in the package name. --revision revision defines
the version number of the package generated. Debian uses certain suffixes to identify standard
kernels, compiled specifically for a given processor, or with certain options (-486, -686, -686-
bigmem, -amd64, -vserver-686, -vserver-686-bigmem, -openvz-686, -xen-686). These suffixes
are best avoided for local packages, so that they can be easily recognized from official packages
issued by the Debian project.
The make-kpkg program performs actions normally restricted to the root user when creating
the Debian package; however, it can be tricked into working under a normal user's identity,
with fakeroot (see sidebar “fakeroot” (page 414)).
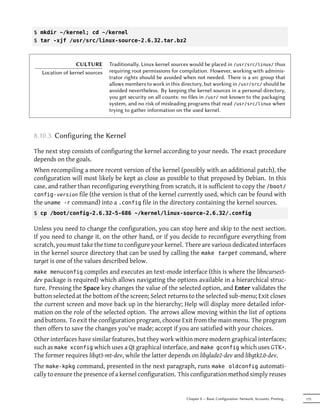
$ fakeroot make-kpkg --append-to-version -falcot --revision 1 --initrd kernel-image
[...]
$ ls ../*.deb
../linux-image-2.6.32-falcot_1_i386.deb
176 The Debian Administrator's Handbook](https://image.slidesharecdn.com/debian-handbook-120527093323-phpapp02/85/Debian-Handbook-202-320.jpg)
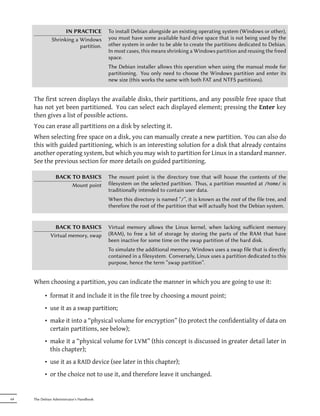
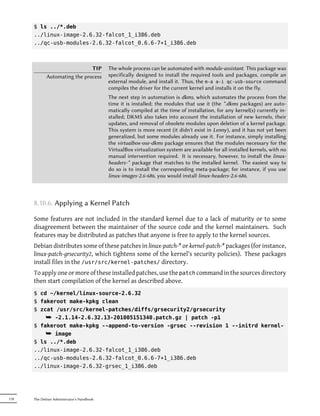
![As you can see, the package is created with the name “linux-image-2.6.32-falcot_1_i386.
deb”.
8.10.5. Compiling External Modules
Some modules are maintained outside of the official Linux kernel. To use them, they must be
compiled alongside the matching kernel. A number of common third party modules are pro-
vided by Debian in dedicated packages: lustre-source for the Lustre filesystem, qc-usb-source for
the drivers for some USB webcams (Logitech QuickCam Express), etc.
These external packages are many and varied and we won't list them all here; the apt-cache
search source$ command can narrow down the search field. However, a complete list isn't
particularly useful since there is no particular reason for compiling external modules except
when you know you need it. In such cases, the device's documentation will typically detail the
specific module(s) it needs to function under Linux.
For example, let's look at the qc-usb-source package: after installation, a .tar.gz of the module's
sources is stored in /usr/src/. These sources must then be extracted to the working directory:
$ cd ~/kernel/
$ tar xjf /usr/src/qc-usb.tar.bz2
$ ls modules/
qc-usb
NOTE When using the make-kpkg modules-image command, it is important to use
Save the seings the same --append-to-version seing used in the previous use of the com-
mand (probably make-kpkg kernel-image), since its value affects the name
of the directory in which the modules are installed, which must correspond
to the kernel version.
Note that make-kpkg must still be invoked from the kernel sources directory,
even when compiling external modules located in other directories.
The module sources are now located in the ~/kernel/modules/qc-usb/ directory. To compile
these modules and create a Debian package, we invoke make-kpkg with the modules-image tar-
get and indicate the location of the modules via the MODULE_LOC environment variable (without
this variable, it uses /usr/src/modules/, which won't work in our case). By default, it tries to
create the packages for all the external modules that can be found at this location extracted.
The --added-modules option allows to explicitly choose the external modules to compile. To
include more than one, separate them with a comma.
$ export MODULE_LOC=~/kernel/modules
$ cd ~/kernel/linux-source-2.6.32
$ fakeroot make-kpkg --append-to-version -falcot modules-image
[...]
Module /home/roland/kernel/modules/qc-usb processed fine
Chapter 8 — Basic Configuration: Network, Accounts, Printing… 177](https://image.slidesharecdn.com/debian-handbook-120527093323-phpapp02/85/Debian-Handbook-203-320.jpg)
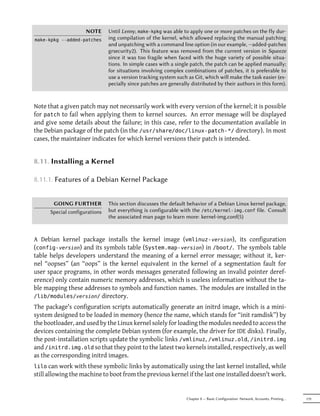


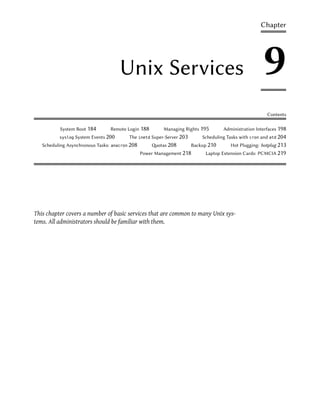


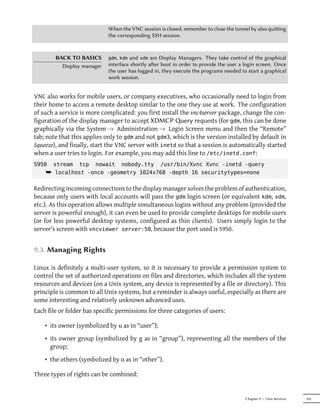
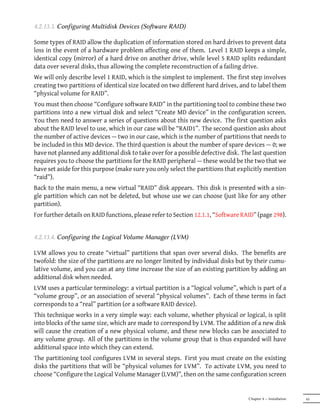
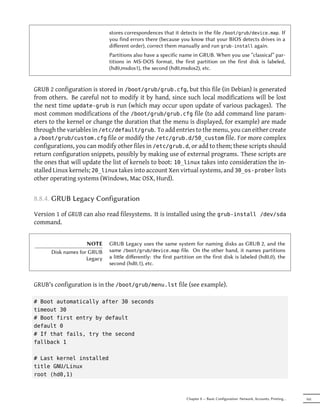
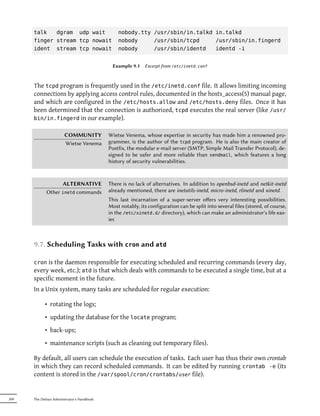
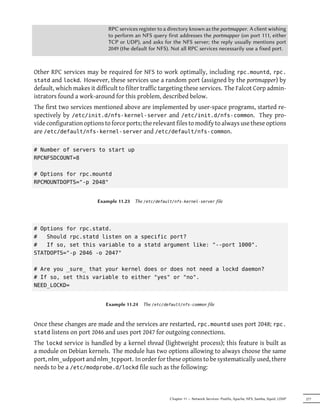
![9.6. The inetd Super-Server
Inetd (often called “Internet super-server”) is a server of servers. It executes rarely used servers
on demand, so that they do not have to run continuously.
The /etc/inetd.conf file lists these servers and their usual ports. The inetd command listens
to all of them; when it detects a connection to any such port, it executes the corresponding
server program.
DEBIAN POLICY Packages frequently want to register a new server in the /etc/inetd.conf
Register a server in inetd. file, but Debian Policy prohibits any package from modifying a configuration
conf file that it doesn't own. This is why the updated-inetd script (in the pack-
age with the same name) was created: It manages the configuration file, and
other packages can thus use it to register a new server to the super-server's
configuration.
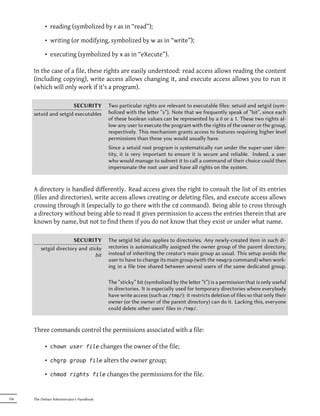
Each significant line of the /etc/inetd.conf file describes a server through seven fields (sep-
arated by spaces):
• The TCP or UDP port number, or the service name (which is mapped to a standard port
number with the information contained in the /etc/services file).
• The socket type: stream for a TCP connection, dgram for UDP datagrams.
• The protocol: tcp or udp.
• The options: two possible values: wait or nowait, to tell inetd whether it should wait
or not for the end of the launched process before accepting another connection. For TCP
connections, easily multiplexable, you can usually use nowait. For programs responding
over UDP, you should use nowait only if the server is capable of managing several con-
nections in parallel. You can suffix this field with a period, followed by the maximum
number of connections authorized per minute (the default limit is 40).
• The user name of the user under whose identity the server will run.
• The full path to the server program to execute.
• The arguments: this is a complete list of the program's arguments, including its own name
(argv[0] in C).
The following example illustrates the most common cases:
Chapter 9 — Unix Services 203](https://image.slidesharecdn.com/debian-handbook-120527093323-phpapp02/85/Debian-Handbook-229-320.jpg)
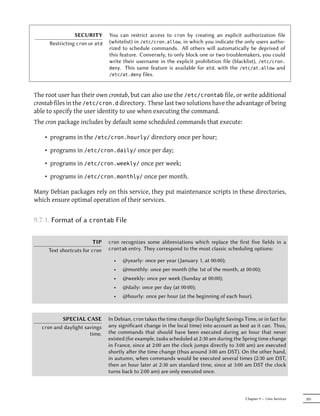
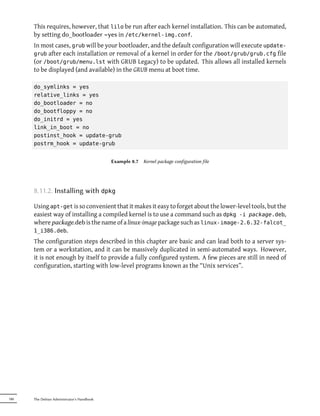
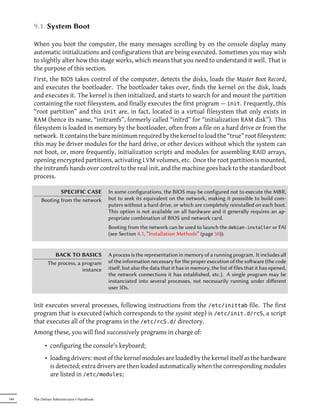
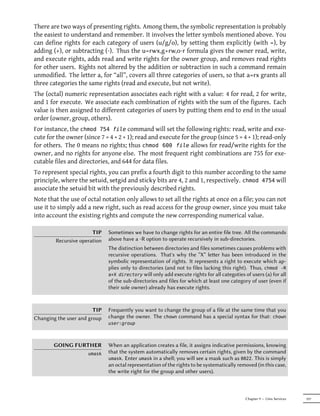
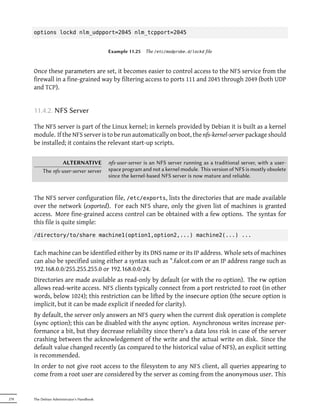
![# Restart the IRC proxy after each reboot
@reboot /usr/bin/dircproxy
Example 9.2 Sample crontab file
TIP To execute a command a single time, just aer booting the computer, you can
Executing a command on use the @reboot macro (a simple restart of cron does not trigger a command
boot scheduled with @reboot). This macro replaces the first five fields of an entry
in the crontab.
9.7.2. Using the at Command
The at executes a command at a specified moment in the future. It takes the desired time and
date as command-line parameters, and the command to be executed in its standard input. The
command will be executed as if it had been entered in the current shell. at even takes care to
retain the current environment, in order to reproduce the same conditions when it executes
the command. The time is indicated by following the usual conventions: 16:12 or 4:12pm rep-
resents 4:12 pm. The date can be specified in several European and Western formats, including
DD.MM.YY (27.07.12 thus representing 27 July 2012), YYYY-MM-DD (this same date being
expressed as 2012-07-27), MM/DD/[CC]YY (ie., 12/25/12 or 12/25/2012 will be December 25,
2012), or simple MMDD[CC]YY (so that 122512 or 12252012 will, likewise, represent Decem-
ber 25, 2012). Without it, the command will be executed as soon as the clock reaches the time
indicated (the same day, or tomorrow if that time has already passed on the same day). You can
also simply write “today” or “tomorrow”, which is self-explanatory.
$ at 09:00 27.07.12 <<END
> echo "Don't forget to wish a Happy Birthday to Raphaël!"
> | mail lolando@debian.org
> END
warning: commands will be executed using /bin/sh
job 31 at Fri Jul 27 09:00:00 2012
An alternative syntax postpones the execution for a given duration: at now + number period.
The period can be minutes, hours, days, or weeks. The number simply indicates the number of
said units that must elapse before execution of the command.
To cancel a task scheduled by cron, simply run crontab -e and delete the corresponding line
in the crontab file. For at tasks, it is almost as easy: run atrm task-number. The task number
is indicated by the at command when you scheduled it, but you can find it again with the atq
command, which gives the current list of scheduled tasks.
Chapter 9 — Unix Services 207](https://image.slidesharecdn.com/debian-handbook-120527093323-phpapp02/85/Debian-Handbook-233-320.jpg)


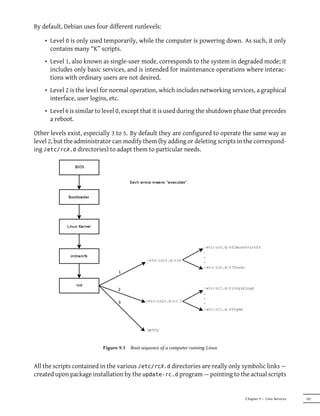
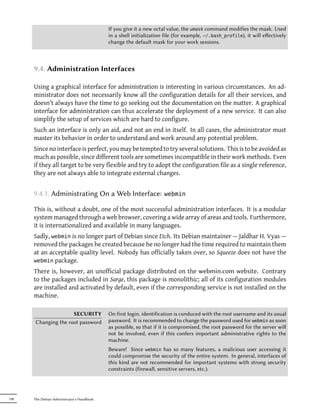
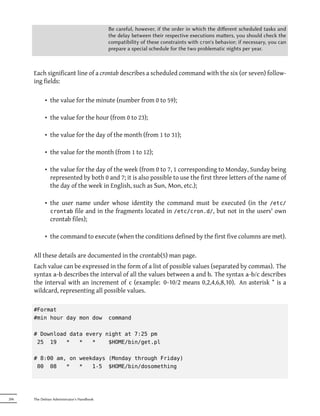
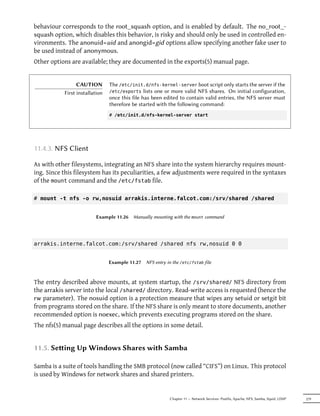
![• ACTION: the action corresponding to the event (“add” when a device has been added,
“remove” when it has been removed);
• DEVPATH: the path of the device's /sys/ entry;
• SUBSYSTEM: the kernel subsystem which generated the request (there are many, but a
few examples are “usb”, “ide”, “net”, “firmware”, etc.);
• ATTR{aribut}: file contents of the attribute file in the /sys/$devpath/ directory of the
device. This is where you find the MAC address and other bus specific identifiers;
• KERNELS, SUBSYSTEMS and ATTRS{aributes} are variations that will try to match the
different options on one of the parent devices of the current device;
• PROGRAM: delegates the test to the indicated program (true if it returns 0, false if not).
The content of the program's standard output is stored so that it can be reused by the
RESULT test;
• RESULT: execute tests on the standard output stored during the last call to PROGRAM.
The right operands can use pattern expressions to match several values at the same time. For
instance, * matches any string (even an empty one); ? matches any character, and [] matches
the set of characters listed between the square brackets (or the opposite thereof if the first
character is an exclamation point, and contiguous ranges of characters are indicated like a-z).
Regarding the assignment operators, = assigns a value (and replaces the current value); in the
case of a list, it is emptied and contains only the value assigned. := does the same, but prevents
later changes to the same variable. As for +=, it adds an item to a list. The following variables
can be changed:
• NAME: the device filename to be created in /dev/. Only the first assignment counts; the
others are ignored;
• SYMLINK: the list of symbolic links that will point to the same device;
• OWNER, GROUP and MODE define the user and group that owns the device, as well as
the associated permission;
• RUN: the list of programs to execute in response to this event.
The values assigned to these variables may use a number of substitutions:
• $kernel or %k: equivalent to KERNEL;
• $number or %n: the order number of the device, for example, for sda3, it would be “3”;
• $devpath or %p: equivalent to DEVPATH;
• $attr{aribute} or %s{aribute}: equivalent to ATTRS{aribute};
Chapter 9 — Unix Services 215](https://image.slidesharecdn.com/debian-handbook-120527093323-phpapp02/85/Debian-Handbook-241-320.jpg)
![• $major or %M: the kernel major number of the device;
• $minor or %m: the kernel minor number of the device;
• $result or %c: the string output by the last program invoked by PROGRAM;
• and, finally, %% and $$ for the percent and dollar sign, respectively.
The above lists are not complete (they include only the most important parameters), but the
udev(7) manual page should be.
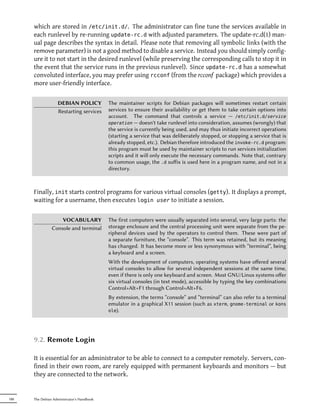
9.11.4. A concrete example
Let us consider the case of a simple USB key and try to assign it a fixed name. First, you must
find the elements that will identify it in a unique manner. For this, plug it in and run udevadm
info -a -n /dev/sdc (replacing /dev/sdc with the actual name assigned to the key).
# udevadm info -a -n /dev/sdc
[...]
looking at device '/devices/pci0000:00/0000:00:10.3/usb1
¯ /1-2/1-2.2/1-2.2:1.0/host9/target9:0:0/9:0:0:0/block/sdc':
KERNEL=="sdc"
SUBSYSTEM=="block"
DRIVER==""
ATTR{range}=="16"
ATTR{ext_range}=="256"
ATTR{removable}=="1"
ATTR{ro}=="0"
ATTR{size}=="126976"
ATTR{alignment_offset}=="0"
ATTR{capability}=="53"
ATTR{stat}==" 51 100 1208 256 0 0
¯ 0 0 0 192 25 6"
ATTR{inflight}==" 0 0"
[...]
looking at parent device '/devices/pci0000:00/0000:00:10.3/usb1
¯ /1-2/1-2.2/1-2.2:1.0/host9/target9:0:0/9:0:0:0':
KERNELS=="9:0:0:0"
SUBSYSTEMS=="scsi"
DRIVERS=="sd"
ATTRS{device_blocked}=="0"
ATTRS{type}=="0"
ATTRS{scsi_level}=="3"
ATTRS{vendor}=="I0MEGA "
ATTRS{model}=="UMni64MB*IOM2C4 "
216 The Debian Administrator's Handbook](https://image.slidesharecdn.com/debian-handbook-120527093323-phpapp02/85/Debian-Handbook-242-320.jpg)
![ATTRS{rev}==" "
ATTRS{state}=="running"
[...]
ATTRS{max_sectors}=="240"
[...]
looking at parent device '/devices/pci0000:00/0000:00:10.3/usb1/1-2/1-2.2':
KERNELS=="9:0:0:0"
SUBSYSTEMS=="usb"
DRIVERS=="usb"
ATTRS{configuration}=="iCfg"
ATTRS{bNumInterfaces}==" 1"
ATTRS{bConfigurationValue}=="1"
ATTRS{bmAttributes}=="80"
ATTRS{bMaxPower}=="100mA"
ATTRS{urbnum}=="398"
ATTRS{idVendor}=="4146"
ATTRS{idProduct}=="4146"
ATTRS{bcdDevice}=="0100"
[...]
ATTRS{manufacturer}=="USB Disk"
ATTRS{product}=="USB Mass Storage Device"
ATTRS{serial}=="M004021000001"
[...]
To create a new rule, you can use tests on the device's variables, as well as those of one of the
parent devices. The above case allows us to create two rules like these:
KERNEL=="sd?", SUBSYSTEM=="block", ATTRS{serial}=="M004021000001", SYMLINK+="
¯ usb_key/disk"
KERNEL=="sd?[0-9]", SUBSYSTEM=="block", ATTRS{serial}=="M004021000001",
¯ SYMLINK+="usb_key/part%n"
Once these rules are set in a file, named for example /etc/udev/rules.d/010_local.rules,
you can simply remove and reconnect the USB key. You can then see that /dev/usb_key/disk
represents the disk associated with the USB key, and /dev/usb_key/part1 is its first partition.
GOING FURTHER Like many daemons, udevd stores logs in /var/log/daemon.log. But it is not
Debugging udev's very verbose by default, and it's usually not enough to understand what's hap-
configuration pening. The udevadm control --log-priority=info command increases the
verbosity level and solves this problem. udevadm control --log-priority=
err returns to the default verbosity level.
Chapter 9 — Unix Services 217](https://image.slidesharecdn.com/debian-handbook-120527093323-phpapp02/85/Debian-Handbook-243-320.jpg)


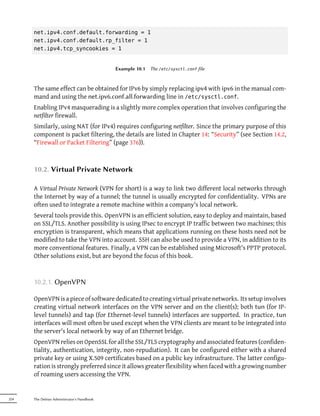
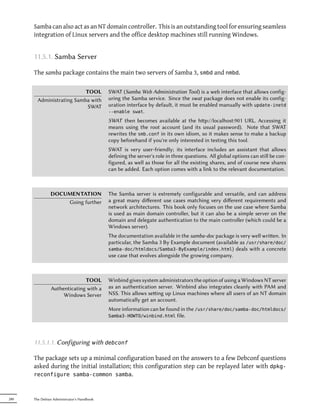
![export KEY_DIR="$EASY_RSA/keys"
echo NOTE: If you run ./clean-all, I will be doing a rm -rf on $KEY_DIR
export KEY_SIZE=1024
export KEY_EXPIRE=3650
export KEY_COUNTRY="FR"
export KEY_PROVINCE="Loire"
export KEY_CITY="Saint-Étienne"
export KEY_ORG="Falcot Corp"
export KEY_EMAIL="admin@falcot.com"
$ . ./vars
NOTE: If you run ./clean-all, I will be doing a rm -rf on /home/rhertzog/pki-
¯ falcot/keys
$ ./clean-all
The next step is the creation of the CA's key pair itself (the two parts of the key pair will be
stored under keys/ca.crt and keys/ca.key during this step):
$ ./build-ca
Generating a 1024 bit RSA private key
..............................................++++++
.......................++++++
writing new private key to 'ca.key'
-----
You are about to be asked to enter information that will be incorporated
into your certificate request.
What you are about to enter is what is called a Distinguished Name or a DN.
There are quite a few fields but you can leave some blank
For some fields there will be a default value,
If you enter '.', the field will be left blank.
-----
Country Name (2 letter code) [FR]:
State or Province Name (full name) [Loire]:
Locality Name (eg, city) [Saint-Étienne]:
Organization Name (eg, company) [Falcot Corp]:
Organizational Unit Name (eg, section) []:
Common Name (eg, your name or your server's hostname) [Falcot Corp CA]:
Name []:
Email Address [admin@falcot.com]:
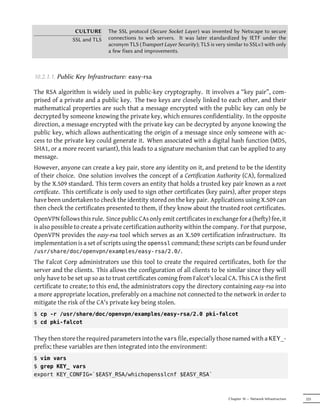
The certificate for the VPN server can now be created, as well as the Diffie-Hellman parameters
required for the server side of an SSL/TLS connection. The VPN server is identified by its DNS
name vpn.falcot.com; this name is re-used for the generated key files (keys/vpn.falcot.com.
226 The Debian Administrator's Handbook](https://image.slidesharecdn.com/debian-handbook-120527093323-phpapp02/85/Debian-Handbook-252-320.jpg)
![crt for the public certificate, keys/vpn.falcot.com.keyfor the private key):
$ ./build-key-server vpn.falcot.com
Generating a 1024 bit RSA private key
...............++++++
...........++++++
writing new private key to 'vpn.falcot.com.key'
-----
You are about to be asked to enter information that will be incorporated
into your certificate request.
What you are about to enter is what is called a Distinguished Name or a DN.
There are quite a few fields but you can leave some blank
For some fields there will be a default value,
If you enter '.', the field will be left blank.
-----
Country Name (2 letter code) [FR]:
State or Province Name (full name) [Loire]:
Locality Name (eg, city) [Saint-Étienne]:
Organization Name (eg, company) [Falcot Corp]:
Organizational Unit Name (eg, section) []:
Common Name (eg, your name or your server's hostname) [vpn.falcot.com]:
Name []:
Email Address [admin@falcot.com]:
Please enter the following 'extra' attributes
to be sent with your certificate request
A challenge password []:
An optional company name []:
Using configuration from /home/rhertzog/pki-falcot/openssl.cnf
Check that the request matches the signature
Signature ok
The Subject's Distinguished Name is as follows
countryName :PRINTABLE:'FR'
stateOrProvinceName :PRINTABLE:'Loire'
localityName :T61STRING:'Saint-0xFFFFFFC30xFFFFFF89tienne'
organizationName :PRINTABLE:'Falcot Corp'
commonName :PRINTABLE:'vpn.falcot.com'
emailAddress :IA5STRING:'admin@falcot.com'
Certificate is to be certified until Oct 9 13:57:42 2020 GMT (3650 days)
Sign the certificate? [y/n]:y
1 out of 1 certificate requests certified, commit? [y/n]y
Write out database with 1 new entries
Chapter 10 — Network Infrastructure 227](https://image.slidesharecdn.com/debian-handbook-120527093323-phpapp02/85/Debian-Handbook-253-320.jpg)
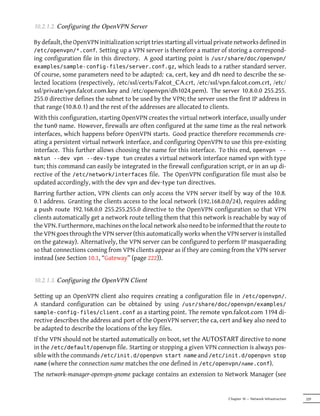
![Data Base Updated
$ ./build-dh
Generating DH parameters, 1024 bit long safe prime, generator 2
This is going to take a long time
..............+.......+.................................++*++*++*
The following step creates certificates for the VPN clients; one certificate is required for each
computer or person allowed to use the VPN:
$ ./build-key JoeSmith
Generating a 1024 bit RSA private key
................++++++
.............................++++++
writing new private key to 'JoeSmith.key'
-----
You are about to be asked to enter information that will be incorporated
into your certificate request.
What you are about to enter is what is called a Distinguished Name or a DN.
There are quite a few fields but you can leave some blank
For some fields there will be a default value,
If you enter '.', the field will be left blank.
-----
Country Name (2 letter code) [FR]:
State or Province Name (full name) [Loire]:
Locality Name (eg, city) [Saint-Étienne]:
Organization Name (eg, company) [Falcot Corp]:
Organizational Unit Name (eg, section) []:
Common Name (eg, your name or your server's hostname) [JoeSmith]:Joe Smith
Name []:
Email Address [admin@falcot.com]:joe@falcot.com
[…]
Now all certificates have been created, they need to be copied where appropriate: the root
certificate's public key (keys/ca.crt) will be stored on all machines (both server and clients)
as /etc/ssl/certs/Falcot_CA.crt. The server's certificate is installed only on the server
(keys/vpn.falcot.com.crt goes to /etc/ssl/vpn.falcot.com.crt, and keys/vpn.falcot.
com.key goes to /etc/ssl/private/vpn.falcot.com.key with restricted permissions so that
only the administrator can read it), with the corresponding Diffie-Hellman parameters (keys/
dh1024.pem) installed to /etc/openvpn/dh1024.pem. Client certificates are installed on the
corresponding VPN client in a similar fashion.
228 The Debian Administrator's Handbook](https://image.slidesharecdn.com/debian-handbook-120527093323-phpapp02/85/Debian-Handbook-254-320.jpg)
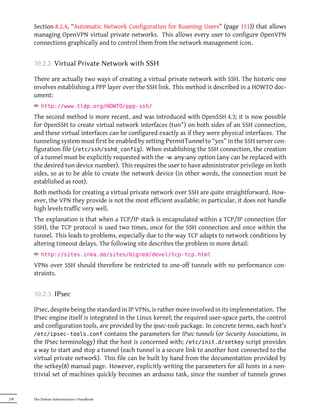

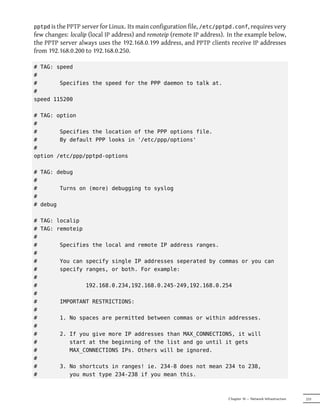
![# vpn.falcot.com is the PPTP server
pty "pptp vpn.falcot.com --nolaunchpppd"
# the connection will identify as the "vpn" user
user vpn
remotename pptp
# encryption is needed
require-mppe-128
file /etc/ppp/options.pptp
ipparam falcot
Example 10.3 The /etc/ppp/peers/falcot file
# Create the route to the Falcot network
if [ "$6" = "falcot" ]; then
# 192.168.0.0/24 is the (remote) Falcot network
route add -net 192.168.0.0 netmask 255.255.255.0 dev $1
fi
Example 10.4 The /etc/ppp/ip-up.d/falcot file
# Delete the route to the Falcot network
if [ "$6" = "falcot" ]; then
# 192.168.0.0/24 is the (remote) Falcot network
route del -net 192.168.0.0 netmask 255.255.255.0 dev $1
fi
Example 10.5 The /etc/ppp/ip-down.d/falcot file
SECURITY Securing PPTP involves using the MPPE feature (Microso Point-to-Point En-
MPPE cryption), which is available in official Debian kernels as a module.
10.2.4.2. Configuring the Server
CAUTION Intermediate firewalls need to be configured to let through IP packets using
PPTP and firewalls protocol 47 (GRE). Moreover, the PPTP server's port 1723 needs to be open so
that the communication channel can happen.
232 The Debian Administrator's Handbook](https://image.slidesharecdn.com/debian-handbook-120527093323-phpapp02/85/Debian-Handbook-258-320.jpg)
![udp6 0 0 fe80::a00:27ff:fe6c:123 :::* 764/ntpd
udp6 0 0 2002:52e0:87e4:0:a0:123 :::* 764/ntpd
udp6 0 0 ::1:123 :::* 764/ntpd
udp6 0 0 :::123 :::* 764/ntpd
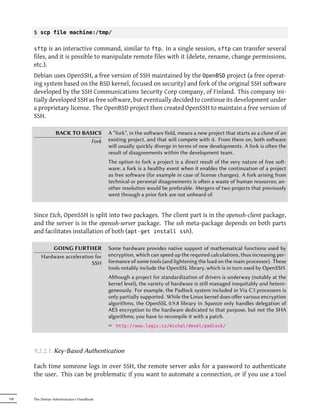
As expected, this lists established connections, two SSH connections in this case, and appli-
cations waiting for incoming connections (listed as LISTEN), notably the Exim4 email server
listening on port 25.
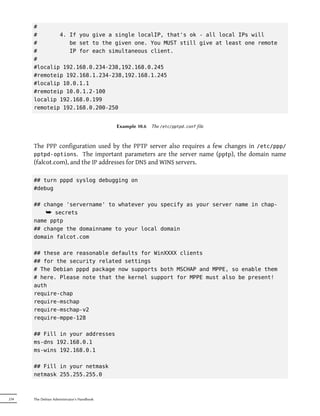
10.8.2. Remote Diagnosis: nmap
nmap (in the similarly-named package) is, in a way, the remote equivalent for netstat. It can
scan a set of “well-known” ports for one or several remote servers, and list the ports where an
application is found to answer to incoming connections. Furthermore, nmap is able to identify
some of these applications, sometimes even their version number. The counterpart of this tool
is that, since it runs remotely, it cannot provide information on processes or users; however, it
can operate on several targets at once.
A typical nmap invocation only uses the -A option (so that nmap attempts to identify the versions
of the server software it finds) followed by one or more IP addresses or DNS names of machines
to scan. Again, many more options exist to finely control the behavior of nmap; please refer to
the documentation in the nmap(1) manual page.
# nmap scouzmir
Starting Nmap 5.00 ( http://nmap.org ) at 2010-10-12 18:52 CEST
Interesting ports on 192.168.1.101:
Not shown: 998 closed ports
PORT STATE SERVICE
22/tcp open ssh
111/tcp open rpcbind
MAC Address: 52:54:00:99:01:01 (QEMU Virtual NIC)
Nmap done: 1 IP address (1 host up) scanned in 2.11 seconds
# nmap -A localhost
Starting Nmap 5.00 ( http://nmap.org ) at 2010-10-12 18:59 CEST
Warning: Hostname localhost resolves to 2 IPs. Using 127.0.0.1.
Interesting ports on localhost (127.0.0.1):
Not shown: 997 closed ports
PORT STATE SERVICE VERSION
22/tcp open ssh OpenSSH 5.5p1 Debian 4 (protocol 2.0)
| ssh-hostkey: 1024 af:07:60:17:16:64:6f:ee:c4:ca:b5:64:1e:4a:4c:22 (DSA)
|_ 2048 25:b0:aa:6b:11:5a:56:b6:8d:2d:ed:b3:16:17:96:33 (RSA)
25/tcp open smtp Exim smtpd 4.72
| smtp-commands: EHLO scouzmir.internal.placard.fr.eu.org Hello localhost [127.0.0.1], SIZE 52428800,
¯ PIPELINING, HELP
|_ HELP Commands supported: AUTH HELO EHLO MAIL RCPT DATA NOOP QUIT RSET HELP
111/tcp open rpcbind
| rpcinfo:
| 100000 2 111/udp rpcbind
| 100024 1 53273/udp status
| 100000 2 111/tcp rpcbind
|_ 100024 1 41127/tcp status
No exact OS matches for host (If you know what OS is running on it, see http://nmap.org/submit/ ).
TCP/IP fingerprint:
OS:SCAN(V=5.00%D=10/12%OT=22%CT=1%CU=34421%PV=N%DS=0%G=Y%TM=4CB4941A%P=i686
OS:-pc-linux-gnu)SEQ(SP=BF%GCD=1%ISR=CC%TI=Z%CI=Z%II=I%TS=8)OPS(O1=M400CST1
OS:1NW4%O2=M400CST11NW4%O3=M400CNNT11NW4%O4=M400CST11NW4%O5=M400CST11NW4%O6
OS:=M400CST11)WIN(W1=8000%W2=8000%W3=8000%W4=8000%W5=8000%W6=8000)ECN(R=Y%D
OS:F=Y%T=40%W=8018%O=M400CNNSNW4%CC=Y%Q=)T1(R=Y%DF=Y%T=40%S=O%A=S+%F=AS%RD=
Chapter 10 — Network Infrastructure 247](https://image.slidesharecdn.com/debian-handbook-120527093323-phpapp02/85/Debian-Handbook-273-320.jpg)

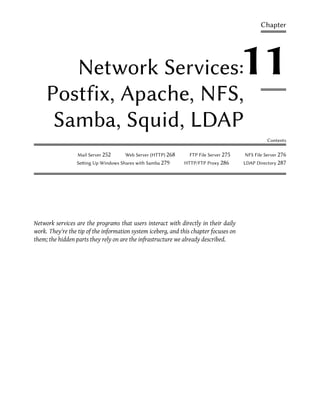
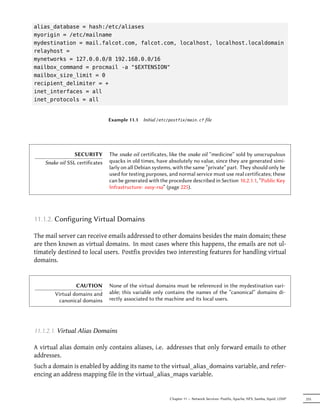

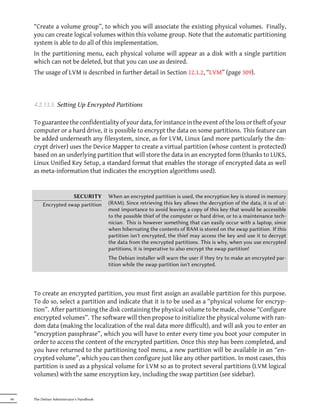
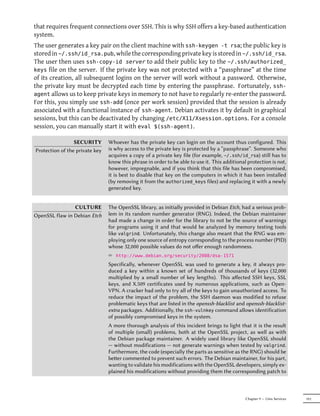
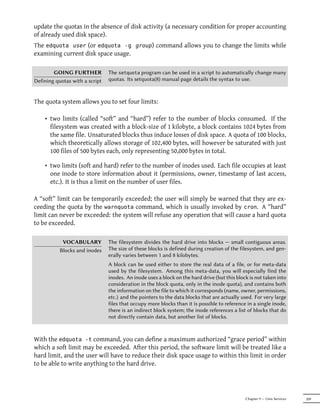
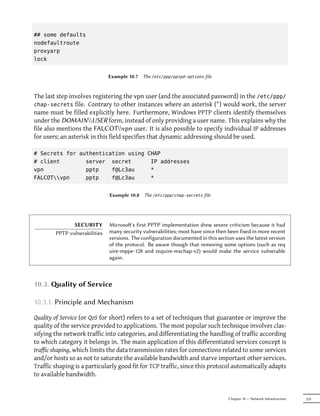
![those applying to the email body.
header_checks = regexp:/etc/postfix/header_checks
body_checks = regexp:/etc/postfix/body_checks
Example 11.11 Enabling content-based filters
Both files contain a list of regular expressions (commonly known as regexps or regexes) and as-
sociated actions to be triggered when the email headers (or body) match the expression.
/^X-Mailer: GOTO Sarbacane/ REJECT I fight spam (GOTO Sarbacane)
/^Subject: *Your email contains VIRUSES/ DISCARD virus notification
Example 11.12 Example /etc/postfix/header_checks file
BACK TO BASICS The regular expression term (shortened to regexp or regex) references a generic
Regular expression notation for expressing a descrition of the contents and/or structure of a string
of characters. Certain special characters allow defining alternatives (for in-
stance, foo|bar matches either “foo” or “bar”), sets of allowed characters (for
instance, [0-9] means any digit, and . — a dot — means any character), quan-
tifications (s? matches either s or the empty string, in other words 0 or 1
occurrence of s; s+ matches one or more consecutive s characters; and so on).
Parentheses allow grouping search results.
The precise syntax of these expressions varies across the tools using them, but
the basic features are similar.
² http://en.wikipedia.org/wiki/Regular_expression
The first one checks the header mentioning the email software; if GOTO Sarbacane (a bulk
email software) is found, the message is rejected. The second expression controls the message
subject; if it mentions a virus notification, we can decide not to reject the message but to discard
it immediately instead.
Using these filters is a double-edged sword, because it is easy to make the rules too generic and
to lose legitimate emails as a consequence. In these cases, not only the messages will be lost,
but their senders will get unwanted (and annoying) error messages.
11.1.4. Seing Up greylisting
“Greylisting” is a filtering technique according to which a message is initially rejected with a
temporary error code, and only accepted on a further try after some delay. This filtering is
particularly efficient against spams sent by the many machines infected by worms and viruses,
since these software rarely act as full SMTP agents (by checking the error code and retrying
262 The Debian Administrator's Handbook](https://image.slidesharecdn.com/debian-handbook-120527093323-phpapp02/85/Debian-Handbook-288-320.jpg)
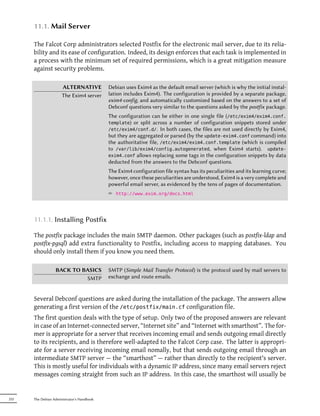
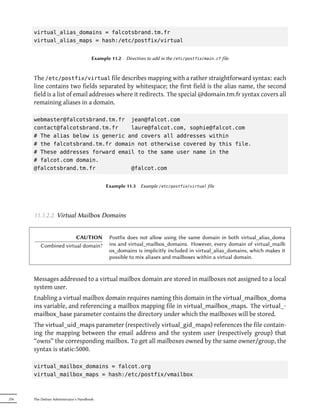
![failed messages later), especially since many of the harvested addresses are really invalid and
retrying would only mean losing time.
Postfix doesn't provide greylisting natively, but there is a feature by which the decision to ac-
cept or reject a given message can be delegated to an external program. The postgrey package
contains just such a program, designed to interface with this access policy delegation service.
Once postgrey is installed, it runs as a daemon and listens on port 60000. Postfix can then be
configured to use it, by adding the check_policy_service parameter as an extra restriction:
smtpd_recipient_restrictions = permit_mynetworks,
[...]
check_policy_service inet:127.0.0.1:60000
Each time Postfix reaches this rule in the ruleset, it will connect to the postgrey daemon and
send it information concerning the relevant message. On its side, Postgrey considers the IP
address/sender/recipient triplet and checks in its database whether that same triplet has been
seen recently. If so, Postgrey replies that the message should be accepted; if not, the reply
indicates that the message should be temporarily rejected, and the triplet gets recorded in the
database.
The main disadvantage of greylisting is that legitimate messages get delayed, which is not al-
ways acceptable. It also increases the burden on servers that send many legitimate emails.
IN PRACTICE Theoretically, greylisting should only delay the first mail from a given sender
Shortcomings of greylisting to a given recipient, and the typical delay is in the order of minutes. Reality,
however, can differ slightly. Some large ISPs use clusters of SMTP servers, and
when a message is initially rejected, the server that retries the transmission
may not be the same as the initial one. When that happens, the second server
gets a temporary error message due to greylisting too, and so on; it may take
several hours until transmission is aempted by a server that has already been
involved, since SMTP servers usually increase the delay between retries at
each failure.
As a consequence, the incoming IP address may vary in time even for a single
sender. But it goes further: even the sender address can change. For instance,
many mailing-list servers encode extra information in the sender address so
as to be able to handle error messages (known as bounces). Each new message
sent to a mailing-list may then need to go through greylisting, which means
it has to be stored (temporarily) on the sender's server. For very large mailing-
lists (with tens of thousands of subscribers), this can soon become a problem.
To mitigate these drawbacks, Postgrey manages a whitelist of such sites,
and messages emanating from them are immediately accepted without go-
ing through greylisting. This list can easily be adapted to local needs, since
it's stored in the /etc/postgrey/whitelist_clients file.
GOING FURTHER The drawbacks of greylisting can be mitigated by only using greylisting on the
Selective greylisting with subset of clients that are already considered as probable sources of spam (be-
whitelister cause they are listed in a DNS black-list). This service is provided by whitelis-
ter, another access policy daemon for Postfix that can be used as a filter just
Chapter 11 — Network Services: Postfix, Apache, NFS, Samba, Squid, LDAP 263](https://image.slidesharecdn.com/debian-handbook-120527093323-phpapp02/85/Debian-Handbook-289-320.jpg)
![before Postgrey. If the client is not listed in any black-list, Whitelister tells
Postfix to accept the message; otherwise, Whitelister's reply is that it has no
opinion, and the message goes on to the next rule in the ruleset (which will
usually be the call to Postgrey). Whitelister listens on port 10000 by default.
smtpd_recipient_restrictions = permit_mynetworks,
[...]
check_policy_service inet:127.0.0.1:10000,
check_policy_service inet:127.0.0.1:60000
Since Whitelister never triggers a definitive rejection, using aggressive DNS
black-lists becomes reasonable, including those listing all dynamic IP ad-
dresses from ISP clients (such as dynablock.njabl.org or dul.dnsbl.sorbs.net).
This can be configured with the rbl parameter in the /etc/whitelister.conf
configuration file.
11.1.5. Customizing Filters Based On the Recipient
The last two sections reviewed many of the possible restrictions. They all have their use in
limiting the amount of received spam, but they also all have their drawbacks. It is therefore
more and more common to customize the set of filters depending on the recipient. At Falcot
Corp, greylisting is interesting for most users, but it hinders the work of some users who need
a low latency in their emails (such as the technical support service). Similarly, the commercial
service sometimes has problems receiving emails from some Asian providers who may be listed
in black-lists; this service asked for a non-filtered address so as to be able to correspond.
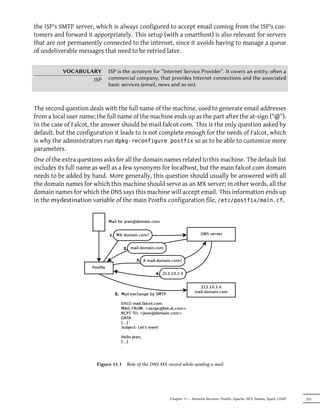
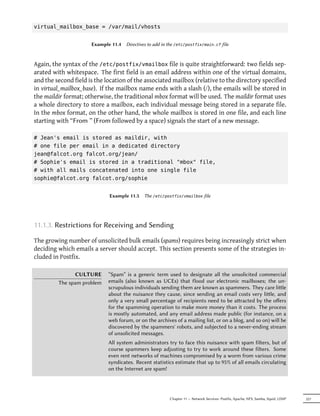
Postfix provides such a customization of filters with a “restriction class” concept. The classes
are declared in the smtpd_restriction_classes parameter, and defined the same way as smtpd_-
recipient_restrictions. The check_recipient_access directive then defines a table mapping a
given recipient to the appropriate set of restrictions.
smtpd_restriction_classes = greylisting, aggressive, permissive
greylisting = check_policy_service inet:127.0.0.1:10000,
check_policy_service inet:127.0.0.1:60000
aggressive = reject_rbl_client sbl-xbl.spamhaus.org,
check_policy_service inet:127.0.0.1:60000
permissive = permit
smtpd_recipient_restrictions = permit_mynetworks,
reject_unauth_destination,
check_recipient_access hash:/etc/postfix/recipient_access
Example 11.13 Defining restriction classes in main.cf
264 The Debian Administrator's Handbook](https://image.slidesharecdn.com/debian-handbook-120527093323-phpapp02/85/Debian-Handbook-290-320.jpg)
![This new configuration is taken into account by running /etc/init.d/clamav-milter rest
art.
The standard ClamAV configuration fits most situations, but some important parameters can
still be customized with dpkg-reconfigure clamav-base. Similarly, running dpkg-reconfig
ure clamav-milter allows defining the mail filter's behaviour in some detail.
The last step involves telling Postfix to use the recently-configured filter. This is a simple matter
of adding the following directive to /etc/postfix/main.cf:
# Virus check with clamav-milter
smtpd_milters = inet:[127.0.0.1]:10002
If the antivirus causes problems, this line can be commented out, and /etc/init.d/postfix
reload should be run so that this change is taken into account.
IN PRACTICE Once the antivirus is set up, its correct behaviour should be tested. The sim-
Testing the antivirus plest way to do that is to send a test email with an aachment containing the
eicar.com (or eicar.com.zip) file, which can be downloaded online:
² http://www.eicar.org/anti_virus_test_file.htm
This file is not a true virus, but a test file that all antivirus soware on the
market diagnose as a virus to allow checking installations.
All messages handled by Postfix now go through the antivirus filter.
11.1.7. Authenticated SMTP
Being able to send emails requires an SMTP server to be reachable; it also requires said SMTP
server to send emails through it. For roaming users, that may need regularly changing the
configuration of the SMTP client, since Falcot's SMTP server rejects messages coming from IP
addresses apparently not belonging to the company. Two solutions exist: either the roaming
user installs an SMTP server on their computer, or they still use the company server with some
means of authenticating as an employee. The former solution is not recommended since the
computer won't be permanently connected, and it won't be able to retry sending messages in
case of problems; we will focus on the latter solution.
SMTP authentication in Postfix relies on SASL (Simple Authentication and Security Layer). It re-
quires installing the libsasl2-modules and sasl2-bin packages, then registering a password in the
SASL database for each user that needs authenticating on the SMTP server. This is done with the
saslpasswd2 command, which takes several parameters. The -u option defines the authentica-
tion domain, which must match the smtpd_sasl_local_domain parameter in the Postfix con-
figuration. The -c option allows creating a user, and -f allows specifying the file to use if the
SASL database needs to be stored at a different location than the default (/etc/sasldb2).
# saslpasswd2 -h `postconf -h myhostname` -f /var/spool/postfix/etc/sasldb2 -c jean
[... type jean's password twice ...]
266 The Debian Administrator's Handbook](https://image.slidesharecdn.com/debian-handbook-120527093323-phpapp02/85/Debian-Handbook-292-320.jpg)
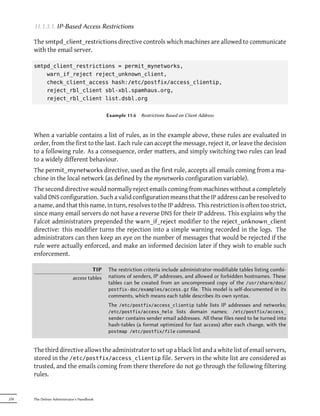
![Note that the SASL database was created in Postfix's directory. In order to ensure consistency,
we also turn /etc/sasldb2 into a symbolic link pointing at the database used by Postfix, with
the ln -sf /var/spool/postfix/etc/sasldb2 /etc/sasldb2 command.
Now we need to configure Postfix to use SASL. First the postfix user needs to be added to the sasl
group, so that it can access the SASL account database. A few new parameters are also needed to
enable SASL, and the smtpd_recipient_restrictions parameter needs to be configured to allow
SASL-authenticated clients to send emails freely.
# Enable SASL authentication
smtpd_sasl_auth_enable = yes
# Define the SASL authentication domain to use
smtpd_sasl_local_domain = $myhostname
[...]
# Adding permit_sasl_authenticated before reject_unauth_destination
# allows relaying mail sent by SASL-authenticated users
smtpd_recipient_restrictions = permit_mynetworks,
permit_sasl_authenticated,
reject_unauth_destination,
[...]
Example 11.15 Enabling SASL in /etc/postfix/main.cf
EXTRA Most email clients are able to authenticate to an SMTP server before sending
Authenticated SMTP client outgoing messages, and using that feature is a simple maer of configuring
the appropriate parameters. If the client in use does not provide that feature,
the workaround is to use a local Postfix server and configure it to relay email
via the remote SMTP server. In this case, the local Postfix itself will be the
client that authenticates with SASL. Here are the required parameters:
smtp_sasl_auth_enable = yes
smtp_sasl_password_maps = hash:/etc/postfix/sasl_passwd
relay_host = [mail.falcot.com]
The /etc/postfix/sasl_passwd file needs to contain the username and pass-
word to use for authenticating on the smtp.falcot.com server. Here's an ex-
ample:
[mail.falcot.com] joe:LyinIsji
As for all Postfix maps, this file must be turned into /etc/postfix/sasl_
passwd.db with the postmap command.
Chapter 11 — Network Services: Postfix, Apache, NFS, Samba, Squid, LDAP 267](https://image.slidesharecdn.com/debian-handbook-120527093323-phpapp02/85/Debian-Handbook-293-320.jpg)
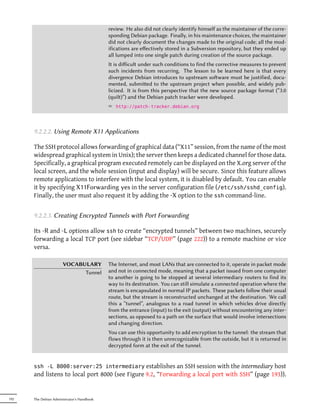
![11.2.3.2. Restricting Access
The Allow from and Deny from directives control access restrictions for a directory (and its
subdirectories, recursively).
The Order directive tells the server of the order in which the Allow from and Deny from di-
rectives are applied; the last one that matches takes precedence. In concrete terms, Order
deny,allow allows access if no Deny from applies, or if an Allow from directive does. Con-
versely, Order allow,deny rejects access if no Allow from directive matches (or if a Deny from
directive applies).
The Allow from and Deny from directives can be followed by an IP address, a network (such as
192.168.0.0/255.255.255.0, 192.168.0.0/24 or even 192.168.0), a hostname or a domain name, or
the all keyword, designating everyone.
Order deny,allow
Allow from 192.168.0.0/16
Deny from all
Example 11.20 Reject by default but allow from the local network
11.2.4. Log Analyzers
A log analyzer is frequently installed on a web server; since the former provides the adminis-
trators with a precise idea of the usage patterns of the latter.
The Falcot Corp administrators selected AWStats (Advanced Web Statistics) to analyze their
Apache log files.
The first configuration step is the creation of the /etc/awstats/awstats.conf file. The /usr/
share/doc/awstats/examples/awstats.model.conf.gz template is a recommended starting
point, and the Falcot administrators keep it unchanged apart from the following parameters:
LogFile="/var/log/apache2/access.log"
LogFormat = "%virtualname %host %other %logname %time1 %methodurl %code %
¯ bytesd %refererquot %uaquot"
SiteDomain="www.falcot.com"
HostAliases="falcot.com REGEX[^.*.falcot.com$]"
DNSLookup=1
DirData="/var/lib/awstats"
DirIcons="/awstats-icon"
DirLang="/usr/share/awstats/lang"
LoadPlugin="tooltips"
All these parameters are documented by comments in the template file. In particular, the
LogFile and LogFormat parameters describe the location and format of the log file and the
Chapter 11 — Network Services: Postfix, Apache, NFS, Samba, Squid, LDAP 273](https://image.slidesharecdn.com/debian-handbook-120527093323-phpapp02/85/Debian-Handbook-299-320.jpg)
![information it contains; SiteDomain and HostAliases list the various names under which the
main web site is known.
For high traffic sites, DNSLookup should usually not be set to 1; for smaller sites, such as the
Falcot one described above, this setting allows getting more readable reports that include full
machine names instead of raw IP addresses.
SECURITY AWStats makes its statistics available on the website with no restrictions by
Access to statistics default, but restrictions can be set up so that only a few (probably internal)
IP addresses can access them; the list of allowed IP addresses needs to be
defined in the AllowAccessFromWebToFollowingIPAddresses parameter
AWStats will also be enabled for other virtual hosts; each virtual host needs its own configura-
tion file, such as /etc/awstats/awstats.www.falcot.org.conf.
Include "/etc/awstats/awstats.conf"
SiteDomain="www.falcot.org"
HostAliases="falcot.org"
Example 11.21 AWStats configuration file for a virtual host
This will only work if the /etc/awstats/awstats.conf file does not contain any Include di-
rective, since AWStats cannot handle multi-level inclusions; unfortunately, the default file pro-
vided by Debian does contain such a directive.
To have this new virtual host taken into account, the /etc/cron.d/awstats needs to be edited
to add an invocation such as the following: /usr/lib/cgi-bin/awstats.pl -config=www.
falcot.org -update
0,10,20,30,40,50 * * * * www-data [ -x /usr/lib/cgi-bin/awstats.pl -a -f /etc
¯ /awstats/awstats.conf -a -r /var/log/apache/access.log ] && /usr/lib/
¯ cgi-bin/awstats.pl -config=awstats -update >/dev/null && /usr/lib/cgi-
¯ bin/awstats.pl -config=www.falcot.org -update >/dev/null
Example 11.22 The /etc/cron.d/awstats file
AWStats uses many icons stored in the /usr/share/awstats/icon/ directory. In order for
these icons to be available on the web site, the Apache configuration needs to be adapted to
include the following directive:
Alias /awstats-icon/ /usr/share/awstats/icon/
After a few minutes (and once the script has been run a few times), the results are available
online:
274 The Debian Administrator's Handbook](https://image.slidesharecdn.com/debian-handbook-120527093323-phpapp02/85/Debian-Handbook-300-320.jpg)
![² http://www.falcot.com/cgi-bin/awstats.pl
² http://www.falcot.org/cgi-bin/awstats.pl
CAUTION In order for the statistics to take all the logs into account, AWStats needs to
Log file rotation be run right before the Apache log files are rotated. This can be achieved by
adding a prerotate directive to the /etc/logrotate.d/apache2 file:
/var/log/apache2/*.log {
weekly
missingok
rotate 52
compress
delaycompress
notifempty
create 644 root adm
sharedscripts
prerotate
su - www-data -c "/usr/lib/cgi-bin/awstats.pl -config=awstats
¯ -update > /dev/null"
su - www-data -c "/usr/lib/cgi-bin/awstats.pl -config=www.
¯ falcot.org -update > /dev/null"
endscript
postrotate
if [ -f /var/run/apache2.pid ]; then
/etc/init.d/apache2 restart > /dev/null
fi
endscript
}
Note also that the log files created by logrotate need to be readable by every-
one, especially AWStats. In the above example, this is ensured by the create
644 root adm line.
11.3. FTP File Server
FTP (File Transfer Protocol) is one of the first protocols of the Internet (RFC 959 was issued in
1985!). It was used to distribute files before the Web was even born (the HTTP protocol was
created in 1990, and formally defined in its 1.0 version by RFC 1945, issued in 1996).
This protocol allows both file uploads and file downloads; for this reason, it is still widely used
to deploy updates to a website hosted by one's Internet service provider (or any other entity
hosting websites). In these cases, secure access is enforced with a user identifier and password;
on successful authentication, the FTP server grants read-write access to that user's home direc-
tory.
Other FTP servers are mainly used to distribute files for public downloading; Debian packages
are a good example. The contents of these servers is fetched from other, geographically remote,
servers; it is then made available to less distant users. This means that client authentication
is not required; as a consequence, this operating mode is known as “anonymous FTP”. To be
Chapter 11 — Network Services: Postfix, Apache, NFS, Samba, Squid, LDAP 275](https://image.slidesharecdn.com/debian-handbook-120527093323-phpapp02/85/Debian-Handbook-301-320.jpg)

![The first piece of required information is the name of the workgroup where the Samba server
will belong (the answer is FALCOTNET in our case). Another question asks whether passwords
should be encrypted. The answer is that they should, because it's a requirement for the most
recent Windows clients; besides, this increases security. The counterpart is that this required
managing Samba passwords separately from the Unix passwords.
The package also proposes identifying the WINS server from the information provided by the
DHCP daemon. The Falcot Corp administrators rejected this option, since they intend to use the
Samba server itself as the WINS server.
The next question is about whether servers should be started by inetd or as stand-alone dae-
mons. Using inetd is only interesting when Samba is rarely used; the Falcot administrators
therefore picked stand-alone daemons.
Finally, the package proposes creating a /var/lib/samba/passdb.tdb file for storing en-
crypted passwords; this option was accepted, since this system is much more efficient than the
standard /etc/samba/smbpasswd text file.
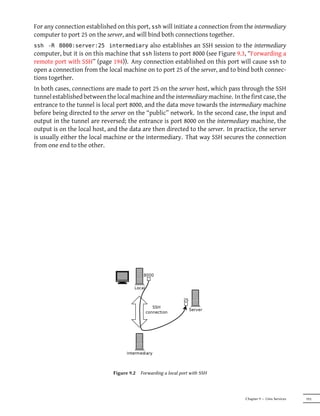
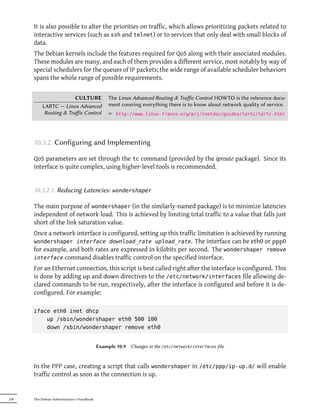
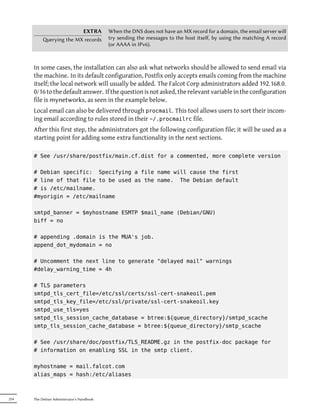
11.5.1.2. Configuring Manually
Changes to smb.conf The requirements at Falcot require other options to be modified in the
/etc/samba/smb.conf configuration file. The following excerpts summarize the changes that
were effected in the [global] section.
[global]
## Browsing/Identification ###
# Change this to the workgroup/NT-domain name your Samba server will part of
workgroup = FALCOTNET
# server string is the equivalent of the NT Description field
server string = %h server (Samba %v)
# Windows Internet Name Serving Support Section:
# WINS Support - Tells the NMBD component of Samba to enable its WINS Server
wins support = yes 1
x
[...]
####### Authentication #######
# "security = user" is always a good idea. This will require a Unix account
# in this server for every user accessing the server. See
# /usr/share/doc/samba-doc/htmldocs/Samba3-HOWTO/ServerType.html
# in the samba-doc package for details.
Chapter 11 — Network Services: Postfix, Apache, NFS, Samba, Squid, LDAP 281](https://image.slidesharecdn.com/debian-handbook-120527093323-phpapp02/85/Debian-Handbook-307-320.jpg)
![security = user
x
2
# You may wish to use password encryption. See the section on
# 'encrypt passwords' in the smb.conf(5) manpage before enabling.
encrypt passwords = true
# If you are using encrypted passwords, Samba will need to know what
# password database type you are using.
passdb backend = tdbsam guest
[...]
########## Printing ##########
# If you want to automatically load your printer list rather
# than setting them up individually then you'll need this
load printers = yes 3
x
# lpr(ng) printing. You may wish to override the location of the
# printcap file
; printing = bsd
; printcap name = /etc/printcap
# CUPS printing. See also the cupsaddsmb(8) manpage in the
# cups-client package.
printing = cups 4
x
printcap name = cups
[...]
######## File sharing ########
# Name mangling options
; preserve case = yes
; short preserve case = yes
unix charset=ISO8859-1
x
5
1x Indicates that Samba should act as a Netbios name server (WINS) for the local network.
2x This is the default value for this parameter; however, since it is central to the Samba
configuration, filling it explicitly is recommended. Each user must authenticate before
accessing any share.
282 The Debian Administrator's Handbook](https://image.slidesharecdn.com/debian-handbook-120527093323-phpapp02/85/Debian-Handbook-308-320.jpg)
![3x Tells Samba to automatically share all local printers that exist in the CUPS configuration.
Restricting access to these printers is still possible, by adding appropriate sections.
4x Specifies the printing system in use; in our case, CUPS.
5x Specifies the character set and encoding used for file names under Linux. The default
value is UTF8 (Unicode).
Adding Users Each Samba user needs an account on the server; the Unix accounts must be
created first, then the user needs to be registered in Samba's database. The Unix step is done
quite normally (using adduser for instance).
Adding an existing user to the Samba database is a matter of running the smbpasswd -a user
command; this command asks for the password interactively.
A user can be deleted with the smbpasswd -x user command. A Samba account can also be
temporarily disabled (with smbpasswd -d user) and re-enabled later (with smbpasswd -e
user).
Switching to Domain Controller This section documents how the Falcot administrators went
even further, by turning the Samba server into a domain controller providing roaming profiles
(which allow users to find their desktop no matter what machine they connect to).
They first added a few extra directives in the [global] section of the configuration file:
domain logons = yes
x
1
preferred master = yes
logon path = %Lprofiles%U
x
2
logon script = scripts/logon.bat
x
3
1x Enables the domain controller functionality.
2x Specifies the location of the users' home directories. These are stored on a dedicated
share, which allows enabling specific options (in particular, profile acls, a requirement
for compatibility with Windows 2000, XP and Vista).
3x Specifies the batch (non-interactive) script that is to be run on the client Windows ma-
chine every time a session is opened. In this case, /var/lib/samba/netlogon/scripts/
logon.bat. The script needs to be in DOS format, where the lines are separated by a
carriage-return character and a line-feed character; if the file was created on Linux, run-
ning unix2dos will convert it.
The commands used most widely in these scripts allow the automatic creation of network
drives and synchronizing the system time.
Chapter 11 — Network Services: Postfix, Apache, NFS, Samba, Squid, LDAP 283](https://image.slidesharecdn.com/debian-handbook-120527093323-phpapp02/85/Debian-Handbook-309-320.jpg)
![net time ARRAKIS /set /yes
net use H: /home
net use U: ARRAKISutils
Example 11.28 The logon.bat file
Two extra shares, and their associated directories, were also created:
[netlogon]
comment = Network Logon Service
path = /var/lib/samba/netlogon
guest ok = yes
writable = no
share modes = no
[profiles]
comment = Profile Share
path = /var/lib/samba/profiles
read only = No
profile acls = Yes
The home directories for all users must also be created (as /var/lib/samba/profiles/user),
and each of them must be owned by the matching user.
11.5.2. Samba Client
The client features in Samba allow a Linux machine to access Windows shares and shared print-
ers. The required programs are available in the smbfs and smbclient packages.
11.5.2.1. The smbclient Program
The smbclient program queries SMB servers. It accepts a -U user option, for connecting to the
server under a specific identity. smbclient //server/share accesses the share in an interac-
tive way similar to the command-line FTP client. smbclient -L server lists all available (and
visible) shares on a server.
11.5.2.2. Mounting Windows Shares
The smbmount command allows mounting a Windows share into the Linux filesystem hierarchy.
284 The Debian Administrator's Handbook](https://image.slidesharecdn.com/debian-handbook-120527093323-phpapp02/85/Debian-Handbook-310-320.jpg)
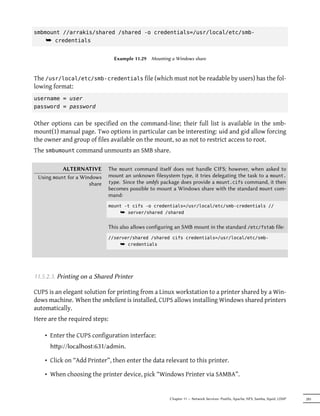

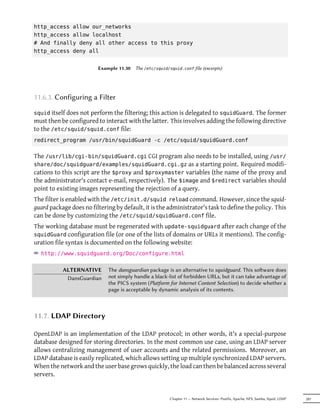
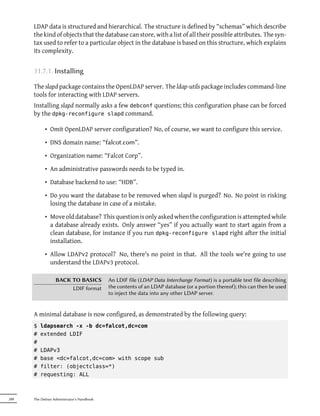
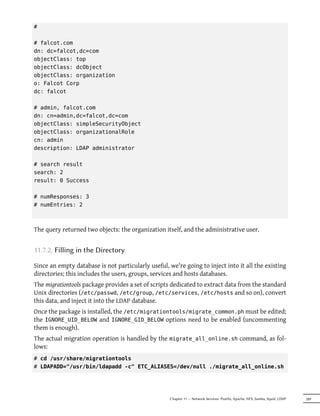
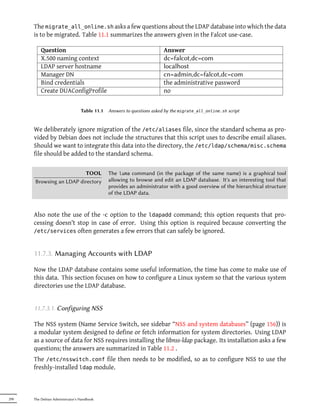
![Question Answer
LDAP server Uniform Resource Identifier ldap://ldap.falcot.com
Distinguished name of the search base dc=falcot,dc=com
LDAP version to use 3
Does the LDAP database require login? no
LDAP account for root cn=admin,dc=falcot,dc=com
LDAP root account password the administrative password
Table 11.2 Configuring the libnss-ldap package
# /etc/nsswitch.conf
#
# Example configuration of GNU Name Service Switch functionality.
# If you have the `glibc-doc' and `info' packages installed, try:
# `info libc "Name Service Switch"' for information about this file.
passwd: ldap compat
group: ldap compat
shadow: ldap compat
hosts: files dns ldap
networks: ldap files
protocols: ldap db files
services: ldap db files
ethers: ldap db files
rpc: ldap db files
netgroup: files
Example 11.31 The /etc/nsswitch.conf file
The ldap module is usually inserted before others, and it will therefore be queried first. The
notable exception is the hosts service since contacting the LDAP server requires consulting
DNS first (to resolve ldap.falcot.com). Without this exception, a hostname query would try to
ask the LDAP server; this would trigger a name resolution for the LDAP server, and so on in an
infinite loop. As for the netgroup services, it is not yet handled by the LDAP module.
If the LDAP server should be considered authoritative (and the local files used by the files
module disregarded), services can be configured with the following syntax:
service:ldap [NOTFOUND=return] files.
Chapter 11 — Network Services: Postfix, Apache, NFS, Samba, Squid, LDAP 291](https://image.slidesharecdn.com/debian-handbook-120527093323-phpapp02/85/Debian-Handbook-317-320.jpg)
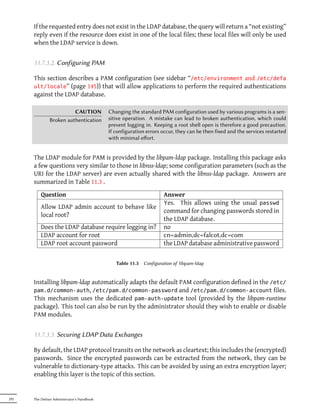

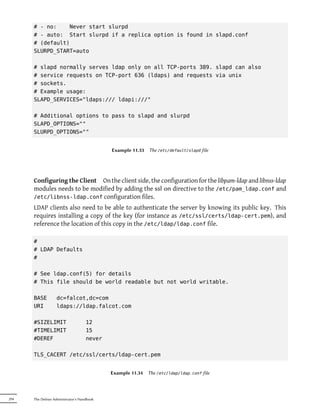


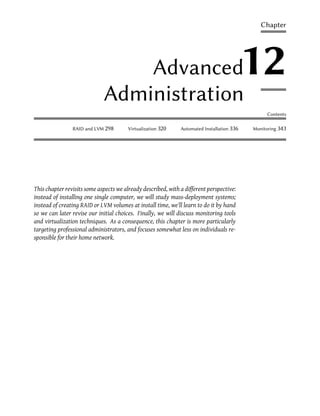
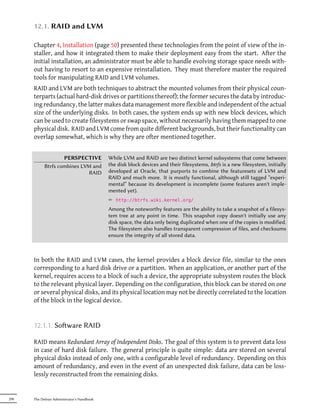
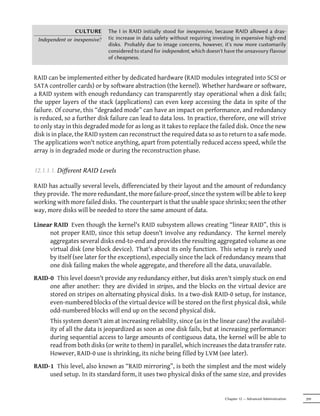
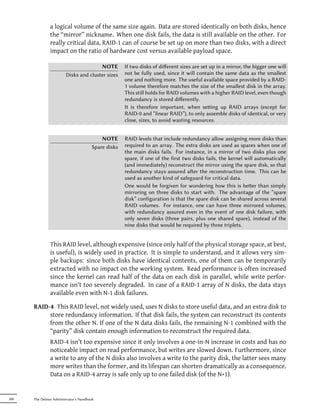
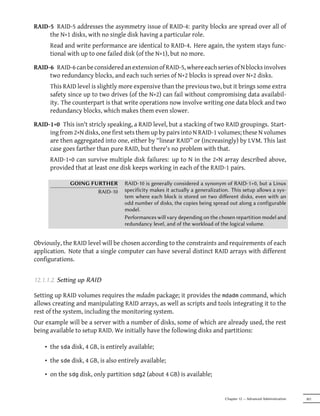
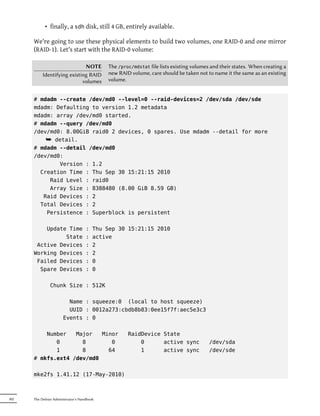
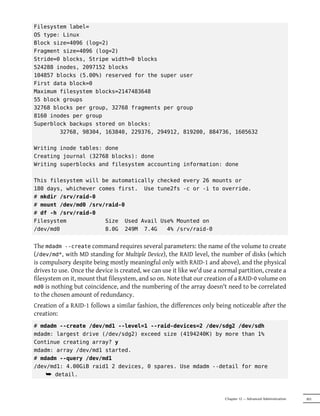
![# mdadm --detail /dev/md1
/dev/md1:
Version : 1.2
Creation Time : Thu Sep 30 15:39:13 2010
Raid Level : raid1
Array Size : 4194240 (4.00 GiB 4.29 GB)
Used Dev Size : 4194240 (4.00 GiB 4.29 GB)
Raid Devices : 2
Total Devices : 2
Persistence : Superblock is persistent
Update Time : Thu Sep 30 15:39:26 2010
State : active, resyncing
Active Devices : 2
Working Devices : 2
Failed Devices : 0
Spare Devices : 0
Rebuild Status : 10% complete
Name : squeeze:1 (local to host squeeze)
UUID : 20a8419b:41612750:b9171cfe:00d9a432
Events : 27
Number Major Minor RaidDevice State
0 8 98 0 active sync /dev/sdg2
1 8 112 1 active sync /dev/sdh
# mdadm --detail /dev/md1
/dev/md1:
[...]
State : active
[...]
TIP As illustrated by our example, RAID devices can be constructed out of disk
RAID, disks and partitions partitions, and do not require full disks.
A few remarks are in order. First, mdadm notices that the physical elements have different sizes;
since this implies that some space will be lost on the bigger element, a confirmation is required.
More importantly, note the state of the mirror. The normal state of a RAID mirror is that both
disks have exactly the same contents. However, nothing guarantees this is the case when the
volume is first created. The RAID subsystem will therefore provide that guarantee itself, and
304 The Debian Administrator's Handbook](https://image.slidesharecdn.com/debian-handbook-120527093323-phpapp02/85/Debian-Handbook-330-320.jpg)
![there will be a synchronisation phase as soon as the RAID device is created. After some time
(the exact amount will depend on the actual size of the disks…), the RAID array switches to the
“active” state. Note that during this reconstruction phase, the mirror is in a degraded mode,
and redundancy isn't assured. A disk failing during that risk window could lead to losing all the
data. Large amounts of critical data, however, are rarely stored on a freshly created RAID array
before its initial synchronisation. Note that even in degraded mode, the /dev/md1 is usable, and
a filesystem can be created on it, as well as some data copied on it.
TIP Sometimes two disks are not immediately available when one wants to start
Starting a mirror in degraded a RAID-1 mirror, for instance because one of the disks one plans to include
mode is already used to store the data one wants to move to the array. In such
circumstances, it is possible to deliberately create a degraded RAID-1 array
by passing missing instead of a device file as one of the arguments to mdadm.
Once the data have been copied to the “mirror”, the old disk can be added to
the array. A synchronisation will then take place, giving us the redundancy
that was wanted in the first place.
TIP RAID-1 volumes are oen created to be used as a new disk, oen considered
Seing up a mirror without blank. The actual initial contents of the disk is therefore not very relevant,
synchronisation since one only needs to know that the data wrien aer the creation of the
volume, in particular the filesystem, can be accessed later.
One might therefore wonder about the point of synchronising both disks at
creation time. Why care whether the contents are identical on zones of the
volume that we know will only be read aer we have wrien to them?
Fortunately, this synchronisation phase can be avoided by passing the --
assume-clean option to mdadm. However, this option can lead to surprises in
cases where the initial data will be read (for instance if a filesystem is already
present on the physical disks), which is why it isn't enabled by default.
Now let's see what happens when one of the elements of the RAID-1 array fails. mdadm, in par-
ticular its --fail option, allows simulating such a disk failure:
# mdadm /dev/md1 --fail /dev/sdh
mdadm: set /dev/sdh faulty in /dev/md1
# mdadm --detail /dev/md1
/dev/md1:
[...]
Update Time : Thu Sep 30 15:45:50 2010
State : active, degraded
Active Devices : 1
Working Devices : 1
Failed Devices : 1
Spare Devices : 0
Name : squeeze:1 (local to host squeeze)
Chapter 12 — Advanced Administration 305](https://image.slidesharecdn.com/debian-handbook-120527093323-phpapp02/85/Debian-Handbook-331-320.jpg)
![UUID : 20a8419b:41612750:b9171cfe:00d9a432
Events : 35
Number Major Minor RaidDevice State
0 8 98 0 active sync /dev/sdg2
1 0 0 1 removed
2 8 112 - faulty spare /dev/sdh
The contents of the volume are still accessible (and, if it's mounted, the applications don't notice
a thing), but the data safety isn't assured anymore: should the sdg disk fail in turn, the data
would be lost. We want to avoid that risk, so we'll replace the failed disk with a new one, sdi:
# mdadm /dev/md1 --add /dev/sdi
mdadm: added /dev/sdi
# mdadm --detail /dev/md1
/dev/md1:
[...]
Raid Devices : 2
Total Devices : 3
Persistence : Superblock is persistent
Update Time : Thu Sep 30 15:52:29 2010
State : active, degraded, recovering
Active Devices : 1
Working Devices : 2
Failed Devices : 1
Spare Devices : 1
Rebuild Status : 45% complete
Name : squeeze:1 (local to host squeeze)
UUID : 20a8419b:41612750:b9171cfe:00d9a432
Events : 53
Number Major Minor RaidDevice State
0 8 98 0 active sync /dev/sdg2
3 8 128 1 spare rebuilding /dev/sdi
2 8 112 - faulty spare /dev/sdh
# [...]
[...]
# mdadm --detail /dev/md1
/dev/md1:
306 The Debian Administrator's Handbook](https://image.slidesharecdn.com/debian-handbook-120527093323-phpapp02/85/Debian-Handbook-332-320.jpg)
![[...]
Update Time : Thu Sep 30 15:52:35 2010
State : active
Active Devices : 2
Working Devices : 2
Failed Devices : 1
Spare Devices : 0
Name : squeeze:1 (local to host squeeze)
UUID : 20a8419b:41612750:b9171cfe:00d9a432
Events : 71
Number Major Minor RaidDevice State
0 8 98 0 active sync /dev/sdg2
1 8 128 1 active sync /dev/sdi
2 8 112 - faulty spare /dev/sdh
Here again, the kernel automatically triggers a reconstruction phase during which the volume,
although still accessible, is in a degraded mode. Once the reconstruction is over, the RAID array
is back to a normal state. One can then tell the system that the sdh disk is about to be removed
from the array, so as to end up with a classical RAID mirror on two disks:
# mdadm /dev/md1 --remove /dev/sdh
mdadm: hot removed /dev/sdh from /dev/md1
# mdadm --detail /dev/md1
/dev/md1:
[...]
Number Major Minor RaidDevice State
0 8 98 0 active sync /dev/sdg2
1 8 128 1 active sync /dev/sdi
From then on, the drive can be physically removed when the server is next switched off, or even
hot-removed when the hardware configuration allows hot-swap. Such configurations include
some SCSI controllers, most SATA disks, and external drives operating on USB or Firewire.
12.1.1.3. Backing up the Configuration
Most of the meta-data concerning RAID volumes are saved directly on the disks that make up
these arrays, so that the kernel can detect the arrays and their components and assemble them
automatically when the system starts up. However, backing up this configuration is encouraged,
because this detection isn't fail-proof, and it's only expected that it will fail precisely in sensitive
circumstances. In our example, if the sdh disk failure had been real (instead of simulated) and
the system had been restarted without removing this sdh disk, this disk could start working
Chapter 12 — Advanced Administration 307](https://image.slidesharecdn.com/debian-handbook-120527093323-phpapp02/85/Debian-Handbook-333-320.jpg)
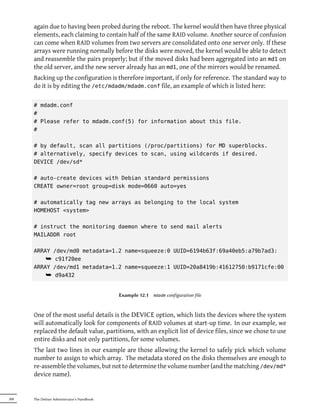
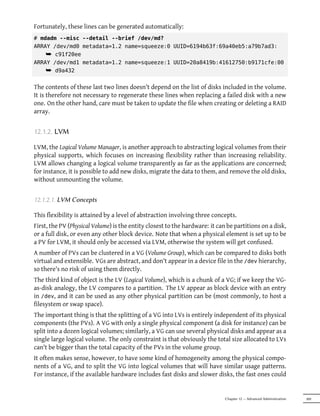
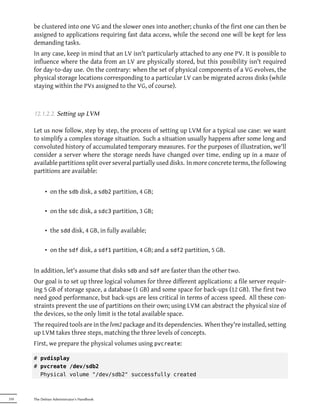
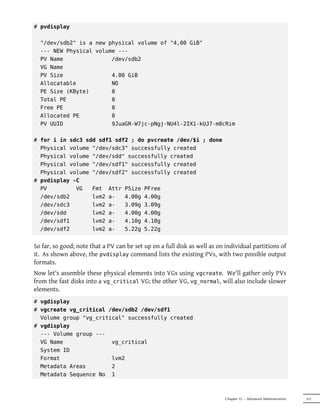
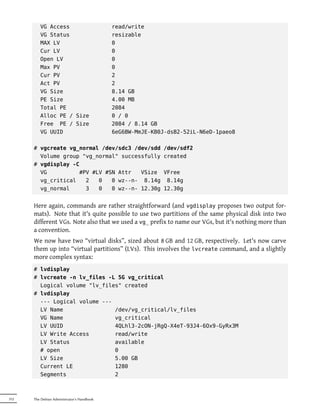
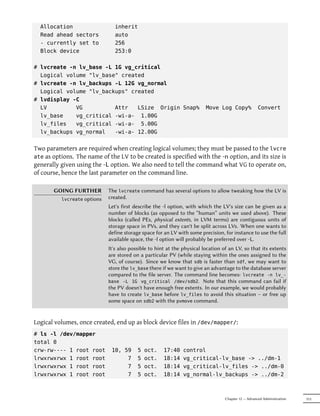
![# ls -l /dev/dm-*
brw-rw---- 1 root disk 253, 0 5 oct. 18:14 /dev/dm-0
brw-rw---- 1 root disk 253, 1 5 oct. 18:14 /dev/dm-1
brw-rw---- 1 root disk 253, 2 5 oct. 18:14 /dev/dm-2
NOTE When the computer boots, the /etc/init.d/lvm script scans the available de-
Autodetecting LVM volumes vices; those that have been initialised as physical volumes for LVM are regis-
tered into the LVM subsystem, those that belong to volume groups are assem-
bled, and the relevant logical volumes are started and made available. There is
therefore no need to edit configuration files when creating or modifying LVM
volumes.
Note, however, that the layout of the LVM elements (physical and logical vol-
umes, and volume groups) is backed up in /etc/lvm/backup, which can be
useful in case of a problem (or just to sneak a peek under the hood).
To make things easier, convenience symbolic links are also created in directories matching the
VGs:
# ls -l /dev/vg_critical
total 0
lrwxrwxrwx 1 root root 7 5 oct. 18:14 lv_base -> ../dm-1
lrwxrwxrwx 1 root root 7 5 oct. 18:14 lv_files -> ../dm-0
# ls -l /dev/vg_normal
total 0
lrwxrwxrwx 1 root root 7 5 oct. 18:14 lv_backups -> ../dm-2
The LVs can then be used exactly like standard partitions:
# mkfs.ext4 /dev/vg_normal/lv_backups
mke2fs 1.41.12 (17-May-2010)
Filesystem label=
OS type: Linux
Block size=4096 (log=2)
[...]
This filesystem will be automatically checked every 34 mounts or
180 days, whichever comes first. Use tune2fs -c or -i to override.
# mkdir /srv/backups
# mount /dev/vg_normal/lv_backups /srv/backups
# df -h /srv/backups
Filesystem Size Used Avail Use% Mounted on
/dev/mapper/vg_normal-lv_backups
12G 159M 12G 2% /srv/backups
# [...]
[...]
314 The Debian Administrator's Handbook](https://image.slidesharecdn.com/debian-handbook-120527093323-phpapp02/85/Debian-Handbook-340-320.jpg)
![# cat /etc/fstab
[...]
/dev/vg_critical/lv_base /srv/base ext4
/dev/vg_critical/lv_files /srv/files ext4
/dev/vg_normal/lv_backups /srv/backups ext4
From the applications' point of view, the myriad small partitions have now been abstracted into
one large 12 GB volume, with a friendlier name.
12.1.2.3. LVM Over Time
Even though the ability to aggregate partitions or physical disks is convenient, this is not the
main advantage brought by LVM. The flexibility it brings is especially noticed as time passes,
when needs evolve. In our example, let's assume that new large files must be stored, and that
the LV dedicated to the file server is too small to contain them. Since we haven't used the
whole space available in vg_critical, we can grow lv_files. For that purpose, we'll use the
lvresize command, then resize2fs to adapt the filesystem accordingly:
# df -h /srv/files/
Filesystem Size Used Avail Use% Mounted on/dev/mapper/vg_critical
¯ -lv_files 5.0G 4.6G 142M 98% /srv/files
# lvdisplay -C vg_critical/lv_files
LV VG Attr LSize Origin Snap% Move Log Copy% Convert
lv_files vg_critical -wi-ao 5.00g
# vgdisplay -C vg_critical
VG #PV #LV #SN Attr VSize VFree
vg_critical 2 2 0 wz--n- 8.14g 2.14g
# lvresize -L 7G vg_critical/lv_files
Extending logical volume lv_files to 7.00 GB
Logical volume lv_files successfully resized
# lvdisplay -C vg_critical/lv_files
LV VG Attr LSize Origin Snap% Move Log Copy% Convert
lv_files vg_critique -wi-ao 7.00g
# resize2fs /dev/vg_critical/lv_files
resize2fs 1.41.12 (17-May-2010)
Filesystem at /dev/vg_critical/lv_files is mounted on /srv/files; on-line
¯ resizing required
old desc_blocks = 1, new_desc_blocks = 1
Performing an on-line resize of /dev/vg_critical/lv_files to 1835008 (4k)
¯ blocks.
The filesystem on /dev/vg_critical/lv_files is now 1835008 blocks long.
Chapter 12 — Advanced Administration 315](https://image.slidesharecdn.com/debian-handbook-120527093323-phpapp02/85/Debian-Handbook-341-320.jpg)
![# df -h /srv/files/
Filesystem Size Used Avail Use% Mounted on
/dev/mapper/vg_critical-lv_files
6.9G 4.6G 2.1G 70% /srv/files
CAUTION Not all filesystems can be resized online; resizing a volume can therefore
Resizing filesystems require unmounting the filesystem first and remounting it aerwards. Of
course, if one wants to shrink the space allocated to an LV, the filesystem
must be shrunk first; the order is reversed when the resizing goes in the other
direction: the logical volume must be grown before the filesystem on it. It's
rather straightforward, since at no time must the filesystem size be larger
than the block device where it resides (whether that device is a physical par-
tition or a logical volume).
The ext3, ext4 and xfs filesystems can be grown online, without unmounting;
shrinking requires an unmount. The reiserfs filesystem allows online resizing
in both directions. The venerable ext2 allows neither, and always requires
unmounting.
We could proceed in a similar fashion to extend the volume hosting the database, only we've
reached the VG's available space limit:
# df -h /srv/base/
Filesystem Size Used Avail Use% Mounted on
/dev/mapper/vg_critical-lv_base
1008M 835M 123M 88% /srv/base
# vgdisplay -C vg_critical
VG #PV #LV #SN Attr VSize VFree
vg_critical 2 2 0 wz--n- 8.14g 144.00m
No matter, since LVM allows adding physical volumes to existing volume groups. For instance,
maybe we've noticed that the sdb1 partition, which was so far used outside of LVM, only con-
tained archives that could be moved to lv_backups. We can now recycle it and integrate it to the
volume group, and thereby reclaim some available space. This is the purpose of the vgextend
command. Of course, the partition must be prepared as a physical volume beforehand. Once the
VG has been extended, we can use similar commands as previously to grow the logical volume
then the filesystem:
# pvcreate /dev/sdb1
Physical volume "/dev/sdb1" successfully created
# vgextend vg_critical /dev/sdb1
Volume group "vg_critical" successfully extended
# vgdisplay -C vg_critical
VG #PV #LV #SN Attr VSize VFree
vg_critical 3 2 0 wz--n- 9.09g 1.09g
# [...]
316 The Debian Administrator's Handbook](https://image.slidesharecdn.com/debian-handbook-120527093323-phpapp02/85/Debian-Handbook-342-320.jpg)
![[...]
# df -h /srv/base/
Filesystem Size Used Avail Use% Mounted on
/dev/mapper/vg_critical-lv_base
2.0G 835M 1.1G 44% /srv/base
GOING FURTHER LVM also caters for more advanced uses, where many details can be specified
Advanced LVM by hand. For instance, an administrator can tweak the size of the blocks that
make up physical and logical volumes, as well as their physical layout. It is
also possible to move blocks across PVs, for instance to fine-tune performance
or, in a more mundane way, to free a PV when one needs to extract the corre-
sponding physical disk from the VG (whether to affect it to another VG or to
remove it from LVM altogether). The manual pages describing the commands
are generally clear and detailed. A good entry point is the lvm(8) manual page.
12.1.3. RAID or LVM?
RAID and LVM both bring undisputable advantages as soon as one leaves the simple case of a
desktop computer with a single hard disk where the usage pattern doesn't change over time.
However, RAID and LVM go in two different directions, with diverging goals, and it is legitimate
to wonder which one should be adopted. The most appropriate answer will of course depend
on current and foreseeable requirements.
There are a few simple cases where the question doesn't really arise. If the requirement is to
safeguard data against hardware failures, then obviously RAID will be set up on a redundant
array of disks, since LVM doesn't really address this problem. If, on the other hand, the need is
for a flexible storage scheme where the volumes are made independent of the physical layout
of the disks, RAID doesn't help much and LVM will be the natural choice.
The third notable use case is when one just wants to aggregate two disks into one volume, either
for performance reasons or to have a single filesystem that is larger than any of the available
disks. This case can be addressed both by a RAID-0 (or even linear-RAID) and by an LVM vol-
ume. When in this situation, and barring extra constraints (keeping in line with the rest of the
computers if they only use RAID), the configuration of choice will often be LVM. The initial set
up is slightly more complex, but that slight increase in complexity more than makes up for the
extra flexibility that LVM brings if the requirements change or if new disks need to be added.
Then of course, there is the really interesting use case, where the storage system needs to be
made both resistant to hardware failure and flexible when it comes to volume allocation. Nei-
ther RAID nor LVM can address both requirements on their own; no matter, this is where we
use both at the same time — or rather, one on top of the other. The scheme that has all but
become a standard since RAID and LVM have reached maturity is to ensure data redundancy
first by grouping disks in a small number of large RAID arrays, and to use these RAID arrays as
LVM physical volumes; logical partitions will then be carved from these LVs for filesystems. The
selling point of this setup is that when a disk fails, only a small number of RAID arrays will need
Chapter 12 — Advanced Administration 317](https://image.slidesharecdn.com/debian-handbook-120527093323-phpapp02/85/Debian-Handbook-343-320.jpg)
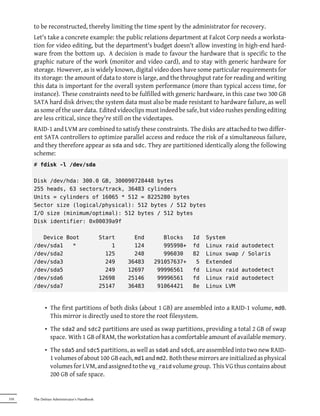

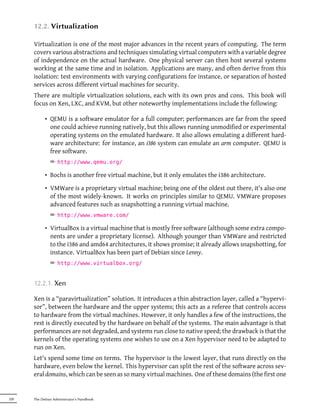
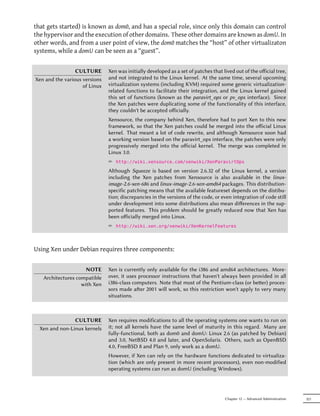
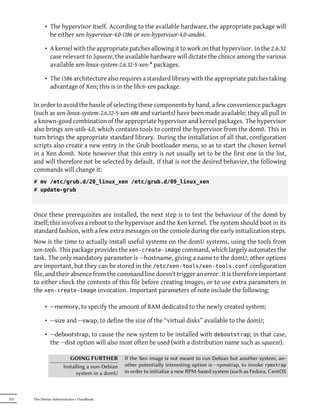
![or Mandriva). Other methods include --copy, to copy an image from an
existing system, and --tar, to extract the system image from an archive.
In case of a non-Linux system, care should be taken to define the kernel
the domU must use, using the --kernel option.
• --dhcp states that the domU's network configuration should be obtained by DHCP while
--ip allows defining a static IP address.
• Lastly, a storage method must be chosen for the images to be created (those that will be
seen as hard disk drives from the domU). The simplest method, corresponding to the --
dir option, is to create one file on the dom0 for each device the domU should be provided.
For systems using LVM, the alternative is to use the --lvm option, followed by the name
of a volume group; xen-create-image will then create a new logical volume inside that
group, and this logical volume will be made available to the domU as a hard disk drive.
NOTE Entire hard disks can also be exported to the domU, as well as parti-
Storage in the domU tions, RAID arrays or pre-existing LVM logical volumes. These opera-
tions are not automated by xen-create-image, however, so editing the
Xen image's configuration file is in order aer its initial creation with
xen-create-image.
Once these choices are made, we can create the image for our future Xen domU:
# xen-create-image --hostname=testxen
General Information
--------------------
Hostname : testxen
Distribution : squeeze
Mirror : http://ftp.us.debian.org/debian/
Partitions : swap 128Mb (swap)
/ 4Gb (ext3)
Image type : sparse
Memory size : 128Mb
Kernel path : /boot/vmlinuz-2.6.32-5-xen-686
Initrd path : /boot/initrd.img-2.6.32-5-xen-686
[...]
Logfile produced at:
/var/log/xen-tools/testxen.log
Installation Summary
---------------------
Hostname : testxen
Distribution : squeeze
IP-Address(es) : dynamic
Chapter 12 — Advanced Administration 323](https://image.slidesharecdn.com/debian-handbook-120527093323-phpapp02/85/Debian-Handbook-349-320.jpg)
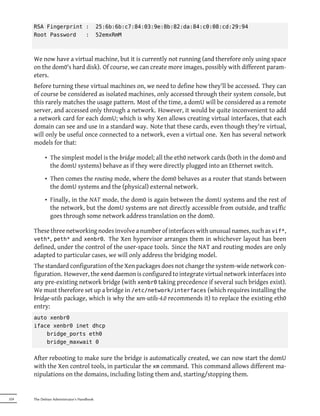
![# xm list
Name ID Mem VCPUs State Time(s)
Domain-0 0 940 1 r----- 3896.9
# xm create testxen.cfg
Using config file "/etc/xen/testxen.cfg".
Started domain testxen (id=1)
# xm list
Name ID Mem VCPUs State Time(s)
Domain-0 0 873 1 r----- 3917.1
testxen 1 128 1 -b---- 3.7
CAUTION While it is of course possible to have several domU systems running in parallel,
Only one domU per image! they will all need to use their own image, since each domU is made to believe it
runs on its own hardware (apart from the small slice of the kernel that talks to
the hypervisor). In particular, it isn't possible for two domU systems running
simultaneously to share storage space. If the domU systems are not run at
the same time, it is however quite possible to reuse a single swap partition, or
the partition hosting the /home filesystem.
Note that the testxen domU uses real memory taken from the RAM that would otherwise be
available to the dom0, not simulated memory. Care should therefore be taken, when building a
server meant to host Xen instances, to provision the physical RAM accordingly.
Voilà! Our virtual machine is starting up. We can access it in one of two modes. The usual way
is to connect to it “remotely” through the network, as we would connect to a real machine;
this will usually require setting up either a DHCP server or some DNS configuration. The other
way, which may be the only way if the network configuration was incorrect, is to use the hvc0
console, with the xm console command:
# xm console testxen
[...]
Starting enhanced syslogd: rsyslogd.
Starting periodic command scheduler: cron.
Starting OpenBSD Secure Shell server: sshd.
Debian GNU/Linux 6.0 testxen hvc0
testxen login:
One can then open a session, just like one would do if sitting at the virtual machine's keyboard.
Detaching from this console is achieved through the Control+] key combination.
Chapter 12 — Advanced Administration 325](https://image.slidesharecdn.com/debian-handbook-120527093323-phpapp02/85/Debian-Handbook-351-320.jpg)
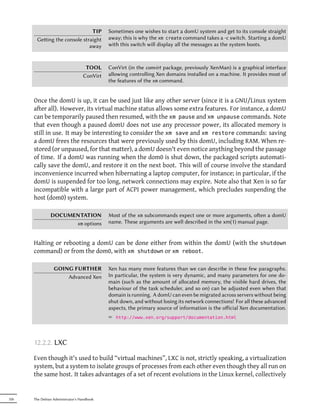
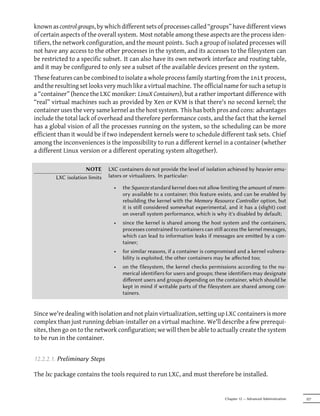
![LXC also requires the control groups configuration system, which is a virtual filesystem to be
mounted on /sys/fs/cgroup. The /etc/fstab should therefore include the following entry:
# /etc/fstab: static file system information.
[...]
cgroup /sys/fs/cgroup cgroup defaults 0 0
/sys/fs/cgroup will then be mounted automatically at boot time; if no immediate reboot is
planned, the filesystem should be manually mounted with mount /sys/fs/cgroup.
12.2.2.2. Network Configuration
The goal of installing LXC is to set up virtual machines; while we could of course keep them
isolated from the network, and only communicate with them via the filesystem, most use cases
involve giving at least minimal network access to the containers. In the typical case, each con-
tainer will get a virtual network interface, connected to the real network through a bridge. This
virtual interface can be plugged either directly onto the host's physical network interface (in
which case the container is directly on the network), or onto another virtual interface defined
on the host (and the host can then filter or route traffic). In both cases, the bridge-utils package
will be required.
The simple case is just a matter of editing /etc/network/interfaces, moving the configura-
tion for the physical interface (for instance eth0) to a bridge interface (usually br0), and config-
uring the link between them. For instance, if the network interface configuration file initially
contains entries such as the following:
auto eth0
iface eth0 inet dhcp
They should be disabled and replaced with the following:
#auto eth0
#iface eth0 inet dhcp
auto br0
iface br0 inet dhcp
bridge-ports eth0
The effect of this configuration will be similar to what would be obtained if the containers
were machines plugged into the same physical network as the host. The “bridge” configura-
tion makes the Ethernet frames on all the bridged interfaces, which includes the physical eth0
as well as the interfaces defined for the containers.
In cases where this configuration cannot be used (for instance if no public IP addresses can be as-
signed to the containers), a virtual tap interface will be created and connected to the bridge. The
equivalent network topology then becomes that of a host with a second network card plugged
328 The Debian Administrator's Handbook](https://image.slidesharecdn.com/debian-handbook-120527093323-phpapp02/85/Debian-Handbook-354-320.jpg)
![into a separate switch, with the containers also plugged into that switch. The host must then
act as a gateway for the containers if they are meant to communicate with the outside world.
In addition to bridge-utils, this “rich” configuration requires the vde2 package; the /etc/
network/interfaces file then becomes:
# Interface eth0 is unchanged
auto eth0
iface eth0 inet dhcp
# Virtual interface
auto tap0
iface tap0 inet manual
vde2-switch -t tap0
# Bridge for containers
auto br0
iface br0 inet static
bridge-ports tap0
address 10.0.0.1
netmask 255.255.255.0
The network can then be either be set up statically in the containers, or dynamically with DHCP
server running on the host. Such a DHCP server will need to be configured to answer queries
on the br0 interface.
12.2.2.3. Seing Up the System
Let us now set up the filesystem to be used by the container. Since this “virtual machine” will not
run directly on the hardware, some tweaks are required when compared to a standard filesys-
tem, especially as far as the kernel, devices and consoles are concerned. Fortunately, the lxc in-
cludes scripts that mostly automate this configuration. For instance, the following commands
(which require the debootstrap package) will install a Debian container:
root@scouzmir:~# mkdir /var/lib/lxc/testlxc/
root@scouzmir:~# /usr/lib/lxc/templates/lxc-debian -p /var/lib/lxc/testlxc/
debootstrap is /usr/sbin/debootstrap
Checking cache download in /var/cache/lxc/debian/rootfs-i386 ...
Downloading debian minimal ...
I: Retrieving Release
I: Retrieving Packages
[...]
Removing any system startup links for /etc/init.d/hwclockfirst.sh ...
/etc/rcS.d/S08hwclockfirst.sh
Root password is 'root', please change !
Chapter 12 — Advanced Administration 329](https://image.slidesharecdn.com/debian-handbook-120527093323-phpapp02/85/Debian-Handbook-355-320.jpg)
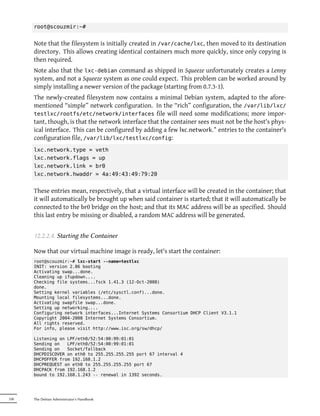
![done.
INIT: Entering runlevel: 3
Starting OpenBSD Secure Shell server: sshd.
Debian GNU/Linux 5.0 scouzmir console
scouzmir login: root
Password:
Linux scouzmir 2.6.32-5-686 #1 SMP Tue Mar 8 21:36:00 UTC 2011 i686
The programs included with the Debian GNU/Linux system are free software;
the exact distribution terms for each program are described in the
individual files in /usr/share/doc/*/copyright.
Debian GNU/Linux comes with ABSOLUTELY NO WARRANTY, to the extent
permitted by applicable law.
scouzmir:~# ps auxwf
USER PID %CPU %MEM VSZ RSS TTY STAT START TIME COMMAND
root 1 0.0 0.2 1984 680 ? Ss 08:44 0:00 init [3]
root 197 0.0 0.1 2064 364 ? Ss 08:44 0:00 dhclient3 -pf /var/run/dhclient.
¯ eth0.pid -lf /var/lib/dhcp3/dhclien
root 286 0.1 0.4 2496 1256 console Ss 08:44 0:00 /bin/login --
root 291 0.7 0.5 2768 1504 console S 08:46 0:00 _ -bash
root 296 0.0 0.3 2300 876 console R+ 08:46 0:00 _ ps auxwf
root 287 0.0 0.2 1652 560 tty1 Ss+ 08:44 0:00 /sbin/getty 38400 tty1 linux
root 288 0.0 0.2 1652 560 tty2 Ss+ 08:44 0:00 /sbin/getty 38400 tty2 linux
root 289 0.0 0.2 1652 556 tty3 Ss+ 08:44 0:00 /sbin/getty 38400 tty3 linux
root 290 0.0 0.2 1652 560 tty4 Ss+ 08:44 0:00 /sbin/getty 38400 tty4 linux
scouzmir:~#
We are now in the container; our access to the processes is restricted to only those started from
the container itself, and our access to the filesystem is similarly restricted to the dedicated sub-
set of the full filesystem (/var/lib/lxc/testlxc/rootfs), in which root's password is initially
set to root.
Should we want to run the container as a background process, we would invoke lxc-start with
the --daemon option. We can then interrupt the container with a command such as lxc-kill
--name=testlxc.
The lxc package contains an initialization script that can automatically start one or several con-
tainers when the host boots; its configuration file, /etc/default/lxc, is relatively straightfor-
ward; note that the container configuration files need to be stored in /etc/lxc/; many users
may prefer symbolic links, such as can be created with ln -s /var/lib/lxc/testlxc/config
/etc/lxc/testlxc.config.
GOING FURTHER Since LXC is a very lightweight isolation system, it can be particularly adapted
Mass virtualization to massive hosting of virtual servers. The network configuration will probably
be a bit more advanced than what we described above, but the “rich” config-
uration using tap and veth interfaces should be enough in many cases.
It may also make sense to share part of the filesystem, such as the /usr and
/lib subtrees, so as to avoid duplicating the soware that may need to be
common to several containers. This will usually be achieved with lxc.mount.
entry entries in the containers configuration file. An interesting side-effect
is that the processes will then use less physical memory, since the kernel is
able to detect that the programs are shared. The marginal cost of one extra
container can then be reduced to the disk space dedicated to its specific data,
and a few extra processes that the kernel must schedule and manage.
Chapter 12 — Advanced Administration 331](https://image.slidesharecdn.com/debian-handbook-120527093323-phpapp02/85/Debian-Handbook-357-320.jpg)
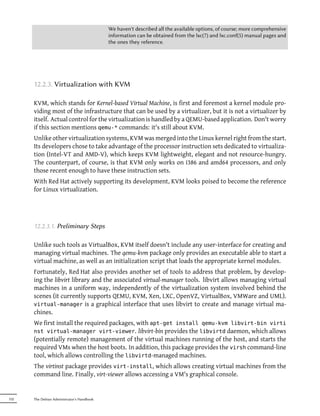
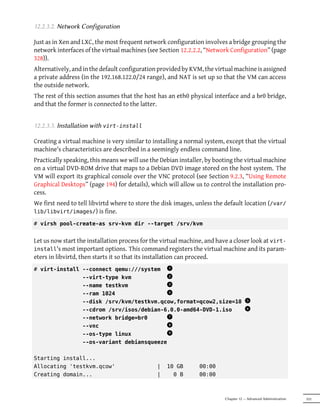
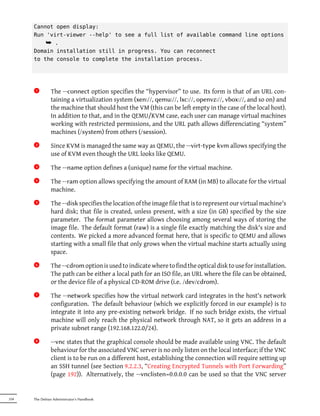
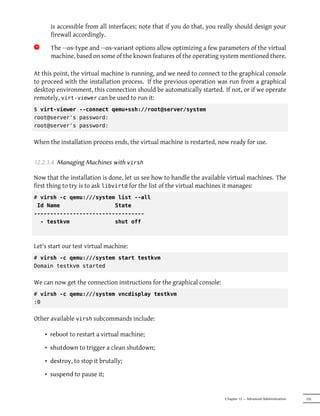
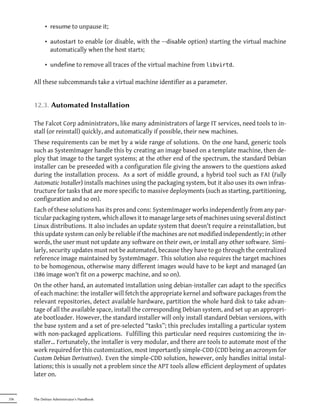
![We will only give a rough overview of FAI, and skip SystemImager altogether (which is no longer
in Debian), in order to focus more intently on debian-installer and simple-CDD, which are more
interesting in a Debian-only context.
12.3.1. Fully Automatic Installer (FAI)
Fully Automatic Installer is probably the oldest automated deployment system for Debian, which
explains its status as a reference; but its very flexible nature only just compensates for the com-
plexity it involves.
FAI requires a server system to store deployment information and allow target machines to boot
from the network. This server requires the fai-server package (or fai-quickstart, which also brings
the required elements for a standard configuration).
FAI uses a specific approach for defining the various installable profiles. Instead of simply dupli-
cating a reference installation, FAI is a full-fledged installer, fully configurable via a set of files
and scripts stored on the server; the default location /srv/fai/config/ is not automatically
created, so the administrator needs to create it along with the relevant files. Most of the times,
these files will be customized from the example files available in the documentation for the fai-
doc package, more particularly the /usr/share/doc/fai-doc/examples/simple/ directory.
Once the profiles are defined, the fai-setup command generates the elements required to start
an FAI installation; this mostly means preparing or updating a minimal system (NFS-root) used
during installation. An alternative is to generate a dedicated boot CD with fai-cd.
Creating all these configuration files requires some understanding of the way FAI works. A
typical installation process is made of the following steps:
• fetching a kernel from the network, and booting it;
• mounting the root filesystem from NFS;
• executing /usr/sbin/fai, which controls the rest of the process (the next steps are
therefore initiated by this script);
• copying the configuration space from the server into /fai/;
• running fai-class. The /fai/class/[0-9][0-9]* scripts are executed in turn, and re-
turn names of “classes” that apply to the machine being installed; this information will
serve as a base for the following steps. This allows for some flexibility in defining the
services to be installed and configured.
• fetching a number of configuration variables, depending on the relevant classes;
• partitioning the disks and formatting the partitions, based on information provided in
/fai/disk_config/class;
• mounting said partitions;
Chapter 12 — Advanced Administration 337](https://image.slidesharecdn.com/debian-handbook-120527093323-phpapp02/85/Debian-Handbook-363-320.jpg)
![• installing the base system;
• preseeding the Debconf database with fai-debconf;
• fetching the list of available packages for APT;
• installing the packages listed in /fai/package_config/class;
• executing the post-configuration scripts, /fai/scripts/class/[0-9][0-9]*;
• recording the installation logs, unmounting the partitions, and rebooting.
12.3.2. Preseeding Debian-Installer
At the end of the day, the best tool to install Debian systems should logically be the official
Debian installer. This is why, right from its inception, debian-installer has been designed for
automated use, taking advantage of the infrastructure provided by debconf. The latter allows,
on the one hand, to reduce the number of questions asked (hidden questions will use the pro-
vided default answer), and on the other hand, to provide the default answers separately, so that
installation can be non-interactive. This last feature is known as preseeding.
GOING FURTHER Preseeding allows to provide a set of answers to Debconf questions at instal-
Debconf with a centralized lation time, but these answers are static and do not evolve as time passes.
database Since already-installed machines may need upgrading, and new answers may
become required, the /etc/debconf.conf configuration file can be set up so
that Debconf uses external data sources (such as an LDAP directory server,
or a remote file mounted via NFS or Samba). Several external data sources
can be defined at the same time, and they complement one another. The lo-
cal database is still used (for read-write access), but the remote databases are
usually restricted to reading. The debconf.conf(5) manual page describes all
the possibilities in detail.
12.3.2.1. Using a Preseed File
There are several places where the installer can get a preseeding file:
• in the initrd used to start the machine; in this case, preseeding happens at the very begin-
ning of the installation, and all questions can be avoided. The file just needs to be called
preseed.cfg and stored in the initrd root.
• on the boot media (CD or USB key); preseeding then happens as soon as the media is
mounted, which means right after the questions about language and keyboard layout.
The preseed/file boot parameter can be used to indicate the location of the preseeding
file (for instance, /cdrom/preseed.cfg when the installation is done off a CD-ROM, or
/hd-media/preseed.cfg in the USB-key case).
338 The Debian Administrator's Handbook](https://image.slidesharecdn.com/debian-handbook-120527093323-phpapp02/85/Debian-Handbook-364-320.jpg)
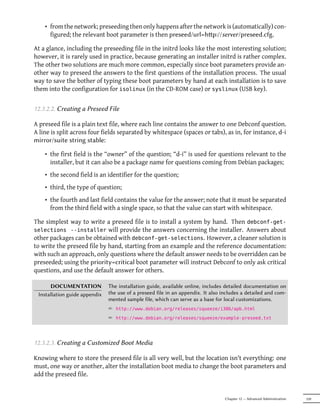
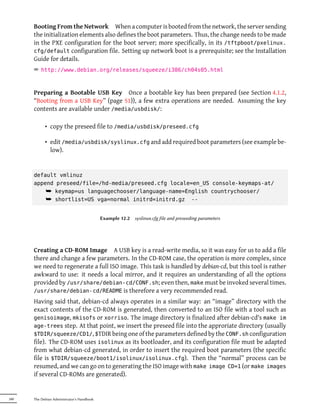
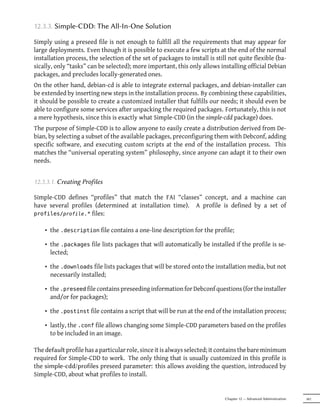
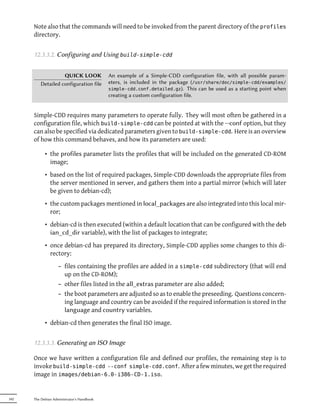
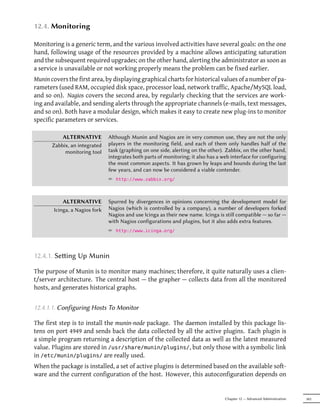
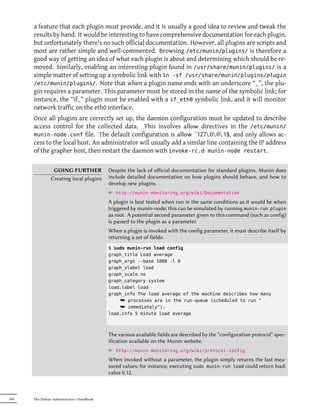
![Finally, when a plugin is invoked with the autoconf parameter, it should return
“yes” (and a 0 exit status) or “no” (with a 1 exit status) according to whether
the plugin should be enabled on this host.
12.4.1.2. Configuring the Grapher
The “grapher” is simply the computer that aggregates the data and generate the corresponding
graphs. The required software is in the munin package. The standard configuration runs munin-
cron (once every 5 minutes), which gathers data from all the hosts listed in /etc/munin/munin.
conf (only the local host is listed by default), saves the historical data in RRD files (Round Robin
Database, a file format designed to store data varying in time) stored under /var/lib/munin/
and generates an HTML page with the graphs in /var/cache/munin/www/.
All monitored machines must therefore be listed in the /etc/munin/munin.conf configuration
file. Each machine is listed as a full section with a name matching the machine and at least an
address entry giving the corresponding IP address.
[ftp.falcot.com]
address 192.168.0.12
use_node_name yes
Sections can be more complex, and describe extra graphs that could be created by combining
data coming from several machines. The samples provided in the configuration file are good
starting points for customization.
The last step is to publish the generated pages; this involves configuring a web server so that the
contents of /var/cache/munin/www/ are made available on a website. Access to this website
will often be restricted, using either an authentication mechanism or IP-based access control.
See Section 11.2, “Web Server (HTTP)” (page 268) for the relevant details.
12.4.2. Seing Up Nagios
Unlike Munin, Nagios does not necessarily require installing anything on the monitored hosts;
most of the time, Nagios is used to check the availability of network services. For instance,
Nagios can connect to a web server and check that a given web page can be obtained within a
given time.
12.4.2.1. Installing
The first step in setting up Nagios is to install the nagios3, nagios-plugins and nagios3-doc packages.
Installing the packages configures the web interface and creates a first nagiosadmin user (for
which it asks for a password). Adding other users is a simple matter of inserting them in the
/etc/nagios3/htpasswd.users file with Apache's htpasswd command. If no Debconf question
Chapter 12 — Advanced Administration 345](https://image.slidesharecdn.com/debian-handbook-120527093323-phpapp02/85/Debian-Handbook-371-320.jpg)
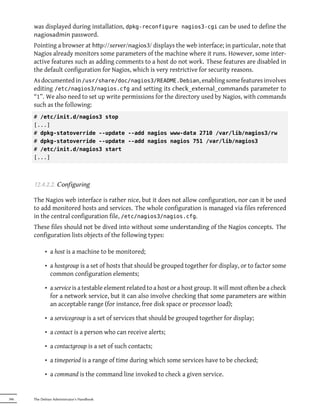


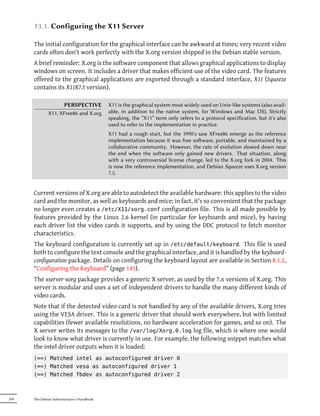

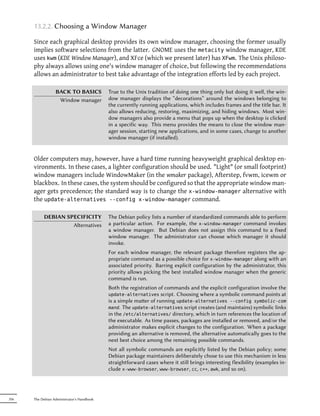

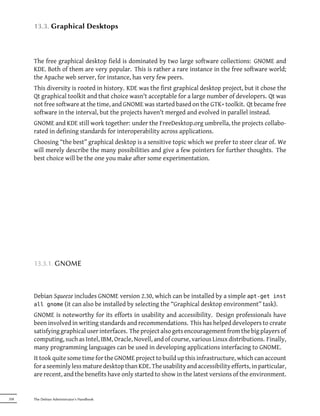
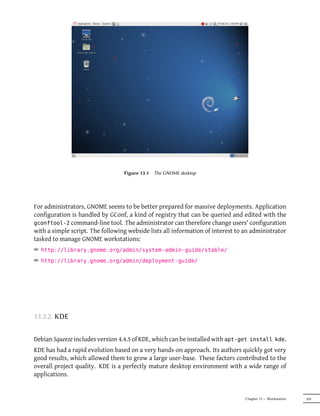
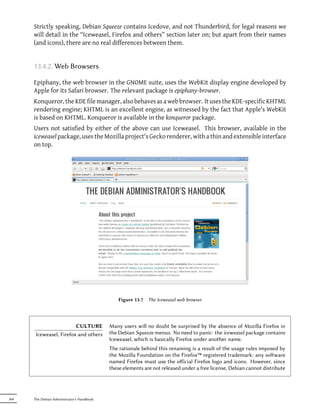
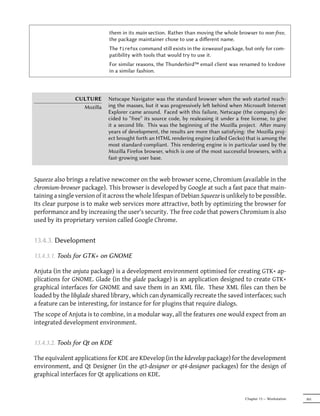
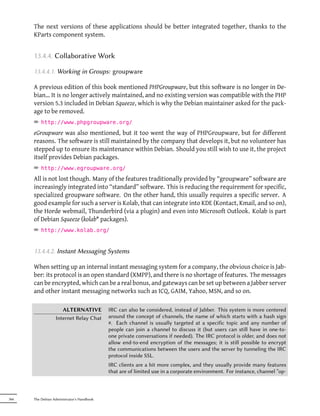
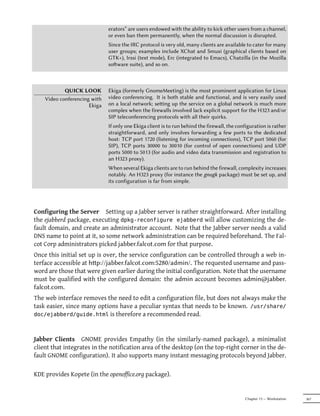
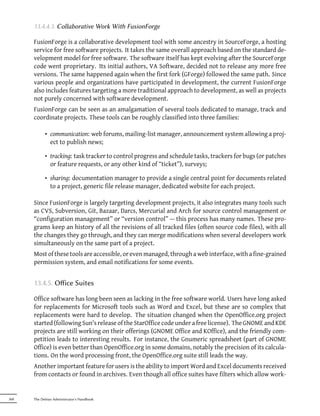

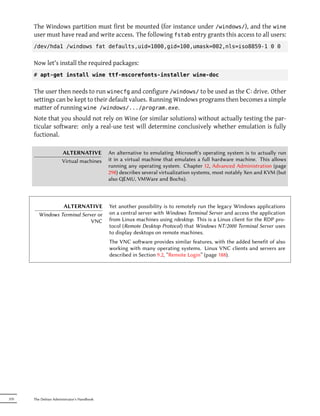


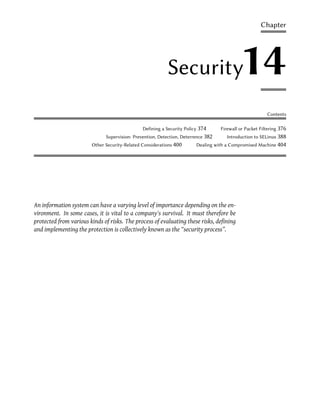
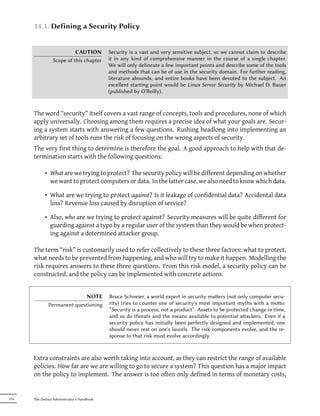
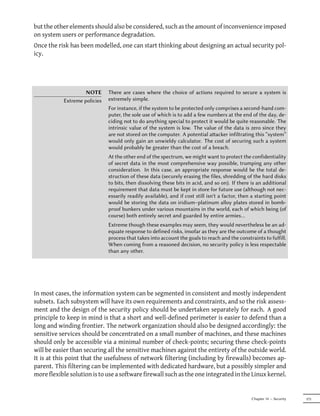
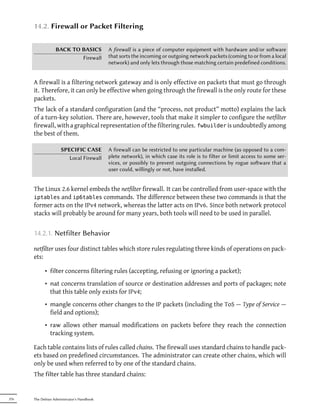
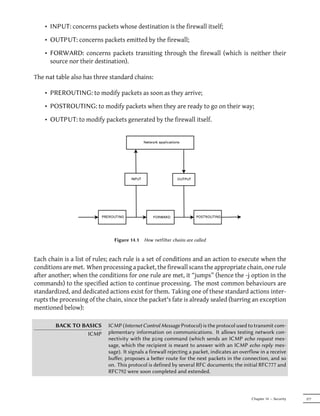
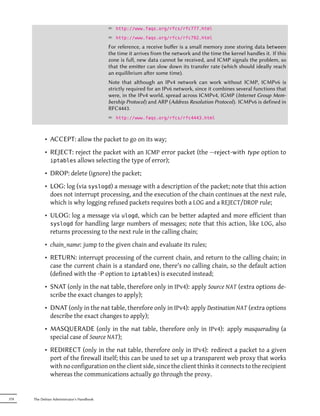
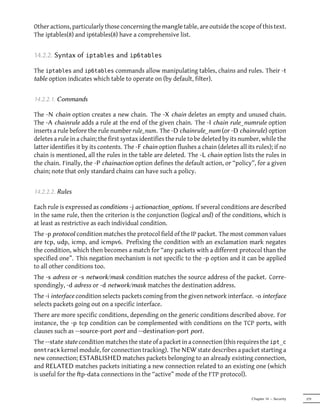
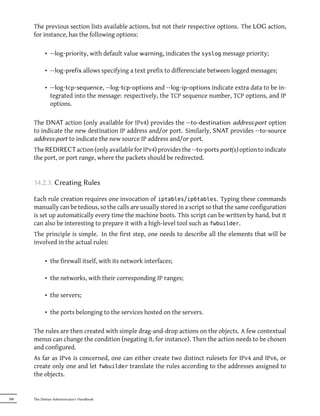
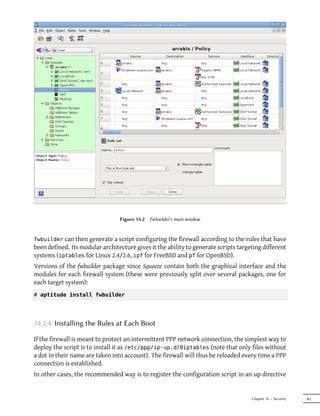
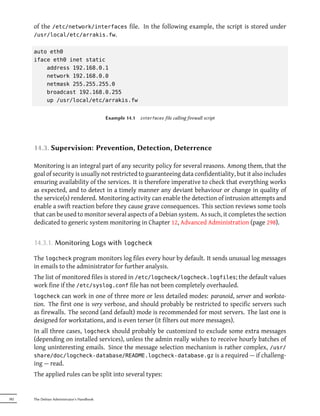

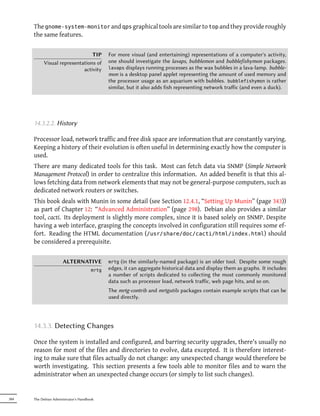
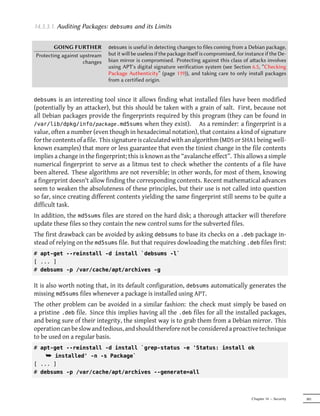

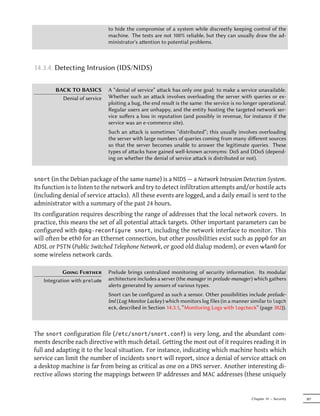
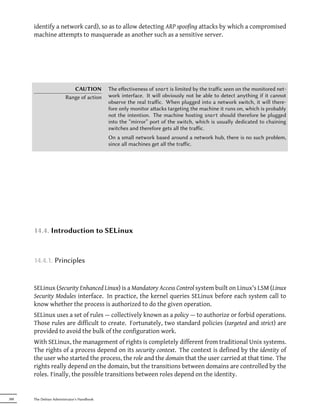
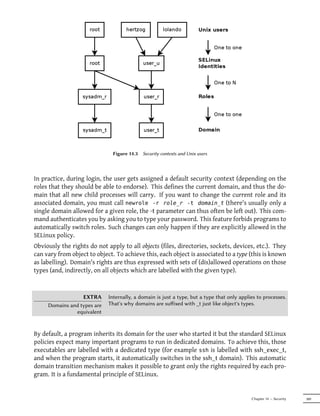
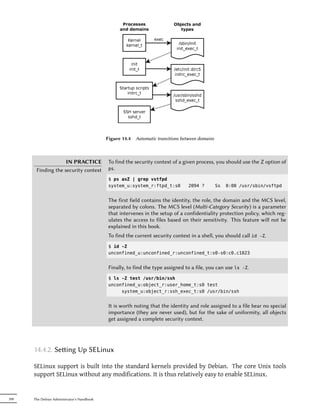
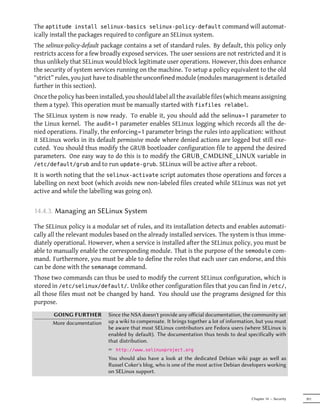
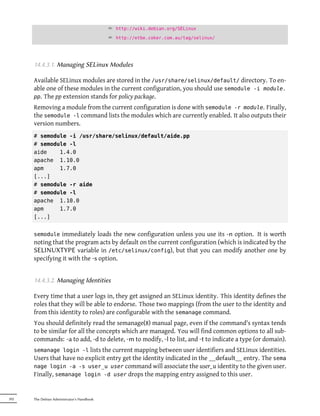
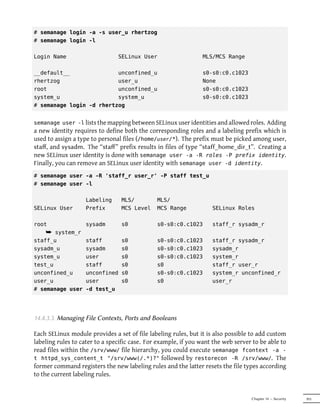
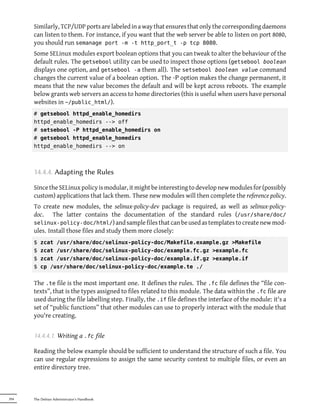
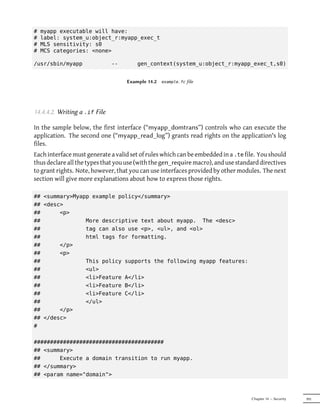
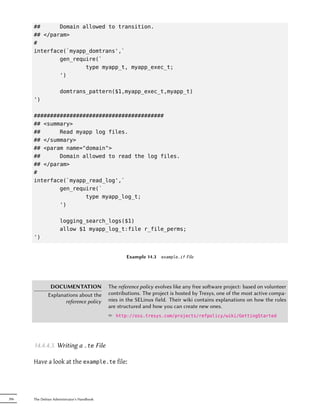
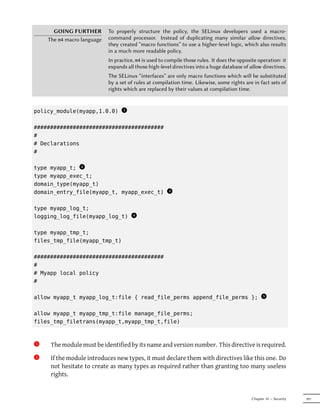
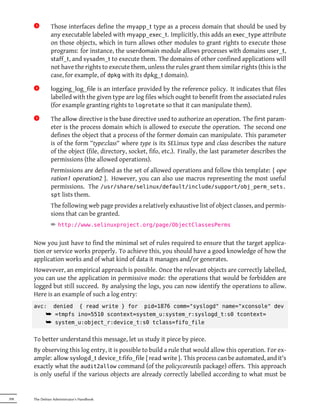
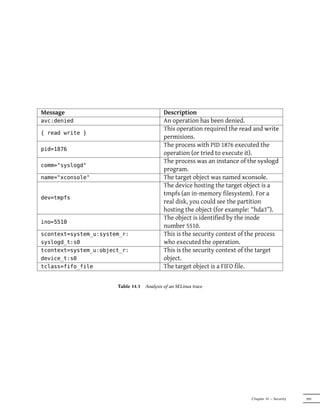
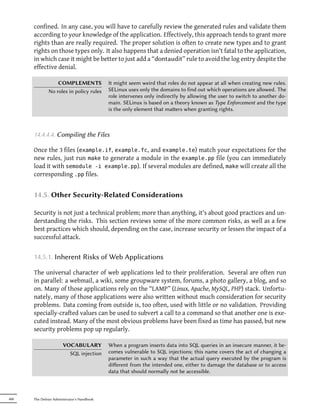

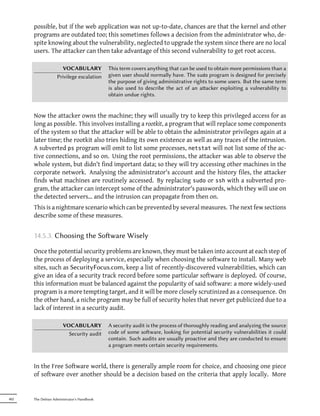
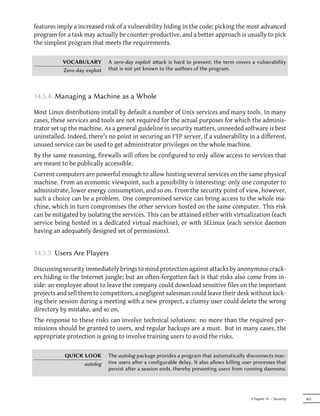
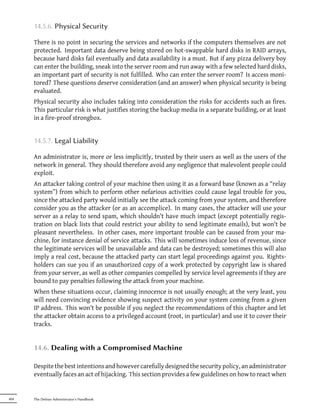
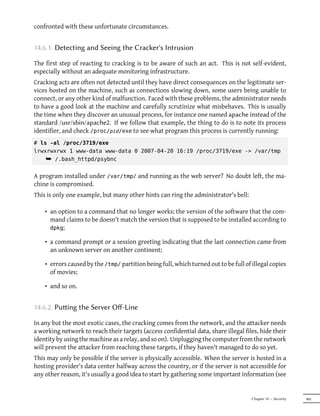
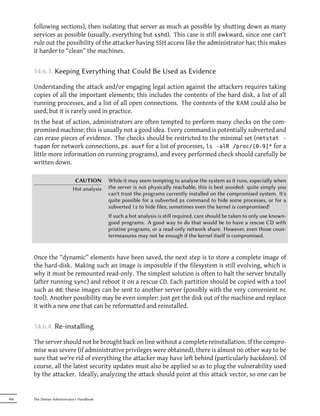
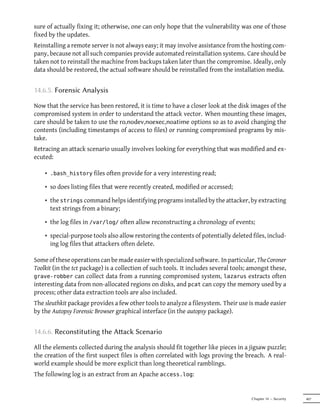
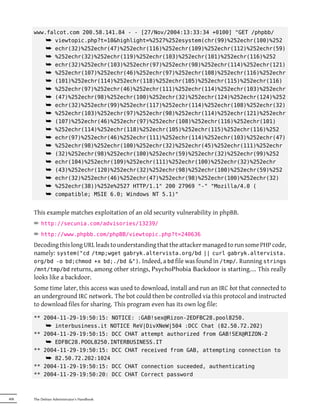
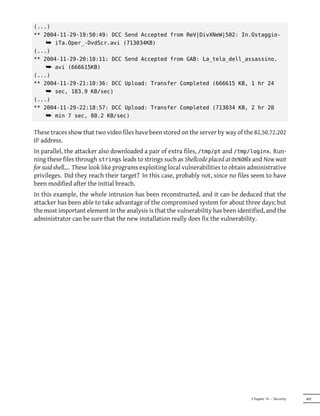

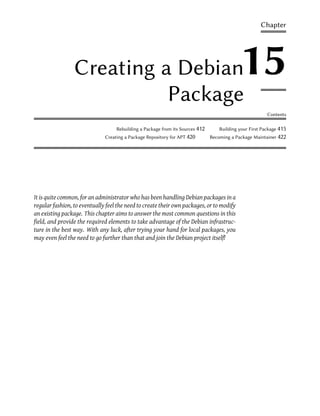
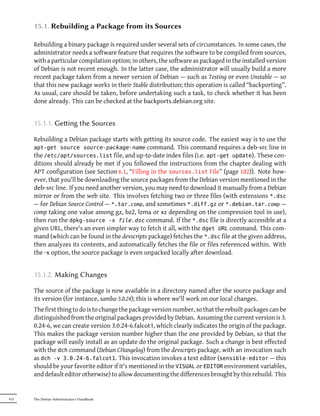

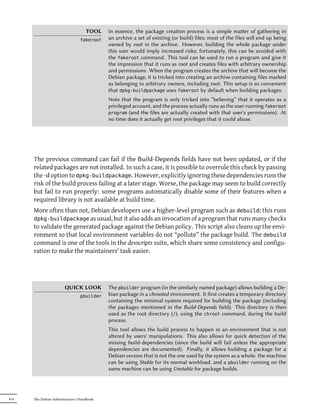

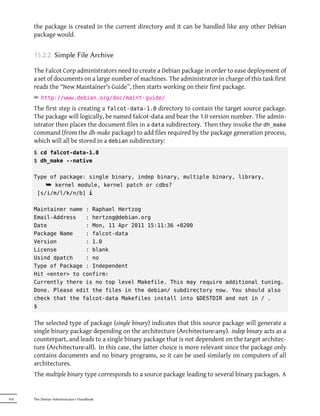
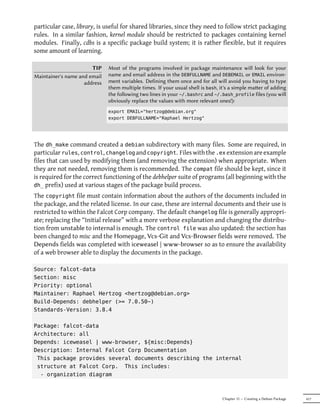
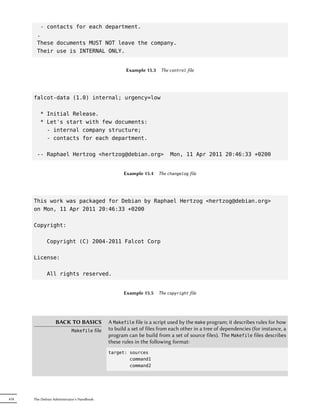
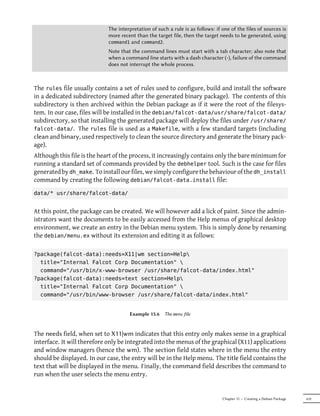
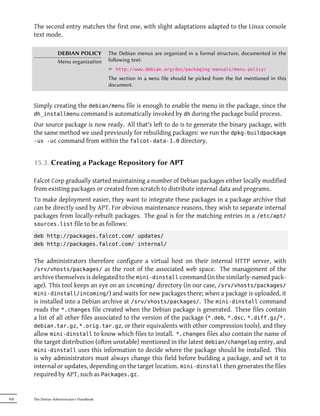
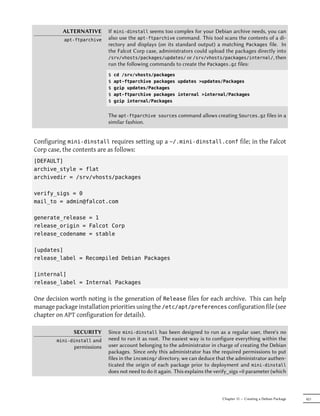
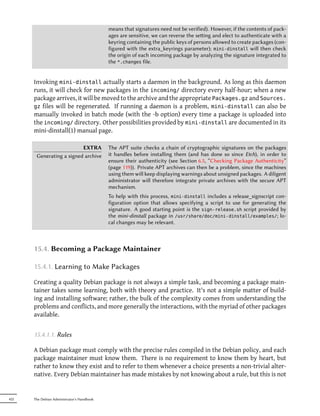
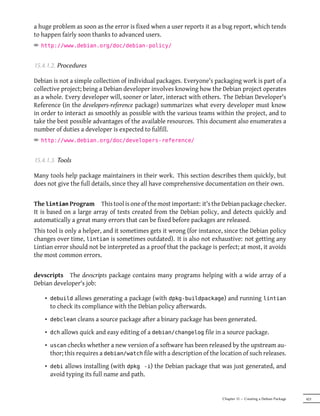
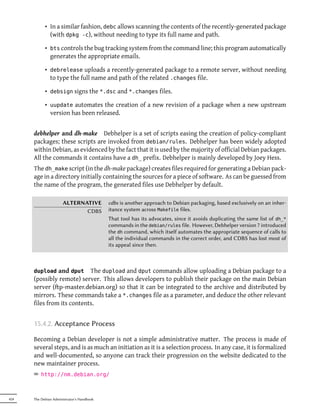


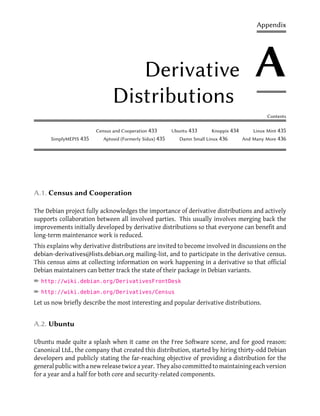
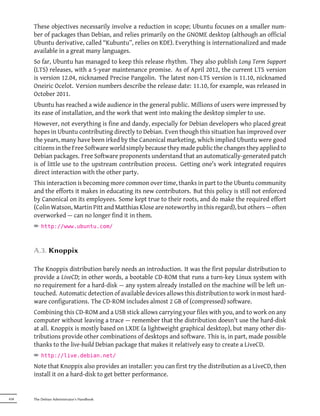
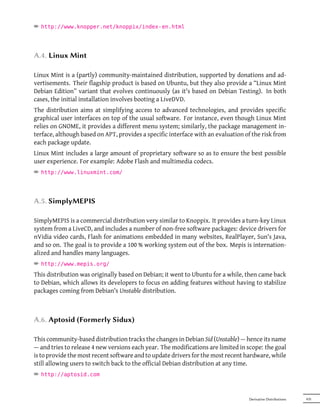


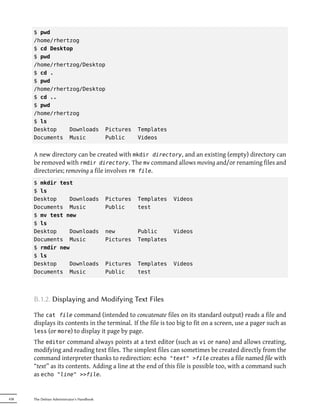
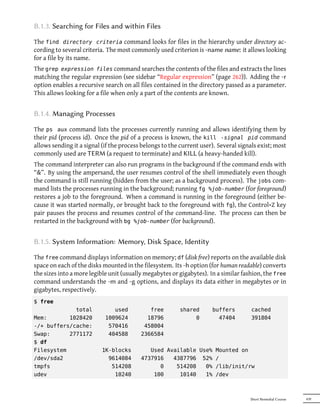
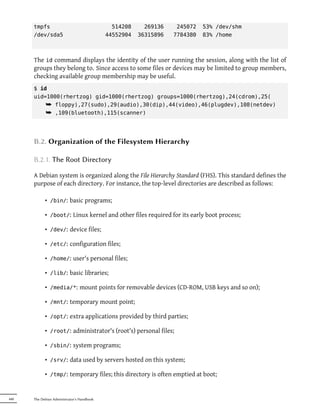
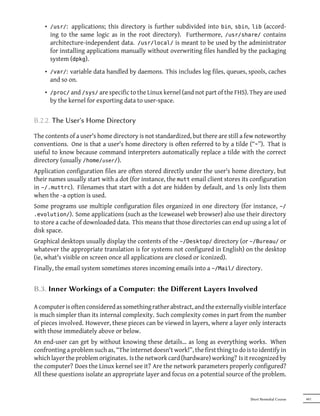
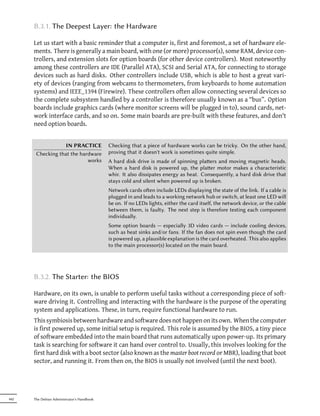
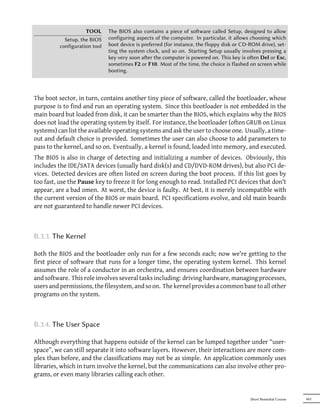
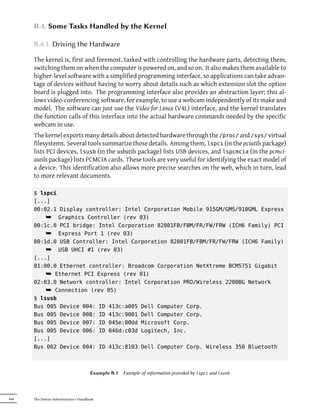
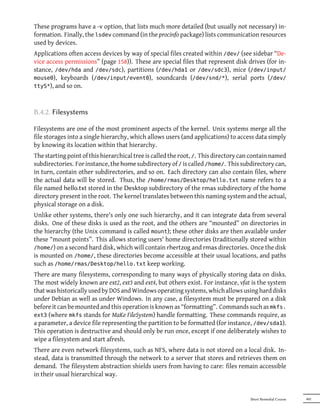

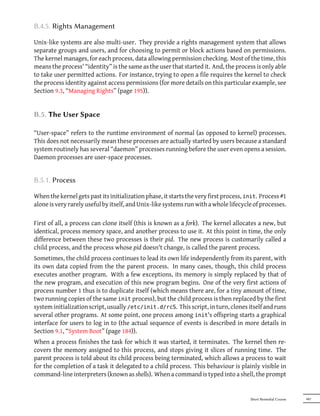

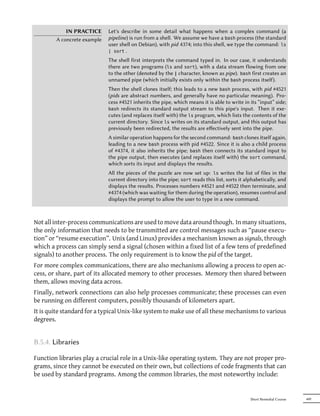
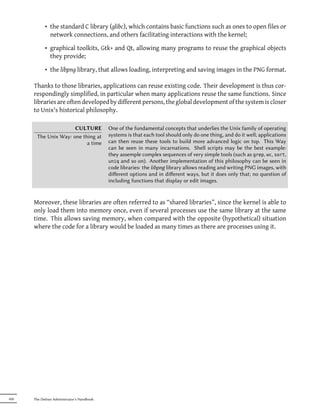
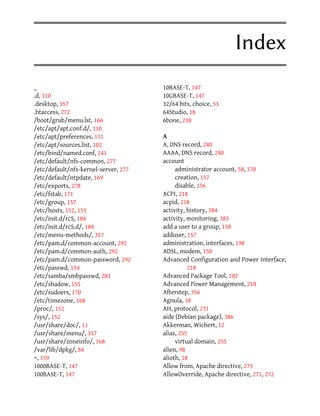

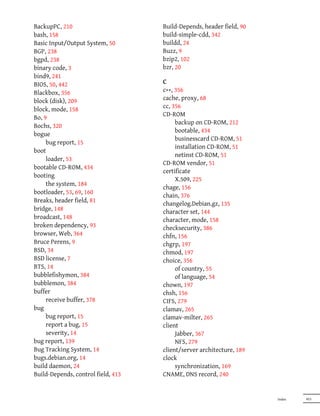
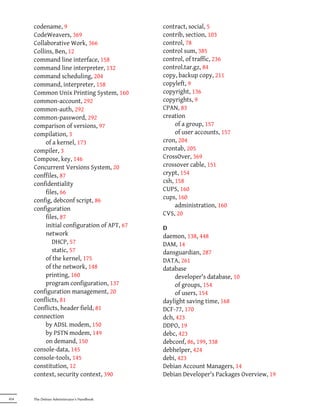

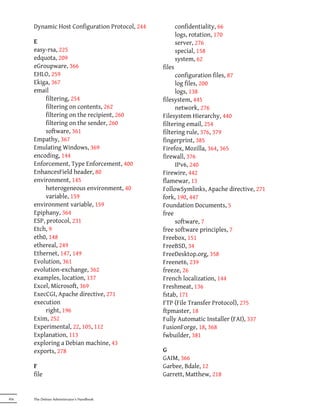
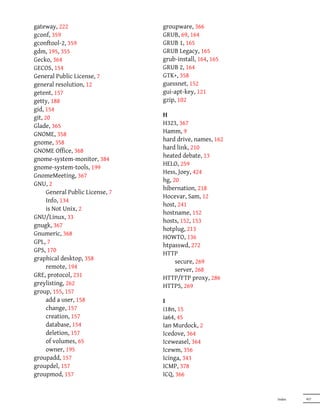
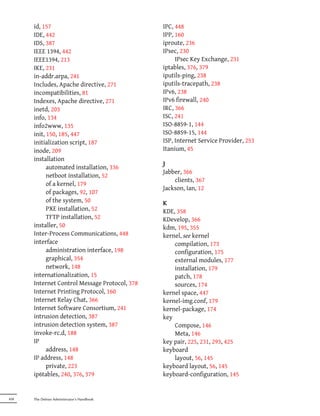

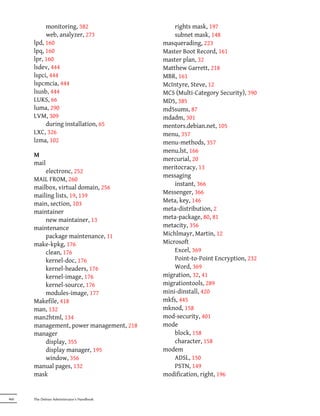

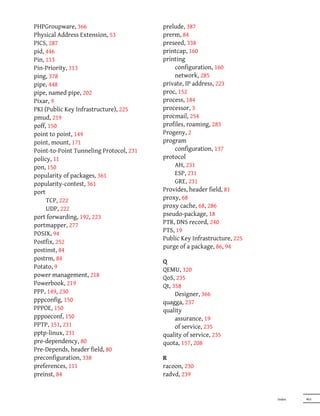
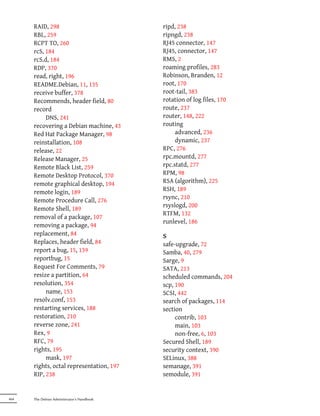
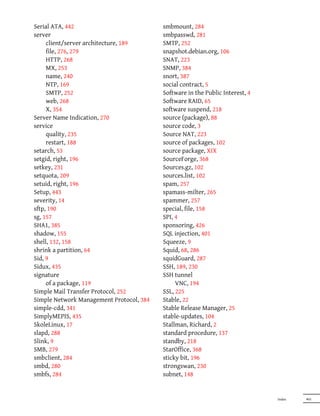


This document provides an overview of the Debian Administrator's Handbook by Raphaël Hertzog and Roland Mas. It details the copyright and licensing information for the book, which is made available under both a Creative Commons license and the GNU General Public License. The book covers topics such as the Debian project, Debian distributions like Squeeze, and how to install and configure Debian.