Download to read offline


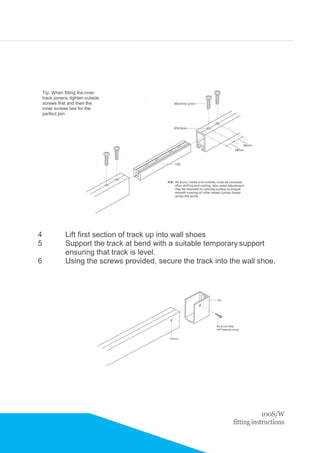
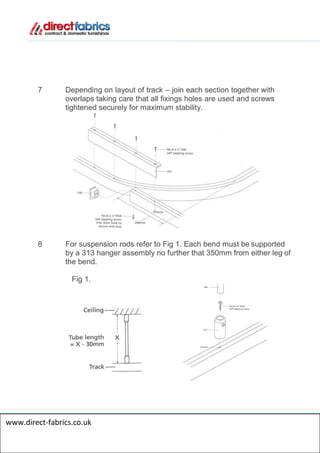


The document provides detailed fitting instructions for installing a 100s/w cubicle curtain track, including initial unpacking, marking positions on the wall, assembling the track, securing it, and ensuring stability with hangers. Specific guidelines are given for track support, including maximum spans and proper join configurations. It concludes with tips for ensuring smooth operation of the gliders and correcting any misalignments.