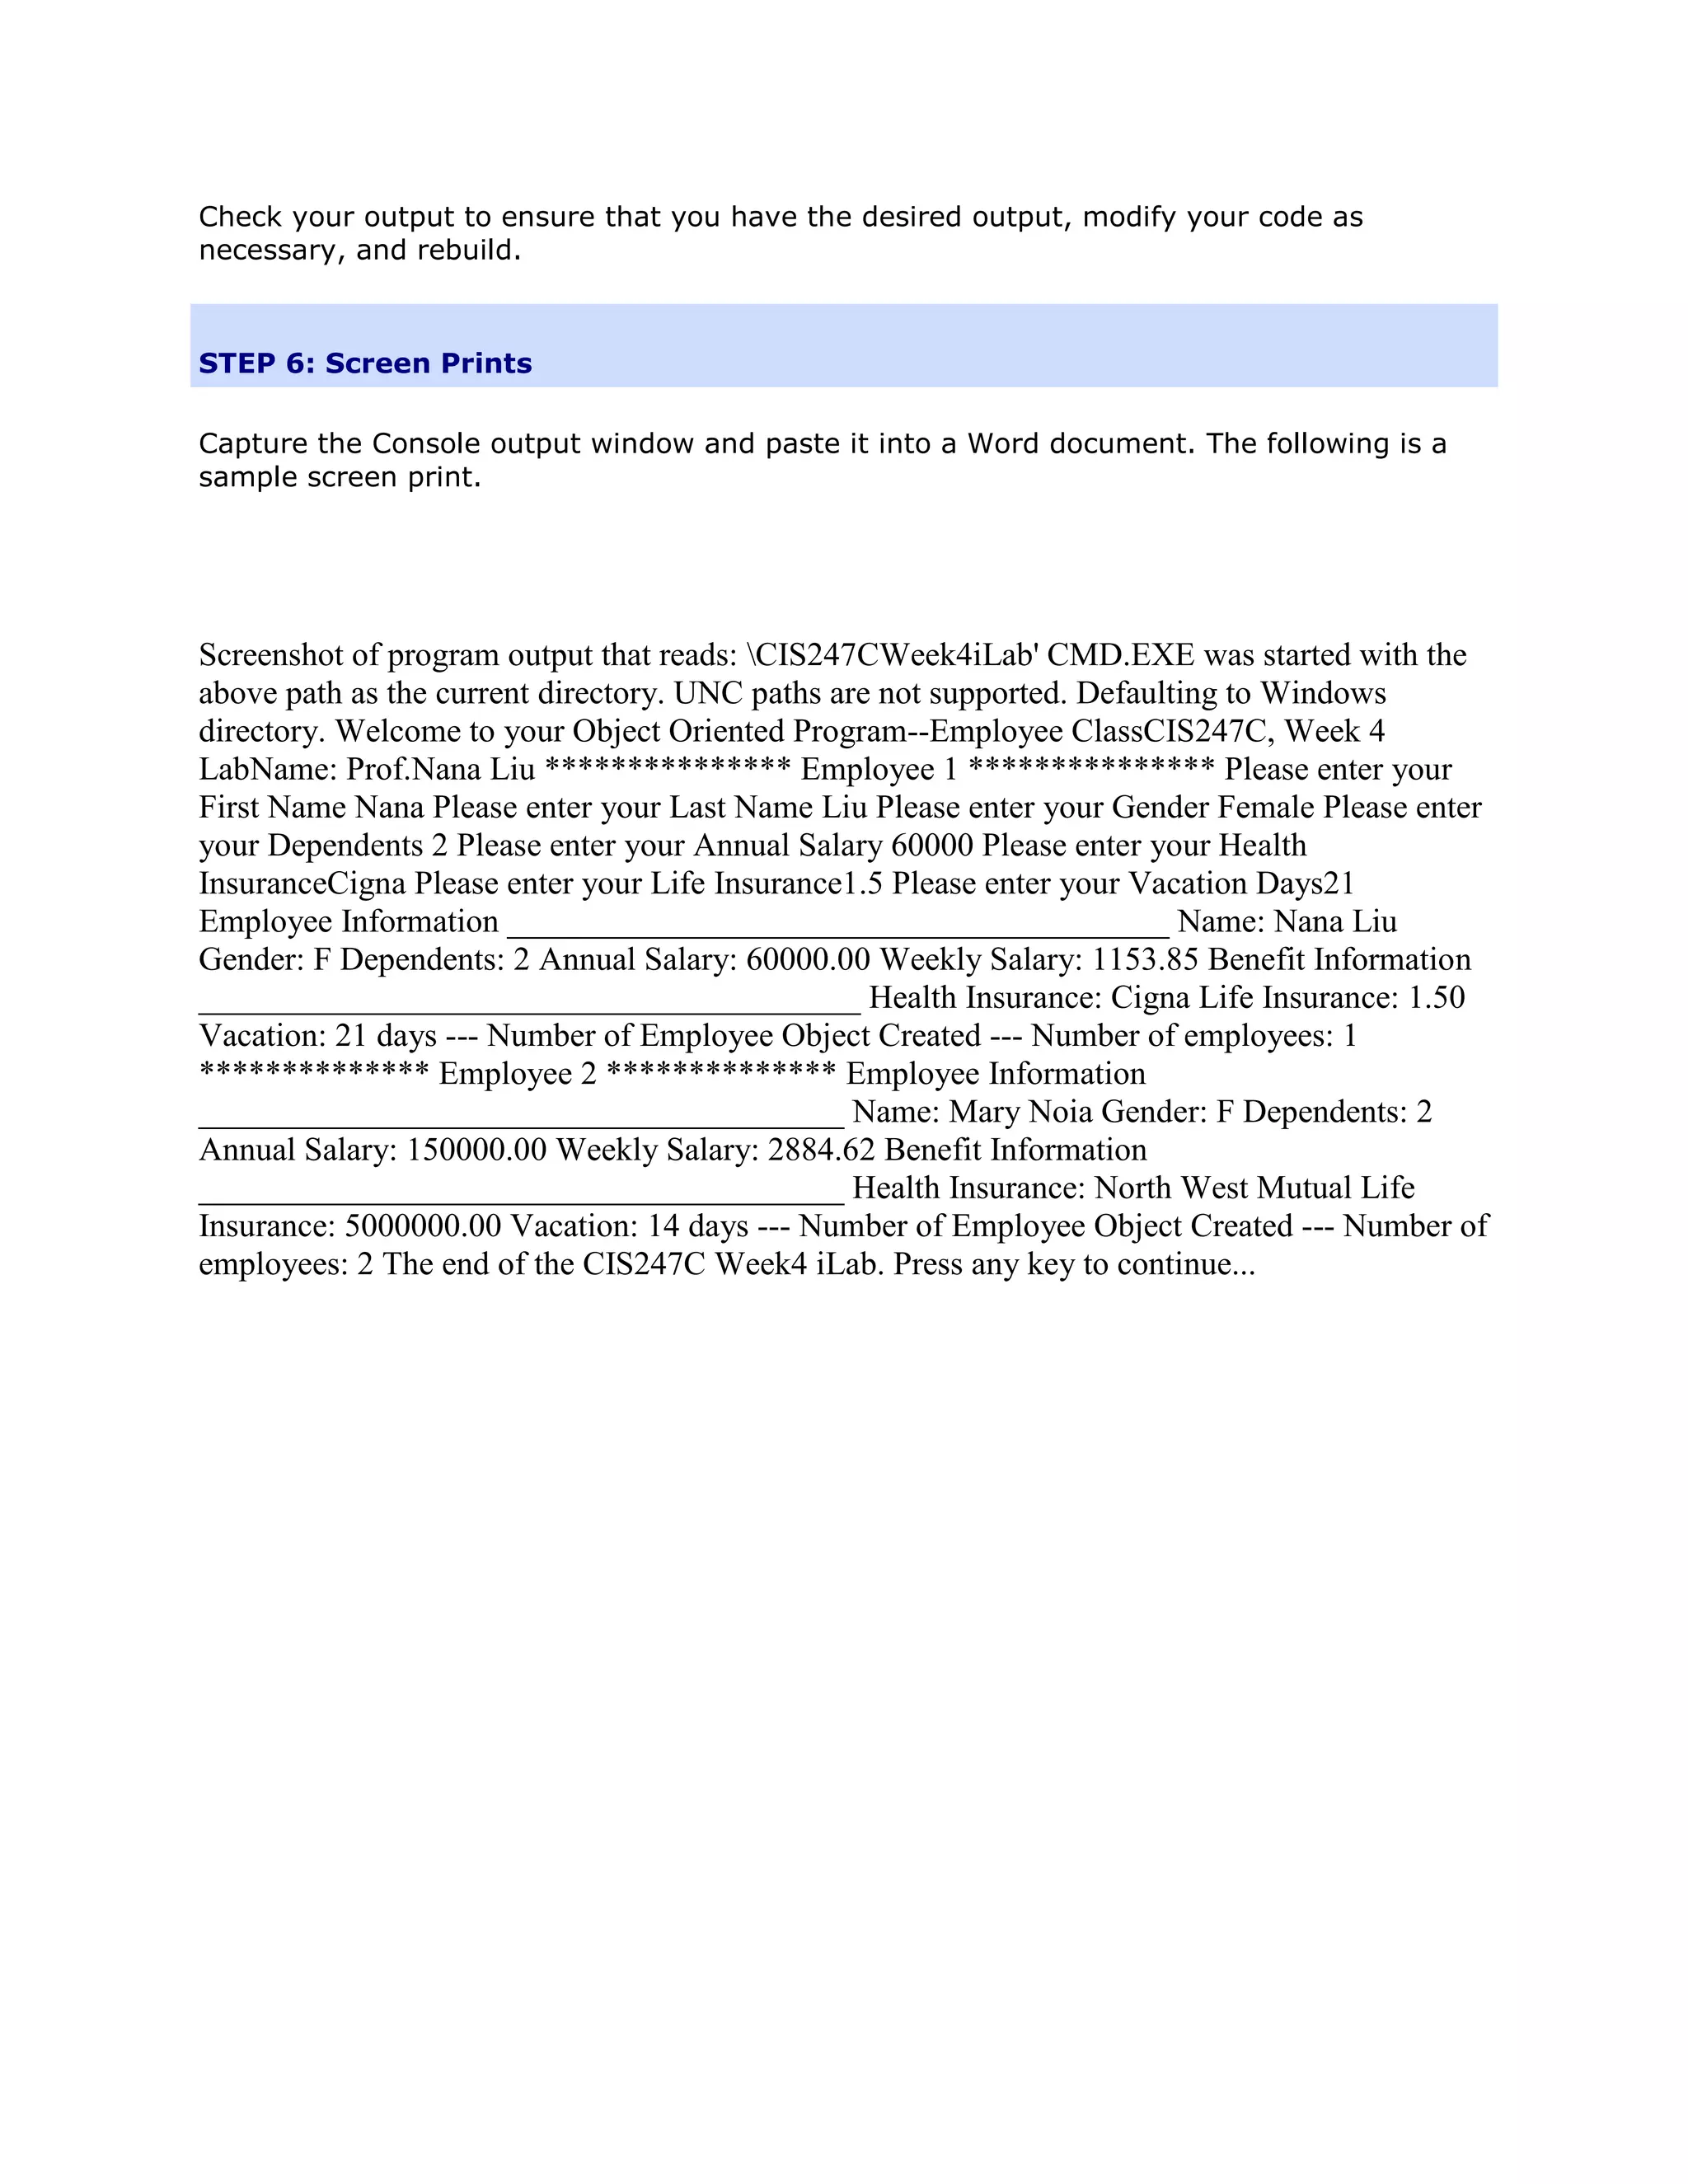
The objective of the lab is to modify the Employee class to incorporate composition with a Benefits class and implement an abstract iEmployee interface. Students are instructed to create a Benefits class, integrate it into the Employee class by adding a Benefit attribute, and make Employee inherit from the abstract iEmployee interface requiring implementation of calculatePay. The main method is updated to demonstrate use of the new Benefits object by prompting the user for benefit details and displaying employee information along with their assigned benefits.


![Program.cs class Program { static void Main(string[] args).pdf](https://cdn.slidesharecdn.com/ss_thumbnails/program-230410031806-5278c551-thumbnail.jpg?width=640&height=640&fit=bounds)