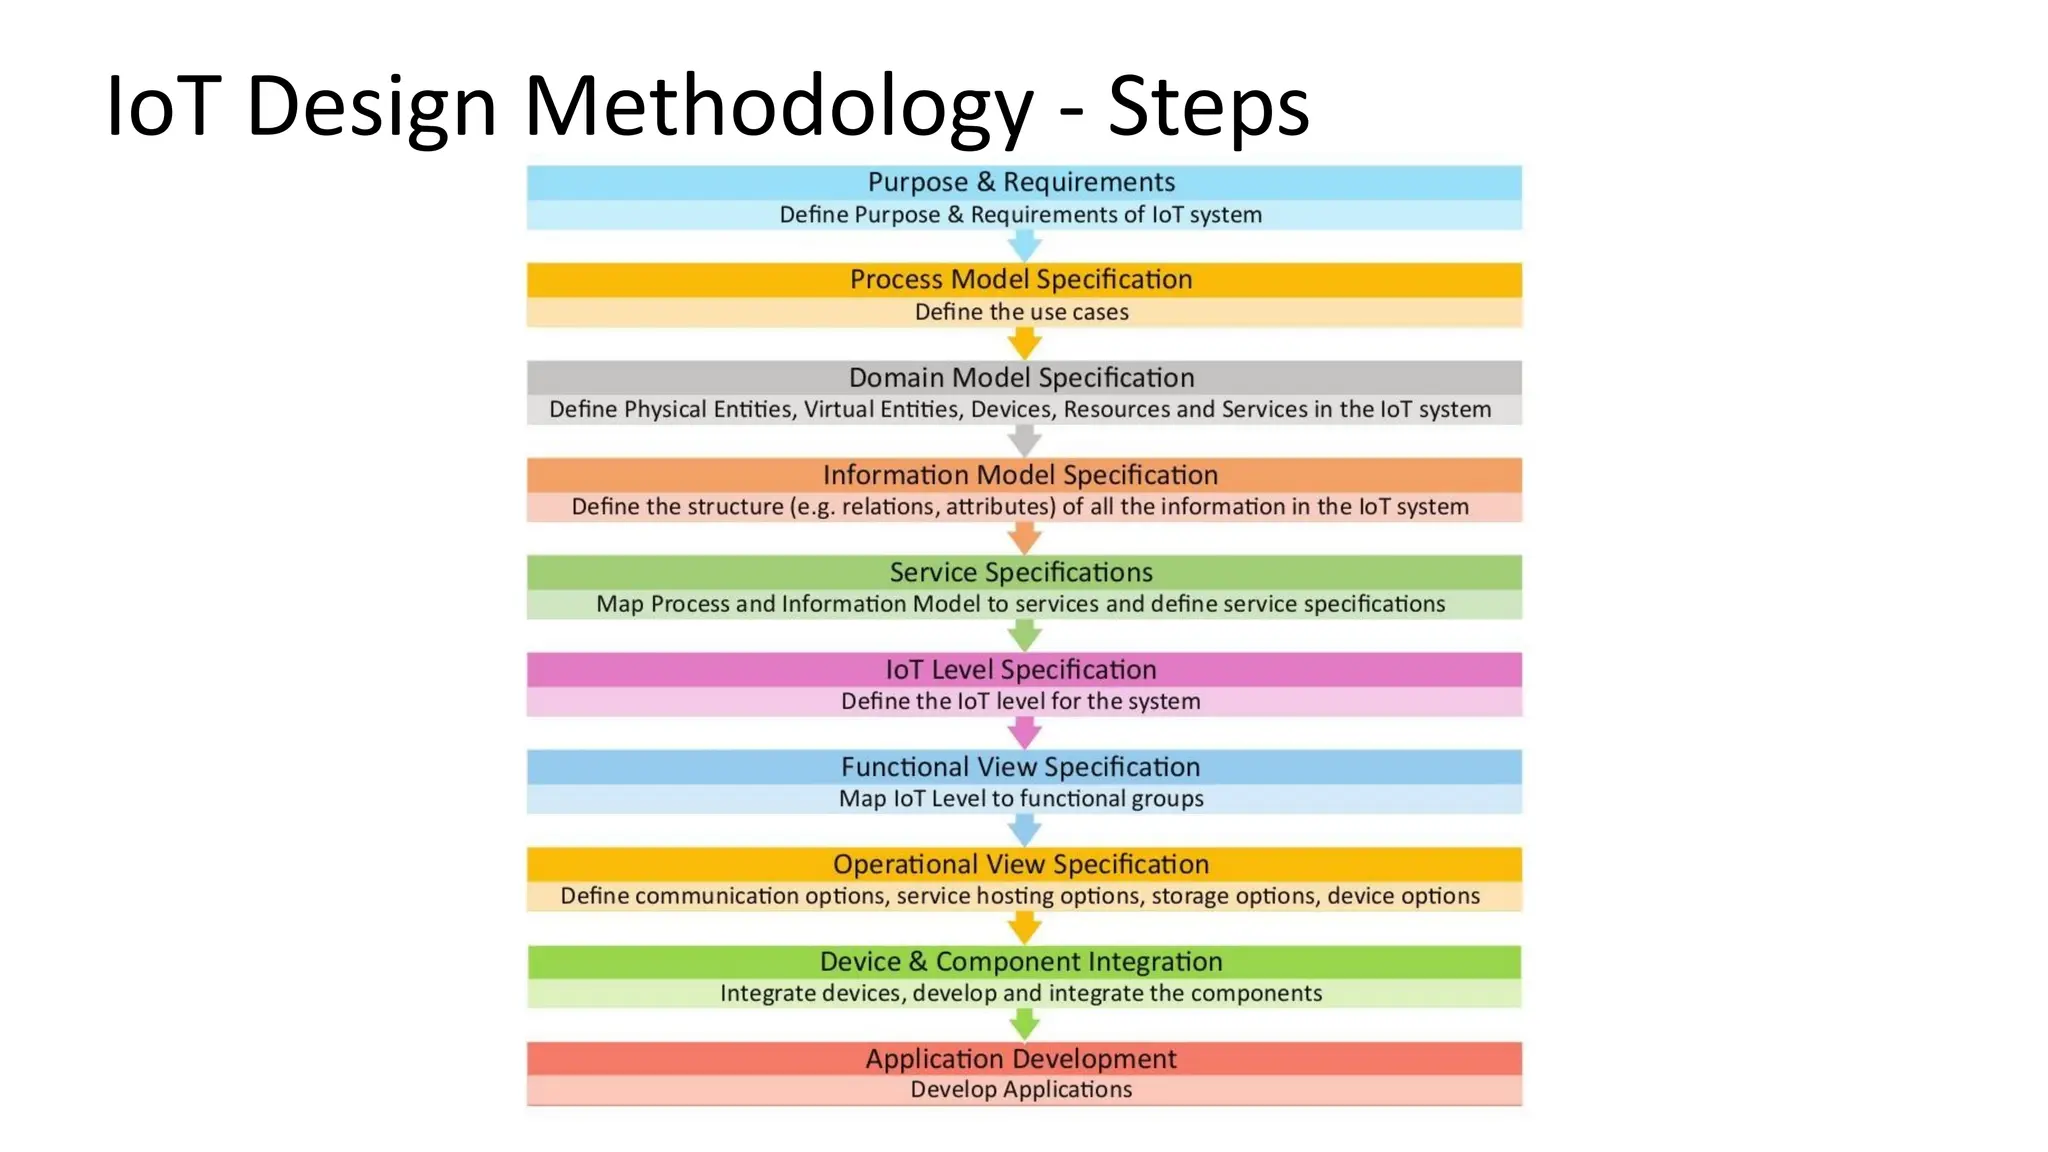
Step 1: Purpose& Requirements Specification
• The first step in IoT system design methodology is to define the
purpose and requirements of the system. In this step, the system
purpose, behavior and requirements (such as data collection
requirements, data analysis requirements, system management
requirements, data privacy and security requirements, user
interface requirements, ...) are captured.
15.
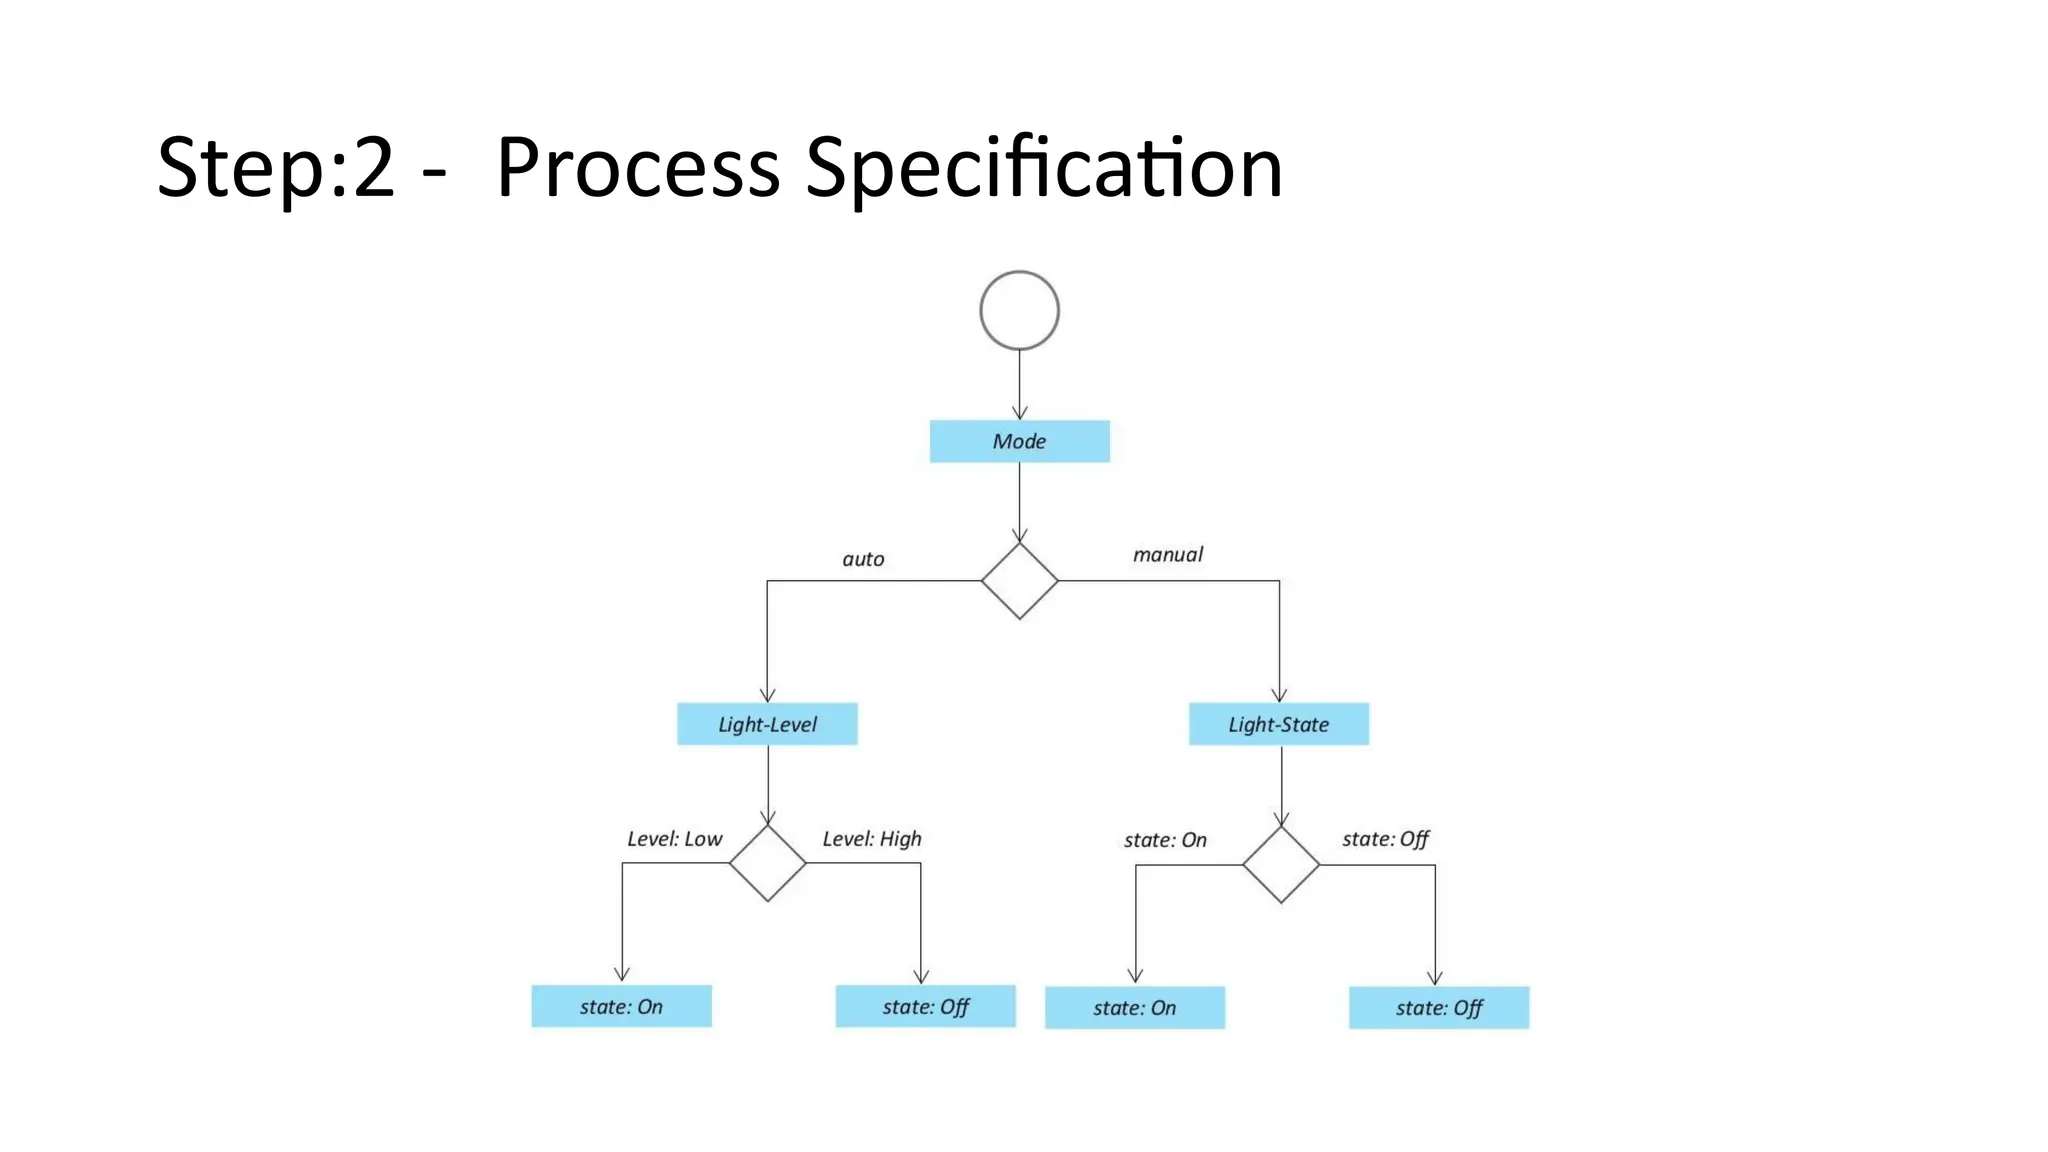
Step 2: ProcessSpecification
• The second step in the IoT design methodology is to define the
process specification. In this step, the use cases of the IoT system are
formally described based on and derived from the purpose and
requirement specifications.
16.
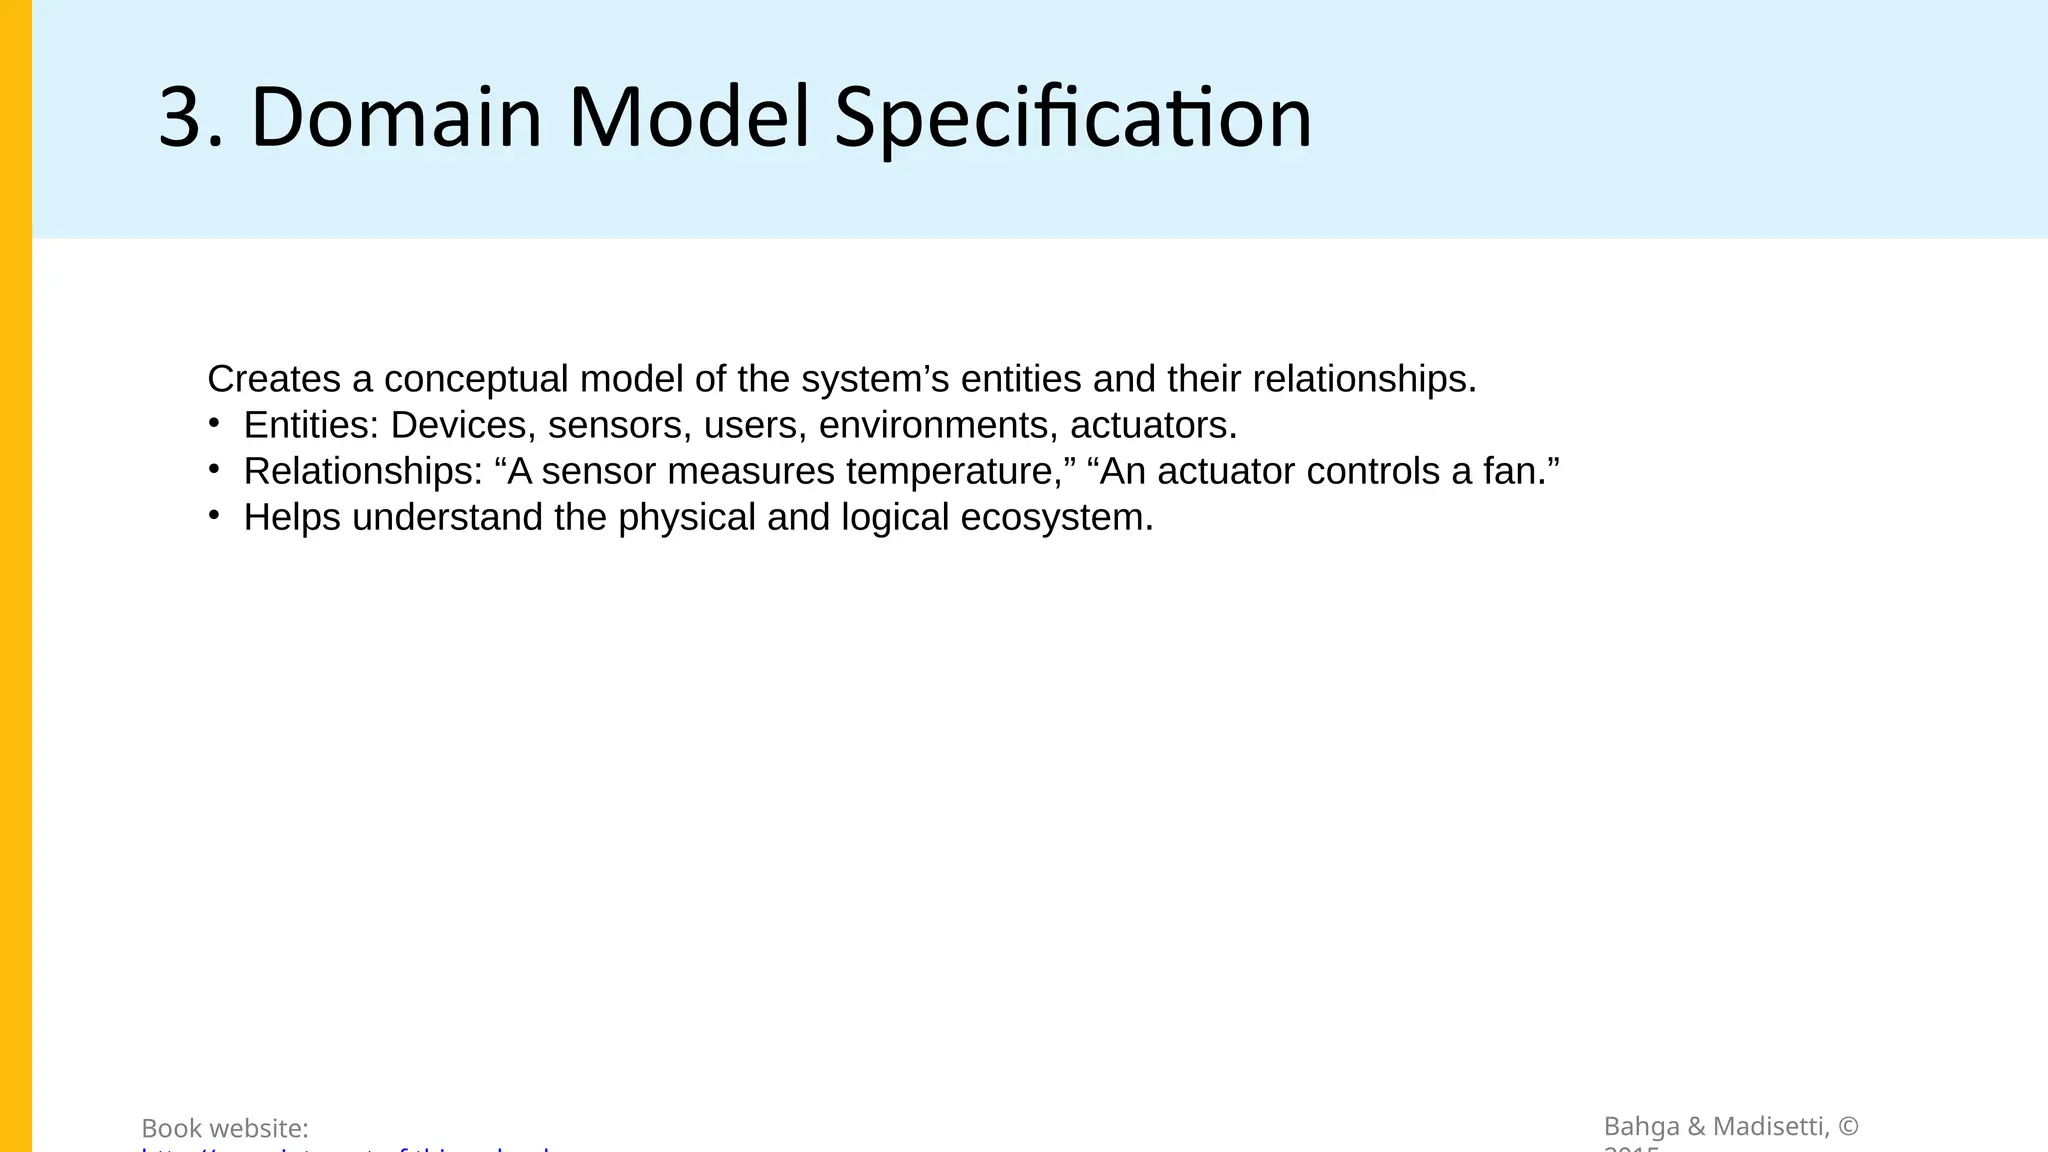
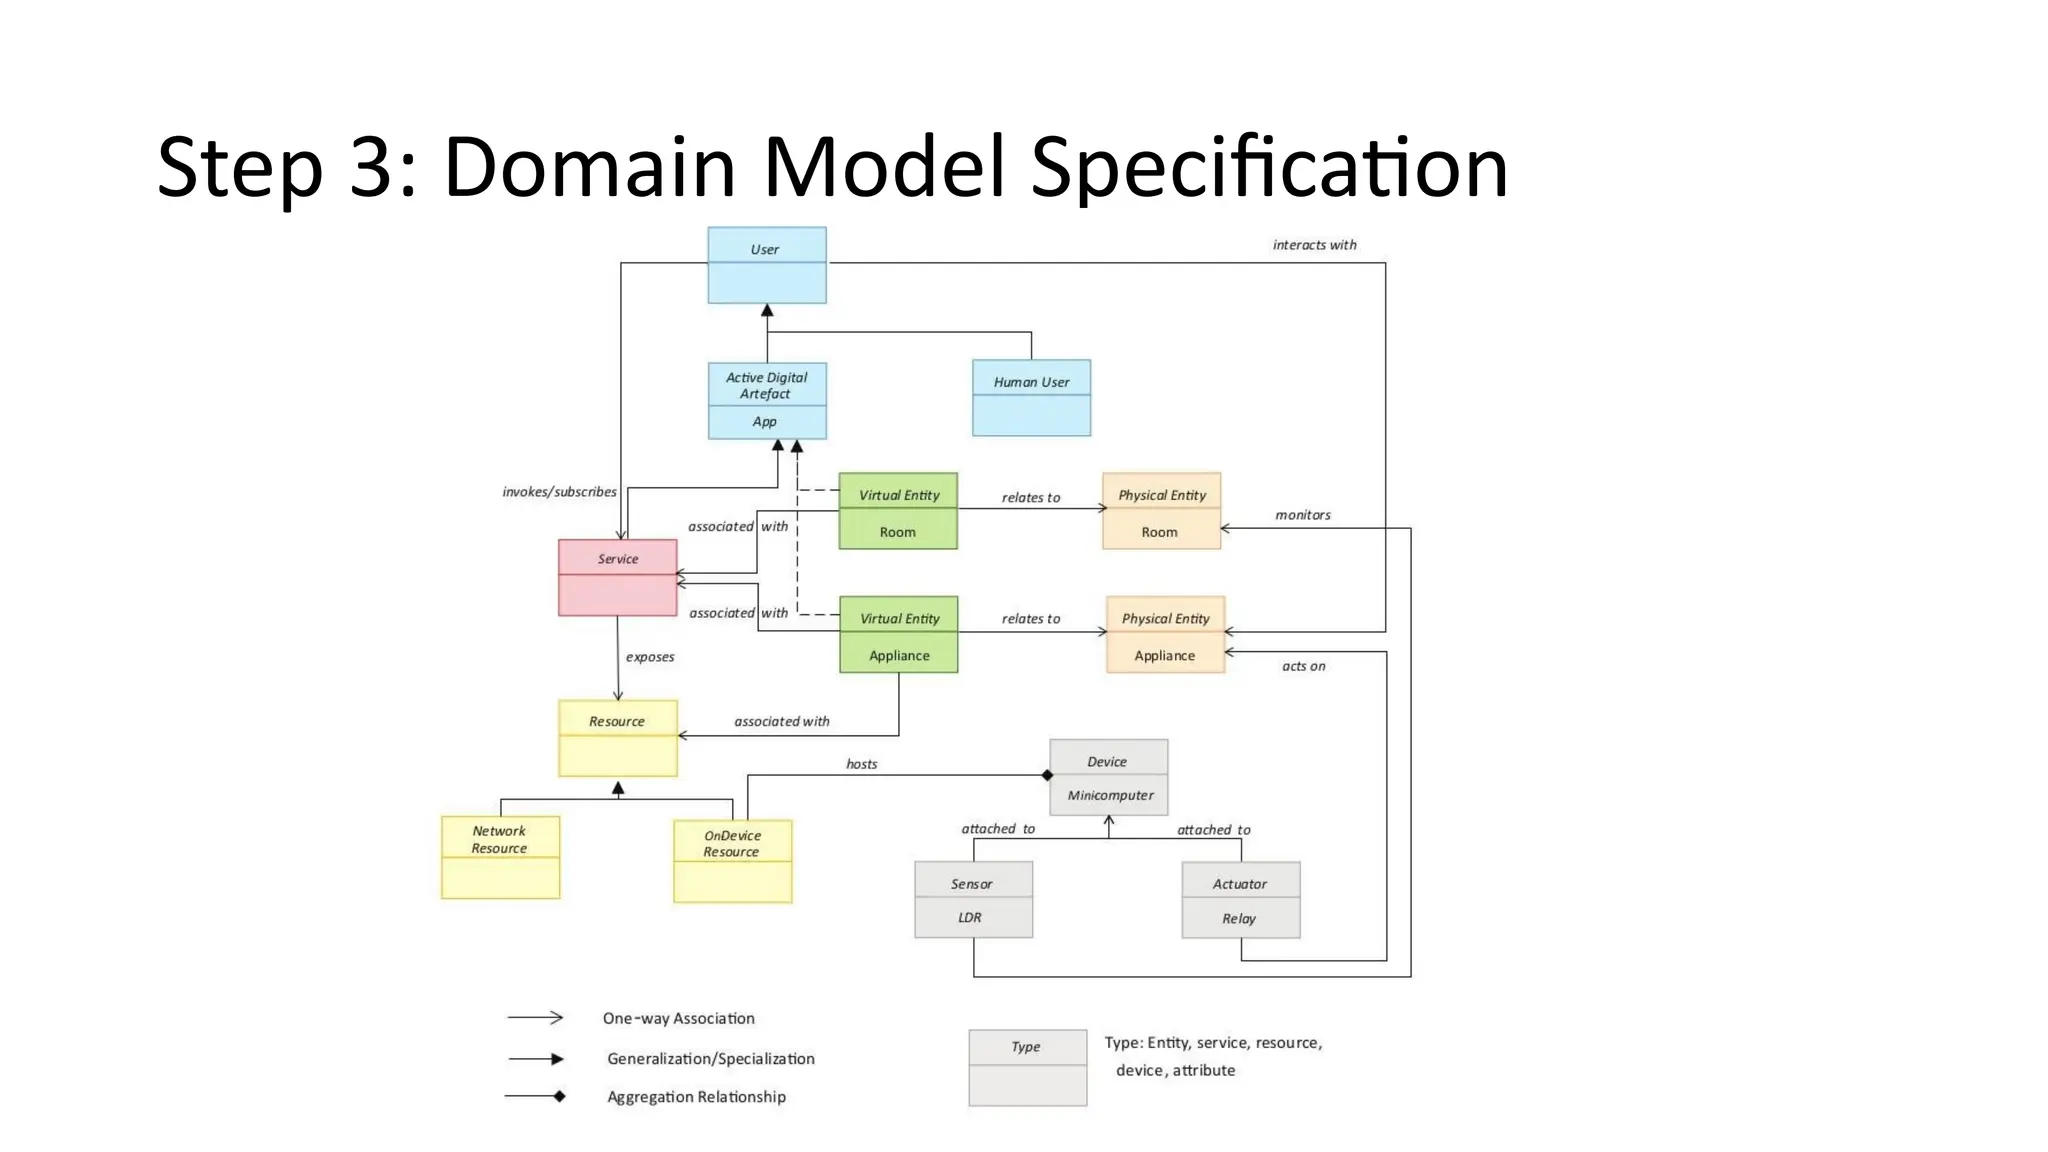
Step 3: DomainModel Specification
• The third step in the IoT design methodology is to define the Domain
Model. The domain model describes the main concepts, entities
and objects in the domain of IoT system to be designed. Domain
model defines the attributes of the objects and relationships
between objects. Domain model provides an abstract
representation of the concepts, objects and entities in the IoT
domain, independent of any specific technology or platform. With
the domain model, the IoT system designers can get an
understanding of the IoT domain for which the system is to be
designed.
17.
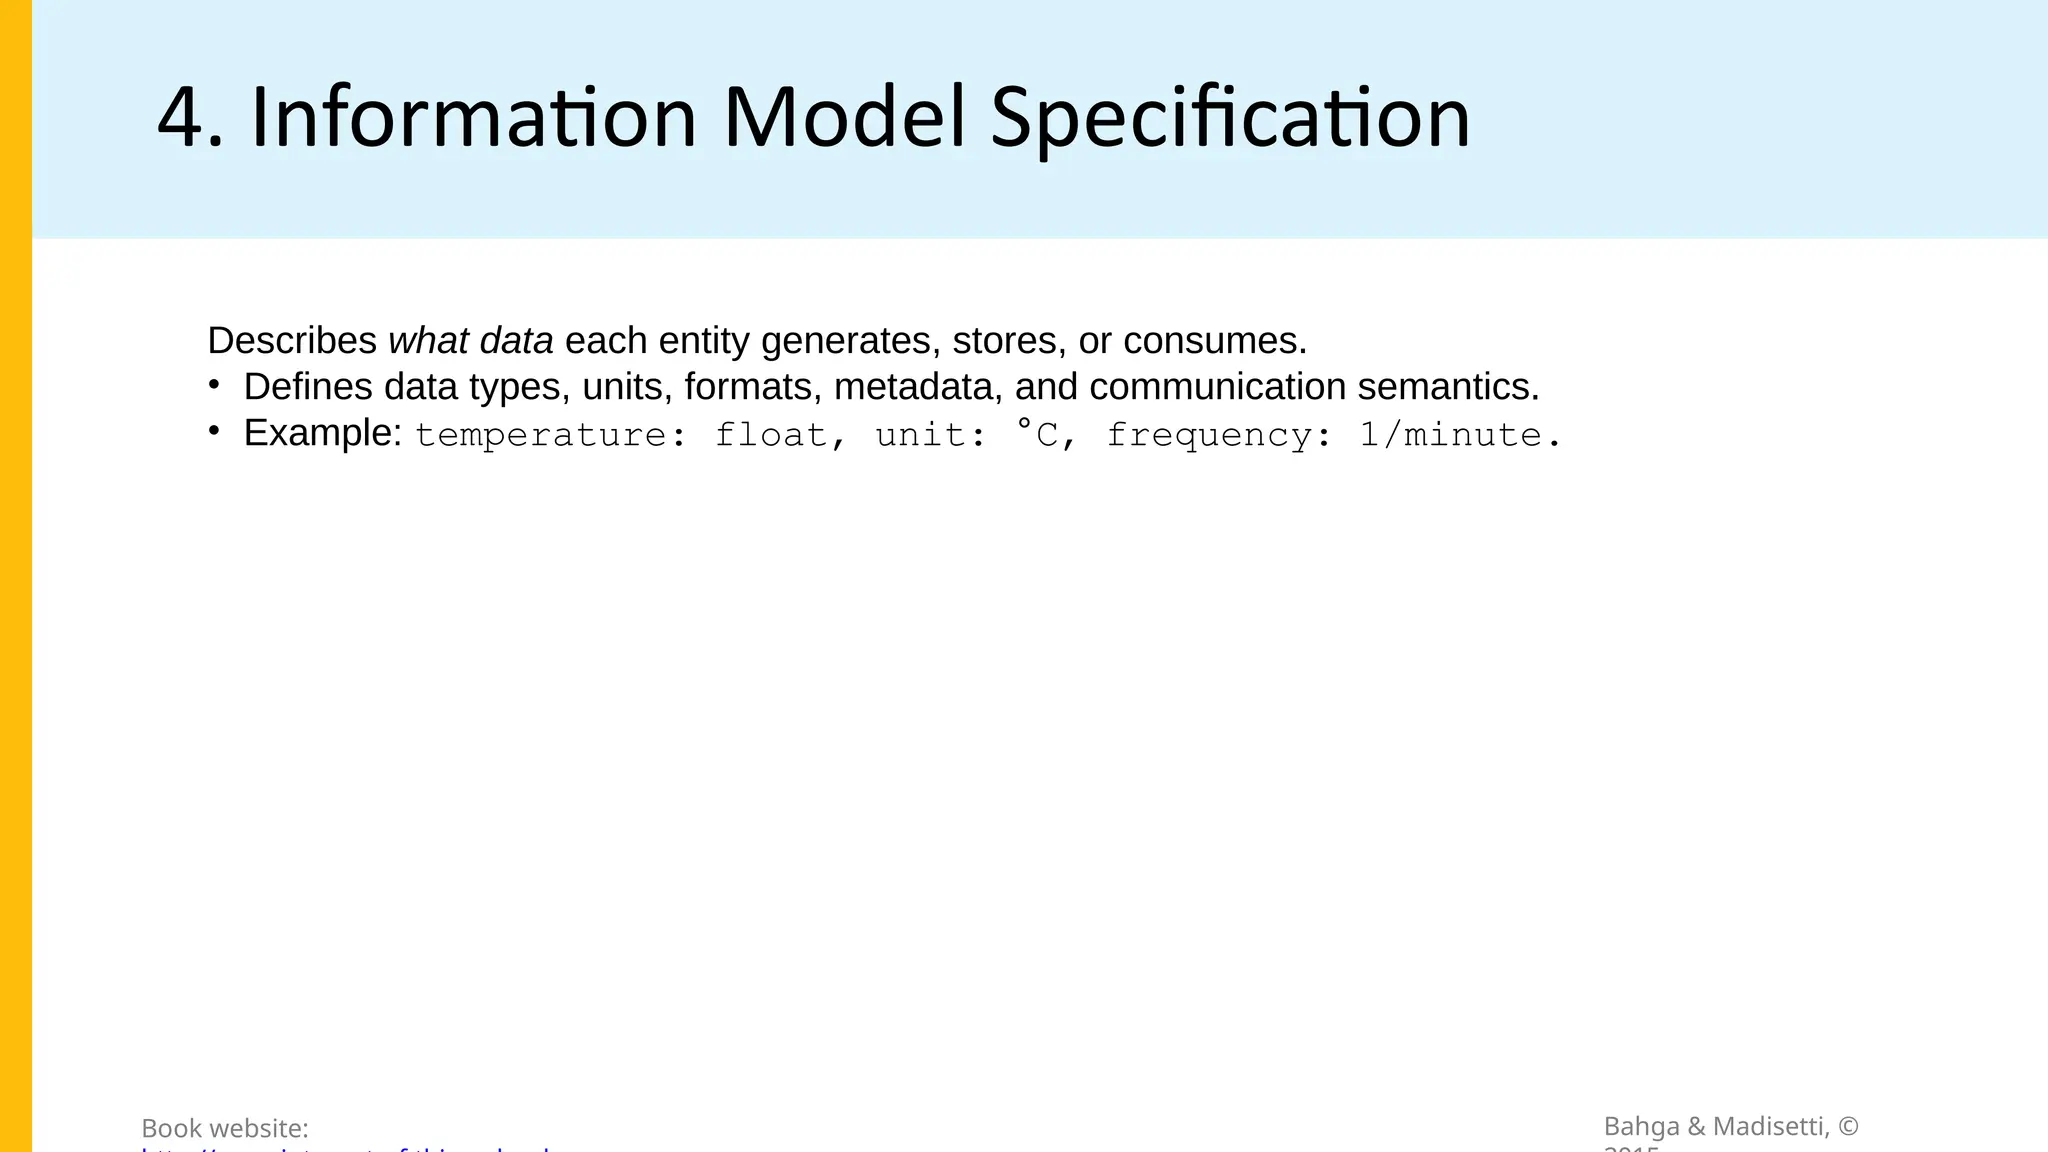
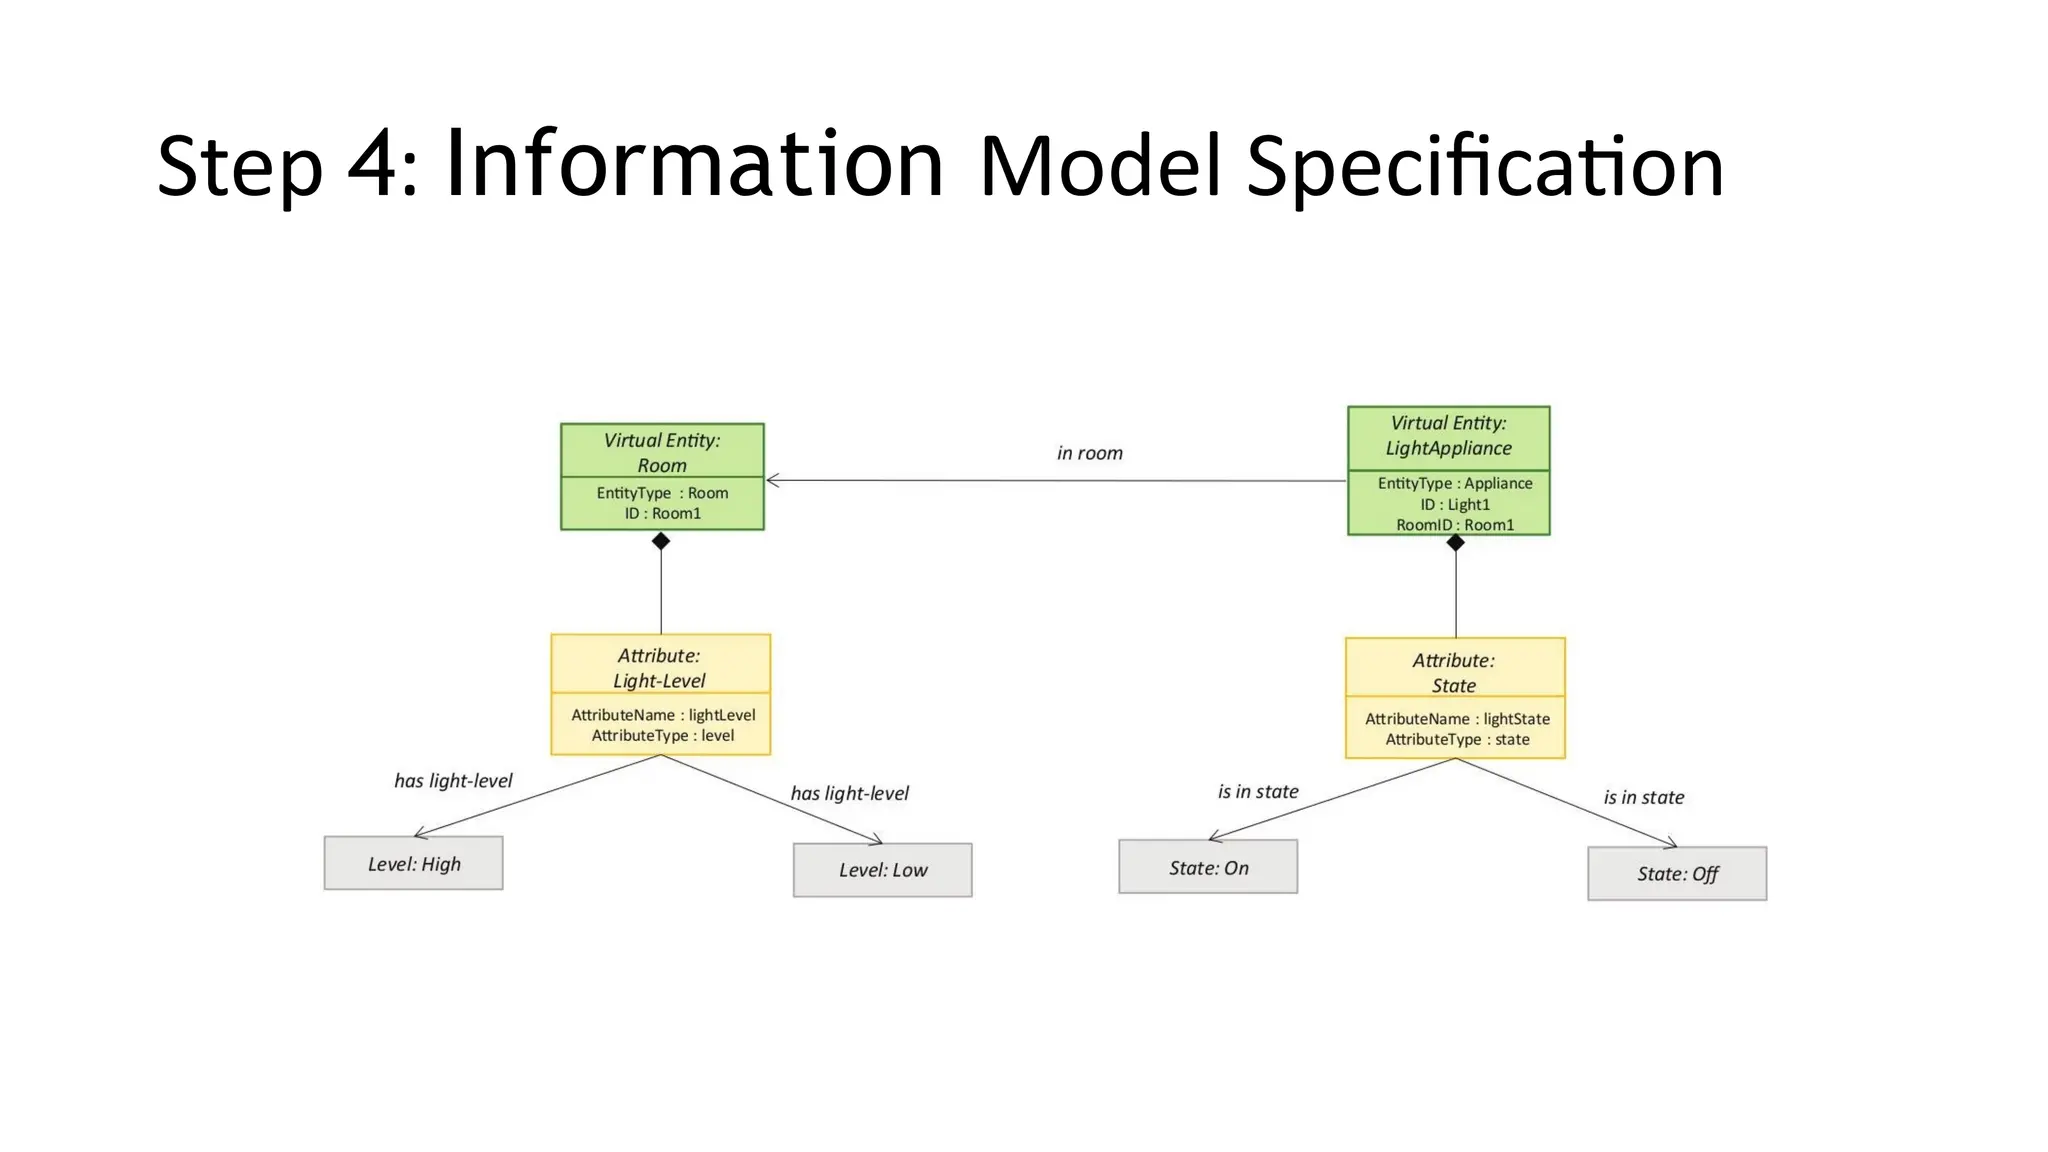
Step 4: InformationModel Specification
• The fourth step in the IoT design methodology is to define the
Information Model. Information Model defines the structure of all
the information in the IoT system, for example, attributes of Virtual
Entities, relations, etc. Information model does not describe the
specifics of how the information is represented or stored. To define
the information model, we first list the Virtual Entities defined in
the Domain Model. Information model adds more details to the
Virtual Entities by defining their attributes and relations.
18.
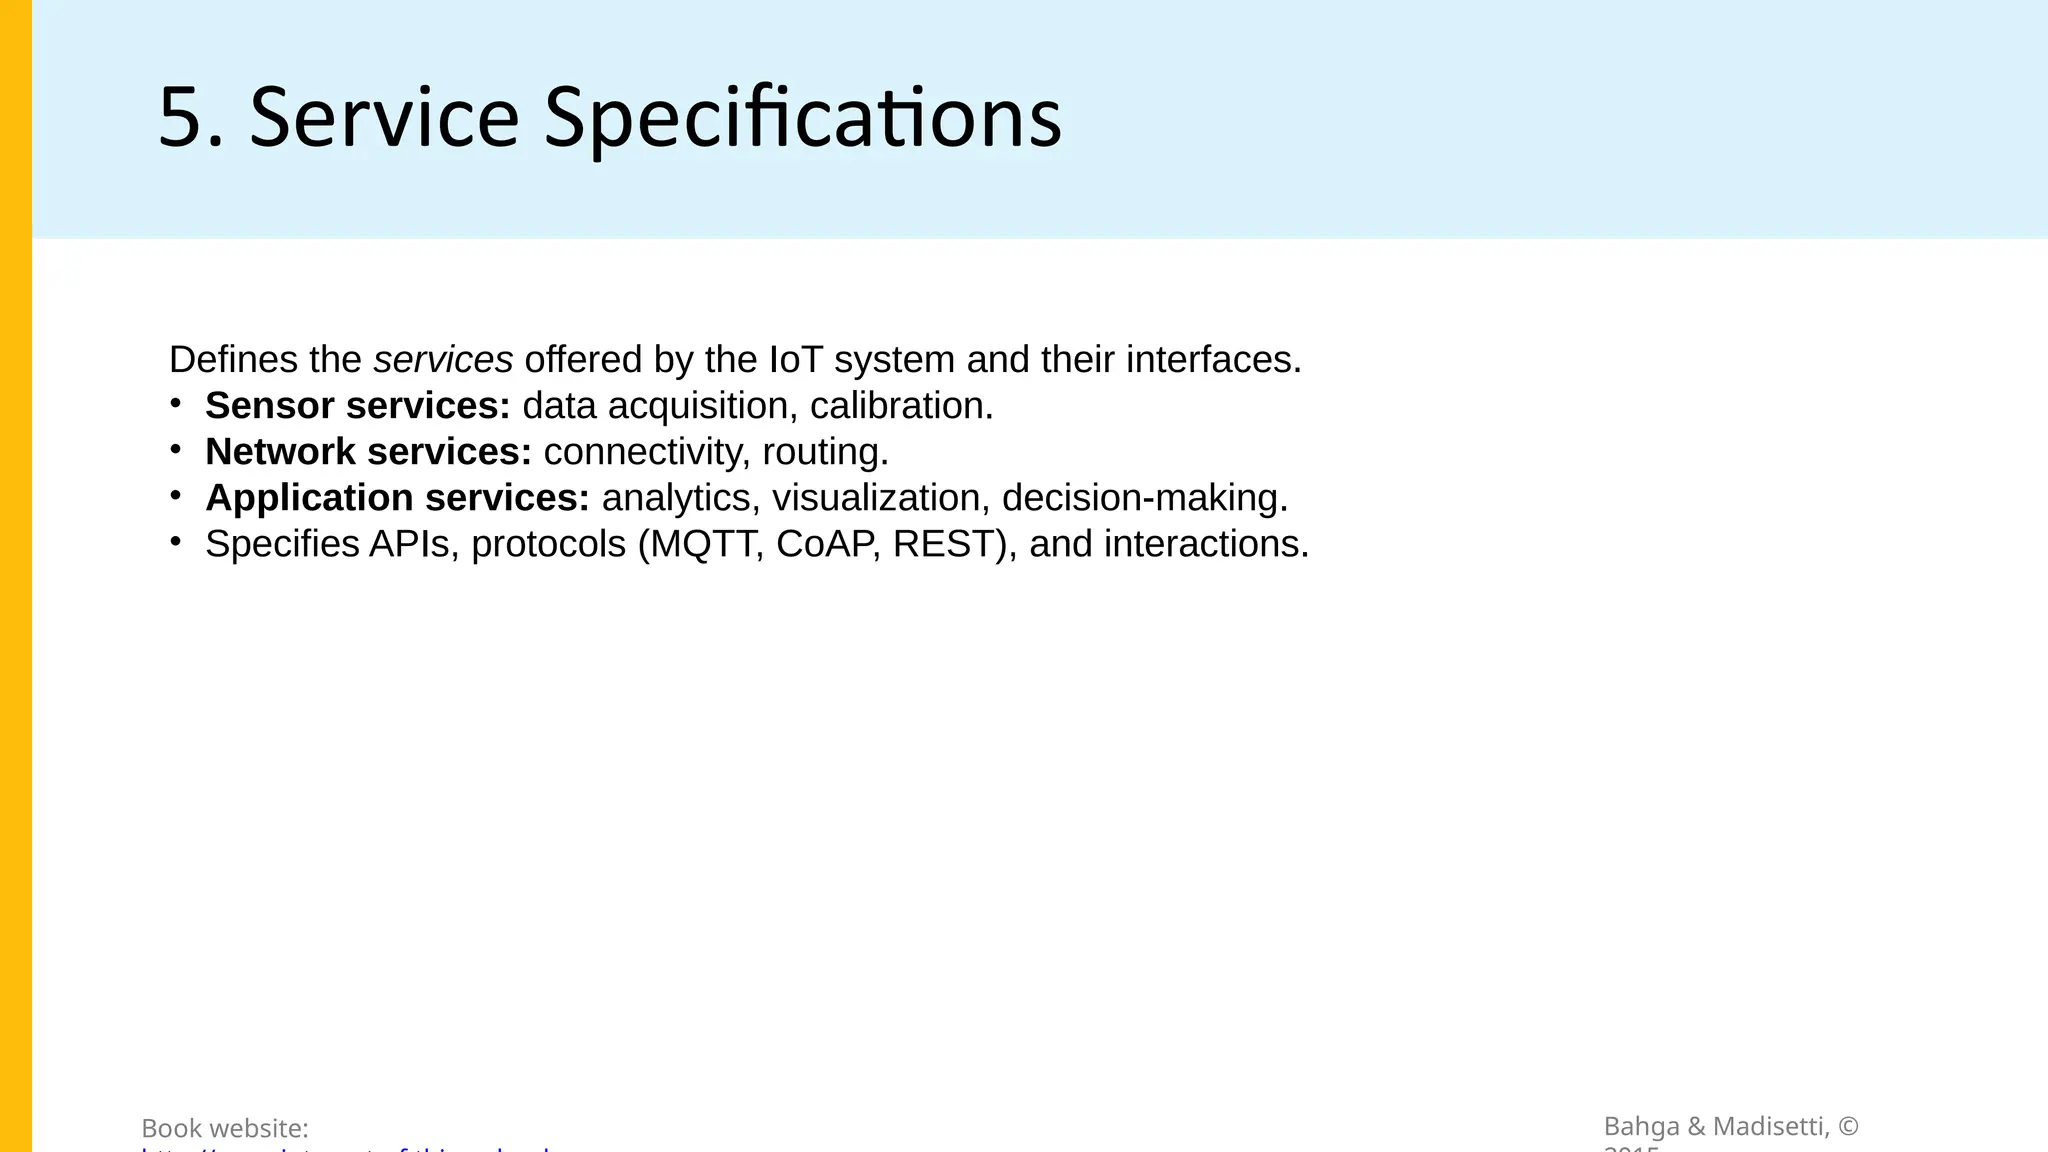
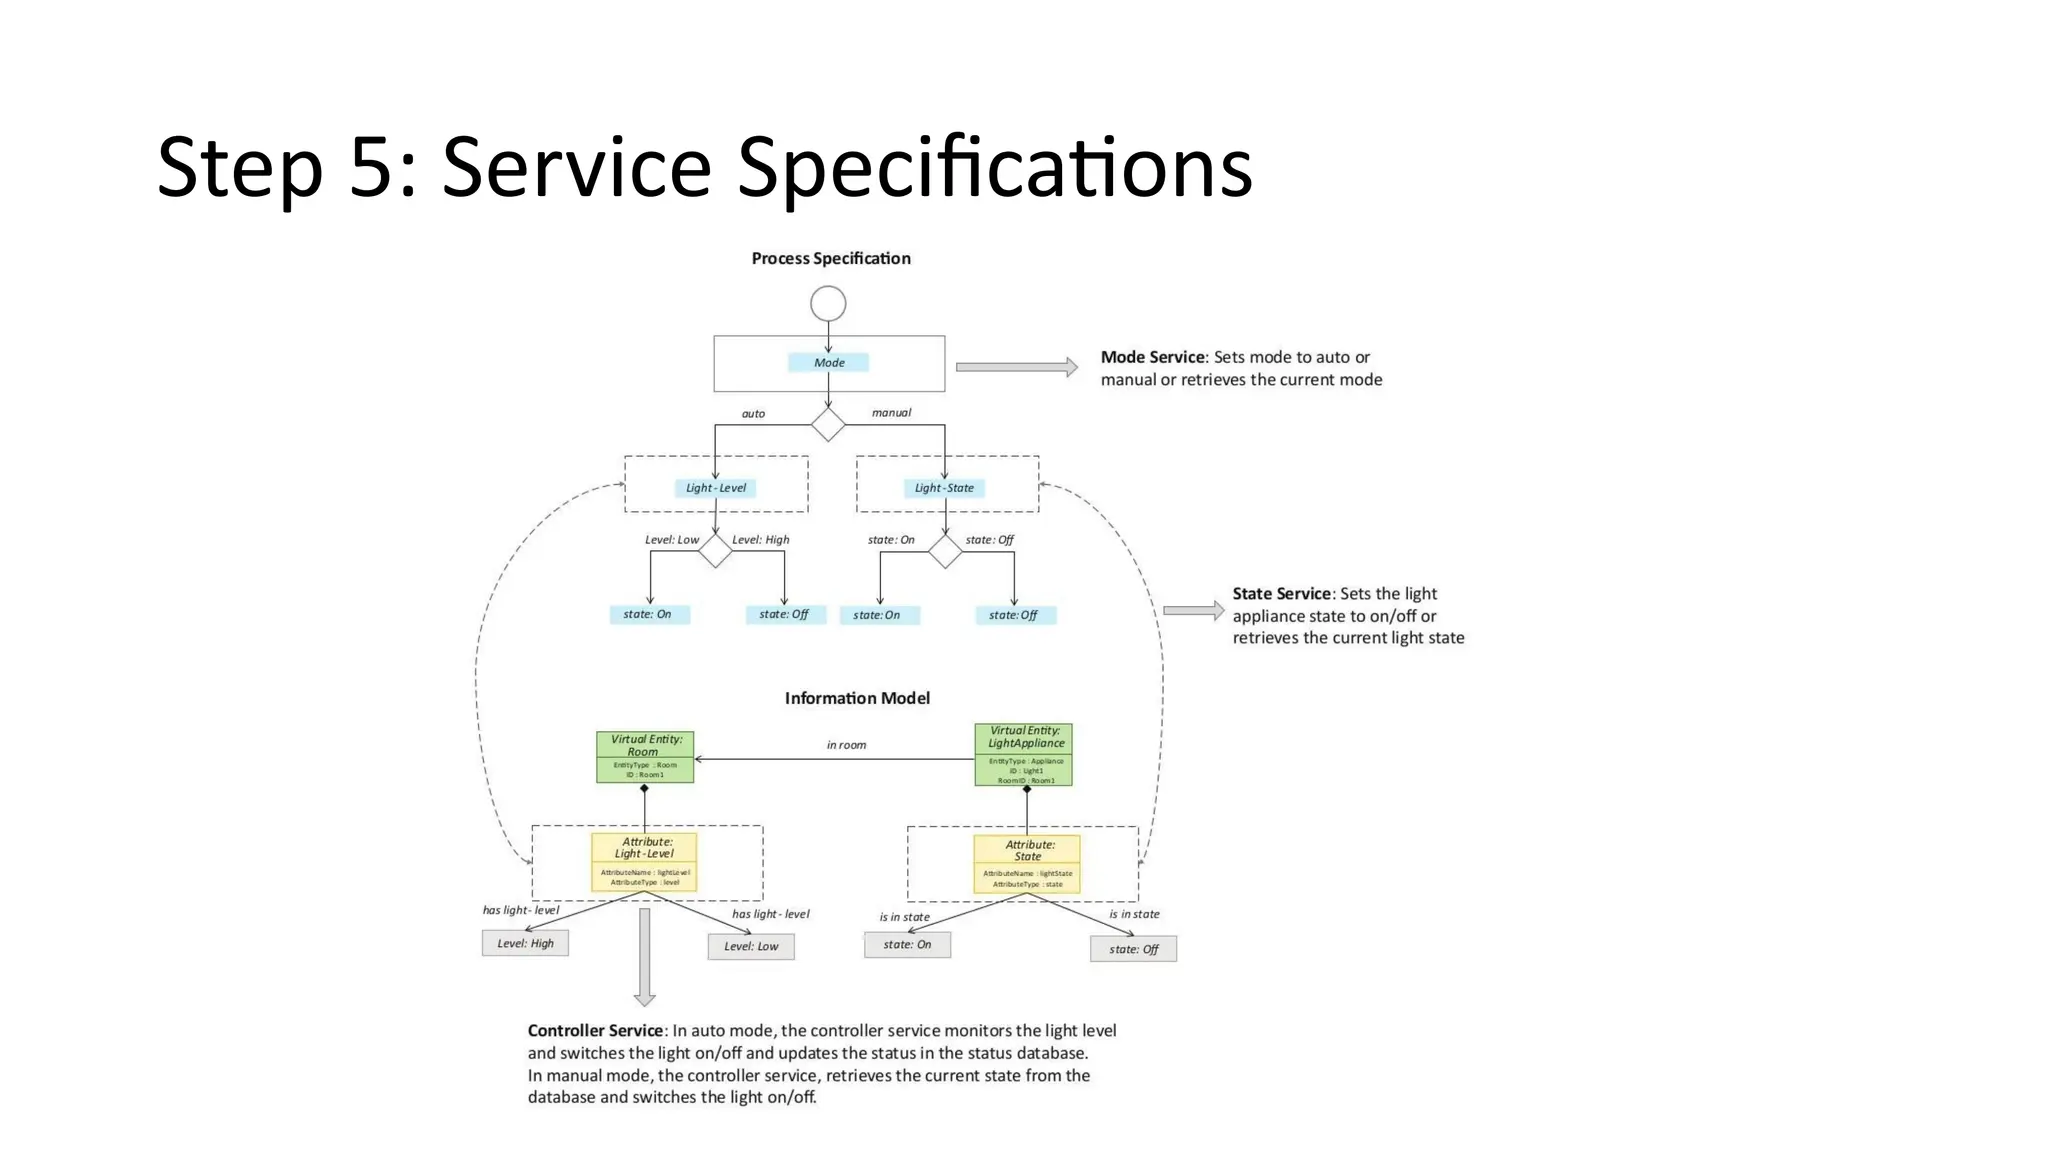
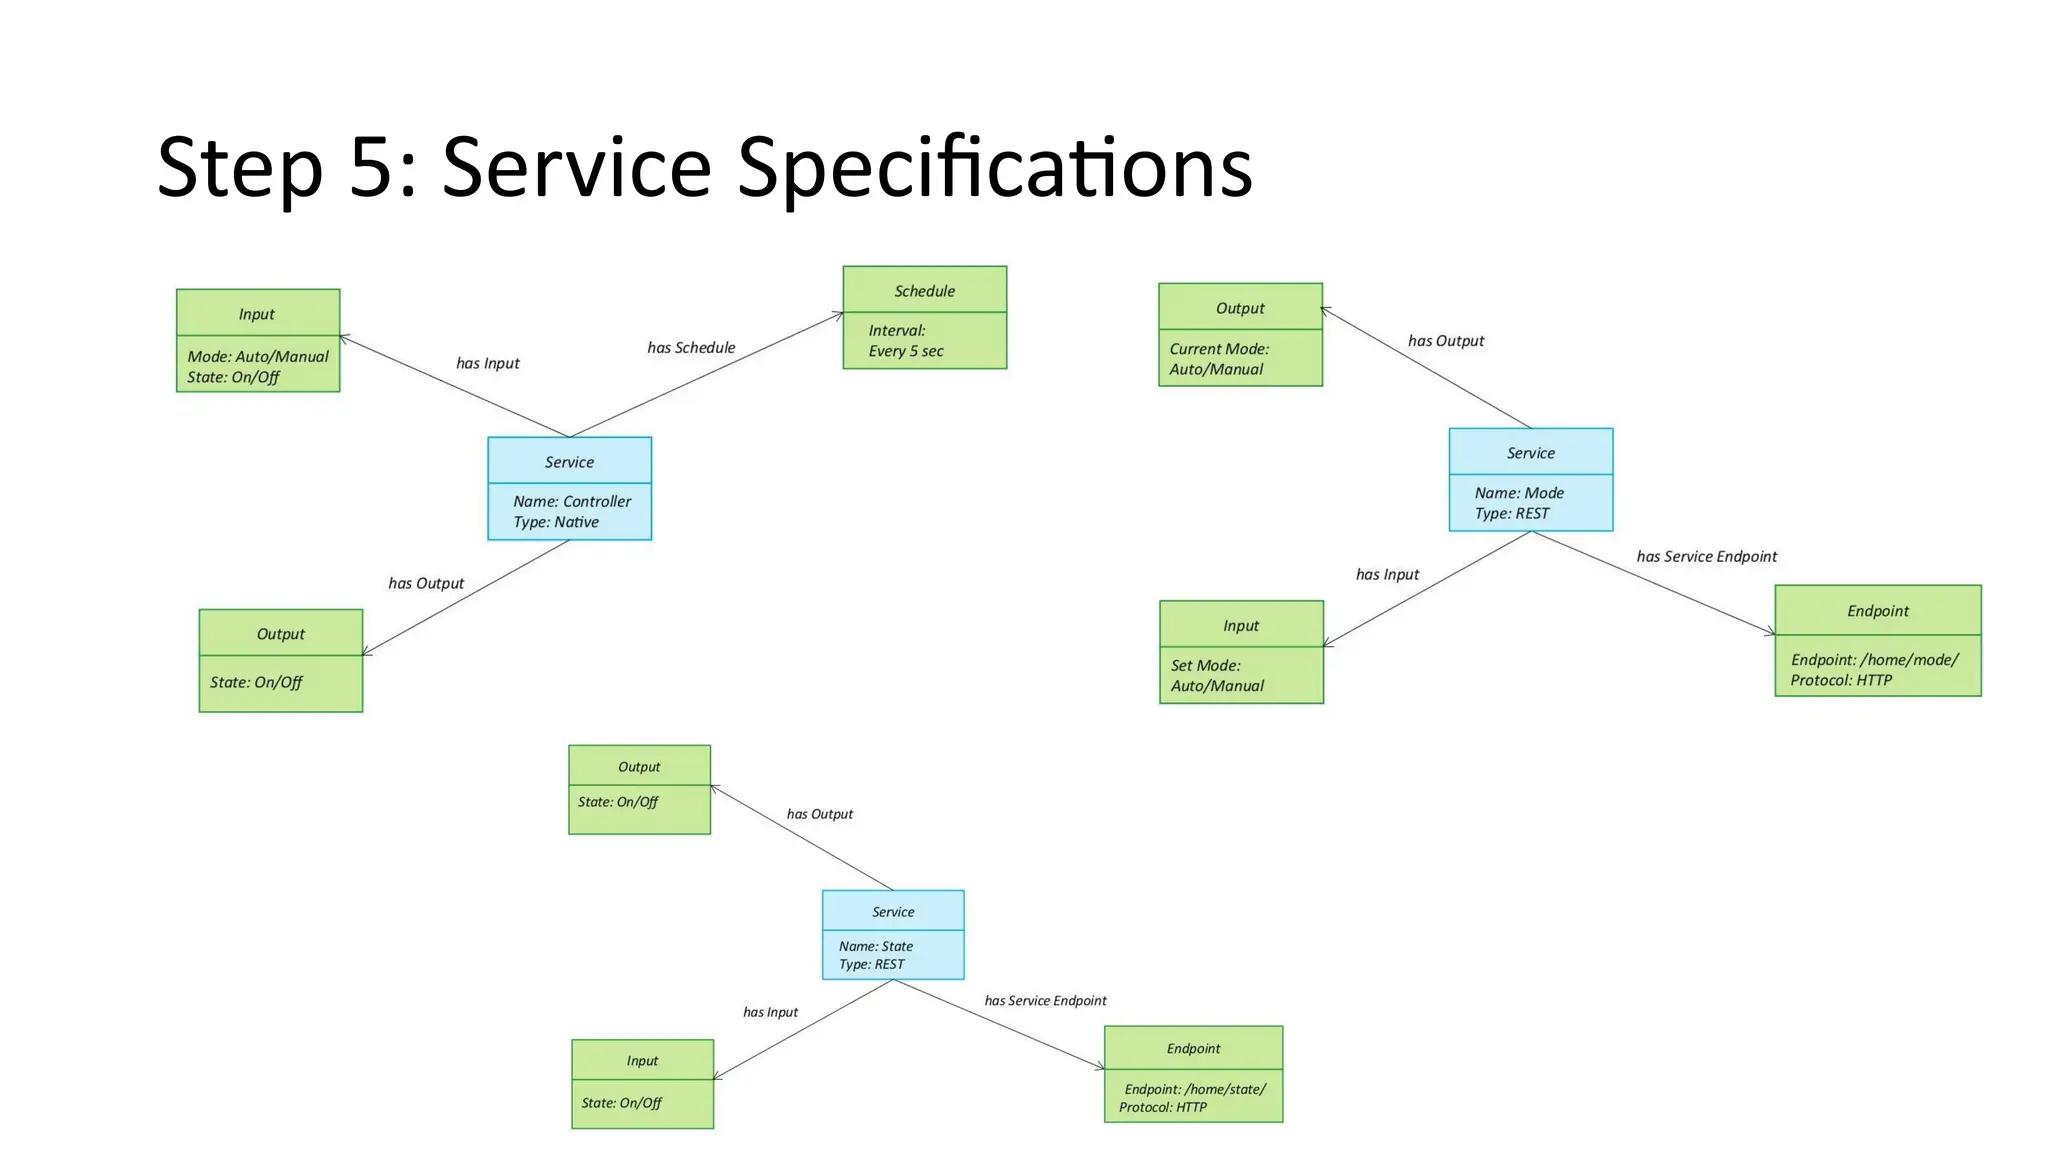
Step 5: ServiceSpecifications
• The fifth step in the IoT design methodology is to define the service
specifications. Service specifications define the services in the IoT
system, service types, service inputs/output, service endpoints,
service schedules, service preconditions and service effects.
19.
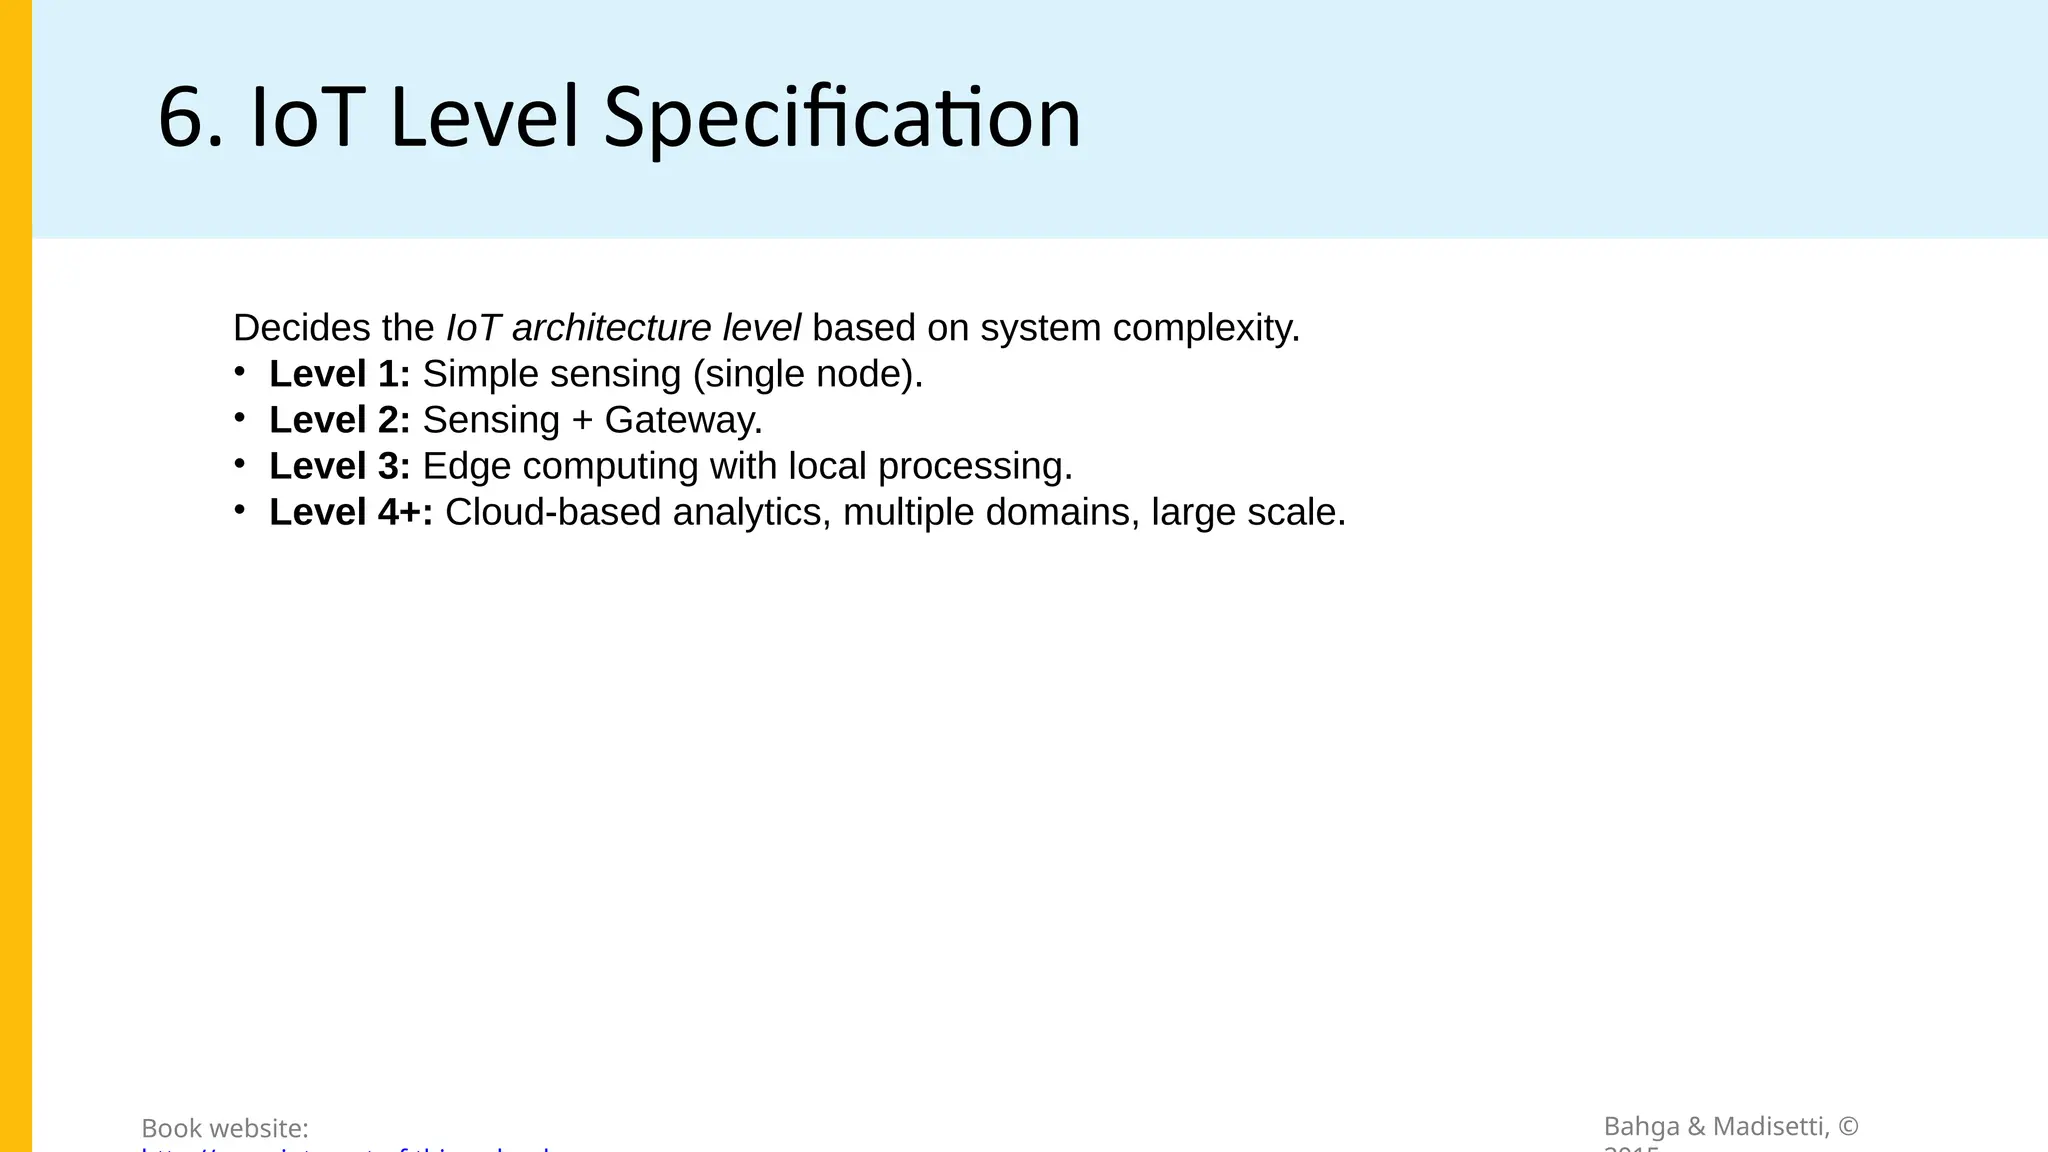
Step 6: IoTLevel Specification
• The sixth step in the IoT design methodology is to define the IoT level
for the system. In Chapter-1, we defined five IoT deployment levels.
20.
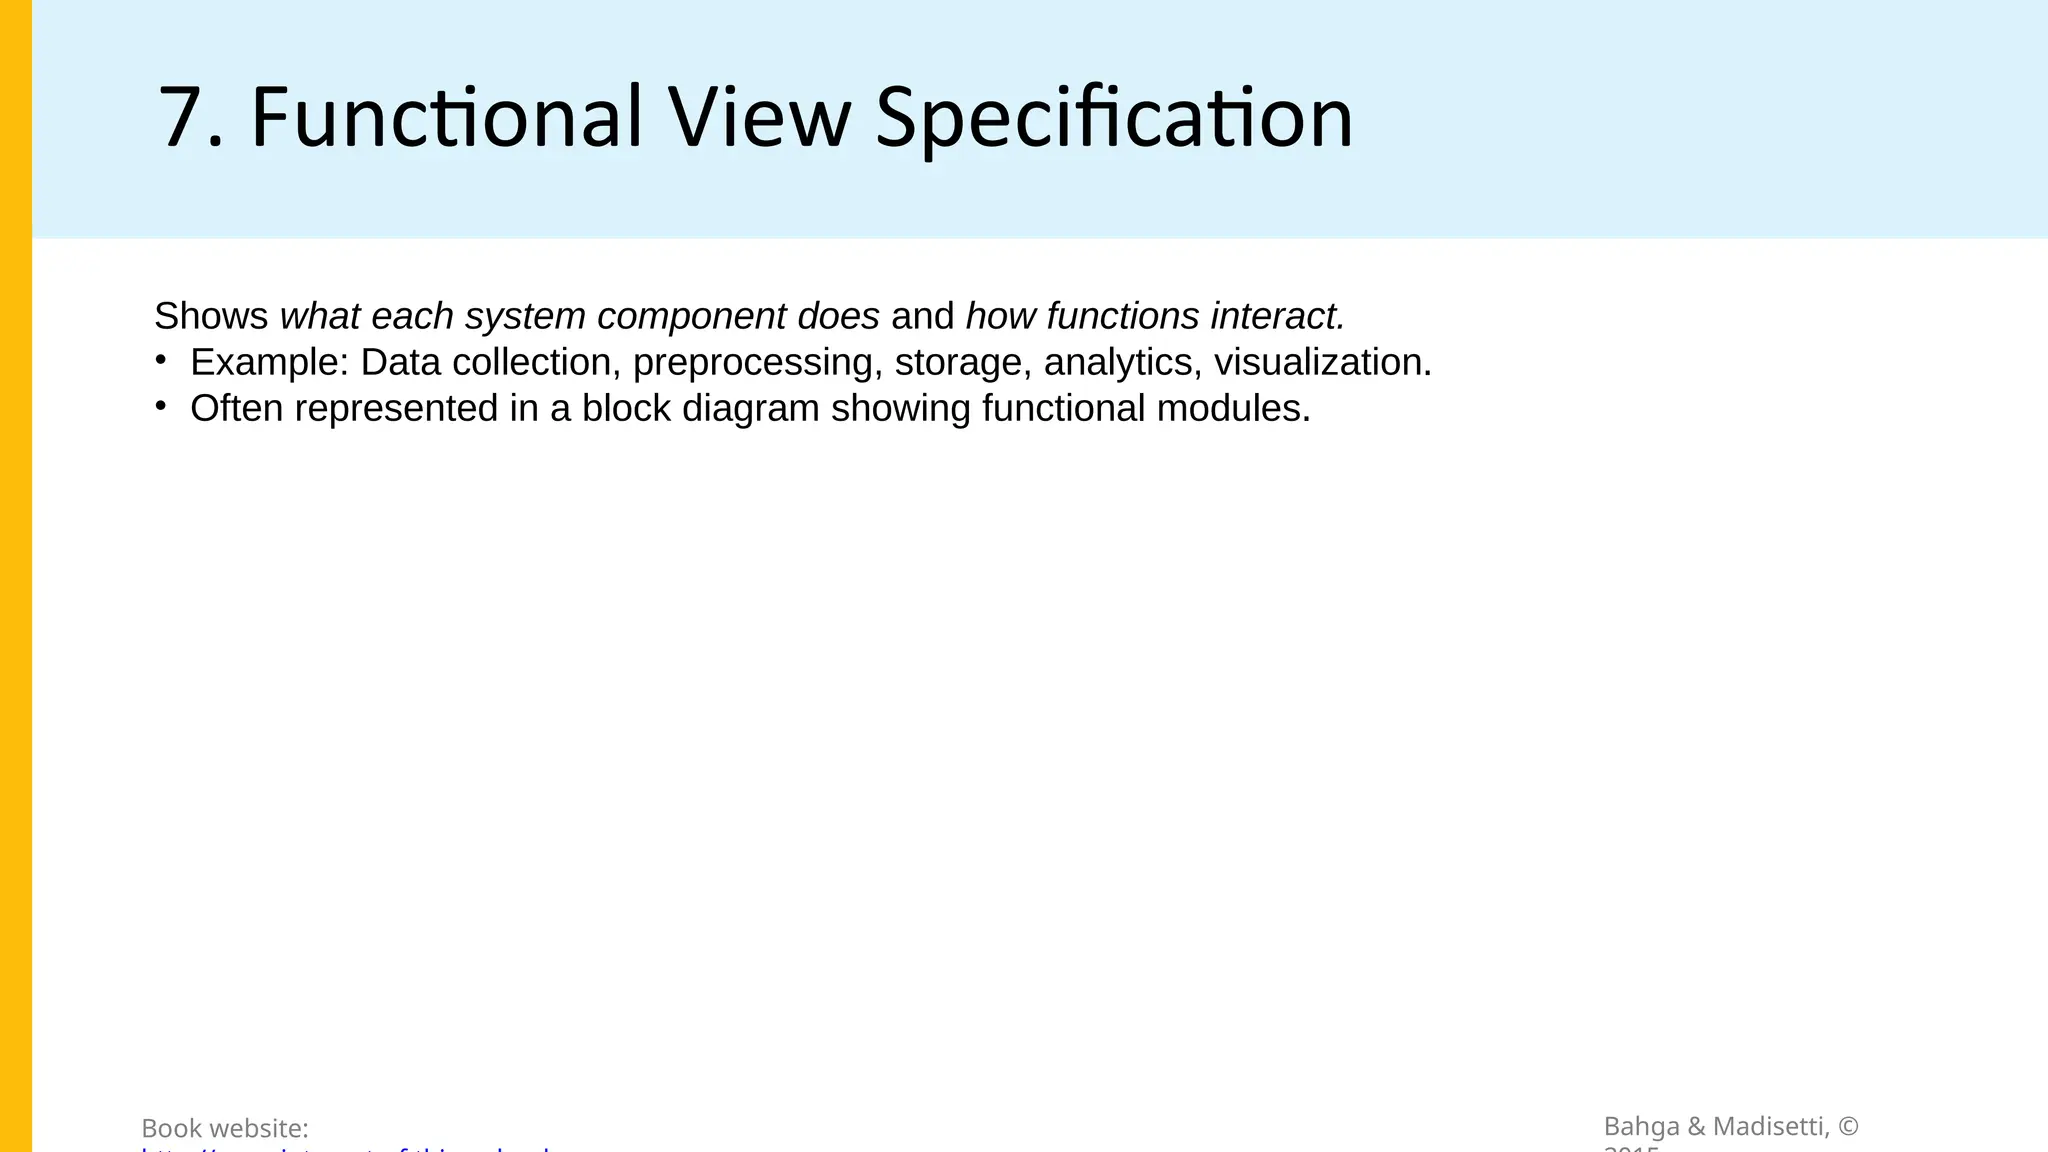
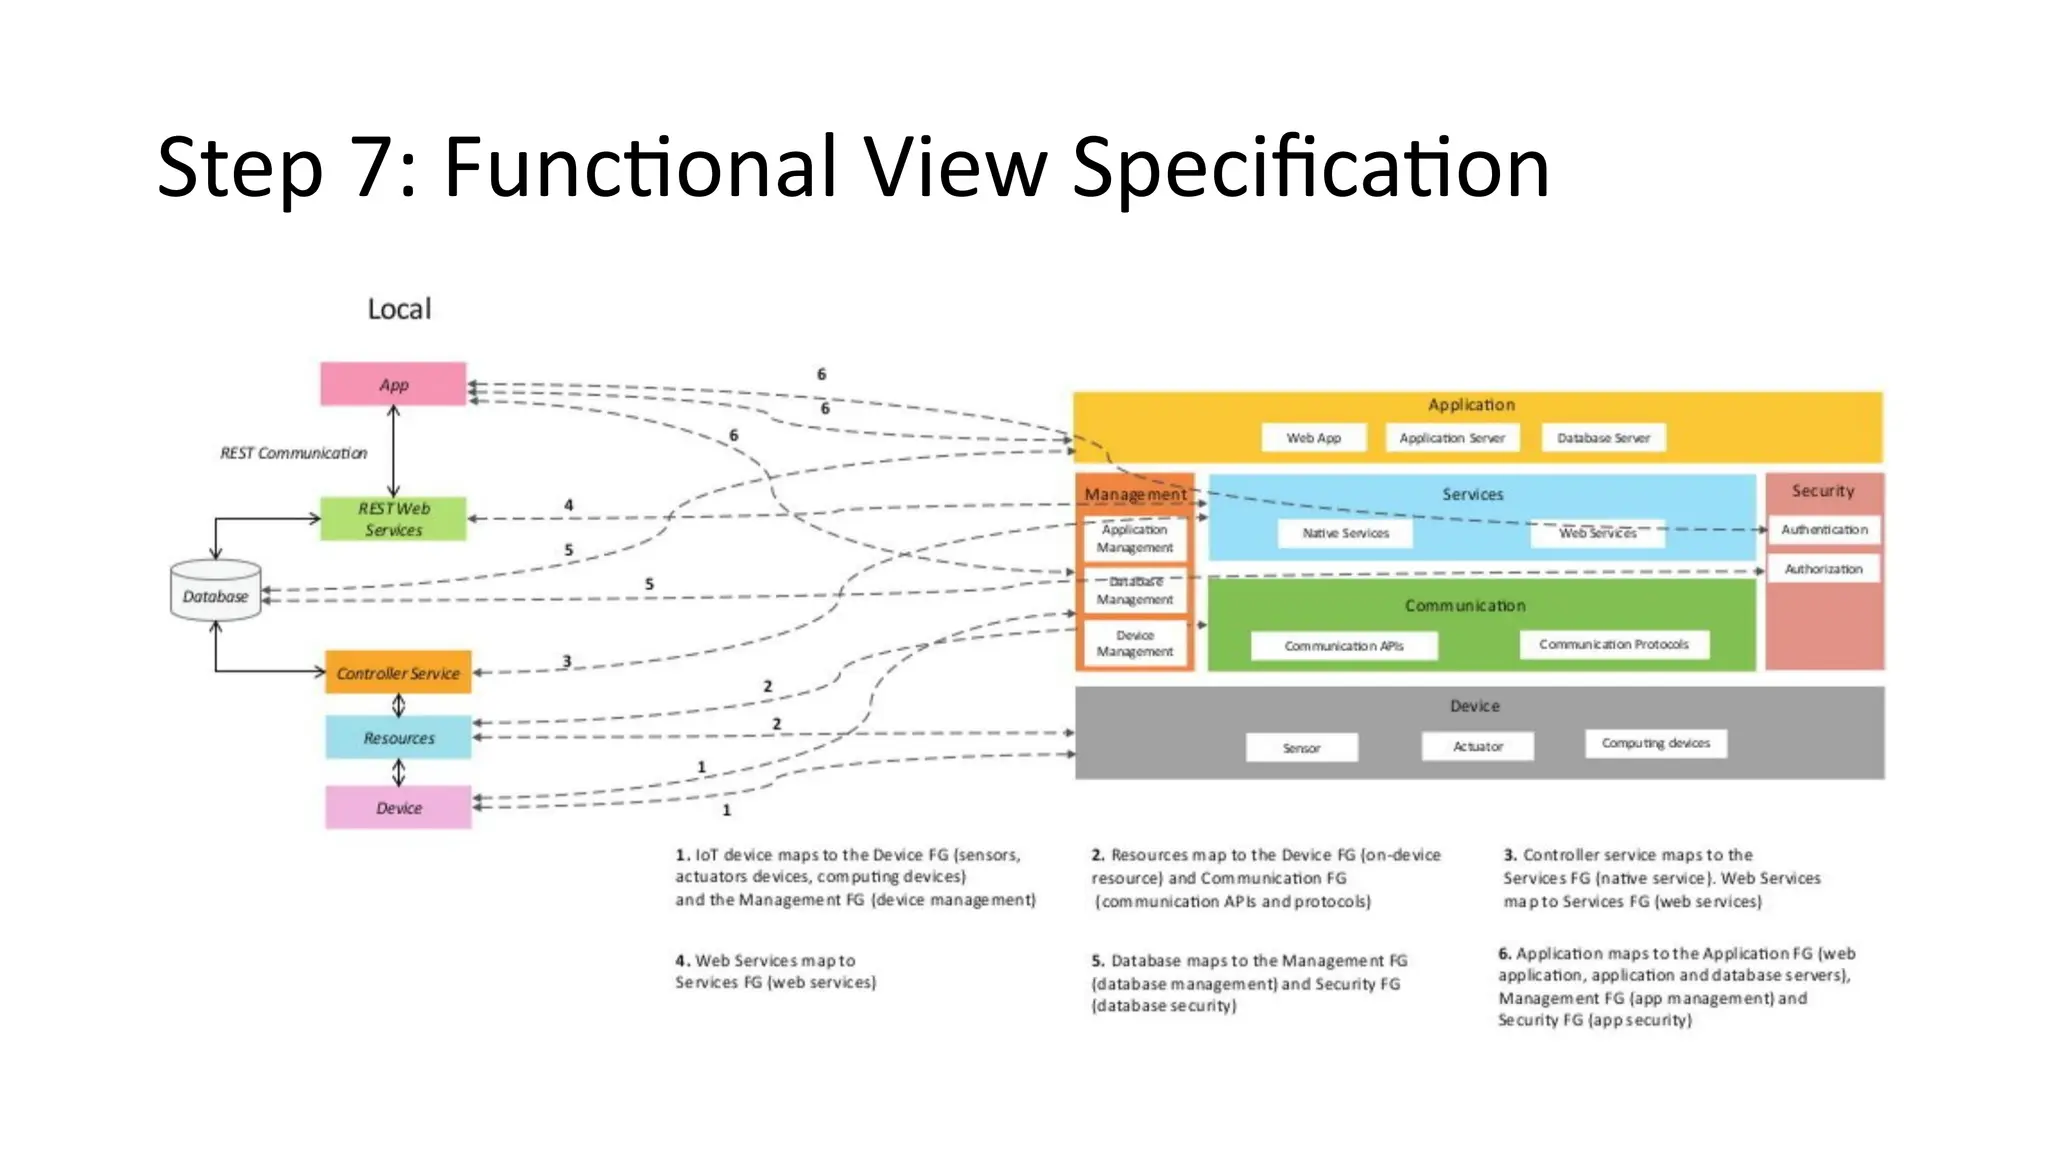
Step 7: FunctionalView Specification
• The seventh step in the IoT design methodology is to define the
Functional View. The Functional View (FV) defines the functions of
the IoT systems grouped into various Functional Groups (FGs).
Each Functional Group either provides functionalities for
interacting with instances of concepts defined in the Domain
Model or provides information related to these concepts.
21.
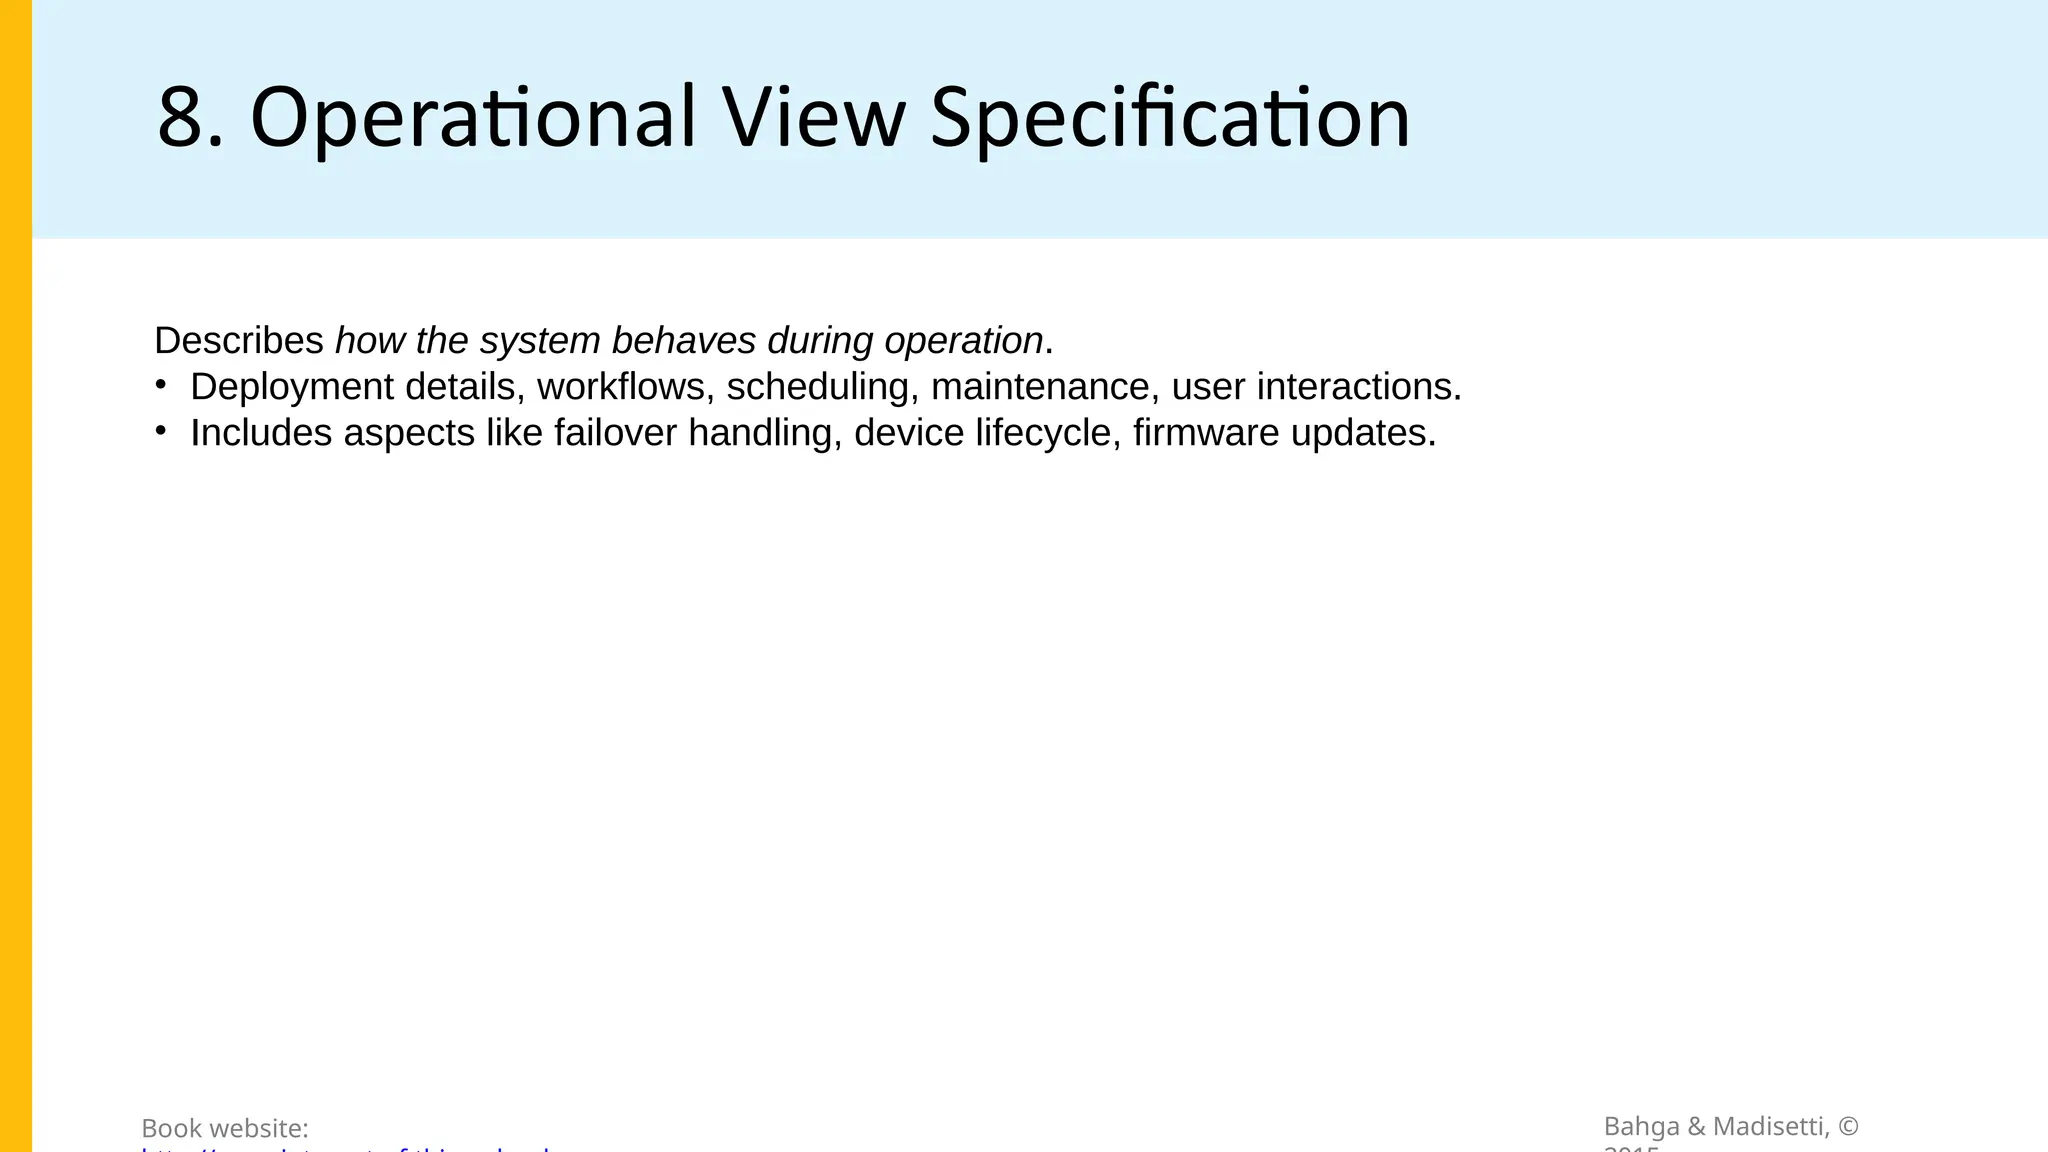
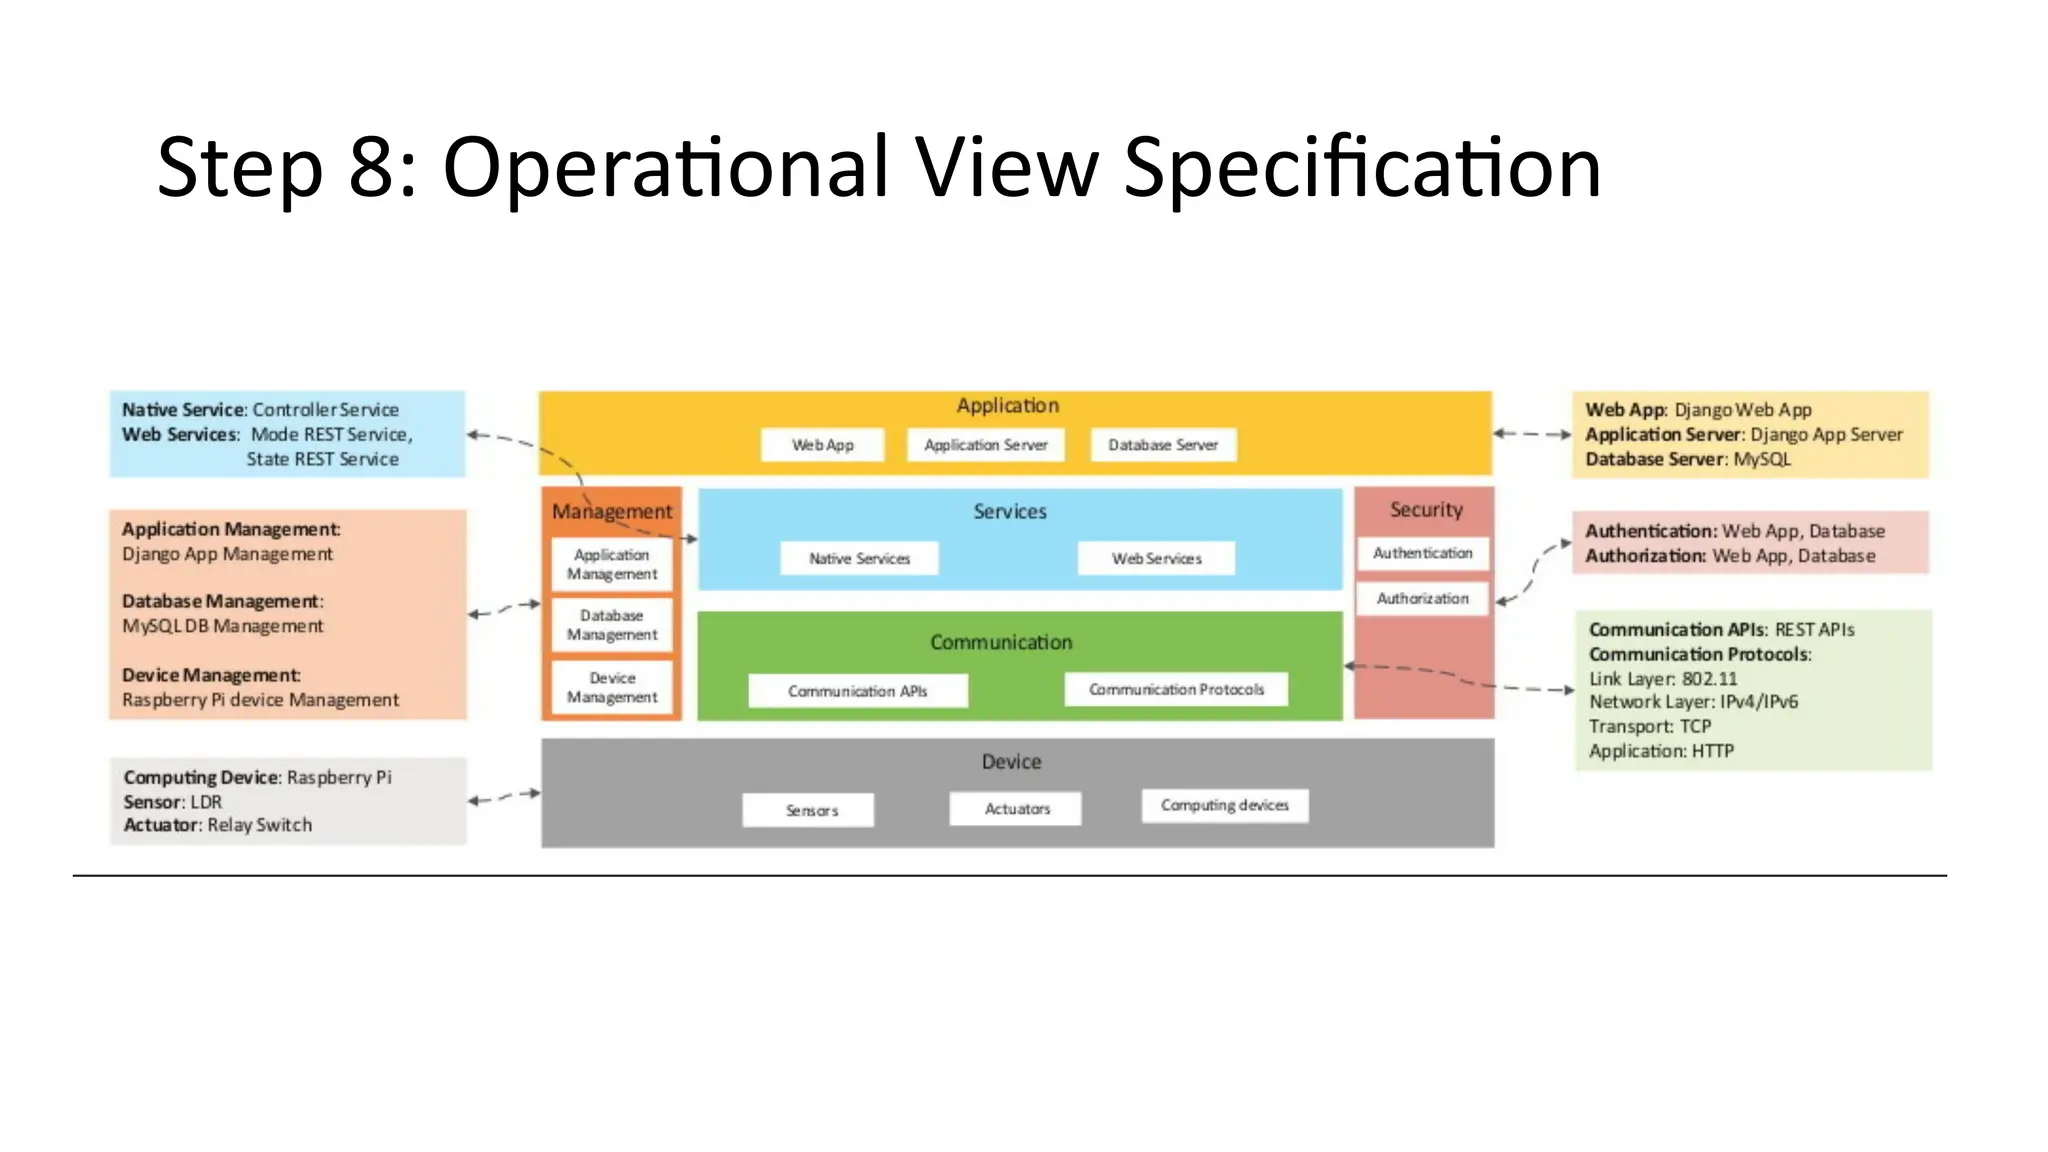
Step 8: OperationalView Specification
• The eighth step in the IoT design methodology is to define the
Operational View Specifications. In this step, various options
pertaining to the IoT system deployment and operation are defined,
such as, service hosting options, storage options, device options,
application hosting options, etc
22.
Step 9: Device& Component Integration
• The ninth step in the IoT design methodology is the integration of the
devices and components.
23.
Step 10: ApplicationDevelopment
• The final step in the IoT design methodology is to develop the IoT
application.
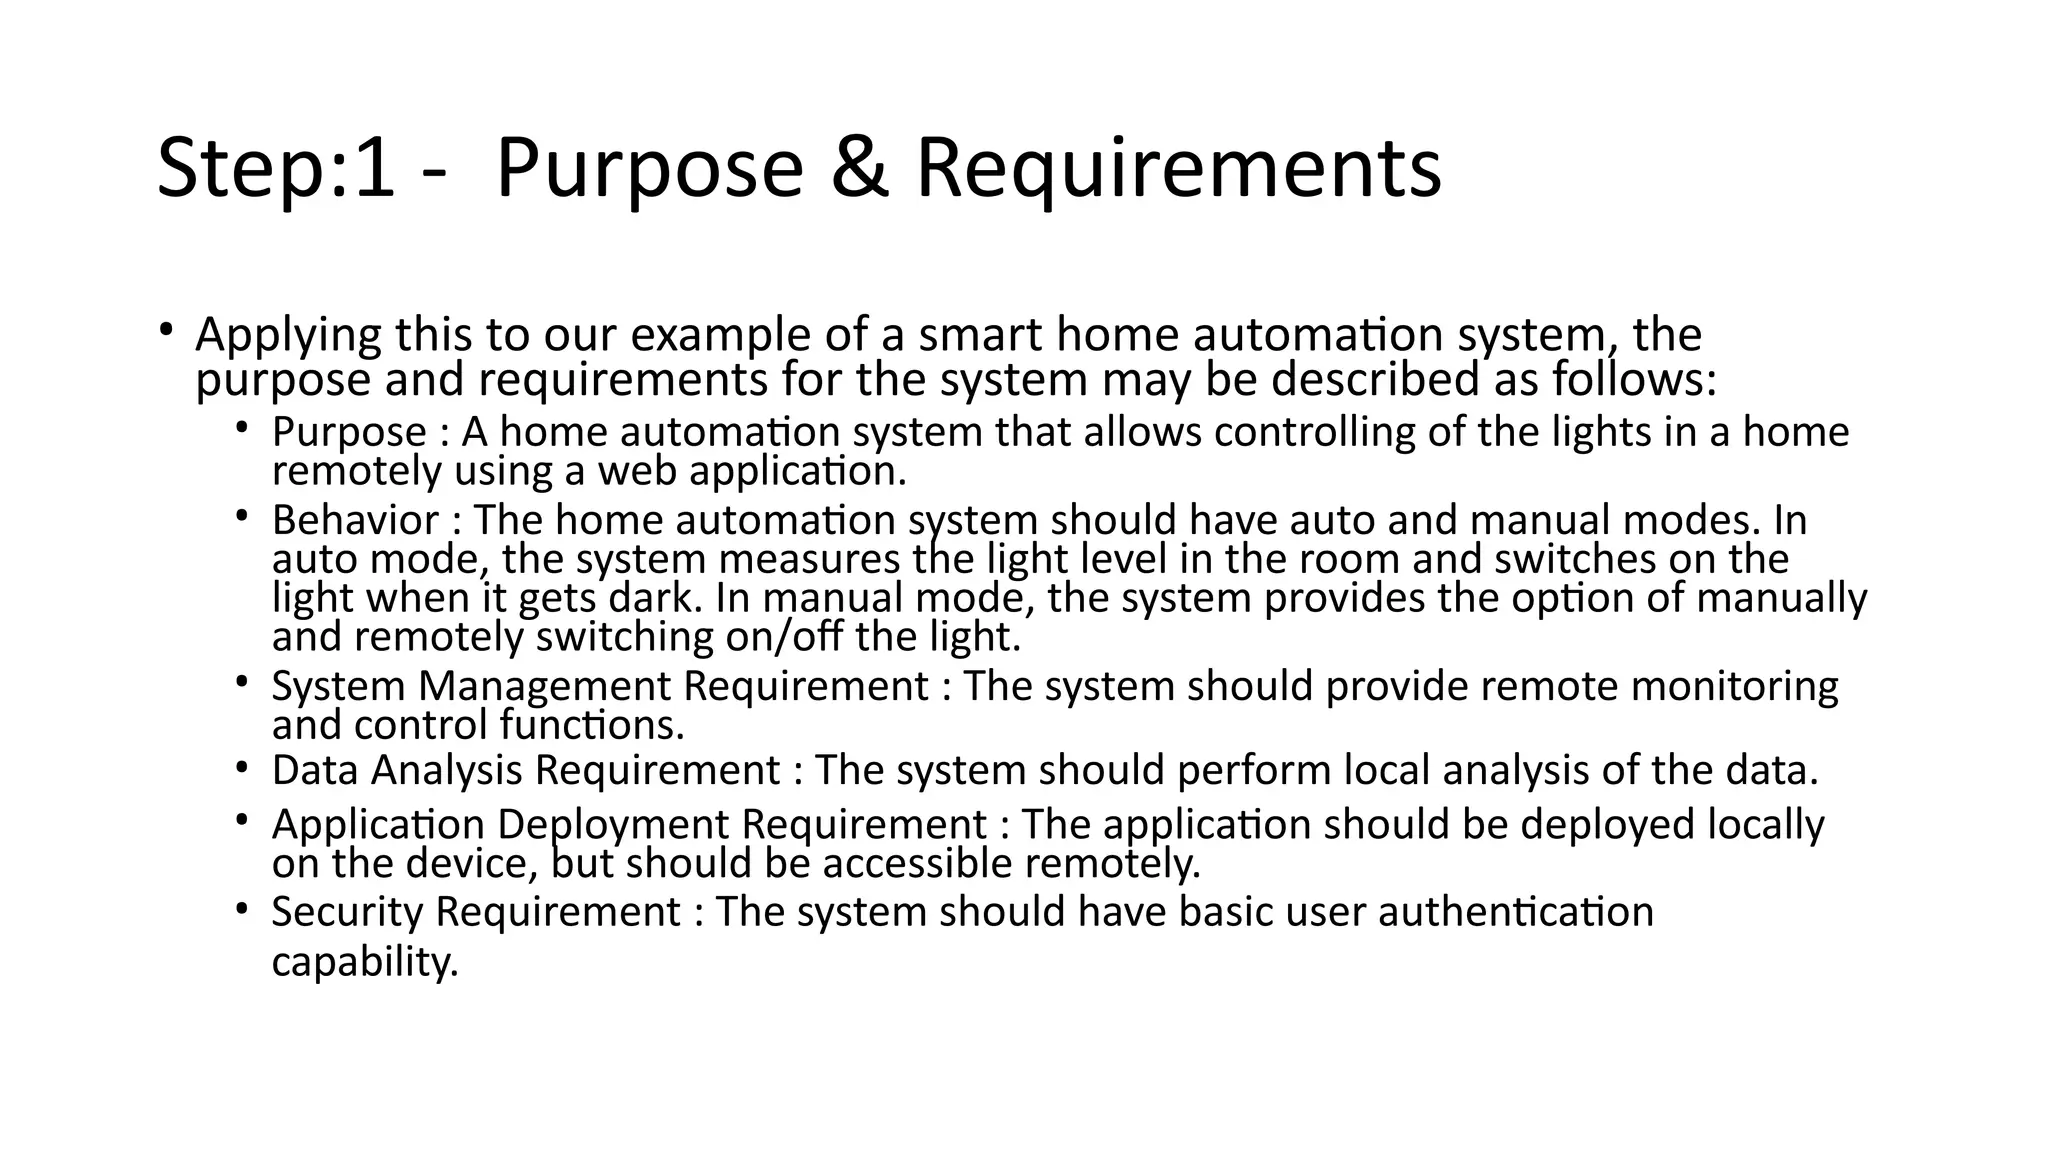
Step:1 - Purpose& Requirements
• Applying this to our example of a smart home automation system, the
purpose and requirements for the system may be described as follows:
• Purpose : A home automation system that allows controlling of the lights in a home
remotely using a web application.
• Behavior : The home automation system should have auto and manual modes. In
auto mode, the system measures the light level in the room and switches on the
light when it gets dark. In manual mode, the system provides the option of manually
and remotely switching on/off the light.
• System Management Requirement : The system should provide remote monitoring
and control functions.
• Data Analysis Requirement : The system should perform local analysis of the data.
• Application Deployment Requirement : The application should be deployed locally
on the device, but should be accessible remotely.
• Security Requirement : The system should have basic user authentication
capability.
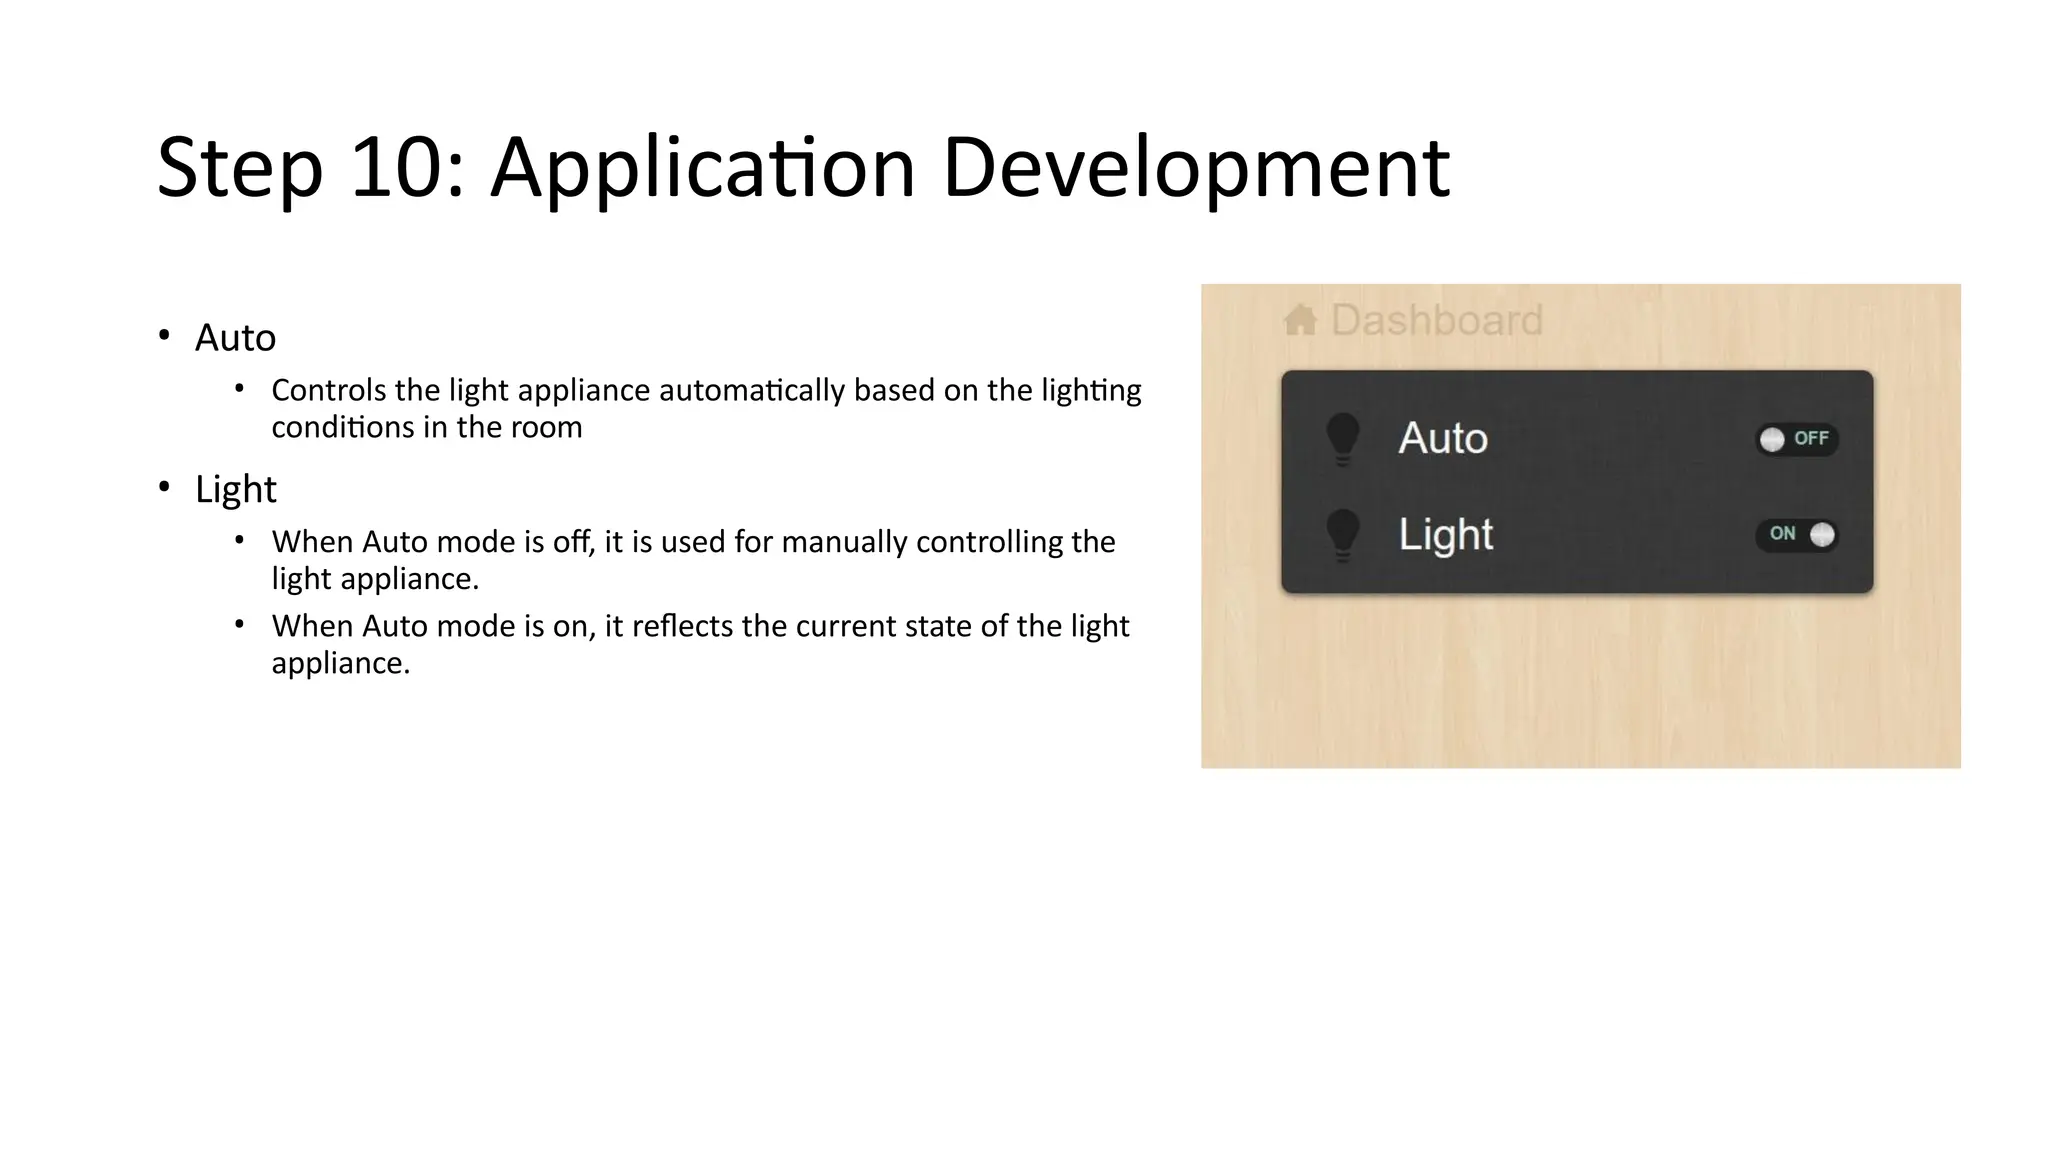
Step 10: ApplicationDevelopment
• Auto
• Controls the light appliance automatically based on the lighting
conditions in the room
• Light
• When Auto mode is off, it is used for manually controlling the
light appliance.
• When Auto mode is on, it reflects the current state of the light
appliance.
36.
Implementation: RESTful WebServices
# Models – models.py
from django.db import models
class Mode(models.Model):
name = models.CharField(max_length=50)
class State(models.Model):
name = models.CharField(max_length=50)
REST services implemented with Django REST Framework
1. Map services to models. Model
fields store the states (on/off,
auto/manual)
2. Write Model serializers. Serializers allow
complex data (such as model instances) to be
converted to native Python datatypes that can
then be easily rendered into JSON, XML or
other content types.
# Serializers – serializers.py
from myapp.models import Mode, State
from rest_framework import serializers
class ModeSerializer(serializers.HyperlinkedModelSerializer):
class Meta:
model = Mode
fields = ('url', 'name')
class StateSerializer(serializers.HyperlinkedModelSerializer):
class Meta:
model = State
fields = ('url', 'name')
37.
Implementation: RESTful WebServices
# Views – views.py
from myapp.models import Mode, State
from rest_framework import viewsets
from myapp.serializers import
ModeSerializer, StateSerializer
class ModeViewSet(viewsets.ModelViewSet):
queryset = Mode.objects.all()
serializer_class = ModeSerializer
class StateViewSet(viewsets.ModelViewSet):
queryset = State.objects.all()
serializer_class = StateSerializer
3. Write ViewSets for the Models which
combine the logic for a set of related views in
a single class.
# Models – models.py
from django.db import models
class Mode(models.Model):
name = models.CharField(max_length=50)
class State(models.Model):
name = models.CharField(max_length=50)
4. Write URL patterns for the services.
Since ViewSets are used instead of views, we
can automatically generate the URL conf by
simply registering the viewsets with a router
class.
Routers automatically determining how the
URLs for an application should be mapped to
the logic that deals with handling incoming
requests.
# URL Patterns – urls.py
from django.conf.urls import patterns, include, url
from django.contrib import admin
from rest_framework import routers
from myapp import views
admin.autodiscover()
router = routers.DefaultRouter()
router.register(r'mode', views.ModeViewSet)
router.register(r'state', views.StateViewSet)
urlpatterns = patterns('',
url(r'^', include(router.urls)),
url(r'^api-auth/', include('rest_framework.urls', namespace='rest_framework')),
url(r'^admin/', include(admin.site.urls)),
url(r'^home/', 'myapp.views.home'),
)
38.
Implementation: RESTful WebServices
Screenshot of browsable
State REST API
Screenshot of browsable
Mode REST API
39.
Implementation: Controller NativeService
#Controller service
import RPi.GPIO as GPIO
import time
import sqlite3 as lite
import sys
con = lite.connect('database.sqlite')
cur = con.cursor()
GPIO.setmode(GPIO.BCM)
threshold = 1000
LDR_PIN = 18
LIGHT_PIN = 25
def readldr(PIN):
reading=0
GPIO.setup(PIN, GPIO.OUT)
GPIO.output(PIN, GPIO.LOW)
time.sleep(0.1)
GPIO.setup(PIN, GPIO.IN)
while (GPIO.input(PIN)==GPIO.LOW):
reading=reading+1
return reading
def switchOnLight(PIN):
GPIO.setup(PIN, GPIO.OUT)
GPIO.output(PIN, GPIO.HIGH)
def switchOffLight(PIN):
GPIO.setup(PIN, GPIO.OUT)
GPIO.output(PIN, GPIO.LOW)
def runAutoMode():
ldr_reading = readldr(LDR_PIN)
if ldr_reading < threshold:
switchOnLight(LIGHT_PIN)
setCurrentState('on')
else:
switchOffLight(LIGHT_PIN)
setCurrentState('off')
def runManualMode():
state = getCurrentState()
if state=='on':
switchOnLight(LIGHT_PIN)
setCurrentState('on')
elif state=='off':
switchOffLight(LIGHT_PIN)
setCurrentState('off')
def getCurrentMode():
cur.execute('SELECT * FROM myapp_mode')
data = cur.fetchone()
#(1, u'auto') return data[1]
def getCurrentState():
cur.execute('SELECT * FROM myapp_state')
data = cur.fetchone()
#(1, u'on') return data[1]
def setCurrentState(val):
query='UPDATE myapp_state set name="'+val+'"'
cur.execute(query)
while True:
currentMode=getCurrentMode()
if currentMode=='auto':
runAutoMode()
elif currentMode=='manual':
runManualMode()
time.sleep(5)
Native service deployed locally
1. Implement the native service in
Python and run on the device
40.
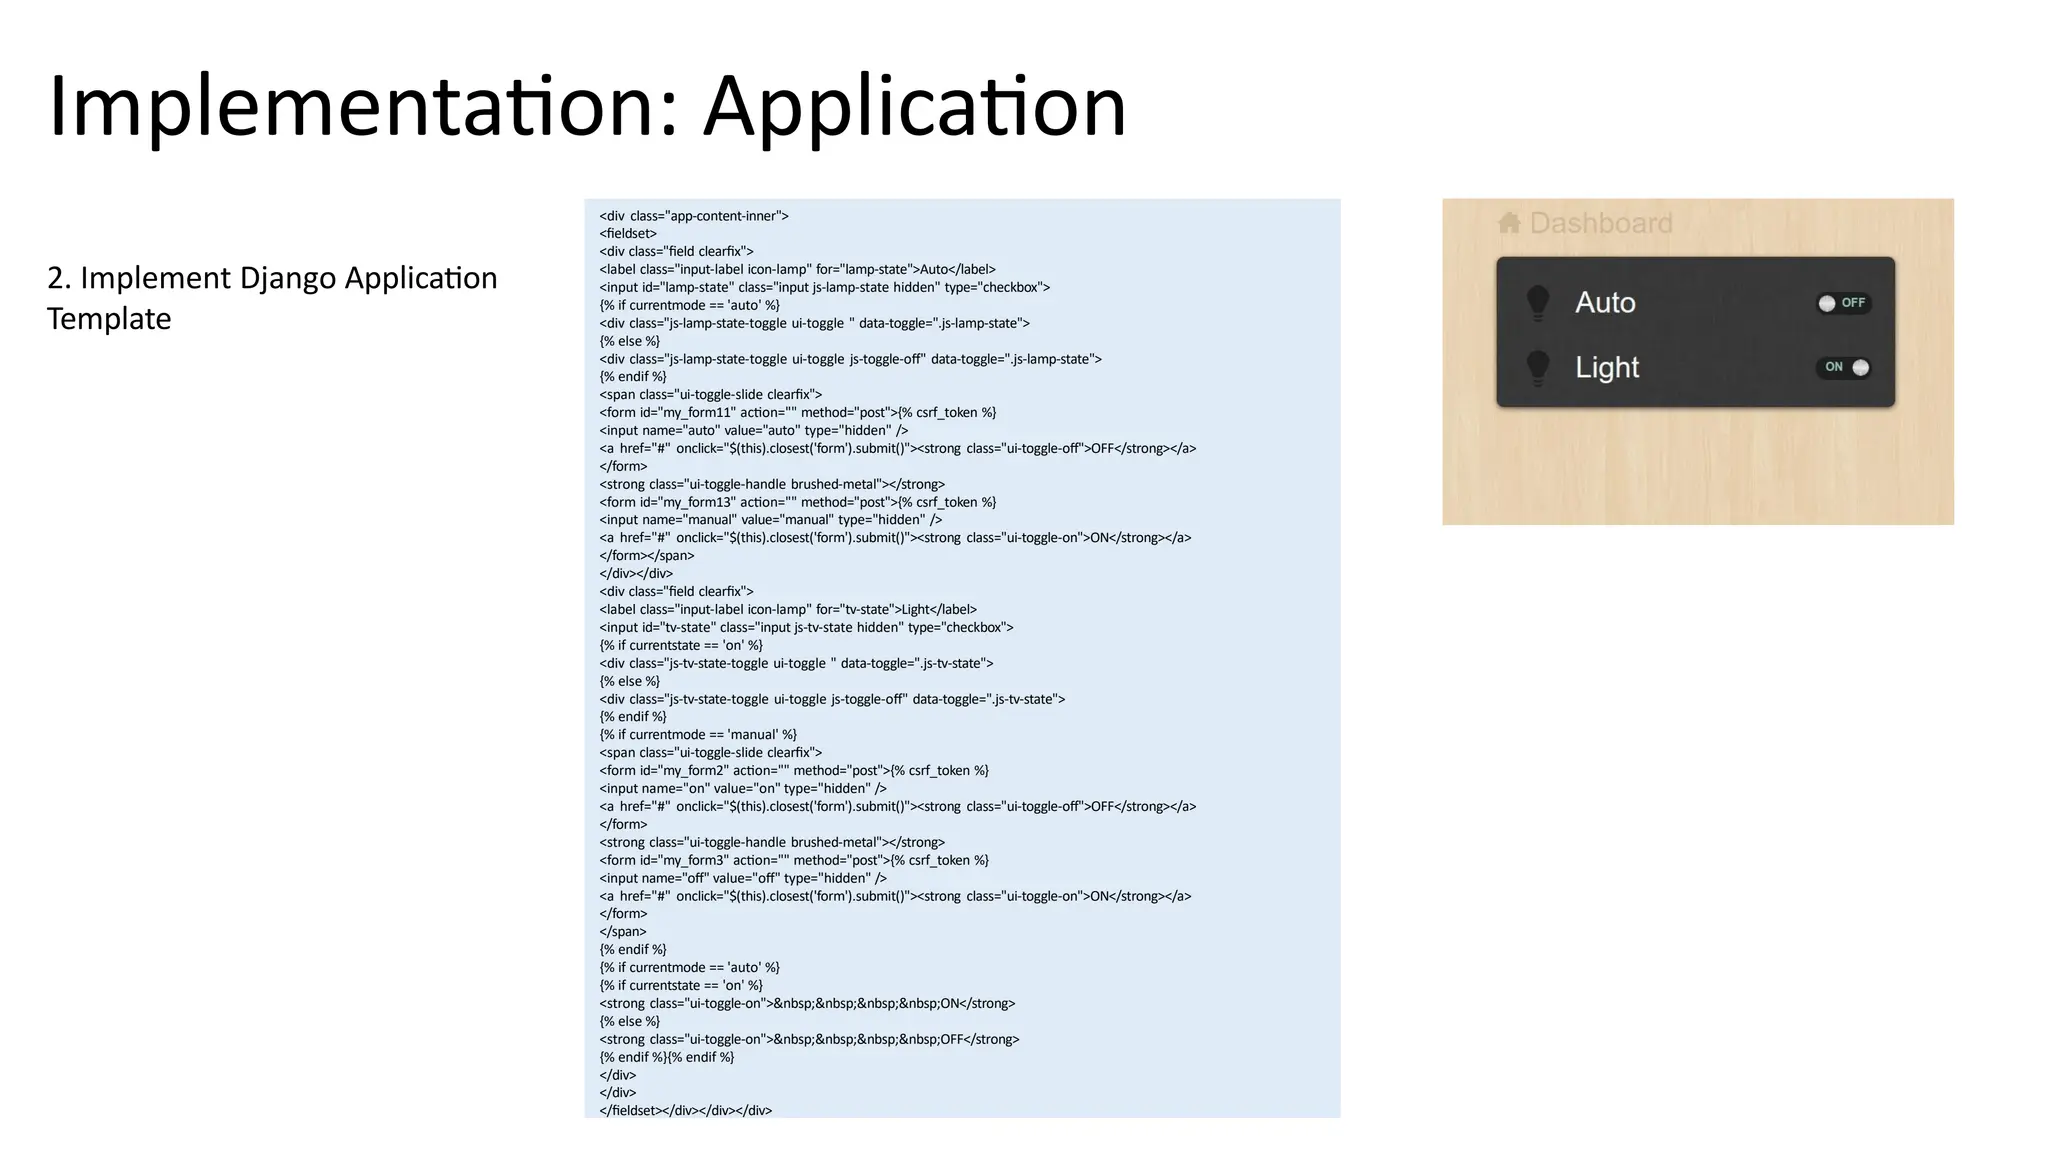
Implementation: Application
# Views– views.py
def home(request):
out=‘’
if 'on' in
request.P
OST:
valu
e
s
=
{
"
n
a
m
e
"
:
"
o
n
"
}
r=requests.put('http://127.0.0.1:8000/state/1/', data=values, auth=(‘username', ‘password'))
result=r.text
output = json.loads(result)
out=output['name']
if 'off' in request.POST:
values = {"name": "off"}
r=requests.put('http://127.0.0.1:8000/state/1/', data=values, auth=(‘username', ‘password'))
result=r.text
output = json.loads(result)
out=output['name']
if 'auto' in request.POST:
values = {"name": "auto"}
r=requests.put('http://127.0.0.1:8000/mode/1/', data=values, auth=(‘username', ‘password'))
result=r.text
1. Implement Django Application View
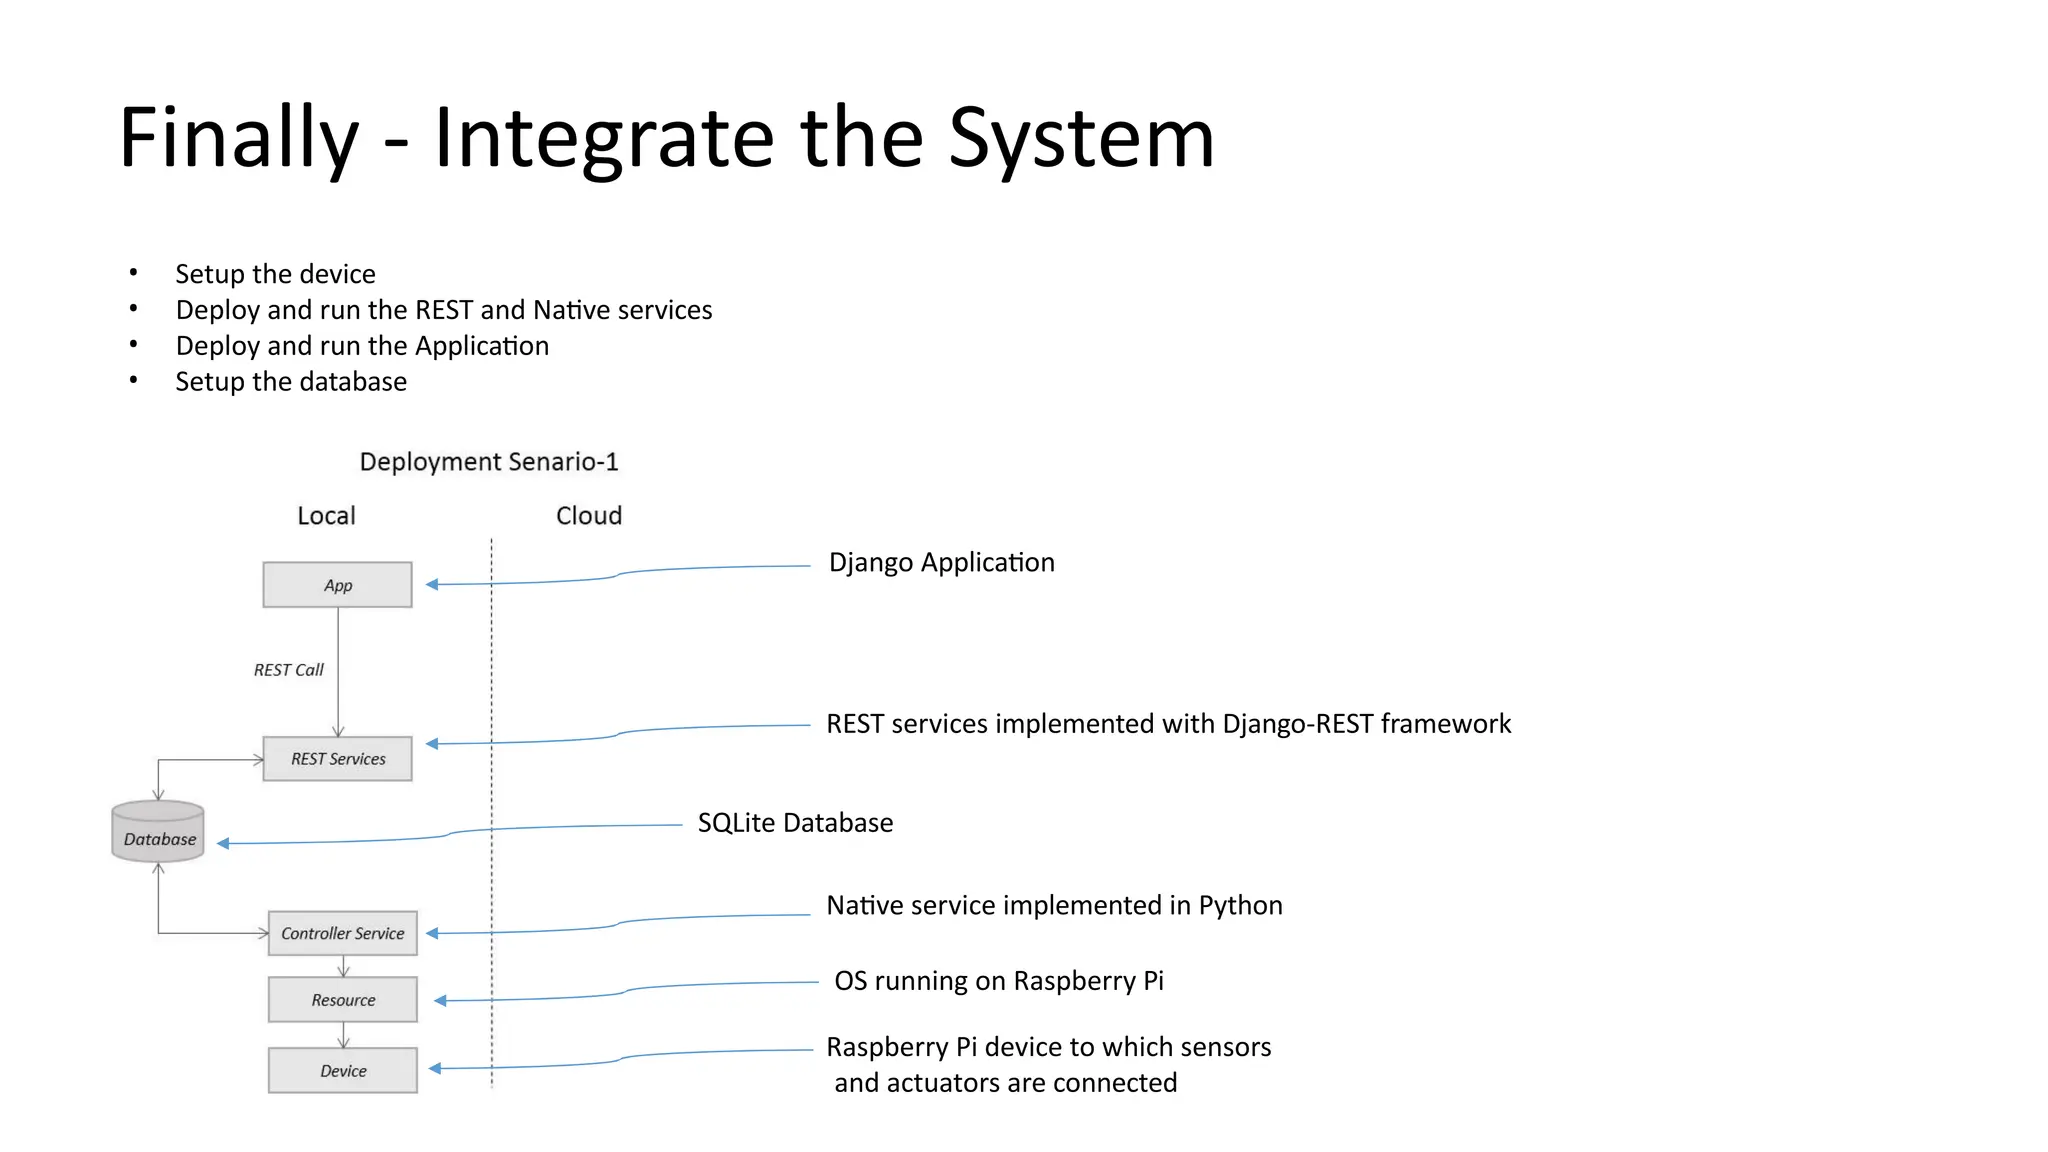
Finally - Integratethe System
Django Application
REST services implemented with Django-REST framework
SQLite Database
Native service implemented in Python
OS running on Raspberry Pi
Raspberry Pi device to which sensors
and actuators are connected
• Setup the device
• Deploy and run the REST and Native services
• Deploy and run the Application
• Setup the database


![Implementation: Controller Native Service
#Controller service
import RPi.GPIO as GPIO
import time
import sqlite3 as lite
import sys
con = lite.connect('database.sqlite')
cur = con.cursor()
GPIO.setmode(GPIO.BCM)
threshold = 1000
LDR_PIN = 18
LIGHT_PIN = 25
def readldr(PIN):
reading=0
GPIO.setup(PIN, GPIO.OUT)
GPIO.output(PIN, GPIO.LOW)
time.sleep(0.1)
GPIO.setup(PIN, GPIO.IN)
while (GPIO.input(PIN)==GPIO.LOW):
reading=reading+1
return reading
def switchOnLight(PIN):
GPIO.setup(PIN, GPIO.OUT)
GPIO.output(PIN, GPIO.HIGH)
def switchOffLight(PIN):
GPIO.setup(PIN, GPIO.OUT)
GPIO.output(PIN, GPIO.LOW)
def runAutoMode():
ldr_reading = readldr(LDR_PIN)
if ldr_reading < threshold:
switchOnLight(LIGHT_PIN)
setCurrentState('on')
else:
switchOffLight(LIGHT_PIN)
setCurrentState('off')
def runManualMode():
state = getCurrentState()
if state=='on':
switchOnLight(LIGHT_PIN)
setCurrentState('on')
elif state=='off':
switchOffLight(LIGHT_PIN)
setCurrentState('off')
def getCurrentMode():
cur.execute('SELECT * FROM myapp_mode')
data = cur.fetchone()
#(1, u'auto') return data[1]
def getCurrentState():
cur.execute('SELECT * FROM myapp_state')
data = cur.fetchone()
#(1, u'on') return data[1]
def setCurrentState(val):
query='UPDATE myapp_state set name="'+val+'"'
cur.execute(query)
while True:
currentMode=getCurrentMode()
if currentMode=='auto':
runAutoMode()
elif currentMode=='manual':
runManualMode()
time.sleep(5)
Native service deployed locally
1. Implement the native service in
Python and run on the device](https://image.slidesharecdn.com/chapter-5-251203032248-7512315f/75/Chapter-5-pptx-social-science-Karnataka-textbook-39-2048.jpg)
![Implementation: Application
# Views – views.py
def home(request):
out=‘’
if 'on' in
request.P
OST:
valu
e
s
=
{
"
n
a
m
e
"
:
"
o
n
"
}
r=requests.put('http://127.0.0.1:8000/state/1/', data=values, auth=(‘username', ‘password'))
result=r.text
output = json.loads(result)
out=output['name']
if 'off' in request.POST:
values = {"name": "off"}
r=requests.put('http://127.0.0.1:8000/state/1/', data=values, auth=(‘username', ‘password'))
result=r.text
output = json.loads(result)
out=output['name']
if 'auto' in request.POST:
values = {"name": "auto"}
r=requests.put('http://127.0.0.1:8000/mode/1/', data=values, auth=(‘username', ‘password'))
result=r.text
1. Implement Django Application View](https://image.slidesharecdn.com/chapter-5-251203032248-7512315f/75/Chapter-5-pptx-social-science-Karnataka-textbook-40-2048.jpg)

![[PPT] _ Unit 2 _ 9.0 _ Domain Specific IoT _Home Automation.pdf](https://cdn.slidesharecdn.com/ss_thumbnails/pptunit29-220516115946-098632b6-thumbnail.jpg?width=640&height=640&fit=bounds)


