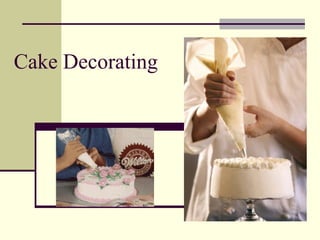
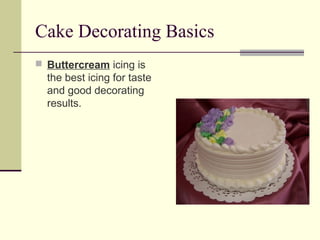
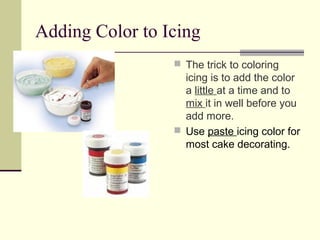
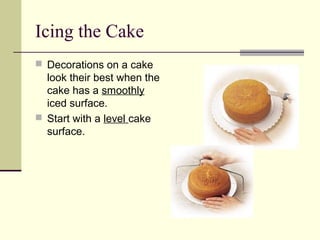
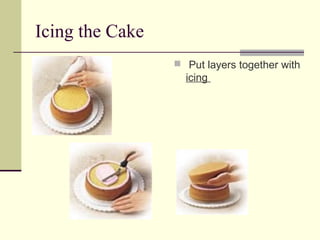
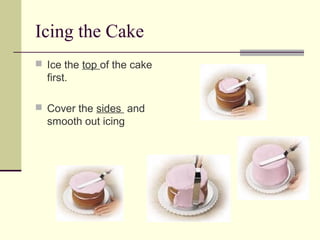
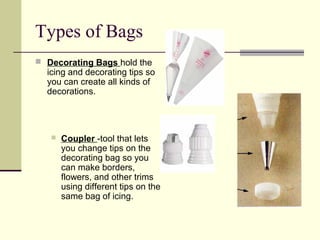
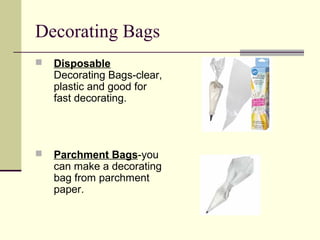
Cake Decorating
Cake Decorating Basics
 Buttercream icing is

the best icing for taste
and good decorating
results.
Adding Color to Icing
 The trick to coloring

icing is to add the color
a little at a time and to
mix it in well before you
add more.
 Use paste icing color for
most cake decorating.
Icing the Cake
 Decorations on a cake

look their best when the
cake has a smoothly
iced surface.
 Start with a level cake
surface.
Icing the Cake
 Put layers together with

icing
Icing the Cake
 Ice the top of the cake

first.
 Cover the sides and

smooth out icing
Types of Bags
 Decorating Bags hold the

icing and decorating tips so
you can create all kinds of
decorations.



Coupler -tool that lets
you change tips on the
decorating bag so you
can make borders,
flowers, and other trims
using different tips on the
same bag of icing.
Decorating Bags


Disposable
Decorating Bags-clear,
plastic and good for
fast decorating.



Parchment Bags-you
can make a decorating
bag from parchment
paper.
Filling a Decorating Bag
1. Remove ring from coupler
and push the coupler into
the narrow end of the bag.

3.

2. Mark the bag with a pencil
where the lower threads
appear.

5.

4.

6.

Remove coupler and trim
bag at pencil mark.
Push the coupler back into
the bag to expose the
bottom threads.
Position a decorating tip
over the coupler and screw
the ring in place.
To change tips, remove the
ring, replace the tip and
ring.
Filling a Decorating Bag
To fill a bag, cuff open end over your hand.
Use a spatula to fill the bag ½ to ⅔ full of icing.
8. Twist the end of the bag closed, forcing the icing
down into the bag and tip.
7.
Basics of Decorating
 1. Consistency
 Flowers require a stiff
consistency icing



Borders require a
medium consistency
icing



Writing and leaves
require thin
consistency icing
Basics of Decorating
 2. Bag Position
 90 ° angle-the

decorating bag is held
perpendicular to the
surface of the cake.
Basics of Decorating
 45° angle-the

decorating bag is held
at a slight angle to the
surface you are
decorating.
Basics of Decorating
 3. Pressure Control-

the amount of pressure
applied to the
decorating bag, as well
as the size of the
opening in the
decorating tip will
determine the size of
the icing decoration.
Novelty Shaped Cakes
1. Ice sides and other
areas per instructions
smooth.

2. Outline details.
Novelty Shaped Cakes
3. Pipe in facial features,

small details, window,
doors, etc.
4. Cover areas with
stars, stripes, zigzags
or hair.
Novelty Shaped Cakes
5. Add message.

6. Edge top and base

with borders. Attach
flowers or trims.
Buttercream Icing
1 cup solid vegetable shortening
1 teaspoon clear vanilla extract
4 cups (1 lb) confectioner’s sugar
2 Tablespoons water or milk
Cream shortening with electric mixer. Add
vanilla. Gradually add sugar, beating well on
medium speed. Add water or milk and beat
at medium speed until light and fluffy. Keep
icing covered with a damp cloth until ready to
use.

Cake decorating

  • 1.
  • 2.
    Cake Decorating Basics Buttercream icing is the best icing for taste and good decorating results.
  • 3.
    Adding Color toIcing  The trick to coloring icing is to add the color a little at a time and to mix it in well before you add more.  Use paste icing color for most cake decorating.
  • 4.
    Icing the Cake Decorations on a cake look their best when the cake has a smoothly iced surface.  Start with a level cake surface.
  • 5.
    Icing the Cake Put layers together with icing
  • 6.
    Icing the Cake Ice the top of the cake first.  Cover the sides and smooth out icing
  • 7.
    Types of Bags Decorating Bags hold the icing and decorating tips so you can create all kinds of decorations.  Coupler -tool that lets you change tips on the decorating bag so you can make borders, flowers, and other trims using different tips on the same bag of icing.
  • 8.
    Decorating Bags  Disposable Decorating Bags-clear, plasticand good for fast decorating.  Parchment Bags-you can make a decorating bag from parchment paper.
  • 9.
    Filling a DecoratingBag 1. Remove ring from coupler and push the coupler into the narrow end of the bag. 3. 2. Mark the bag with a pencil where the lower threads appear. 5. 4. 6. Remove coupler and trim bag at pencil mark. Push the coupler back into the bag to expose the bottom threads. Position a decorating tip over the coupler and screw the ring in place. To change tips, remove the ring, replace the tip and ring.
  • 10.
  • 11.
    Filling a DecoratingBag To fill a bag, cuff open end over your hand. Use a spatula to fill the bag ½ to ⅔ full of icing. 8. Twist the end of the bag closed, forcing the icing down into the bag and tip. 7.
  • 12.
    Basics of Decorating 1. Consistency  Flowers require a stiff consistency icing  Borders require a medium consistency icing  Writing and leaves require thin consistency icing
  • 13.
    Basics of Decorating 2. Bag Position  90 ° angle-the decorating bag is held perpendicular to the surface of the cake.
  • 14.
    Basics of Decorating 45° angle-the decorating bag is held at a slight angle to the surface you are decorating.
  • 15.
    Basics of Decorating 3. Pressure Control- the amount of pressure applied to the decorating bag, as well as the size of the opening in the decorating tip will determine the size of the icing decoration.
  • 16.
    Novelty Shaped Cakes 1.Ice sides and other areas per instructions smooth. 2. Outline details.
  • 17.
    Novelty Shaped Cakes 3.Pipe in facial features, small details, window, doors, etc. 4. Cover areas with stars, stripes, zigzags or hair.
  • 18.
    Novelty Shaped Cakes 5.Add message. 6. Edge top and base with borders. Attach flowers or trims.
  • 19.
    Buttercream Icing 1 cupsolid vegetable shortening 1 teaspoon clear vanilla extract 4 cups (1 lb) confectioner’s sugar 2 Tablespoons water or milk Cream shortening with electric mixer. Add vanilla. Gradually add sugar, beating well on medium speed. Add water or milk and beat at medium speed until light and fluffy. Keep icing covered with a damp cloth until ready to use.