1. Auto 131 Lab Experience Report
Part 1: Vehicle Information
Student name(s):
Eddy Torres Nunez
TJ Mathews
Vehicle year, make, model:
2007 Toyota Corolla LE
Customer’s name & repair order number:
Kimberly Moore 9786
Customer’s concern(s):
Alternator not working, car wouldn’t start even by jump starting it.
Part 2: Documentation
Document the steps you took to diagnose and repair the vehicle—in the order that you did
them. Write every step—even if you made mistakes and now wish you would have done it
differently. Begin when you picked up the keys, end when you returned them. BE
DETAILED & INCLUDE PHOTOGRAPHS!
We received the repair order from the office in the Austin 106. Then we proceeded to call the
customer to verify that she still wanted to have her car repaired and made arrangements to
have the vehicle towed to the school.
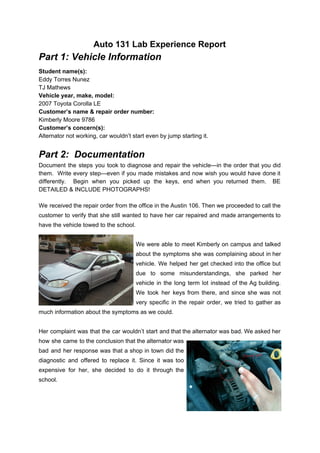
We were able to meet Kimberly on campus and talked
about the symptoms she was complaining about in her
vehicle. We helped her get checked into the office but
due to some misunderstandings, she parked her
vehicle in the long term lot instead of the Ag building.
We took her keys from there, and since she was not
very specific in the repair order, we tried to gather as
much information about the symptoms as we could.
Her complaint was that the car wouldn’t start and that the alternator was bad. We asked her
how she came to the conclusion that the alternator was
bad and her response was that a shop in town did the
diagnostic and offered to replace it. Since it was too
expensive for her, she decided to do it through the
school.
2. When we found the vehicle, we verified the complaint and had to tow it into the shop. Once
in the shop, we opened the hood and performed a visual inspection. The only visible
problem we found was that the bolt that holds the alternator to the engine block was missing,
creating undesired vibration and looseness in the belt. Then we proceeded to do some
research to find probable causes for the complaint. A wiring diagram for the battery, the
charging system, and the starter motor were located and printed. We also looked for
Technical Service Bulletins to see if the complaint was a common problem in that vehicle
model, but didn’t find any that related to our problem or symptoms.
After we thought we had all the information we
could find, we decided to start with the battery
and started isolating components in the circuit
from there. Upon measuring the battery voltage
in the car, the battery read 0.6 Volts. We tried to
jump start the car to get enough power in the
system to try to start the car but our attempts
were unsuccessful. Even though the jumpstarter
was correctly connected, the car wouldn’t start.
We came to the conclusion that the car couldn't be jumpstarted because the battery’s state
of charge was too low, so it would drain the voltage from the battery saver to try to charge
the battery instead of starting the car. it was then that a battery charger was placed on the
battery while we kept gathering information online about this problem. About 30 minutes
later, we returned to the vehicle, disconnected the battery charger, turned the ignition on,
and the car started right away. We were excited to see the car running for the first time
because we were feeling that we were progressing in the diagnose of the vehicle’s problem.
We tried to perform a battery load test with our multimeter but after looking at the readings
concluded that in order to get accurate results, we must have a fully charged battery. So we
drove the car to the parking lot, then disconnected the battery from the car, and left it
connected to one of our smart chargers inside the building until the next class period.
Two days later (in the next class period),
we disconnected the battery and
measured its voltage with our multimeter.
The battery measured 3.26 volts. After
seeing this result we decided that the
battery was dead and needed to be
replaced. As we kept inspecting the
reasons why the battery was not charging,
3. we realized that the edges of the battery were warped, which is a result of the battery being
drained in cold temperatures and the battery freezing, breaking the cells in the battery.
With no power, we could not verify any of the components of the charging system, and we
couldn't diagnose the root of the problem. We contacted the customer and told her that she
needed a new battery and after we received approval, We went to the toolroom and found
the battery that the vehicle needed in stock, then proceeded to bill it into Omnique. After we
were done, we proceeded to install the battery and started the car. The car started with no
problems.
Now with power in the circuit, we went ahead and performed a battery load test and a
charging system test with our multimeter. We connected
our multimeter to the battery and measured 12.68V, then
turned the Min/Max mode and started the car. As soon as
the car started we noticed the voltage went up to 14.2V,
but as we started adding more loads (turned the A/C to
full, turned the headlights, dome lights, radio and
basically as many electrical components as we could).
the voltage started reading to the point that it reached
12.4V. As we revved the engine, we noticed that the
voltage increased and stayed above 13V. then, we
turned off the engine and looked at our minimum voltage
reading and it was 9.98V. After doing that test we learned
two things: 1 That the battery was working perfectly and
2 that the alternator was able to keep up with all the
loads in the circuit when it was running, not idling. We
wanted to make sure that the alternator was functioning
properly, so we decided to use a more accurate tool to double check, so we used the
VAT40. Because, neither of us knew how to use it correctly, we watched the videos on
Ilearn on how to use the VAT40. After watching it a few
times, we hooked the VAT40 up and followed the
procedure listed in the video. Once the VAT40 was
hooked up we put it on the blue setting to measure how
many amps the battery could produce. With the car
revving around 15002000 rpm we turned the dial putting a
load on the car. When the dial reached 12.6 volts the
meter was reading over 100 amps.
After performing this test we confirmed that the alternator
was capable of charging the battery under full load. Thus
resulting that the alternator was still good. But we kept
asking ourselves, with a good alternator and a good
battery, why was the original battery dead in the first
place? There were only two options: a parasitic drain in
the circuit or the customer killed the battery by using it
4. without the car running for an extended period of time. To cover all of our bases, we decided
to keep further testing the vehicle to find the root of the problem.
The last test that we decided to perform was a parasitic
drain test, to see if anything was draining the battery while
the car was not on, which resulted in the initial battery to
drain and freeze. While performing the parasitic drain test,
we placed our multimeter in series with the battery and
changed it to the amp setting. When the car went to sleep, it
was pulling 28.24 milliamps. Which is in accordance to the
maximum of 30 milliamps for a parasitic drain test. After
that, we tested the fuse block to find out what circuit was
pulling the current.
With no parasitic drain, an alternator that passed both tests,
and a brand new battery, we concluded that the cause of
the symptoms was an abuse in the battery usage from the
customer. We
finished by installing the missing bolt in the alternator,
and proceeded to bill out the car, made sure that
there were no errors in Omnique, verified that the
complaint was repaired, received the appropriate
signatures, parked the car on center street, took the
keys to the Automotive office in the Austin, and then
proceeded to call the customer with the final total of
the repair, a brief detail of what we did.
Part 3: Reflection & Analysis
∙ What parts of this process went well?
Overall the diagnosing of the problem went well. We were able to figure out the problem as
well as solve it. Even though in certain tests the results were more valuable than others,
each test allowed us to diagnose the problem by narrowing down each part of the circuit until
we discarded all the possible causes and found the problem.
∙ Which steps were most critical in your diagnosis process?
The steps that we the most critical in diagnosing the cars problems were performing the
original battery test, performing the load test on the alternator as well as performing a
parasitic drain test to make sure nothing was draining the battery. Through these tests, we
were able to conclude that the battery was not functional. Second, the alternator was
performing up to its standards, and third that there were not any parasitic drains.
∙ What kept you from being as effective as you could have been?