
Recommended
More Related Content
Similar to 5 lecture preparation histological specimens.pdf
Similar to 5 lecture preparation histological specimens.pdf (20)
Recently uploaded
Recently uploaded (20)
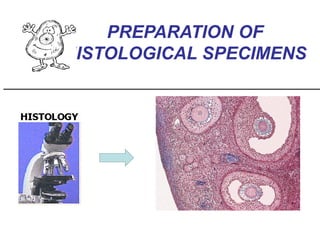
5 lecture preparation histological specimens.pdf
- 2. Histo-techniques • Preparation of tissue for microscopic examination • Series of processes • Ultimate aim – to make tissue ‘visible’ as it is • Pathology Vs Anatomy • Steps vary – types of tissue & microscopy – structure to be seen – stains to be used – time duration etc.
- 3. Steps Tissue procurement and preparation Fixation Dehydration Clearing Embedding Section cutting Staining and mounting in slide
- 4. Source of tissues Post-mortem bodies Cadavers Tissue of patients from pathology lab Animal sacrifice Slaughter house Tissue Procurement
- 5. Tissue preparation & precautions Start fixation a.s.a.p. Prevent osmotic damage do not dry wash with and immerse in NS No unnecessary handling Remove excess blood, mucosa etc. Cut with a sharp knife Marking of ‘cutting surface’ Labeling and putting in specimen tube Instructions for mounting – wall, tube, stained surface etc.
- 6. TISSUE FIXATION • The aim of fixation: 1- To prevent autolysis and bacterial attack. 2- To fix the tissues so they will not change their volume and shape during processing. 3- To prepare tissue and leave it in a condition which allow clear staining of sections. 4- To leave tissue as close as their living state as possible, and no small molecules should be lost. 5- Render tissue unaffected to the harmful effects of chemicals to be used in further processing. • Fixation is coming by reaction between the fixative and the molecules, so keeping every thing as their in vivo relation to each other.
- 7. Types of fixative: Acetic acid, Formaldehyde, Ethanol, Glutaraldehyde, Methanol and Picric acid. FIXATIVE SOLUTIONS: 10% neutral buffered formalin, 4% paraformaldehyde IMPORTANT: Formaldehyde/glutaraldehyde - directly proportional cross-linking formation with amine groups
- 8. - PH. - Temperature. - Penetration of fixative. - Time. According to previous factors we can determine the concentration of fixative and fixation time. Factors affect fixation:
- 9. PH • Anoxia in tissue -> CO2 -> pH • General purpose: optimal pH 6-8 • Buffers maintain desired pH Temperature • 0-4 oC • Low temperature – rate of decomposition
- 10. Penetration of fixatives • Rate of penetration varies with various factors. – Glutaraldehyde > Formaldehyde • Deeper tissue takes longer time • Tissue slices should be thin 2 cm3
- 11. Time • Formaldehyde – Too short – reversal of fixation – Too long • shrinkage of tissue • Masks the antigen - Immunohistochemistry • Depends upon – Thickness of tissue – Temperature • Optimal 12 hours, maximum 24 hours
- 12. • Size of tissue, 2 cm3 1 • Volume of fixative, 10X 2 • Time – 12-24 hrs (formalin) 3 Fixation : Golden rules
- 13. Choosing buffers • Buffer should not react chemically with fixative • Immunohistochemistry: buffer should not react or inhibit incubation medium or enzymes • As close to tissue pH as possible – esp for Histochemistry
- 14. Methods of fixation • Immersion – commonly used • Perfusion – ideal method e.g. embalming • Heparin pretreatment
- 16. Freezing LIQUID N2 + Isopentane Freezing Cryoprotectant (OCT, sucrose solution) Rapid low-temp freezing Lipids and activity stains (enzymes)
- 17. TISSUE PROCESSING the aim of tissue processing is to embed the tissue in a solid medium firm enough to support the tissue and give it sufficient rigidity to enable thin sections to be cut (3-10 µm). Stages of processing: 1- Dehydration. 2- Clearing. 3- Embedding.
- 18. Dehydration Remove fixative and water from the tissue and replace them with dehydrating fluid. • To minimize tissue shrinking specimens are dehydrated in a graded ethanol series from water through 70%-90%- -95%-100% ethanol. • two or three changes of absolute ethanol before proceeding to the clearing stage. • Duration of dehydration should be kept to the minimum consistent with the tissues being processed. Tissue blocks 1 mm thick should receive up to 30 minutes in each alcohol, blocks 5 mm thick require up to 90 minutes or longer in each change. Types of dehydrating agents: Ethanol, Methanol, Acetone.
- 19. Clearing • replacing the dehydrating fluid with a fluid that is totally miscible with both the dehydrating fluid and the embedding medium. • Some clearing agents: - Xylene. - Toluene. - Chloroform. - Benzene. - Petrol.
- 20. • During dehydration water in tissue has been replaced by alcohol. • The next step alcohol should be replaced by paraffin wax. • As paraffin wax is not alcohol soluble, we replace alcohol with a substance in which wax is soluble. This step is called clearing. Clearing
- 21. Embedding • is the process by which tissues are surrounded by a medium such as agar, gelatin, or wax which when solidified will provide sufficient external support during sectioning. • Paraffin wax properties : • Paraffin wax is a polycrystalline mixture of solid hydrocarbons produced during the refining of coal and mineral oils. It is about two thirds the density and slightly more elastic than dried protein. Paraffin wax is traditionally marketed by its melting points which range from 39°C to 68°C. • The properties of paraffin wax are improved for histological purposes by the inclusion of substances added alone or in combination to the wax: - improve ribboning. - increase hardness. - decrease melting point - improve adhesion between specimen and wax
- 22. Impregnation with Wax • This is allowed to occur at melting point temperature of paraffin wax, which is 54-60oC. Volume of wax should be about 25-30 times the volume of tissues. • The duration of impregnation depends on size and types of tissues and the clearing agents employed. • Longer periods are required for larger pieces and also for harder tissue like bones and skin as compared to liver kidney, spleen,lung etc.
- 23. Tampone per 70° 90° Da 20’ a 3h Da 20’ a 1,30h Stufa sottovuoto
- 24. Precaution while embedding in wax • The wax is clear of clearing agent. • No dust particles must be present. • Immediately after tissue embedding, the wax must be cooled to harden wax.
- 25. • There are two main mould systems and associated embedding protocols presently in use : 1- the Peel-a-way system using disposable plastic moulds and 2- systems using embedding rings or cassette-bases which become an integral part of the block and serve as the block holder in the microtome.
- 27. Processing methods and routine schedules • Machine processing • manual processing
- 28. CUTTING • using the microtome
- 29. • A microtome is a mechanical instrument used to cut biological specimens into very thin segments for microscopic examination. Most microtomes use a steel blade and are used to prepare sections of animal or plant tissues for histology.
- 30. 1- Traditional histological technique: tissues are hardened by replacing water with paraffin. The tissue is then cut in the microtome at thicknesses varying from 2 to 25 micrometers thick. From there the tissue can be mounted on a microscope slide, stained and examined using a light microscope
- 31. • 2- Cryosection: • water-rich tissues are hardened by freezing and cut frozen; sections are stained and examined with a light microscope. This technique is much faster than traditional histology and are used in operations to achieve a quick diagnosis. Cryosections can also be used in immunohistochemistry as freezing tissue does not alter or mask its chemical composition as much as preserving it with a fixative.
- 32. Microtome knives • STEEL KNIVES • NON-CORROSIVE KNIVES FOR CRYOSTATS • DISPOSABLE BLADES
- 33. STAINING
- 34. Staining • Staining is a process by which we give colour to a section. • There are hundreds of stains available. • Classification of Stains: • Acid stains (in an acid dye the basic component is colored, stains cytoplasm) • Basic stains (In a basic dye the acid component is colored, stains nucleus)
- 35. • Hematoxylin & eosin (H&E) is the most common dye combination. – Hematoxylin – basic- like dye which stains acid molecules (blue) • i.e. Nucleic acids – Eosin - acidic dye which stains basic molecules (pink) • Cytoplasm (proteins) Material stained with eosin Nuclei stained with hematoxylin
- 36. Fixation Any well fixed tissue. Staining Procedure 1. Deparaffinize and hydrate to water 2. Mayer's hematoxylin for 15 minutes 3. Wash in running tap water for 20 minutes 4. Counterstain with eosin from 15 seconds to 2 minutes depending on the depth of the counterstain desired. 5. Dehydrate in 95% and absolute alcohols, until excess eosin is removed. 6. Clear in xylene, two changes of 2 minutes each 7. Mount in Permount or Histoclad Results Nuclei - blue Cytoplasm - various shades of pink H&E
- 37. IN SUMMARY