This document provides instructions for servicing the cylinder head of a 2003-06 Acura MDX engine. It includes procedures for checking engine compression, testing the VTEC rocker arms, adjusting valve clearance, and identifying special tools and cylinder head components. Figures illustrate the component locations, special tool installation, feeler gauge use, and piston TDC alignment points for adjusting each cylinder's valves.
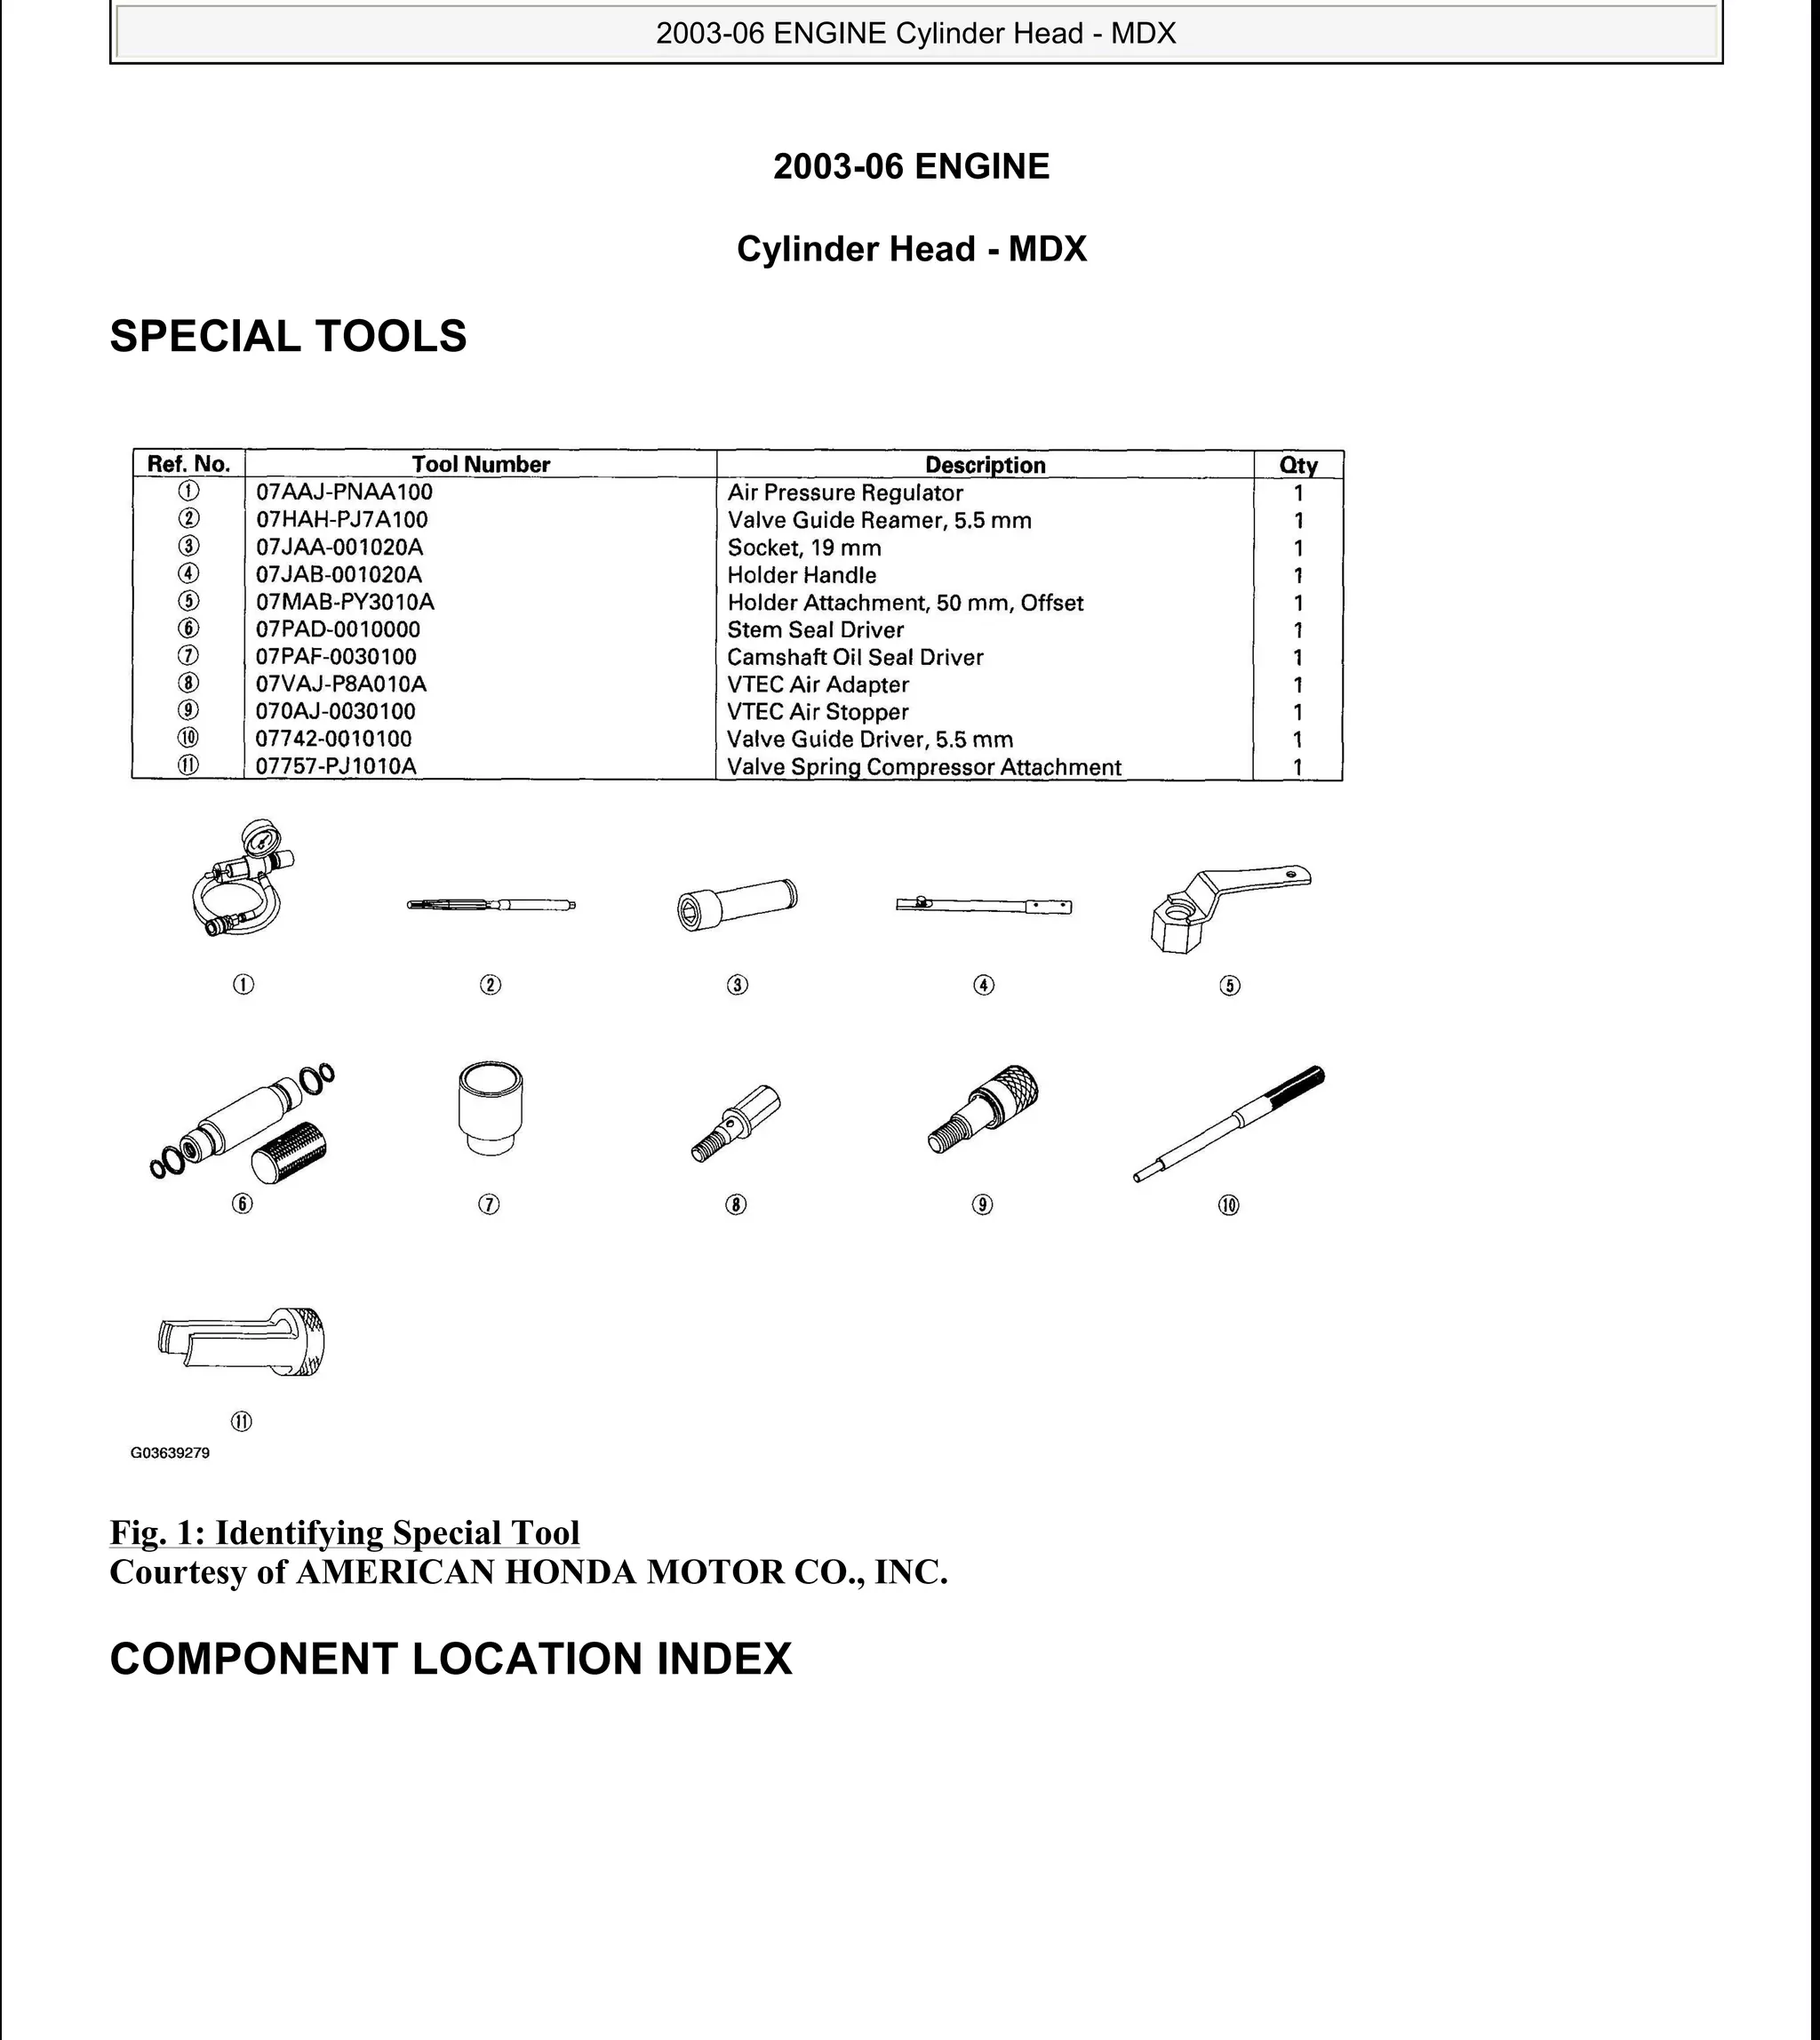
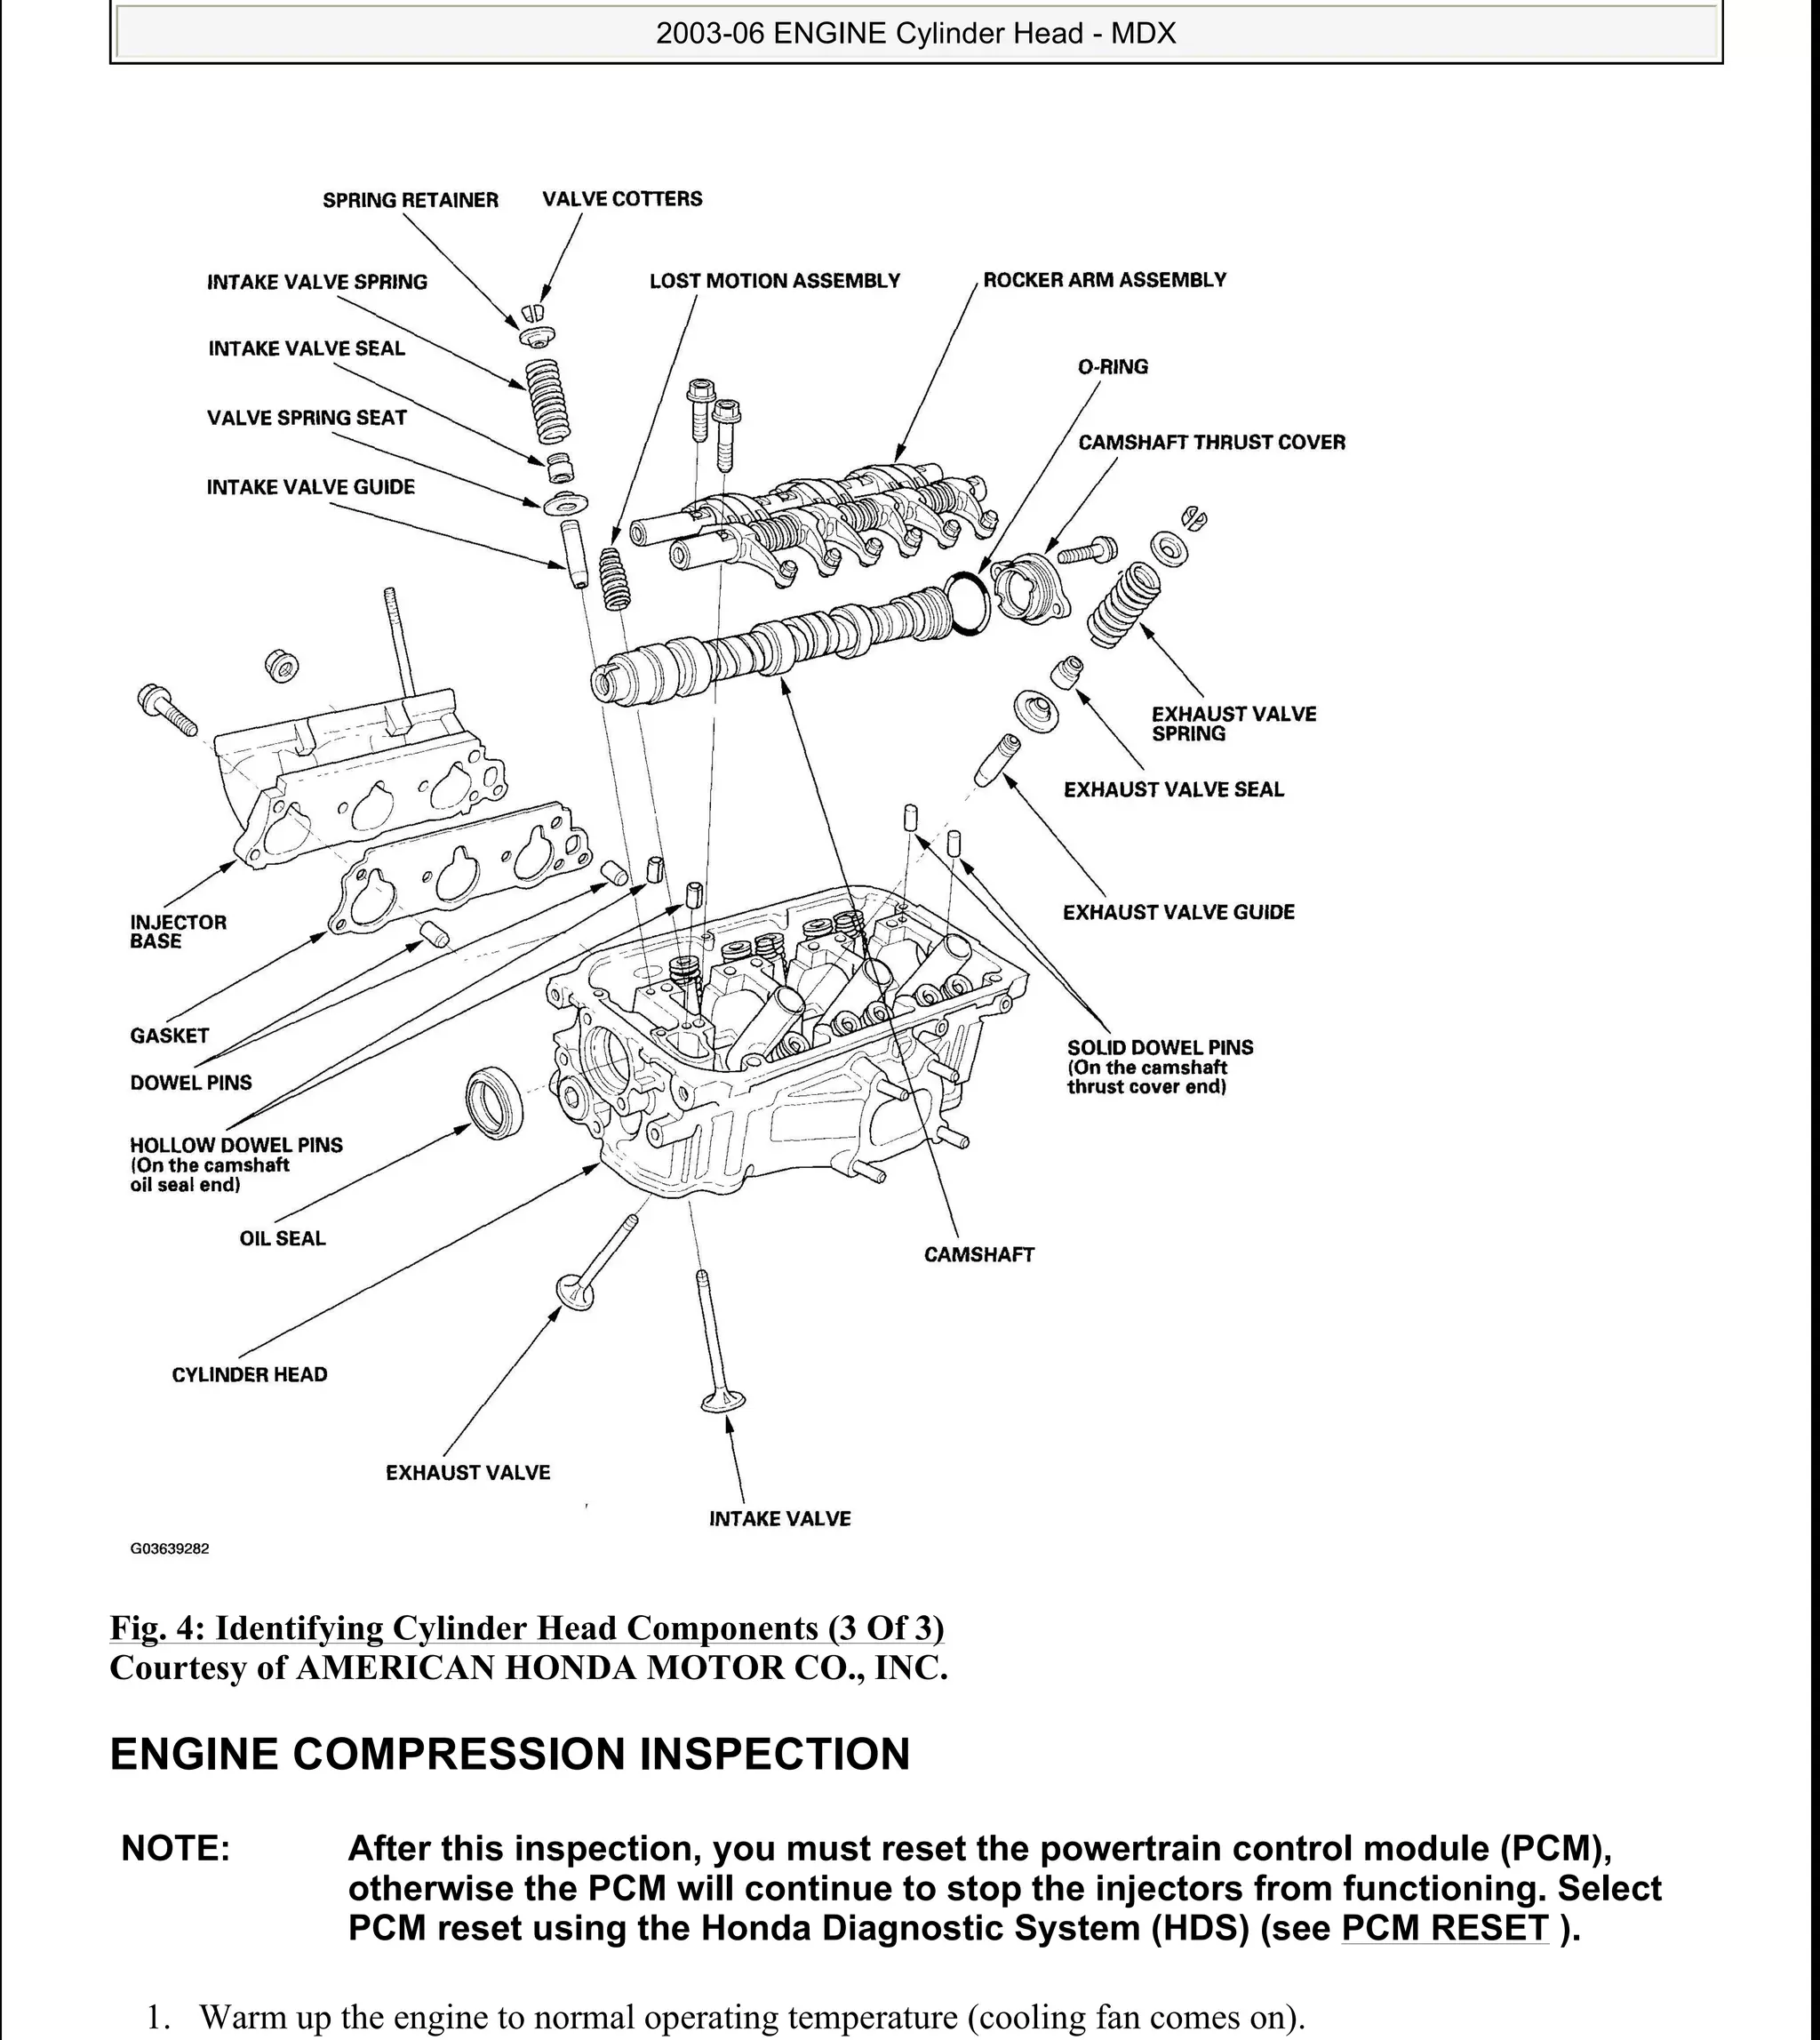
Identifying the special tools and components related to the engine cylinder head of a 2006 Acura MDX.
Steps for engine compression inspection, including pressure measurements above 930 kPa, and identifying issues with valves, gaskets, and piston rings.
Instructions for performing a VTEC rocker arm test including special tools, procedures for checking rocker arm movement, and air pressure application.
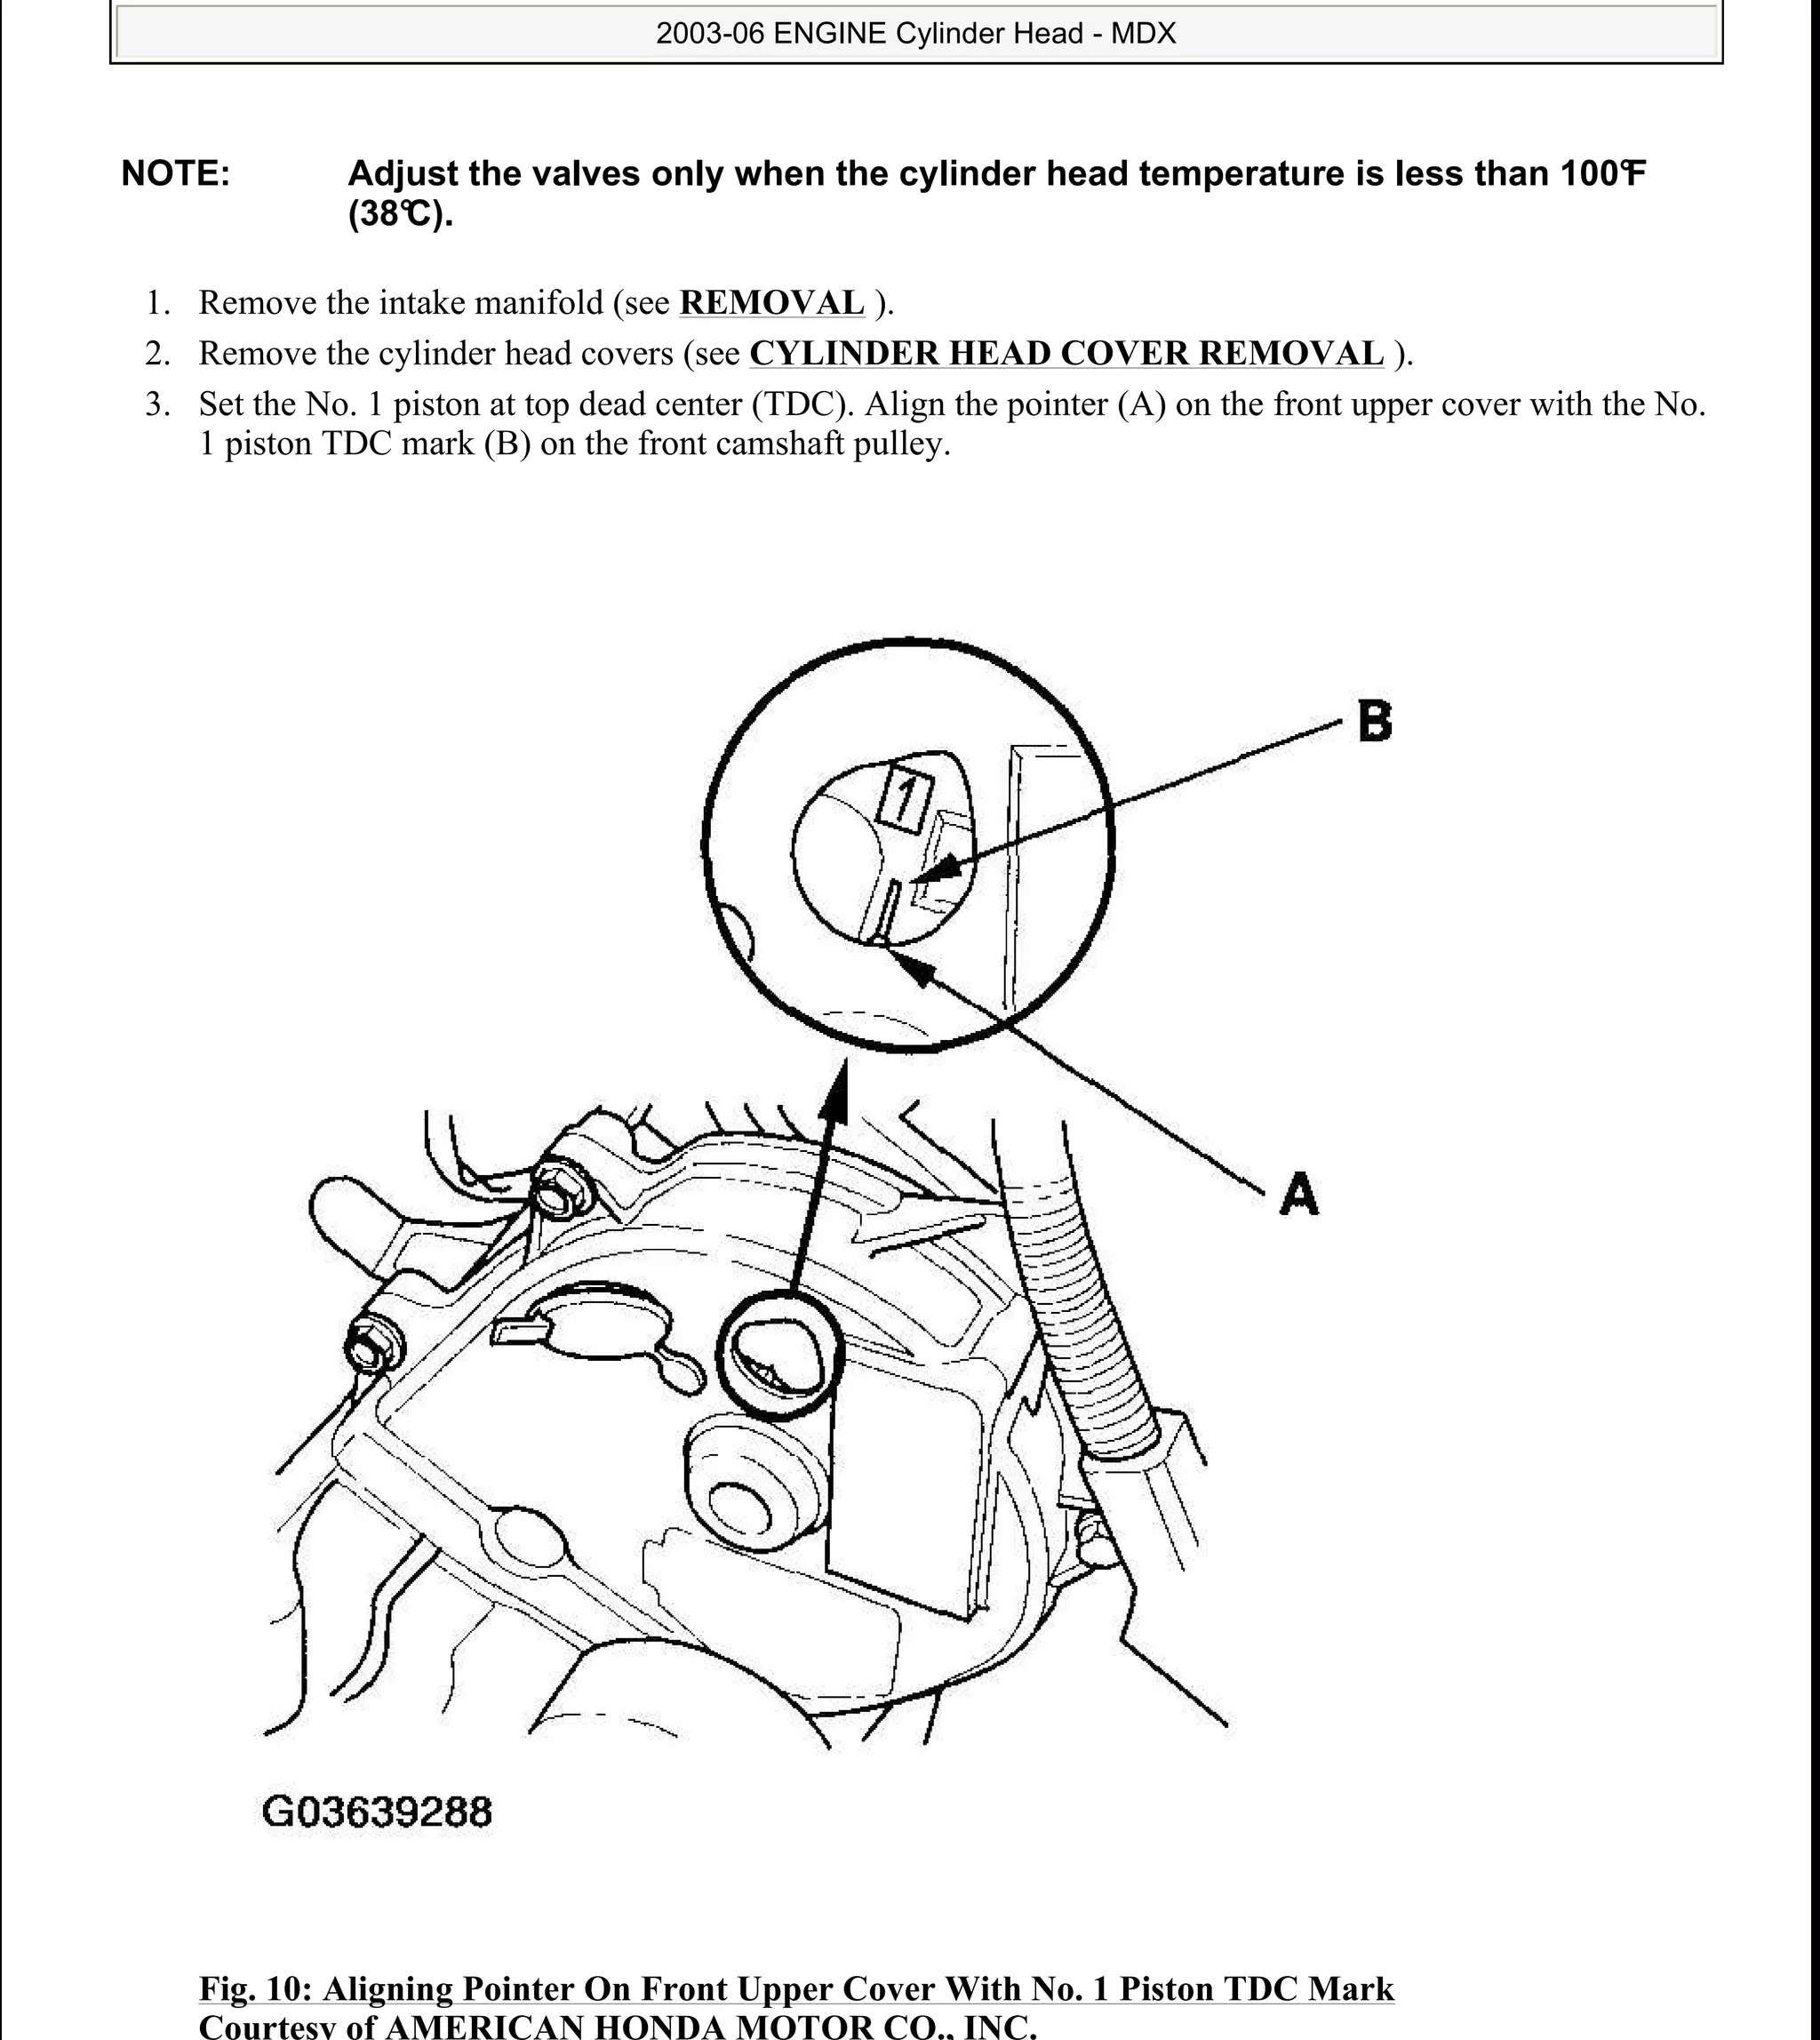
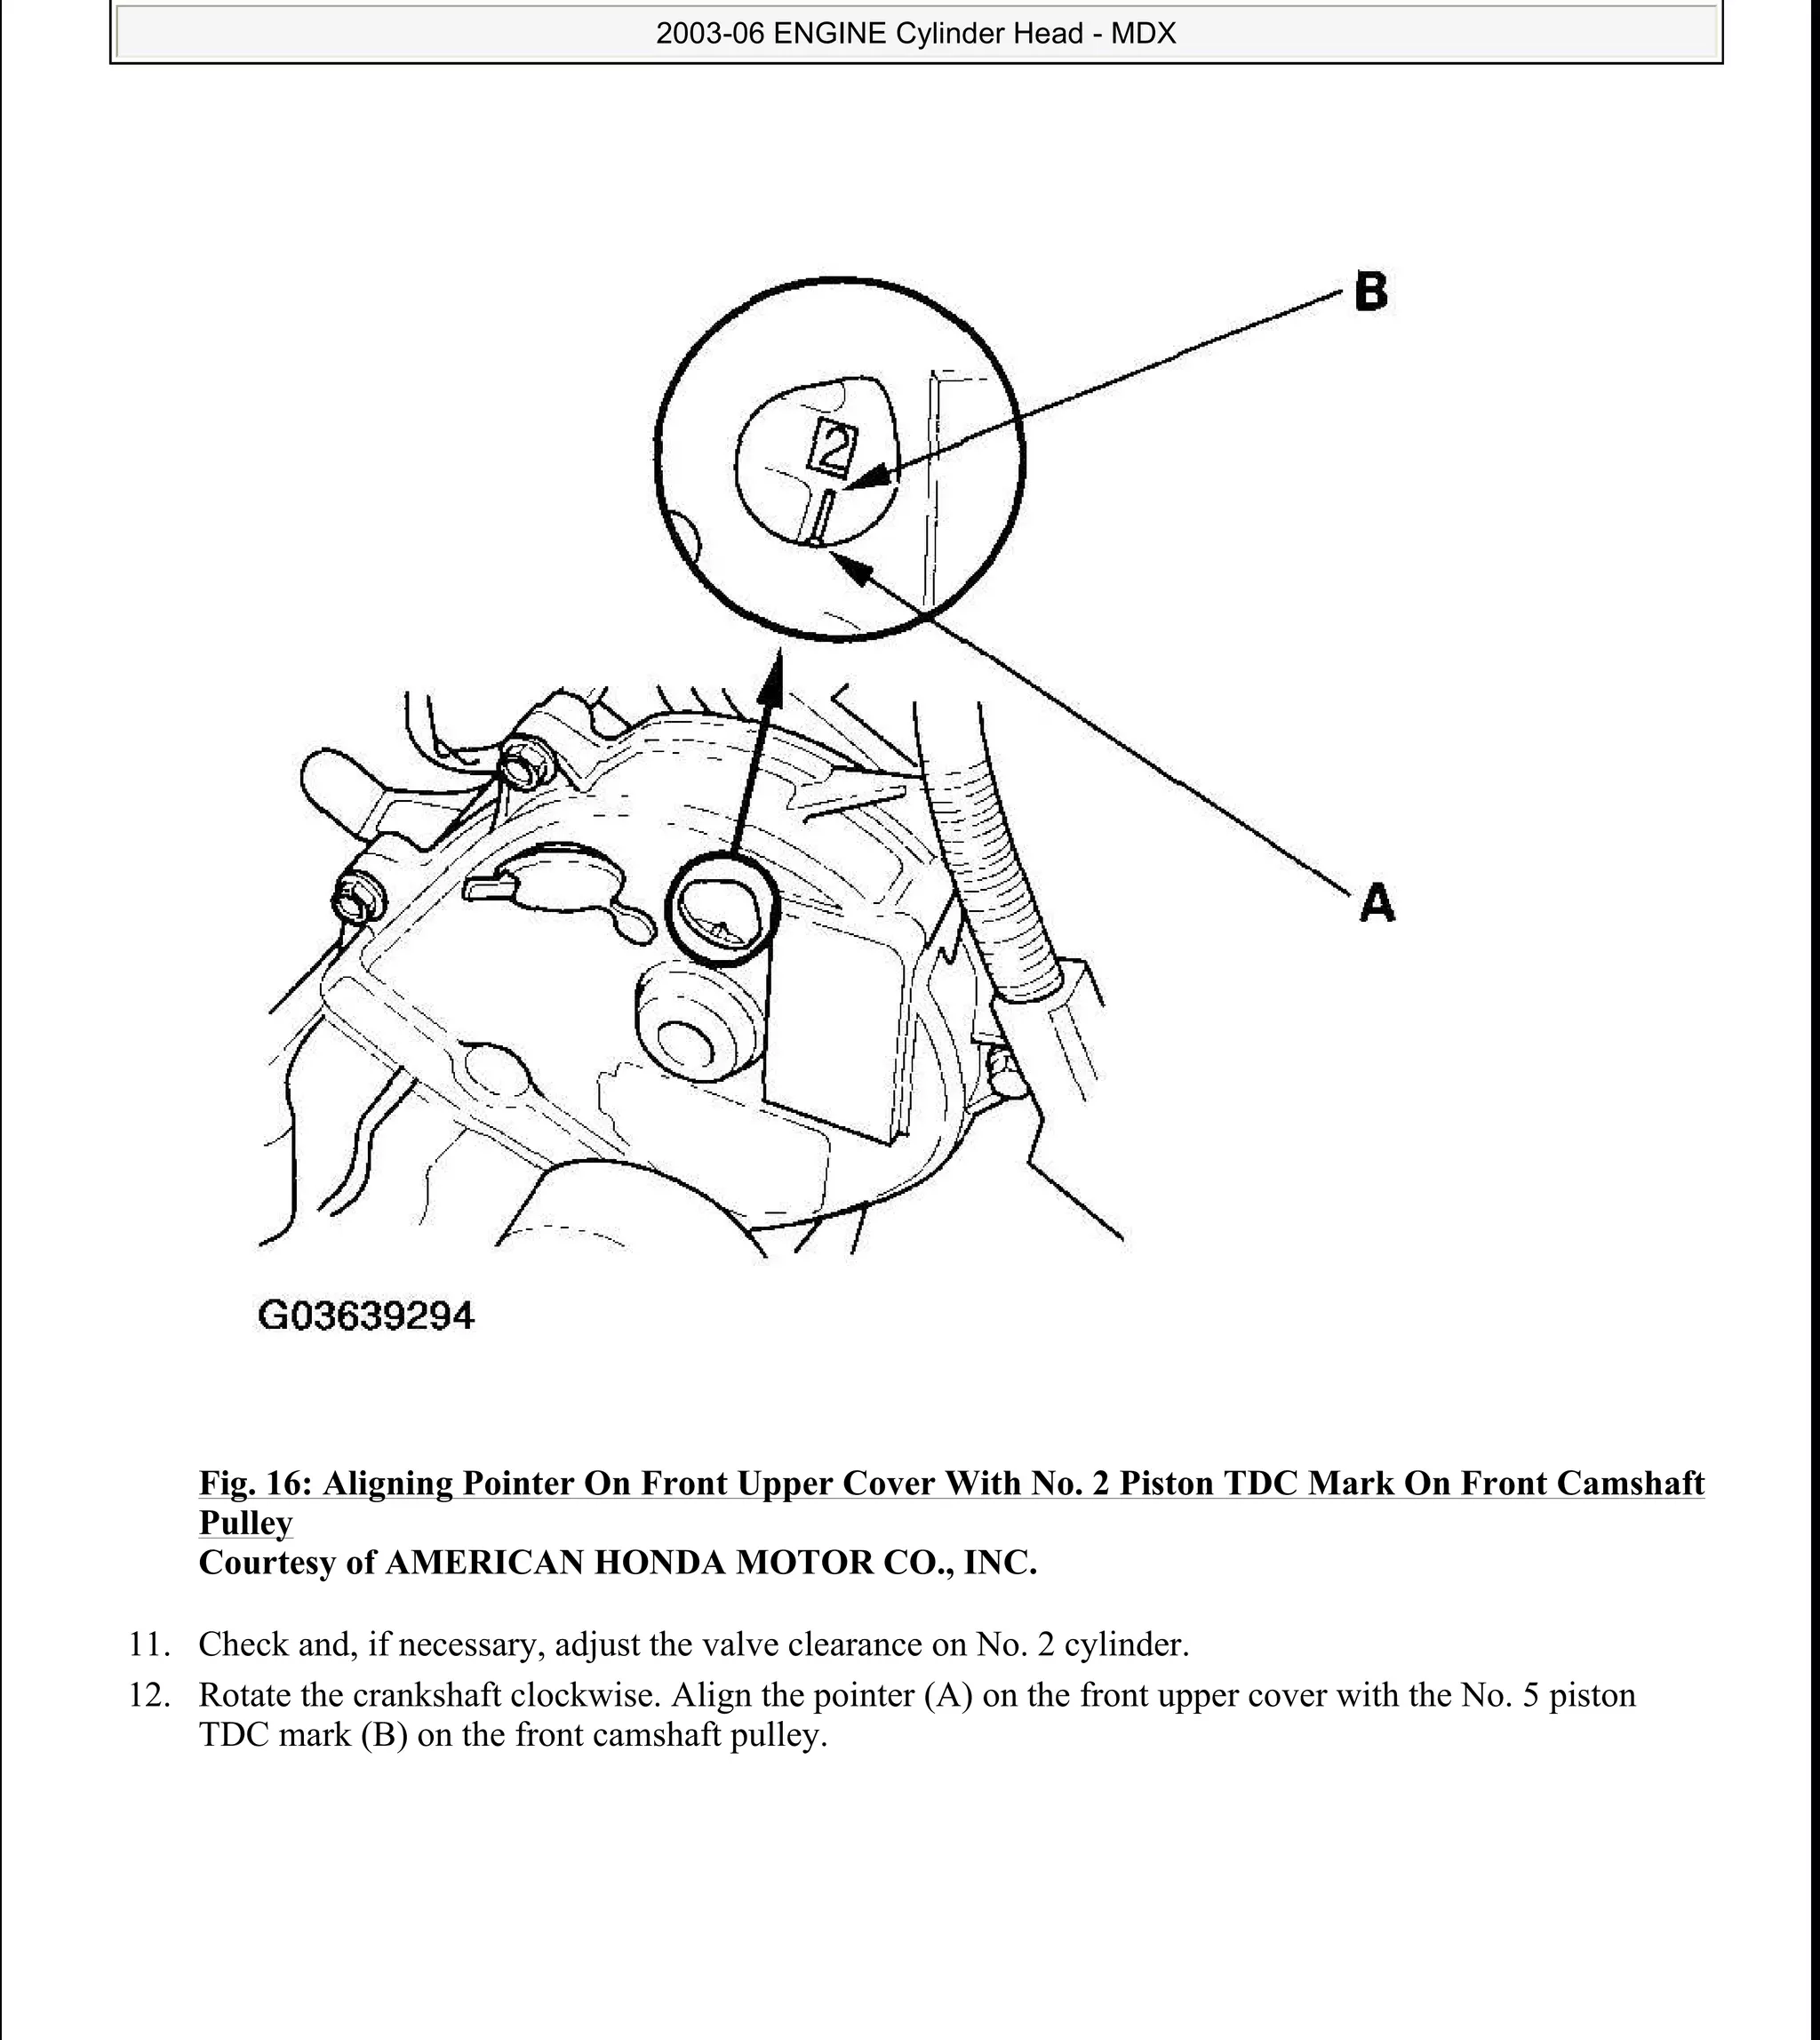
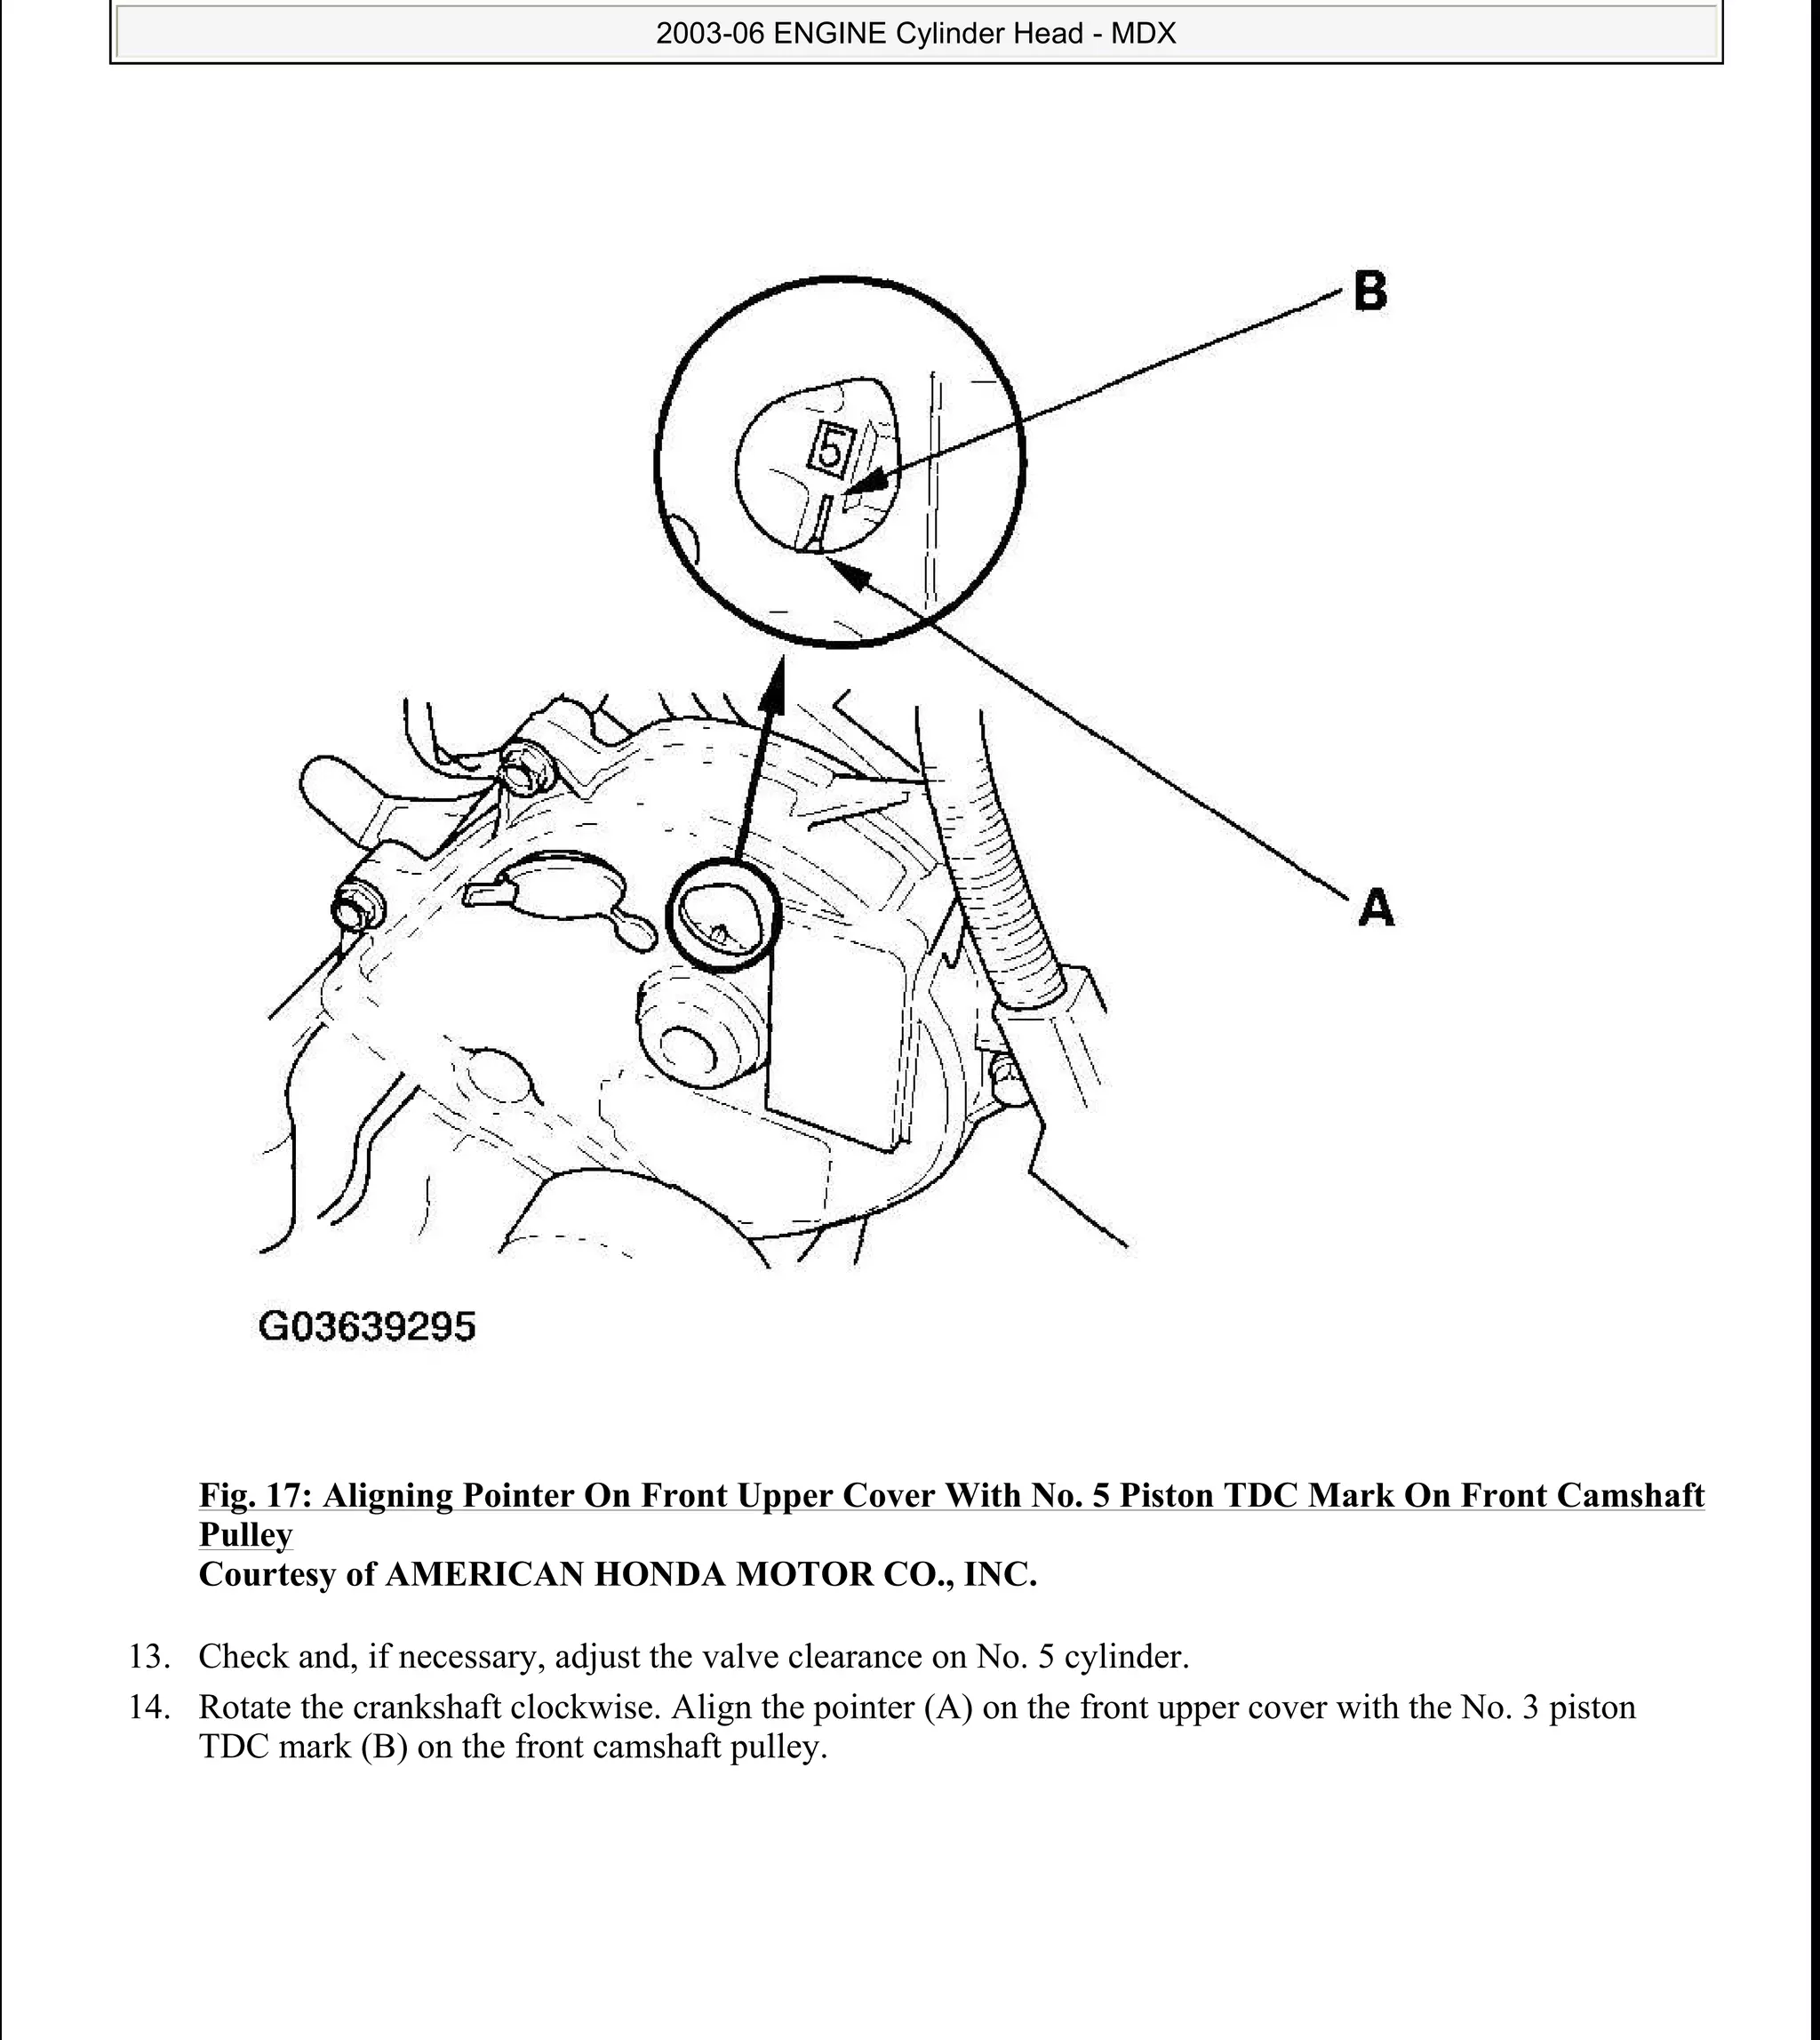
Detailed steps for adjusting valve clearance on all cylinders, specifying measurements for intake and exhaust valves, and using a feeler gauge.
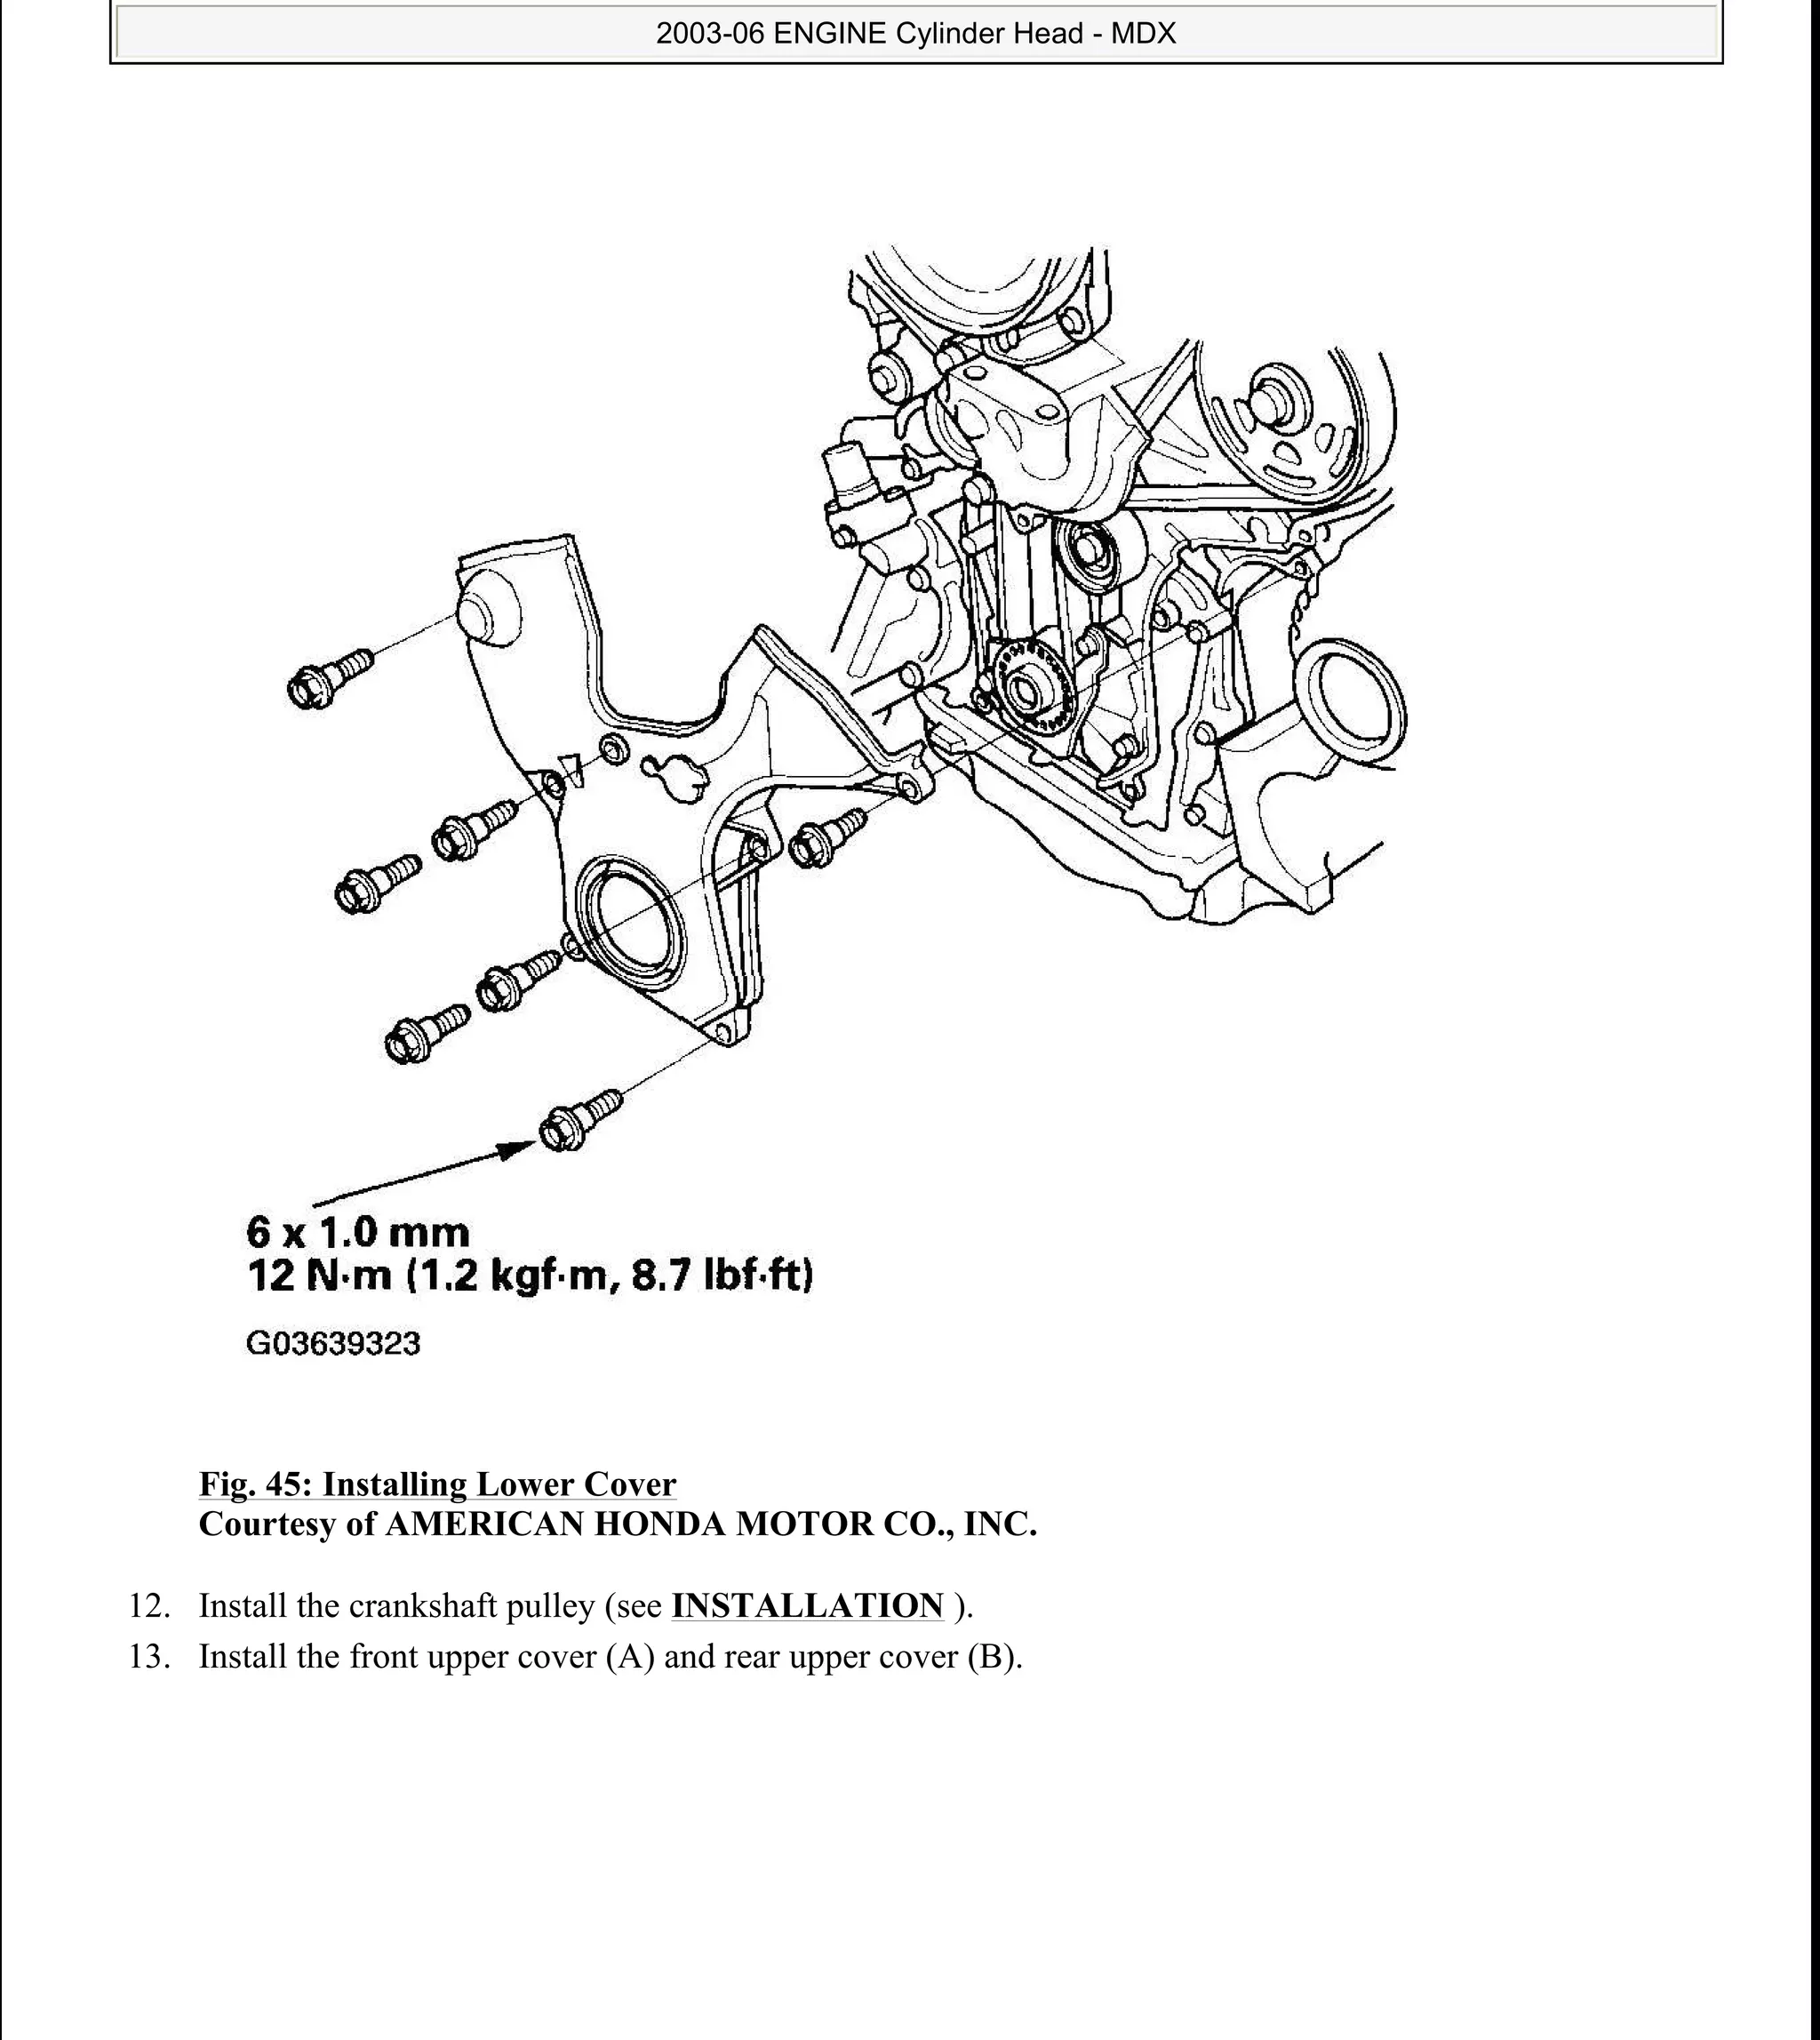
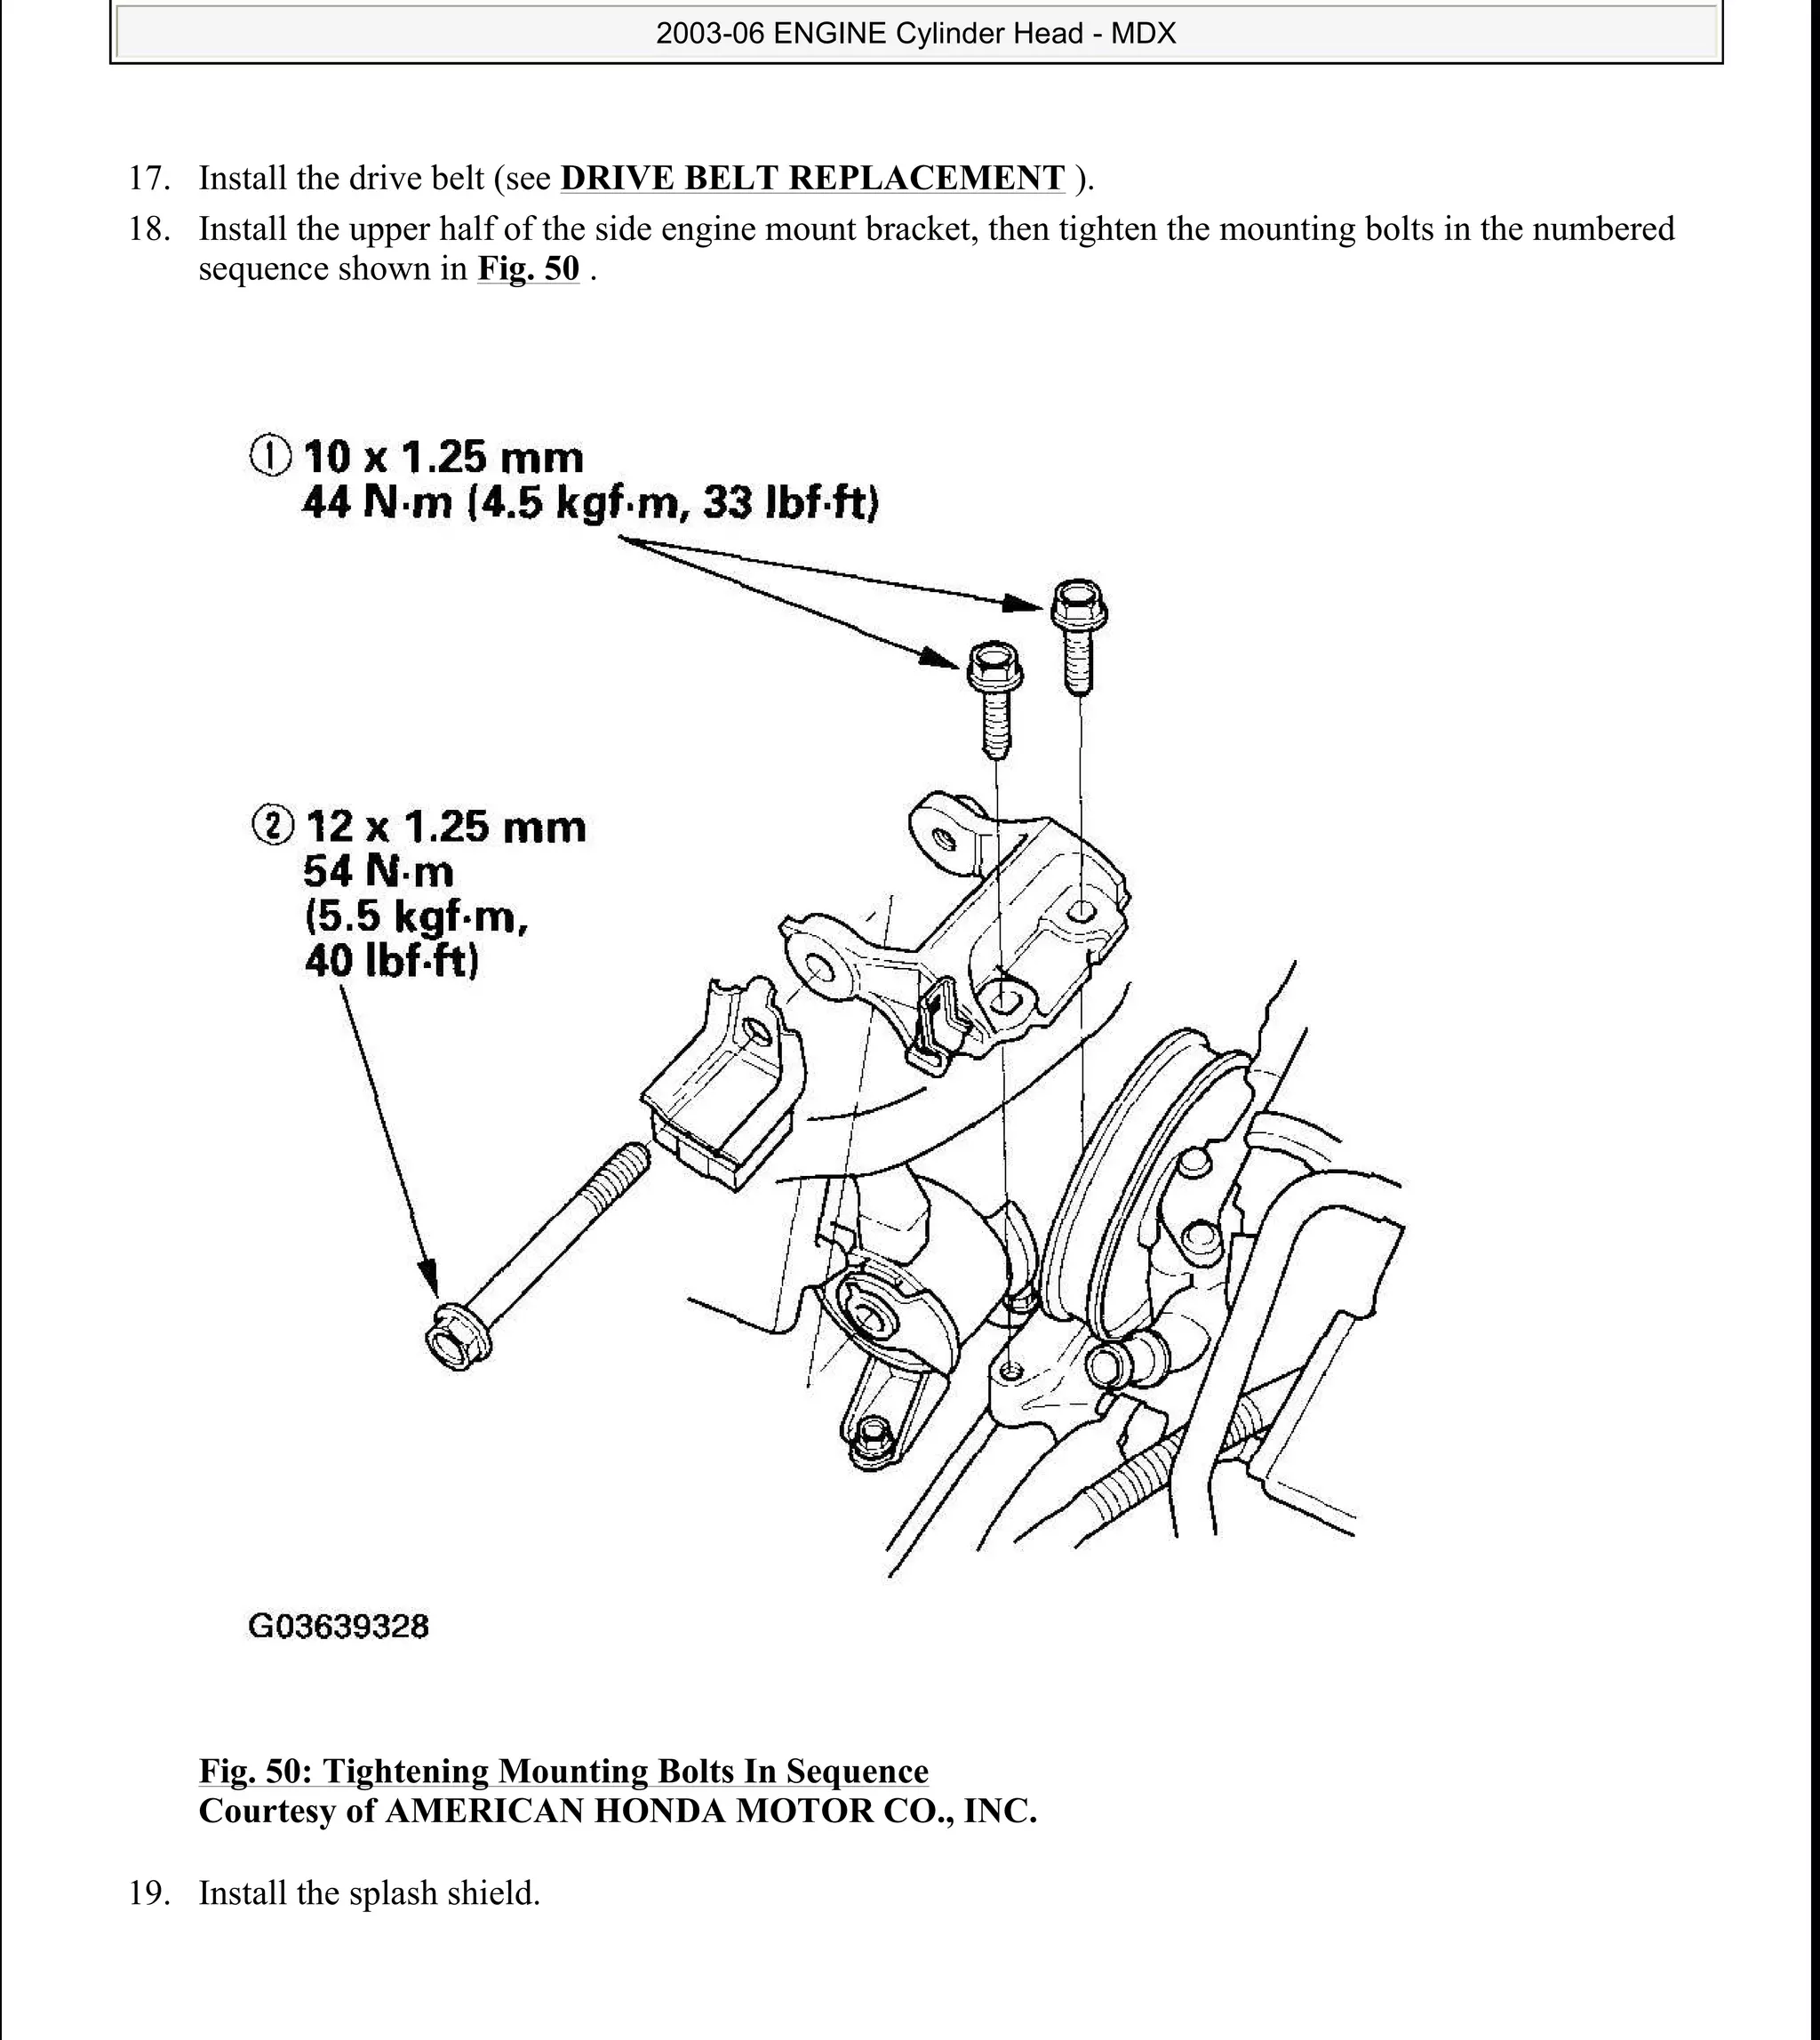
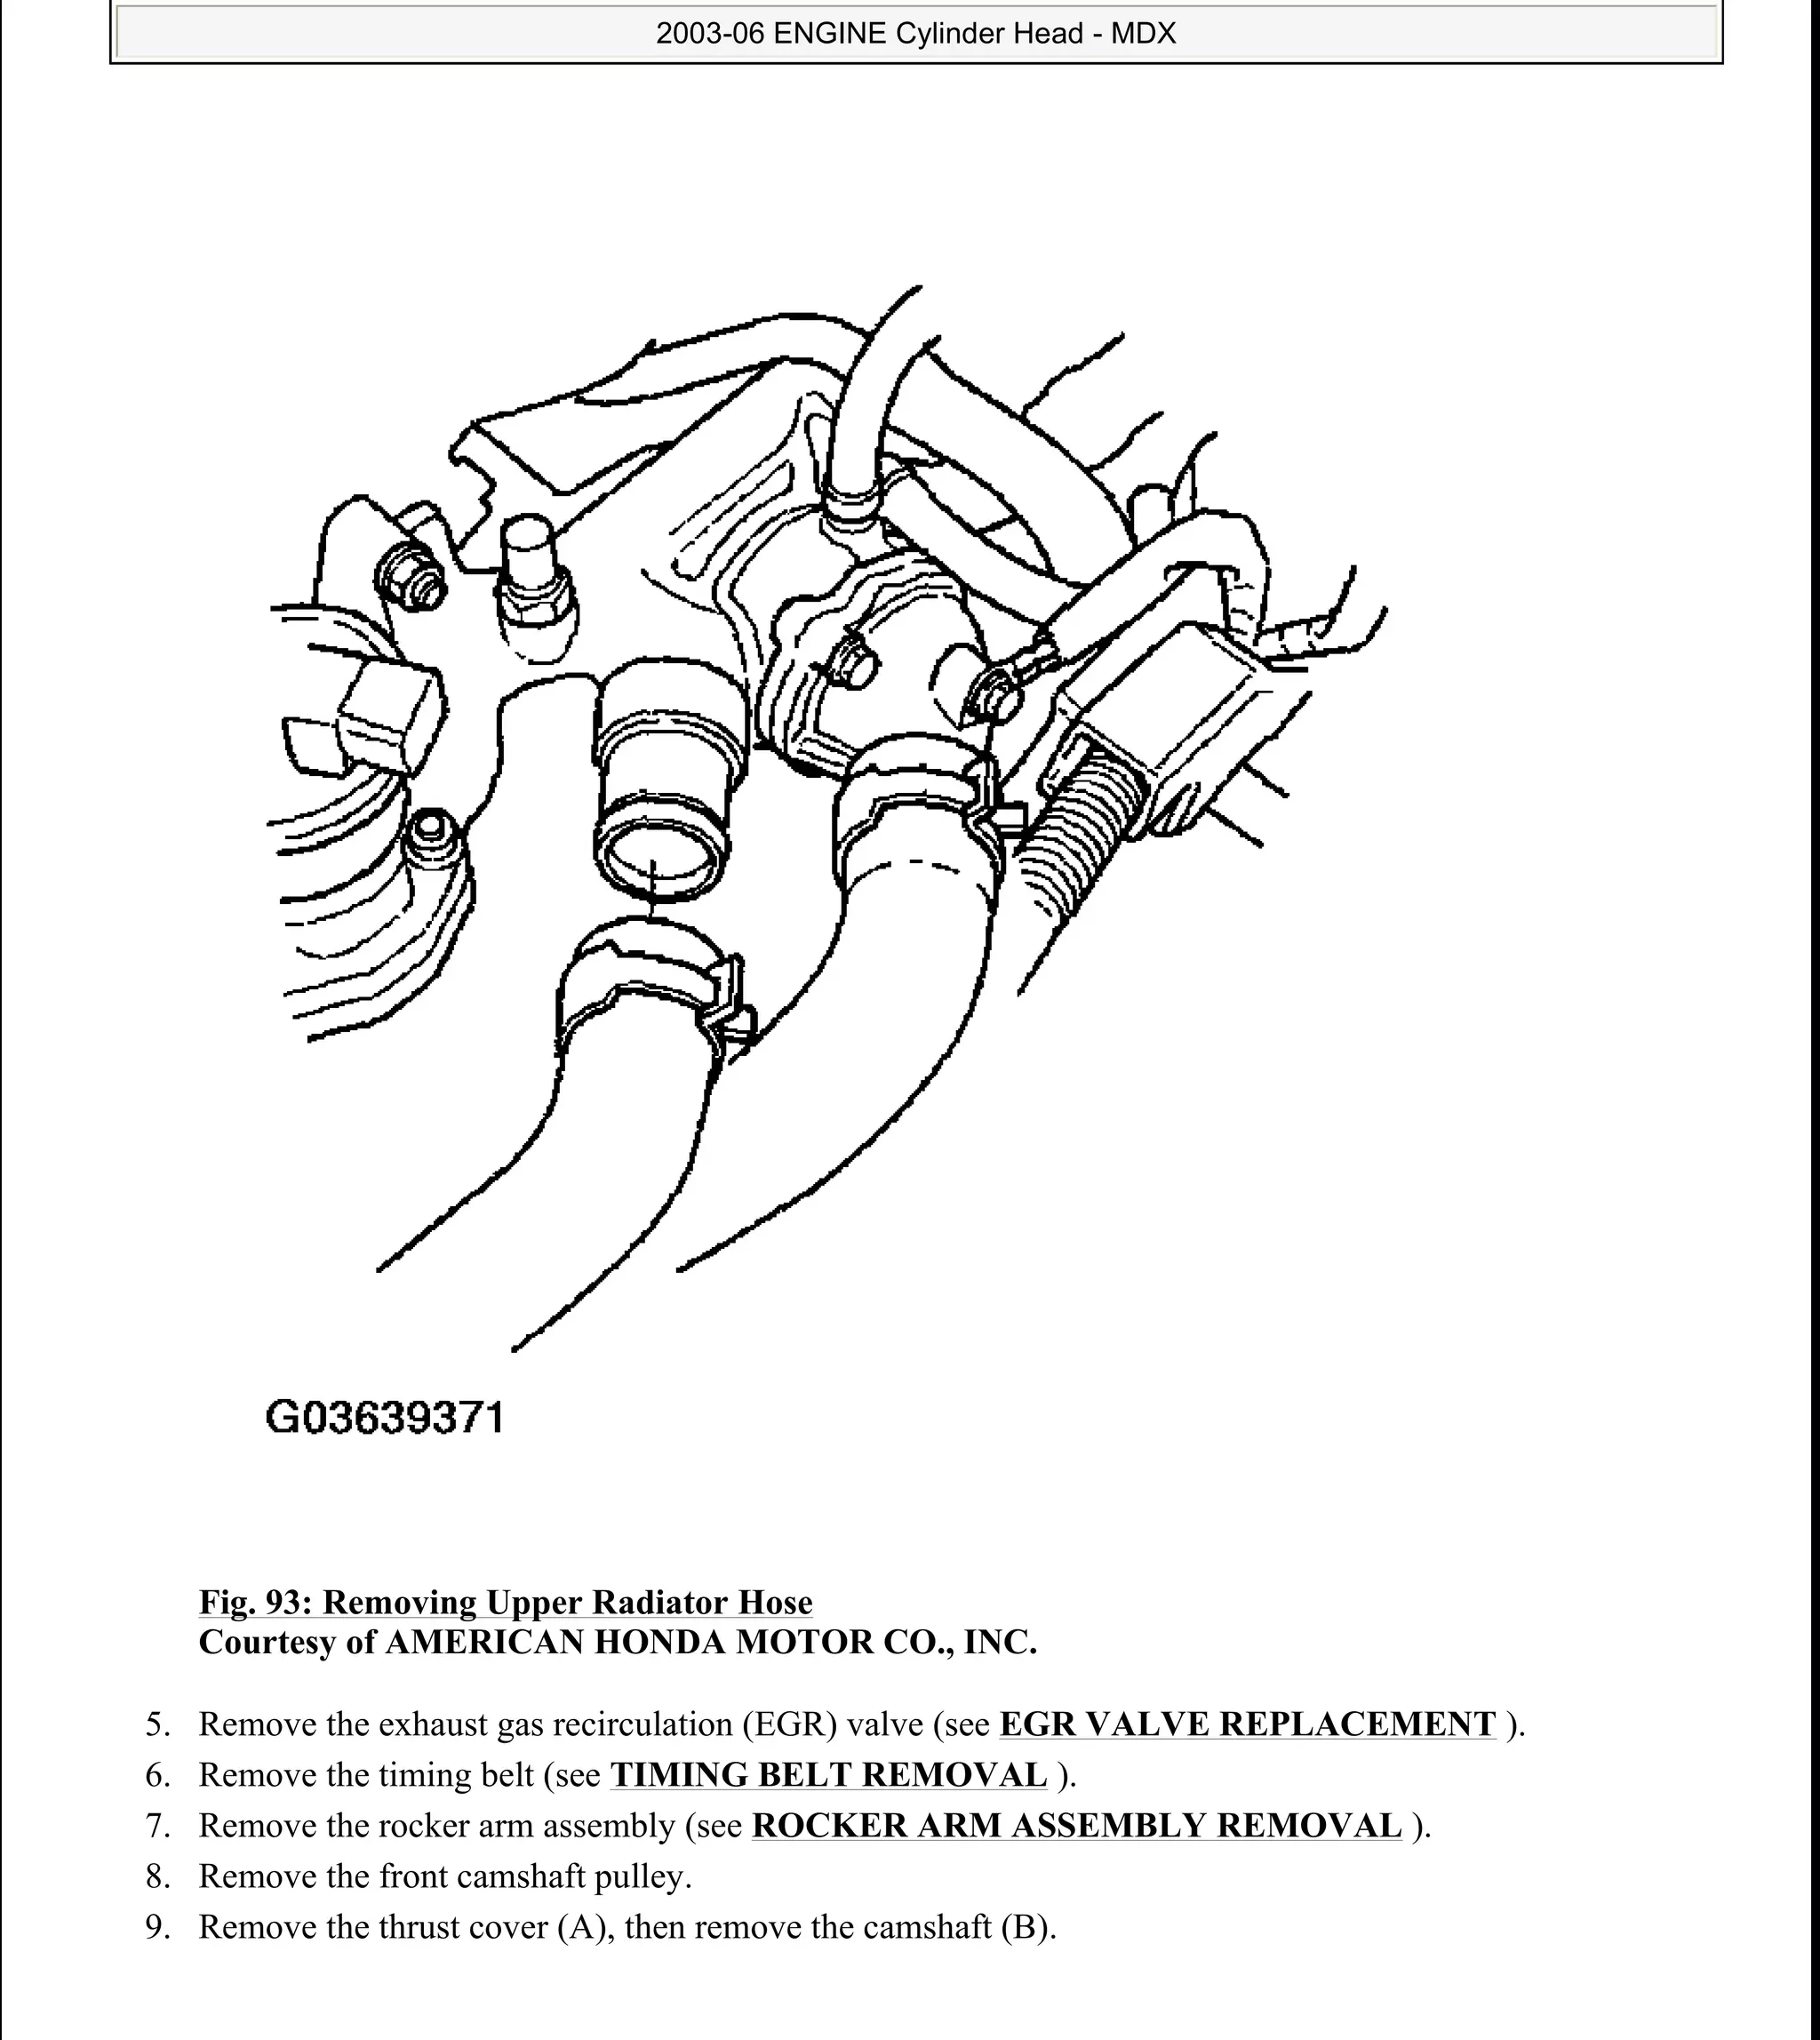
Process for removing and installing the crankshaft pulley using special tools and ensuring proper torque specifications.
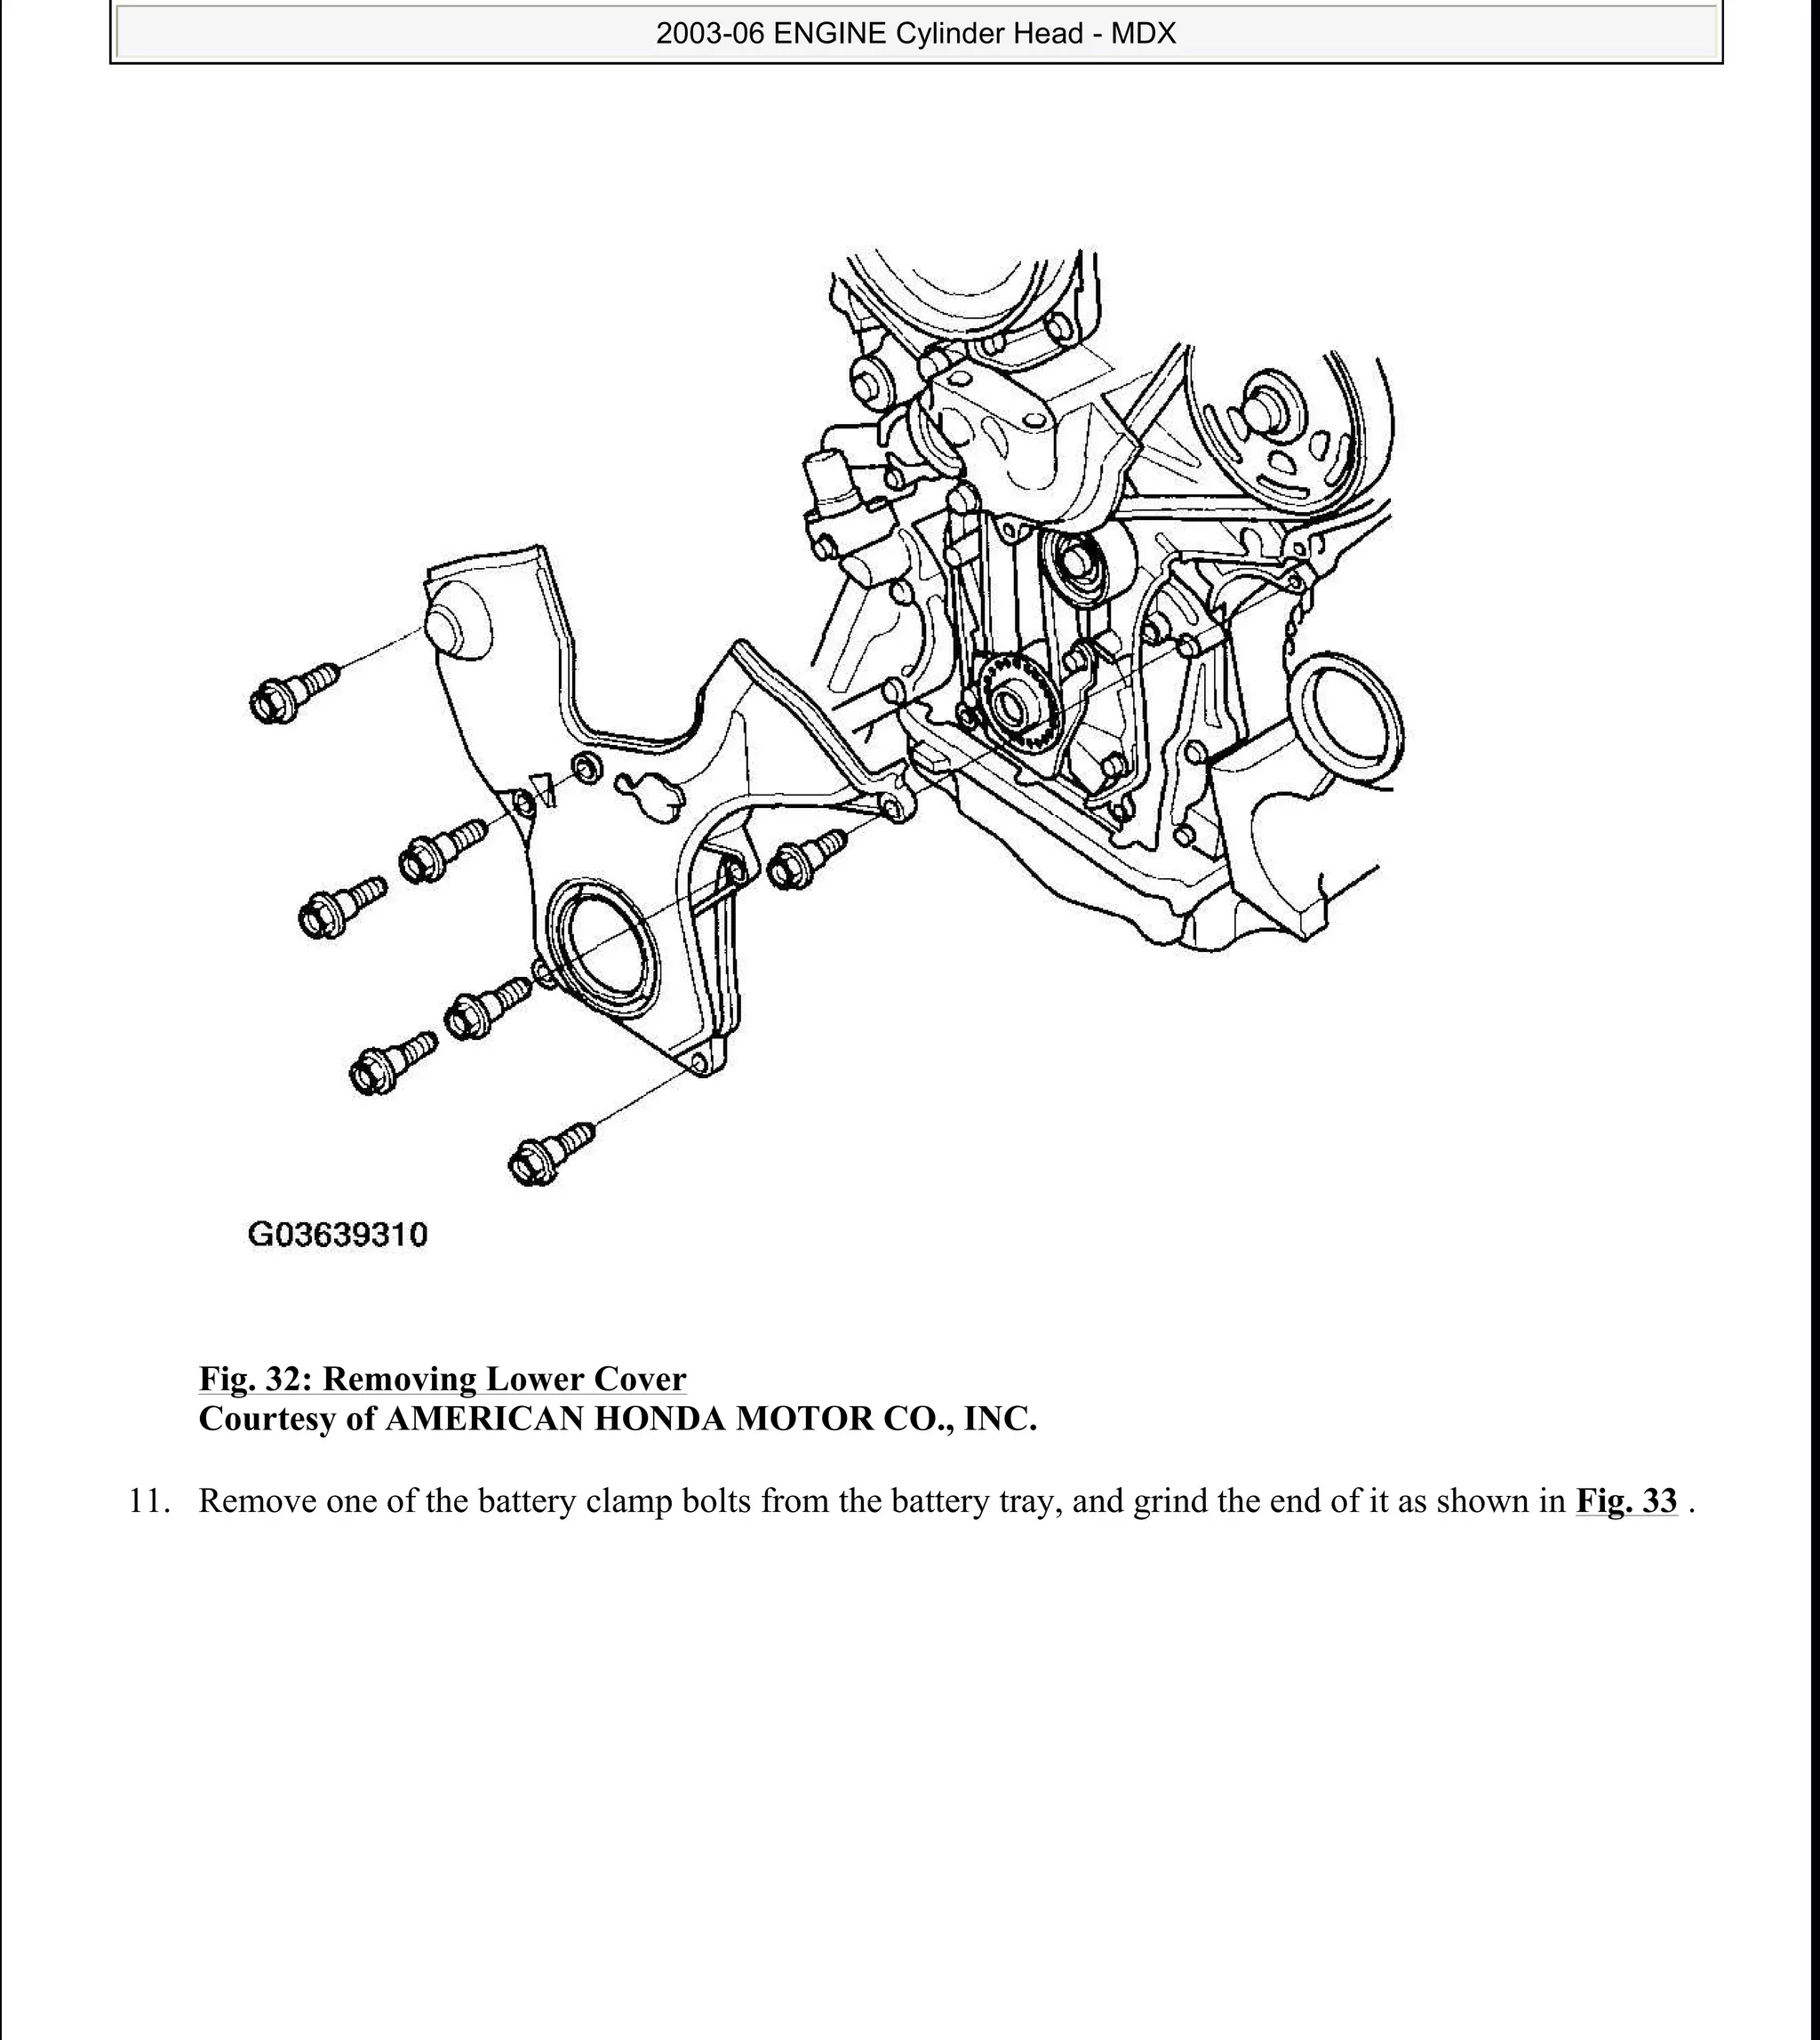
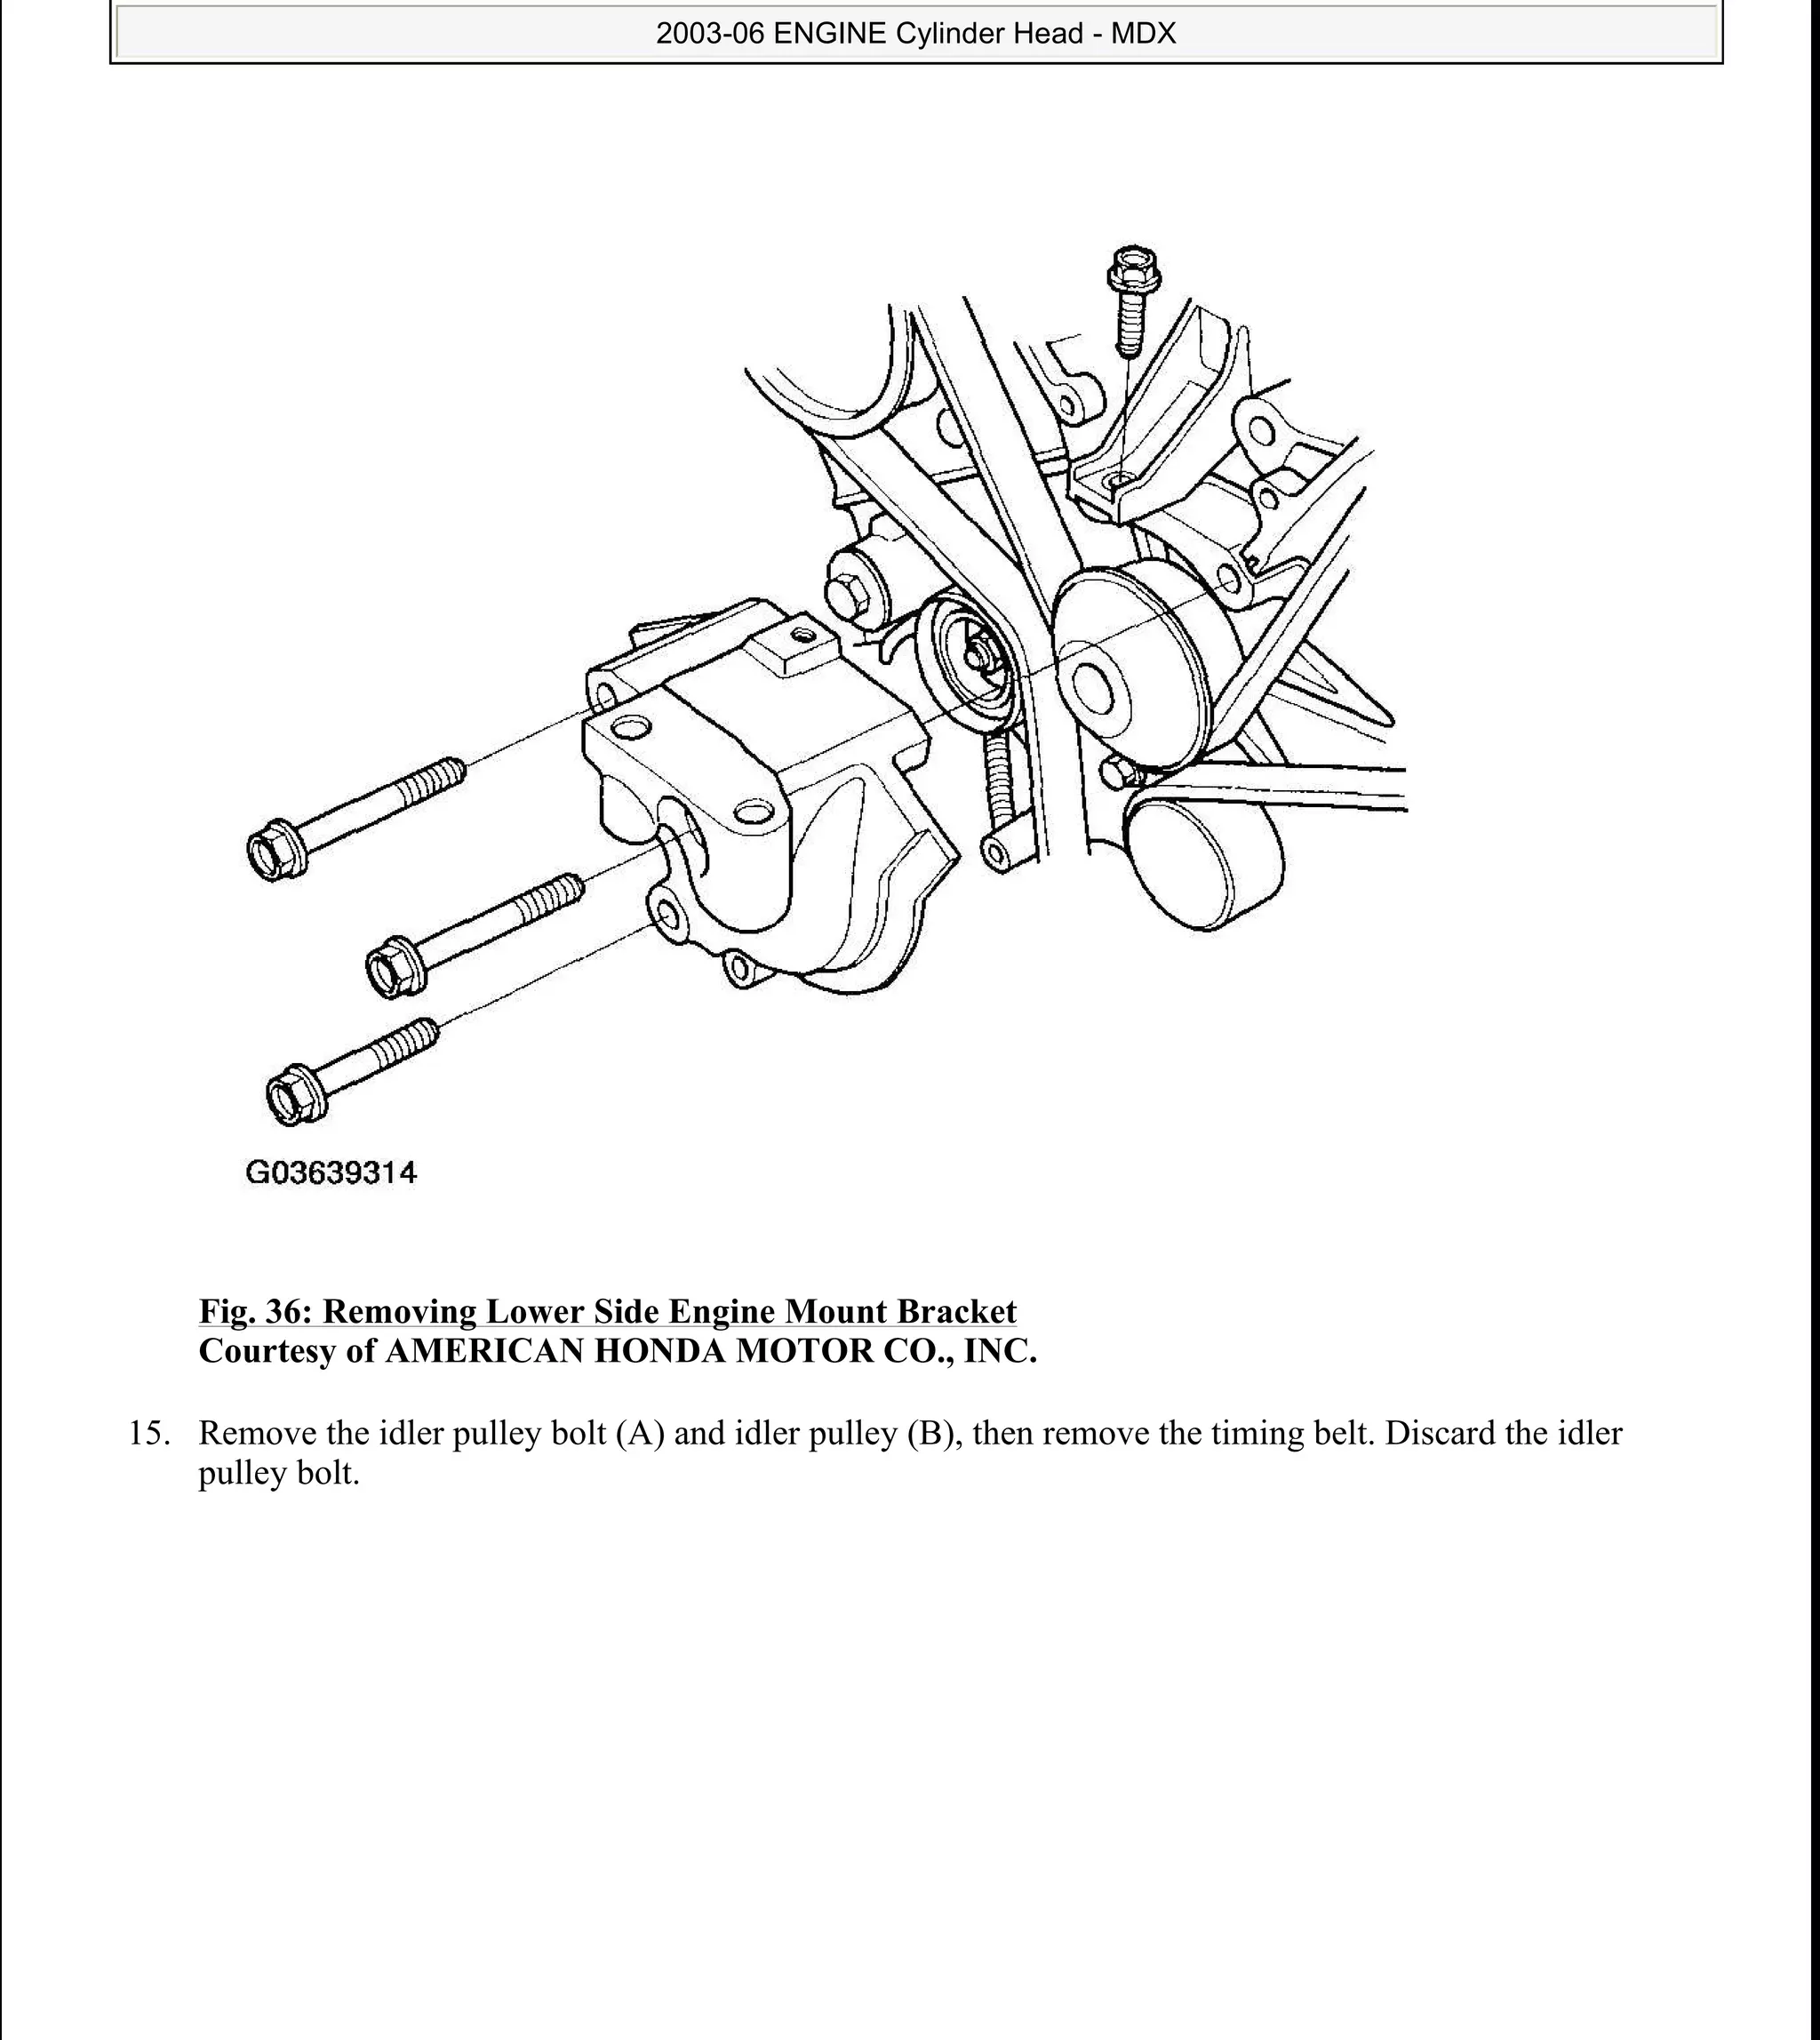
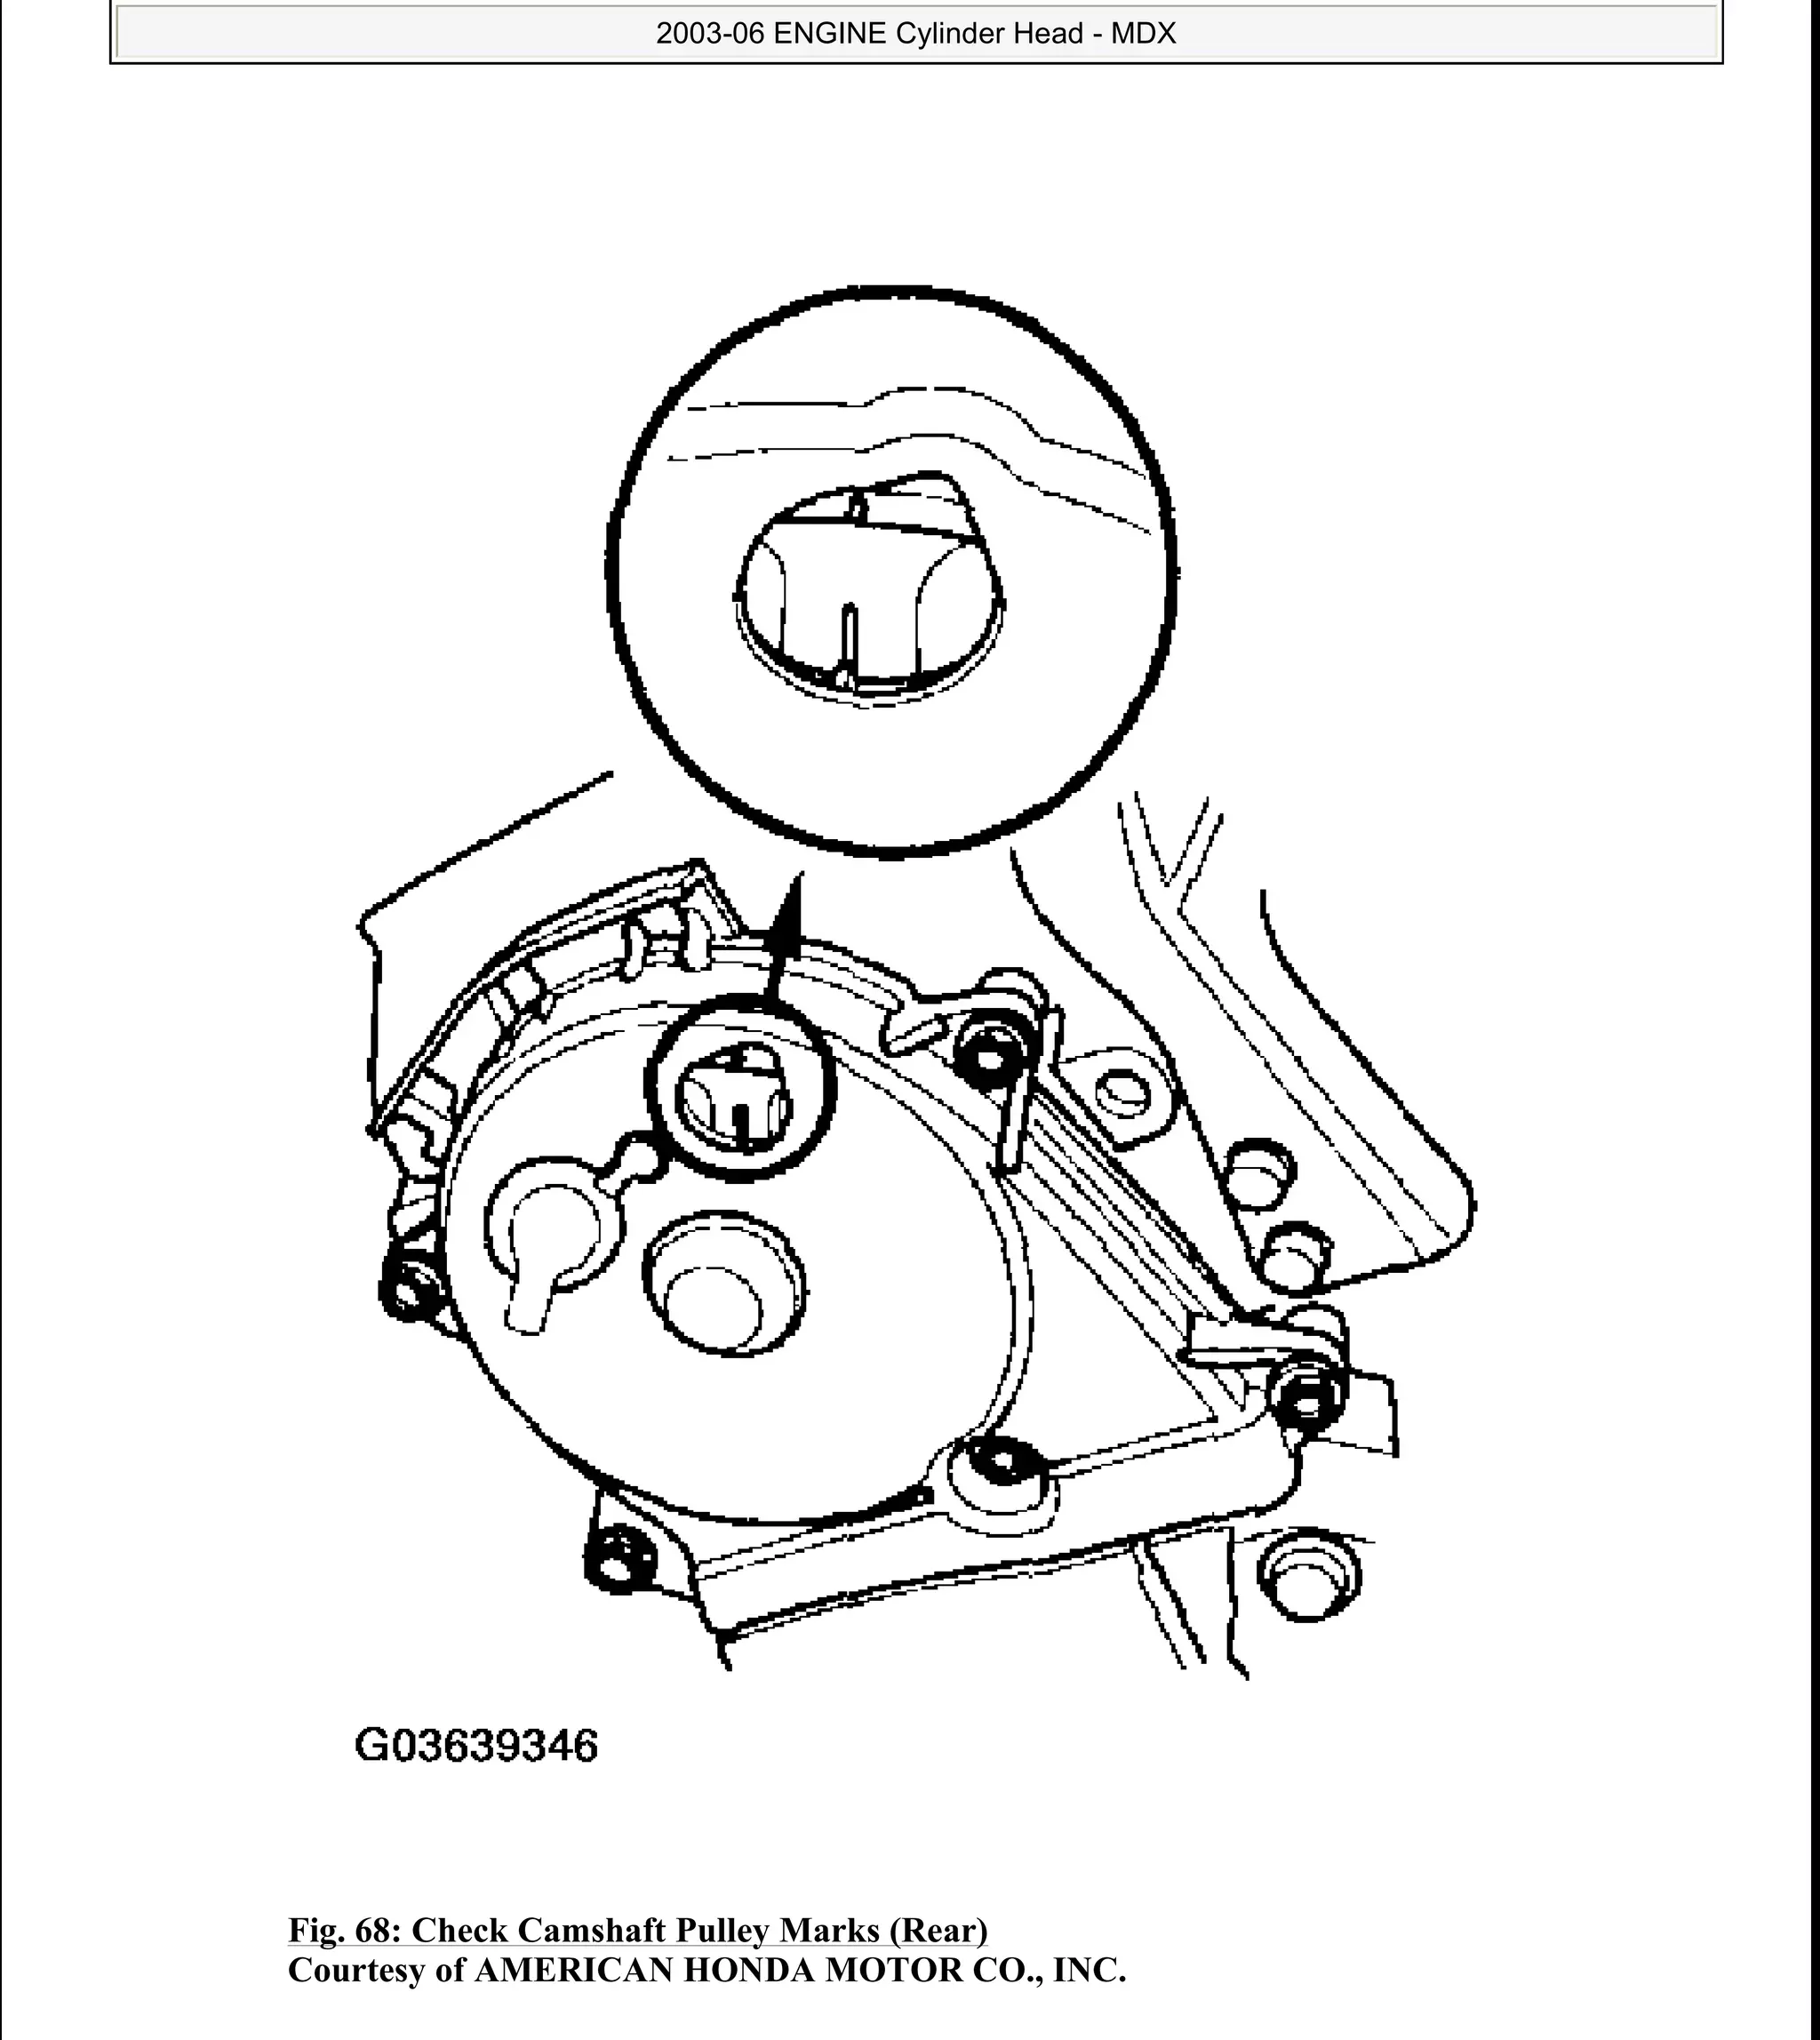
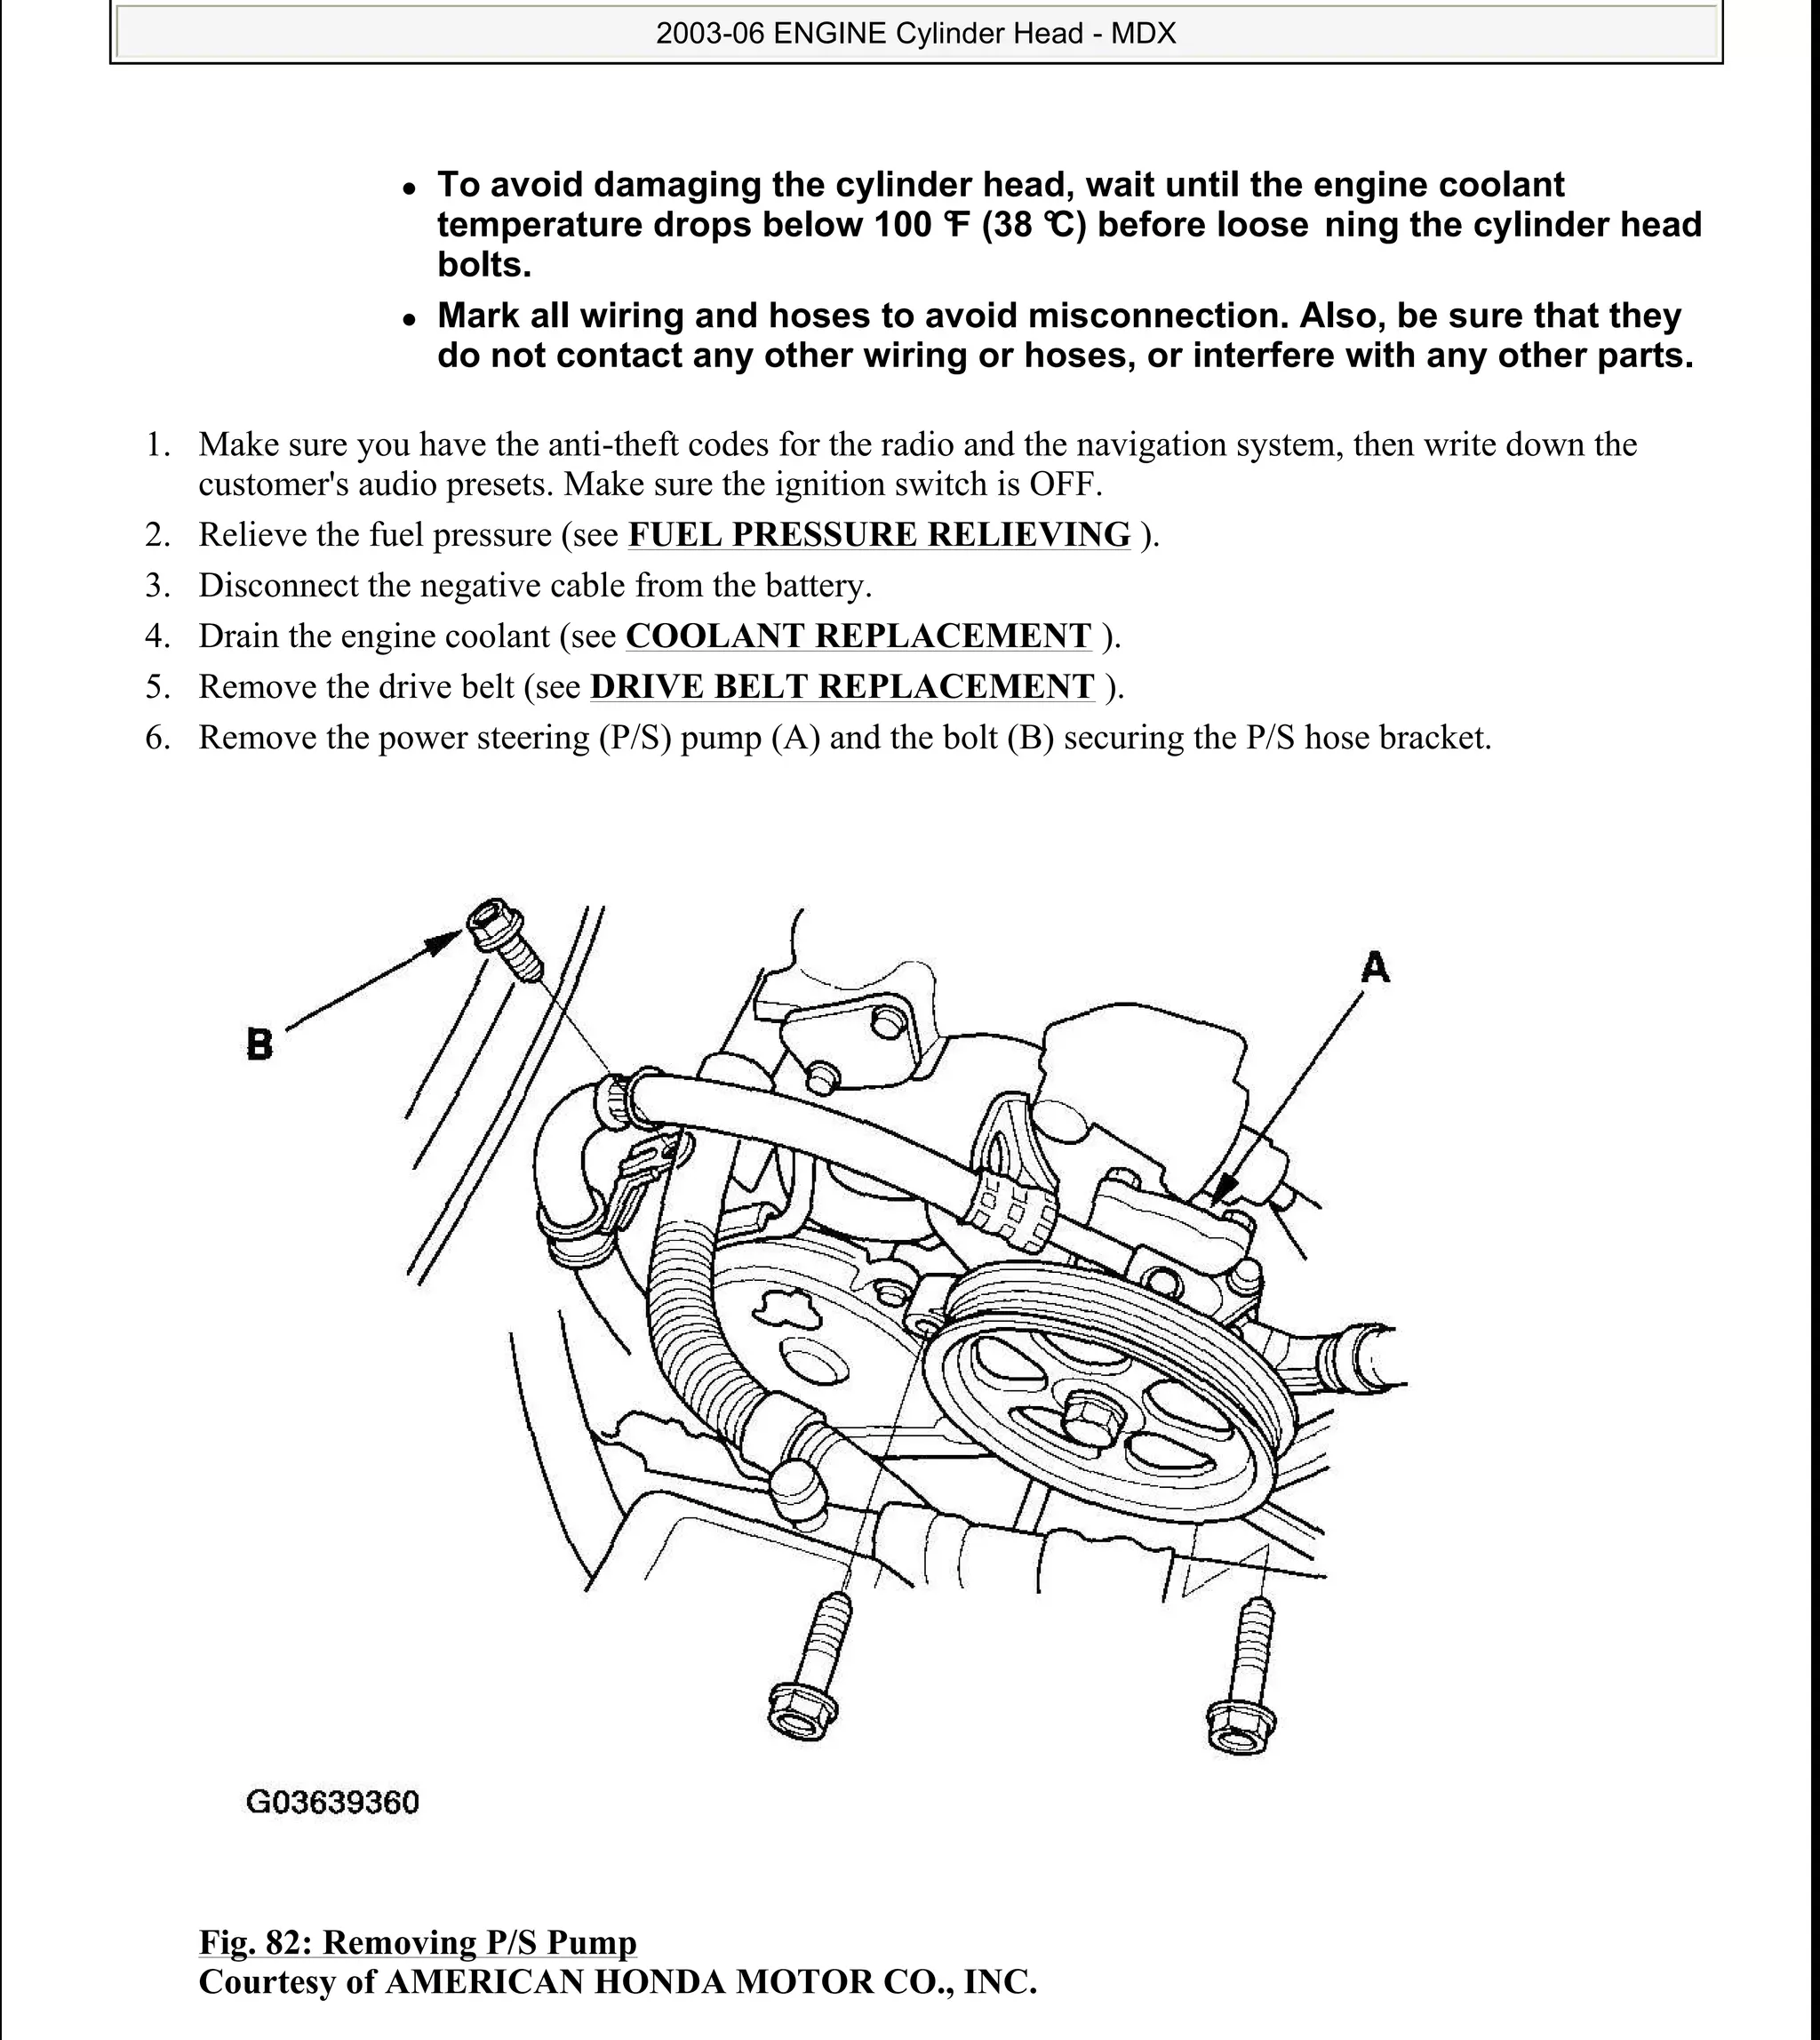
Steps to inspect the timing belt for damage, removal procedures, and alignment checks for the crankshaft and camshaft.
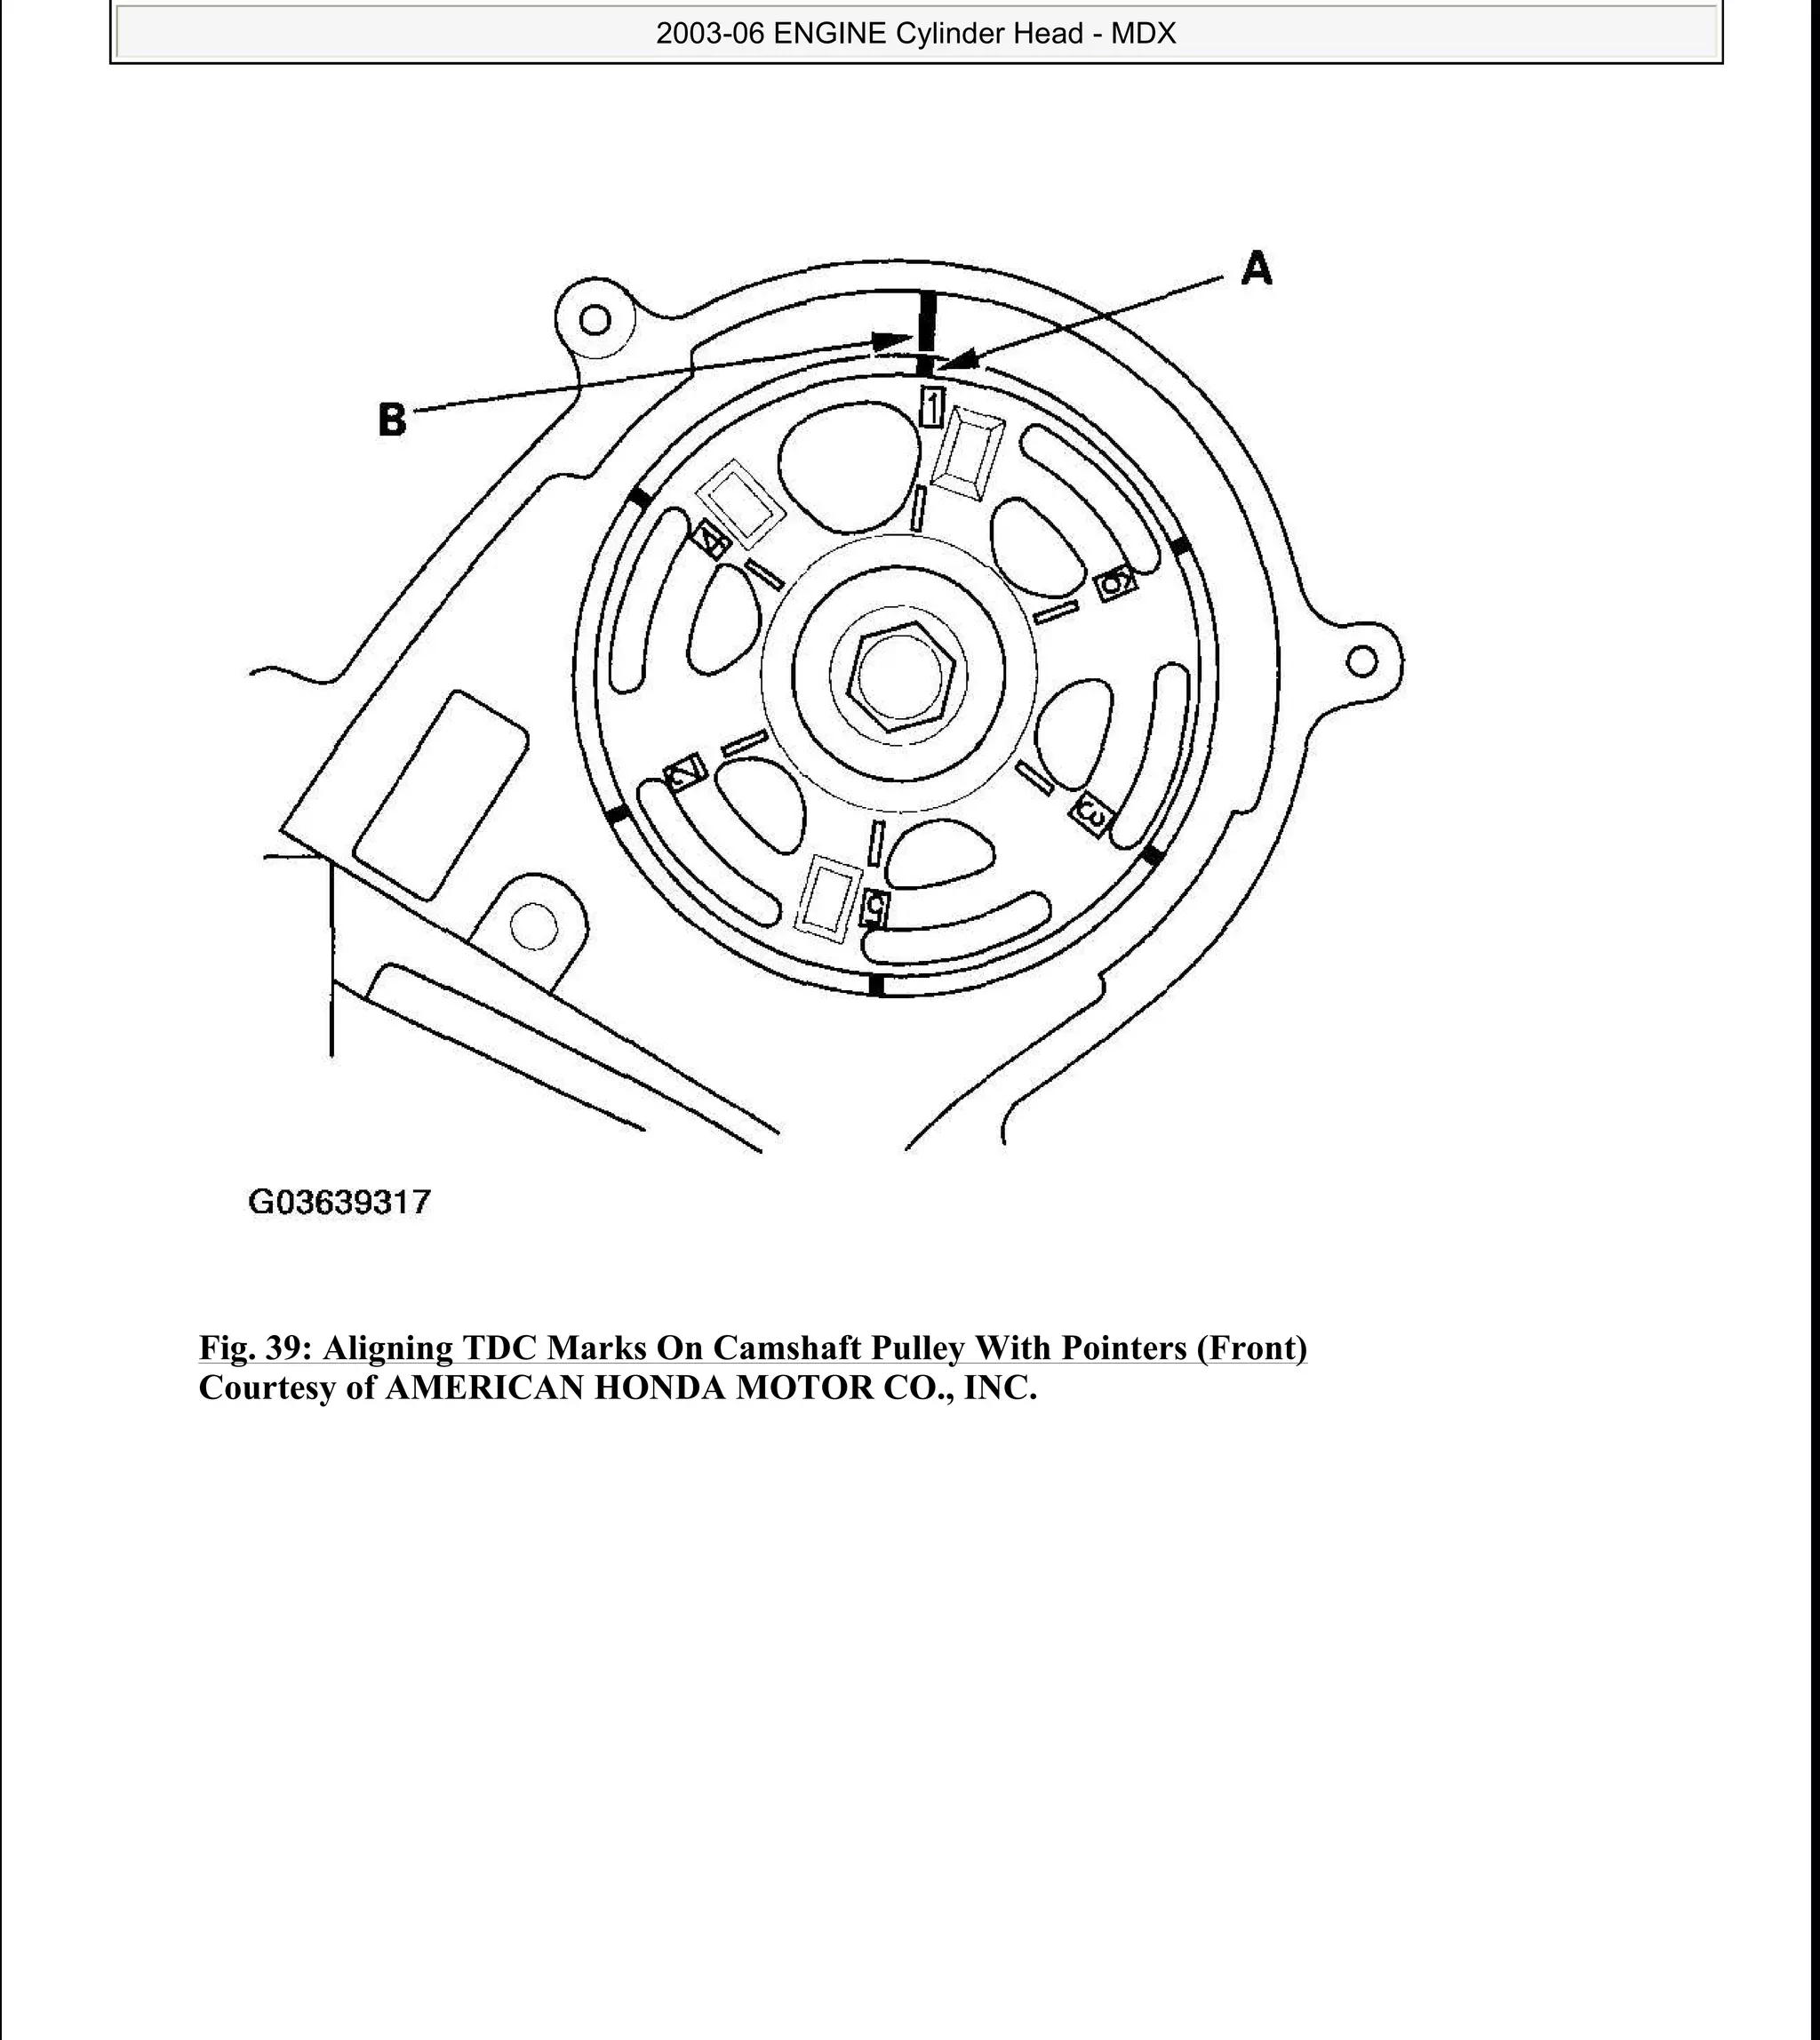
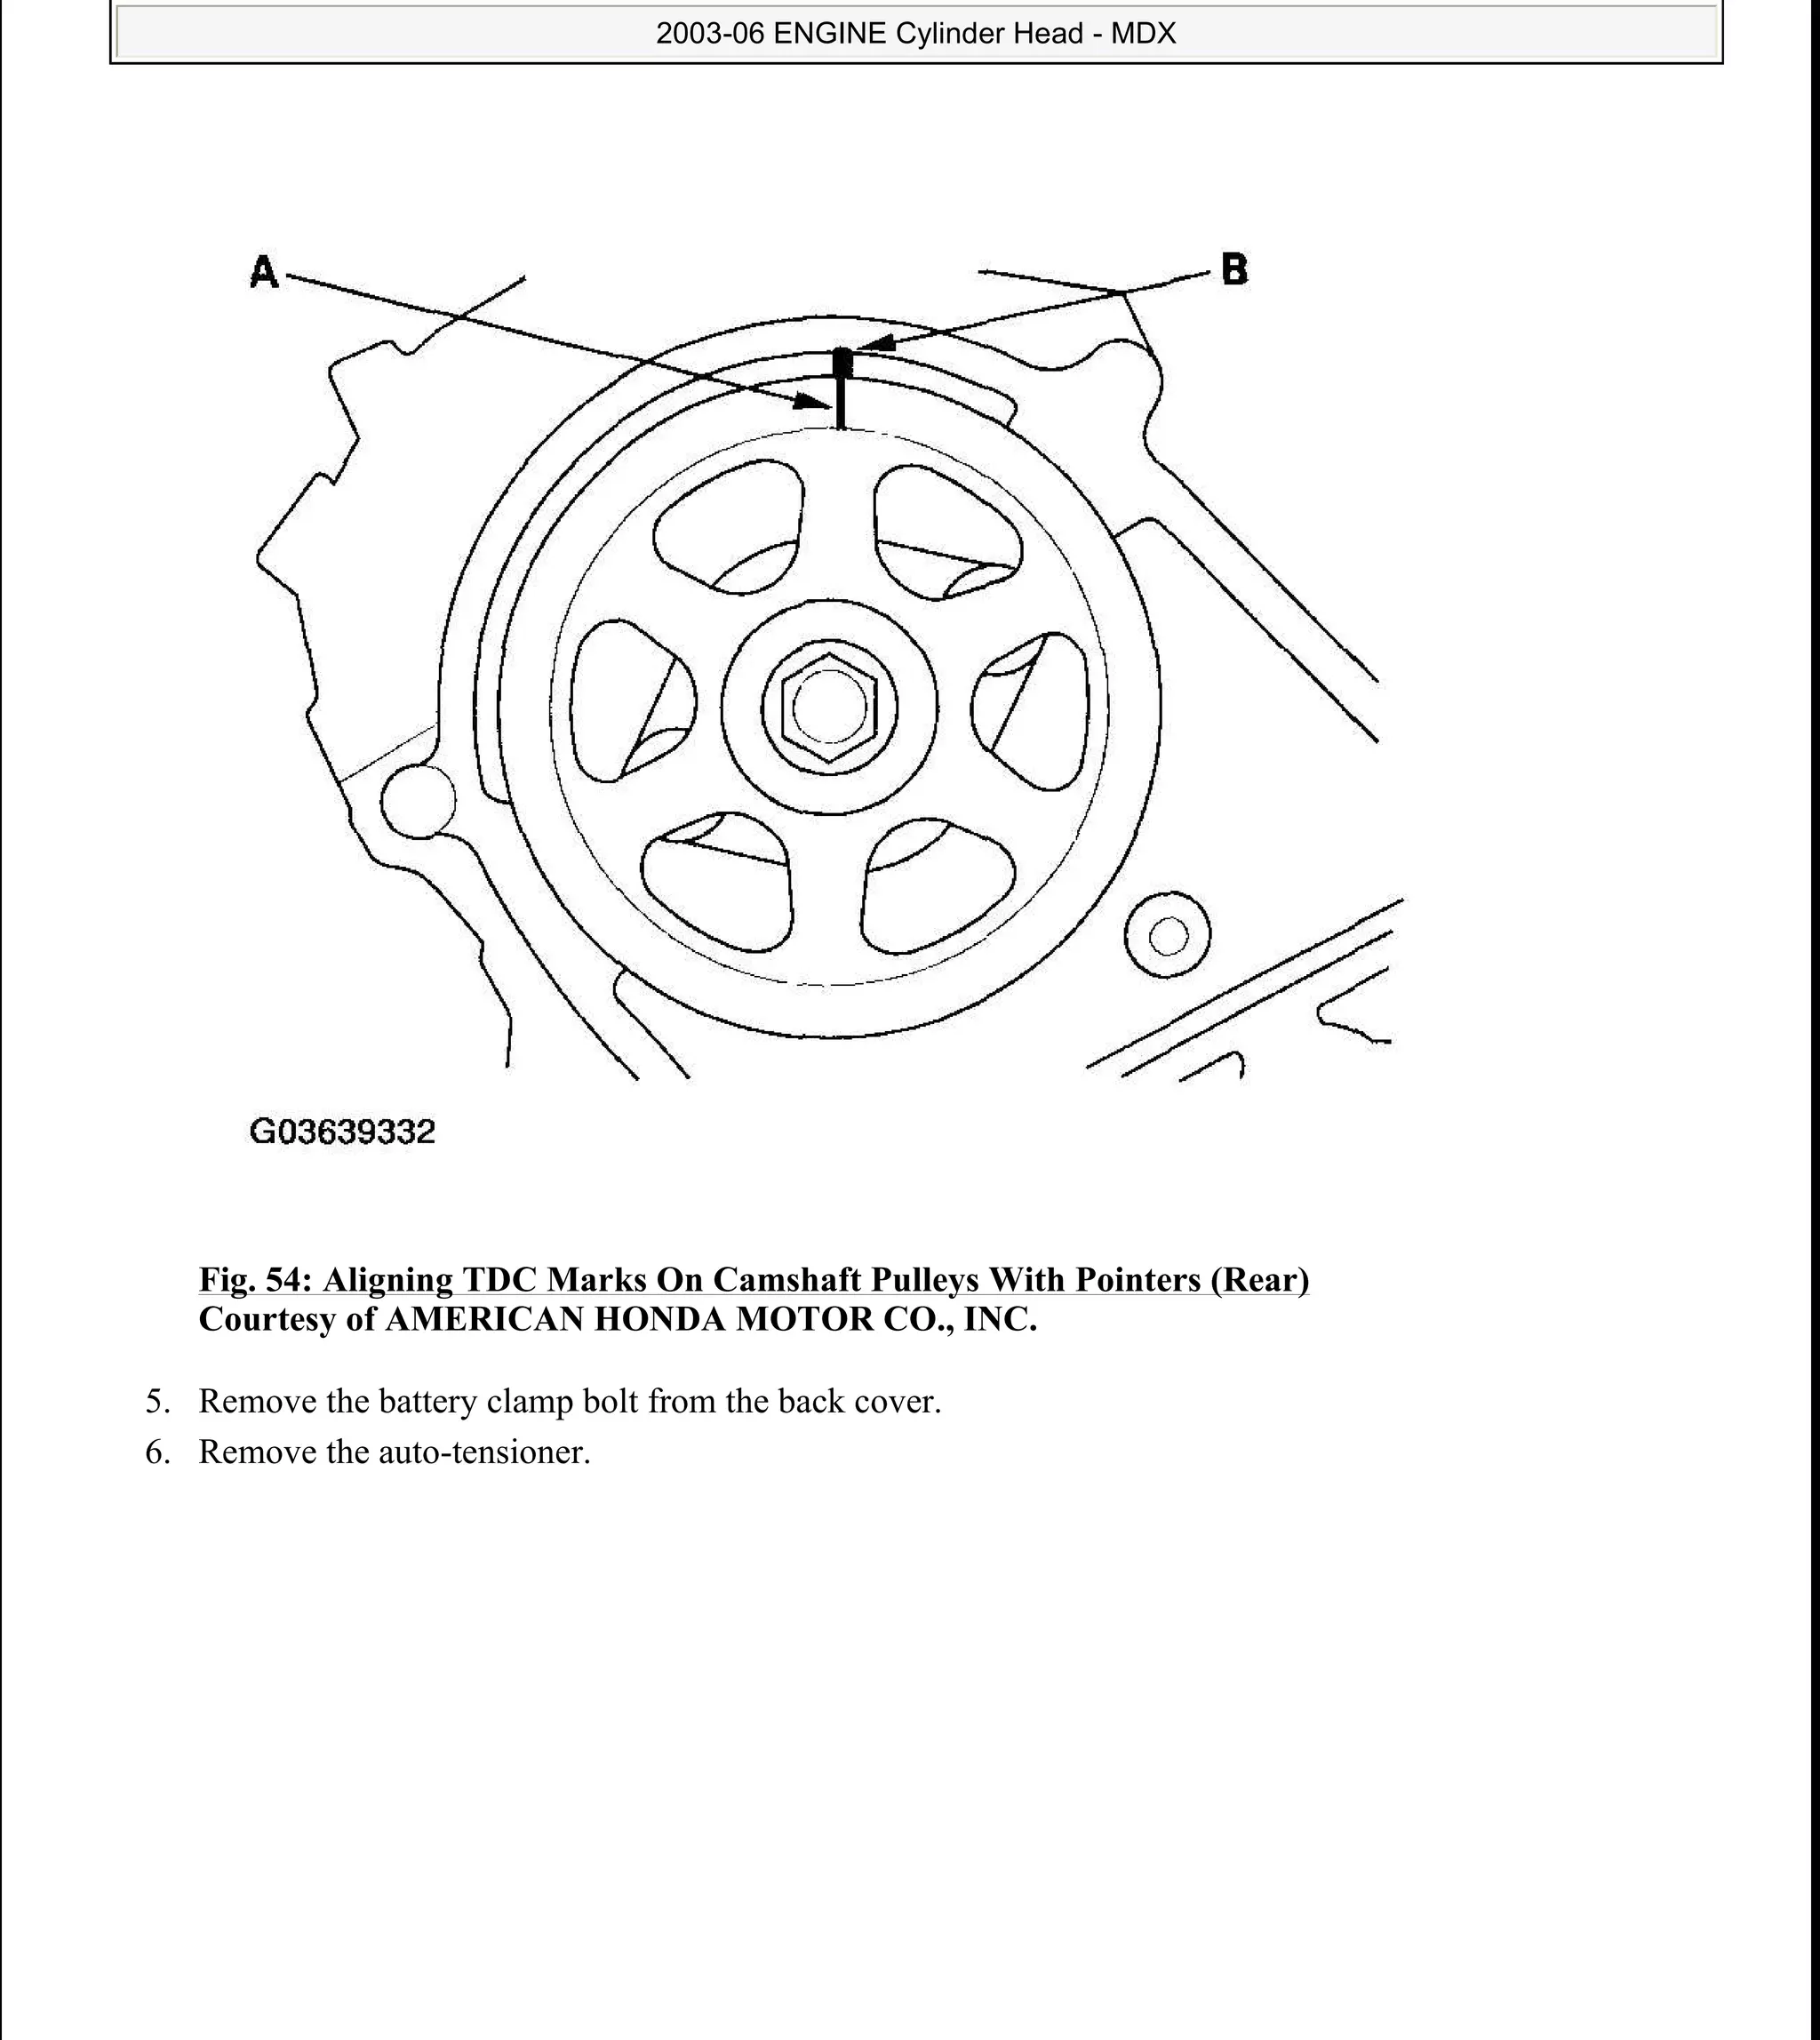
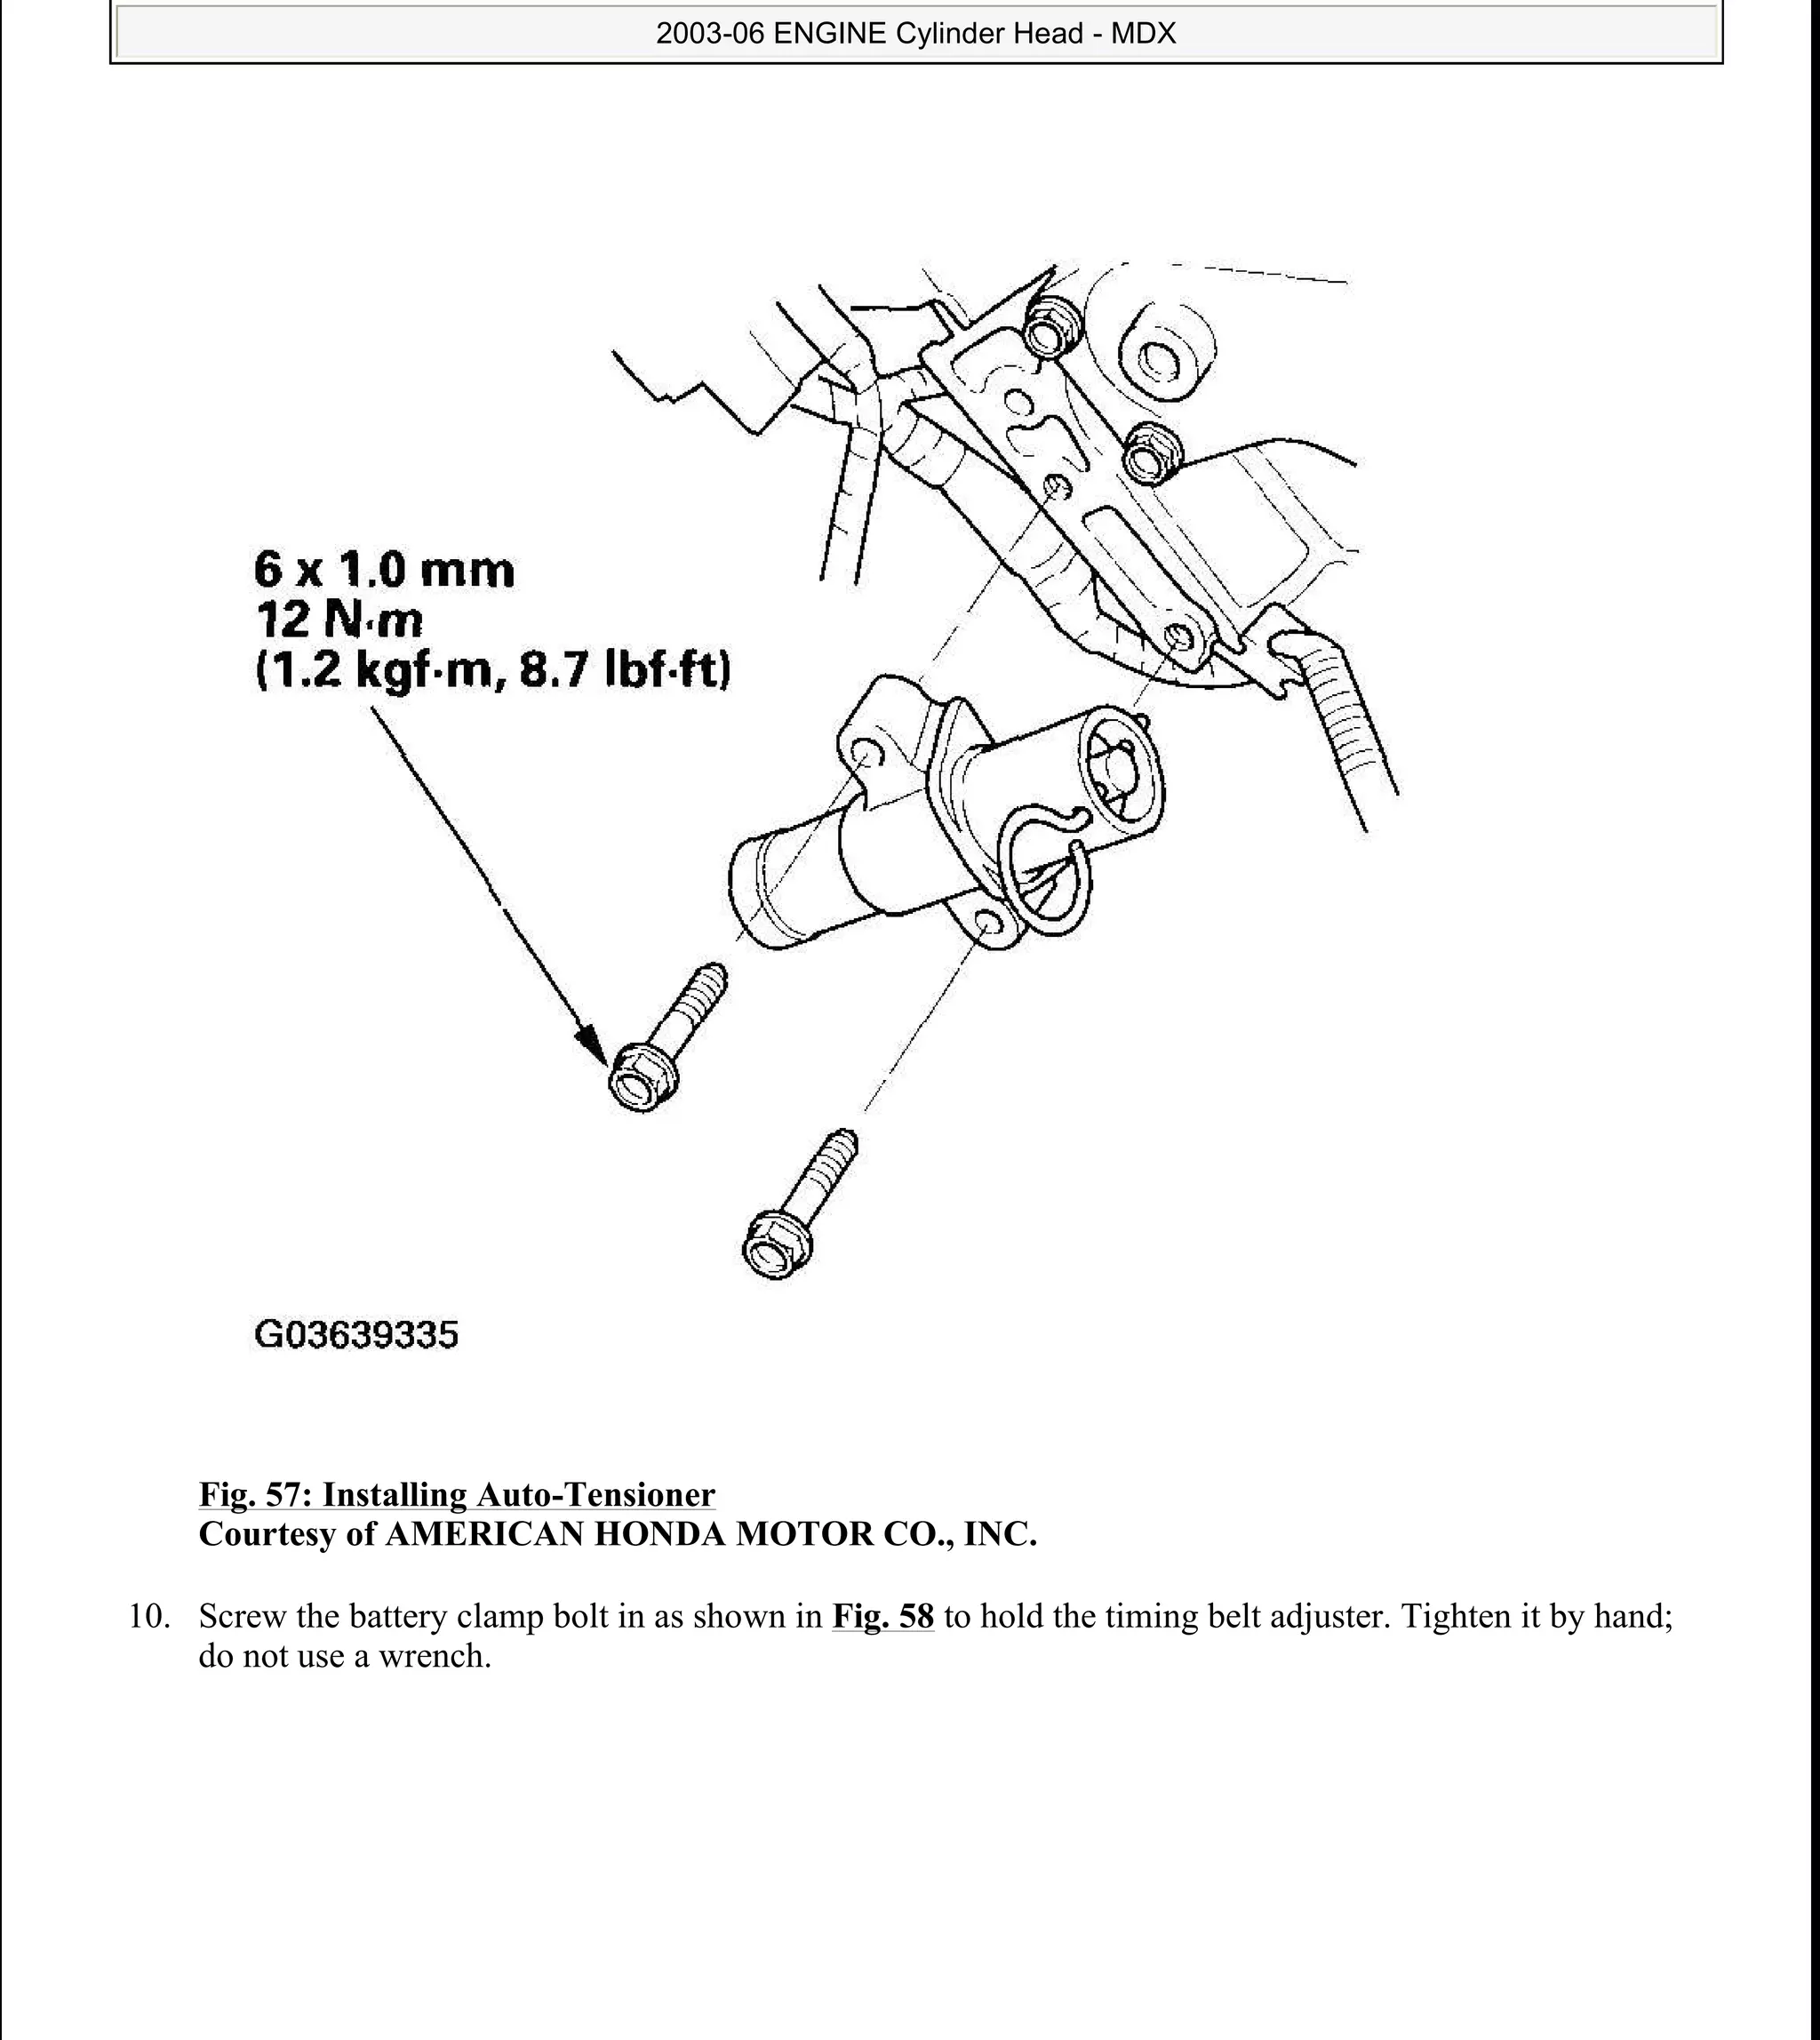
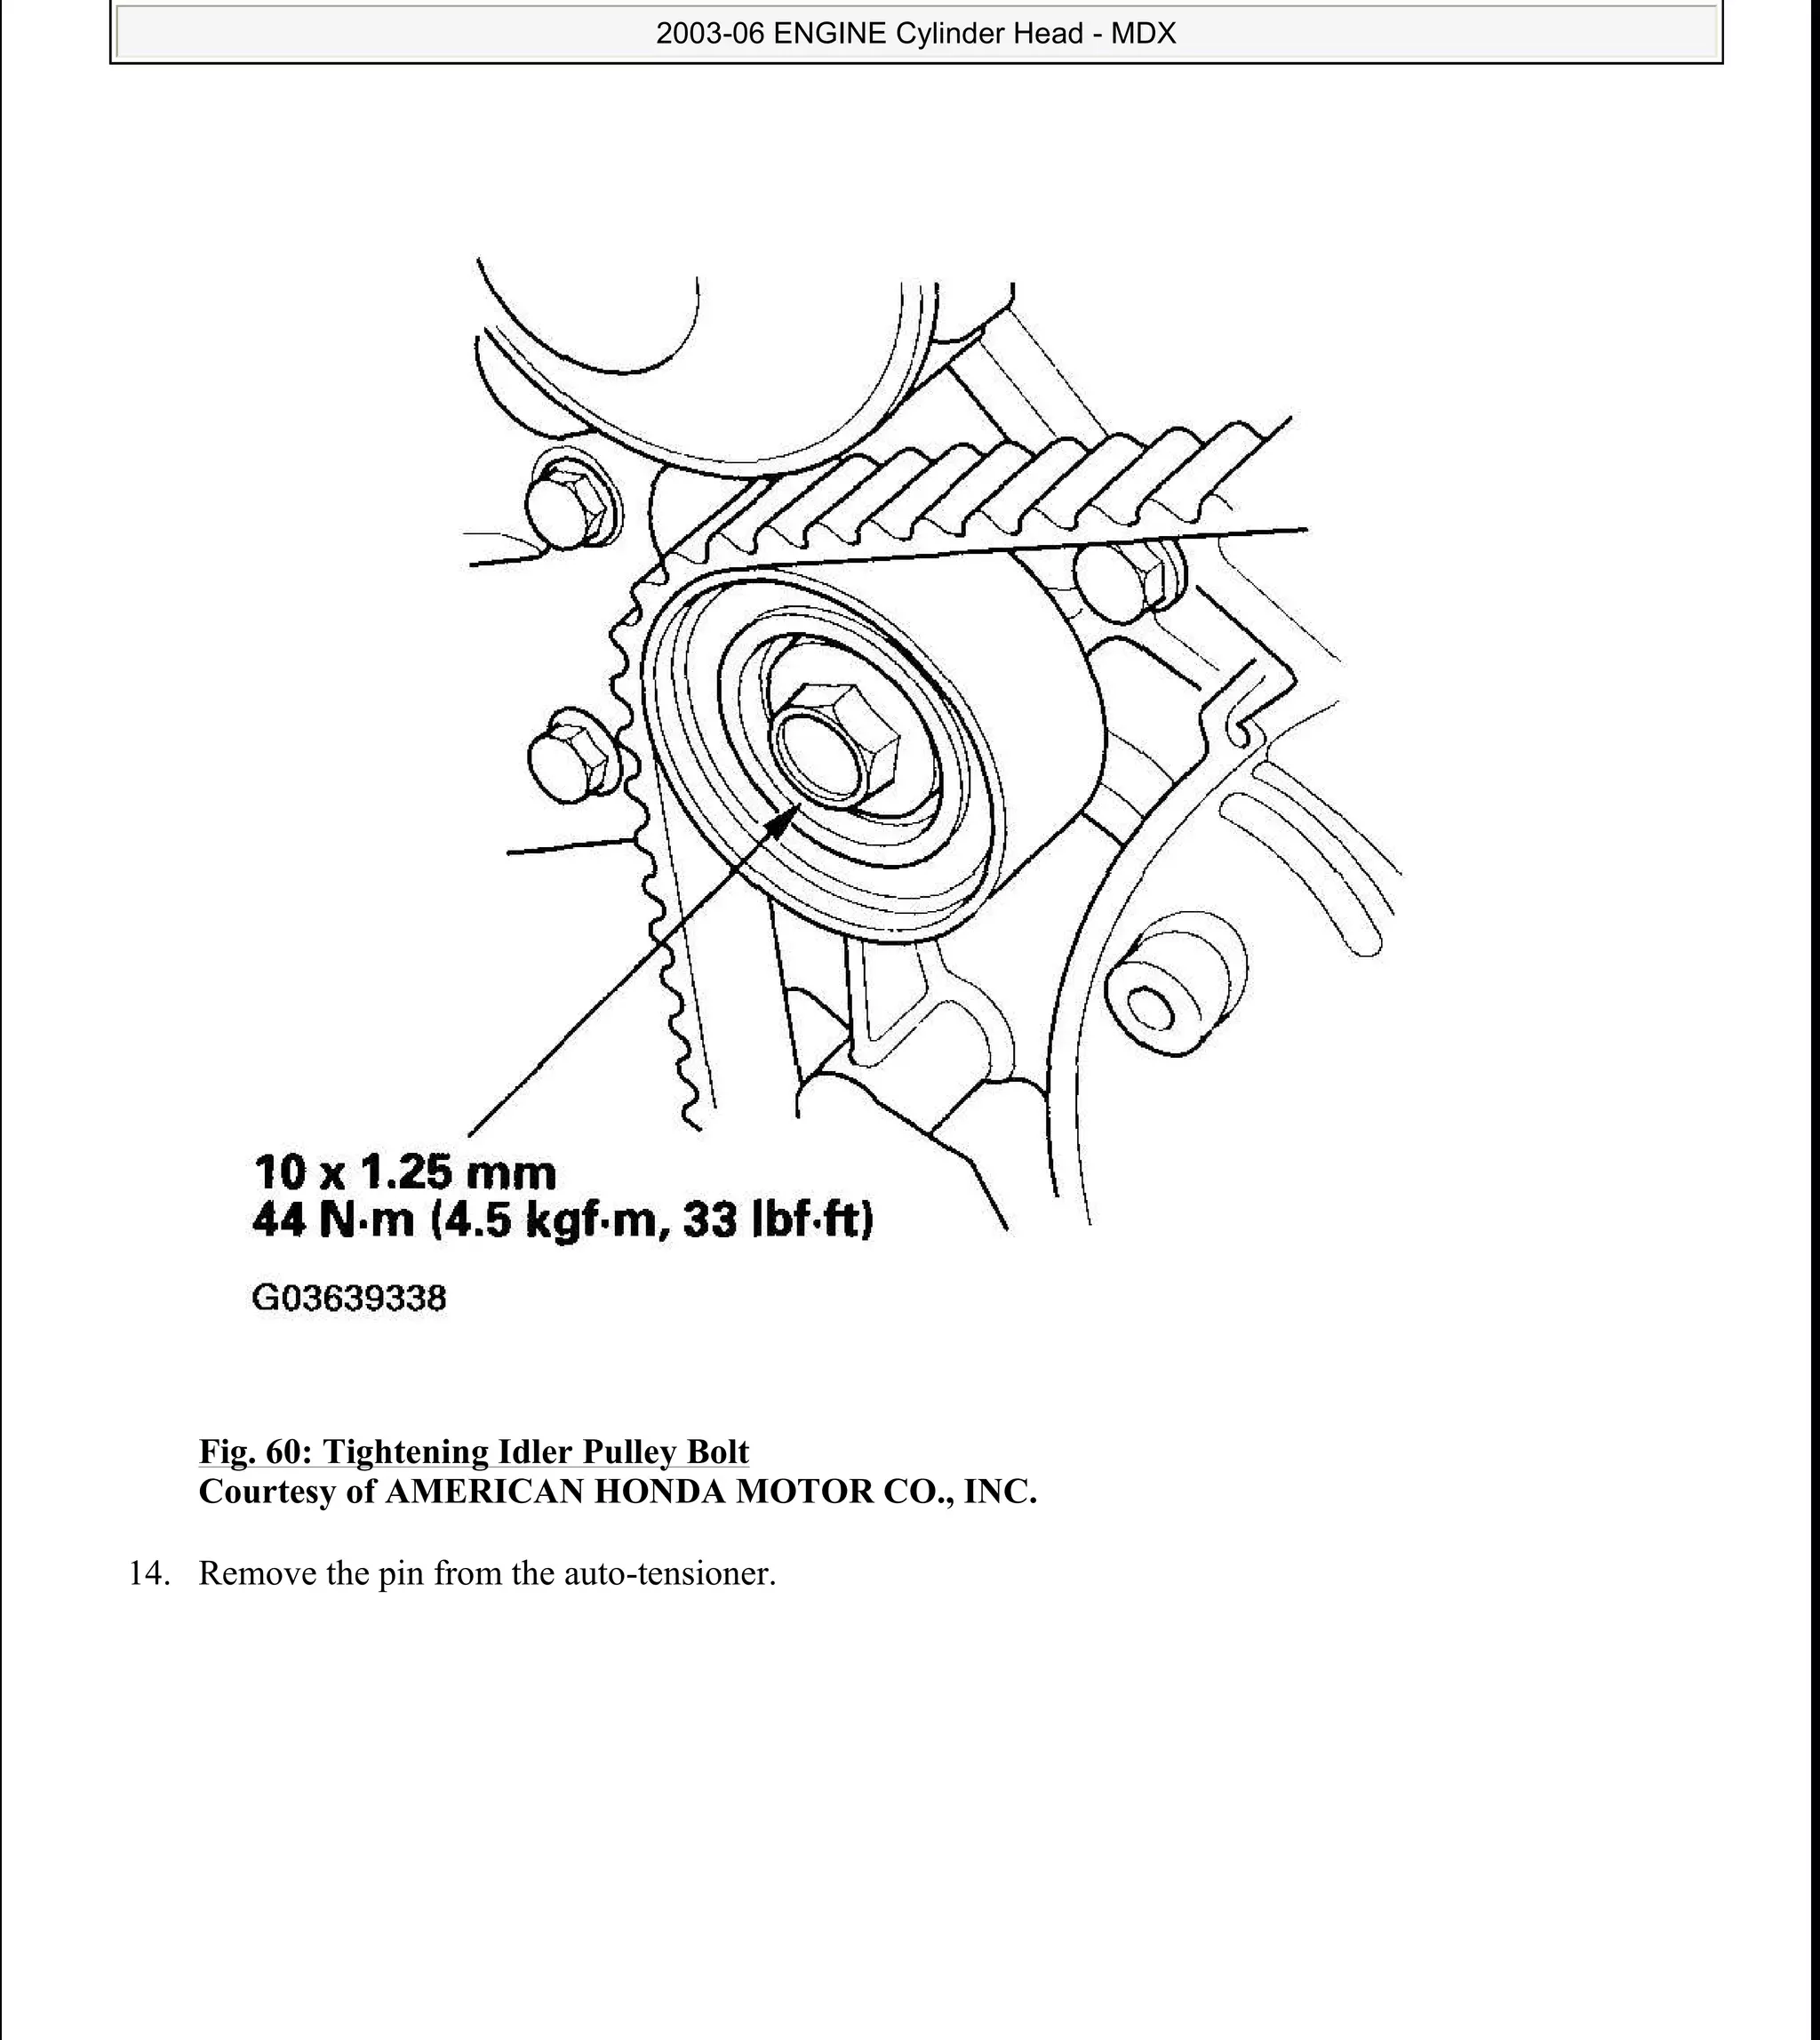
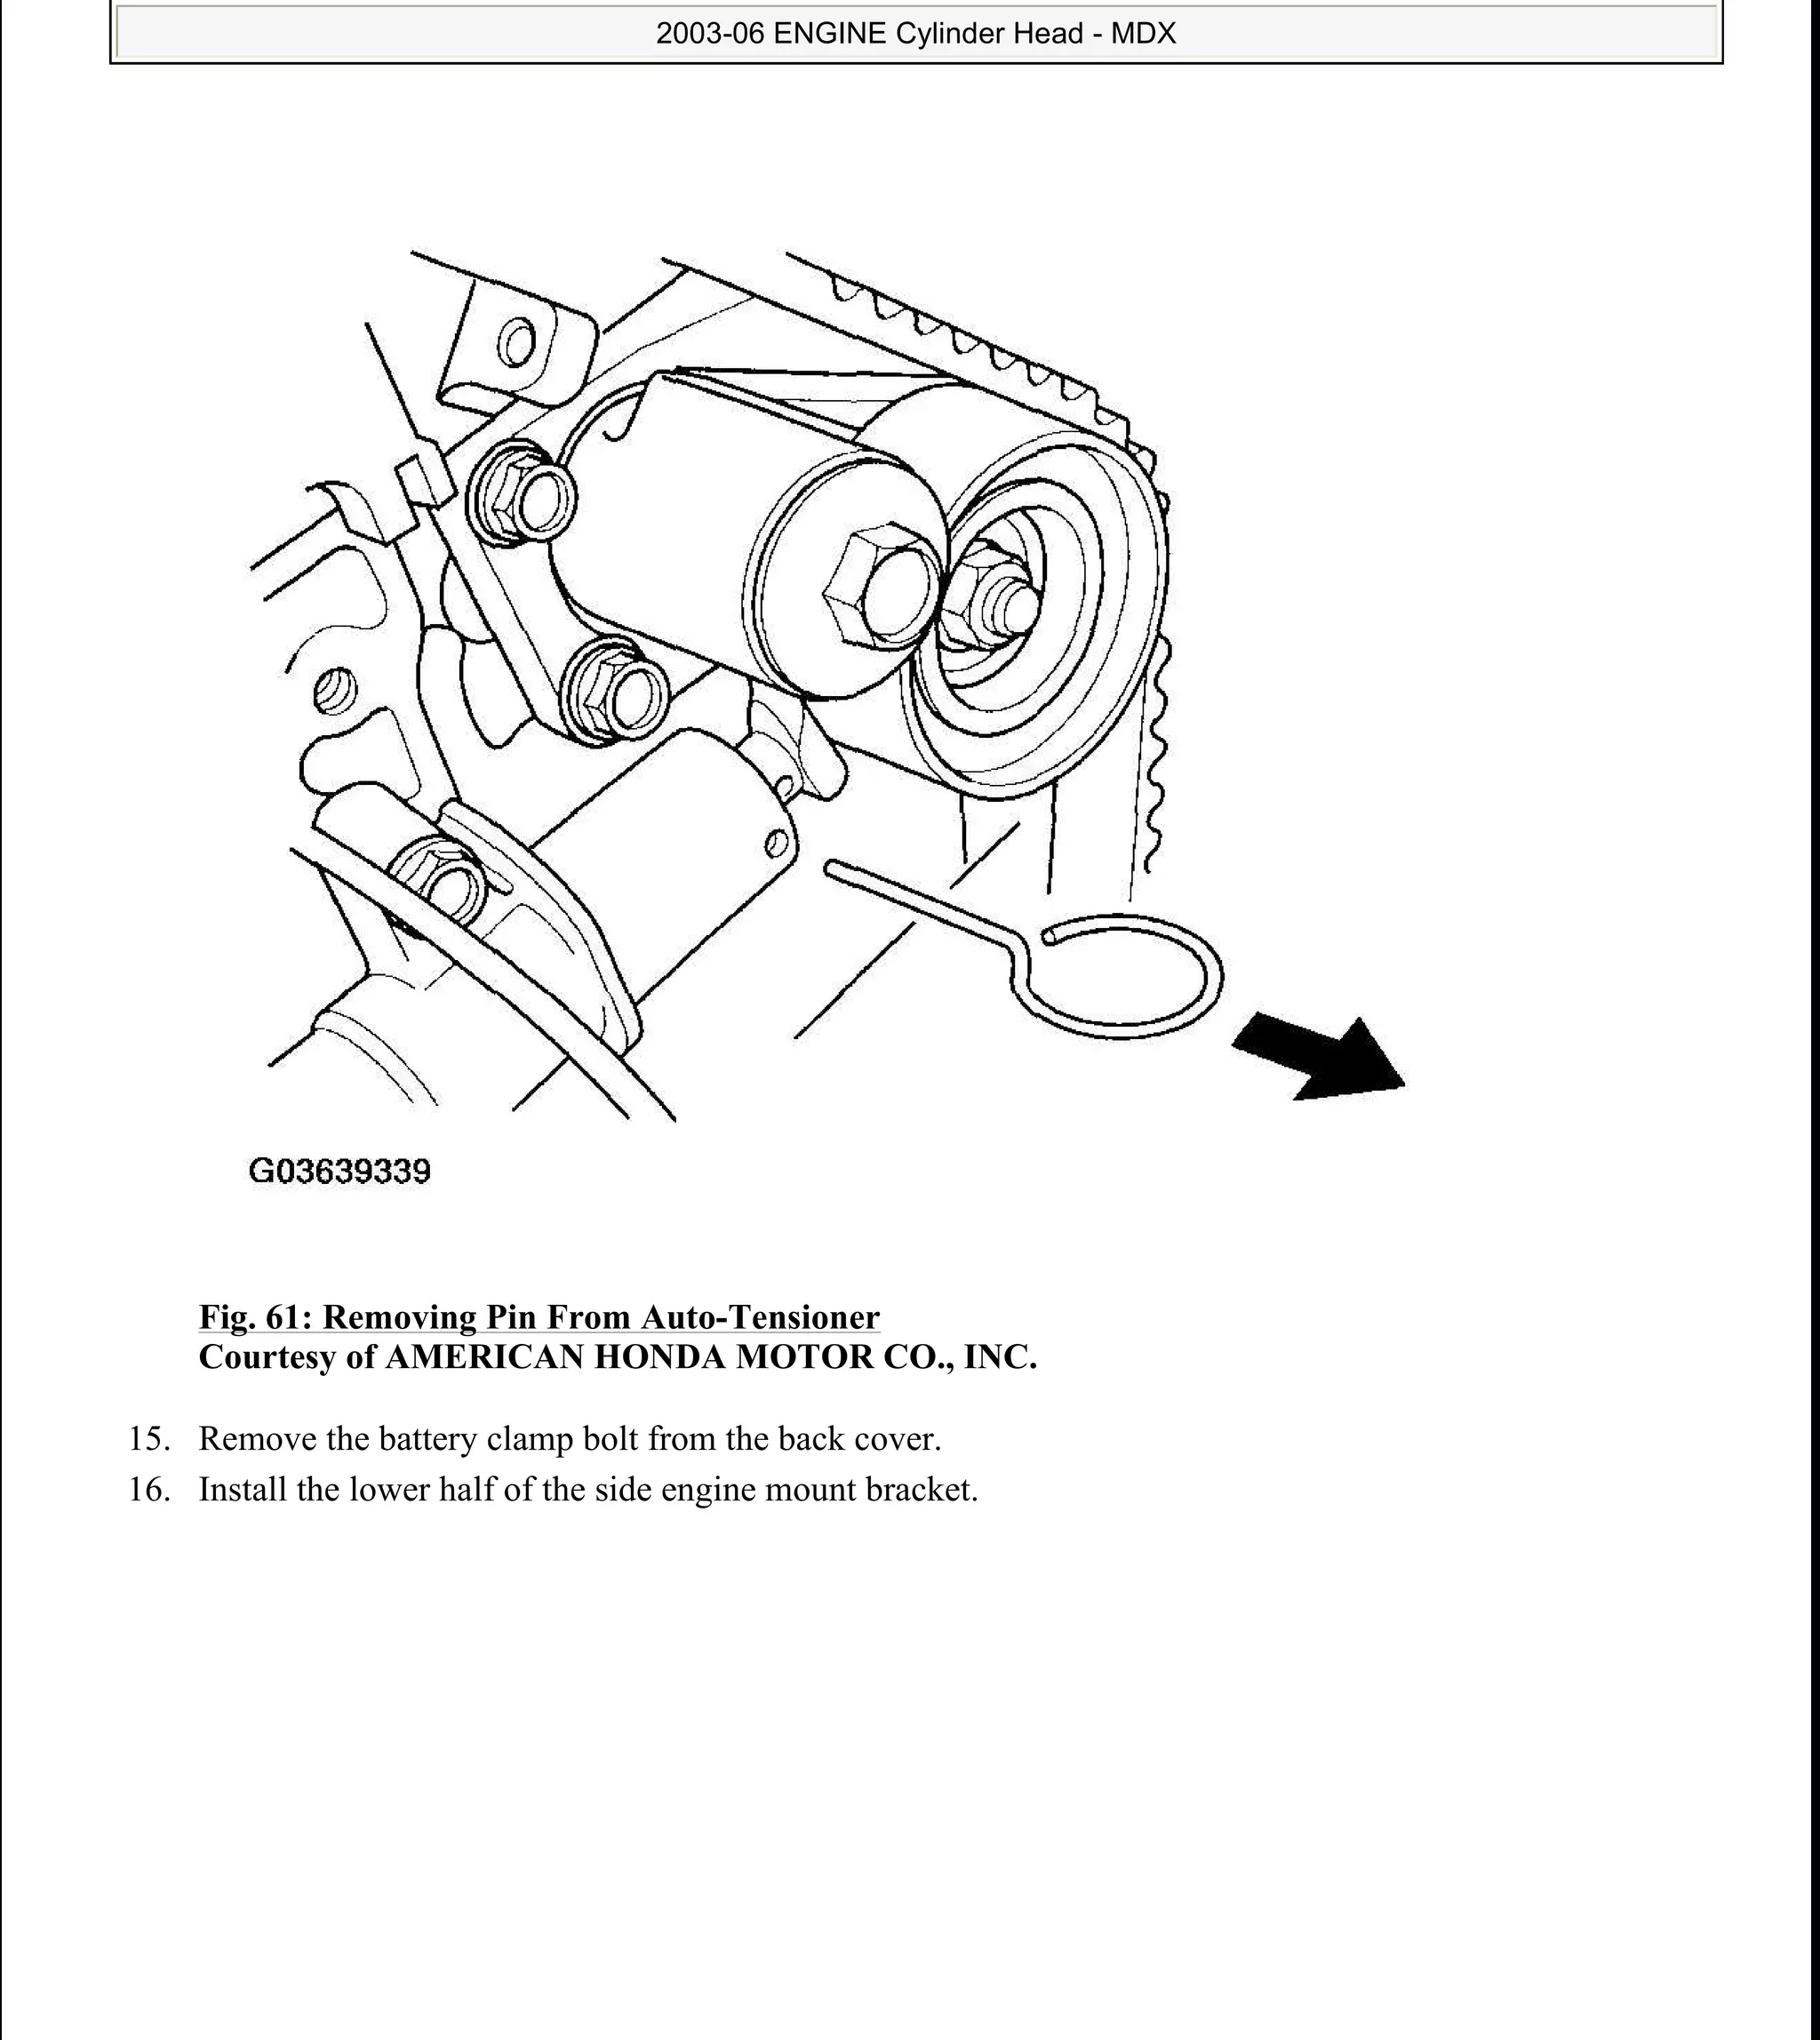
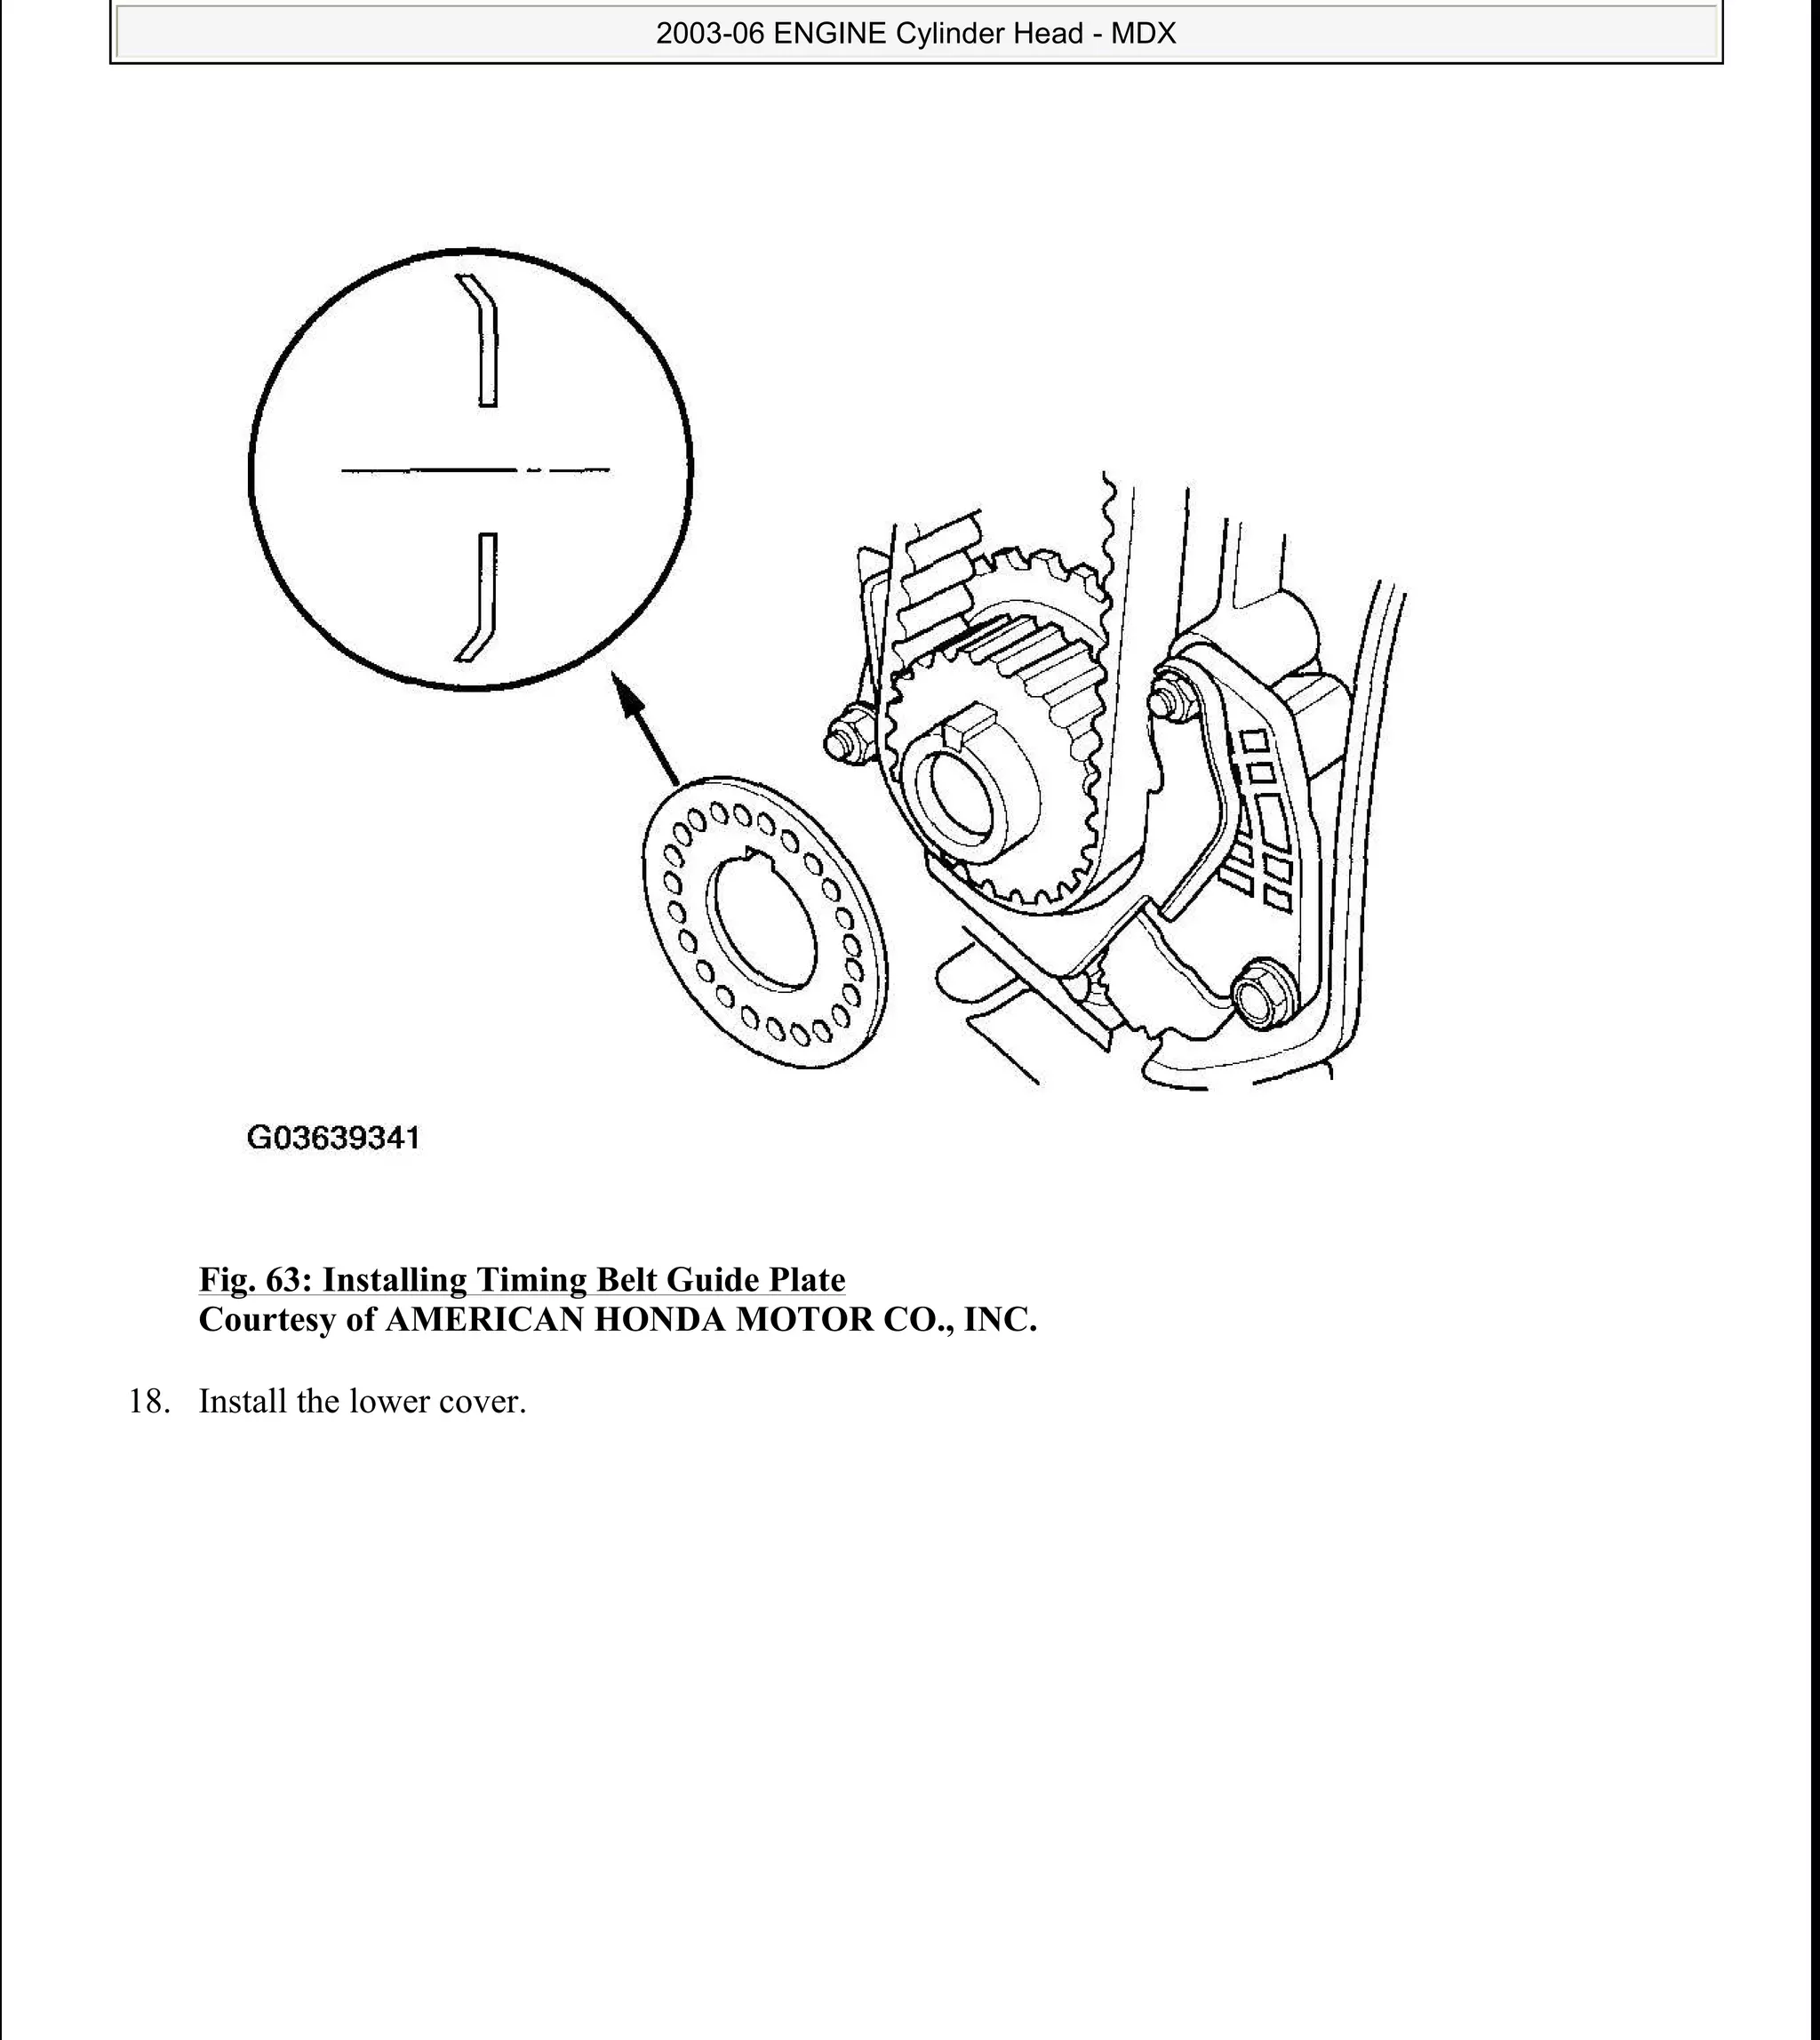
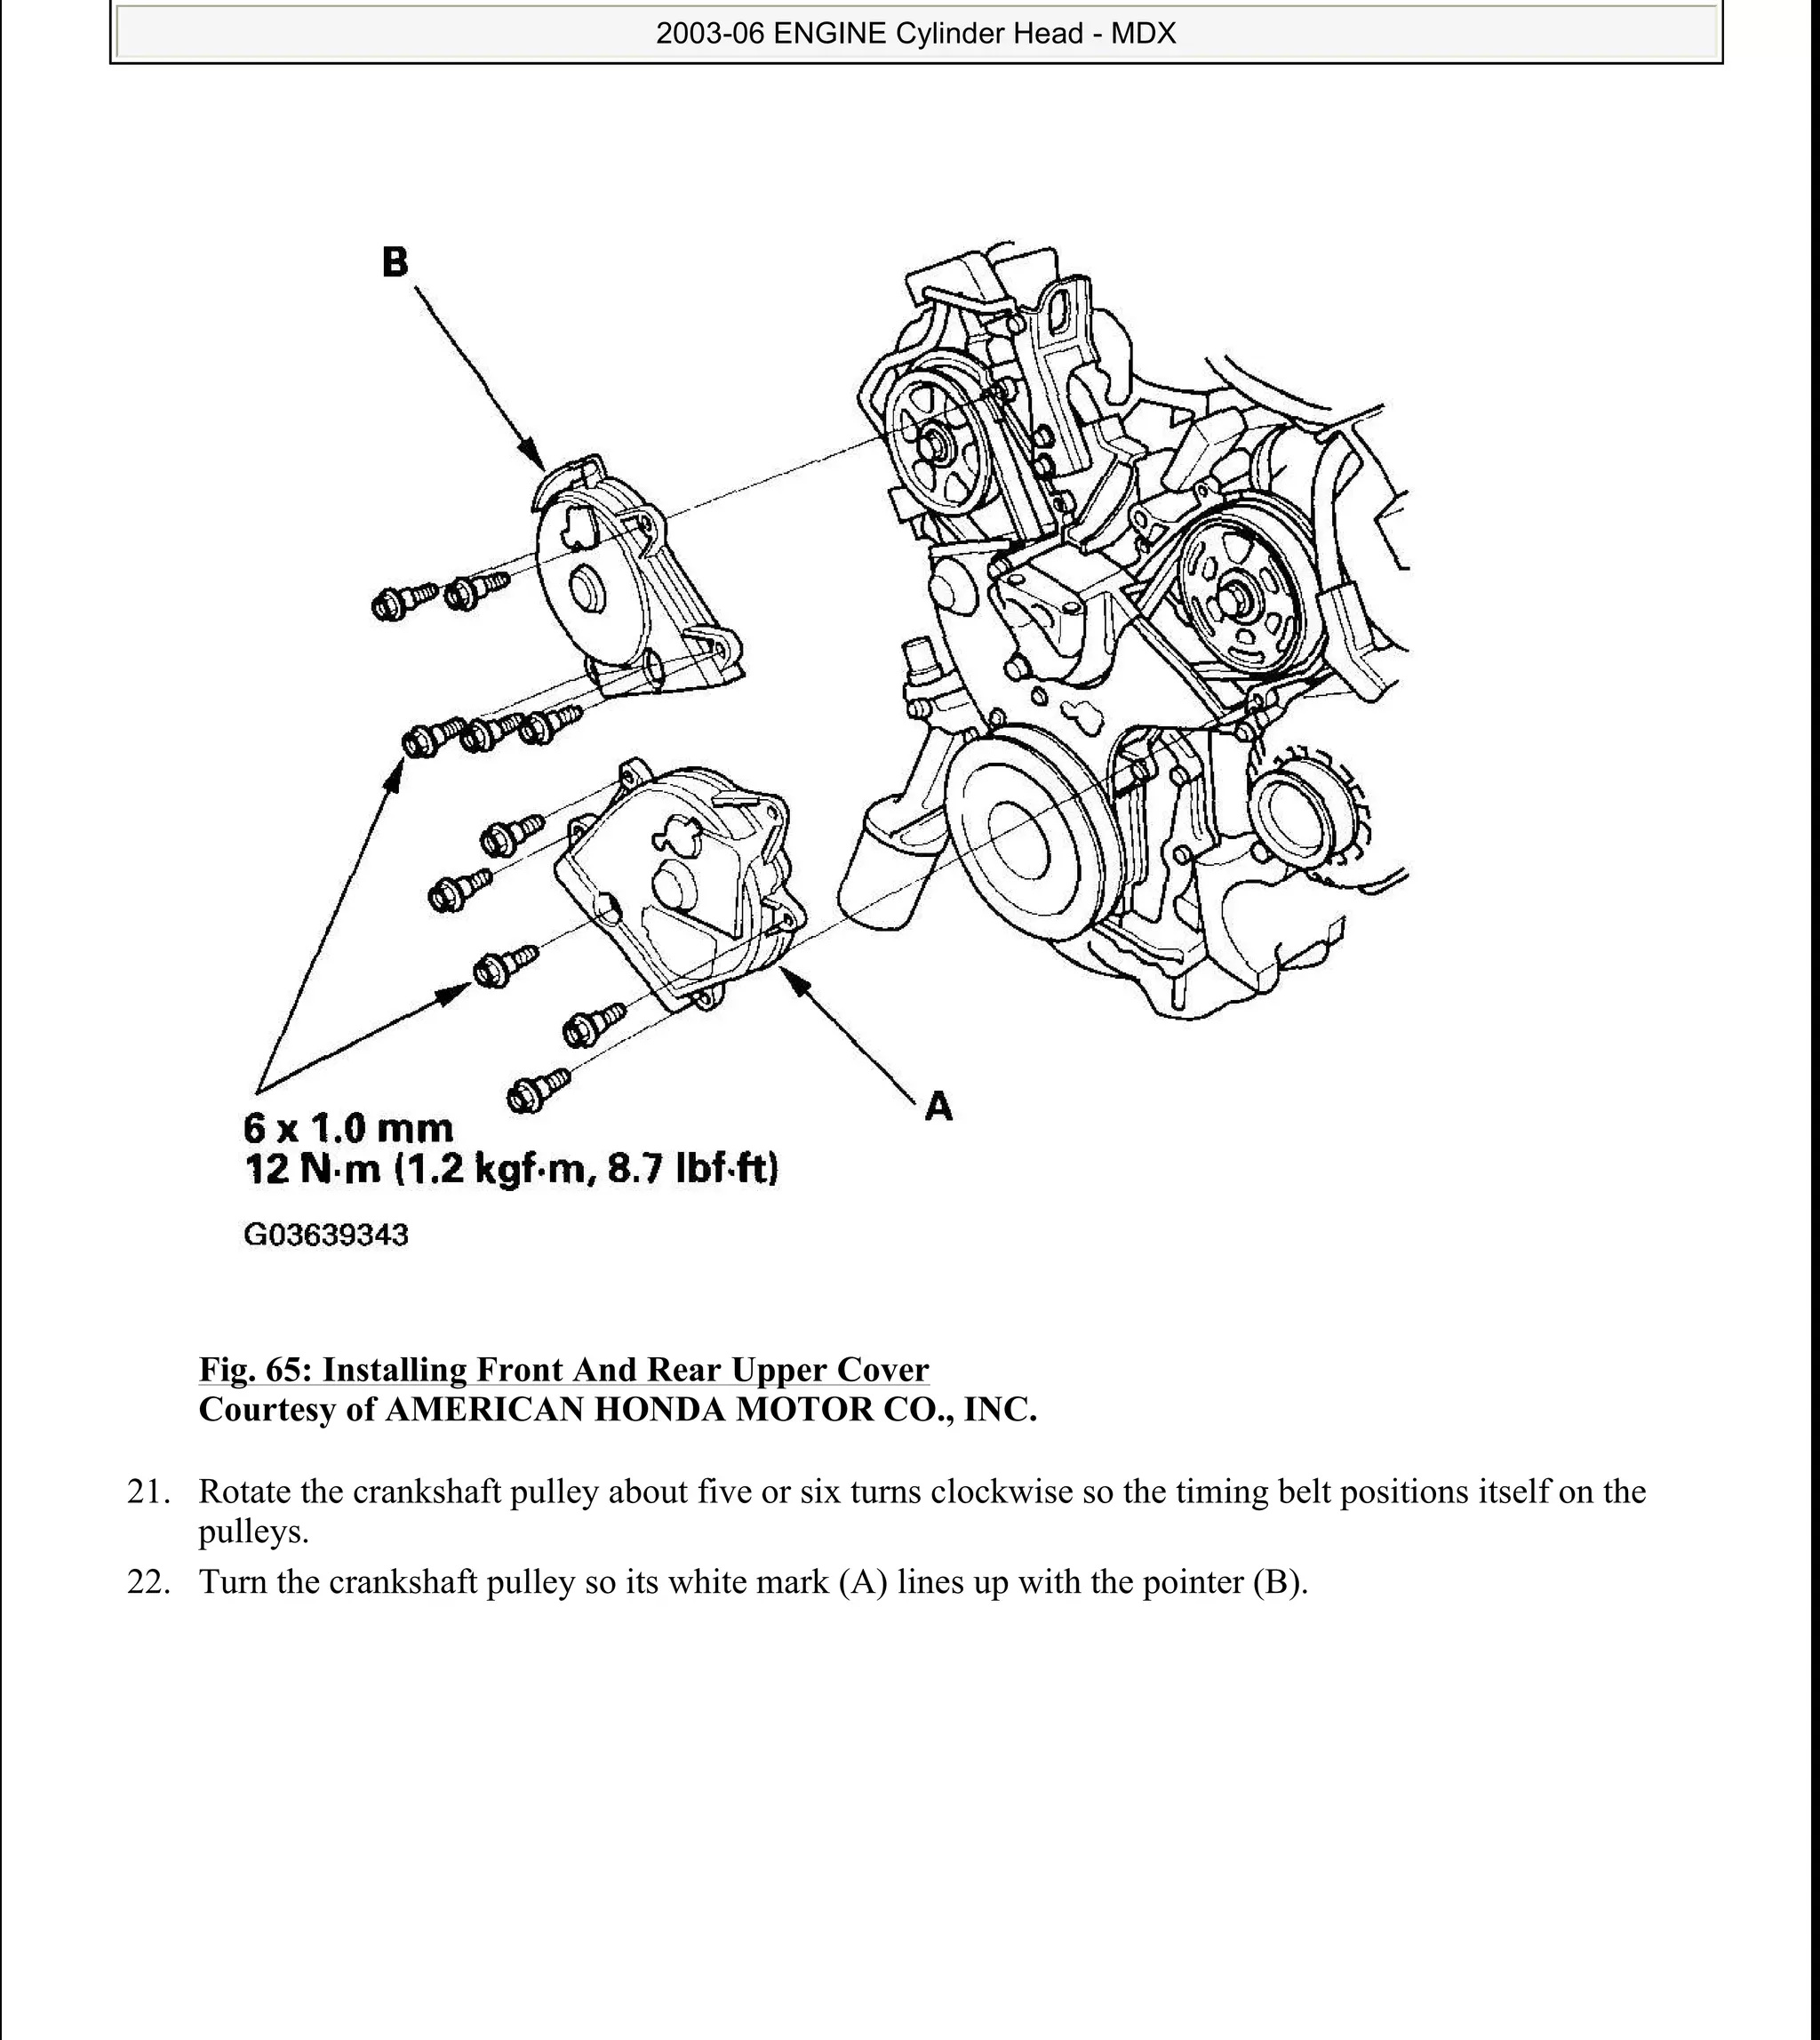
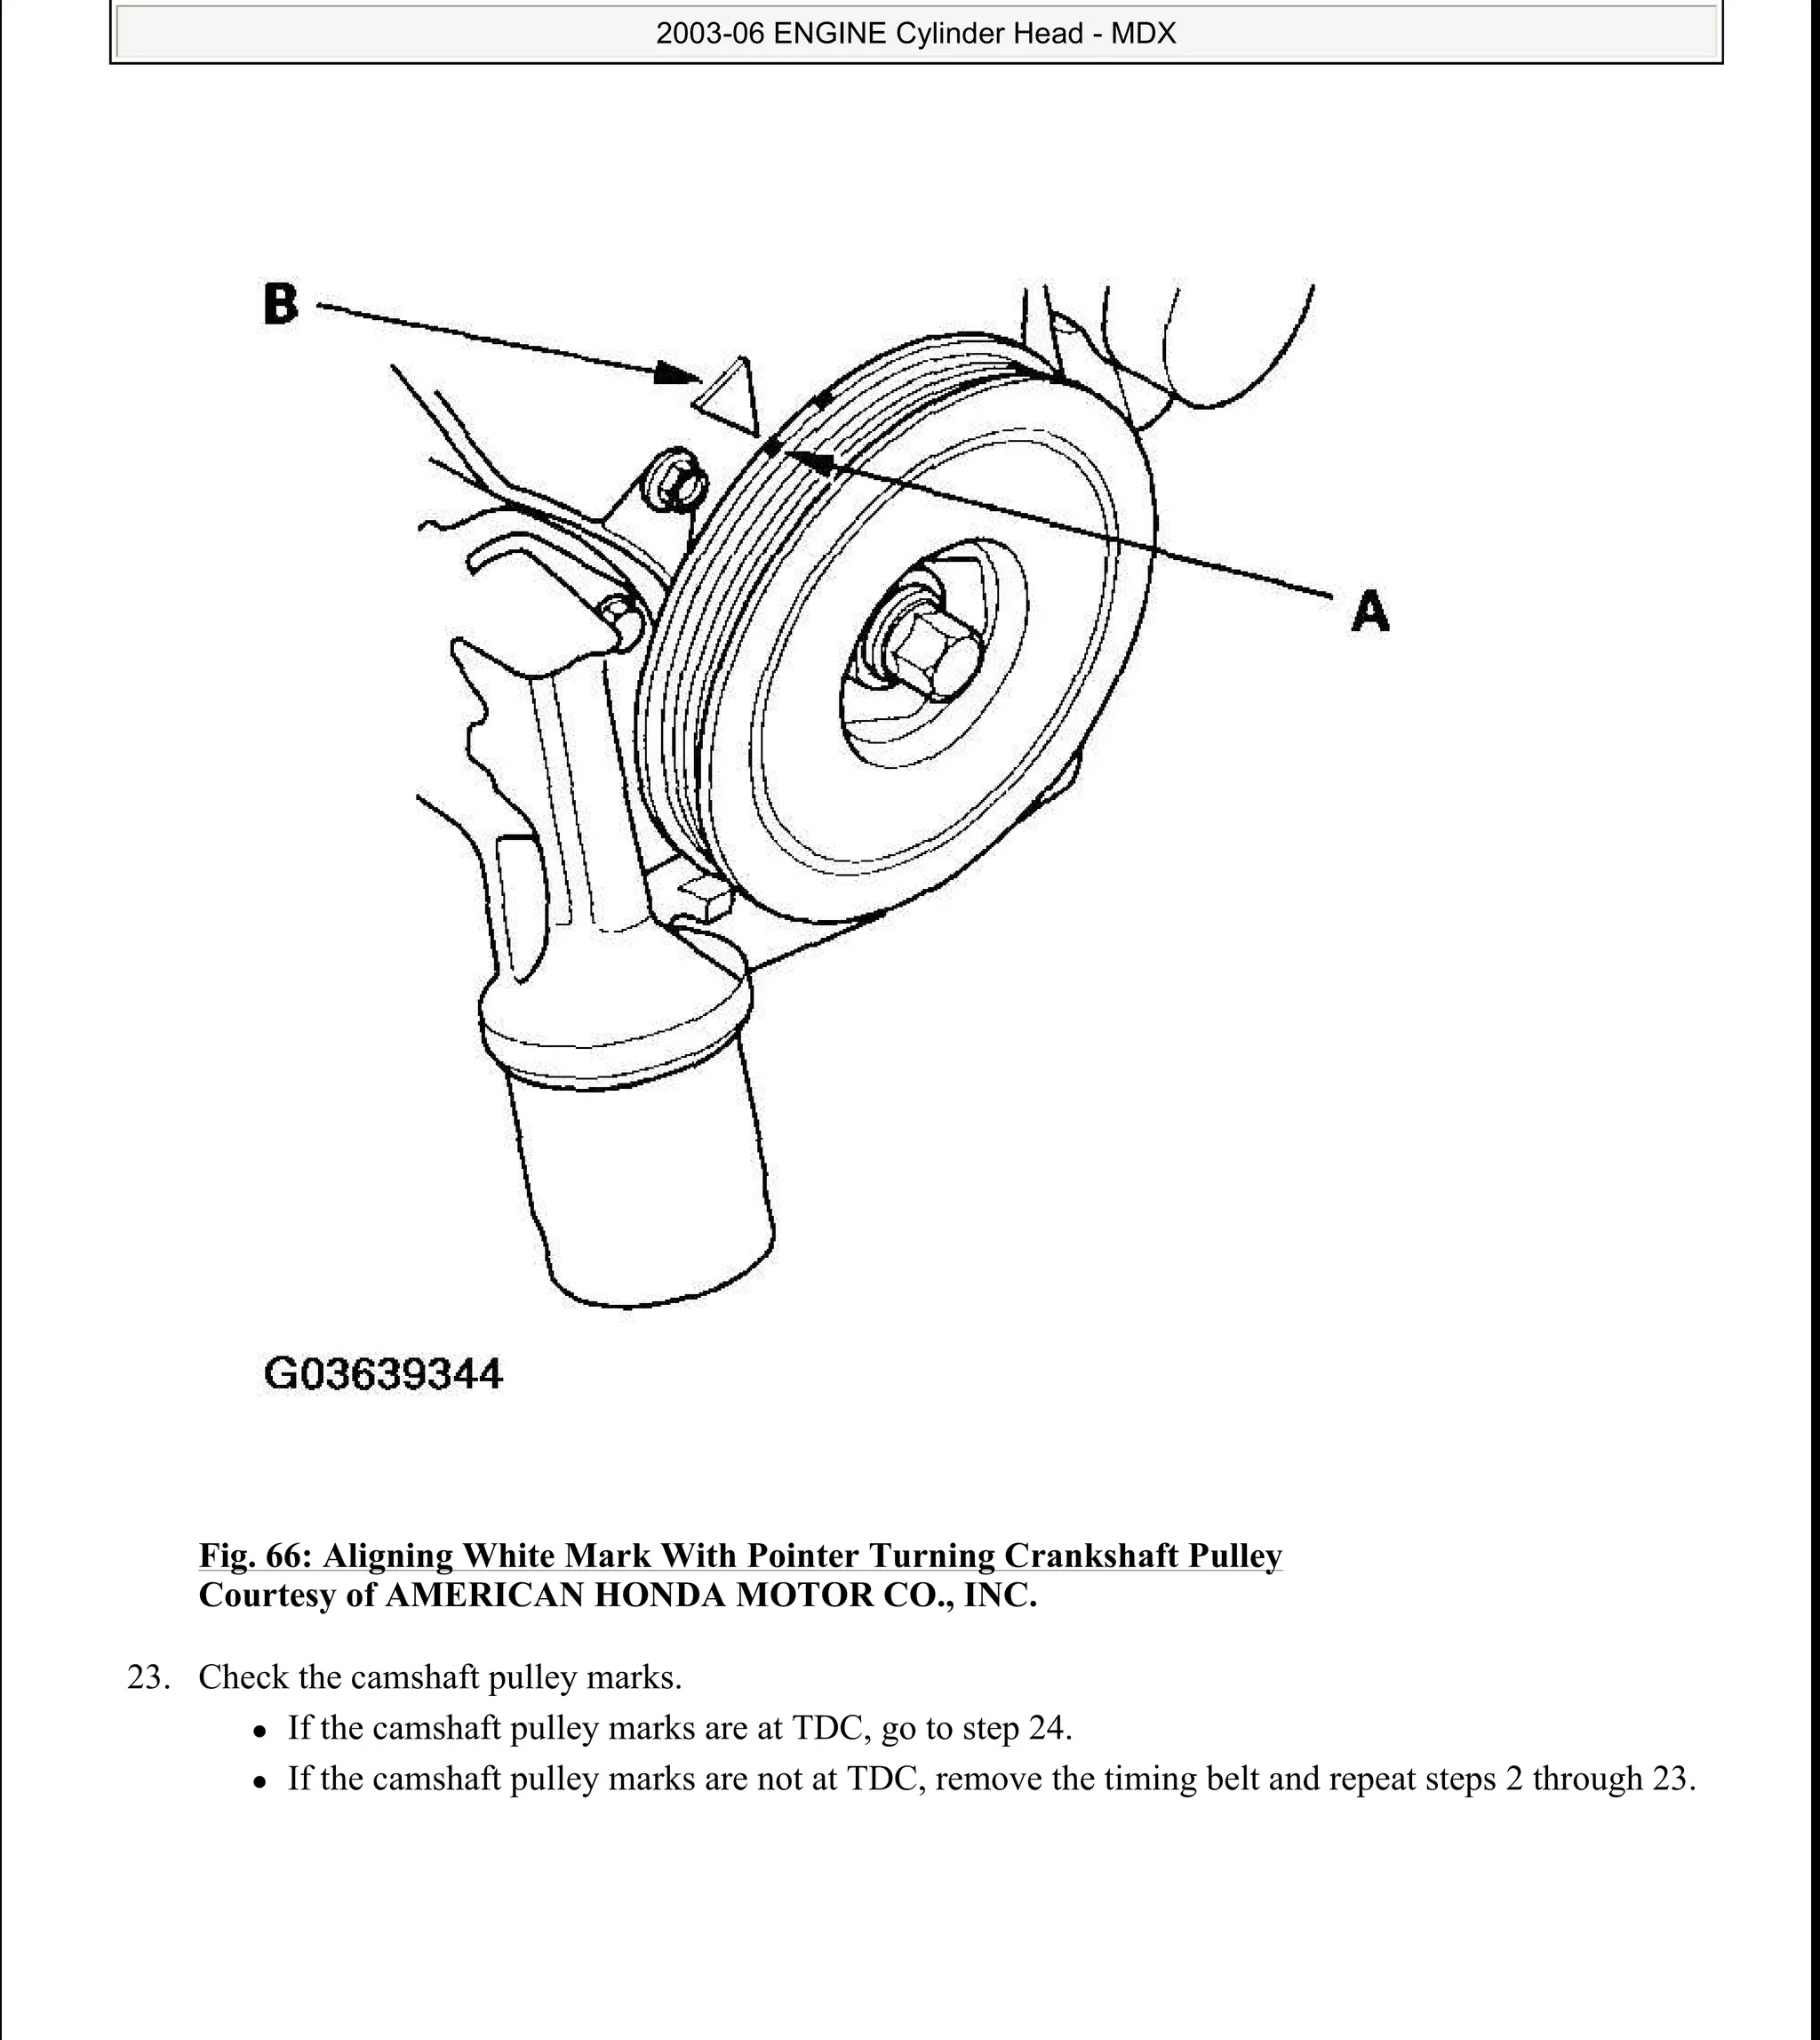
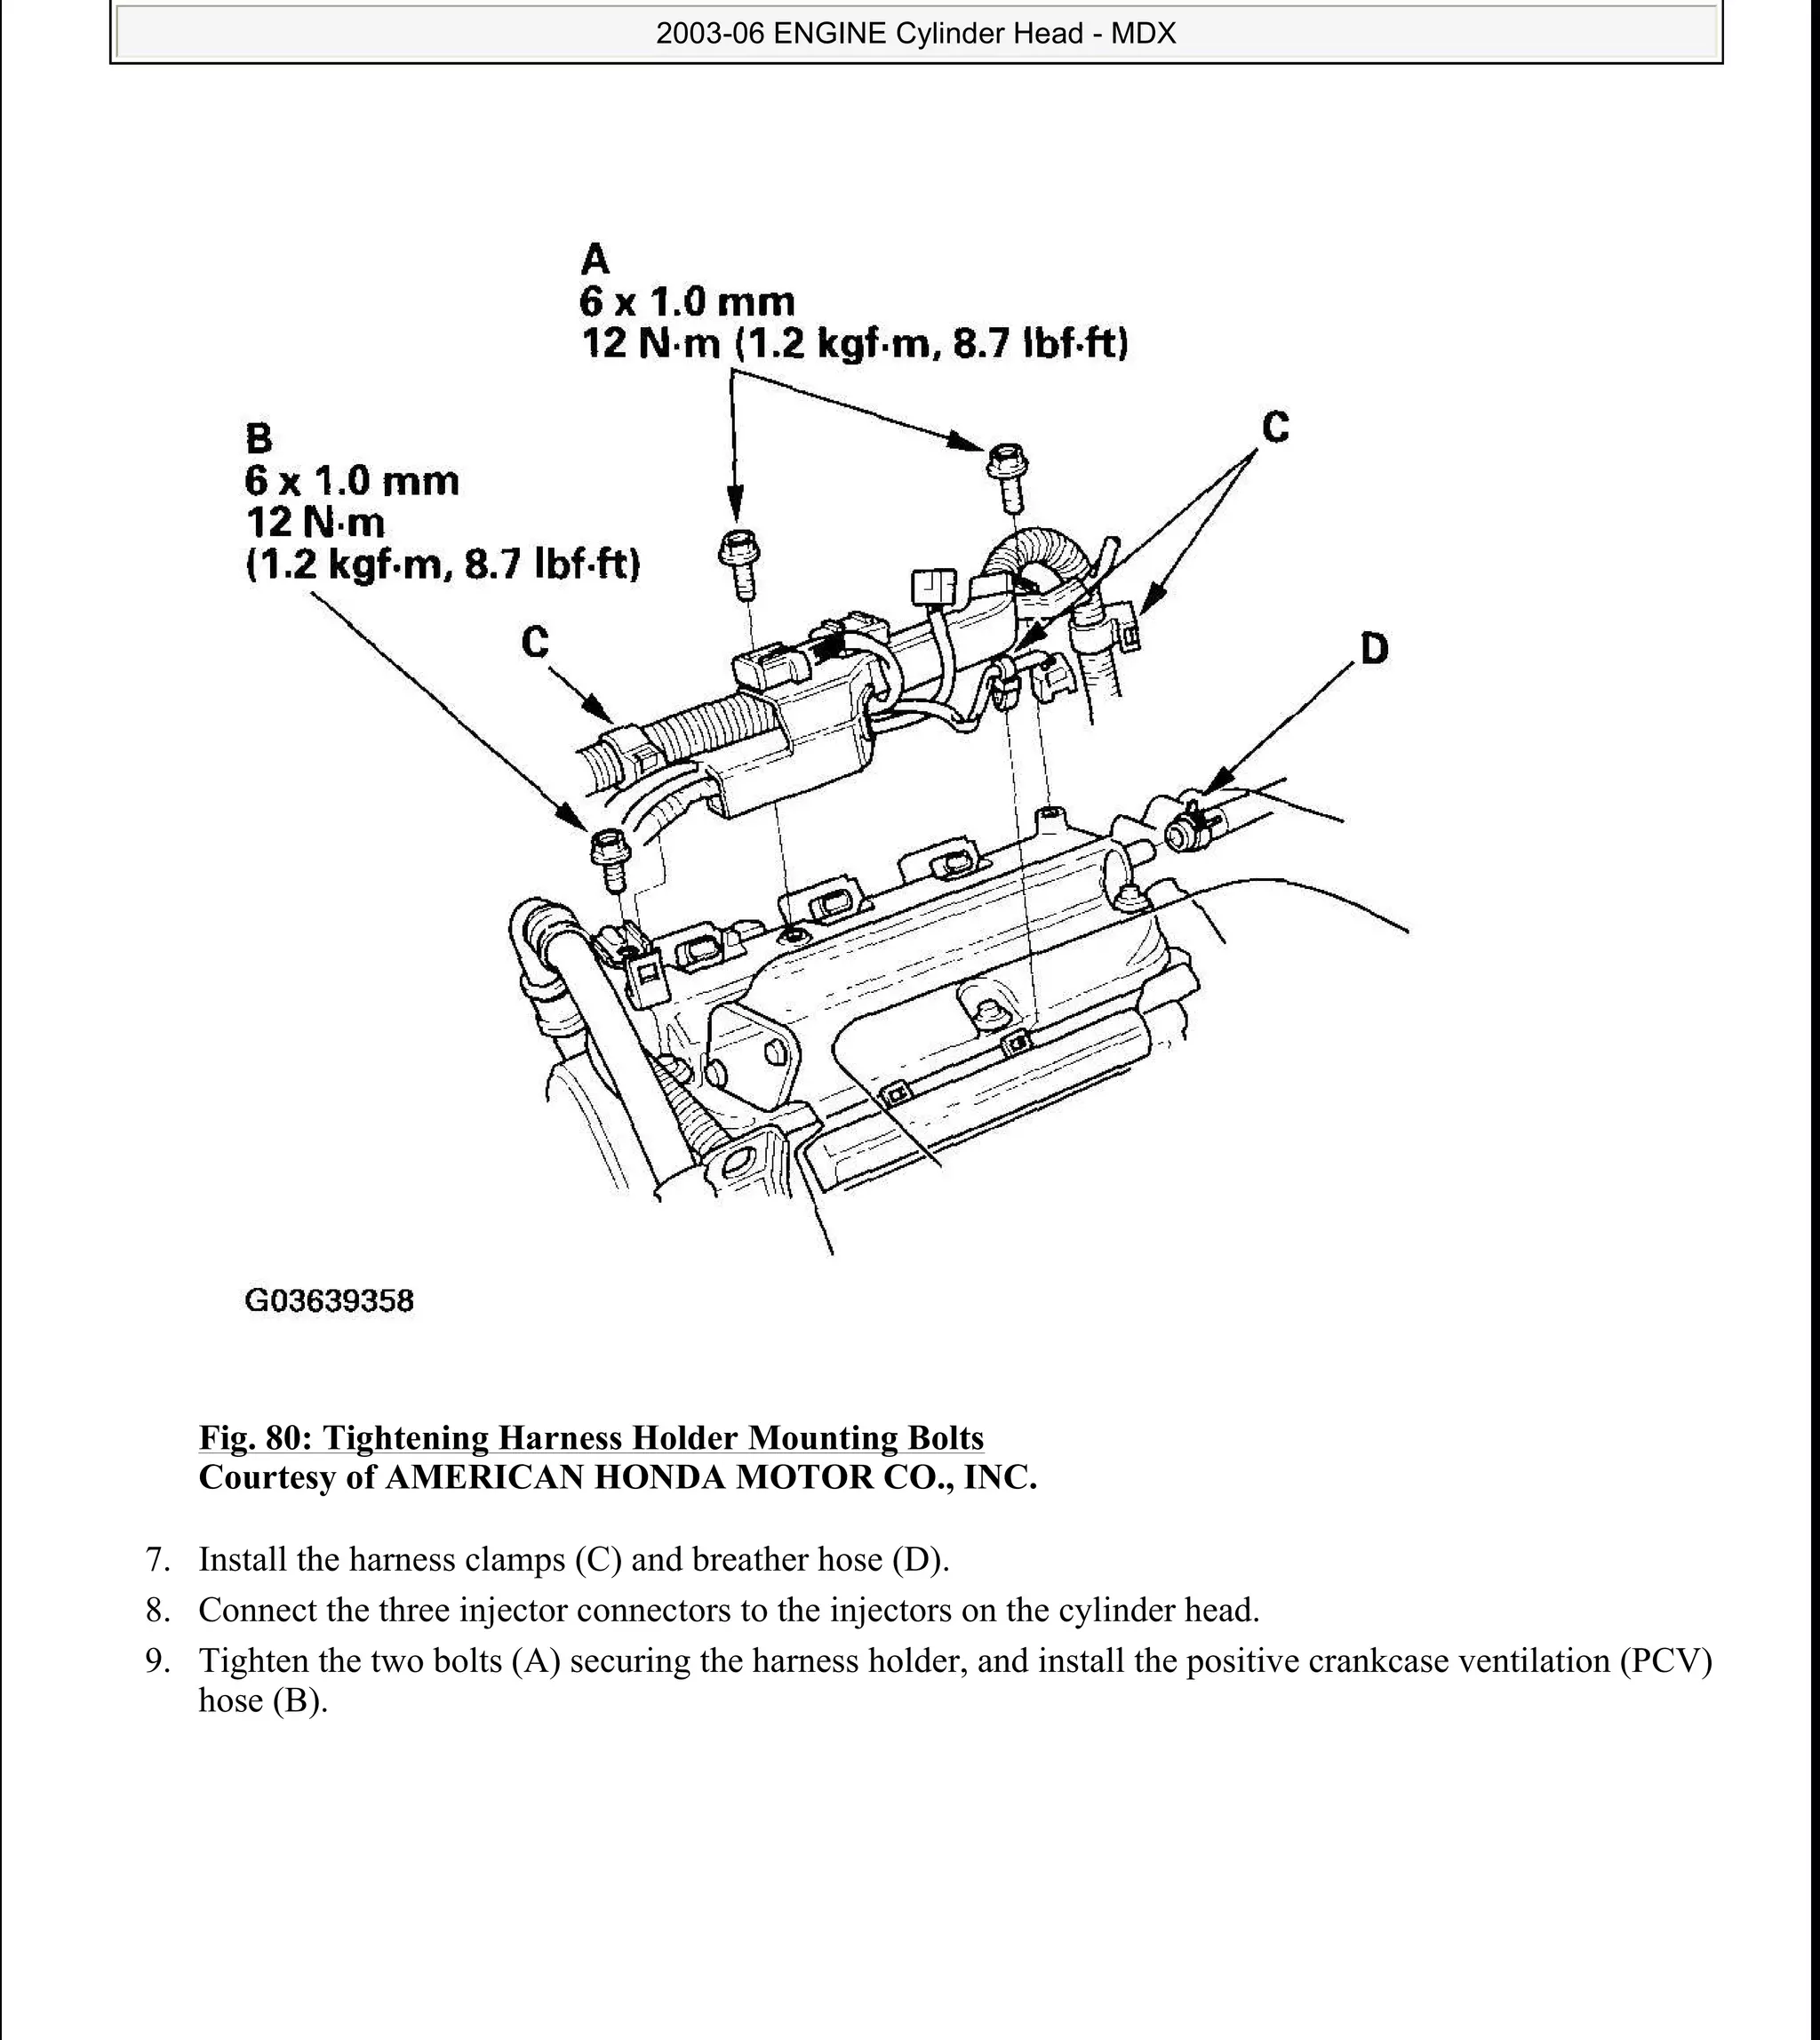
Procedures for installing a timing belt, aligning TDC marks for the pulleys, and ensuring correct positioning.
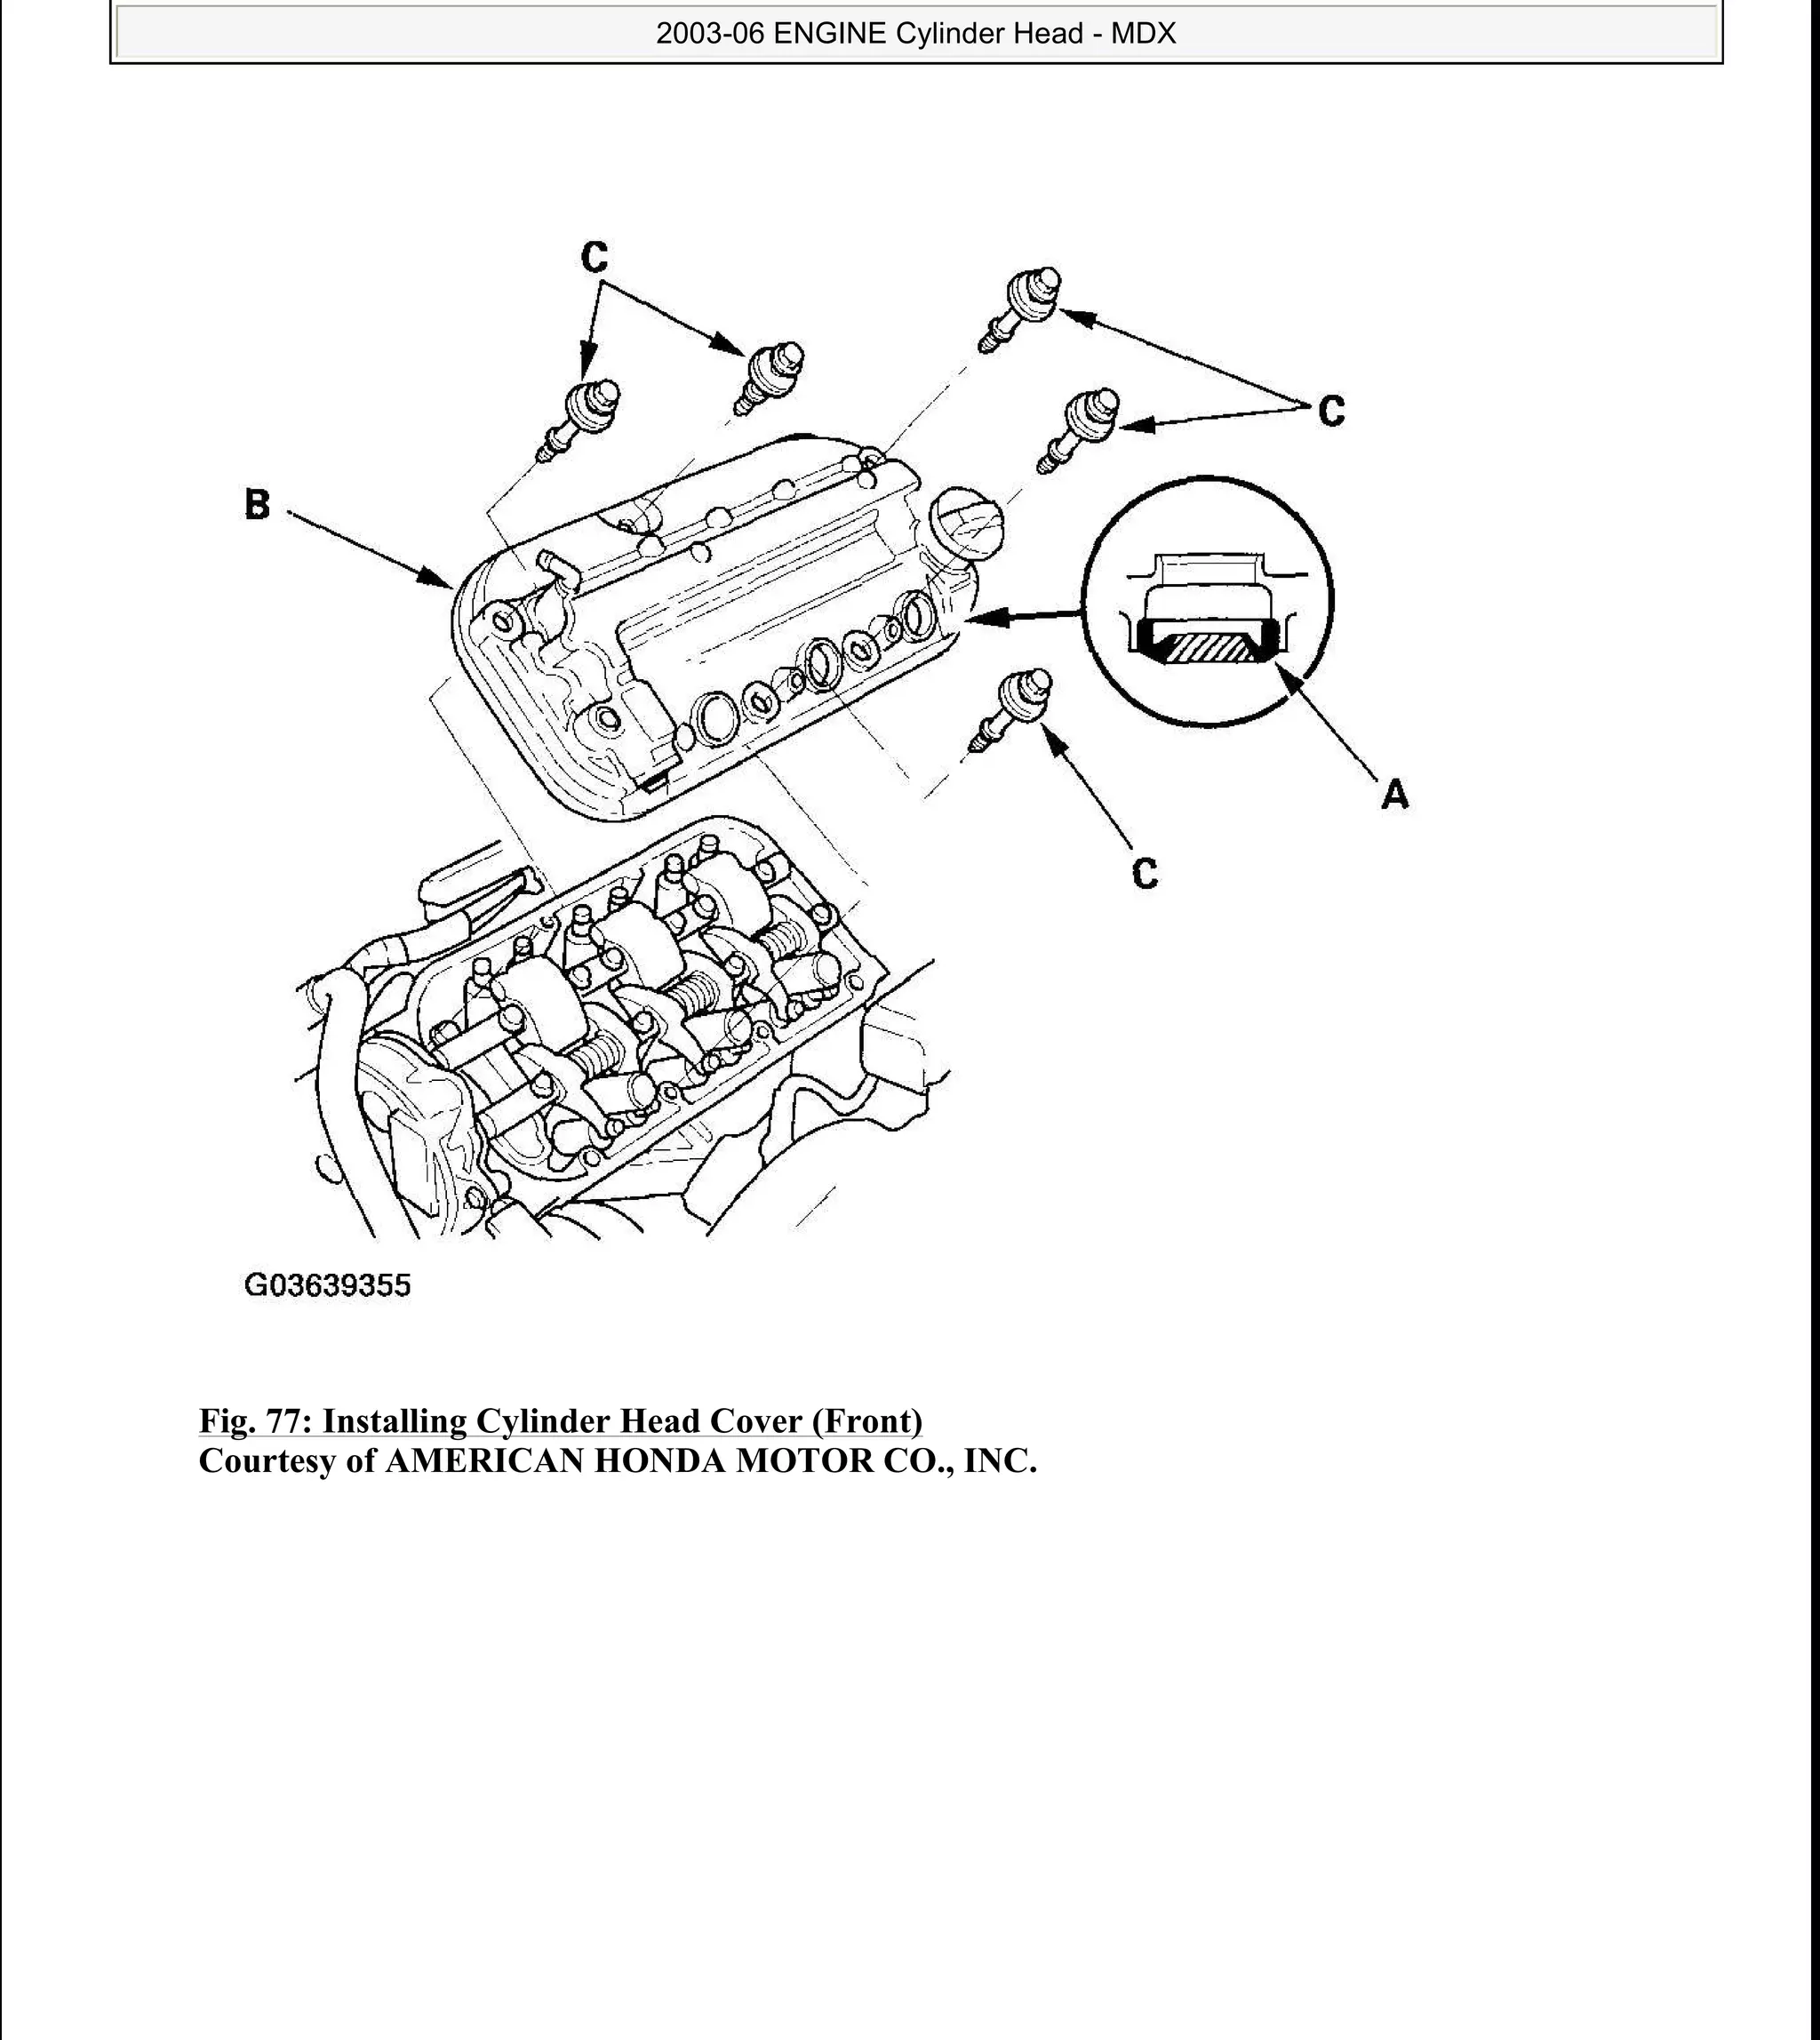
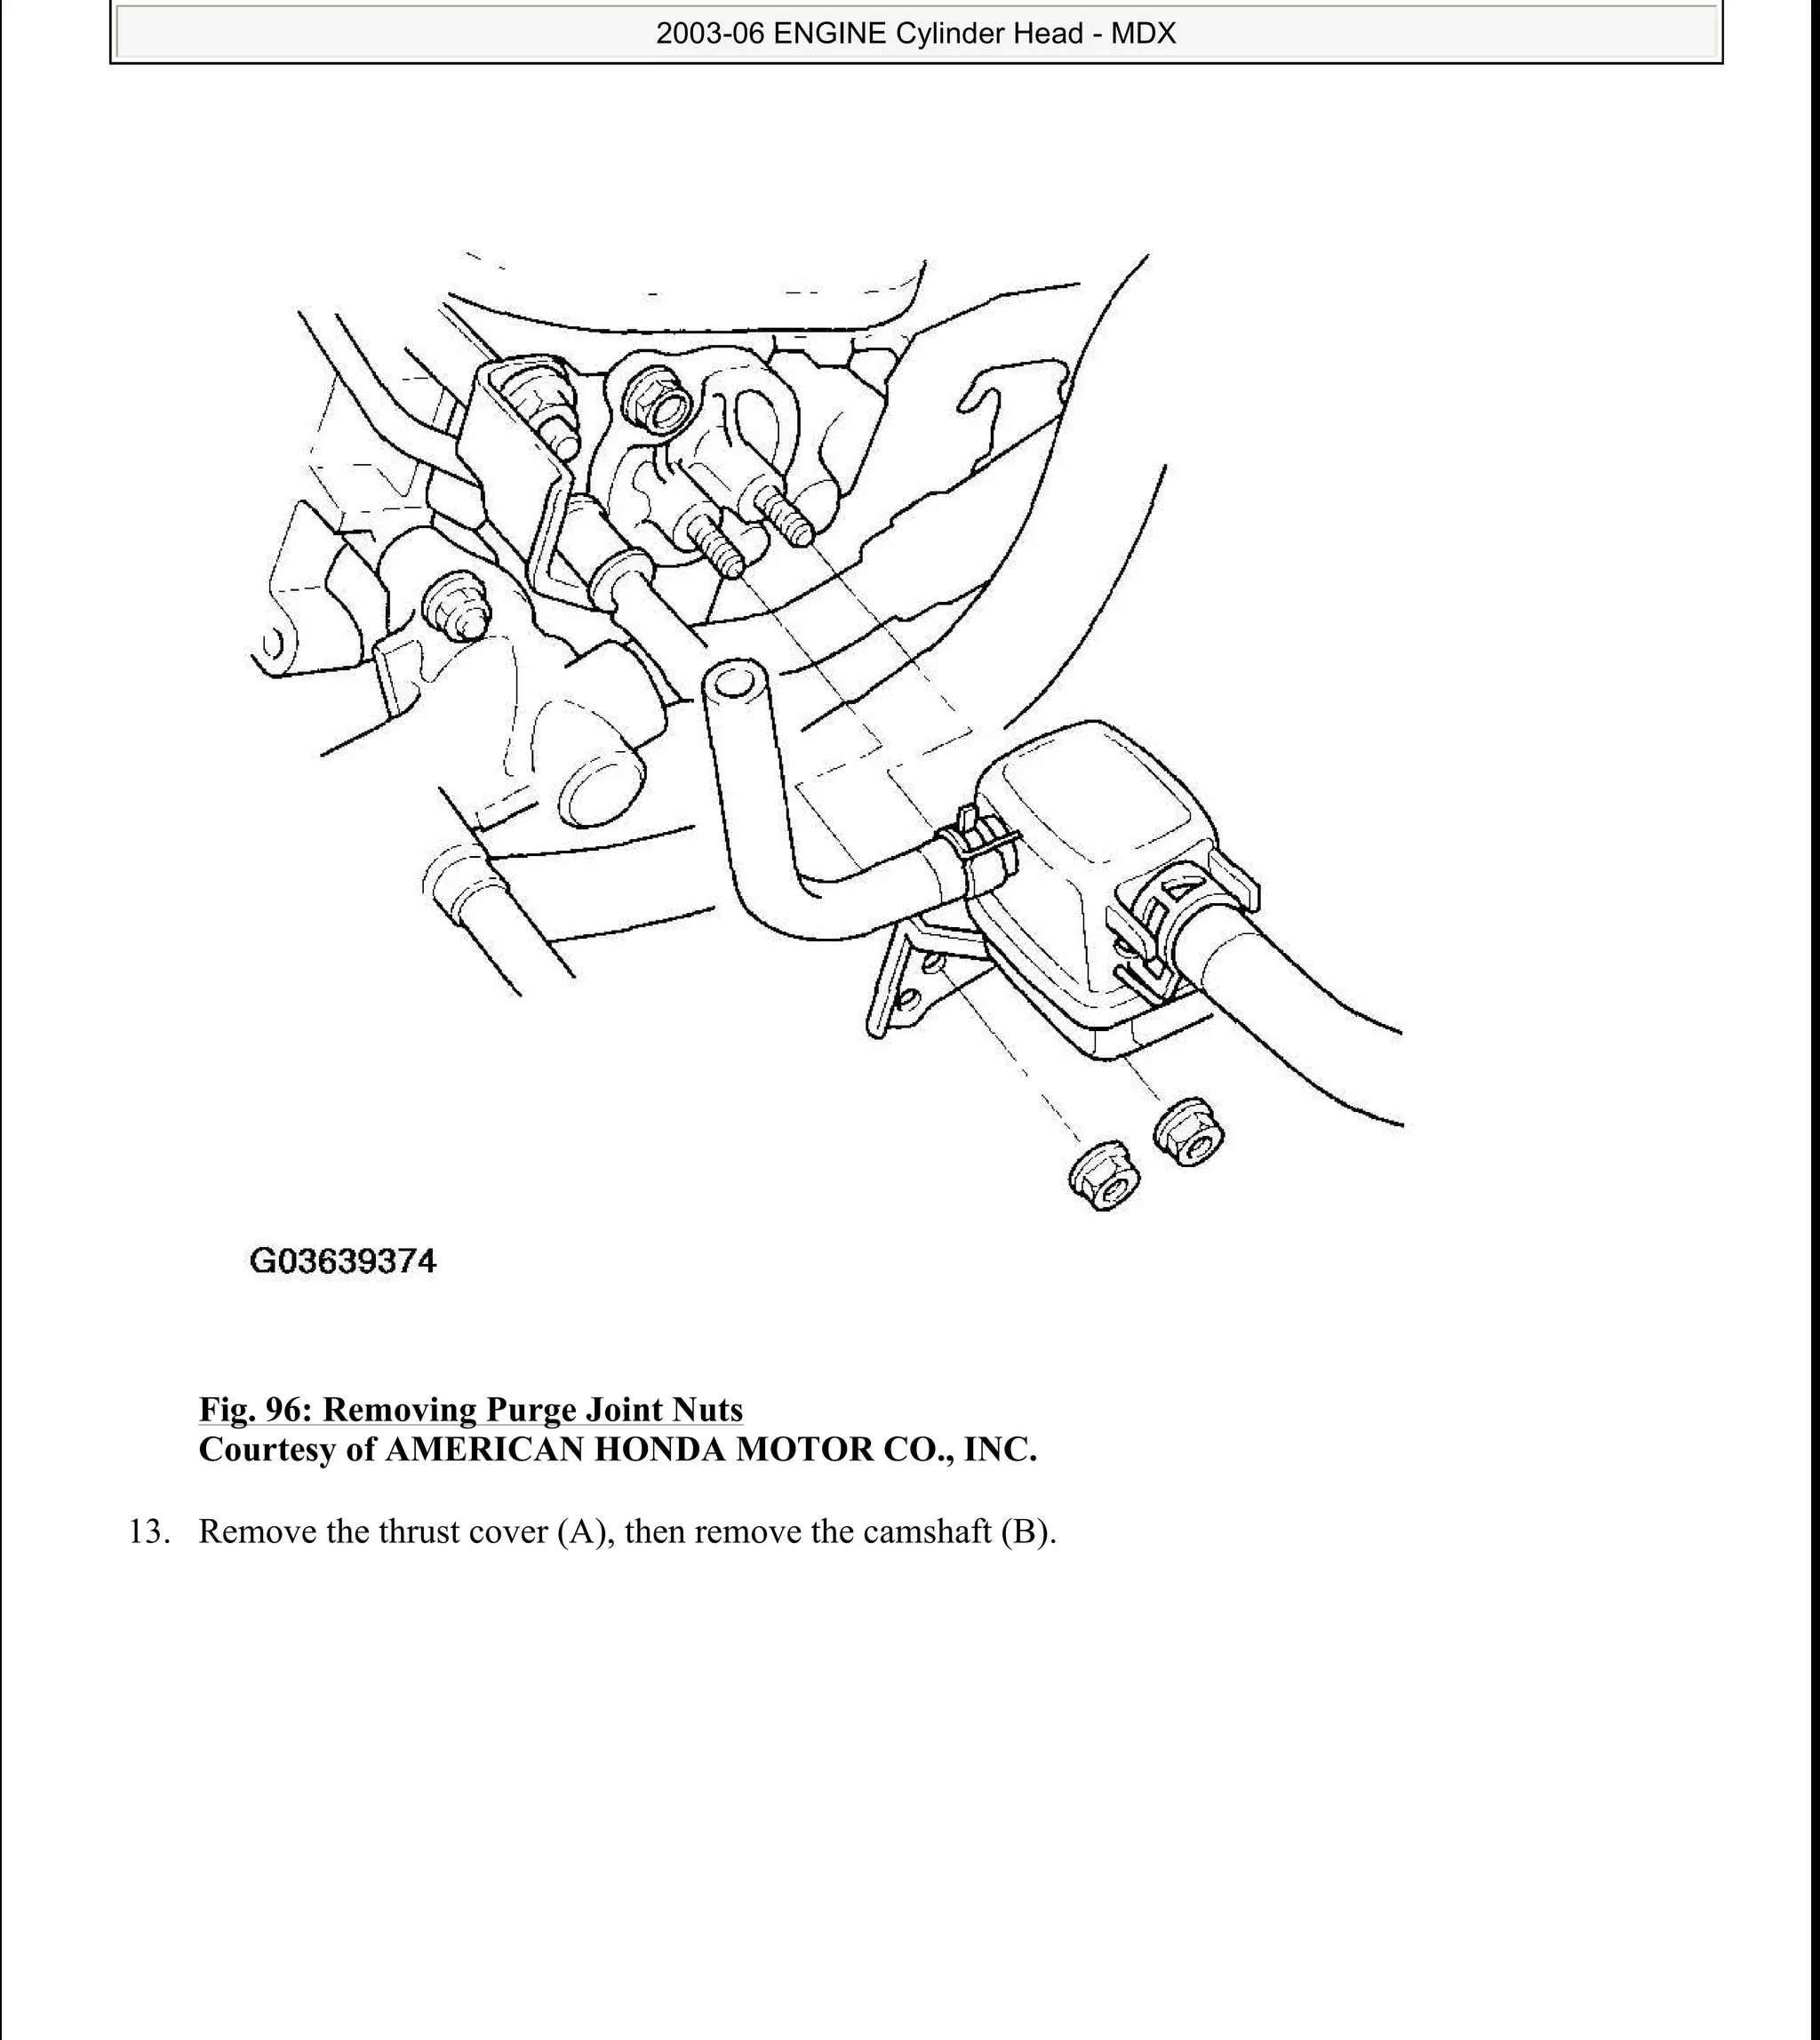
Steps for removing and installing the cylinder head cover, including necessary checks and tightening sequences.Comprehensive steps for removing the cylinder head including the disconnection of various components.Instructions for camshaft removal and installation including necessary steps to maintain vehicle systems post-installation.