탐색/분석 데이터확보
파일질라(FTP) 실행 > Server02 접속 > 파일 다운로드
- 다운로드 경로: /home/pilot-pjt/mahout-data/classification/input
- 다운로드 파일: classification_data.txt
- 다운로드 위치: D://data/
Step-1
파이썬 홖경 구성 및 실행
윈도우 시작 메뉴 > Anaconda Prompt 실행
> Activate py35
> conda install seaborn
> jupyter notebook
Step-2
Jupyter Notebook 생성
Jupyter Home > New > Python 3 실행
Step-3
7.
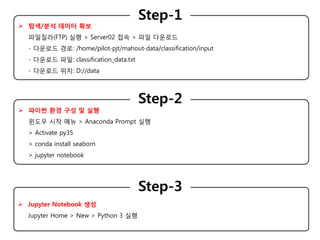
라이브러리 Import
importos.path
import pandas as pd
import numpy as np
import tensorflow as tf
import matplotlib.pyplot as plt
import matplotlib.gridspec as gridspec
import seaborn as sns
from sklearn import preprocessing
Step-4
분석 데이터 로드
df= pd.read_csv("D://data/classification_dataset.txt", names = ["sex", "age", "marriage", "region", "job",
"car_capacity", "car_year", "car_model", "tire_fl", "tire_fr", "tire_bl", "tire_br", "light_fl", "light_fr",
"light_bl", "light_br", "engine_s", "break_s", "battery_s", "result"])
df.head()
Step-5
미분석 항목 제외
df = df.drop(['sex','age','marriage','region','job','car_model'], axis =1)
df.head()
Step-6


![ 라이브러리 Import
import os.path
import pandas as pd
import numpy as np
import tensorflow as tf
import matplotlib.pyplot as plt
import matplotlib.gridspec as gridspec
import seaborn as sns
from sklearn import preprocessing
Step-4
분석 데이터 로드
df= pd.read_csv("D://data/classification_dataset.txt", names = ["sex", "age", "marriage", "region", "job",
"car_capacity", "car_year", "car_model", "tire_fl", "tire_fr", "tire_bl", "tire_br", "light_fl", "light_fr",
"light_bl", "light_br", "engine_s", "break_s", "battery_s", "result"])
df.head()
Step-5
미분석 항목 제외
df = df.drop(['sex','age','marriage','region','job','car_model'], axis =1)
df.head()
Step-6](https://image.slidesharecdn.com/12-180326154442/85/12-Application-Python-Pandas-7-320.jpg)
![ 레이블 변수값 변홖
df.loc[df.result == '비정상', 'result'] = 1
df.loc[df.result == '정상', 'result'] = 0
df.head()
Step-7
레이블 변수 탐색
print("# 비정상")
print(df.result[df.result ==1].describe())
print("====================================")
print("# 정상")
print(df.result[df.result ==0].describe())
Step-8
비정상 데이터 탐색
f, ax1 = plt.subplots(1, 1, sharex=True, figsize=(12,4))
ax1.hist(df.car_year[df.result == 1], bins = 50)
ax1.set_title('Bad Condition')
plt.ylabel('Number of Transactions')
plt.show()
Step-9](https://image.slidesharecdn.com/12-180326154442/85/12-Application-Python-Pandas-8-320.jpg)
![ 데이터 변홖 – 엔진/브레이크
df.loc[df.engine_s == 'A', 'engine_s'] = 0
df.loc[df.engine_s == 'B', 'engine_s'] = 50
df.loc[df.engine_s == 'C', 'engine_s'] = 100
df.loc[df.break_s == 'A', 'break_s'] = 0
df.loc[df.break_s == 'B', 'break_s'] = 50
df.loc[df.break_s == 'C', 'break_s'] = 100
Step-10
데이터 정규화
dValues = df.values
min_max_scaler = preprocessing.MinMaxScaler()
dValues_scaled = min_max_scaler.fit_transform(dValues )
df = pd.DataFrame(dValues_scaled , columns = [ "car_capacity", "car_year", "tire_fl", "tire_fr",
"tire_bl", "tire_br", "light_fl", "light_fr", "light_bl", "light_br", "engine_s", "break_s", "battery_s",
"result"] )
Step-11](https://image.slidesharecdn.com/12-180326154442/85/12-Application-Python-Pandas-9-320.jpg)
![ 영향도 낮은 변수 제외
df = df.drop(['tire_fl','tire_fr','tire_bl','tire_br','light_fl','light_fr','light_bl','light_br'], axis =1)
df.head()
Step-13
변수(피처)들의 영향도 파악
v_features = df.ix[:,0:13].columns
plt.figure(figsize=(12,28*4))
gs = gridspec.GridSpec(28, 1)
for i, cn in enumerate(df[v_features]):
ax = plt.subplot(gs[i])
sns.distplot(df[cn][df.result == 1], bins=50, color='red')
sns.distplot(df[cn][df.result == 0], bins=50 )
ax.set_xlabel('')
ax.set_title('histogram of feature: ' + str(cn))
plt.show()
Step-12
프로그램 저장
File > Rename > “12.Python&Pandas 활용”
Step-14](https://image.slidesharecdn.com/12-180326154442/85/12-Application-Python-Pandas-10-320.jpg)
![실무로 배우는 빅데이터 기술
확장하기 12편 – Python+Pandas 홗용
[ 강의자료 ]
동 영 상: 유튜브 www.youtube.com
실습문서: 슬라이드쉐어 www.slideshare.net](https://image.slidesharecdn.com/12-180326154442/85/12-Application-Python-Pandas-11-320.jpg)


![[Pgday.Seoul 2017] 7. PostgreSQL DB Tuning 기업사례 - 송춘자](https://cdn.slidesharecdn.com/ss_thumbnails/cjsongpostgresqldbtuningexam-20171102-171106043044-thumbnail.jpg?width=640&height=640&fit=bounds)

![[143] Modern C++ 무조건 써야 해?](https://cdn.slidesharecdn.com/ss_thumbnails/143deview2018modernc9-181011024146-thumbnail.jpg?width=640&height=640&fit=bounds)

![[Pgday.Seoul 2021] 1. 예제로 살펴보는 포스트그레스큐엘의 독특한 SQL](https://cdn.slidesharecdn.com/ss_thumbnails/sql-211217063145-thumbnail.jpg?width=640&height=640&fit=bounds)

![[Gpg2권]1.1 c++ 게임의 최적화](https://cdn.slidesharecdn.com/ss_thumbnails/gpg21-1c-110627045501-phpapp02-thumbnail.jpg?width=640&height=640&fit=bounds)

![[Pgday.Seoul 2020] SQL Tuning](https://cdn.slidesharecdn.com/ss_thumbnails/pgday-201117134901-thumbnail.jpg?width=640&height=640&fit=bounds)
![[1B4]안드로이드 동시성_프로그래밍](https://cdn.slidesharecdn.com/ss_thumbnails/1b4-140928080341-phpapp01-thumbnail.jpg?width=640&height=640&fit=bounds)
![[Pgday.Seoul 2017] 8. PostgreSQL 10 새기능 소개 - 김상기](https://cdn.slidesharecdn.com/ss_thumbnails/pgday-seoul-2017-pg10-new-features-171106041845-thumbnail.jpg?width=640&height=640&fit=bounds)


![[하코사세미나]미리보는 대규모 자바스크립트 어플리케이션 개발](https://cdn.slidesharecdn.com/ss_thumbnails/hacosakimsuho-151208014839-lva1-app6891-thumbnail.jpg?width=640&height=640&fit=bounds)


![[PyCon KR 2018] 땀내를 줄이는 Data와 Feature 다루기](https://cdn.slidesharecdn.com/ss_thumbnails/pyconkr2018joeunparksweat-180820041651-thumbnail.jpg?width=640&height=640&fit=bounds)


