SlideShare a Scribd company logo
instructables
10 Woodworking Tricks the Pros Use
by mikeasaurus
I'm always looking for shortcuts in my work, either to
save time or make my life easier. Over time, I've
come across a new way to do something I've done a
hundred times before and wonder why it never
occurred to me to find an easier way.
In an effort to share some of my experiences in the
shop, here are 10 woodworking tips that I've learned
from professionals or on my own. These tips are
simple yet effective ways to stay organized and
efficient when working with wood. If you have any of
your own tricks, share a picture of them in the
comments below and help out others. Be sure to
check out the second part I made based on some of
the responses in the comments, 10 MORE Woodwor
king Tricks the Pros Use.
I hope these woodworking tips help you in your next
project!
10 Woodworking Tricks the Pros Use: Page 1
Step 1: Wood Layout - Triangle Registration
When laying out wood pieces it's easy to get them
mixed up, especially when you've got multiple cuts of
a similar length. Numbering the pieces and where
they join is fine, but an even easier way is to use a
triangular shape. When the pieces are moved, you
can quickly visualize their position relative to each
other since there will only be one way that triangle
shape can be made when together.
Scribe a triangle onto your wood when they are laying
in the correct position, ensuring some part of the
triangle hits all the pieces you want to register with
each other. Using a straight edge makes this a quick
and easy method to keep even the most complex
glue-ups properly references.
Whether you've got boards laminated together in a
particular orientation, or just multiple pieces that need
to be in a specific place, the triangle registration mark
is a great tool to use.
10 Woodworking Tricks the Pros Use: Page 2
Step 2: Marking Cut Lines
When measuring material to be cut I find it helpful to
put a little tick mark of the side to cut on. This simple
action saves countless time remeasuring and helps
me account for kerf, the thickness of the blade you
are cutting with.
Kerf is the divergence between the left and right sides
of the saw teeth, and any cutting will result in some
loss of wood that is turned into sawdust. If you just
cut directly on the marked line the blade kerf would
eat into your measured piece, causing your cut to be
inaccurate. This may not seem like a big deal, but if
you've ever had a project be a 1/8" out of
measurement you know how frustrating this can be.
The solution is to measure your piece and make a
small tick to one side of the measured line, indicated
which side to cut on. Once measured, line your blade
up to the line with the blade on the ticked side, so that
the kerf will be on one side of the line and not into
your measured area. If you ever work with a buddy
and are dividing labor this is a great trick to keep
each other informed of the areas to cut.
I use this every time I mark cut lines, and it's a great
habit to fall into.
10 Woodworking Tricks the Pros Use: Page 3
Step 3: Straight Lines on Dowels
Making a straight line on a dowel is something that
comes up every so often and can appear to be a
tough task, despite all the fancy measuring tools you
may have at your disposal. However, the solution is
simple: just place the dowel into any straight slotted
surface. In the workshop, that can be the track of your
table saw and laying a pencil against the track and
dowel to create a line.
Don't have a table saw? Just use any door jamb or
casing. This trick can work on all kinds of cylindrical
objects you need a bisecting line on.
10 Woodworking Tricks the Pros Use: Page 4
Step 4: Story Stick
Making accurate measurements is important but
there's an easy way to cut down on repetitive
measurements by making a story stick, a measured
reference that can be easily made out of any squared
scrap laying around.
Story sticks are great because they can be as
specific as you need, are less cumbersome than a
tape measure, and once you have the measurement
marked there's no chance of a misread measurement.
Taking this concept further a story stick can also be
used from drilling holes a consistent distance from an
edge. Make a story stick as usual, but this time drill
an opening at the measured mark. Now your story
stick can be used as a drill guide.
10 Woodworking Tricks the Pros Use: Page 5
Step 5: Drill Depth
Not every hole that's drilled needs to be completely
though the material. Though setting up stops on a drill
press is easy enough, there are plenty of times when
using the press isn't the best tool for the job
(portability, size of material, etc.). Making a depth
marker for a handheld power drill is as easy as using
a piece of tape to mark the intended depth of that bit.
This is the same tip discussed in the Drilling Perfect
Holes lesson in the Woodworking Class.
10 Woodworking Tricks the Pros Use: Page 6
Step 6: Glue Cleanup
Glue is a great tool for lots of woodworking projects.
Applying glue is simple enough, but sometimes there
can be a bit of a mess. While the glue is still wet,
cleanup of glue squeeze-out is as simple as applying
sawdust to the glue and rubbing it around to absorb
the excess glue. This is a preferable method for glue
removal over a damp cloth or sponge, as moisture
can cause wood to swell.
Glue cleanup from your hands is even easier. If you
get any glue on your hands after your piece is secure
you can easily remove it by just rubbing your hands
together. Wet or still damp glue should just flake off.
10 Woodworking Tricks the Pros Use: Page 7
Step 7: Keep Slippery Glue-Ups Steady
Not every glue job going smoothly, and sometimes
wood pieces are want to slip apart when being
clamped together. This is especially true if you have
multiple pieces that are being glued together and
secured in a single clamp. An easy fix for this is
sprinkling a small amount of salt onto the glue before
clamping.
The salt crystal shape act like square wheels on a
car, preventing the pieces from sliding around. In the
above image I used too much salt for illustrative
purposes.
When clamping the salt is embedded into the wood
and is untraceable from the outside.
10 Woodworking Tricks the Pros Use: Page 8
Step 8: Wax Paper Cover
Accidentally gluing your work to the bench is a
mistake that usually only happens once. Keeping a
roll of wax or parchment paper under your glue-up will
not only keep your workbench clean by catching glue
drips, but will also prevent your work from sticking to
the bench while it's drying
Rather than use the serrated edge on the roll, I find it
easiest to unroll more wax paper than I think I'll need
and trim it to the specific shape once it's under the
work. A shop ruler works great for ripping a clean
edge on the wax paper.
10 Woodworking Tricks the Pros Use: Page 9
Step 9: Hold Glue-Ups Instantly
Sometimes a clamp just won't fit into where I need to
hold a piece during a glue-up, and sometimes I'm too
impatient to wait for the wood glue to set before
needing to move on to the next part of the build. In
cases like this, hot glue is a great crutch to use with
wood glue and hold the glue-up instantly.
Plug in your hot glue gun and let it come to
temperature before applying any wood glue. Once
your hot glue is ready, apply wood glue as usual but
leave small gaps every so often in the piece to be
glued.
Once your wood glue is applied add a squirt of hot
glue in the gaps of wood glue. Before the hot glue
has a chance to set, join the wood pieces together
and hold in place for a few seconds. The hot glue
bonds the two pieces together with enough strength
to keep working, and holding the wood in place until
the wood glue can take hold and make a stronger
bond.
10 Woodworking Tricks the Pros Use: Page 10
Step 10: Sandpaper Organization
I have all kinds of abrasive paper on hand, just in
case I need a specific grit or type. As such, my
sandpaper storage was a mess. Since almost all
sandpaper is the same size as printer paper, I keep it
all neatly organized in an inexpensive accordion-style
file folder.
I pulled all of my sandpaper out of it's packaging and
sorted it by grit. Each grit has it's own slot in the
folder, with the front pouch reserved for smaller
scraps of sandpaper.
Now my sandpaper is all in one place, and I can just
grab the folder and bring it to my work and have all
the sandpaper I could ever want.
Happy making! :)
Do you have your own woodworking tips that keep
you productive or organized? I want to see them!
Happy making :)
10 Woodworking Tricks the Pros Use: Page 11
FINAL STEP: Watch the Complete Video Presentation for Comprehensive Guide

More Related Content

Similar to 10 woodworking tricks use to achieve accurate and beautiful design

How To Simple Stamp For Fabric Printing
How To Simple Stamp For Fabric PrintingHow To Simple Stamp For Fabric Printing
How To Simple Stamp For Fabric Printingkootoyoo
 
Life hacks maharashtra today
Life hacks     maharashtra todayLife hacks     maharashtra today
Life hacks maharashtra today
marathitadkanewsnews
 
Life hacks maharashtra today
Life hacks     maharashtra todayLife hacks     maharashtra today
Life hacks maharashtra today
marathitadkanewsnews
 
Life hacks maharashtra today
Life hacks     maharashtra todayLife hacks     maharashtra today
Life hacks maharashtra today
marathitadkanewsnews
 
Life hacks maharashtra today
Life hacks     maharashtra todayLife hacks     maharashtra today
Life hacks maharashtra today
marathitadkanewsnews
 
Resin and wood crochet hooks
Resin and wood crochet hooksResin and wood crochet hooks
Resin and wood crochet hooks
jessica30251
 
Building giant articulated hands carved from wood
Building giant articulated hands carved from woodBuilding giant articulated hands carved from wood
Building giant articulated hands carved from wood
jessica30251
 
Bible miniworld-princess-baby-model
Bible miniworld-princess-baby-modelBible miniworld-princess-baby-model
Bible miniworld-princess-baby-modelSandra Fuso
 
Ten tipstocustomizeyourreelkit
Ten tipstocustomizeyourreelkitTen tipstocustomizeyourreelkit
Ten tipstocustomizeyourreelkit
Anibal Ruben Reyes
 
Woodworking - DIY- Veneering
Woodworking - DIY- VeneeringWoodworking - DIY- Veneering
Woodworking - DIY- Veneering
Ramón Vidal
 
What Equipment Is Required To Learn Easy Knitting?
What Equipment Is Required To Learn Easy Knitting?What Equipment Is Required To Learn Easy Knitting?
What Equipment Is Required To Learn Easy Knitting?
woodwriter
 
Using the lathe
Using the latheUsing the lathe
Using the latherickjames5
 
Using the lathe
Using the latheUsing the lathe
Using the lathe
rickjames5
 
Simple storage box
Simple storage boxSimple storage box
Simple storage box
jessica30251
 
Tying Bass Poppers Tool box
Tying Bass Poppers Tool boxTying Bass Poppers Tool box
Tying Bass Poppers Tool box
Fred Crisp
 
Handmade key grips
Handmade key gripsHandmade key grips
Handmade key grips
Mohammedi Smail
 
Diy frame to stretch canvas
Diy frame to stretch canvasDiy frame to stretch canvas
Diy frame to stretch canvas
jessica30251
 
How to Make Pearl Snap FastenerJewelry
How to Make Pearl Snap FastenerJewelryHow to Make Pearl Snap FastenerJewelry
How to Make Pearl Snap FastenerJewelry
The Beading Gem's Journal
 

Similar to 10 woodworking tricks use to achieve accurate and beautiful design (20)

Making a seiza meditation bench
Making a seiza meditation benchMaking a seiza meditation bench
Making a seiza meditation bench
 
How To Simple Stamp For Fabric Printing
How To Simple Stamp For Fabric PrintingHow To Simple Stamp For Fabric Printing
How To Simple Stamp For Fabric Printing
 
Life hacks maharashtra today
Life hacks     maharashtra todayLife hacks     maharashtra today
Life hacks maharashtra today
 
Life hacks maharashtra today
Life hacks     maharashtra todayLife hacks     maharashtra today
Life hacks maharashtra today
 
Life hacks maharashtra today
Life hacks     maharashtra todayLife hacks     maharashtra today
Life hacks maharashtra today
 
Life hacks maharashtra today
Life hacks     maharashtra todayLife hacks     maharashtra today
Life hacks maharashtra today
 
Resin and wood crochet hooks
Resin and wood crochet hooksResin and wood crochet hooks
Resin and wood crochet hooks
 
Building giant articulated hands carved from wood
Building giant articulated hands carved from woodBuilding giant articulated hands carved from wood
Building giant articulated hands carved from wood
 
Bible miniworld-princess-baby-model
Bible miniworld-princess-baby-modelBible miniworld-princess-baby-model
Bible miniworld-princess-baby-model
 
Ten tipstocustomizeyourreelkit
Ten tipstocustomizeyourreelkitTen tipstocustomizeyourreelkit
Ten tipstocustomizeyourreelkit
 
Woodworking - DIY- Veneering
Woodworking - DIY- VeneeringWoodworking - DIY- Veneering
Woodworking - DIY- Veneering
 
Veneering blogg
Veneering bloggVeneering blogg
Veneering blogg
 
What Equipment Is Required To Learn Easy Knitting?
What Equipment Is Required To Learn Easy Knitting?What Equipment Is Required To Learn Easy Knitting?
What Equipment Is Required To Learn Easy Knitting?
 
Using the lathe
Using the latheUsing the lathe
Using the lathe
 
Using the lathe
Using the latheUsing the lathe
Using the lathe
 
Simple storage box
Simple storage boxSimple storage box
Simple storage box
 
Tying Bass Poppers Tool box
Tying Bass Poppers Tool boxTying Bass Poppers Tool box
Tying Bass Poppers Tool box
 
Handmade key grips
Handmade key gripsHandmade key grips
Handmade key grips
 
Diy frame to stretch canvas
Diy frame to stretch canvasDiy frame to stretch canvas
Diy frame to stretch canvas
 
How to Make Pearl Snap FastenerJewelry
How to Make Pearl Snap FastenerJewelryHow to Make Pearl Snap FastenerJewelry
How to Make Pearl Snap FastenerJewelry
 

Recently uploaded

Get To Know About Salma Karina Hayat.pdf
Get To Know About Salma Karina Hayat.pdfGet To Know About Salma Karina Hayat.pdf
Get To Know About Salma Karina Hayat.pdf
Salma Karina Hayat
 
Dining Tables and Chairs | Furniture Store in Sarasota, Florida
Dining Tables and Chairs | Furniture Store in Sarasota, FloridaDining Tables and Chairs | Furniture Store in Sarasota, Florida
Dining Tables and Chairs | Furniture Store in Sarasota, Florida
The Sarasota Collection Home Store
 
Create a spend money transaction during bank reconciliation.pdf
Create a spend money transaction during bank reconciliation.pdfCreate a spend money transaction during bank reconciliation.pdf
Create a spend money transaction during bank reconciliation.pdf
andreakaterasco
 
Textile Chemical Brochure - Tradeasia (1).pdf
Textile Chemical Brochure - Tradeasia (1).pdfTextile Chemical Brochure - Tradeasia (1).pdf
Textile Chemical Brochure - Tradeasia (1).pdf
jeffmilton96
 
Office Furniture | Furniture Store in Sarasota, Florida | Sarasota Collection
Office Furniture | Furniture Store in Sarasota, Florida | Sarasota CollectionOffice Furniture | Furniture Store in Sarasota, Florida | Sarasota Collection
Office Furniture | Furniture Store in Sarasota, Florida | Sarasota Collection
The Sarasota Collection Home Store
 
Showcase Portfolio- Marian Andrea Tana.pdf
Showcase Portfolio- Marian Andrea Tana.pdfShowcase Portfolio- Marian Andrea Tana.pdf
Showcase Portfolio- Marian Andrea Tana.pdf
MarianAndreaSTana
 
How To Leak-Proof Your Magazine Business
How To Leak-Proof Your Magazine BusinessHow To Leak-Proof Your Magazine Business
How To Leak-Proof Your Magazine Business
Charlie McDermott
 
Best Crypto Marketing Ideas to Lead Your Project to Success
Best Crypto Marketing Ideas to Lead Your Project to SuccessBest Crypto Marketing Ideas to Lead Your Project to Success
Best Crypto Marketing Ideas to Lead Your Project to Success
Intelisync
 
Web Technology LAB MANUAL for Undergraduate Programs
Web Technology  LAB MANUAL for Undergraduate ProgramsWeb Technology  LAB MANUAL for Undergraduate Programs
Web Technology LAB MANUAL for Undergraduate Programs
Chandrakant Divate
 
Michael Economou - Don't build a marketplace.pdf
Michael Economou - Don't build a marketplace.pdfMichael Economou - Don't build a marketplace.pdf
Michael Economou - Don't build a marketplace.pdf
Michael Oikonomou
 
How to Build a Diversified Investment Portfolio.pdf
How to Build a Diversified Investment Portfolio.pdfHow to Build a Diversified Investment Portfolio.pdf
How to Build a Diversified Investment Portfolio.pdf
Trims Creators
 

Recently uploaded (11)

Get To Know About Salma Karina Hayat.pdf
Get To Know About Salma Karina Hayat.pdfGet To Know About Salma Karina Hayat.pdf
Get To Know About Salma Karina Hayat.pdf
 
Dining Tables and Chairs | Furniture Store in Sarasota, Florida
Dining Tables and Chairs | Furniture Store in Sarasota, FloridaDining Tables and Chairs | Furniture Store in Sarasota, Florida
Dining Tables and Chairs | Furniture Store in Sarasota, Florida
 
Create a spend money transaction during bank reconciliation.pdf
Create a spend money transaction during bank reconciliation.pdfCreate a spend money transaction during bank reconciliation.pdf
Create a spend money transaction during bank reconciliation.pdf
 
Textile Chemical Brochure - Tradeasia (1).pdf
Textile Chemical Brochure - Tradeasia (1).pdfTextile Chemical Brochure - Tradeasia (1).pdf
Textile Chemical Brochure - Tradeasia (1).pdf
 
Office Furniture | Furniture Store in Sarasota, Florida | Sarasota Collection
Office Furniture | Furniture Store in Sarasota, Florida | Sarasota CollectionOffice Furniture | Furniture Store in Sarasota, Florida | Sarasota Collection
Office Furniture | Furniture Store in Sarasota, Florida | Sarasota Collection
 
Showcase Portfolio- Marian Andrea Tana.pdf
Showcase Portfolio- Marian Andrea Tana.pdfShowcase Portfolio- Marian Andrea Tana.pdf
Showcase Portfolio- Marian Andrea Tana.pdf
 
How To Leak-Proof Your Magazine Business
How To Leak-Proof Your Magazine BusinessHow To Leak-Proof Your Magazine Business
How To Leak-Proof Your Magazine Business
 
Best Crypto Marketing Ideas to Lead Your Project to Success
Best Crypto Marketing Ideas to Lead Your Project to SuccessBest Crypto Marketing Ideas to Lead Your Project to Success
Best Crypto Marketing Ideas to Lead Your Project to Success
 
Web Technology LAB MANUAL for Undergraduate Programs
Web Technology  LAB MANUAL for Undergraduate ProgramsWeb Technology  LAB MANUAL for Undergraduate Programs
Web Technology LAB MANUAL for Undergraduate Programs
 
Michael Economou - Don't build a marketplace.pdf
Michael Economou - Don't build a marketplace.pdfMichael Economou - Don't build a marketplace.pdf
Michael Economou - Don't build a marketplace.pdf
 
How to Build a Diversified Investment Portfolio.pdf
How to Build a Diversified Investment Portfolio.pdfHow to Build a Diversified Investment Portfolio.pdf
How to Build a Diversified Investment Portfolio.pdf
 

10 woodworking tricks use to achieve accurate and beautiful design

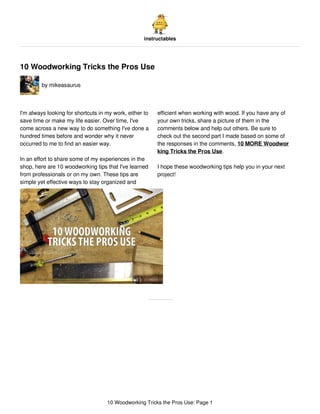
  • 1. instructables 10 Woodworking Tricks the Pros Use by mikeasaurus I'm always looking for shortcuts in my work, either to save time or make my life easier. Over time, I've come across a new way to do something I've done a hundred times before and wonder why it never occurred to me to find an easier way. In an effort to share some of my experiences in the shop, here are 10 woodworking tips that I've learned from professionals or on my own. These tips are simple yet effective ways to stay organized and efficient when working with wood. If you have any of your own tricks, share a picture of them in the comments below and help out others. Be sure to check out the second part I made based on some of the responses in the comments, 10 MORE Woodwor king Tricks the Pros Use. I hope these woodworking tips help you in your next project! 10 Woodworking Tricks the Pros Use: Page 1
  • 2. Step 1: Wood Layout - Triangle Registration When laying out wood pieces it's easy to get them mixed up, especially when you've got multiple cuts of a similar length. Numbering the pieces and where they join is fine, but an even easier way is to use a triangular shape. When the pieces are moved, you can quickly visualize their position relative to each other since there will only be one way that triangle shape can be made when together. Scribe a triangle onto your wood when they are laying in the correct position, ensuring some part of the triangle hits all the pieces you want to register with each other. Using a straight edge makes this a quick and easy method to keep even the most complex glue-ups properly references. Whether you've got boards laminated together in a particular orientation, or just multiple pieces that need to be in a specific place, the triangle registration mark is a great tool to use. 10 Woodworking Tricks the Pros Use: Page 2
  • 3. Step 2: Marking Cut Lines When measuring material to be cut I find it helpful to put a little tick mark of the side to cut on. This simple action saves countless time remeasuring and helps me account for kerf, the thickness of the blade you are cutting with. Kerf is the divergence between the left and right sides of the saw teeth, and any cutting will result in some loss of wood that is turned into sawdust. If you just cut directly on the marked line the blade kerf would eat into your measured piece, causing your cut to be inaccurate. This may not seem like a big deal, but if you've ever had a project be a 1/8" out of measurement you know how frustrating this can be. The solution is to measure your piece and make a small tick to one side of the measured line, indicated which side to cut on. Once measured, line your blade up to the line with the blade on the ticked side, so that the kerf will be on one side of the line and not into your measured area. If you ever work with a buddy and are dividing labor this is a great trick to keep each other informed of the areas to cut. I use this every time I mark cut lines, and it's a great habit to fall into. 10 Woodworking Tricks the Pros Use: Page 3
  • 4. Step 3: Straight Lines on Dowels Making a straight line on a dowel is something that comes up every so often and can appear to be a tough task, despite all the fancy measuring tools you may have at your disposal. However, the solution is simple: just place the dowel into any straight slotted surface. In the workshop, that can be the track of your table saw and laying a pencil against the track and dowel to create a line. Don't have a table saw? Just use any door jamb or casing. This trick can work on all kinds of cylindrical objects you need a bisecting line on. 10 Woodworking Tricks the Pros Use: Page 4
  • 5. Step 4: Story Stick Making accurate measurements is important but there's an easy way to cut down on repetitive measurements by making a story stick, a measured reference that can be easily made out of any squared scrap laying around. Story sticks are great because they can be as specific as you need, are less cumbersome than a tape measure, and once you have the measurement marked there's no chance of a misread measurement. Taking this concept further a story stick can also be used from drilling holes a consistent distance from an edge. Make a story stick as usual, but this time drill an opening at the measured mark. Now your story stick can be used as a drill guide. 10 Woodworking Tricks the Pros Use: Page 5
  • 6. Step 5: Drill Depth Not every hole that's drilled needs to be completely though the material. Though setting up stops on a drill press is easy enough, there are plenty of times when using the press isn't the best tool for the job (portability, size of material, etc.). Making a depth marker for a handheld power drill is as easy as using a piece of tape to mark the intended depth of that bit. This is the same tip discussed in the Drilling Perfect Holes lesson in the Woodworking Class. 10 Woodworking Tricks the Pros Use: Page 6
  • 7. Step 6: Glue Cleanup Glue is a great tool for lots of woodworking projects. Applying glue is simple enough, but sometimes there can be a bit of a mess. While the glue is still wet, cleanup of glue squeeze-out is as simple as applying sawdust to the glue and rubbing it around to absorb the excess glue. This is a preferable method for glue removal over a damp cloth or sponge, as moisture can cause wood to swell. Glue cleanup from your hands is even easier. If you get any glue on your hands after your piece is secure you can easily remove it by just rubbing your hands together. Wet or still damp glue should just flake off. 10 Woodworking Tricks the Pros Use: Page 7
  • 8. Step 7: Keep Slippery Glue-Ups Steady Not every glue job going smoothly, and sometimes wood pieces are want to slip apart when being clamped together. This is especially true if you have multiple pieces that are being glued together and secured in a single clamp. An easy fix for this is sprinkling a small amount of salt onto the glue before clamping. The salt crystal shape act like square wheels on a car, preventing the pieces from sliding around. In the above image I used too much salt for illustrative purposes. When clamping the salt is embedded into the wood and is untraceable from the outside. 10 Woodworking Tricks the Pros Use: Page 8
  • 9. Step 8: Wax Paper Cover Accidentally gluing your work to the bench is a mistake that usually only happens once. Keeping a roll of wax or parchment paper under your glue-up will not only keep your workbench clean by catching glue drips, but will also prevent your work from sticking to the bench while it's drying Rather than use the serrated edge on the roll, I find it easiest to unroll more wax paper than I think I'll need and trim it to the specific shape once it's under the work. A shop ruler works great for ripping a clean edge on the wax paper. 10 Woodworking Tricks the Pros Use: Page 9
  • 10. Step 9: Hold Glue-Ups Instantly Sometimes a clamp just won't fit into where I need to hold a piece during a glue-up, and sometimes I'm too impatient to wait for the wood glue to set before needing to move on to the next part of the build. In cases like this, hot glue is a great crutch to use with wood glue and hold the glue-up instantly. Plug in your hot glue gun and let it come to temperature before applying any wood glue. Once your hot glue is ready, apply wood glue as usual but leave small gaps every so often in the piece to be glued. Once your wood glue is applied add a squirt of hot glue in the gaps of wood glue. Before the hot glue has a chance to set, join the wood pieces together and hold in place for a few seconds. The hot glue bonds the two pieces together with enough strength to keep working, and holding the wood in place until the wood glue can take hold and make a stronger bond. 10 Woodworking Tricks the Pros Use: Page 10
  • 11. Step 10: Sandpaper Organization I have all kinds of abrasive paper on hand, just in case I need a specific grit or type. As such, my sandpaper storage was a mess. Since almost all sandpaper is the same size as printer paper, I keep it all neatly organized in an inexpensive accordion-style file folder. I pulled all of my sandpaper out of it's packaging and sorted it by grit. Each grit has it's own slot in the folder, with the front pouch reserved for smaller scraps of sandpaper. Now my sandpaper is all in one place, and I can just grab the folder and bring it to my work and have all the sandpaper I could ever want. Happy making! :) Do you have your own woodworking tips that keep you productive or organized? I want to see them! Happy making :) 10 Woodworking Tricks the Pros Use: Page 11
  • 12. FINAL STEP: Watch the Complete Video Presentation for Comprehensive Guide