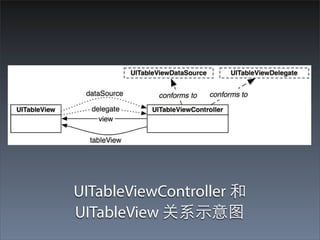
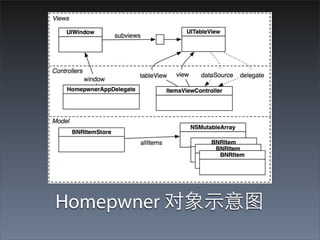
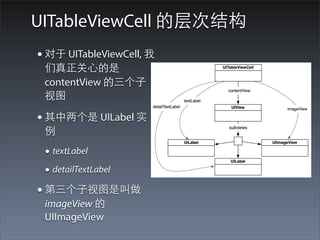
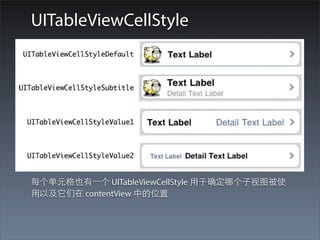
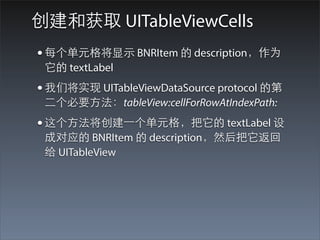
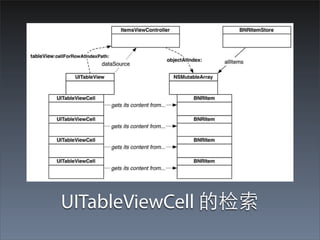
本文件介绍了如何使用 UITableView 和 UITableViewController 构建库存管理应用 Homepwner,涵盖了视图控制器的基本结构、数据源和委托以及如何实现单例模式来管理 BNRItem 实例的存储。此外,描述了UITableViewCell的创建和复用,展示如何将 BNRItem 的描述显示在 UITableView 中的每一行。


![- (id)init
{
// 调⽤用超类的 designated initializer
self = [super initWithStyle:UITableViewStyleGrouped];
if (self) {
}
return self;
}
- (id)initWithStyle:(UITableViewStyle)style
{
return [self init];
}
• 这就确保了不管发送什么初始化消息给
ItemsViewController, 所有的 ItemsViewController
的实例都使⽤用 UITableViewStyleGrouped 样式。](https://image.slidesharecdn.com/09uitableviewanduitableviewcontroller-121101231925-phpapp01/85/09-UITableView-and-UITableViewController-9-320.jpg)
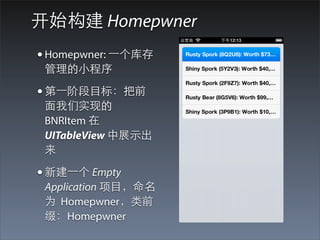
![• 打开 HomepwnerAppDelegate.m, 在
application:didFinishLaunchingWithOptions: 中,
创建⼀一个 ItemsViewController 的实例并把它设成
window 的 rootViewController
• 确保在⽂文件顶部导⼊入 ItemsViewController 头⽂文件
#import "ItemsViewController.h"
@implementation HomepwnerAppDelegate
- (BOOL)application:(UIApplication *)application didFinishLaunchingWithOptions:
(NSDictionary *)launchOptions
{
self.window = [[UIWindow alloc] initWithFrame:[[UIScreen mainScreen] bounds]];
// Override point for customization after application launch.
ItemsViewController *ivc = [[ItemsViewController alloc] init];
[[self window] setRootViewController:ivc];
self.window.backgroundColor = [UIColor whiteColor];
[self.window makeKeyAndVisible];
return YES;
}](https://image.slidesharecdn.com/09uitableviewanduitableviewcontroller-121101231925-phpapp01/85/09-UITableView-and-UITableViewController-10-320.jpg)
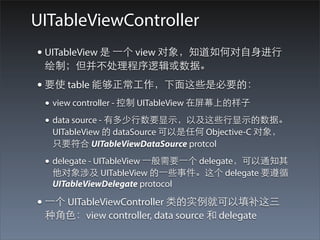
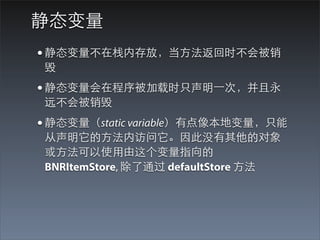
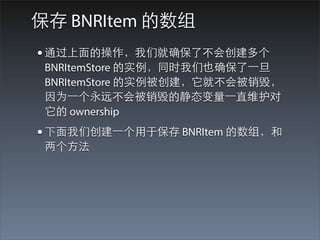
![创建 BNRItemStore
• 创建⼀一个新的 NSObject 的⼦子类,命名:
BNRItemStore
• 增加⼀一个类⽅方法:defaultStore: ,实现单例模式
#import <Foundation/Foundation.h>
@interface BNRItemStore : NSObject
// 增加⼀一个类⽅方法,前缀 +
+ (BNRItemStore *)defaultStore;
@end
+ (BNRItemStore *)defaultStore
{
static BNRItemStore *defaultStore = nil;
if (!defaultStore) {
defaultStore = [[super allocWithZone:nil] init];
}
return defaultStore;
}](https://image.slidesharecdn.com/09uitableviewanduitableviewcontroller-121101231925-phpapp01/85/09-UITableView-and-UITableViewController-16-320.jpg)
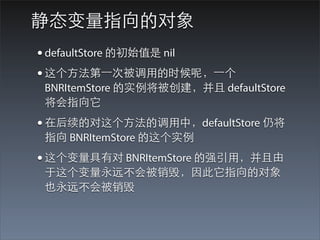
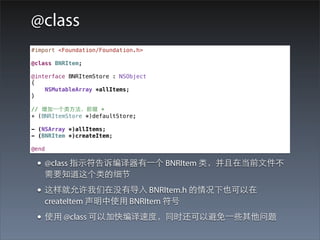
![重写 initWithZone:
// zone 参数在 Objective-C ⾥里⾯面是没有⽤用的,忽略即可
+ (id)allocWithZone:(NSZone *)zone
{
return [self defaultStore];
}
• 调⽤用 NSObject 的 allocWithZone: 实现, ⽽而不是⾃自⾝身
的 allocWithZone:
• defaultStore = [[super allocWithZone:nil] init];](https://image.slidesharecdn.com/09uitableviewanduitableviewcontroller-121101231925-phpapp01/85/09-UITableView-and-UITableViewController-20-320.jpg)

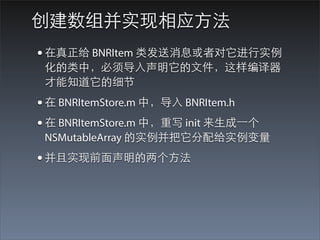
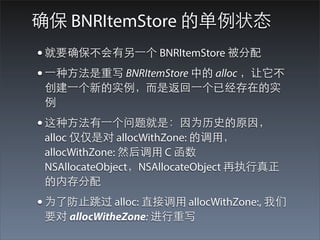
![代码
#import "BNRItemStore.h"
// 导⼊入 BNRItem 头⽂文件
#import "BNRItem.h"
@implementation BNRItemStore
- (id)init
{
self = [super init];
if (self) {
allItems = [[NSMutableArray alloc] init];
}
return self;
}
- (NSArray *)allItems
{
return allItems;
}
- (BNRItem *)createItem
{
BNRItem *p = [BNRItem randomItem];
[allItems addObject:p];
return p;
}](https://image.slidesharecdn.com/09uitableviewanduitableviewcontroller-121101231925-phpapp01/85/09-UITableView-and-UITableViewController-26-320.jpg)


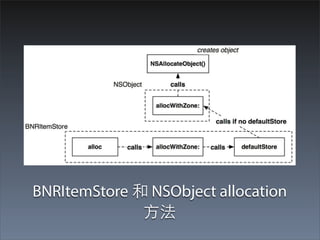
![在 designated initializer 中增加5个随机条⺫⽬目到
BNRItemStore
#import "ItemsViewController.h"
#import "BNRItemStore.h"
#import "BNRItem.h"
@implementation ItemsViewController
- (id)init
{
self = [super initWithStyle:UITableViewStyleGrouped];
if (self) {
for (int i = 0; i < 5; i++) {
[[BNRItemStore defaultStore] createItem];
}
}
return self;
}](https://image.slidesharecdn.com/09uitableviewanduitableviewcontroller-121101231925-phpapp01/85/09-UITableView-and-UITableViewController-29-320.jpg)
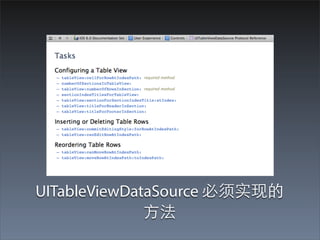
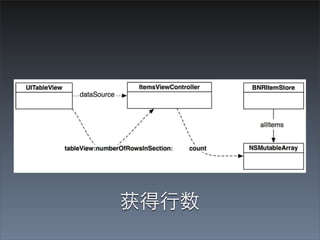
![tableView:numberOfRowsInSection:
- (NSInteger)tableView:(UITableView *)tableView numberOfRowsInSection:(NSInteger)section
{
return [[[BNRItemStore defaultStore] allItems] count];
}
• 第⼆二个必须要实现的⽅方法是:
tableView:cellForRowAtIndexPath:
• 要实现这个⽅方法,我们要先了解另外⼀一个类 -
UITableViewCell](https://image.slidesharecdn.com/09uitableviewanduitableviewcontroller-121101231925-phpapp01/85/09-UITableView-and-UITableViewController-32-320.jpg)
![实现单元格的获取
- (UITableViewCell *)tableView:(UITableView *)tableView
cellForRowAtIndexPath:(NSIndexPath *)indexPath
{
// 使⽤用默认的外观⽣生成⼀一个 UITableViewCell 的实例
UITableViewCell *cell = [[UITableViewCell alloc]
initWithStyle:UITableViewCellStyleDefault
reuseIdentifier:@"UITableViewCell"];
// 使⽤用 item 的 description 设置单元格的⽂文本
BNRItem *p = [[[BNRItemStore defaultStore] allItems]
objectAtIndex:[indexPath row]];
[[cell textLabel] setText:[p description]];
return cell;
}
• tableView:cellForRowAtIndexPath: 的⼀一个参数是
NSIndexPath, 它具有两个属性:section 和 row
• 因为我们只有⼀一个section,我们就让第 n ⾏行显⽰示
allItems 数组中的第 n 条记录](https://image.slidesharecdn.com/09uitableviewanduitableviewcontroller-121101231925-phpapp01/85/09-UITableView-and-UITableViewController-40-320.jpg)
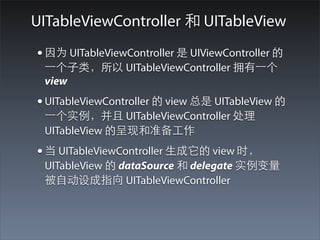
![单元格复⽤用的实现
- (UITableViewCell *)tableView:(UITableView *)tableView cellForRowAtIndexPath:
(NSIndexPath *)indexPath
{
// ⾸首先检查是否有可以重⽤用的单元格,如果存在的化就使⽤用
UITableViewCell *cell = [tableView
dequeueReusableCellWithIdentifier:@"UITableViewCell"];
if (!cell) {
cell = [[UITableViewCell alloc] initWithStyle:UITableViewCellStyleDefault
reuseIdentifier:@"UITableViewCell"];
}
// 使⽤用 item 的 description 设置单元格的⽂文本
BNRItem *p = [[[BNRItemStore defaultStore] allItems]
objectAtIndex:[indexPath row]];
[[cell textLabel] setText:[p description]];
return cell;
}](https://image.slidesharecdn.com/09uitableviewanduitableviewcontroller-121101231925-phpapp01/85/09-UITableView-and-UITableViewController-42-320.jpg)


