3D Vectoring Lift Injection Technique Guidelines
•
13 likes•8,418 views

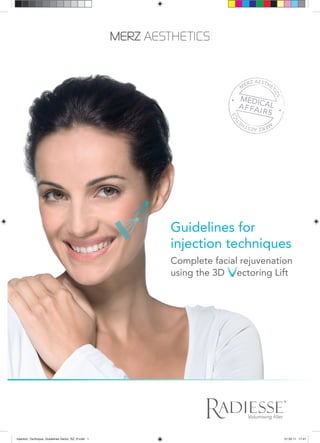
Guidelines for Radiesse Vectoring injection techniques Complete facial rejuvenation using the 3D vectoring Lift

Recommended
More Related Content
What's hot
What's hot (20)
Viewers also liked
Viewers also liked (10)
Similar to 3D Vectoring Lift Injection Technique Guidelines
Similar to 3D Vectoring Lift Injection Technique Guidelines (20)
More from Dr. Patrick J. Treacy
More from Dr. Patrick J. Treacy (20)
Recently uploaded
Recently uploaded (20)
3D Vectoring Lift Injection Technique Guidelines
- 1. ® Guidelines for injection techniques Complete facial rejuvenation using the 3D ectoring Lift Injection_Technique_Guidelines Vector_RZ_R.indd 1Injection_Technique_Guidelines Vector_RZ_R.indd 1 21.03.11 17:4121.03.11 17:41
- 2. ® Fixed areas Mobile areas F1 M2 F3 THE AGEING PROCESS AND TISSUE MOBILITY The human face does not age uniformly. We can distinguish fixed areas and mobile areas: 1. Fixed areas (F1 and F3): Fixed areas of the face will mostly stay in position. They preserve the identity of the person. They function like anchor points for the skin and the muscles. Also the supporting ligaments provide extra structural support. 2. Mobile areas (M2): In between the fixed areas of the face, we find mobile areas more subject to gravity. Tissue mobility is greater in the medial areas (central zone). The most important are the facial fat compartments that gradually get more separated and displaced. Volume loss also adds to the ageing process. Other factors of ageing include sagging skin and laxity in the facial ligaments. FAT COMPARTMENTS Facial fat was once thought to be a confluent mass that was eventually weighed down by gravity, creating sagging skin, wrinkles and sulci. Actually we have facial fat compartments. Fat composition varies from compartment to compartment: More dense and less mobile as you approach the pre-auricular or lateral cheek aspects. Midline of the two sides of the face is just the opposite: fat is less dense and tissue has the greatest mobility. Facial ageing is, in part, characterised by how these separate compartments change as we grow older. Injection_Technique_Guidelines Vector_RZ_R.indd 2Injection_Technique_Guidelines Vector_RZ_R.indd 2 21.03.11 17:4121.03.11 17:41
- 3. 2 Dimensional (2D) Surgical Rejuvenation Lateral lift Vertical lift 3 Dimensional (3D) Facial Vectors for Rejuvenation Lateral lift Vertical lift Volume (projection) 1 2 3 4 ® RETAINING LIGAMENTS The retaining ligaments of the mid-lateral face maintain the skin in its normal anatomic position, but they become less tight during the ageing process. 1 Orbital retaining/malar ligaments = responsible for malar mounds 2 Zygomatic ligaments = responsible for mid cheek ptosis (creation of nasolabial folds) 3 Masseter-cutaneous ligaments = responsible for cheek hollows, marionette lines, oral commissures 4 Mental ligaments = responsible for pre-jowl sulcus WHAT IS A 3D VECTOR? The changes in the face due to ageing can be denoted as the “negative vectors of ageing”: A vector is a quantity with a certain (negative) direction and magnitude. They can be visualised by a line or an arrow pointing downwards and inwards to show the direction of the facial changes. Since they have an anatomic basis, they are predictable and common to all individuals. Since volume loss contributes to the ageing process, we speak about three dimensional (3D) negative vectors: Lateral tissue ptosis Vertical tissue ptosis Volume loss The correction of these vectors in reverse direction (positive vectors) requires from the practitioner a comprehensive vector and volume analysis: Just augmenting lines or folds does not address the underlying issues of fat displacement. Objective of treatment should be to restore each fat compartment to its original position, providing a lateral and vertical lift; and providing a 3D-correction by the restoration of volume loss: The displacement of soft tissue (negative vector) that occurs under the influence of gravity is conditional on laxity being present. Correction of laxity in the vector of displacement (positive vector) nullifies the effect of gravity. Injection_Technique_Guidelines Vector_RZ_R.indd 3Injection_Technique_Guidelines Vector_RZ_R.indd 3 21.03.11 17:4121.03.11 17:41
- 4. * Alternatively to the two needles (28G needle (27G inner lumen) 0.75”, 27G needle, 1.25”) provided by Merz Aesthetics, you may inject with one of the Merz Aesthetics cannulas available in the following sizes: - 25G 2“ (50 mm) - 27G 1.5“ (38 mm) These ultra thin wall cannulas can deliver excellent cosmetic results with less trauma for the patient (likely less hematoma, less bruising). At the same time they minimise the downtime for the patient and consequently lead to increased patient satisfaction. 1:1 TRAINING OPPORTUNITY If you are interested in exchanging clinical works and best practices on a personal 1:1 basis in your office, please ask your dedicated account manager for further information on our Field Clinical Specialist trainings. ® GENERAL BEST PRACTICE GUIDELINES WITH REGARD TO THE USE OF RADIESSE® Points to note before injecting with Radiesse® Before the injection Consult with patient and identify area(s) to be injected and discuss desires and expectations. Obtain patient consent on appropriate form. Take photographs before and after the injections. Provide some level of anaesthesia (Merz’ Anaesthesia Guidelines). Use a non-permanent skin marker or white make-up pencil to mark areas to be treated (if necessary) with patient in upright position. Prep skin with alcohol or skin cleanser of choice. Performing the treatment Open the Radiesse® foil package. Note there may be a few moisture droplets inside, which is normal. Affix the needle or cannula* of choice and always prime the needle or cannula before injecting. Inject fine threads in multiple passes in a retrograde fashion; no need to remove needle from the skin between threads. Massage and mould injected areas to smoothen any subtle irregularities; be mindful where multiple products have been injected. For further information please consult Radiesse® Instructions For Use (IFU) enclosed in the package. Discard any unused product. After the treatment Inform your patient of post-treatment measures. Injection_Technique_Guidelines Vector_RZ_R.indd 4Injection_Technique_Guidelines Vector_RZ_R.indd 4 21.03.11 17:4121.03.11 17:41
- 5. 5. For the cheeks, temporal hollows and liquid face-lift: mark the zygomatic arch borders. 12 3 4 5 Supraperiosteal injection epidermis dermis subcutis muscle bone epidermis dermis subcutis Subdermal injection ® MAPPING THE FACE 1. Mark the infraorbital rim. Contra-lateral side may differ. If the level of the two rims differ, lower the line of the higher rim to match the level of the lower rim. 2. Mark the infraorbital foramen. Use cotton-tipped applicator to find this subtle depression under the tissue. Patient will feel and verbalise nerve irritation. 3. Draw the medial canthal line, parallel to the patient’s nasolabial fold. Product placement should stay lateral from this line. 4. Mark the inferior cheekbone border by drawing a line from the peri-alar triangle to the tragus. General rule of thumb Above this line, inject supraperiosteally (onlay implantation) and subdermally only for lateral zygoma enhancement when blending surrounding areas. Below this line inject subdermally. Injection_Technique_Guidelines Vector_RZ_R.indd 5Injection_Technique_Guidelines Vector_RZ_R.indd 5 21.03.11 17:4121.03.11 17:41
- 6. 1 2 1 3 2 1 2 Lifting of the nasolabial fold Lifting of the marionette fold Lifting/contouring of the jaw line ® APPLY A COMPREHENSIVE APPROACH – THE 3D- ECTORING LIFT Linear threading and fanning technique 27G needle, 1.25” 27G cannula, 1.5” (38 mm) 25G cannula, 2” (50mm) To reverse a negative vector - Injection technique using a needle: Map the face (see Mapping the Face), determine your injection points and mark your target area for correction. Choose your anchor point superior and lateral to the target area. Pull the skin at your anchor point to ensure you are targeting the tissue appropriately. The greater the tissue laxity in the central zone, the greater the need to begin your filling near the base of the tragus (laterally) to help anchor the tissue. Aim 0.1cc long support threads (to act as struts) toward the target area you wish to correct/lift. Support threads should stay aimed towards your marked target. Advance to your next insertion point, medial, to place more support threads, keeping threads aimed towards your marked target. Support threads have maximal impact when they stay as close as possible to the area you are restoring/lifting. Placing strains of Radiesse® into the skin stimulates collagen neogenesis with subsequent tissue retraction and lifting of the target area Injection technique using a cannula Map the face (see Mapping the Face), determine your injection points and mark your target area for correction. When using a cannula, compared to a needle, only two insertion points are needed to perform a full liquid face-lift. Choose your anchor point superior and lateral to the target area. Pull the skin at your anchor point to ensure you are targeting the tissue appropriately. The greater the tissue laxity in the central zone, the greater the need to begin your filling near the base of the tragus (laterally) to help anchor the tissue. Injection_Technique_Guidelines Vector_RZ_R.indd 6Injection_Technique_Guidelines Vector_RZ_R.indd 6 21.03.11 17:4121.03.11 17:41
- 7. 1 2 ® Infiltrate the skin with lidocaine for your two insertion points (see Anaesthesia Guidelines). Make the insertion point with a 27G or 25G needle. Insert the needle into the dermal/subcutaneous junction or subcutaneous space and move the needle from left to right. Lift skin up with needle (with the bevel up) and retract from skin. Insert the cannula at the first insertion point. By pulling the skin up with the non-dominant index finger and thumb, you can advance your cannula easier through the insertion point and skin. Aim 0.1cc, long support threads using fanning technique (to act as struts) toward the target area you wish to correct/lift, starting top down. From a second insertion point, using the fanning technique, further lift and augment the face. SUMMARY Using the vectoring technique allows you: to follow a full facial rejuvenation approach to achieve great results using less product to provide anchoring support and to avoid the weighting down of tissue in the mobile areas of the face. Injection_Technique_Guidelines Vector_RZ_R.indd 7Injection_Technique_Guidelines Vector_RZ_R.indd 7 21.03.11 17:4121.03.11 17:41
- 8. 03/11 Merz Pharmaceuticals GmbH, Eckenheimer Landstraße 100, 60318 Frankfurt am Main, Germany www.merzaesthetics.com Injection_Technique_Guidelines Vector_RZ_R.indd 8Injection_Technique_Guidelines Vector_RZ_R.indd 8 21.03.11 17:4121.03.11 17:41