
Recommended
More Related Content
Similar to Basicshelterbuilding
Similar to Basicshelterbuilding (20)
Basicshelterbuilding
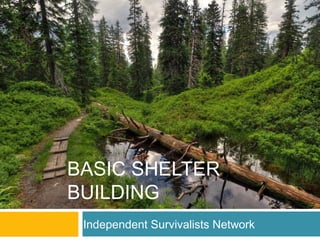
- 1. BASIC SHELTER BUILDING Independent Survivalists Network
- 2. Types of Shelters Tarp Shelters Tarp Tent Tarp Tepee Debris Shelters Lean To Debris Hut
- 3. Tarp Shelters: Tarp Tent A tarp tent is quite possibly the easiest shelter to build. These shelters are perfect for windy or cold climates. With one end of the shelter closed it will protect you from wind, with the narrow design it is easily heated with your own Materials body heat. • Tarp • Rope • Two trees within close distance to one another. • Heavy rocks for anchors Building a Tarp Tent • Find two trees within close distance to one another. • Using bowling knots, tie rope from one tree to the other, the end of the rope facing the wind should be tied close to the ground. • Throw the tarp over the rope, splitting the tarp evenly on each side. • Anchor the ends of the tarp with the rocks.
- 4. Tarp Shelters: Tarp Tepee Tarp Tepees are another very simple to build shelter. They are very effective in many types of weather, they are completely enclosed, protecting you from wind and easily warmed with your own body heat. Their steep design provides runoff of rain and/or snow. Materials • Tarp • Rope • A tree • Heavy rocks for anchors Building a Tarp • Find a treTee wpiethe a sturdy fairly low handing branch • Put a small rock in the center of you tarp, bundle the tarp around it and tie a knot around it. • Using a bowling know, tie the other end of the rope around the branch. • Use the heavy rocks to anchor the ends of the tarp to the
- 5. Debris Shelters: Lean To The Lean To Shelter is another basic shelter, using materials found in the wilderness. This design can block the wind but is not suited for troublesome weather. Materials • Ax or Hatchet/Knife • Natural Materials • Rope or Cord (Can be substituted with vines) Building a Debris Lean • Find two longt obranches of equal height, or cut them to height. Carve them into a Y shape and drive them into the ground. These are you columns. • Find a sturdy and straight branch, wedge it between the Y shapes of your columns. Lash it to your columns using cord. This is your frame. • Lean branches across your frame, filling all gaps. Lash them to the frame using cord. This is your roof. • Line your roof with leaves, fill all gaps.
- 6. Debris Shelters: Debris Hut The Debris Hut is a more advanced method of wilderness sheltering, though not too hard to build. It is completely enclosed, protecting from wind and easily warmed with your own body heat. In warmer weather, use less foliage covering to keep from overheating. Materials • Ax or Hatchet/Knife • Natural Materials • Rope or Cord (Can be substituted with vines) Building a Debris Hut • Find a tree stump or cut a thick branch and drive it into the ground. Carve a groove into it. This is your column • Find a sturdy and straight branch, wedge it into the groove on your column. This is your frame. • Lean branches across your frame, on both sides, filling all gaps. Lash them to the frame using cord. This is your roof. • Line your roof with leaves, fill all gaps.
- 7. Conclusion It is important to be prepared for a survival situation, always carry a 72 hour prep bag, consisting of any materials that you would need in an emergency or survival situation, like some of those listed within this guide. Keep one in your home and one in your vehicle. Remember. Practice your survival skills. It is not good enough to have all of the supplies that you need if you do not know how to use them. This has been a BASIC Shelter Building guide. Check back at http://isurvivalists.com in the future for a more in depth guide.
Editor's Notes
- Relative vocabulary list.