
Recommended
More Related Content
What's hot
What's hot (20)
Similar to Omender bt4090022 testing
Similar to Omender bt4090022 testing (20)
Recently uploaded
Recently uploaded (20)
Omender bt4090022 testing
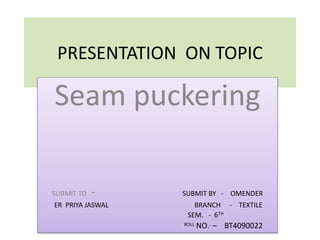
- 1. PRESENTATION ON TOPIC Seam puckering SUBMIT TO - SUBMIT BY - OMENDER ER PRIYA JASWAL BRANCH - TEXTILE SEM. - 6TH ROLL NO.. – BT4090022
- 2. INTRODUCTION • Seam puckering refers to the gathering of a seam during sewing, after sewing, or after laundering, causing an unacceptable seam appearance. Seam puckering is more common on woven fabrics than knits; and it is prominent on tightly woven fabrics
- 3. Puckering is usually caused by one or more of the following conditions: 1• Yarn Displacement (structural jamming of fabric yarns). 2 • Tension Puckering (excessive thread tension and recovery). 3• Machine Puckering (uneven ply feeding). 4• Shrinkage (where seam components have differential shrinkage)
- 4. Below is a rating system for seam puckering from 1 to 5 with 5 being pucker-free. This AATCC seam smoothness analysis is used by many major manufacturers to rate their seam performance.
- 5. INHERENT PUCKER OR DISPLACEMENT PUCKER • Seam puckering is more prevalent on very tightly woven fabrics because the yarns are oriented in very tight layers that cannot shift easily to compensate for the thread as it is inserted into the seam. This causes these tight yarns in the fabric to draw up giving a rippled appearance along the seam line. This is usually more of a problem when seams are sewn in the warp direction than in the weft (filling) or bias directions.
- 6. IDENTIFICATION • If possible, carefully clip the thread between adjacent needle penetrations along the seam and observe if the puckering remains in the fabric or goes away. If the puckering is still in the seam after the threads are clipped, then yarn displacement is the probable cause.
- 7. Solutions to Puckering Caused by Yarn Displacement- • ƒTo minimize seam puckering caused by yarn displacement or the structural jamming of the yarn in the fabric being sewn, the following corrective action should be used: • 1 - Use the smallest thread size available that will maintain adequate seam strength and sewing performance. Threads specifically designed for minimizing seam pucker These threads are very strong for their size and have excellent frictional characteristics allowing them to be sewn with minimum machine thread tension. • 2 -Use smallest needle size possible that will not cause excessive sewing problems. We also recommend using a needle with a longer needle point, if available which will have less resistance as it penetrates the seam. • 3- Use a needle plate with a small needle hole; and a presser foot with a small needle hole. • 4- Reduce the number of stitches per inch so there are fewer yarns displaced in the stitch line to cause seam puckering. • 5- When possible, cut the garment pieces so they can be sewn on the bias or in a direction that allows the different yarns in the construction of the fabric to be displaced.
- 8. Tension Puckering • If a thread is sewn into the seam with excessive machine thread tension, the thread will try to recover or return to its original length. This will cause the seam to pucker immediately as the seam comes out from under the presser-foot. However, sometimes the sizing or resins in the fabric will initially maintain a flat seam but later in the day, the seam will appear puckered. This phenomenon also occurs after the garment is laundered and the sizing materials are removed causing the seam to pucker and the inspector to think that there was too much shrinkage in the thread. Excessive thread tension during sewing will not only cause puckered seams but also cause other sewing problems including thread breakage and skipped stitches. Our Perma Core® Ultimate threads are designed to be sewn with minimum thread tension. They also have a very high initial modulus or resistance to stretching under normal sewing tensions. This will help minimize or eliminate ‘tension’ puckering.
- 9. IDENTIFICATION OF TENSION PUCKERING • Carefully clip the thread between adjacent needle penetrations along the seam and observe if the puckering is reduced in the fabric. If it is, then excessive thread tension is the probable cause of the seam puckering.
- 10. Solutions to Tension Puckering • 1-Use a thread with a low elongation or high initial modulus to minimize stretching during sewing. • 2-Use a thread with good lubricity characteristics that will allow it to be sewn with minimum machine thread tension. Perma Core® Ultimate is specifically designed to have these physical characteristics. • 3-Use very light machine thread tensions. Begin by setting the bottom thread tension (bobbin or looper) as light as possible but still maintain the proper thread control. Next adjust the needle thread tension to a minimum level necessary to maintain a closed seam and a balanced stitch. This not only reduces the elongation of the thread in the seam, but also improves loop formation and sewability. • 4- Reducing the thread size will not only help to minimize structural jamming but can usually be sewn with lighter machine thread tension because a smaller thread requires less tension to pull it up into the seam and set the stitch. • 5-. Properly set the take-up spring so that the stitch can be set with minimum thread tension. • 6- Polish or replace all eyelets and thread guides that may be grooved to make sure they do not affect the frictional properties of the thread. • 7- On some machines the thread control guides and eyelets can be adjusted to control the thread more efficiently so less tension is required. This is advisable when possible. • 8- Thread bobbin should be wound carefully at very low tension upto 30 CN
- 11. Feed Puckering (Uneven Ply Feeding) • Feed puckering occurs when one of the fabric plies is fed into the seam at a different rate than the other ply or plies. This causes a gathering effect in the over- fed ply. Ply mismatching usually occurs when the presser foot holds back on the upper ply as the bottom ply is being fed into the seam at a higher rate by the feed dog. and when the operator holds back on the bottom ply and pushes the top ply into the machine so the fabric edges will come out evenly. Many seams observed display both of these conditions, with the first usually contributing to the latter because the sewing operator will attempt to correct for the uneven feeding of the sewing machine.
- 12. IDENTIFICATION • Make two perpendicular cuts across a sewn seam where the puckered condition is the greatest. Remove the thread in the seam and see if the two plies are of equal length. If one is longer than the other then the puckering is being caused by uneven ply feeding.
- 13. SOLUTION • :1 ƒUse the minimum presser foot pressure that will maintain uniform feeding. Make sure the presser foot is clamping the fabric properly both in front and back of the needle. • 2- When the feed is up and moving the fabric, the seam should be clamped by the entire bottom surface of the presser foot. This can be checked by inserting a piece of paper under the foot from different angles and observing if the foot is clamping the fabric properly. • ƒ3-Set the feed dogs at their proper height and check for back-feeding. The feed dog should have the optimum teeth per inch and number of rows of teeth for the operation and fabric being sewn.
- 14. • ƒ3- Use the correct presser foot and needle plate for the material and operation being sewn • 4- Use a low friction presser foot: Teflon coated roller bearing, “feeding foot”, etc. terial and operation being sewn. ƒ • 5-Make sure the pieces are cut properly in the cutting room and the proper seam tolerances have been maintained so the pieces are of equal length before seaming.
- 15. SHRINKAGE PUCKERING • Shrinkage puckering can be caused when one of the components sewn into a seam shrinks at a different rate than the other components. Typical components include the shell fabric, interlining, zipper tapes, stay tapes and the thread. All these components should have minimum shrinkage to produce the flattest pucker-free seam.
- 16. IDENTIFICATION • Using an indelible ink pen, make two perpendicular lines exactly 10 inches apart across a seam that usually exhibits excessive seam puckering after laundering. Connect the marks with a line running parallel to the seam connecting the two perpendicular lines previously made. Now, subject the garment to finishing and pressing cycles and then check the length of the seam again. If there is seam shrinkage, the distance between the two marks will be less than 10 inches. The difference in length divided by 10 will give you the percent shrinkage. 10 INCH
- 17. SOLUTION • A&E’s Perma Core® Ultimate (THREAD)has been designed with minimum shrinkage. In fact, when this new thread was subjected to standard shrinkage testing at 180° C for 15 minutes, and this new thread result iszero shrinkage.
- 18. Any query?