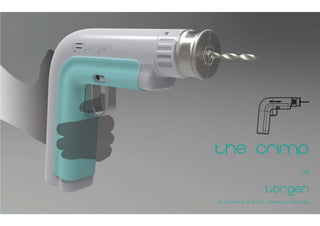
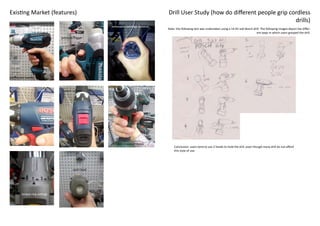
This document summarizes the design development process for a contemporary drill meant for use in small apartments. It details research into target markets and existing drills. Personas and user needs were developed. Early concepts explored integrating a USB charger and different handle designs. Further iterations refined the form based on user testing. The trigger and torque settings were developed, with the final torque ring using pictorial icons to simply convey settings. User testing provided feedback that improved the design.
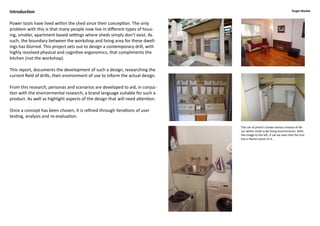
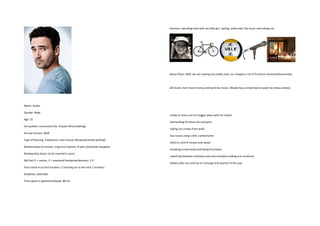
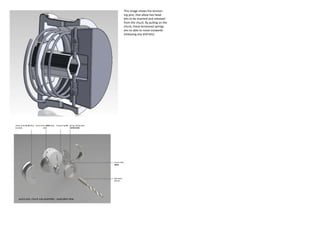
![More User Testing:
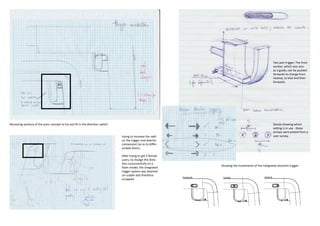
Initially, users found it somewhat confusing the change the direction (possibly due to the fact that they had never trigger path
quite interacted wtih such a mechanism on a drill) - although, once they spotted the direction icon slot, they picked
it up. And once they new it, after 5 minutes i asked them to change it again and they knew exactly what to do. Note:
with the old style direction swtiches - this was not the case. Each time the user put the drill down and then picked it
up again, they were sure which way the drill was spinning until they pressed the trigger. (This was confirmed using
the CAD assembly model in conjunction with the foam model)
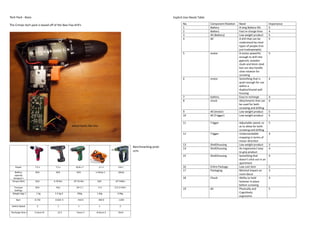
trigger
directional
switch
speed icons
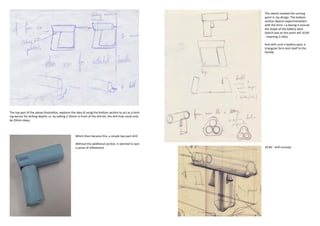
How to actually make the directional switch work...
One thing that was still considered
uncomfortable about the new trig-
ger design was the height of it. Users The trigger sensor on the tech pack, can be
complained, that the trigger was to changed by moving the opage arrow switch
long (from the top shaft downwards) up (for clockwise - which is actually right [if
the user is behind the drill]), the middle is
locked and down for anti-clockwise.
trigger
By mapping the bottom left illustration over
the top, this allows the exterior mapping to
coincide with the trigger mechanism itself.
32mm from the top of the bot-
tom section of the top shaft was
considered adequate.](https://image.slidesharecdn.com/brontestolz-designdevelopmentreport-121115080036-phpapp02/85/Bronte-stolz-design-development-report-15-320.jpg)