Abortion pills in Jeddah | +966572737505 | Get Cytotec
data binding.docx
1. The user can bind values to the respective controls in ADO.NET. Depending on the
type of binding offered, they are distinguished as follows:
1. Simple Data Binding
2. Complex Data Binding
1. Simple Data Binding
The Simple Data Binding is the process of binding the control with the single value in
the dataset. The controls like text box, label can be bound to the control through the
control properties.
Consider an example to display the result of the students in an examination. The
details are added in the following format.
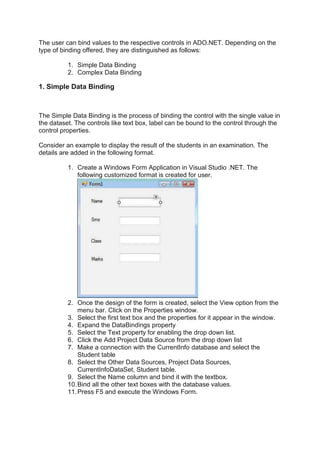
1. Create a Windows Form Application in Visual Studio .NET. The
following customized format is created for user.
2. Once the design of the form is created, select the View option from the
menu bar. Click on the Properties window.
3. Select the first text box and the properties for it appear in the window.
4. Expand the DataBindings property
5. Select the Text property for enabling the drop down list.
6. Click the Add Project Data Source from the drop down list
7. Make a connection with the CurrentInfo database and select the
Student table
8. Select the Other Data Sources, Project Data Sources,
CurrentInfoDataSet, Student table.
9. Select the Name column and bind it with the textbox.
10.Bind all the other text boxes with the database values.
11.Press F5 and execute the Windows Form.
2. 12.The following output is displayed to the user.
2. Complex Data Binding
The Complex Data Binding is the process of binding the component with the
Database. The controls can be GridView, Dropdown list, or combo box. Multiple
values can be displayed from the dataset through the binding.
The controls that can be used for binding the multiple values from the database to
the Windows Form are listed below.
1. DataGridView: It is used to display the multiple records and columns.
The DataSource property of the DataGridView control is used for
binding the specific data element.
2. ComboBox: The control contains a text box for entering the data and
drop down list for displaying the values. The DataSource property is
useful for binding the control. The element specific information can be
bind through the DisplayMember property
3. ListBox: It is used for displaying the data for the column from several
records of datasets. The DataSource property is used for binding the
control to the data source.
4. The DisplayMember property is used for binding the control to the
specific data element.
Navigating Records in ADO.NET
A BindingNavigator control is used for handling the binding to the data source
through the pointer to the current item in the list of records.
The navigator control is used with the BindingSource control for enabling the users
3. to navigate the data records on a form. It provides a layer between the controls and
windows form of the data source. Users can navigate and modify the records in the
Windows form.
The following figure displays the BindingNavigator control and the BindingSource
control in the Windows Form.
The Binding Navigator control has many controls for modifying the data source. The
list of controls and their functions are mentioned below:
1. bindingNavigatorAddNewItem Button: The + sign indicates that the new
row can be added to the data source.
2. bindingNavigatorDeleteItem Button: The X sign indicates that the
current row can be deleted from the data source.
3. bindingNavigatorMoveFirstItem Button: The button indicates that the
user can move to the first item in the data source.
4. bindingNavigatorMoveLastItem Button: The button indicates that the
user can move to the last item in the data source
5. bindingNavigatorMoveNextItem Button: The button indicates that the
user can move to the next item in the data source
6. bindingNavigatorMovePreviousItem Button: The button indicates that
the user can move to the previous item in the data source
7. bindingNavigatorPositionItem textbox: The returns current position in
the data source
8. bindingNavigatorCountItemText box: The is used to return the total
number of items in the data source.
Consider the Order details table containing the data about the orders to be added.
The data is organized into a format as shown below:
1. Open Visual studio application and add Windows Forms Application
from the template pane.
2. Add the labels and a binding Navigator control, and textbox controls to
the form
4. 3. Click OK button
4. Click View, Properties Window, and open the Properties Window.
5. Add the appropriate names to the controls present in the web form.
6. Open the Data Source Configuration Wizard. The Database icon must
be selected. Click Next Button
7. Click New Connection Button. Add Connection dialog box is shown.
8. Add the Server Name, select Use SQL Server Authentication option
from the Log on the server section
9. Add the User name as sa and password as abcd1234
10.Select the Order Details database and click Test Connection button
11.Click OK and close the Add Connection dialog box
12.Click Next button. In the Choose Your Database Objects dialog box,
expand Tables node.
13.Select the Orderdata table and click Finish button.
For binding the data to the control in the Windows Form, the following steps are
executed.
1. Select the textbox1, and expand the DataBindings property.
2. Select the Text property and click on the drop down list.
3. Expand the Other Data Sources, Project Data, Sources, Orderdataset,
Orderdata nodes.
4. Select the OrderID column and bind it with textbox1.
5. Perform the similar operations for all the textboxes.
Press F5 or click Debug -> Start Debugging option from the menu. The Order Details
form is displayed as shown below:
5. User can navigate through the other records using the navigator button of the
control.
Close the form and exit the Visual Studio application.
Filtering Data
There are requirements when user wants to display only limited data to the client.
The filtering of data is possible for displaying the desired results. The data can be
sorted in ascending or descending order.
There are two ways by which the data can be filtered. They are as mentioned below:
1. Parameterized Queries
2. Filtering data using controls in Windows Form.
1. Parameterized Queries
The stored procedures are always useful for accessing data from the database. By
using the stored procedures users can precompiled execution, use of code, less
network traffic, and security is high for the data stored in the system.
The parameterized queries are useful for filtering the data based on the conditions
defined by the user at runtime. They are useful when user wants to execute the data
based on the situation.
The following query is useful for selecting the student with the ID specified.
Code:
SELECT StudName FROM Student
WHERE StudID = @StudID
6. In the above code, the @StudID is the parameter in the query. The value is passed
at the runtime by the user.
In ADO.NET, for populating the @StudID parameter, the SqlParameter object in the
SqlParameter class for the command. The SqlParameter object is used for assigning
the parameterized values to the queries.
Consider the example for extracting the details of the student. The following code
shows the execution parameterized query.
Code:
SqlConnection con = new SqlConnection();
con.ConnectionString = “DataSource = SQLSERVER02; Initial Catalog=StudData; User
ID = sa; Password=abcd1234”;
con.Open();
string studid;
studid = textbox1.Text;
String query = “ SELECT * from StudData where StudID = @StudID”;
SqlCommand cmd = new SqlCommand( query, con);
cmd.Parameters.Add( new SqlParameter ( “@StudID”, StudID ) );
SqlDataReader dr = cmd.ExecuteReader();
2. Filtering data using controls in Windows Form
Once the data is retrieved from the data source by binding the data to the control of
the Windows form, the data filter is used for displaying the selective records.
Consider the example of a company where user wants to view the information about
the employee data. The information is displayed in the form of a grid view. The
connection is established with the database and the data binding through the
DataGridView control.
If user wants the data only of the specific employees in the organization, they can be
filtered using the following steps.
1. Select the DataGridView control in the form and open the
DataGridViewTasks window.
2. Click on the Add Query option. The SearchCriteria Builder dialog box
will open.
3. Add the following query in the query text box.
Code:
SELECT EmpID, EmpName, EmpRole FROM Employee WHERE ( EmpID = 101 )
4. Click on the Query Builder button
5. Click on the Execute Query button. The output generated by the query
can be checked
6. Click OK button and close the Search Criteria Builder dialog box
7. Press F5 and execute the Windows Form.
In the above example, TableAdapter queries are the SQL statements or procedures
that are executed. The FillBy method is useful for executing the TableAdapter
7. queries.
The following code can be added to the Click event of the FillByToolStrip control.
Code:
private void fillByToolStripButton_Click( object sender, EventArgs e )
{
try
{
this.internalCandidateTableAdapter.FillBy(
this.EmpDataSet.Employee);
}
catch( System.Exception ex )
{
System.Windows.Forms.MessageBox.Show( ex.Message );
}
}
In the above code, the FillBy method is used for adding data from the Employee
table of the EmpDataSet.