Download to read offline
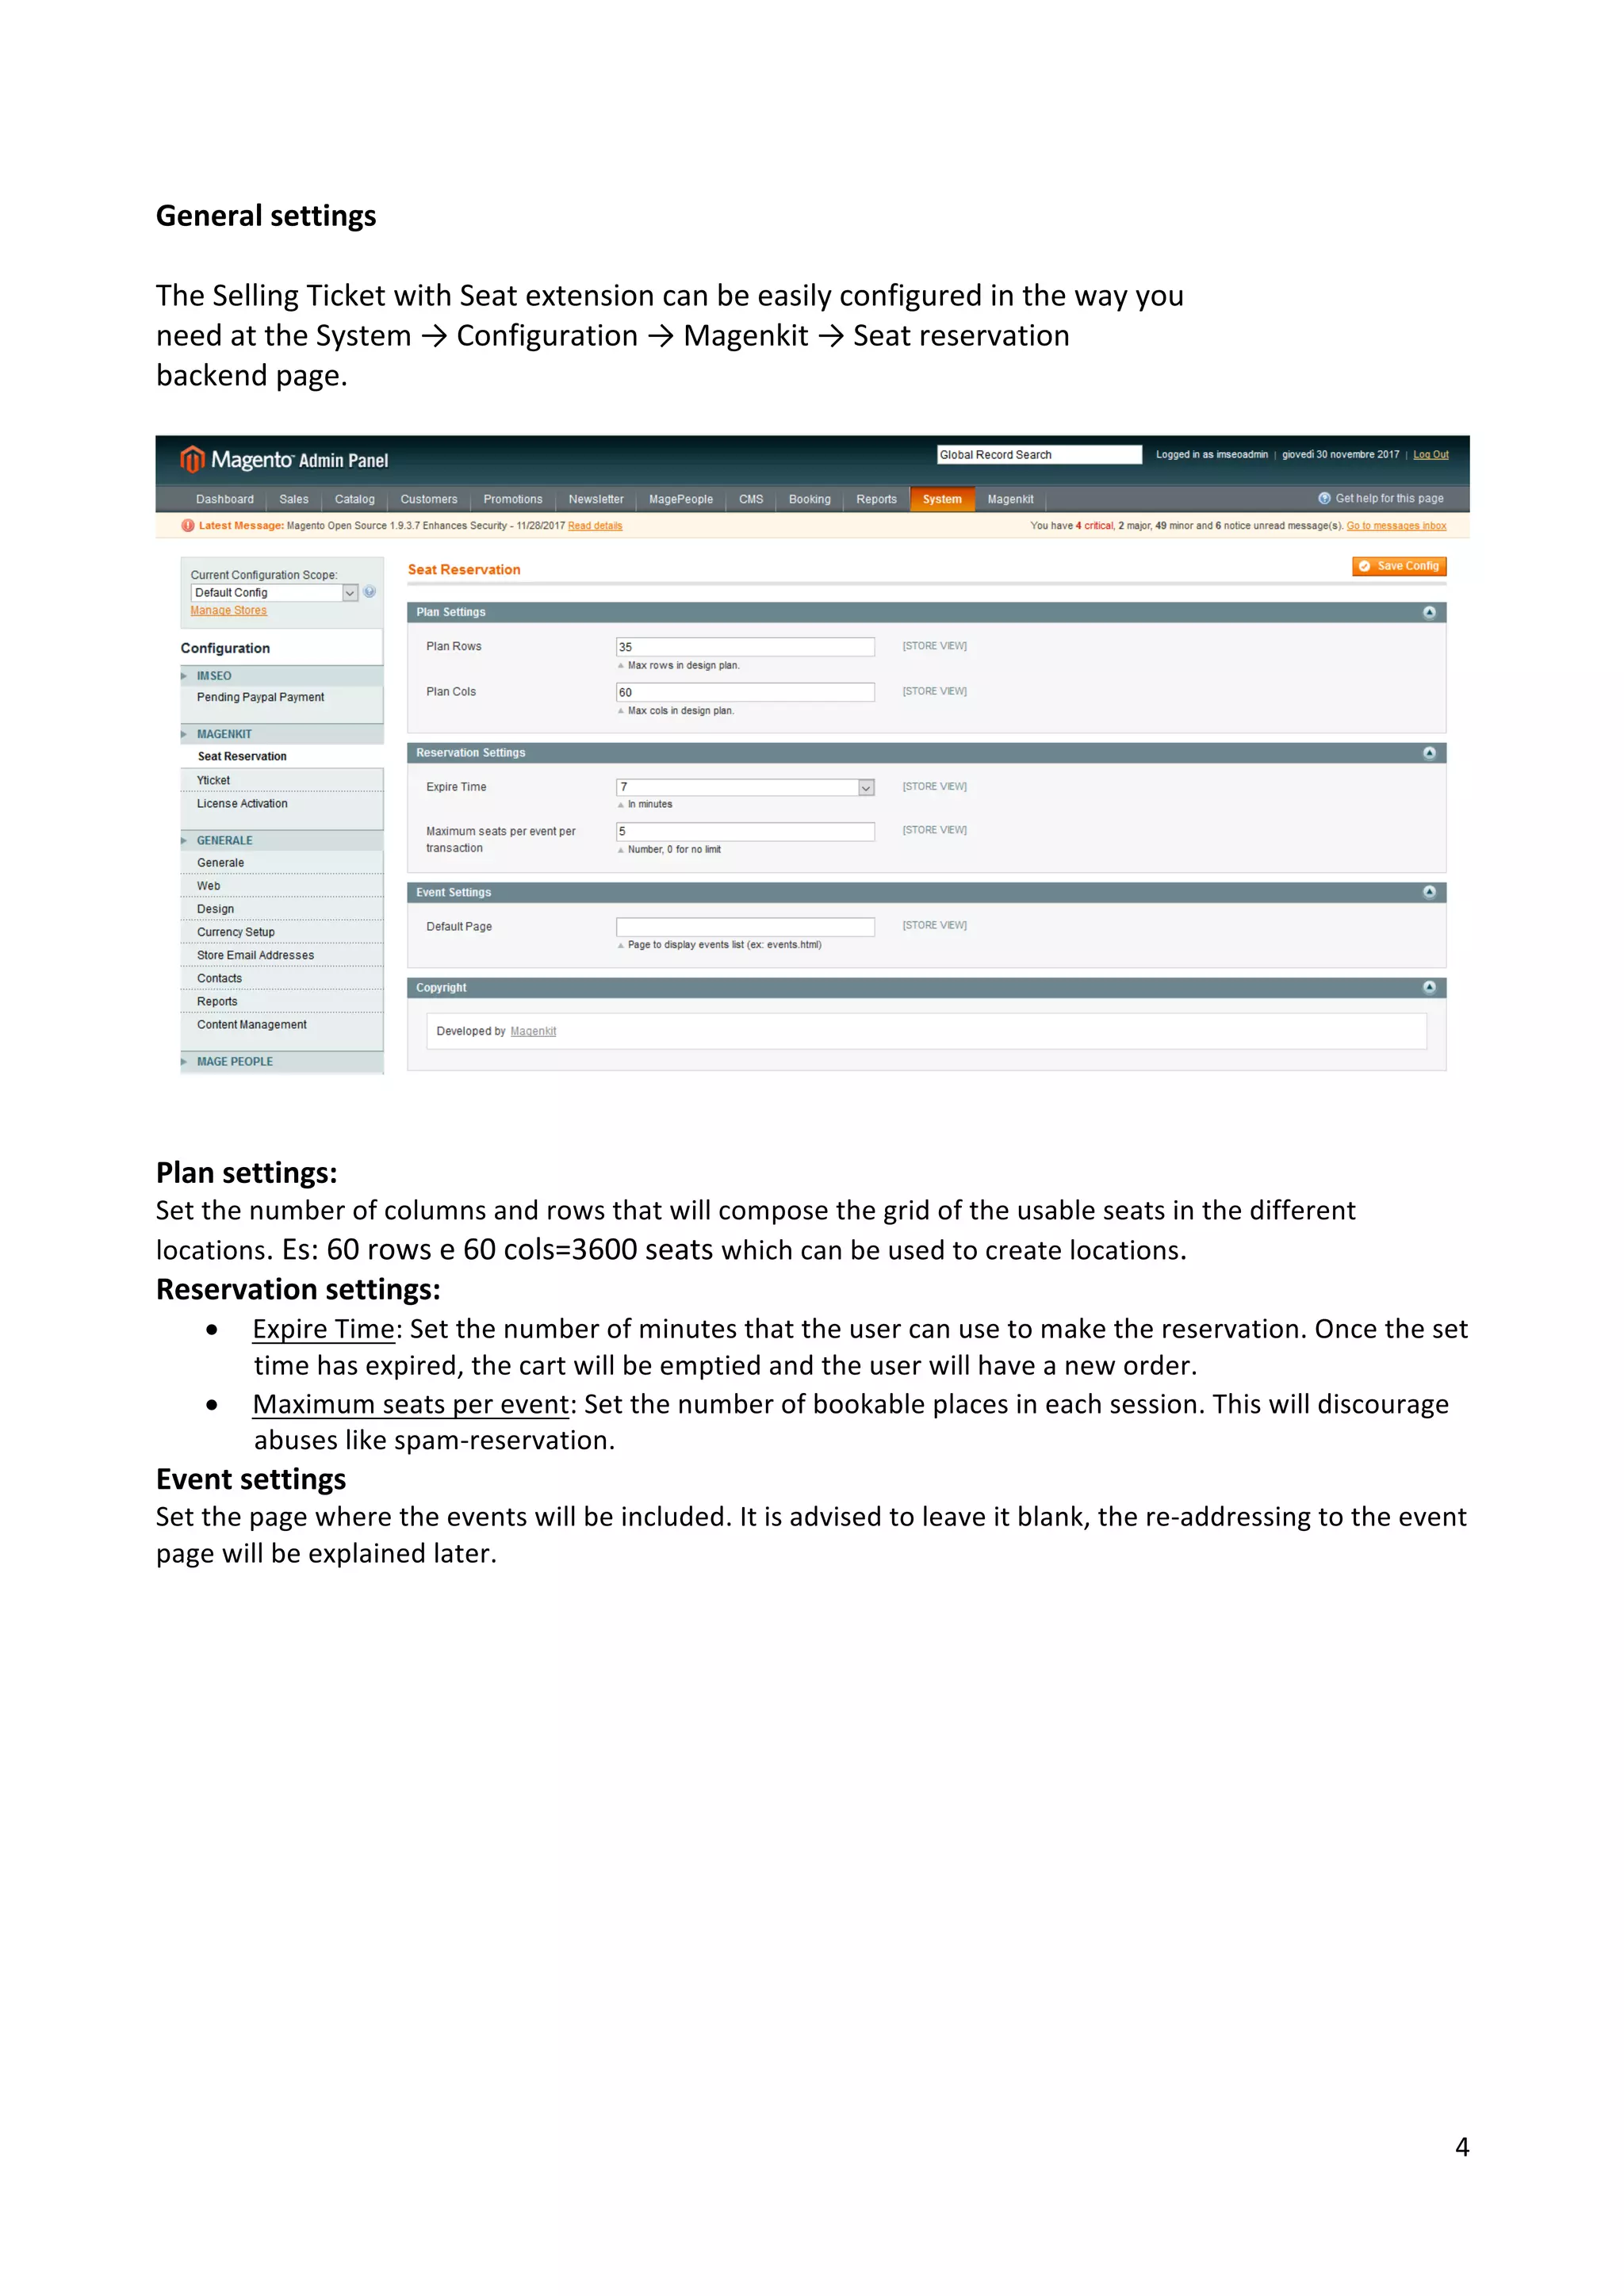

This document details version 1.1.0 of the seat reservation module for Magento, including installation, configuration, and management of events and reservations. It outlines steps for setting up locations, creating event pages, configuring tickets, and handling customer reservations through both the frontend and backend. The document emphasizes important settings such as expiration time for reservations and the maximum number of seats per event to prevent abuse.


