SlideShare a Scribd company logo
1 of 83
User Manual for iRex Digital Reader 1000 series
                February 2009
1 What’s New
   This user manual will include some new software features that were
   included in the latest software release (version 1.5). In addition to the
   many improvements you can't see, we have changed the following:

   Added an interactive toolbar
   The Inbox is now working
   Added 2 new zooming functions; zoom in and zoom out
   Added 2 new font size functions; increase font size and decrease font size
   Power management settings to help save battery power
   Included PressReader application for digital newspapers from
   PressDisplay.com


DR1000-1.5.0-EN                                                                 2
Contents

1.  What’s New ................................................................................... 2
2. Preface .......................................................................................... 4
3. Copyright ....................................................................................... 5
4. Disclaimer ...................................................................................... 5
5. Warranty and Safety Information ...................................................... 6
6. General Information ....................................................................... 8
7. Getting Started ............................................................................. 11
8. Menus, Status Area, and Browsing Folders ...................................... 16
9. Home .......................................................................................... 24
10. Documents .................................................................................. 25
11. Inbox ........................................................................................... 28
12. Help ............................................................................................ 30
13. Dictionaries .................................................................................. 31
14. WritePads and Templates .............................................................. 32
15. Navigating and Reading a Document ............................................... 33
16. Settings ........................................................................................ 47
17. iRex Companion Software .............................................................. 52
18. Extra Device Information ............................................................... 57
19. Troubleshooting ........................................................................... 58
20. Icon Index .................................................................................... 61


DR1000-1.5.0-EN                                                                                            3
2 Preface
    Welcome to the world of digital reading and writing!
    At iRex, we take pride in offering you the best possible reading and writing
    experience from a digital reader device. Being the leader in electronic paper
    display technologies, we have taken yet another monumental step with this
    second generation of digital reader devices.

    iRex offers you many best-in-class performance elements that will make your
    reading more productive and enjoyable and will help you organize and
    manage all your reading habits in one device. Seamless integration with your
    PC environment will make the experience only more pleasurable. You may
    expect from us the continued promise of providing new features and
    applications.

    After you have acquainted yourself with your Digital Reader, it is important to
    create an account to download free new software upgrades for your device.
    Please go to https://myirex.irexnet.com, click the link ‘Create new iRex user’
    and follow the steps described.

    Once it has been set up, you can:
■   Get software upgrades
■   Download the latest User Manual and Quick Reference Guide
■   Store content in your personal secure library (planned).
■   Share content with other Digital Readers or user accounts (planned).
■   And much more to come…

    We hope you will join us in our continued effort to conserve natural resources
    and protect the environment by reducing the amount of paper that is printed
    each day. The iRex team wishes you a memorable reading experience and, if
    you have suggestions or questions, please feel free to send an email to
    info@irextechnologies.com.


DR1000-1.5.0-EN                                                                 4
3 Copyright
   All Rights reserved.
   Reproduction in whole or in parts is prohibited without the prior written
   consent of the copyright owner.
   iRex Technologies BV© 2009

4 Disclaimer
   While every effort has been made to ensure that the information contained in
   this manual is accurate and complete, no liability can be accepted for any
   errors or omissions. iRex Technologies reserves the right to change the
   specifications of the hardware and software described herein at any time
   and without prior notice.

   No part of this manual may be reproduced, transmitted, transcribed, stored in
   a retrieval system, or translated into any language in any form, by any means,
   without the prior written permission of iRex Technologies.

   iRex Technologies does not accept any liability for damages resulting from
   corrupted or lost data due to erroneous operation or malfunction of the
   Digital Reader, the software, personal computers, peripheral devices, USB, or
   SD cards.


DR1000-1.5.0-EN                                                                5
5 Warranty and Safety Information
      Please read this manual carefully before using the device. The iRex Digital
      Reader should only be connected and used in the way described in this
      manual.

5.1 Product Warranty
      Damage and defects that are not the direct result of shipping or
      manufacturing will not be covered by warranty. Please be aware that the
      display screen of this device is made from glass and can be scratched or
      broken if mistreated. Any damage caused by fire, accident, misuse, or
      unauthorized alterations to the device is not covered by warranty.

5.2 Battery Safety
      The Digital Reader uses a rechargeable Lithium Ion battery to power the
      device. The battery is charged by connecting the Digital Reader to a power
      source using the included USB cable.

  ■   Do not expose the battery to fire, or direct sunlight
  ■   Do not attempt to open or alter the battery
  ■   Do not dispose of the battery with household waste
  ■   Keep the battery out of reach of children

5.3 Exposure to Moisture
      Do not expose this device to water, extreme humidity, or liquids of any kind.
      Damage caused by moisture is not covered by warranty. If the device does get
      wet, turn the device off, wait for it to dry, and turn it on again. If the device
      does not work properly after drying, you can contact customer support to
      arrange for it to be repaired. It is also advised to avoid exposure to dust and
      sand as much as possible.

5.4 Extreme Temperatures
      Avoid using the device in temperatures below 0°C/32°F or above
      45°C/113°F. The device can be stored in temperatures ranging from
      -20°C/-4°F to 70°C/158°F.

5.5 Exposure to Direct Sunlight
      Do not leave the display exposed to direct sunlight for extended periods of
      time. Use a protective cover (available for purchase) to shield the device from
      the sun.


DR1000-1.5.0-EN                                                                    6
5.6 Cleaning
       Only use a soft, damp, lint free cloth to clean your device. Cleaning solutions
       and aerosol sprays can damage the device and should not be used. Make sure
       the device is unplugged while cleaning and avoid getting moisture in the
       openings.

 5.7 Professional Maintenance
       Never open the device or attempt to repair it. Opening the device will void
       any warranty and release the manufacturer from all responsibilities. If you feel
       your device is defective, please contact customer support to arrange for it to
       be repaired.

 5.8 Proper Disposal of the Device
       Please join iRex in conserving natural resources and protecting the
       environment by recycling your device when it has reached the end of its life
       cycle. You can contact your local authorities for information about laws and
       regulations regarding the proper disposal of this device.

 5.9 Make Back-Ups
       It is always a good idea to make a back‐up of your information on a regular
       basis. This Digital Reader is a portable device like any other, and it is possible
       that it may be lost or the information on the memory card is accidentally
       erased.

5.10 Resetting the Digital Reader
       To reset the device, take the stylusor the tip of a ballpoint pen and very gently
       press the reset button on the bottom of the device. Pressing the button with too
       much force could damage the electronics inside.


DR1000-1.5.0-EN                                                                      7
6 General Information
       Software updates, information about networks and how to get extra help are
       among the topics discussed in this chapter.

 6.1 Included Pieces in the Box


1 iRex Digital Reader 1 Mini USB Cable 1 1GB SD Card 1 Stylus

 6.2 Software Updates
       As new features become available for your device, software updates will be
       released. Some of these updates will be automatically installed on your device
       in order to ensure it operates correctly, while other updates are optional.
6.2.1 Installing Software Updates
      Software updates will be delivered through the Companion Software or can
      be found on the iRex web site. After they are installed on the SD card, the
      device must be restarted in order to update the software.
6.2.2 Download Software Updates
      21.Connect the Digital Reader to a computer with an active Internet
         connection using the included USB cable
      22.If a pop‐up automatically appears on your computer screen, select ‘Run the
         iRexDR1000 Companion Software program’
      23.If a pop‐up did not appear, open My Computer and double click on
         iRexDR1000
      24.The Companion Software will start up and automatically check and
         download software updates
      25.Disconnect the Digital Reader from the computer and restart it to install
         the new software
DR1000-1.5.0-EN   8
6.3 SD Cards and Internal Memory
       The device has limited internal memory that is used to run the system and
       applications on the device. Your files, folders, iRex Companion Software, and
       settings are saved directly to the SD card. This means that when you remove
       the SD card, all your information stays securely with you and not on the
       device.
6.3.1 Inserting the SD card
      Insert the card into the card slot on the bottom of the device. Press the card
      in with your finger until you hear or feel it ‘click’. If the card doesn’t want to
      slide into the slot, it may be upside down. Turn the card over and try again.
6.3.2 Removing the SD card
      To remove the card from the device, push the card into the device until you
      hear or feel it ‘click’. Pull back your finger and the card will eject from the slot.
      You can now pull it free from the device.

       Never remove the SD card while the Digital Reader or Companion
       Software is busy.
       If the card is not safely removed, information on the card could be lost or
       corrupted.

       You can safely remove the SD card from the device by selecting Menu>Safely
       Remove from the bottom row. A message will be displayed when it is safe to
       remove the card from the device.

6.3.3 Using the Device without a SD Card
      The device will still work without a card inserted, but because the card holds
      the content, there isn’t much to see. The Home and Settings icons will still
      appear on the screen, but the shortcuts will have disappeared. All the settings
      will be removed from the device, but it will remember the language, lights,
      and sound settings as well as leave you the option to format new cards for the
      device. You can read about these in the section about Settings.
6.3.4 Using Your Card on Another iRex Digital Reader
      If you were to insert your SD card in another Digital Reader, your own settings
      will be used on the new device. You will also be able to read your own content
      on the device, but any documents that have Digital Rights Management
      (DRM) protection will not open.


DR1000-1.5.0-EN                                                                       9
6.4 Support
     If you have any questions, comments, or experience problems with your
     device, you will find a Troubleshooter section and forum on the iRex web site
     (http://support.irexnet.com/). You can also reach these support pages by
     choosing ‘Support Web site’ from the ‘Help’ tab in the included iRex
     Companion Software.


DR1000-1.5.0-EN                                                                10
7 Getting Started


     Digital Reader Overview
1                             SD Card Slot
2                  Function Extension Slot
3                   Mini‐USB Connection
4                            Reset Button
5          Arrow Up Sensor (▲) ‐ there are 2 on the device
6         Enter/Open Sensor (•) ‐ there are 2 on the device
7         Arrow Down Sensor (▼) ‐ there are 2 on the device
8                  Arrow Left Sensor (◀)
9                Menu Open/On Sensor (•)
10                Arrow Right Sensor (▶)
     11   Main LED Indicator
     12   Sensor LED Indicators ‐ there are 9 on the device
DR1000-1.5.0-EN   11
7.1 Charging the Digital Reader
     The Digital Reader is charged by
     connecting it to a power source using
     the included USB cable. If you are
     using a computer to charge, be sure
     that the computer is turned on,
     otherwise no power will get to the
     Digital Reader.


7.1.1 Is it charging?
       You can tell if the device is
       charging by looking at the main
       LED indicator above the screen.
       While the battery is charging, the
       LED will be orange. As soon as the
       battery is fully charged, the LED
       will turn green.

      If your device is turned off and you
      connect it to charge, the device and
      LED will turn on. If you decide to
      turn off the device while it is still
      connected, both the screen and
      main LED will turn off but the
      device will remain charging.

       Main LED Indicator
       Above the screen, you will see a
       Light Emitting Diode (LED). This
       LED will change colour depending
       on the state the device is in.
        Device is and is          the LED
        will be:
                                  Steady
                                  Red ‐
                                  the
                                  battery
                                  is too
                                  low to
turn the
           Not         device
Restarting
           Chargin
           g           on
                       Fast
                       Blinking
                       Green ‐
                       the
                       device is
                       busy
                       restartin
                       g
                       Fast
          Blinking Green ‐ the
          device and LED will
          Charging
                       turn on
Turned    Not
                       No LED
Off       Charging
                       Slow Blinking Green ‐ device is on
Turned    Not
                       Fast Blinking Green ‐ device is busy
On        Charging
                       Slow Blinking Red ‐ battery is low
                       Steady Orange ‐ battery is charging
          Charging
                         Steady Green ‐ battery is fully charged
7.1.2 How long should it charge?
       The first time you charge the device, it should be charged longer than
       necessary in order to extend the lifetime of the battery. When the device is
       turned off, it will take approximately 3 hours to charge a completely empty
       battery. If you are using the device while it is charging, it will take longer to
       charge.

     To stretch the most out of the battery, you can turn the stylus, lights, and sound off.
     Learn more about these in Settings.

7.2 Turning the Device On and Off
     Once the device has charged, it can be turned on and used.

     Turn the Device On
     ■ Place your finger
       on the • sensor
       below the screen
       until you hear a
       beep
       (approximately 1½
       seconds), and then
       remove your
       finger
    ■ The screen will turn on and the
      device will begin starting up;
      you will see a start up screen
      while it is busy
    ■ The device is ready to use when
      you see the Home screen
      appear


     Turn the Device Off
     ■ Tap on the lower • sensor with your finger. The menu will open


DR1000-1.5.0-EN                                                                       13
■ Choose Menu>Turn Off from the bottom row in the menu. The device
         will start to power down and then turn off

  7.3 Using the Sensors
       The sensors used in the Digital Reader are called capacitive sensors. These
       work by sensing your fingertip through the plastic. This means that you
       don’t need to apply any pressure on the sensors; the contact of your skin
       to the plastic is enough. Next to each sensor is a small green LED that will
       let you know that it has sensed your finger and you will also hear a beep.


7.3.1 Terms
       In the rest of this manual, the terms ‘Tap’, ‘Long Press’, ‘Hold’, and ‘Cancel’ will
       be referred to when describing how to touch the sensors.

       Tap – is when you quickly touch a sensor with your finger for less than ½ a
       second
       Long Press – is when you touch a sensor and keep your finger on it for
       more than ½ a second. The light next to the sensor will dim to tell you that
       you have reached the time frame of a long press and can remove your
       finger for actions such as jumping pages
       Hold – is when you keep your finger on the sensor
       Cancel – hold your finger on the sensor for more than 2½ seconds and
       then remove it. Nothing will happen

        Sensor Shortcuts
        All the shortcuts for the sensors are listed below
        Do                                   To
        Long Press lower, middle • (9)       Turn device on
        Tap lower, middle • (9)              Open and close the menu


DR1000-1.5.0-EN                                                                       14
Tap a side • (6)               Open a file or folder
                               Choose a menu function
                               Click a button
Tap ▲ (5) TapT (7)             Check and uncheck boxes
                               Move selection box up
Tap^ (8) Tap ►                 Turn 1 page backward
                               Move selection box down
(10) Long Press ▲              Turn 1 page forward
                               Turn selection box left
(5)                            Turn 1 page backward
                               Move selection box Right
                               Turn 1 page forward
Long Press T (7)
                               Move selection box to top of column
                               Turn 5 pages backward
Long Press A (8)               Move selection box to bottom of
                               column
Long Press ► (10)              Turn 5 pages forward
                               Move selection box to start of row
Hold side • and Tap T or ►     Turn 5 pages backward
Hold one side • and Tap ▲ or   Move selection box to end of row
<                              Turn 5 pages forward
__________________________     Find next hyperlink
Hold one side • and Tap
another side •                 Find previous hyperlink
________________________
                               Go back after using a hyperlink
Tap ▲, Y, < or ►
                               Pans the screen when zoomed in and
                               the pan function is active
DR1000-    1
1.5.0-EN   5
8 Menus, Status Area, and Browsing Folders
8.1 The Menu
     The menu contains all the tools and functions that can be used on the device.
     Two rows, General and Task Manager, will always be available when you
     open the menu. The rest of the menu will be filled with functions that are
     dependent on the type of document or application that is open.


     Open and Close the Menu
     with the sensor - Tap the bottom • sensor
     with the stylus - Tap on the menu icon (I^EDL^H) in the status area

    Select a Function from the Menu
    with the sensors
    ■ Tap your finger on a A,Y,4, or ► sensor to move the selection box
       around the function you wish to select
  ■ Tap one of the • sensors on the side to select the function with the
    stylus
  ■ Tap on the function you wish to select with the stylus

     Cancel Opening of Menu or Selecting a Function
     ■ Hold your finger on the sensor for longer than 2½ seconds and the
       action will be ignored


DR1000-1.5.0-EN                                                                16
General Menu Functions
      Every time you open the menu, you will always have a group called
      ‘General’, and it will always show the same functions.

Home
Shows the Home screen

Rotate
Rotates the screen, menu, and sensors from landscape to portrait and from portrait to
landscape

Sensors
Locks/unlocks the sensors. You can choose which sensors to lock in Settings

Safely Remove
Prepares the SD card to be safely removed from the device


Turn Off Device
Turns the device off

8.2 ‘Task Manager’ in the Menu
     The Task Manager group is located above the General Group. This row
     shows the files and applications that are currently open and running on the
     device and a shortcut (§§) back to the last folder that was open.

     Once the Task Manager row in the menu is full, the least used task will be
     saved, closed, and removed from the list when you open a new task. You
     can also close a task yourself by opening it and selecting Menu>Close.


      Task Manager Menu
      The task manager row is a fast way to switch between open files,
      applications, and the last opened folder

Return to Folder
Returns to the last folder you opened. If you last used Home to open a file, it will take
you back to Home.


DR1000-1.5.0-EN                                                                    17
8.3 The Status Area
       The status area is located in the lower right corner of the screen. It has
       icons that tell you the status of the device. For example, if the battery is
       low or the memory card is full, you will see it appear here.


HBHL                                                             ^.^TBEŽS

        Symbols in the Status Area
        The status area displays information about the Digital Reader
Icon                                          Indication
Battery Level
Indicates the remaining battery level and the battery status (example shown: battery
almost empty, battery full, battery charging)

dtí                 Sensor Lock
                    Indicates that the sensors are locked or unlocked

                    Sleep Mode
                    The device is in sleep mode (to save power) until you begin using it
MU                  again. It will respond to a touch on the sensor or a tap of the stylus
                    Menu
                    The stylus will open and close the menu using this icon
                    Memory Level
                    The memory card is almost or completely full


Stylus Mode
Shows what mode the stylus is: pencil/eraser/pan/pointer/zoom selector/look up


8.3.1 Viewing the Battery Level
       You can view the current battery level and status by tapping one time on the
       battery icon. To close the information box, tap on the OK button inside the
       dialogue.


DR1000-1.5.0-EN                                                                       18
8.3.2 Using the Sensor Lock
       The sensors can be locked and unlocked by tapping on the lock icon in the
       status area.

       Hint: go to Settings>Personal Preferences and make sure you have chosen at
       least one sensor to be locked.

 8.4 Toolbar
       The toolbar is located in the lower left corner of the screen, just opposite from
       the status area. Each application on the Digital Reader has a unique toolbar,
       making it easy to organize and place your favorite icons within reach. This
       makes it fast and easy to find and use functions that are in the menu.

       Some icons have already been added to the toolbar for you. You can
       personalize it further by adding icons, replacing them, and even removing them
       from the toolbar.


       Note: You can add any icon from the menu that completes one specific task to
       the toolbar. Below are the few exceptions.

       Open documents and applications found in the Task Manager cannot be
       added to the toolbar

       Toolboxes, such as Writing Tools, cannot be added to the toolbar. The icons
       inside a toolbox, like the pencil, can be added.


DR1000-1.5.0-EN                                                                     19
8.4.1   Adding or Replacing Icons in the Toolbar
        ■ Open the menu by tapping the lower •
          sensor or by tapping on the menu icon on
          the screen
        ■ Hold the stylus on an icon and then
          (without lifting the stylus from the
          screen) drag it to a slot on the toolbar
        ■ Lift the stylus from the screen and you will
          see the icon appear in the space
        ■ It's possible that your stylus calibration is a
          little off and the icon isn't dropped into the
          space. If this happens, you will get a
          message. You could try dropping it again,
          and perhaps calibrating the stylus might also
          help.


8.4.2   Using Icons in the Toolbar
        The thumbnail and detail view icons have already been placed in the toolbar
        for you. The instruction below will use these as an example, but the technique
        can be applied to any icon.

        ■ Tap one time on the View Details icon in the toolbar. The content
          browser will change to a detailed list view.
        ■ Tap one time on the View Thumbnails icon in the toolbar. The content
          browser will change to a thumbnail view.

        I How do I know what is active in the toolbar?
        If an icon is active, it will have a bold, white border around it. You might also
        sometimes notice that an icon is grayed out. This means it is disabled |at the
        moment. When you are able to use it again, the gray will disappear.

8.4.3 Removing Icons from the Toolbar
        Icons can be removed from the toolbar by dragging them away from the toolbar
        area. Removing an icon from the toolbar does not mean it is removed from
        Digital Reader; the functions and tools will always be in the menu.

    ■ Hold the stylus on the icon in the toolbar
    ■ Drag the icon at least 1cm (about 1/3") away from the toolbar area


DR1000-1.5.0-                                                                         20
EN
■ Lift the stylus from the screen
      ■ A dialogue will appear that asks if you are sure about removing it from
          the toolbar. Select Yes
    ■ The icon is removed from the toolbar

 8.5 Browsing Folders
       Since the SD card can be organized in a folder structure, it is useful to be
       able to browse them. To do this, you will need to be able to Open and
       Select files and folders, and move Up a Level through the folders.

8.5.1 Selecting a File or Folder
       In order to delete an item or make a shortcut to it, you will first need to
       select it. An item is selected when it has a black outline around it.

       ■ Tap your finger on a ▲, ▼, A, or ► sensor to move the selection box
         around the folder you want to select

8.5.2 Files and Folders that are Out of View
       Sometimes you will have more files and folders than will fit onto the
       screen. You can see how many files and folders there are by looking in the
       upper right corner of the screen (for example 1-25 of 100). This tells you
       that there are 75 more files or folders out of view.


       using the sensors
       ■ Move the selection box around a folder on the bottom row


DR1000-1.5.0-EN                                                                       21
■ Tap one more time on the ▼ sensor and the screen will display the next
       group of items
     ■ The same action works if you go to the top row and tap on the ▲ to show
       the previous group of items

     using the stylus
     ■ Tap on the (insert image) and (insert image) to move to the next or
        previous groups of items

     Move the Selection Box to the Top or Bottom of a Column
     Long press a ▲ or ▼ sensor and the selection box will move to the top or
     bottom of the column on the screen
     Move the Selection Box to the Start or End of a Row
     Long press the A or ► sensor and the selection box will move to the start
     or end of the row
     If you are already at the start or end of the row, the selection box will
     move to the start or end of the previous or next row
     Move the Selection Box to the Same Position in the Next/ Previous Group of
     Items
     Move the selection box to the top or bottom of a column Long press the ▲ or
     ▼ sensor and the screen will move one group of items and the selection box
     will appear at the same place on the screen as it did in the previous group

8.6 Opening Files and Folders
     When you open a folder, you will see the contents inside of that folder.
     There will always be one icon at the start, the Up a Level icon ('■ '*). This
     icon will help you move out of folders and up to the previous level. Above
     the contents of the folder, you will see the file path you have followed to
     get to your current location on the SD card.

    Open a File or Folder
    1. using the sensors
  ■ Select the file or folder
  ■ Tap your finger one time on a side • sensor

     2. using the stylus
     ■ Tap the file or folder one time with the stylus


DR1000-1.5.0-EN                                                                      22
3. using the menu
■ Select the file or folder
■ Open the menu
■ Choose Menu>Open

Move one level up in the Documents
■ Choose Up a Level from the list of contents in the folder


DR1000-1.5.0-EN
9 Home
   The Home screen is where you will find all the applications and shortcuts
   to special folders that are on the device. You can also place your own
   shortcuts on the Home screen.

            Documents
            Displays all the files and folders that are on the SD card. From here, you
            can open files. (see Documents).
            Inbox
            A shortcut to the Inbox where subscriptions and other news is saved (see
            Inbox).
            Help
            This shortcut takes you directly to the User Manuals and Quick Reference
            Guides (see Help).
            Dictionaries
            A special shortcut to the Dictionaries folder in Documents. Mobipocket
            dictionaries placed here are used by the Look Up function (see
            Dictionaries).
            WritePads
            Take notes, draw pictures, or keep a diary using WritePads (see
            WritePads).
            Settings
            Find and adjust settings such as language, time & date, and device
            rotation (see Settings).
            PressReader
            This application lets you read newspapers that are downloaded from
*—w         PressDisplay.com. Please go to
            http://www.irextechnologies.com/pressreader for more information.
            Shortcut
            A quick link to a file or folder in Documents (see Creating
            Shortcuts).


DR1000-1.5.0-EN                                                                24
10 Documents
       ‘Documents’ shows all the files and folders that are stored on the SD card. It
       uses a folder structure to help organize your books, newspapers, and
       documents. Anything you save on the card will be found in this location. You
       could consider it the content browser of the device.

       Functions in the Documents Menu
       While you are browsing the documents on the device, you will have
       access to a menu full of tools to work with the files and folders.
Icon                                        Meaning
Open
Opens the selected file or folder
Add Shortcut
Adds a shortcut to the selected file or folder to Home

Delete
Removes the selected file or folder from the SD card


E
Sort by Type
                  Sort by Name
                  Sorts the folder alphabetically by name


Sorts the folder by type

Sort by Size
Sorts the folder by size, largest to smallest
Sort by Date
Sorts the folder by date, from newest to oldest


Sort by Author
Sorts the folder alphabetically by author


DR1000-1.5.0-EN                                                                    25
View Thumbnails
Shows the content as thumbnail images

View Details
Shows the content as a detailed list

10.1 Changing the Views
       The Digital Reader can
       display the content of your
       documents as thumbnails
       or as a detailed list. The
       view you have chosen will
       be used for all the folders
       on the device.


       Change the view
       ■ Choose Menu>
         and choose the
         view layout you
         wish to use from the
         Views group

10.2 Sorting the Views
       It’s sometimes useful
       to sort the contents in
       order to find
       something more
       quickly. You can sort
the content by Name,
     Author, Size, Type,
     and Date.

     Sort the view
     ■ Choose Menu> and choose
     a sorting preference from the
     Sorting group

10.3 Creating Shortcuts
     Another way to quickly
     access the files and
     folders in Documents is
     by creating shortcuts
     to them on the Home
     screen.


                                     2
These shortcuts are unique to the SD card. If you remove the card, you also
remove the shortcuts from the Home screen. When you insert a different
card, you will see the shortcuts from the new card appear.

If you delete, rename, or move the file or folder, the shortcut will no longer
work because the Digital Reader cannot find it. You can either put the file
or folder back in place or delete the shortcut and make a new one to the
new location.

Create a Shortcut
Select the file or folder you want the
shortcut to link to
■ Choose Menu>Add Shortcut
The shortcut is placed on the Home

Delete a Shortcut
■ Select the shortcut you want to delete
■ Choose Menu>Delete
■ Choose ‘Yes’ in the pop-up to confirm that you want to delete the
  shortcut
■ The shortcut is deleted from the Home screen


DR1000-1.5                                                                 .0-
EN   27
11 Inbox
    The Inbox is where you will find a list of shortcuts to the documents and
    subscriptions that were downloaded. If you already have, or will be
    interested in, subscribing to newspapers or other services, this is a chapter
    worth reading.

    To use the Inbox, please follow the steps below to create an account and
    activate the Inbox on the device.

   1. Sign up for an account online
 ■ Go to https://myirex.irexnet.com
 ■ Enter a valid email address and click Send
 ■ Check your email and follow the instructions to activate the account

   2. Run the iRex Companion Software
   ■ Connect the Digital Reader to a computer with an active internet
      connection
 ■ Run the software in one of two ways:
   Using the Auto-Run Pop-up
  ■ Insert the SD card into the computer or
    connect the Digital Reader with the
    USB cable and choose Yes
  ■ Choose Run iRexDR1000 Companion
    Software from the autorun pop-up that
    appears on your computer
 ■ The program will begin to load

Using My Computer
                                                                                ■


Insert the SD card into the computer or connect the Digital Reader with the
   USB cable and choose Yes
■ On the PC, click Start and then My Computer
■ Double click on the iRexDR1000 drive
■ The program will begin to load
DR1000-1.5.0-   28
EN
■ Click on the Inbox tab and then on the MyiRex Account link. A pop-up
  will appear.
■ Fill in the email address and password and then click Save.

3. Download Subscriptions to the Inbox
■ After your MyiRex account information has been saved in the
   Companion Software, you will be able to connect and download
   content from the server.
■ Click on the Inbox tab and then on Connect & Download
■ The software will connect to the server and download any available
   content
■ Your downloads will be saved on the SD card


DR1000-1.5.0-EN                                                          29
12 Help
       Help is another one of the pre‐installed folders on your Digital Reader and is
       part of Documents. It contains User Manuals as well as Quick Reference Guides
       in all the supported languages. You probably don’t need to use up space to
       keep the same manual in all the different languages, so this is a good place
       to practice deleting files.

12.1 Downloading Manuals
       Updated manuals will be published with most software updates and can be
       downloaded from the iRex web site.


DR1000-1.5.0-EN                                                                 30
13 Dictionaries
     In order the device to automatically look up words in a dictionary for you, it
     must be a Mobipocket dictionary and it must be saved either in the location
     System/Dictionaries or on the root of the card as a folder named ‘ebooks’ on
     the SD card. You can purchase a dictionary online or download a free sample
     from www.mobipocket.com.

     You will probably use the dictionaries mainly when you are reading other
     documents and need to look up a word. For this, you will use the Look Up
     function found in the menu for your document.

     You can also open a dictionary to look up words. You will be asked to type
     in the word (or part of it) and a result list will be shown.

     Look Up a Word inside a Dictionary
 ■   Open a Dictionary
 ■   Choose Menu>Find Word
 ■   Type the word using the on-screen keyboard
 ■   Tap the Find button and wait; a list of words will be created
 ■   Tap on the word in the list and the dictionary will show the page it is on

     Important: Mobipocket books, dictionaries, and reference materials that
     you have purchased will only work on your own device. You cannot share
     them with others and they will not work if you put your SD card in a
     different electronic device. You will find the PID number, used for
     registering with Mobipocket, under Settings>About.


DR1000-1.5.0-EN                                                                   31
14 WritePads and Templates
       Templates are handy to have when you are filling out forms on the Digital
       Reader. When you open template or WritePad (also a template), it will
       immediately open a copy for you to write on. All your notes are automatically
       saved on the SD card and a temporary file name is created.

       WritePads were included with your device on the SD card. You can also
       create your own by using the iRex Companion Software to convert any
       supported document into a template.

14.1 Sharing Your Notes with Others
       If you want to share your WritePads with others, you will need to use the iRex
       Companion Software to merge the handwriting to the paper before it can be
       shared. This is also true for any notes you have written on other documents.
       Please see iRex Companion Software for more information about merging
       documents.

14.2 Converting Handwriting to Digital Text
       If you are interested in converting handwriting to digital text with your
       computer, you can download and purchase additional software, such as
       MyScript Notes. You will find a link to the iRex Shop in the iRex Companion
       Software by clicking on ‘Links’ and choosing ‘iRex Shop’. If you are using
       MyScript Notes version 2, you can use the Companion Software to export the
       database file for the program.


DR1000-1.5.0-EN                                                                   32
15 Navigating and Reading a Document
    Reading documents is probably the main task you will be doing on Digital
    Reader. To help you get the most out of the device, this chapter describes
    how to navigate a document by turning and finding specific pages, using
    bookmarks, and making notes on a document. There is also information at
    the end of this chapter about zooming and changing the view of a
    document.

     Supported File Formats
     The format icons will be used later in this section to identify the functions
     that can be used with them
     Icon      Format Type
                PDF

      A
                You can make notes and use zooming features on PDF
                documents. To make your own PDF documents, use the
                included PDF printer


       é
                Mobipocket
                A Mobipocket document is a special file type. It can only be
                opened on your own device
                Images
       m        .JPG, .PNG, .BMP, .GIF, and .TIFF images can be viewed on this
                device.
                HTML

       Ú        HTML files can be viewed on this device, but not movement and
                sound
                TXT
                A nice feature of .TXT files is that you can easily change the font
                sizes

15.1 Turning Pages
    The best way to turn pages is by using the sensors. You are able to turn
    single pages by tapping and 5 pages by long pressing.

     Page Turning with Sensors
     Do                   To
     Tap ▼ or ▶           Turn 1 page forward


     DR1000-1.5.0-EN
Tap ▲ or ◀          Turn 1 page backward
Long Press ▼ or     Turn 5 pages forward
▶
Long Press ▲ or     Turn 5 pages backward
◀

 15.2 Page Progress Bar
        Documents will always have a page progress bar at the bottom of the screen.
        By looking at this bar, you can see which page you are reading and how far you
        are into the document. If you have a stylus and you tap on the progress bar,
        you will flip to the page you tapped on. When the document is being viewed
        in full screen, this progress bar will not be displayed.


15.2.1 Bookmarks in the Page Progress Bar
         Á
        As you make bookmarks in a document, they will appear as small marks
        above the page progress bar. Some bookmarks might have already been
        made by the publisher of the document. If you have a stylus, you can tap
        on them and the document will turn to that page.


 15.3 Jumping Pages
        The Jump To function allows you to jump to specific pages in the
        document by typing in the page number.


DR1000-1.5.0-EN                                                                    34
■ Using the stylus, tap on the current page in the page progress bar, type
        in the page number, and then tap the ‘Go to page’ button

15.4 Zooming and Page Format Tools
      Changing the appearance of the document on the screen is very easy. You
      will find that there are many different zooming options available for
      documents. The document will remember the last view and the next time
      you open it, it looks the same as when it was closed.

      ■ Choose Menu>Zooming from the Toolboxes row and then choose from
        one of the following options:


       Zooming and Page Formats
       The available zooming and page layouts are shown below

       Menu     Action


Full Screen
Expands the document to fit the entire screen, hiding the page
progress bar and status area. Tap the icon again to turn full
screen off___________________________________________
Hide Margins J-. *-l
Crops the white margins of the document so the contents have
more screen space


DR1000-1.5.0-EN                                                35
Fit on Screen .<£*] JH
Fits the entire document on the screen. The page progress bar
and status area will also be shown


Page Flow Normal/Page Flow Continuous .^M ■H
Toggles the document between individual pages or one long,
continuous page


Zoom In and Zoom Out ^1 Ml
Zooms the document in or out by 25% each time it is used

Zoom 75%-200% ^1 ■H
Zooms the document using a specific zoom factor

Selection Zoom <M Ml
Use the stylus to create a boundary box around the area that is
to be zoomed________________________________________
Pan J*l .**]
Pan can be used when the page has been zoomed. A tap on
the arrow sensors will move the page or the stylus can be
used to hold and drag it

15.4.1 Making a Zoom Selection
        If you want to zoom into a specific
        area of a page, you can use the
        Selection Zoom function.


D                                                                 .
R1
00
0-1
36
■ Choose Menu>Zooming>Selection Zoom
       ■ Use the stylus to draw a diagonal line that connects the upper left
           and lower right corner of the area you wish to zoom
     ■ Lift the stylus from the screen and the zoomed area will be displayed

15.4.2 Panning with the Stylus
       The page must first be zoomed in before you are able to pan it. You
       can then use the stylus to ‘drag’ the page on the screen to position
       it.


      Choose Menu>Zooming>Pan
      Hold the stylus on the screen and drag it the distance and direction you
      want the page to move
DR1000-1.5.0-EN   37
■ Lift the stylus from the screen

 15.5 Changing Document Views

15.5.1 Reading View .^M & Ml §s I
        Reading view is the normal view used to read a document.


       To switch to the Reading view, choose Menu>Normal Reading from the Views row

15.5.2 Page Thumbnail View ^IMI
        A thumbnail of every page in a document is made and saved in the Page
        Thumbnail view. You can quickly browse through them and then select the
        page you wish to read. If a page has been bookmarked, a small bookmark is
        also indicated on the thumbnail.


DR1000-1.5.0-EN                                                                38
■ To switch to the Page Thumbnail view, choose Menu>Page Thumbnails
        from the Views row


15.5.3 All Bookmarks View M     IB
      The Bookmark view is similar to the page thumbnail view, but it only
      contains thumbnails of the pages that have bookmarks on them. From this
      view, you can select and flip to a bookmarked page. You can also delete
      bookmarked pages (except the locked ones) from this view.


     To switch to the Bookmark view, choose Menu>All Bookmarks from the Views
     row
DR1000-1.5.0-EN   39
■ To delete a bookmark from the view, select the page and choose
           Menu>Delete Bookmark

15.5.4 Table of Contents View *»!
        Some PDF documents come with additional information that can be used
        to automatically generate a Table of Contents. If this is possible with your
        document, this option will be active in the menu.

        You can use the Table of Contents by tapping on the text with the stylus or by
        selecting and opening them with the sensors.


         ■ To switch to the Table of Contents view, choose Menu>Table of
           Contents from the Views row

 15.6 Working Actively with a Document
        By using the navigation features described above, you can easily read your
        documents on the device. This section will make it quick and easy to work
        actively with documents.

15.6.1 Writing on Documents .<**•] Ml
        One of the notable features of the Digital Reader 1000 S is that you can use
        the stylus to write on your PDF documents and images. This makes it easy to
        mark-up and revise things such as letters and business documents.


DR1000-1.5.0-EN                                                                        40
Choose Menu>Writing from the Toolboxes row and then choose from one of
        the following options:


         Writing Tools
         These writing tools can be used to make notes on your documents

         Menu      Action


Pencil
Switches the stylus into a pencil that you can use to write

Eraser
Switches the stylus into an eraser to remove pencil marks

Sizes
5 pencil sizes are available for writing

Colours
Only a black pencil stroke is available at this time

15.6.2 Adding and Deleting Bookmarks *& *l
        Adding bookmarks to pages in your document makes it easy to find them
        again. They will be displayed in the page progress bar at the bottom of the
        document and also be added to the Bookmark View of the document.


DR1000-1.5.0-EN                                                                 41
Some publishers have included their own bookmarks in the documents.
        While you are free to add and remove the bookmarks you’ve made
        yourself, you cannot remove the ones made by the publisher.


       Choose Menu>Bookmarking from the Toolboxes row and then choose from one of
       the following options:


         Bookmarking Menu Options

         Menu      Action


Add Bookmark
Adds a bookmark to the current page of the document


Delete Bookmark
Deletes the bookmark of the current page

15.6.3 Finding a Word in the Text -^l 0 M
        If there is a particular word you are looking for in the body of the text, you can
        begin a quick text search.
DR1000-1.5.0-EN   42
Starting a Search
      ■ Choose Menu>Find Word from the Actions row. A search screen
         will open
    ■ Type in the word you wish to find in the text
      ■ Optional: choose to match only whole words or to change where
         the search begins
    ■ Tap the ‘Find’ button and wait for the search to complete

       Finding the Previous or Next Word
       ■ Tap with the stylus on the A or ► buttons on the screen to
          highlight
          the previous or next word

      Stopping the Word Search
    ■ Tap the stylus on the X in the upper right corner of the pop-up window
      ■ The pop-up window will close and the document will remain on the
         page with the last word found

15.6.4 Looking Up Words &*>
       The Look Up in Dictionary feature allows you to look up words in your text
       using the dictionaries that are in the Dictionary or ebooks folder. It doesn’t
       just search one dictionary, it searches all of those that are in the folder.
       The result is a list of dictionaries containing a result that you can open and
       read.
DR1000-1.5.0-EN   43
Look Up in Dictionary                              J. 4Liii-;niii?i:lfl-!»iil IIIJ—Jin-al iriili hnijfuimJi -Jin-I tail 1.
                                                                                                          |i■■■ in- MI I'-' -nK '.


                                                       ^ CiixdiPd cwtlntwreBdKia

                                                          NL-NL Engtfc-Nrci. Womdcnboelt                  J.HUUJ IIIHU rUUIH|i 'JJII ritbili
                                                          rabbit
                                                                                                          i—timpi—
                 ]
  r:nsptar       1                                        MM                    jr
                                                          MM                                       f
                                                          rabbitLll       ^^T


      Down the Rabbit H                                   rabhit|3| ^^F
                                                          EHE.N ^BÍk Pcckv! On-fcrd Locjlish Dictionary
                                                          rabUll^^
                                                          EH-LN CxfarD Fjperbot t Thesaurm
                                                          rabbit
        Alice was begir mg to get very tired of s
          on the bank, jd of having nothing to dc
  had pccpcdrfhto the book her sister was
  no pictui^f or conversations in it, "and T
            book," thought Alice, "without pictures
           So she wae considering, in her own m
       could, for the hot day made her feel v£>ry
            whether the plea&ure of making a dai
             worth the trouble of getting up and p
          when suddenly a White Rabbit with pin
  her.
             There was nothing so very remarkal
              Alice think it so very much out of thí
         Rabbi t say to itsel f "Oh dear! Oh dear!


             Look Up a Word
           ■ Choose Menu>Look Up in Dictionary from the actions row
           ■ Tap with the stylus on the word you want to look up
             ■ Wait for a list of results to be created and then select a dictionary from the
               list

15.6.5 Changing Font Sizes ©1 VI
                     Some document formats allow you to change the size of the font instead of
                     zooming in on it. Adjusting the font size will influence the length of the
                     document each time it is changed. The device is not always able to keep up with
                     these changes and it may be difficult for it to accurately keep track of your
                     bookmarks.


DR1000-1.5.0-EN                                                                                                                                                                     44
■ Change the size of the font by choosing Menu>Font Sizes from the
           Tools row and then selecting your preferred font size.
         ■ Or you can also use the Increase or Decrease Font Size function. This
           will increase or decrease the font size 2pts every time you choose it.

15.6.6 Using Hyperlinks JM«7|.M.
        Many documents have hyperlinks that let you open new documents or
        move to other places in the same document. You can tap with the stylus
        on a hyperlink to follow it, or select and open it using the sensors.


         Using the Sensors to Navigate Hyperlinks

Sensor Shortcut
                         Action
Hold a side • and Tap ▼ Next Hyperlink
or ►                     Moves the selection box to the next
                         hyperlink in the document
 Hold a side • and Tap ▲ Previous Hyperlink
or M                     Moves the selection box to the previous
                         hyperlink in the document
                                 Open Hyperlink
Tap any side •           Follow the hyperlink k to a new location (either in same
                         document or in a new document)

 15.7 Page History
        As you are moving around in a document using functions such as
        hyperlinks and bookmarks, you are building up a page history. It is similar
        to using a web browser that has a back and forward button.

        Move to Previous using the sensors
        ■ Hold one side • and tap the other side •

        Move to Previous or Next using the Menu
        ■ Choose Menu> and select one of the following options from the Actions
          row:


DR1000-1.5.0-EN                                                                       45
Page History in the Menu
       You will find a Next and Previous function in the Menu
       Menu      Action

IS*            Jump to Next
               Turns to the next page in the page history

Jump to Previous


Turns back to the previous page in the page history

15.8 Closing a Task (an open document or application)
      There are two ways a document is closed. You can close it yourself or the
      device closes it for you. In both cases, there is no need to worry about losing
      your work because it is always saved automatically. It remembers what page
      you were on so the next time you open the document, it opens in the same
      place.

      Close a Task Yourself
    ■ Choose Menu>Close Document and the document will close
    ■ The last opened folder appears

      Let the Device Close your Task
      ■ Once the Task Manager row in the menu is full, the oldest task will be
         saved, closed, and removed from the list each time you open a new
         task
DR1000-1.5.0-EN   46
16 Settings
       Inside Settings, you will find all the ways you can personalize your device
       so it works best for you. These settings are saved to the SD card and are
       unique to the card.

        It may take a few seconds for the device to save and change your settings.

16.1 Settings Quick Reference Device
        Language Time and Date                                Automatic Shutdown
                                                              Suspend Timeout
Rotation                                              SD Card Properties

Personal Preferences                                     Card Storage Capacity
                                                         Format SD Card
Lights                                                    Setup SD Card
Sound                                                     Reset Settings
Sensor Lock
Stylus                                                About
                                                      Device Information
                                                 Acknowledgments
        Power Preferences


        Using the Sensors to Fill in Settings

Do                                                  To
Tap a side •                      Click a button
                                  Check and uncheck boxes
Tap ▲ or ▼                   Move Selection Box Up and Down
Tap ◀ or ▶                   Move Selection Box Left and Right

16.2 Device Settings
       The Device settings are the essential settings that will help make using this
       device easy. You will find that you can change the language, set the time and
       date, and choose the screen rotation direction.


DR1000-1.5.0-EN                                                                      47
To Change Device Settings
■ Choose Settings>Device and a screen
  similar to the one to the right will
  appear

16.2.1 Language
        You can choose to
        have your device
        interface in English,
        German, French, or
        Dutch.

16.2.2 Time and Date
        You can set the time and date
        that is used on the device.

       Change the Time without a
       Stylus
     ■ Move the selection box
       around the time box
     ■ Tap any side • to select it and
       an option box will appear
       ■ Enter the a
          number by
          moving the
          selection box
          around the
          number and
          tapping a side •
          sensor
     ■ Select OK

       Change the Date without a
       Stylus
     ■ Move the selection box
       around the date box
     ■ Tap any side • to select the
       field and an option box will
       appear
     ■ Choose the date and tap a
       side • sensor to select it

16.2.3 Rotation
When you rotate the
device interface, the
screen will turn either
clockwise or anti-
clockwise. This setting
allows you to choose the
rotation direction so you
can hold the device in
the way that is most
comfortable for you.


                            4
16.3 Personal Preferences
         Personal Preferences let you turn the sensor LED’s and sound on and off and
         also let you determine the behaviour of the sensors when they are locked.


16.3.1 Lights
       This setting is for the green lights next to the sensor panels. It will not affect
       the light at the top of the screen. You can choose between On and Off.
16.3.2 Sensors
       This setting determines what sensor areas will lock when the Sensor lock is
       activated. Locking the sensors will help prevent accidentally page turning or
       opening menus when you are holding the device or using the stylus to
       write.
16.3.3 Sound
       The ‘beep’ you hear when using the sensors can be controlled with this
       setting. You can choose between having the sound On or Off.
16.3.4 Stylus
       In this section, you can make adjustments to the stylus. By turning the
       stylus mode to Off (inactive), you could help extend the time you get out of
       the battery charge. Also, if you’re having problems accurately tapping or
       writing with the stylus, there is a calibration exercise you can use.


         DR1000-1.5.0-EN
Calibrating the Stylus
         Tap Calibrate Stylus and follow the instructions given on the screen

  16.4 Power Preferences
         Power preferences will help you mange the amount of power the device is
         using in different situations and uses.
         To Change Power Preferences
                                                      Power Preferences
         ■ Choose Settings>Power Preferences          Automatic Shutdown

           and a screen similar to the one to the     Turn orf the device automatics I ty when not in use:
                                                      ^[■•■i.^-i.'-l

           right will appear                          O Onty when running on battery
                                                      Turn off the device when it is not in use after:
                                                      Q Never
                                                      O 15 minutes
                                                      :•: ■    nn''
                                                      C -!5 r-mules-O 00
                                                      minutes


                                                      Suspend Timeout
                                                      Suspend the device to save power when it is not in use after:
                                                      O 30 seconds
                                                      O 43 seconds
                                                      <■) 1 minute
                                                      O 2 minutes
                                                      O 3 minutes
                                                                                                    | 5a^e & Close])   Cancel


16.4.1 Automatic Shutdown
        The automatic shutdown setting has two options to set; when to use the
        setting, and how long to wait until it uses it.

         If you prefer that the device always automatically shuts down, even when
         it is attached to a computer or other power source, you should choose
         Always.

         If you only want your device to automatically shutdown when it is running
         on the battery, you should choose Only when running on battery. Note:
         When this setting is active and the device is connected to a computer or
         power source, it will never automatically shut down.
16.4.2 Sleep Mode
        When the device goes into sleep mode, it means that it has temporarily
        turned off power to parts of the device. It's similar to the screensaver on a
        computer…but you can still read the screen.


DR1000-1.5.0-EN                                                                                                        50
You can choose how long the device will wait for you to do something before
         it goes to sleep. You should experiment with different times to see what works
         best for your own reading speed.

 16.5 SD Card Properties
         You can see how much remaining space is left on the SD Card, erase the
         contents of the card, or reset the settings in the SD Card Properties section.

16.5.1 Card Storage Capacity
         This meter will tell you how much used and remaining space is left on the SD
         card.

16.5.2 Format the SD Card
       Formatting the SD card will erase all the information from the card. This also
       means that the user manuals, iRex Companion Software, and settings will be
       deleted.

16.5.3 Setup a SD Card for the Device
         This function installs a folder named ‘System’, factory settings, and the iRex
         Companion Software to the SD card. It will not affect existing information on
         the card.

16.5.4 Reset the Settings
         Resetting the settings will return all of the settings to their original, factory
         defaults.

 16.6 About
         Technical specifications and information specific to your device will be found in
         the About section. You will find here:

     ■   Product Serial Number
     ■   Main Software Version Number
     ■   Kernel Version Number
     ■   Firmware Version Number
     ■   Acknowledgements


DR1000-1.5.0-EN                                                                          51
17 iRex Companion Software
      The iRex Companion Software has been saved on the SD card that was
      included with the device. The application will help guide you while you are
      working with your documents and computer, as well as provide links to
      services and an online shop where you can buy accessories for your device.
      To access the iRex Companion Software, you will need to connect the
      device to the computer using a USB cable or insert the SD card into the
      card reader on your computer.

17.1 Turn on the Companion Software
     Using the Auto-Run Pop-up
    ■ Insert the SD card into the computer or
      connect the Digital Reader with the
      USB cable and choose Yes
    ■ Choose Run iRexDR1000 Companion
      Software from the autorun pop-up that
      appears on your computer
   ■ The program will begin to load

Using My Computer
                                                                               ■


Insert the SD card into the computer or connect the Digital Reader with the USB
   cable and choose Yes
■ On the PC, click Start and then My Computer
■ Double click on the iRexDR1000 drive
■ The program will begin to load


      Metadata Files
      There is a file named metadata.db in every folder on the Digital
      Reader. The metadata.db file is unique to the folder and files inside
      of it and contains information such as the handwriting you’ve made
      on a document. If you delete it or remove it from the folder, the
      information is no longer there for the device to read.

      You can never have two metadata files in the same folder
DR1000-1.5.0-   52
EN
If you copy a metadata.db file from one folder and try to paste it in another
        folder, you will be asked if you want to replace the file. If you replace it, the
        information from the second folder is gone.

        Copy the metadata.db file to your computer
        If you copy a document to your computer and plan to move it back to the
        Digital Reader and edit your handwriting later, you must copy the document
        and metadata.db file from the Digital Reader.

17.2 Merging Handwriting (Scribbles)
        If you have made digital notes on a document and wish to see them on your
        computer or share them with others, you will need to merge the document.

        Merge a Document
    ■   Click on the Convert tab
    ■   Find and select the file you wish to merge
    ■   Click the Merge link found under the convert tab
    ■   Choose the location to save the merged document and click Save

17.3 Converting Documents to Templates
        Templates are useful to have when you are going to be filling out forms or
        using the same document layout to write on over and over again. You can
        convert any file that is supported by the Digital Reader into a template. It is
        also possible to convert a template back to a normal document.

      Convert a Document
    ■ Click on the Convert tab
    ■ Find and select the file you wish to convert
      ■ Click either the Convert to Template or Convert to Document link found
         under the convert tab

17.4 Exporting Documents for MyScript Notes, Version 2
        If you wish to use MyScript Notes (version 2) to convert your handwriting to
        type, you can use the Export MyScript Notes function.

      Export Handwritten Notes
    ■ Click on the Convert tab
    ■ Find and select the file you wish to export
    ■ Click the Export MyScript Notes link found under the convert tab


DR1000-1.5.0-EN                                                                        53
Choose the location to save it and click on Save

17.5 Transferring Content to the Digital Reader
       To transfer files and folders to and from the Digital Reader, you will use Windows
       Explorer or other similar file manager. You can access the Digital Reader using
       Windows Explorer in two different ways.


      Using the Auto-Run Pop-up
     ■ Insert the SD card into the computer or
       connect the Digital Reader with the
       USB cable and choose Yes
     ■ Choose Open Folder from the autorun
       pop-up that appears on your computer
     ■ You can now move content into the
       window and it will be saved on the
       Digital Reader

      Using My Computer
     ■ Insert the SD card into the computer or
       connect the Digital Reader with the
       USB cable and choose Yes
     ■ On the PC, click Start and then My
       Computer
    ■ Right click on the iRexDR1000 drive
    ■ Choose Explore from the drop-down
     ■ You can now move content into the window and
       it will be saved on the Digital Reader

17.6 Transferring Content From the Digital Reader
       To transfer files and folders to and from the Digital Reader, you should use the
       Companion Software. Using the Companion Software to move documents to a
       computer or other place on the SD card will help you keep the handwriting
       information together with the document.

       Copy a File or Folder
       ■ Click on the Document Management tab so you can see the options
         under it


DR1000-1.5.0-EN                                                                   54
Select the file or folder you wish to copy
         Click on Copy To…
         Choose the location you wish to copy the file or folder to and click Save
         If your document (or folder containing documents) had handwriting on
         it (scribbles), you will be asked if you wish to merge them. Choose Yes,
         No, or Cancel.
       ■ Yes - merges the handwriting to the copied document(s)
        ■ No - copies only the file(s), you will not see any handwriting on the
            copy
       ■ Cancel - stops copying the file or folder

      Move a File or Folder
      ■ Click on the Document Management tab so you can see the options
          under it
    ■ Select the file or folder you wish to move
    ■ Click on Move To…
      ■ Choose the location you wish to move the file or folder to and click
          Save
      ■ If your document (or folder containing documents) had handwriting on
          it (scribbles), you will be asked if you wish to merge them. Choose Yes,
          No, or Cancel.
      ■ Yes - merges the handwriting to the moved document(s)
        ■ No - copies only the file(s), you will not see any handwriting on the
             copy
      ■ Cancel - stops copying the file or folder

17.7 Inbox
       If you wish to use the Inbox feature, you must have a valid MyiRex
       account. Once you have an account and the account information is saved
       in the Companion Software, you can connect and download subscriptions
       and other documents from the server.

       Create a MyiRex Account and Save the Account information
       ■ Click on the Inbox tab and then on the MyiRex Account link. A pop-up
          will appear.
       ■ If you already have a valid MyiRex account, you can fill in the email
          address and password and then click Save.
       ■ If you do not have a valid MyiRex account, click the Create Account
          button and follow the instructions on the website. Once you have


DR1000-1.5.0-EN                                                                      55
verified the account, you can fill in the email address and password and then
            click Save.

       Download Subscriptions to the Inbox
       ■ After your MyiRex account information has been saved in the
          Companion Software, you will be able to connect and download
          content from the server.
     ■ Click on the Inbox tab and then on Connect & Download
       ■ The software will connect to the server and download any available content
     ■ Your downloads will be saved on the SD card

 17.8 Additional Software
        If you don’t have a PDF printer or reader installed on your computer, no
        worries. The iRex Companion Software can help you download and install free
        software on any computer that makes it quick and easy to print and read PDF
        documents.

17.8.1 PDF Printer
        You will find the PDF Printer under the Install tab. The PDF printer will be
        installed alongside your other printers on your computer. All you have to do to
        print directly to your Digital Reader is set the printer as your default and press
        print in any application on your computer.

17.8.2 Adobe® Reader
        The latest version of Adobe® Reader is always available for download from the
        Adobe web site. A link to the web site is under the Links tab in the Companion
        Software.

 17.9 iRex Shop and Help
        A link to the online iRex webshop is found under the Links tab. Here, you can
        purchase accessories, software, and even find e-books for your device. The
        Help tab has links to open this user manual, the quick reference guide, and to
        go to the online iRex support site.


DR1000-1.5.0-EN                                                                     56
18 Extra Device Information
18.1 Product Specification
    ■   10.2 inch Electronic Paper Display
    ■   1024 x 1280 pixels
    ■   16-level grey scale
    ■   Freescale i.MX31L Processor
    ■   128 MB RAM
    ■   1 GB SD Card (interchangeable with other SD Cards)
    ■   Wacom® touch sensor input using stylus
    ■   Rechargeable, internal Lithium-Ion battery
    ■   Mini-USB connector
    ■   Dimensions (HxWxD): 268x217x12mm
    ■   Weight: +/- 570 grams
    ■   Operating temperature: 0°C/32°F to 45°C/113°F
    ■   Storage temperature: -20°C/-4°F to 70°C/158°F
        ■ Supported formats: Mobipocket PRC / Adobe® PDF / TXT / HTML / JPEG /
           PNG / GIF / TIFF / BMP

18.2 PC System Requirements
    ■   Windows® XP or Vista®
    ■   800 MHz processor or better
    ■   Minimum of 128 MB RAM
    ■   Minimum of 25 MB available hard disk space
    ■   USB port

18.3 Included Accessories
    ■   USB cable
    ■   Stylus
    ■   1 GB SD Card
    ■   Quick Start Guide


DR1000-1.5.0-EN                                                                  57
19 Troubleshooting
19.1 My device will not turn on
       Is the battery charged?
       The battery can be charged by connecting the device to a computer or other
       power source with the USB cable. Let the device charge for at least an hour
       and then try again. If this still doesn’t work, you can also try using a different
       USB port or a different computer.

       Did you hold your finger on the correct sensor for the correct time?
       Touch your finger on the lower, middle sensor (the one with the little iRex
       logo above it) until you hear a beep and see the screen turn on.

       It still doesn’t start?
       As a last resort, reset the device by gently pressing the reset button at the
       bottom of the device with the tip of a stylus or ballpoint pen.

19.2 I can’t get the menu to open
       Did you hold your finger on the correct sensor for the correct time?
       Quickly tap your finger on the lower bottom • sensor to open the menu. If
       you are using a stylus, tap on the menu icon at the bottom of the screen. You
       can also calibrate your stylus.

       Are the sensors locked?
       Use your stylus to tap on the menu icon at the bottom of the screen and then
       choose Sensors to unlock them again.

19.3 I see text and images on the screen, but the device does
     not seem to work
       Is the battery charged?
       If the battery runs out, the image will still remain on the screen. Connect the
       device to a power source to charge the battery for at least an hour and then
       turn it on again.

       Is the device frozen?
       If the device has a full battery and still won’t respond, you can reset it by
       gently pressing the reset button on the bottom of the device with the tip of
       the stylus or ballpoint pen. The device will begin to reset itself, the green
       LED’s will begin to flash, and the screen will flicker a few times.


DR1000-1.5.0-EN                                                                        58
19.4 I try to delete, move, or copy items and it does not work
       Is the SD card locked?
       You can check by first safely removing the SD card from the device by
       choosing Menu>Safely Remove. Once it is ready to be removed, eject the card
       and check that the switch on the card is in the unlocked position

       Is the SD card memory full?
       If there is not enough space on the memory card, you cannot copy more files
       on it. Try deleting some unused files and try again.

19.5 I do not see the status area or page progress bar
       Is the device in full screen mode?
       Full Screen will hide the status area and page progress bar from view. You can
       turn off full screen mode by choosing Menu>Screen Mode>Full Screen.

19.6 I zoomed in and now I cannot flip to the next page
       The panning tool is now active
       Because the document is now larger than the screen, the device thought it
       would be useful if you had a panning tool. This is feature is currently being
       reviewed by the iRex team and may be removed in the future. You can turn off
       the panning tool by selecting Menu>Zooming>Pan.

       Change to Continuous Mode
       You could also change your document viewing mode to Continuous by
       selecting Menu>Zooming>Page Flow. With the document in continuous mode,
       you can use your stylus to pan up and down a page.

19.7 I opened my document on my computer but I do not see
     my handwritten notes
       Did you use the iRex Companion Software to merge the document?
       The Companion Software will merge the handwriting to the document so you
       are able to view it on a computer.

19.8 How do I reset the device?
       There is a small reset button located on the bottom of the device. Use the tip of
       the stylus or a ballpoint pen and very gently press the button. You will feel a
       slight click. The device will begin to reset itself and will return to the Home
       screen when it is ready to use.


DR1000-1.5.0-EN                                                                    59
19.9 How do I turn the device off?
       Open the menu and select the Turn Off Device icon from the bottom row.


DR1000-1.5.0-EN                                                                 60
20 Icon Index
20.1 Home Icons
                                      _ Inbox
    Zp               Dictionaries
                                    JK
i   i___________


                                       Settings

                   Documents
Help
                                      Q                      WritePads


20.2 Status Area Icons
 Battery                      Level                   Stylus Mode
                                           ř§EJ pencil, eraser,            ÍHI
           D        Memory                Ipointer,
                                          selector,
                                                pan,
                                          ^■S look-up
                                                                           zoom

                    Menu
                                                      Suspend (device is

           B        Sensor Lock
                                                      suspended)

20.3 General and Task Manager Icons


                                      Safely Remove SD Card

Home


                                                 Sensor Lock

Return to Folder

3              Rotate                                     Turn Off

20.4 Content Browser Icons

                                                       Delete

Add Shortcut


DR1000-1.5.0-EN                                                        61
Open
                   Sort by Type


Sort by Author
                    Up a Level

Sort by
Date

                 View Detailed
                 List
Sort by
Name

                      View
Sort by               Thumbnails
Size

20.5 Reading Icons

Add
Bookmark                Find Word


Back                    Fit on
                        Screen

Bookmark View
                         Font Tools


Cl
os
e
                     Font Sizes (6pt‐
                     34pt)

Decrease Font Size
                         Full Screen


Delete Bookmark
                        Hide Margin


Era
ser                   Increase Font
                      Size


D                                       6
I3f ^ Jump to
    Next                              Reading View


  Jump to Previous
                                       See All…


  Page Flow Continuous
                                   Selection Zoom


  Page Flow
  Normal                       Table of Contents
                               View

  Page Thumbnail View
                                    Writing Tools


  Pan                           Zoom (75%, 100%,
                                150%, 200%)

  Pencil
                                     Zoom In


  Pencil Colours (black)
                                      Zoom Out


                           H
  Pencil Sizes (1‐5)
                                    Zooming Tools


  20.6 Settings Icons

  About
                           n    Power Preferences


  D        Device
           Settings
                               s
                                   SD Card
                                   Properties


  Personal Preferences
D   6
R
1
0
0
0
-
1
.
5
.
0
-
E
N

More Related Content

Similar to En User Manual

Taking care of your computers
Taking care of your computersTaking care of your computers
Taking care of your computersJean Ulpindo
 
Active autowerke G5 Personal programmer
Active autowerke G5 Personal programmerActive autowerke G5 Personal programmer
Active autowerke G5 Personal programmerSandra Hugh
 
Galaxy note n7100 tutorial
Galaxy note n7100 tutorialGalaxy note n7100 tutorial
Galaxy note n7100 tutorialandris17
 
Lenovo 100s Chromebook user guide Manual PDF (English)
Lenovo 100s Chromebook user guide Manual PDF (English)Lenovo 100s Chromebook user guide Manual PDF (English)
Lenovo 100s Chromebook user guide Manual PDF (English)manualsheet
 
Samsung Galaxy S2 (GT-I9100) User Guide
Samsung Galaxy S2 (GT-I9100) User GuideSamsung Galaxy S2 (GT-I9100) User Guide
Samsung Galaxy S2 (GT-I9100) User Guiderosselli00
 
Alcatel Plus 12 Manual / User Guide
Alcatel Plus 12 Manual / User GuideAlcatel Plus 12 Manual / User Guide
Alcatel Plus 12 Manual / User Guidemanualsheet
 
Laptop Dell Inspiron 14 5490 FMKJV1
Laptop Dell Inspiron 14 5490 FMKJV1Laptop Dell Inspiron 14 5490 FMKJV1
Laptop Dell Inspiron 14 5490 FMKJV1LAPTOP TRẦN PHÁT
 
ZTE Axon 7 Manual/User Guide
ZTE Axon 7 Manual/User GuideZTE Axon 7 Manual/User Guide
ZTE Axon 7 Manual/User Guidemanualsheet
 
Samsung galaxy s5 mini duos sm g800 h - samsung galaxy s5 mini duos sm-g800h ...
Samsung galaxy s5 mini duos sm g800 h - samsung galaxy s5 mini duos sm-g800h ...Samsung galaxy s5 mini duos sm g800 h - samsung galaxy s5 mini duos sm-g800h ...
Samsung galaxy s5 mini duos sm g800 h - samsung galaxy s5 mini duos sm-g800h ...HECTOR HERRERA
 
Dell Inspiron 5593 Laptop Dành Cho Văn Phòng
Dell Inspiron 5593 Laptop Dành Cho Văn PhòngDell Inspiron 5593 Laptop Dành Cho Văn Phòng
Dell Inspiron 5593 Laptop Dành Cho Văn PhòngLAPTOP TRẦN PHÁT
 
LG G5 T-Mobile Manual / User Guide (English)
LG G5 T-Mobile  Manual  / User Guide (English)LG G5 T-Mobile  Manual  / User Guide (English)
LG G5 T-Mobile Manual / User Guide (English)manualsheet
 
Alcatel U5 Manual / User Guide
Alcatel U5 Manual / User GuideAlcatel U5 Manual / User Guide
Alcatel U5 Manual / User Guidemanualsheet
 
CP PLUS Camera Manual
CP PLUS Camera ManualCP PLUS Camera Manual
CP PLUS Camera Manualgolu4567
 
Manual galaxy gio_gt-s5660
Manual galaxy gio_gt-s5660Manual galaxy gio_gt-s5660
Manual galaxy gio_gt-s5660Oky Resandi
 
Samsung Galaxy S4 Manual User Guide
Samsung Galaxy S4 Manual User GuideSamsung Galaxy S4 Manual User Guide
Samsung Galaxy S4 Manual User Guidedavnec
 
Lenovo Ideapad 700 (17") user manual PDF (english) / User Guide
  Lenovo Ideapad 700 (17") user manual PDF (english) / User Guide  Lenovo Ideapad 700 (17") user manual PDF (english) / User Guide
Lenovo Ideapad 700 (17") user manual PDF (english) / User Guidemanualsheet
 
Alcatel Onetouch Pixi 8 Manual / User Guide
Alcatel Onetouch Pixi 8 Manual / User GuideAlcatel Onetouch Pixi 8 Manual / User Guide
Alcatel Onetouch Pixi 8 Manual / User Guidemanualsheet
 

Similar to En User Manual (20)

Taking care of your computers
Taking care of your computersTaking care of your computers
Taking care of your computers
 
Active autowerke G5 Personal programmer
Active autowerke G5 Personal programmerActive autowerke G5 Personal programmer
Active autowerke G5 Personal programmer
 
Galaxy note n7100 tutorial
Galaxy note n7100 tutorialGalaxy note n7100 tutorial
Galaxy note n7100 tutorial
 
Lenovo 100s Chromebook user guide Manual PDF (English)
Lenovo 100s Chromebook user guide Manual PDF (English)Lenovo 100s Chromebook user guide Manual PDF (English)
Lenovo 100s Chromebook user guide Manual PDF (English)
 
Laptop Dell Inspiron 7591
Laptop Dell Inspiron 7591Laptop Dell Inspiron 7591
Laptop Dell Inspiron 7591
 
Samsung Galaxy S2 (GT-I9100) User Guide
Samsung Galaxy S2 (GT-I9100) User GuideSamsung Galaxy S2 (GT-I9100) User Guide
Samsung Galaxy S2 (GT-I9100) User Guide
 
Alcatel Plus 12 Manual / User Guide
Alcatel Plus 12 Manual / User GuideAlcatel Plus 12 Manual / User Guide
Alcatel Plus 12 Manual / User Guide
 
Laptop Dell Inspiron 14 5490 FMKJV1
Laptop Dell Inspiron 14 5490 FMKJV1Laptop Dell Inspiron 14 5490 FMKJV1
Laptop Dell Inspiron 14 5490 FMKJV1
 
ZTE Axon 7 Manual/User Guide
ZTE Axon 7 Manual/User GuideZTE Axon 7 Manual/User Guide
ZTE Axon 7 Manual/User Guide
 
C01124007
C01124007C01124007
C01124007
 
Samsung galaxy s5 mini duos sm g800 h - samsung galaxy s5 mini duos sm-g800h ...
Samsung galaxy s5 mini duos sm g800 h - samsung galaxy s5 mini duos sm-g800h ...Samsung galaxy s5 mini duos sm g800 h - samsung galaxy s5 mini duos sm-g800h ...
Samsung galaxy s5 mini duos sm g800 h - samsung galaxy s5 mini duos sm-g800h ...
 
Dell Inspiron 5593 Laptop Dành Cho Văn Phòng
Dell Inspiron 5593 Laptop Dành Cho Văn PhòngDell Inspiron 5593 Laptop Dành Cho Văn Phòng
Dell Inspiron 5593 Laptop Dành Cho Văn Phòng
 
LG G5 T-Mobile Manual / User Guide (English)
LG G5 T-Mobile  Manual  / User Guide (English)LG G5 T-Mobile  Manual  / User Guide (English)
LG G5 T-Mobile Manual / User Guide (English)
 
c06523509 (HP Manual).pdf
c06523509 (HP Manual).pdfc06523509 (HP Manual).pdf
c06523509 (HP Manual).pdf
 
Alcatel U5 Manual / User Guide
Alcatel U5 Manual / User GuideAlcatel U5 Manual / User Guide
Alcatel U5 Manual / User Guide
 
CP PLUS Camera Manual
CP PLUS Camera ManualCP PLUS Camera Manual
CP PLUS Camera Manual
 
Manual galaxy gio_gt-s5660
Manual galaxy gio_gt-s5660Manual galaxy gio_gt-s5660
Manual galaxy gio_gt-s5660
 
Samsung Galaxy S4 Manual User Guide
Samsung Galaxy S4 Manual User GuideSamsung Galaxy S4 Manual User Guide
Samsung Galaxy S4 Manual User Guide
 
Lenovo Ideapad 700 (17") user manual PDF (english) / User Guide
  Lenovo Ideapad 700 (17") user manual PDF (english) / User Guide  Lenovo Ideapad 700 (17") user manual PDF (english) / User Guide
Lenovo Ideapad 700 (17") user manual PDF (english) / User Guide
 
Alcatel Onetouch Pixi 8 Manual / User Guide
Alcatel Onetouch Pixi 8 Manual / User GuideAlcatel Onetouch Pixi 8 Manual / User Guide
Alcatel Onetouch Pixi 8 Manual / User Guide
 

Recently uploaded

Book Cheap Flight Tickets - TraveljunctionUK
Book  Cheap Flight Tickets - TraveljunctionUKBook  Cheap Flight Tickets - TraveljunctionUK
Book Cheap Flight Tickets - TraveljunctionUKTravel Juncation
 
ITALY - Visa Options for expats and digital nomads
ITALY - Visa Options for expats and digital nomadsITALY - Visa Options for expats and digital nomads
ITALY - Visa Options for expats and digital nomadsMarco Mazzeschi
 
Study Consultants in Lahore || 📞03094429236
Study Consultants in Lahore || 📞03094429236Study Consultants in Lahore || 📞03094429236
Study Consultants in Lahore || 📞03094429236Sherazi Tours
 
visa consultant | 📞📞 03094429236 || Best Study Visa Consultant
visa consultant | 📞📞 03094429236 || Best Study Visa Consultantvisa consultant | 📞📞 03094429236 || Best Study Visa Consultant
visa consultant | 📞📞 03094429236 || Best Study Visa ConsultantSherazi Tours
 
Genesis 1:6 || Meditate the Scripture daily verse by verse
Genesis 1:6  ||  Meditate the Scripture daily verse by verseGenesis 1:6  ||  Meditate the Scripture daily verse by verse
Genesis 1:6 || Meditate the Scripture daily verse by versemaricelcanoynuay
 
BERMUDA Triangle the mystery of life.pptx
BERMUDA Triangle the mystery of life.pptxBERMUDA Triangle the mystery of life.pptx
BERMUDA Triangle the mystery of life.pptxseri bangash
 
Hire 💕 8617697112 Champawat Call Girls Service Call Girls Agency
Hire 💕 8617697112 Champawat Call Girls Service Call Girls AgencyHire 💕 8617697112 Champawat Call Girls Service Call Girls Agency
Hire 💕 8617697112 Champawat Call Girls Service Call Girls AgencyNitya salvi
 
9 Days Kenya Ultimate Safari Odyssey with Kibera Holiday Safaris
9 Days Kenya Ultimate Safari Odyssey with Kibera Holiday Safaris9 Days Kenya Ultimate Safari Odyssey with Kibera Holiday Safaris
9 Days Kenya Ultimate Safari Odyssey with Kibera Holiday SafarisKibera Holiday Safaris Safaris
 
"Embark on the Ultimate Adventure: Top 10 Must-Visit Destinations for Thrill-...
"Embark on the Ultimate Adventure: Top 10 Must-Visit Destinations for Thrill-..."Embark on the Ultimate Adventure: Top 10 Must-Visit Destinations for Thrill-...
"Embark on the Ultimate Adventure: Top 10 Must-Visit Destinations for Thrill-...Ishwaholidays
 
Texas Tales Brenham and Amarillo Experiences Elevated by Find American Rental...
Texas Tales Brenham and Amarillo Experiences Elevated by Find American Rental...Texas Tales Brenham and Amarillo Experiences Elevated by Find American Rental...
Texas Tales Brenham and Amarillo Experiences Elevated by Find American Rental...Find American Rentals
 
🔥HOT🔥📲9602870969🔥Prostitute Service in Udaipur Call Girls in City Palace Lake...
🔥HOT🔥📲9602870969🔥Prostitute Service in Udaipur Call Girls in City Palace Lake...🔥HOT🔥📲9602870969🔥Prostitute Service in Udaipur Call Girls in City Palace Lake...
🔥HOT🔥📲9602870969🔥Prostitute Service in Udaipur Call Girls in City Palace Lake...Apsara Of India
 
Kanpur Call Girls Service ☎ ️82500–77686 ☎️ Enjoy 24/7 Escort Service
Kanpur Call Girls Service ☎ ️82500–77686 ☎️ Enjoy 24/7 Escort ServiceKanpur Call Girls Service ☎ ️82500–77686 ☎️ Enjoy 24/7 Escort Service
Kanpur Call Girls Service ☎ ️82500–77686 ☎️ Enjoy 24/7 Escort ServiceDamini Dixit
 
Top 10 Traditional Indian Handicrafts.pptx
Top 10 Traditional Indian Handicrafts.pptxTop 10 Traditional Indian Handicrafts.pptx
Top 10 Traditional Indian Handicrafts.pptxdishha99
 
DARK TRAVEL AGENCY presented by Khuda Bux
DARK TRAVEL AGENCY presented by Khuda BuxDARK TRAVEL AGENCY presented by Khuda Bux
DARK TRAVEL AGENCY presented by Khuda BuxBeEducate
 
High Profile 🔝 8250077686 📞 Call Girls Service in Siri Fort🍑
High Profile 🔝 8250077686 📞 Call Girls Service in Siri Fort🍑High Profile 🔝 8250077686 📞 Call Girls Service in Siri Fort🍑
High Profile 🔝 8250077686 📞 Call Girls Service in Siri Fort🍑Damini Dixit
 
A tour of African gastronomy - World Tourism Organization
A tour of African gastronomy - World Tourism OrganizationA tour of African gastronomy - World Tourism Organization
A tour of African gastronomy - World Tourism OrganizationJuan Carlos Fonseca Mata
 
Night 7k to 12k Daman Call Girls 👉👉 8617697112⭐⭐ 100% Genuine Escort Service ...
Night 7k to 12k Daman Call Girls 👉👉 8617697112⭐⭐ 100% Genuine Escort Service ...Night 7k to 12k Daman Call Girls 👉👉 8617697112⭐⭐ 100% Genuine Escort Service ...
Night 7k to 12k Daman Call Girls 👉👉 8617697112⭐⭐ 100% Genuine Escort Service ...Nitya salvi
 
Hire 💕 8617697112 Chamba Call Girls Service Call Girls Agency
Hire 💕 8617697112 Chamba Call Girls Service Call Girls AgencyHire 💕 8617697112 Chamba Call Girls Service Call Girls Agency
Hire 💕 8617697112 Chamba Call Girls Service Call Girls AgencyNitya salvi
 

Recently uploaded (20)

Call Girls Service !! New Friends Colony!! @9999965857 Delhi 🫦 No Advance VV...
Call Girls Service !! New Friends Colony!! @9999965857 Delhi 🫦 No Advance  VV...Call Girls Service !! New Friends Colony!! @9999965857 Delhi 🫦 No Advance  VV...
Call Girls Service !! New Friends Colony!! @9999965857 Delhi 🫦 No Advance VV...
 
Book Cheap Flight Tickets - TraveljunctionUK
Book  Cheap Flight Tickets - TraveljunctionUKBook  Cheap Flight Tickets - TraveljunctionUK
Book Cheap Flight Tickets - TraveljunctionUK
 
ITALY - Visa Options for expats and digital nomads
ITALY - Visa Options for expats and digital nomadsITALY - Visa Options for expats and digital nomads
ITALY - Visa Options for expats and digital nomads
 
Study Consultants in Lahore || 📞03094429236
Study Consultants in Lahore || 📞03094429236Study Consultants in Lahore || 📞03094429236
Study Consultants in Lahore || 📞03094429236
 
visa consultant | 📞📞 03094429236 || Best Study Visa Consultant
visa consultant | 📞📞 03094429236 || Best Study Visa Consultantvisa consultant | 📞📞 03094429236 || Best Study Visa Consultant
visa consultant | 📞📞 03094429236 || Best Study Visa Consultant
 
Genesis 1:6 || Meditate the Scripture daily verse by verse
Genesis 1:6  ||  Meditate the Scripture daily verse by verseGenesis 1:6  ||  Meditate the Scripture daily verse by verse
Genesis 1:6 || Meditate the Scripture daily verse by verse
 
BERMUDA Triangle the mystery of life.pptx
BERMUDA Triangle the mystery of life.pptxBERMUDA Triangle the mystery of life.pptx
BERMUDA Triangle the mystery of life.pptx
 
Hire 💕 8617697112 Champawat Call Girls Service Call Girls Agency
Hire 💕 8617697112 Champawat Call Girls Service Call Girls AgencyHire 💕 8617697112 Champawat Call Girls Service Call Girls Agency
Hire 💕 8617697112 Champawat Call Girls Service Call Girls Agency
 
9 Days Kenya Ultimate Safari Odyssey with Kibera Holiday Safaris
9 Days Kenya Ultimate Safari Odyssey with Kibera Holiday Safaris9 Days Kenya Ultimate Safari Odyssey with Kibera Holiday Safaris
9 Days Kenya Ultimate Safari Odyssey with Kibera Holiday Safaris
 
"Embark on the Ultimate Adventure: Top 10 Must-Visit Destinations for Thrill-...
"Embark on the Ultimate Adventure: Top 10 Must-Visit Destinations for Thrill-..."Embark on the Ultimate Adventure: Top 10 Must-Visit Destinations for Thrill-...
"Embark on the Ultimate Adventure: Top 10 Must-Visit Destinations for Thrill-...
 
Texas Tales Brenham and Amarillo Experiences Elevated by Find American Rental...
Texas Tales Brenham and Amarillo Experiences Elevated by Find American Rental...Texas Tales Brenham and Amarillo Experiences Elevated by Find American Rental...
Texas Tales Brenham and Amarillo Experiences Elevated by Find American Rental...
 
🔥HOT🔥📲9602870969🔥Prostitute Service in Udaipur Call Girls in City Palace Lake...
🔥HOT🔥📲9602870969🔥Prostitute Service in Udaipur Call Girls in City Palace Lake...🔥HOT🔥📲9602870969🔥Prostitute Service in Udaipur Call Girls in City Palace Lake...
🔥HOT🔥📲9602870969🔥Prostitute Service in Udaipur Call Girls in City Palace Lake...
 
Kanpur Call Girls Service ☎ ️82500–77686 ☎️ Enjoy 24/7 Escort Service
Kanpur Call Girls Service ☎ ️82500–77686 ☎️ Enjoy 24/7 Escort ServiceKanpur Call Girls Service ☎ ️82500–77686 ☎️ Enjoy 24/7 Escort Service
Kanpur Call Girls Service ☎ ️82500–77686 ☎️ Enjoy 24/7 Escort Service
 
Call Girls Service !! Indirapuram!! @9999965857 Delhi 🫦 No Advance VVVIP 🍎 S...
Call Girls Service !! Indirapuram!! @9999965857 Delhi 🫦 No Advance  VVVIP 🍎 S...Call Girls Service !! Indirapuram!! @9999965857 Delhi 🫦 No Advance  VVVIP 🍎 S...
Call Girls Service !! Indirapuram!! @9999965857 Delhi 🫦 No Advance VVVIP 🍎 S...
 
Top 10 Traditional Indian Handicrafts.pptx
Top 10 Traditional Indian Handicrafts.pptxTop 10 Traditional Indian Handicrafts.pptx
Top 10 Traditional Indian Handicrafts.pptx
 
DARK TRAVEL AGENCY presented by Khuda Bux
DARK TRAVEL AGENCY presented by Khuda BuxDARK TRAVEL AGENCY presented by Khuda Bux
DARK TRAVEL AGENCY presented by Khuda Bux
 
High Profile 🔝 8250077686 📞 Call Girls Service in Siri Fort🍑
High Profile 🔝 8250077686 📞 Call Girls Service in Siri Fort🍑High Profile 🔝 8250077686 📞 Call Girls Service in Siri Fort🍑
High Profile 🔝 8250077686 📞 Call Girls Service in Siri Fort🍑
 
A tour of African gastronomy - World Tourism Organization
A tour of African gastronomy - World Tourism OrganizationA tour of African gastronomy - World Tourism Organization
A tour of African gastronomy - World Tourism Organization
 
Night 7k to 12k Daman Call Girls 👉👉 8617697112⭐⭐ 100% Genuine Escort Service ...
Night 7k to 12k Daman Call Girls 👉👉 8617697112⭐⭐ 100% Genuine Escort Service ...Night 7k to 12k Daman Call Girls 👉👉 8617697112⭐⭐ 100% Genuine Escort Service ...
Night 7k to 12k Daman Call Girls 👉👉 8617697112⭐⭐ 100% Genuine Escort Service ...
 
Hire 💕 8617697112 Chamba Call Girls Service Call Girls Agency
Hire 💕 8617697112 Chamba Call Girls Service Call Girls AgencyHire 💕 8617697112 Chamba Call Girls Service Call Girls Agency
Hire 💕 8617697112 Chamba Call Girls Service Call Girls Agency
 

En User Manual

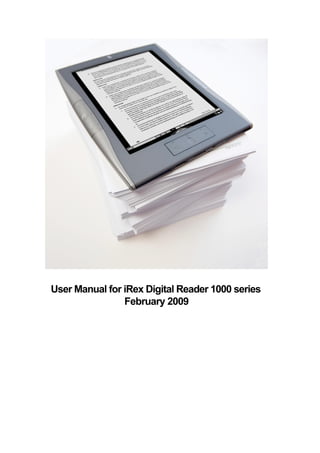
  • 1. User Manual for iRex Digital Reader 1000 series February 2009
  • 2. 1 What’s New This user manual will include some new software features that were included in the latest software release (version 1.5). In addition to the many improvements you can't see, we have changed the following: Added an interactive toolbar The Inbox is now working Added 2 new zooming functions; zoom in and zoom out Added 2 new font size functions; increase font size and decrease font size Power management settings to help save battery power Included PressReader application for digital newspapers from PressDisplay.com DR1000-1.5.0-EN 2
  • 3. Contents 1. What’s New ................................................................................... 2 2. Preface .......................................................................................... 4 3. Copyright ....................................................................................... 5 4. Disclaimer ...................................................................................... 5 5. Warranty and Safety Information ...................................................... 6 6. General Information ....................................................................... 8 7. Getting Started ............................................................................. 11 8. Menus, Status Area, and Browsing Folders ...................................... 16 9. Home .......................................................................................... 24 10. Documents .................................................................................. 25 11. Inbox ........................................................................................... 28 12. Help ............................................................................................ 30 13. Dictionaries .................................................................................. 31 14. WritePads and Templates .............................................................. 32 15. Navigating and Reading a Document ............................................... 33 16. Settings ........................................................................................ 47 17. iRex Companion Software .............................................................. 52 18. Extra Device Information ............................................................... 57 19. Troubleshooting ........................................................................... 58 20. Icon Index .................................................................................... 61 DR1000-1.5.0-EN 3
  • 4. 2 Preface Welcome to the world of digital reading and writing! At iRex, we take pride in offering you the best possible reading and writing experience from a digital reader device. Being the leader in electronic paper display technologies, we have taken yet another monumental step with this second generation of digital reader devices. iRex offers you many best-in-class performance elements that will make your reading more productive and enjoyable and will help you organize and manage all your reading habits in one device. Seamless integration with your PC environment will make the experience only more pleasurable. You may expect from us the continued promise of providing new features and applications. After you have acquainted yourself with your Digital Reader, it is important to create an account to download free new software upgrades for your device. Please go to https://myirex.irexnet.com, click the link ‘Create new iRex user’ and follow the steps described. Once it has been set up, you can: ■ Get software upgrades ■ Download the latest User Manual and Quick Reference Guide ■ Store content in your personal secure library (planned). ■ Share content with other Digital Readers or user accounts (planned). ■ And much more to come… We hope you will join us in our continued effort to conserve natural resources and protect the environment by reducing the amount of paper that is printed each day. The iRex team wishes you a memorable reading experience and, if you have suggestions or questions, please feel free to send an email to info@irextechnologies.com. DR1000-1.5.0-EN 4
  • 5. 3 Copyright All Rights reserved. Reproduction in whole or in parts is prohibited without the prior written consent of the copyright owner. iRex Technologies BV© 2009 4 Disclaimer While every effort has been made to ensure that the information contained in this manual is accurate and complete, no liability can be accepted for any errors or omissions. iRex Technologies reserves the right to change the specifications of the hardware and software described herein at any time and without prior notice. No part of this manual may be reproduced, transmitted, transcribed, stored in a retrieval system, or translated into any language in any form, by any means, without the prior written permission of iRex Technologies. iRex Technologies does not accept any liability for damages resulting from corrupted or lost data due to erroneous operation or malfunction of the Digital Reader, the software, personal computers, peripheral devices, USB, or SD cards. DR1000-1.5.0-EN 5
  • 6. 5 Warranty and Safety Information Please read this manual carefully before using the device. The iRex Digital Reader should only be connected and used in the way described in this manual. 5.1 Product Warranty Damage and defects that are not the direct result of shipping or manufacturing will not be covered by warranty. Please be aware that the display screen of this device is made from glass and can be scratched or broken if mistreated. Any damage caused by fire, accident, misuse, or unauthorized alterations to the device is not covered by warranty. 5.2 Battery Safety The Digital Reader uses a rechargeable Lithium Ion battery to power the device. The battery is charged by connecting the Digital Reader to a power source using the included USB cable. ■ Do not expose the battery to fire, or direct sunlight ■ Do not attempt to open or alter the battery ■ Do not dispose of the battery with household waste ■ Keep the battery out of reach of children 5.3 Exposure to Moisture Do not expose this device to water, extreme humidity, or liquids of any kind. Damage caused by moisture is not covered by warranty. If the device does get wet, turn the device off, wait for it to dry, and turn it on again. If the device does not work properly after drying, you can contact customer support to arrange for it to be repaired. It is also advised to avoid exposure to dust and sand as much as possible. 5.4 Extreme Temperatures Avoid using the device in temperatures below 0°C/32°F or above 45°C/113°F. The device can be stored in temperatures ranging from -20°C/-4°F to 70°C/158°F. 5.5 Exposure to Direct Sunlight Do not leave the display exposed to direct sunlight for extended periods of time. Use a protective cover (available for purchase) to shield the device from the sun. DR1000-1.5.0-EN 6
  • 7. 5.6 Cleaning Only use a soft, damp, lint free cloth to clean your device. Cleaning solutions and aerosol sprays can damage the device and should not be used. Make sure the device is unplugged while cleaning and avoid getting moisture in the openings. 5.7 Professional Maintenance Never open the device or attempt to repair it. Opening the device will void any warranty and release the manufacturer from all responsibilities. If you feel your device is defective, please contact customer support to arrange for it to be repaired. 5.8 Proper Disposal of the Device Please join iRex in conserving natural resources and protecting the environment by recycling your device when it has reached the end of its life cycle. You can contact your local authorities for information about laws and regulations regarding the proper disposal of this device. 5.9 Make Back-Ups It is always a good idea to make a back‐up of your information on a regular basis. This Digital Reader is a portable device like any other, and it is possible that it may be lost or the information on the memory card is accidentally erased. 5.10 Resetting the Digital Reader To reset the device, take the stylusor the tip of a ballpoint pen and very gently press the reset button on the bottom of the device. Pressing the button with too much force could damage the electronics inside. DR1000-1.5.0-EN 7
  • 8. 6 General Information Software updates, information about networks and how to get extra help are among the topics discussed in this chapter. 6.1 Included Pieces in the Box 1 iRex Digital Reader 1 Mini USB Cable 1 1GB SD Card 1 Stylus 6.2 Software Updates As new features become available for your device, software updates will be released. Some of these updates will be automatically installed on your device in order to ensure it operates correctly, while other updates are optional. 6.2.1 Installing Software Updates Software updates will be delivered through the Companion Software or can be found on the iRex web site. After they are installed on the SD card, the device must be restarted in order to update the software. 6.2.2 Download Software Updates 21.Connect the Digital Reader to a computer with an active Internet connection using the included USB cable 22.If a pop‐up automatically appears on your computer screen, select ‘Run the iRexDR1000 Companion Software program’ 23.If a pop‐up did not appear, open My Computer and double click on iRexDR1000 24.The Companion Software will start up and automatically check and download software updates 25.Disconnect the Digital Reader from the computer and restart it to install the new software
  • 10. 6.3 SD Cards and Internal Memory The device has limited internal memory that is used to run the system and applications on the device. Your files, folders, iRex Companion Software, and settings are saved directly to the SD card. This means that when you remove the SD card, all your information stays securely with you and not on the device. 6.3.1 Inserting the SD card Insert the card into the card slot on the bottom of the device. Press the card in with your finger until you hear or feel it ‘click’. If the card doesn’t want to slide into the slot, it may be upside down. Turn the card over and try again. 6.3.2 Removing the SD card To remove the card from the device, push the card into the device until you hear or feel it ‘click’. Pull back your finger and the card will eject from the slot. You can now pull it free from the device. Never remove the SD card while the Digital Reader or Companion Software is busy. If the card is not safely removed, information on the card could be lost or corrupted. You can safely remove the SD card from the device by selecting Menu>Safely Remove from the bottom row. A message will be displayed when it is safe to remove the card from the device. 6.3.3 Using the Device without a SD Card The device will still work without a card inserted, but because the card holds the content, there isn’t much to see. The Home and Settings icons will still appear on the screen, but the shortcuts will have disappeared. All the settings will be removed from the device, but it will remember the language, lights, and sound settings as well as leave you the option to format new cards for the device. You can read about these in the section about Settings. 6.3.4 Using Your Card on Another iRex Digital Reader If you were to insert your SD card in another Digital Reader, your own settings will be used on the new device. You will also be able to read your own content on the device, but any documents that have Digital Rights Management (DRM) protection will not open. DR1000-1.5.0-EN 9
  • 11. 6.4 Support If you have any questions, comments, or experience problems with your device, you will find a Troubleshooter section and forum on the iRex web site (http://support.irexnet.com/). You can also reach these support pages by choosing ‘Support Web site’ from the ‘Help’ tab in the included iRex Companion Software. DR1000-1.5.0-EN 10
  • 12. 7 Getting Started Digital Reader Overview 1 SD Card Slot 2 Function Extension Slot 3 Mini‐USB Connection 4 Reset Button 5 Arrow Up Sensor (▲) ‐ there are 2 on the device 6 Enter/Open Sensor (•) ‐ there are 2 on the device 7 Arrow Down Sensor (▼) ‐ there are 2 on the device 8 Arrow Left Sensor (◀) 9 Menu Open/On Sensor (•) 10 Arrow Right Sensor (▶) 11 Main LED Indicator 12 Sensor LED Indicators ‐ there are 9 on the device
  • 14. 7.1 Charging the Digital Reader The Digital Reader is charged by connecting it to a power source using the included USB cable. If you are using a computer to charge, be sure that the computer is turned on, otherwise no power will get to the Digital Reader. 7.1.1 Is it charging? You can tell if the device is charging by looking at the main LED indicator above the screen. While the battery is charging, the LED will be orange. As soon as the battery is fully charged, the LED will turn green. If your device is turned off and you connect it to charge, the device and LED will turn on. If you decide to turn off the device while it is still connected, both the screen and main LED will turn off but the device will remain charging. Main LED Indicator Above the screen, you will see a Light Emitting Diode (LED). This LED will change colour depending on the state the device is in. Device is and is the LED will be: Steady Red ‐ the battery is too low to
  • 15. turn the Not device Restarting Chargin g on Fast Blinking Green ‐ the device is busy restartin g Fast Blinking Green ‐ the device and LED will Charging turn on Turned Not No LED Off Charging Slow Blinking Green ‐ device is on Turned Not Fast Blinking Green ‐ device is busy On Charging Slow Blinking Red ‐ battery is low Steady Orange ‐ battery is charging Charging Steady Green ‐ battery is fully charged
  • 16. 7.1.2 How long should it charge? The first time you charge the device, it should be charged longer than necessary in order to extend the lifetime of the battery. When the device is turned off, it will take approximately 3 hours to charge a completely empty battery. If you are using the device while it is charging, it will take longer to charge. To stretch the most out of the battery, you can turn the stylus, lights, and sound off. Learn more about these in Settings. 7.2 Turning the Device On and Off Once the device has charged, it can be turned on and used. Turn the Device On ■ Place your finger on the • sensor below the screen until you hear a beep (approximately 1½ seconds), and then remove your finger ■ The screen will turn on and the device will begin starting up; you will see a start up screen while it is busy ■ The device is ready to use when you see the Home screen appear Turn the Device Off ■ Tap on the lower • sensor with your finger. The menu will open DR1000-1.5.0-EN 13
  • 17. ■ Choose Menu>Turn Off from the bottom row in the menu. The device will start to power down and then turn off 7.3 Using the Sensors The sensors used in the Digital Reader are called capacitive sensors. These work by sensing your fingertip through the plastic. This means that you don’t need to apply any pressure on the sensors; the contact of your skin to the plastic is enough. Next to each sensor is a small green LED that will let you know that it has sensed your finger and you will also hear a beep. 7.3.1 Terms In the rest of this manual, the terms ‘Tap’, ‘Long Press’, ‘Hold’, and ‘Cancel’ will be referred to when describing how to touch the sensors. Tap – is when you quickly touch a sensor with your finger for less than ½ a second Long Press – is when you touch a sensor and keep your finger on it for more than ½ a second. The light next to the sensor will dim to tell you that you have reached the time frame of a long press and can remove your finger for actions such as jumping pages Hold – is when you keep your finger on the sensor Cancel – hold your finger on the sensor for more than 2½ seconds and then remove it. Nothing will happen Sensor Shortcuts All the shortcuts for the sensors are listed below Do To Long Press lower, middle • (9) Turn device on Tap lower, middle • (9) Open and close the menu DR1000-1.5.0-EN 14
  • 18. Tap a side • (6) Open a file or folder Choose a menu function Click a button Tap ▲ (5) TapT (7) Check and uncheck boxes Move selection box up Tap^ (8) Tap ► Turn 1 page backward Move selection box down (10) Long Press ▲ Turn 1 page forward Turn selection box left (5) Turn 1 page backward Move selection box Right Turn 1 page forward Long Press T (7) Move selection box to top of column Turn 5 pages backward Long Press A (8) Move selection box to bottom of column Long Press ► (10) Turn 5 pages forward Move selection box to start of row Hold side • and Tap T or ► Turn 5 pages backward Hold one side • and Tap ▲ or Move selection box to end of row < Turn 5 pages forward __________________________ Find next hyperlink Hold one side • and Tap another side • Find previous hyperlink ________________________ Go back after using a hyperlink Tap ▲, Y, < or ► Pans the screen when zoomed in and the pan function is active
  • 19. DR1000- 1 1.5.0-EN 5
  • 20. 8 Menus, Status Area, and Browsing Folders 8.1 The Menu The menu contains all the tools and functions that can be used on the device. Two rows, General and Task Manager, will always be available when you open the menu. The rest of the menu will be filled with functions that are dependent on the type of document or application that is open. Open and Close the Menu with the sensor - Tap the bottom • sensor with the stylus - Tap on the menu icon (I^EDL^H) in the status area Select a Function from the Menu with the sensors ■ Tap your finger on a A,Y,4, or ► sensor to move the selection box around the function you wish to select ■ Tap one of the • sensors on the side to select the function with the stylus ■ Tap on the function you wish to select with the stylus Cancel Opening of Menu or Selecting a Function ■ Hold your finger on the sensor for longer than 2½ seconds and the action will be ignored DR1000-1.5.0-EN 16
  • 21. General Menu Functions Every time you open the menu, you will always have a group called ‘General’, and it will always show the same functions. Home Shows the Home screen Rotate Rotates the screen, menu, and sensors from landscape to portrait and from portrait to landscape Sensors Locks/unlocks the sensors. You can choose which sensors to lock in Settings Safely Remove Prepares the SD card to be safely removed from the device Turn Off Device Turns the device off 8.2 ‘Task Manager’ in the Menu The Task Manager group is located above the General Group. This row shows the files and applications that are currently open and running on the device and a shortcut (§§) back to the last folder that was open. Once the Task Manager row in the menu is full, the least used task will be saved, closed, and removed from the list when you open a new task. You can also close a task yourself by opening it and selecting Menu>Close. Task Manager Menu The task manager row is a fast way to switch between open files, applications, and the last opened folder Return to Folder Returns to the last folder you opened. If you last used Home to open a file, it will take you back to Home. DR1000-1.5.0-EN 17
  • 22. 8.3 The Status Area The status area is located in the lower right corner of the screen. It has icons that tell you the status of the device. For example, if the battery is low or the memory card is full, you will see it appear here. HBHL ^.^TBEŽS Symbols in the Status Area The status area displays information about the Digital Reader Icon Indication Battery Level Indicates the remaining battery level and the battery status (example shown: battery almost empty, battery full, battery charging) dtí Sensor Lock Indicates that the sensors are locked or unlocked Sleep Mode The device is in sleep mode (to save power) until you begin using it MU again. It will respond to a touch on the sensor or a tap of the stylus Menu The stylus will open and close the menu using this icon Memory Level The memory card is almost or completely full Stylus Mode Shows what mode the stylus is: pencil/eraser/pan/pointer/zoom selector/look up 8.3.1 Viewing the Battery Level You can view the current battery level and status by tapping one time on the battery icon. To close the information box, tap on the OK button inside the dialogue. DR1000-1.5.0-EN 18
  • 23. 8.3.2 Using the Sensor Lock The sensors can be locked and unlocked by tapping on the lock icon in the status area. Hint: go to Settings>Personal Preferences and make sure you have chosen at least one sensor to be locked. 8.4 Toolbar The toolbar is located in the lower left corner of the screen, just opposite from the status area. Each application on the Digital Reader has a unique toolbar, making it easy to organize and place your favorite icons within reach. This makes it fast and easy to find and use functions that are in the menu. Some icons have already been added to the toolbar for you. You can personalize it further by adding icons, replacing them, and even removing them from the toolbar. Note: You can add any icon from the menu that completes one specific task to the toolbar. Below are the few exceptions. Open documents and applications found in the Task Manager cannot be added to the toolbar Toolboxes, such as Writing Tools, cannot be added to the toolbar. The icons inside a toolbox, like the pencil, can be added. DR1000-1.5.0-EN 19
  • 24. 8.4.1 Adding or Replacing Icons in the Toolbar ■ Open the menu by tapping the lower • sensor or by tapping on the menu icon on the screen ■ Hold the stylus on an icon and then (without lifting the stylus from the screen) drag it to a slot on the toolbar ■ Lift the stylus from the screen and you will see the icon appear in the space ■ It's possible that your stylus calibration is a little off and the icon isn't dropped into the space. If this happens, you will get a message. You could try dropping it again, and perhaps calibrating the stylus might also help. 8.4.2 Using Icons in the Toolbar The thumbnail and detail view icons have already been placed in the toolbar for you. The instruction below will use these as an example, but the technique can be applied to any icon. ■ Tap one time on the View Details icon in the toolbar. The content browser will change to a detailed list view. ■ Tap one time on the View Thumbnails icon in the toolbar. The content browser will change to a thumbnail view. I How do I know what is active in the toolbar? If an icon is active, it will have a bold, white border around it. You might also sometimes notice that an icon is grayed out. This means it is disabled |at the moment. When you are able to use it again, the gray will disappear. 8.4.3 Removing Icons from the Toolbar Icons can be removed from the toolbar by dragging them away from the toolbar area. Removing an icon from the toolbar does not mean it is removed from Digital Reader; the functions and tools will always be in the menu. ■ Hold the stylus on the icon in the toolbar ■ Drag the icon at least 1cm (about 1/3") away from the toolbar area DR1000-1.5.0- 20 EN
  • 25. ■ Lift the stylus from the screen ■ A dialogue will appear that asks if you are sure about removing it from the toolbar. Select Yes ■ The icon is removed from the toolbar 8.5 Browsing Folders Since the SD card can be organized in a folder structure, it is useful to be able to browse them. To do this, you will need to be able to Open and Select files and folders, and move Up a Level through the folders. 8.5.1 Selecting a File or Folder In order to delete an item or make a shortcut to it, you will first need to select it. An item is selected when it has a black outline around it. ■ Tap your finger on a ▲, ▼, A, or ► sensor to move the selection box around the folder you want to select 8.5.2 Files and Folders that are Out of View Sometimes you will have more files and folders than will fit onto the screen. You can see how many files and folders there are by looking in the upper right corner of the screen (for example 1-25 of 100). This tells you that there are 75 more files or folders out of view. using the sensors ■ Move the selection box around a folder on the bottom row DR1000-1.5.0-EN 21
  • 26. ■ Tap one more time on the ▼ sensor and the screen will display the next group of items ■ The same action works if you go to the top row and tap on the ▲ to show the previous group of items using the stylus ■ Tap on the (insert image) and (insert image) to move to the next or previous groups of items Move the Selection Box to the Top or Bottom of a Column Long press a ▲ or ▼ sensor and the selection box will move to the top or bottom of the column on the screen Move the Selection Box to the Start or End of a Row Long press the A or ► sensor and the selection box will move to the start or end of the row If you are already at the start or end of the row, the selection box will move to the start or end of the previous or next row Move the Selection Box to the Same Position in the Next/ Previous Group of Items Move the selection box to the top or bottom of a column Long press the ▲ or ▼ sensor and the screen will move one group of items and the selection box will appear at the same place on the screen as it did in the previous group 8.6 Opening Files and Folders When you open a folder, you will see the contents inside of that folder. There will always be one icon at the start, the Up a Level icon ('■ '*). This icon will help you move out of folders and up to the previous level. Above the contents of the folder, you will see the file path you have followed to get to your current location on the SD card. Open a File or Folder 1. using the sensors ■ Select the file or folder ■ Tap your finger one time on a side • sensor 2. using the stylus ■ Tap the file or folder one time with the stylus DR1000-1.5.0-EN 22
  • 27. 3. using the menu ■ Select the file or folder ■ Open the menu ■ Choose Menu>Open Move one level up in the Documents ■ Choose Up a Level from the list of contents in the folder DR1000-1.5.0-EN
  • 28. 9 Home The Home screen is where you will find all the applications and shortcuts to special folders that are on the device. You can also place your own shortcuts on the Home screen. Documents Displays all the files and folders that are on the SD card. From here, you can open files. (see Documents). Inbox A shortcut to the Inbox where subscriptions and other news is saved (see Inbox). Help This shortcut takes you directly to the User Manuals and Quick Reference Guides (see Help). Dictionaries A special shortcut to the Dictionaries folder in Documents. Mobipocket dictionaries placed here are used by the Look Up function (see Dictionaries). WritePads Take notes, draw pictures, or keep a diary using WritePads (see WritePads). Settings Find and adjust settings such as language, time & date, and device rotation (see Settings). PressReader This application lets you read newspapers that are downloaded from *—w PressDisplay.com. Please go to http://www.irextechnologies.com/pressreader for more information. Shortcut A quick link to a file or folder in Documents (see Creating Shortcuts). DR1000-1.5.0-EN 24
  • 29. 10 Documents ‘Documents’ shows all the files and folders that are stored on the SD card. It uses a folder structure to help organize your books, newspapers, and documents. Anything you save on the card will be found in this location. You could consider it the content browser of the device. Functions in the Documents Menu While you are browsing the documents on the device, you will have access to a menu full of tools to work with the files and folders. Icon Meaning Open Opens the selected file or folder Add Shortcut Adds a shortcut to the selected file or folder to Home Delete Removes the selected file or folder from the SD card E Sort by Type Sort by Name Sorts the folder alphabetically by name Sorts the folder by type Sort by Size Sorts the folder by size, largest to smallest Sort by Date Sorts the folder by date, from newest to oldest Sort by Author Sorts the folder alphabetically by author DR1000-1.5.0-EN 25
  • 30. View Thumbnails Shows the content as thumbnail images View Details Shows the content as a detailed list 10.1 Changing the Views The Digital Reader can display the content of your documents as thumbnails or as a detailed list. The view you have chosen will be used for all the folders on the device. Change the view ■ Choose Menu> and choose the view layout you wish to use from the Views group 10.2 Sorting the Views It’s sometimes useful to sort the contents in order to find something more quickly. You can sort
  • 31. the content by Name, Author, Size, Type, and Date. Sort the view ■ Choose Menu> and choose a sorting preference from the Sorting group 10.3 Creating Shortcuts Another way to quickly access the files and folders in Documents is by creating shortcuts to them on the Home screen. 2
  • 32. These shortcuts are unique to the SD card. If you remove the card, you also remove the shortcuts from the Home screen. When you insert a different card, you will see the shortcuts from the new card appear. If you delete, rename, or move the file or folder, the shortcut will no longer work because the Digital Reader cannot find it. You can either put the file or folder back in place or delete the shortcut and make a new one to the new location. Create a Shortcut Select the file or folder you want the shortcut to link to ■ Choose Menu>Add Shortcut The shortcut is placed on the Home Delete a Shortcut ■ Select the shortcut you want to delete ■ Choose Menu>Delete ■ Choose ‘Yes’ in the pop-up to confirm that you want to delete the shortcut ■ The shortcut is deleted from the Home screen DR1000-1.5 .0-
  • 33. EN 27
  • 34. 11 Inbox The Inbox is where you will find a list of shortcuts to the documents and subscriptions that were downloaded. If you already have, or will be interested in, subscribing to newspapers or other services, this is a chapter worth reading. To use the Inbox, please follow the steps below to create an account and activate the Inbox on the device. 1. Sign up for an account online ■ Go to https://myirex.irexnet.com ■ Enter a valid email address and click Send ■ Check your email and follow the instructions to activate the account 2. Run the iRex Companion Software ■ Connect the Digital Reader to a computer with an active internet connection ■ Run the software in one of two ways: Using the Auto-Run Pop-up ■ Insert the SD card into the computer or connect the Digital Reader with the USB cable and choose Yes ■ Choose Run iRexDR1000 Companion Software from the autorun pop-up that appears on your computer ■ The program will begin to load Using My Computer ■ Insert the SD card into the computer or connect the Digital Reader with the USB cable and choose Yes ■ On the PC, click Start and then My Computer ■ Double click on the iRexDR1000 drive ■ The program will begin to load
  • 35. DR1000-1.5.0- 28 EN
  • 36. ■ Click on the Inbox tab and then on the MyiRex Account link. A pop-up will appear. ■ Fill in the email address and password and then click Save. 3. Download Subscriptions to the Inbox ■ After your MyiRex account information has been saved in the Companion Software, you will be able to connect and download content from the server. ■ Click on the Inbox tab and then on Connect & Download ■ The software will connect to the server and download any available content ■ Your downloads will be saved on the SD card DR1000-1.5.0-EN 29
  • 37. 12 Help Help is another one of the pre‐installed folders on your Digital Reader and is part of Documents. It contains User Manuals as well as Quick Reference Guides in all the supported languages. You probably don’t need to use up space to keep the same manual in all the different languages, so this is a good place to practice deleting files. 12.1 Downloading Manuals Updated manuals will be published with most software updates and can be downloaded from the iRex web site. DR1000-1.5.0-EN 30
  • 38. 13 Dictionaries In order the device to automatically look up words in a dictionary for you, it must be a Mobipocket dictionary and it must be saved either in the location System/Dictionaries or on the root of the card as a folder named ‘ebooks’ on the SD card. You can purchase a dictionary online or download a free sample from www.mobipocket.com. You will probably use the dictionaries mainly when you are reading other documents and need to look up a word. For this, you will use the Look Up function found in the menu for your document. You can also open a dictionary to look up words. You will be asked to type in the word (or part of it) and a result list will be shown. Look Up a Word inside a Dictionary ■ Open a Dictionary ■ Choose Menu>Find Word ■ Type the word using the on-screen keyboard ■ Tap the Find button and wait; a list of words will be created ■ Tap on the word in the list and the dictionary will show the page it is on Important: Mobipocket books, dictionaries, and reference materials that you have purchased will only work on your own device. You cannot share them with others and they will not work if you put your SD card in a different electronic device. You will find the PID number, used for registering with Mobipocket, under Settings>About. DR1000-1.5.0-EN 31
  • 39. 14 WritePads and Templates Templates are handy to have when you are filling out forms on the Digital Reader. When you open template or WritePad (also a template), it will immediately open a copy for you to write on. All your notes are automatically saved on the SD card and a temporary file name is created. WritePads were included with your device on the SD card. You can also create your own by using the iRex Companion Software to convert any supported document into a template. 14.1 Sharing Your Notes with Others If you want to share your WritePads with others, you will need to use the iRex Companion Software to merge the handwriting to the paper before it can be shared. This is also true for any notes you have written on other documents. Please see iRex Companion Software for more information about merging documents. 14.2 Converting Handwriting to Digital Text If you are interested in converting handwriting to digital text with your computer, you can download and purchase additional software, such as MyScript Notes. You will find a link to the iRex Shop in the iRex Companion Software by clicking on ‘Links’ and choosing ‘iRex Shop’. If you are using MyScript Notes version 2, you can use the Companion Software to export the database file for the program. DR1000-1.5.0-EN 32
  • 40. 15 Navigating and Reading a Document Reading documents is probably the main task you will be doing on Digital Reader. To help you get the most out of the device, this chapter describes how to navigate a document by turning and finding specific pages, using bookmarks, and making notes on a document. There is also information at the end of this chapter about zooming and changing the view of a document. Supported File Formats The format icons will be used later in this section to identify the functions that can be used with them Icon Format Type PDF A You can make notes and use zooming features on PDF documents. To make your own PDF documents, use the included PDF printer é Mobipocket A Mobipocket document is a special file type. It can only be opened on your own device Images m .JPG, .PNG, .BMP, .GIF, and .TIFF images can be viewed on this device. HTML Ú HTML files can be viewed on this device, but not movement and sound TXT A nice feature of .TXT files is that you can easily change the font sizes 15.1 Turning Pages The best way to turn pages is by using the sensors. You are able to turn single pages by tapping and 5 pages by long pressing. Page Turning with Sensors Do To Tap ▼ or ▶ Turn 1 page forward DR1000-1.5.0-EN
  • 41. Tap ▲ or ◀ Turn 1 page backward Long Press ▼ or Turn 5 pages forward ▶ Long Press ▲ or Turn 5 pages backward ◀ 15.2 Page Progress Bar Documents will always have a page progress bar at the bottom of the screen. By looking at this bar, you can see which page you are reading and how far you are into the document. If you have a stylus and you tap on the progress bar, you will flip to the page you tapped on. When the document is being viewed in full screen, this progress bar will not be displayed. 15.2.1 Bookmarks in the Page Progress Bar Á As you make bookmarks in a document, they will appear as small marks above the page progress bar. Some bookmarks might have already been made by the publisher of the document. If you have a stylus, you can tap on them and the document will turn to that page. 15.3 Jumping Pages The Jump To function allows you to jump to specific pages in the document by typing in the page number. DR1000-1.5.0-EN 34
  • 42. ■ Using the stylus, tap on the current page in the page progress bar, type in the page number, and then tap the ‘Go to page’ button 15.4 Zooming and Page Format Tools Changing the appearance of the document on the screen is very easy. You will find that there are many different zooming options available for documents. The document will remember the last view and the next time you open it, it looks the same as when it was closed. ■ Choose Menu>Zooming from the Toolboxes row and then choose from one of the following options: Zooming and Page Formats The available zooming and page layouts are shown below Menu Action Full Screen Expands the document to fit the entire screen, hiding the page progress bar and status area. Tap the icon again to turn full
  • 43. screen off___________________________________________ Hide Margins J-. *-l Crops the white margins of the document so the contents have more screen space DR1000-1.5.0-EN 35
  • 44. Fit on Screen .<£*] JH Fits the entire document on the screen. The page progress bar and status area will also be shown Page Flow Normal/Page Flow Continuous .^M ■H Toggles the document between individual pages or one long, continuous page Zoom In and Zoom Out ^1 Ml Zooms the document in or out by 25% each time it is used Zoom 75%-200% ^1 ■H Zooms the document using a specific zoom factor Selection Zoom <M Ml Use the stylus to create a boundary box around the area that is to be zoomed________________________________________ Pan J*l .**] Pan can be used when the page has been zoomed. A tap on the arrow sensors will move the page or the stylus can be used to hold and drag it 15.4.1 Making a Zoom Selection If you want to zoom into a specific area of a page, you can use the Selection Zoom function. D . R1 00 0-1
  • 45. 36
  • 46. ■ Choose Menu>Zooming>Selection Zoom ■ Use the stylus to draw a diagonal line that connects the upper left and lower right corner of the area you wish to zoom ■ Lift the stylus from the screen and the zoomed area will be displayed 15.4.2 Panning with the Stylus The page must first be zoomed in before you are able to pan it. You can then use the stylus to ‘drag’ the page on the screen to position it. Choose Menu>Zooming>Pan Hold the stylus on the screen and drag it the distance and direction you want the page to move
  • 48. ■ Lift the stylus from the screen 15.5 Changing Document Views 15.5.1 Reading View .^M & Ml §s I Reading view is the normal view used to read a document. To switch to the Reading view, choose Menu>Normal Reading from the Views row 15.5.2 Page Thumbnail View ^IMI A thumbnail of every page in a document is made and saved in the Page Thumbnail view. You can quickly browse through them and then select the page you wish to read. If a page has been bookmarked, a small bookmark is also indicated on the thumbnail. DR1000-1.5.0-EN 38
  • 49. ■ To switch to the Page Thumbnail view, choose Menu>Page Thumbnails from the Views row 15.5.3 All Bookmarks View M IB The Bookmark view is similar to the page thumbnail view, but it only contains thumbnails of the pages that have bookmarks on them. From this view, you can select and flip to a bookmarked page. You can also delete bookmarked pages (except the locked ones) from this view. To switch to the Bookmark view, choose Menu>All Bookmarks from the Views row
  • 51. ■ To delete a bookmark from the view, select the page and choose Menu>Delete Bookmark 15.5.4 Table of Contents View *»! Some PDF documents come with additional information that can be used to automatically generate a Table of Contents. If this is possible with your document, this option will be active in the menu. You can use the Table of Contents by tapping on the text with the stylus or by selecting and opening them with the sensors. ■ To switch to the Table of Contents view, choose Menu>Table of Contents from the Views row 15.6 Working Actively with a Document By using the navigation features described above, you can easily read your documents on the device. This section will make it quick and easy to work actively with documents. 15.6.1 Writing on Documents .<**•] Ml One of the notable features of the Digital Reader 1000 S is that you can use the stylus to write on your PDF documents and images. This makes it easy to mark-up and revise things such as letters and business documents. DR1000-1.5.0-EN 40
  • 52. Choose Menu>Writing from the Toolboxes row and then choose from one of the following options: Writing Tools These writing tools can be used to make notes on your documents Menu Action Pencil Switches the stylus into a pencil that you can use to write Eraser Switches the stylus into an eraser to remove pencil marks Sizes
  • 53. 5 pencil sizes are available for writing Colours Only a black pencil stroke is available at this time 15.6.2 Adding and Deleting Bookmarks *& *l Adding bookmarks to pages in your document makes it easy to find them again. They will be displayed in the page progress bar at the bottom of the document and also be added to the Bookmark View of the document. DR1000-1.5.0-EN 41
  • 54. Some publishers have included their own bookmarks in the documents. While you are free to add and remove the bookmarks you’ve made yourself, you cannot remove the ones made by the publisher. Choose Menu>Bookmarking from the Toolboxes row and then choose from one of the following options: Bookmarking Menu Options Menu Action Add Bookmark Adds a bookmark to the current page of the document Delete Bookmark Deletes the bookmark of the current page 15.6.3 Finding a Word in the Text -^l 0 M If there is a particular word you are looking for in the body of the text, you can begin a quick text search.
  • 56. Starting a Search ■ Choose Menu>Find Word from the Actions row. A search screen will open ■ Type in the word you wish to find in the text ■ Optional: choose to match only whole words or to change where the search begins ■ Tap the ‘Find’ button and wait for the search to complete Finding the Previous or Next Word ■ Tap with the stylus on the A or ► buttons on the screen to highlight the previous or next word Stopping the Word Search ■ Tap the stylus on the X in the upper right corner of the pop-up window ■ The pop-up window will close and the document will remain on the page with the last word found 15.6.4 Looking Up Words &*> The Look Up in Dictionary feature allows you to look up words in your text using the dictionaries that are in the Dictionary or ebooks folder. It doesn’t just search one dictionary, it searches all of those that are in the folder. The result is a list of dictionaries containing a result that you can open and read.
  • 58. Look Up in Dictionary J. 4Liii-;niii?i:lfl-!»iil IIIJ—Jin-al iriili hnijfuimJi -Jin-I tail 1. |i■■■ in- MI I'-' -nK '. ^ CiixdiPd cwtlntwreBdKia NL-NL Engtfc-Nrci. Womdcnboelt J.HUUJ IIIHU rUUIH|i 'JJII ritbili rabbit i—timpi— ] r:nsptar 1 MM jr MM f rabbitLll ^^T Down the Rabbit H rabhit|3| ^^F EHE.N ^BÍk Pcckv! On-fcrd Locjlish Dictionary rabUll^^ EH-LN CxfarD Fjperbot t Thesaurm rabbit Alice was begir mg to get very tired of s on the bank, jd of having nothing to dc had pccpcdrfhto the book her sister was no pictui^f or conversations in it, "and T book," thought Alice, "without pictures So she wae considering, in her own m could, for the hot day made her feel v£>ry whether the plea&ure of making a dai worth the trouble of getting up and p when suddenly a White Rabbit with pin her. There was nothing so very remarkal Alice think it so very much out of thí Rabbi t say to itsel f "Oh dear! Oh dear! Look Up a Word ■ Choose Menu>Look Up in Dictionary from the actions row ■ Tap with the stylus on the word you want to look up ■ Wait for a list of results to be created and then select a dictionary from the list 15.6.5 Changing Font Sizes ©1 VI Some document formats allow you to change the size of the font instead of zooming in on it. Adjusting the font size will influence the length of the document each time it is changed. The device is not always able to keep up with these changes and it may be difficult for it to accurately keep track of your bookmarks. DR1000-1.5.0-EN 44
  • 59. ■ Change the size of the font by choosing Menu>Font Sizes from the Tools row and then selecting your preferred font size. ■ Or you can also use the Increase or Decrease Font Size function. This will increase or decrease the font size 2pts every time you choose it. 15.6.6 Using Hyperlinks JM«7|.M. Many documents have hyperlinks that let you open new documents or move to other places in the same document. You can tap with the stylus on a hyperlink to follow it, or select and open it using the sensors. Using the Sensors to Navigate Hyperlinks Sensor Shortcut Action Hold a side • and Tap ▼ Next Hyperlink or ► Moves the selection box to the next hyperlink in the document Hold a side • and Tap ▲ Previous Hyperlink or M Moves the selection box to the previous hyperlink in the document Open Hyperlink Tap any side • Follow the hyperlink k to a new location (either in same document or in a new document) 15.7 Page History As you are moving around in a document using functions such as hyperlinks and bookmarks, you are building up a page history. It is similar to using a web browser that has a back and forward button. Move to Previous using the sensors ■ Hold one side • and tap the other side • Move to Previous or Next using the Menu ■ Choose Menu> and select one of the following options from the Actions row: DR1000-1.5.0-EN 45
  • 60. Page History in the Menu You will find a Next and Previous function in the Menu Menu Action IS* Jump to Next Turns to the next page in the page history Jump to Previous Turns back to the previous page in the page history 15.8 Closing a Task (an open document or application) There are two ways a document is closed. You can close it yourself or the device closes it for you. In both cases, there is no need to worry about losing your work because it is always saved automatically. It remembers what page you were on so the next time you open the document, it opens in the same place. Close a Task Yourself ■ Choose Menu>Close Document and the document will close ■ The last opened folder appears Let the Device Close your Task ■ Once the Task Manager row in the menu is full, the oldest task will be saved, closed, and removed from the list each time you open a new task
  • 62. 16 Settings Inside Settings, you will find all the ways you can personalize your device so it works best for you. These settings are saved to the SD card and are unique to the card. It may take a few seconds for the device to save and change your settings. 16.1 Settings Quick Reference Device Language Time and Date Automatic Shutdown Suspend Timeout Rotation SD Card Properties Personal Preferences Card Storage Capacity Format SD Card Lights Setup SD Card Sound Reset Settings Sensor Lock Stylus About Device Information Acknowledgments Power Preferences Using the Sensors to Fill in Settings Do To Tap a side • Click a button Check and uncheck boxes Tap ▲ or ▼ Move Selection Box Up and Down Tap ◀ or ▶ Move Selection Box Left and Right 16.2 Device Settings The Device settings are the essential settings that will help make using this device easy. You will find that you can change the language, set the time and date, and choose the screen rotation direction. DR1000-1.5.0-EN 47
  • 63. To Change Device Settings ■ Choose Settings>Device and a screen similar to the one to the right will appear 16.2.1 Language You can choose to have your device interface in English, German, French, or Dutch. 16.2.2 Time and Date You can set the time and date that is used on the device. Change the Time without a Stylus ■ Move the selection box around the time box ■ Tap any side • to select it and an option box will appear ■ Enter the a number by moving the selection box around the number and tapping a side • sensor ■ Select OK Change the Date without a Stylus ■ Move the selection box around the date box ■ Tap any side • to select the field and an option box will appear ■ Choose the date and tap a side • sensor to select it 16.2.3 Rotation
  • 64. When you rotate the device interface, the screen will turn either clockwise or anti- clockwise. This setting allows you to choose the rotation direction so you can hold the device in the way that is most comfortable for you. 4
  • 65. 16.3 Personal Preferences Personal Preferences let you turn the sensor LED’s and sound on and off and also let you determine the behaviour of the sensors when they are locked. 16.3.1 Lights This setting is for the green lights next to the sensor panels. It will not affect the light at the top of the screen. You can choose between On and Off. 16.3.2 Sensors This setting determines what sensor areas will lock when the Sensor lock is activated. Locking the sensors will help prevent accidentally page turning or opening menus when you are holding the device or using the stylus to write. 16.3.3 Sound The ‘beep’ you hear when using the sensors can be controlled with this setting. You can choose between having the sound On or Off. 16.3.4 Stylus In this section, you can make adjustments to the stylus. By turning the stylus mode to Off (inactive), you could help extend the time you get out of the battery charge. Also, if you’re having problems accurately tapping or writing with the stylus, there is a calibration exercise you can use. DR1000-1.5.0-EN
  • 66. Calibrating the Stylus Tap Calibrate Stylus and follow the instructions given on the screen 16.4 Power Preferences Power preferences will help you mange the amount of power the device is using in different situations and uses. To Change Power Preferences Power Preferences ■ Choose Settings>Power Preferences Automatic Shutdown and a screen similar to the one to the Turn orf the device automatics I ty when not in use: ^[■•■i.^-i.'-l right will appear O Onty when running on battery Turn off the device when it is not in use after: Q Never O 15 minutes :•: ■ nn'' C -!5 r-mules-O 00 minutes Suspend Timeout Suspend the device to save power when it is not in use after: O 30 seconds O 43 seconds <■) 1 minute O 2 minutes O 3 minutes | 5a^e & Close]) Cancel 16.4.1 Automatic Shutdown The automatic shutdown setting has two options to set; when to use the setting, and how long to wait until it uses it. If you prefer that the device always automatically shuts down, even when it is attached to a computer or other power source, you should choose Always. If you only want your device to automatically shutdown when it is running on the battery, you should choose Only when running on battery. Note: When this setting is active and the device is connected to a computer or power source, it will never automatically shut down. 16.4.2 Sleep Mode When the device goes into sleep mode, it means that it has temporarily turned off power to parts of the device. It's similar to the screensaver on a computer…but you can still read the screen. DR1000-1.5.0-EN 50
  • 67. You can choose how long the device will wait for you to do something before it goes to sleep. You should experiment with different times to see what works best for your own reading speed. 16.5 SD Card Properties You can see how much remaining space is left on the SD Card, erase the contents of the card, or reset the settings in the SD Card Properties section. 16.5.1 Card Storage Capacity This meter will tell you how much used and remaining space is left on the SD card. 16.5.2 Format the SD Card Formatting the SD card will erase all the information from the card. This also means that the user manuals, iRex Companion Software, and settings will be deleted. 16.5.3 Setup a SD Card for the Device This function installs a folder named ‘System’, factory settings, and the iRex Companion Software to the SD card. It will not affect existing information on the card. 16.5.4 Reset the Settings Resetting the settings will return all of the settings to their original, factory defaults. 16.6 About Technical specifications and information specific to your device will be found in the About section. You will find here: ■ Product Serial Number ■ Main Software Version Number ■ Kernel Version Number ■ Firmware Version Number ■ Acknowledgements DR1000-1.5.0-EN 51
  • 68. 17 iRex Companion Software The iRex Companion Software has been saved on the SD card that was included with the device. The application will help guide you while you are working with your documents and computer, as well as provide links to services and an online shop where you can buy accessories for your device. To access the iRex Companion Software, you will need to connect the device to the computer using a USB cable or insert the SD card into the card reader on your computer. 17.1 Turn on the Companion Software Using the Auto-Run Pop-up ■ Insert the SD card into the computer or connect the Digital Reader with the USB cable and choose Yes ■ Choose Run iRexDR1000 Companion Software from the autorun pop-up that appears on your computer ■ The program will begin to load Using My Computer ■ Insert the SD card into the computer or connect the Digital Reader with the USB cable and choose Yes ■ On the PC, click Start and then My Computer ■ Double click on the iRexDR1000 drive ■ The program will begin to load Metadata Files There is a file named metadata.db in every folder on the Digital Reader. The metadata.db file is unique to the folder and files inside of it and contains information such as the handwriting you’ve made on a document. If you delete it or remove it from the folder, the information is no longer there for the device to read. You can never have two metadata files in the same folder
  • 69. DR1000-1.5.0- 52 EN
  • 70. If you copy a metadata.db file from one folder and try to paste it in another folder, you will be asked if you want to replace the file. If you replace it, the information from the second folder is gone. Copy the metadata.db file to your computer If you copy a document to your computer and plan to move it back to the Digital Reader and edit your handwriting later, you must copy the document and metadata.db file from the Digital Reader. 17.2 Merging Handwriting (Scribbles) If you have made digital notes on a document and wish to see them on your computer or share them with others, you will need to merge the document. Merge a Document ■ Click on the Convert tab ■ Find and select the file you wish to merge ■ Click the Merge link found under the convert tab ■ Choose the location to save the merged document and click Save 17.3 Converting Documents to Templates Templates are useful to have when you are going to be filling out forms or using the same document layout to write on over and over again. You can convert any file that is supported by the Digital Reader into a template. It is also possible to convert a template back to a normal document. Convert a Document ■ Click on the Convert tab ■ Find and select the file you wish to convert ■ Click either the Convert to Template or Convert to Document link found under the convert tab 17.4 Exporting Documents for MyScript Notes, Version 2 If you wish to use MyScript Notes (version 2) to convert your handwriting to type, you can use the Export MyScript Notes function. Export Handwritten Notes ■ Click on the Convert tab ■ Find and select the file you wish to export ■ Click the Export MyScript Notes link found under the convert tab DR1000-1.5.0-EN 53
  • 71. Choose the location to save it and click on Save 17.5 Transferring Content to the Digital Reader To transfer files and folders to and from the Digital Reader, you will use Windows Explorer or other similar file manager. You can access the Digital Reader using Windows Explorer in two different ways. Using the Auto-Run Pop-up ■ Insert the SD card into the computer or connect the Digital Reader with the USB cable and choose Yes ■ Choose Open Folder from the autorun pop-up that appears on your computer ■ You can now move content into the window and it will be saved on the Digital Reader Using My Computer ■ Insert the SD card into the computer or connect the Digital Reader with the USB cable and choose Yes ■ On the PC, click Start and then My Computer ■ Right click on the iRexDR1000 drive ■ Choose Explore from the drop-down ■ You can now move content into the window and it will be saved on the Digital Reader 17.6 Transferring Content From the Digital Reader To transfer files and folders to and from the Digital Reader, you should use the Companion Software. Using the Companion Software to move documents to a computer or other place on the SD card will help you keep the handwriting information together with the document. Copy a File or Folder ■ Click on the Document Management tab so you can see the options under it DR1000-1.5.0-EN 54
  • 72. Select the file or folder you wish to copy Click on Copy To… Choose the location you wish to copy the file or folder to and click Save If your document (or folder containing documents) had handwriting on it (scribbles), you will be asked if you wish to merge them. Choose Yes, No, or Cancel. ■ Yes - merges the handwriting to the copied document(s) ■ No - copies only the file(s), you will not see any handwriting on the copy ■ Cancel - stops copying the file or folder Move a File or Folder ■ Click on the Document Management tab so you can see the options under it ■ Select the file or folder you wish to move ■ Click on Move To… ■ Choose the location you wish to move the file or folder to and click Save ■ If your document (or folder containing documents) had handwriting on it (scribbles), you will be asked if you wish to merge them. Choose Yes, No, or Cancel. ■ Yes - merges the handwriting to the moved document(s) ■ No - copies only the file(s), you will not see any handwriting on the copy ■ Cancel - stops copying the file or folder 17.7 Inbox If you wish to use the Inbox feature, you must have a valid MyiRex account. Once you have an account and the account information is saved in the Companion Software, you can connect and download subscriptions and other documents from the server. Create a MyiRex Account and Save the Account information ■ Click on the Inbox tab and then on the MyiRex Account link. A pop-up will appear. ■ If you already have a valid MyiRex account, you can fill in the email address and password and then click Save. ■ If you do not have a valid MyiRex account, click the Create Account button and follow the instructions on the website. Once you have DR1000-1.5.0-EN 55
  • 73. verified the account, you can fill in the email address and password and then click Save. Download Subscriptions to the Inbox ■ After your MyiRex account information has been saved in the Companion Software, you will be able to connect and download content from the server. ■ Click on the Inbox tab and then on Connect & Download ■ The software will connect to the server and download any available content ■ Your downloads will be saved on the SD card 17.8 Additional Software If you don’t have a PDF printer or reader installed on your computer, no worries. The iRex Companion Software can help you download and install free software on any computer that makes it quick and easy to print and read PDF documents. 17.8.1 PDF Printer You will find the PDF Printer under the Install tab. The PDF printer will be installed alongside your other printers on your computer. All you have to do to print directly to your Digital Reader is set the printer as your default and press print in any application on your computer. 17.8.2 Adobe® Reader The latest version of Adobe® Reader is always available for download from the Adobe web site. A link to the web site is under the Links tab in the Companion Software. 17.9 iRex Shop and Help A link to the online iRex webshop is found under the Links tab. Here, you can purchase accessories, software, and even find e-books for your device. The Help tab has links to open this user manual, the quick reference guide, and to go to the online iRex support site. DR1000-1.5.0-EN 56
  • 74. 18 Extra Device Information 18.1 Product Specification ■ 10.2 inch Electronic Paper Display ■ 1024 x 1280 pixels ■ 16-level grey scale ■ Freescale i.MX31L Processor ■ 128 MB RAM ■ 1 GB SD Card (interchangeable with other SD Cards) ■ Wacom® touch sensor input using stylus ■ Rechargeable, internal Lithium-Ion battery ■ Mini-USB connector ■ Dimensions (HxWxD): 268x217x12mm ■ Weight: +/- 570 grams ■ Operating temperature: 0°C/32°F to 45°C/113°F ■ Storage temperature: -20°C/-4°F to 70°C/158°F ■ Supported formats: Mobipocket PRC / Adobe® PDF / TXT / HTML / JPEG / PNG / GIF / TIFF / BMP 18.2 PC System Requirements ■ Windows® XP or Vista® ■ 800 MHz processor or better ■ Minimum of 128 MB RAM ■ Minimum of 25 MB available hard disk space ■ USB port 18.3 Included Accessories ■ USB cable ■ Stylus ■ 1 GB SD Card ■ Quick Start Guide DR1000-1.5.0-EN 57
  • 75. 19 Troubleshooting 19.1 My device will not turn on Is the battery charged? The battery can be charged by connecting the device to a computer or other power source with the USB cable. Let the device charge for at least an hour and then try again. If this still doesn’t work, you can also try using a different USB port or a different computer. Did you hold your finger on the correct sensor for the correct time? Touch your finger on the lower, middle sensor (the one with the little iRex logo above it) until you hear a beep and see the screen turn on. It still doesn’t start? As a last resort, reset the device by gently pressing the reset button at the bottom of the device with the tip of a stylus or ballpoint pen. 19.2 I can’t get the menu to open Did you hold your finger on the correct sensor for the correct time? Quickly tap your finger on the lower bottom • sensor to open the menu. If you are using a stylus, tap on the menu icon at the bottom of the screen. You can also calibrate your stylus. Are the sensors locked? Use your stylus to tap on the menu icon at the bottom of the screen and then choose Sensors to unlock them again. 19.3 I see text and images on the screen, but the device does not seem to work Is the battery charged? If the battery runs out, the image will still remain on the screen. Connect the device to a power source to charge the battery for at least an hour and then turn it on again. Is the device frozen? If the device has a full battery and still won’t respond, you can reset it by gently pressing the reset button on the bottom of the device with the tip of the stylus or ballpoint pen. The device will begin to reset itself, the green LED’s will begin to flash, and the screen will flicker a few times. DR1000-1.5.0-EN 58
  • 76. 19.4 I try to delete, move, or copy items and it does not work Is the SD card locked? You can check by first safely removing the SD card from the device by choosing Menu>Safely Remove. Once it is ready to be removed, eject the card and check that the switch on the card is in the unlocked position Is the SD card memory full? If there is not enough space on the memory card, you cannot copy more files on it. Try deleting some unused files and try again. 19.5 I do not see the status area or page progress bar Is the device in full screen mode? Full Screen will hide the status area and page progress bar from view. You can turn off full screen mode by choosing Menu>Screen Mode>Full Screen. 19.6 I zoomed in and now I cannot flip to the next page The panning tool is now active Because the document is now larger than the screen, the device thought it would be useful if you had a panning tool. This is feature is currently being reviewed by the iRex team and may be removed in the future. You can turn off the panning tool by selecting Menu>Zooming>Pan. Change to Continuous Mode You could also change your document viewing mode to Continuous by selecting Menu>Zooming>Page Flow. With the document in continuous mode, you can use your stylus to pan up and down a page. 19.7 I opened my document on my computer but I do not see my handwritten notes Did you use the iRex Companion Software to merge the document? The Companion Software will merge the handwriting to the document so you are able to view it on a computer. 19.8 How do I reset the device? There is a small reset button located on the bottom of the device. Use the tip of the stylus or a ballpoint pen and very gently press the button. You will feel a slight click. The device will begin to reset itself and will return to the Home screen when it is ready to use. DR1000-1.5.0-EN 59
  • 77. 19.9 How do I turn the device off? Open the menu and select the Turn Off Device icon from the bottom row. DR1000-1.5.0-EN 60
  • 78. 20 Icon Index 20.1 Home Icons _ Inbox Zp Dictionaries JK i i___________ Settings Documents
  • 79. Help Q WritePads 20.2 Status Area Icons Battery Level Stylus Mode ř§EJ pencil, eraser, ÍHI D Memory Ipointer, selector, pan, ^■S look-up zoom Menu Suspend (device is B Sensor Lock suspended) 20.3 General and Task Manager Icons Safely Remove SD Card Home Sensor Lock Return to Folder 3 Rotate Turn Off 20.4 Content Browser Icons Delete Add Shortcut DR1000-1.5.0-EN 61
  • 80. Open Sort by Type Sort by Author Up a Level Sort by Date View Detailed List
  • 81. Sort by Name View Sort by Thumbnails Size 20.5 Reading Icons Add Bookmark Find Word Back Fit on Screen Bookmark View Font Tools Cl os e Font Sizes (6pt‐ 34pt) Decrease Font Size Full Screen Delete Bookmark Hide Margin Era ser Increase Font Size D 6
  • 82. I3f ^ Jump to Next Reading View Jump to Previous See All… Page Flow Continuous Selection Zoom Page Flow Normal Table of Contents View Page Thumbnail View Writing Tools Pan Zoom (75%, 100%, 150%, 200%) Pencil Zoom In Pencil Colours (black) Zoom Out H Pencil Sizes (1‐5) Zooming Tools 20.6 Settings Icons About n Power Preferences D Device Settings s SD Card Properties Personal Preferences
  • 83. D 6 R 1 0 0 0 - 1 . 5 . 0 - E N