
Recommended
More Related Content
Similar to How to Do Dryer Parts Repair All by Yourself-Acuteblog.com
Similar to How to Do Dryer Parts Repair All by Yourself-Acuteblog.com (20)
More from angelinarobert1
More from angelinarobert1 (12)
Recently uploaded
Recently uploaded (20)
How to Do Dryer Parts Repair All by Yourself-Acuteblog.com
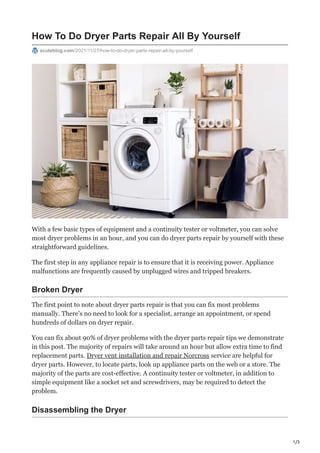
- 1. 1/3 How To Do Dryer Parts Repair All By Yourself acuteblog.com/2021/11/27/how-to-do-dryer-parts-repair-all-by-yourself With a few basic types of equipment and a continuity tester or voltmeter, you can solve most dryer problems in an hour, and you can do dryer parts repair by yourself with these straightforward guidelines. The first step in any appliance repair is to ensure that it is receiving power. Appliance malfunctions are frequently caused by unplugged wires and tripped breakers. Broken Dryer The first point to note about dryer parts repair is that you can fix most problems manually. There’s no need to look for a specialist, arrange an appointment, or spend hundreds of dollars on dryer repair. You can fix about 90% of dryer problems with the dryer parts repair tips we demonstrate in this post. The majority of repairs will take around an hour but allow extra time to find replacement parts. Dryer vent installation and repair Norcross service are helpful for dryer parts. However, to locate parts, look up appliance parts on the web or a store. The majority of the parts are cost-effective. A continuity tester or voltmeter, in addition to simple equipment like a socket set and screwdrivers, may be required to detect the problem. Disassembling the Dryer
- 2. 2/3 Most dryers necessitate some disassembly of the outside box in order to access the internal parts, and you may not even require the services of a dryer parts repair company. If your dryer’s debris or lint filter is inside the front door, follow these steps to disassemble it: Remove the screws in the corners of the control panel first. To uncover the screws in the top panel, flip the panel up and back. Now, pull the cover toward you and take it off after removing the screws. To open the lower plate, push a putty knife into the area right above the spring catches to release them. Remove two screws from the top and two from the bottom of the front panel while the lower plate is open. Remove the screws beside the filter slot if your filter slips into the top of the machine. Release the spring clips under the above panel at the front with a putty knife. Remove the screws that keep the front panel in place by tilting the top board up like a vehicle bonnet. Tip To Fix A Dryer If It’s Not Starting When you turn on your dryer, and it looks dead, it’s likely that the door switch is broken or bent or that the plunger is broken or bent. However, slamming the door two or three times might accelerate their life. For dryer maintenance, start by checking the plunger on the door. Replace it if it’s missing or twisted. If the plunger is in fine condition, the next step to fix it in the dryer is to remove the top box panel to reach the door button. See the disassembly guidelines for further information. Door Switch Check for continuity in the switch. If the switch is good, check the thermal fuse on the blower housing. However, if your gas dryer has a door-mounted lint filter, open the bottom panel to reach the thermal fuse. Remove the entire front panel if the filter slides into the machine’s top. Furthermore, remove the back service panel on an electric dryer. If the thermal fuse fails to provide a continuity measurement, then don’t replace it. A blown thermal fuse indicates the presence of other major issues, such as a broken thermostat or a clogged vent. Replace the fuse after you’ve fixed those. Drum Support Rollers Remove the roller by clipping off the original triangular roller retainer. However, install the new keeper and a roller after wiping the shaft with a rag and alcohol. You should not lubricate the shaft. The rollers that hold the drum are worn out. You have to replace all those rollers. If the noise persists, you should replace the tensioner roller. We propose changing both rollers and belts at the same time because disassembling the machine takes longer than replacing them. Continuity Tester
- 3. 3/3 Simply connect the clamp to one connection point and the probe to the other to utilize a continuity tester. You have continuity if the light glows. If there is no light, you’re in trouble. You can also get a dryer vent cleaning Norcross service for dryer problems. No Heat Issue Check the thermal switch for continuity if your electric or gas dryer tumbles but doesn’t heat. If the thermal fuse passes inspection, continue on to the radiant detector if your dryer works on gas. When the igniter achieves maximum temperature, it analyzes it and turns on the gas valve coils. The entire presentation will be suspended if a bump sensor is activated. If it fails, check for continuity and change it. Disconnect the electrical connector from the ignition source and verify for continuity if the detector is good. If it fails the continuity test again, then replace it. Repair the gas valve coils if both the radiant detector and the ignition coil pass the test. Remove the retaining plate, unhook the sensors, and lift them away from the gas valve to change them. If your electric dryer’s thermal switch is good, check the heating element for continuity. If you don’t get continuity, then replace the part. Must Read: Indoor Plant: A Perfect Green Item in your Condo