Roller Team Pegaso 740 Manual | TMC Motorhomes
•Download as DOCX, PDF•
2 likes•3,159 views

We'd like to present the Pegaso 740 manual to help guide you through your motorhome ownership.

Recommended
Recommended
More Related Content
What's hot
What's hot (20)
Similar to Roller Team Pegaso 740 Manual | TMC Motorhomes
Similar to Roller Team Pegaso 740 Manual | TMC Motorhomes (20)
More from TMC Motorhomes
More from TMC Motorhomes (10)
Recently uploaded
Recently uploaded (20)
Roller Team Pegaso 740 Manual | TMC Motorhomes
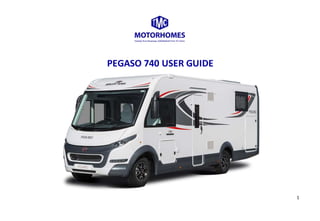
- 1. 1 PEGASO 740 USER GUIDE
- 2. 2 Contents GettingStarted Page 3-4 Power Page 5 Gas Page 6 Control Panel Page 7 Water Tanks Page 8-9 Fridge Page 10 Heating& Hot Water Page 11 Oven& Grill Page 12 Toilet&EmptyingCassette Page 13-14 Dinette Area&Bed Conversion Page 15-16 ReversingCamera Page 17 Bike Rack Page 18 Lights& Sockets Page 19 RCD & Fuses Page 20 TowingEye, Gas IsolationTaps Page 21 WindowOperations Page 22 Blinds Page 23 Roof Vents Page 24 Shower& SinkOperations Page 25 Door & Cupboards Page 26 Pre Start Checks Page 27 FAQ’s Page 28-30 Contact Details Page 31
- 3. 3 Getting Started Keys:You have 2 keys,one forthe cab doors,ignitionanddiesel cap. The second is forthe habitationdoorandall external lockers. Fuel: Openthe fuel tankwiththe maincab key. Please note thatthe motorhome takes Diesel fuel only. The fuel fillerpointislocatedonthe passengerside of the vehicle underacover flapbythe external lockerof the cab. Driving: Althoughthe motorhome isn’tmuchwiderthanan ordinarycar, itis longer. We wouldrecommendtakingcornersslowandwide, andadvise precautionuntil you are usedtodrivingthe vehicle. Look outfor lowbridges,overhangingtreesanduse cautiononnarrowroads. Fridge: Once you’ve startedthe engine we recommendthatyouturnon the fridge andsetit to batterymode, to start it cooling. Once onsite youcan switchthe powerto the mains230v hookup. (See notesonFridge Instructions) Avoidingrunningthe leisurebatterydown. Note:make sure you park the vehicle on level ground,any kind of incline andthe fridge will not work.
- 4. 4 Levelling: Upon arrival at your destination,itisessential togetthe motorhome aslevel as possible. Itcanaffectthe efficientworkingof the fridge,drainage of the showertraysandsinks and mostimportantlyyourcomfortable night’s sleep. Levellingramps canbe used. Theycan be usedto liftone endor alternativelyone side. Take care whenusingthe rampsand drive upthemslowly.If youovershootanddrive off the end,theycould become wedgedunderthe motorhome. Once levelled, applythe handbrake andleave in1stgearor select‘Park’onautomaticmodels. Tip:Run some waterin the sink,if itflowsawaydownthe plughole itslevel. If waterremainsinsink,it’snotlevel. Alternatively,youcanfill a glasshalf full of waterto see the level. Locks: All lockersare openedusingthe habitationkey.The lockwill be inthe closedpositionand heldfirmlyclose tothe motorhome.Putthe keyinand turn to unlock.Thiswill release the lockand it will ‘popout’.Youcan now twistthe lockto gainaccess to lockers. To lock,turn the keyand pushthe black handle backin.Thenthe handle doesn’tturn,itislocked.
- 5. 5 Power: To use the on board facilitiesyouwillneedtoconnectthe motorhome tothe onsite 230v mainselectricsupply. 1. Take the orange hookup cable,unreel (Importanttofullyunreel all the cable asitcan become hot) and plugitintothe mainsconnection on the lefthandside of the motorhome. 2. Next, connectthe otherendof the cable to the socketat yourpitchto use the sitespowersupply. NOTE: connectingthemotorhomefirst avoidshandlingalive connector. The blue flapon the connectorhooksontothe matingplug.So to release the socket,pull the flaptowardsyoupressingthe release leveratthe same time. There mayalsobe a switchon the campsite socketoutletthatmustbe turnedon.The electrical control panel for the Motorhome isoverthe entrance door. Be aware that on itshighestsetting,the roomheatercandraw8 ampsof currentfrom the campsite.If usedat the same time asan electrickettle and 4 ampwaterheater,the combinedloadmayexceedthe limitof the campsite supply(often16amps),andcause it to switchoff andneed resetting. There are mainelectrical switchesandfuseslocatedinsidethe motorhome,youhave beenshownonthe handover andthe mainRCD switch shouldyouneedtore-setthe electricsafteratrip. BE CAREFUL NOTTO DRIVE AWAY WITH THE CABLECONNECTED 1 2
- 6. 6 Gas: To use the heatingandhotwater systemsyouwill needto turnon the gas supply. Simplyopenthe gaslockeronthe side of the motorhome andturnthe brasstap on the top of the gas cylinderanti clockwise. (Youmayheara hiss as the gas flowsthrough) andclockwise toclose. To change gas cylindersover,close the tapand unscrewthe blackplasticvalve.Undothe nylon webbingstraprestrainingthe cylinder putthe newcylinderinplace andtightenthe valve inplace. Whenfittinganewcylindermake sure sitsflatonthe floor, before tighteningthe straps. If You Smell Gas: • Turn off the tap on gas cylinder • Extinguishall nakedflames • Do notswitchon any electrical devices(includingbatterypoweredones) • Openall doorsand windows • Stayoutside of the motorhome until gashasdispersed On the floorof the gas locker,there are some ventilationholes.Itisimportantnotto coverthese holes.Gasweighsheavierthanoxygensointhe eventof a gas leakfromthe bottle or hose,the gaswill sinkandescape throughthese holesandwon’tfinditswayintothe motorhome.
- 7. 7 Control Panel DisplayScreen illuminatedwhen230v site mainspowerisconnected illuminatedwhentravellingandbothbatteriesare coupled illuminatedwhenafuse hasblown NOTE Turn off all the power before leaving the motorhome. Water Pump- use for shower,tapsand toilet flush.Note,turnoff when not inuse. External Lights– on/off, may notbe presentonall models. Internal Lights – on/off,has to be on to use internal lightsandto operate the TV. Temperature –Pressonce for internal andtwice for external temperature. Water tanklevel –press once for freshwaterlevel, twice forgrey waste water. Leisure BatteryCharge B2 – pressonce to display voltage,twice for remainingcharge % StarterBattery Charge B1 – pressonce to display voltage,twice for remainingcharge % On/Off – Activatesthe control panel onor off.
- 8. 8 Water Tanks: The motorhome hastwoseparate on-boardwatertanks,one freshwatertankand the secondis a waste watertank (greywater). Fresh Water Tank(holdsapprox. 100 litresof freshwater). To refill opencoveronthe passengerside of the motorhome andplace the hose pipe providedintothe tank makingsure that the hose isas far downas possible. Make sure the pressure of the watersupplyisnot ontoo strongas the waterwill be flowingtoofast& the tank will notbe filledupfully. Checklevelsof tankbyusingthe control panel before youremove the hose pipe(see‘control panel’section, it will indicate0%,33%, 66% or 100% full).
- 9. 9 Grey Water Tank: Greywateris waste waterfromthe shower, kitchenandbathroomsinks, iscollected ina tankunderneaththe motorhome. Thiscanbe foundonthe off-side. To emptythe tank release leverwhichislocatedunderneaththe motorhome. Pull the leavertowardsyoutoempty,andpushback to close once complete.Ensuring leaverisreturnedfully before travelling. Note:The greywaste watershouldbe emptiedoveradesignatedwaste point on site before youleave (usuallyagrid to drive over,askon site forlocation).
- 10. 10 Fridge: The fridge can runon 3 differentpowersupplies: • 230v hook-upsocket–usedwhenconnectedto a siteselectricsupply • 12v leisure battery –onlyworkswhenthe engine isrunning! • The fridge can alsoworkon Propane gas. If no 230v electrical hookupisavailable. Once the fridge hasfoundthe powersource and iscooling,the displaylightswill gooff anda small greenlightshowonthe on/off button. If the fridge isunable torunfrom the selectedpowersource,the symbolswill continue toflashandthe on/off buttonwill showaredlight. Before removingthe mains230vpower,turn onengine andswitchtobatterymode or turn the fridge off! Note:Please make sure you park the vehicle onlevel ground,any kindof incline and the fridge will not work. 1. To turnthe fridge on,pressandhold the on/off buttonuntil the displaylight illuminates 2. To selectthe appropriate power sources,pressthe firstbuttononthe display.Donotuse the batterysymbol withthe ‘A’. 3. Pressthe 2nd buttonto selectthe requiredcoolinglevelindicator. Lightswill thenflash,pressthe square buttonto scroll upand down withthe temperature andpressOK to selectthe temperature.
- 11. 11 Heating and Hot Water: Pressand holdthe dial buttonuntil the displaylights up. 1. To setthe heatingtemperature,turnthe dial until the motorhome symbol with thermostatflashes.Press the button,turn the dial to the requiredtemperature and pressbuttonto confirm. 2. To setthe Hot water,turn the dial until the water symbol withthermostatflashes,pressthe button. Turn the dial to requiredtemperature,Eco,Hotor Boost. 3. Powerselection,turnthe dial tothe cleargas bottle with2 blacklightingforks,pressthe buttonandturn the dial to selectthe powersource.
- 12. 12 Gas Hob, Oven & Grill: Turn the gas onand check the gas isolationtapisopen. To lightthe Hob, Turn the requireddial anti-clockwiseandholdfora fewseconds,lightwith ignitionswitch.Afterlightingkeepthe dial pressedfor around10 seconds. Flame canthenbe alteredasrequired. Neverclose the glasslidaftercookingasthe glasswill shatter,checkthe hobhas cooledfirst15-20 minutes.Itmustbe downwhentravelling. Turn the dial to the leftto setthe ovenand to the rightfor the grill. The ovenandgrill are litusingthe ignitionswitch.
- 13. 13 Using the Toilet & Emptying the Cassette: To use the electricflush (blue button),turnonwaterpumpat the maincontrol panel. Before use openthe vent(blade) tothe cassette byslidingthe greylever,afteruse,flush(with blue button) andclose the blade byreturningthe levertoitsoriginposition. The seat of the toiletbowl swivelstogive alittle more elbowroom. A redwarninglightwill showwhenthe toilettankisnearlyfull,if illuminatedEMPTYthe toiletcassette IMMEDIATELY. DO NOT USE!
- 14. 14 Emptying: Ensure the “blade”isin the closedposition,separatingthe lootothe toiletcassette.(Thisisinsideof bathroom, greyleaverunderneaththe toiletbowl). Unlocktoiletcassette door,pushinbothbuttonat the same time toopen. Liftup the blue leverandpull cassette outfromthe locker,carefully!! If it won’tslide outeasilycheckthe blade isclosed,itwon’t release withthe blade open. Take cassette to designatedwaste disposalareaor conventional toilet. Rotate greyarm upwardsandunscrew blue cap. Pourcontentsdowndesignatedwaste disposalareaorconventional toilet. Whenemptying,pressdownthe blue button,thisletsairintothe tankso itpours freelywithoutglugging. Don’t pressthe buttonuntil the tankis inthe tippingposition, sothe buttonisabove the level of the waste inside. Rinse withwateruntil itrunsclear. Replace blue capand swivel neckbacktooriginal position.
- 15. 15 Bed Conversion: The drop-downbedabove the cabpullsdownfromthe ceiling. Before loweringthe bed,youwill needto lowerthe frontseatsin the cab usingthe greyleveronthe side of the seat. Thiswill allowthe bedtocome downfully.If the seatsare not lowered,the seatswillrestrictthe bedfromcomingdown. Pressthe redbuttonon the cliptorelease.Pull the greyhandle downand the bedwill anchordownfromthe roof andwill fill the voidinthe cab area. Please note:The bedisheldinpositionwithaclipthatshouldbe fastenedwhenthe bedisnotinuse toavoidit fromcomingdownunexpectedly.
- 16. 16 Bed Conversion: The rear double bedcan be raisedandlowertogive more storage space inthe rear locker. Thisis done fromthe rear external locker,usingthe handle attachedtothe inside wall.
- 17. 17 Reversing Camera: The camera ismountedonthe right handside of the steeringwheelonthe dash.
- 18. 18 Bike Rack: To openthe bike rack loosencentral arm (smallestone onthe left) byundoingthe topcentral black screwand unclipthe plasticstraparoundthe tray. Pull the tray downso it isin a horizontal position. Place the bikesonthe tray andsecure the wheels by clippingthe plasticstrapsaroundthe wheels. Nowsecure the central arm to the bike frame usingthe plasticstrap.If more than 1 bike,secure the bike furthestfromthe motorhome,thiswill holdall of theminone place. Whenthe bike rackisnot in use foldthe tray back to the vertical positionandsecure withthe central armandplasticstrap. As the bike rackextendspastthe lengthof the motorhome,itisadvisable to have someonestanding behindyouwhenreversing. Total Maximum Weightpermittedonbike rack - 60KG
- 19. 19 Lights: To switchon:Turn the ‘on/off’ buttononat the control panel and pressthe lightbulbbutton. Thisworkslike amasterlightswitch,andshould be turnedoff as you leave the motorhome. All interiorlightshave theirownpoweron/off switch. Plug Sockets: The plugsocketswill onlyworkif youare connectedtoa 230V electrical hook-upsource oragenerator. These are locatedaroundthe motorhome above the hob,underthe overhead cupboard,inthe bathroomandalsoon the side of the dinette seat. Note:The plugsocketwill notworkwhenyouare travelling, orunlessyouhave the orange powercable connected.
- 20. 20 RCD Unit:(residual currentdevice) Thisis locatedina cupboardunderneaththe kitchensink. If you experience no230v powerplease checkto make sure the switchison. i.e switchisin the ‘up’position. If thisistrippedorknockedaccidentlythenthe 230V supplywill not work. Fuses: Shouldafuse blow,theyare locatedunderthe seatinginthe Dinette area.
- 21. 21 Towing eye: Your towingeye islocatedinthe emergencykitbox. The connection pointisfoundon the driver’sside frontbumper.Justopenthe captoexpose the hole into the bulkheadwhichiswhere youscrewthe towingeye into. Gas Isolation Taps: (locatedinthe cupboardunderneaththe sink) These redtaps isolate variousgasfunctionsonboardthe motorhome. The tap whichhas a picture of a pan isfor yourgas hob. The tap whichhas a picture of a tap/boilerisforyourheatingandhotwater boiler. The tap whichhas a picture of a snowflake isforyour gas supplytothe fridge. The tap whichhas a picture of an ovenisforyour oven.
- 22. 22 Window Operations: To open:Undo all latches;pushwindowoutuntil itclicksintothe position. To close:Pushwindow all the wayoutand letwindowfall backtoclosedposition.Thisshouldneverbe forced. Flyscreen:Pull the catch gentlydownuntil itclicks intothe frame. Nightblind:Pull the blindgentlyacrossandclick intothe frame. NOTE: Please take greatcare whenopeningand closingall windows,blindsandflyscreens. It isrecommendedthatall windowsare closedwhenvehicle isinmotion. Cab Blinds:
- 23. 23 Blinds: All windowshave 2blindsonthem:a blackout blindanda flyscreen.The flyscreenpullsdownfromthe topof the window. The blackout blindpullsupfromthe bottom.To move andlockthe blackout blind,pinchthe 2 wings,move the blindintothe desiredpositionand release.
- 24. 24 Roof vent window operation: It isadvisedthatall Roof ventsshould be closedwhenthe vehicle isinmotion. Unlockthe white leveronthe roof ventand thenrotate the plastic dial clockwise toopenandanti-clockwise toclose.Toopenand close the blind locatedonthe roof ventgentlypull the blindacross to clipintoplace on the opposite side.Fromone side,the flyscreen blindwill come acrossandfrom the otherthe black outblind.To release gentlyunclipthe blind. Ventilation: The roof vents mustalwaysbe closedwhentravelling;otherwisetheymaybe takenoff bylowbranches orby travellingat speed.Whencookingorshowering,openingthe ventstohelpremove moistair,foodsmells,andreduce the riskof condensation. Pushthe central buttonto release the roof vent.Pushthe roof ventup.Whenclosing,slowlypull the leverdownanditwill lockback intoposition.
- 25. 25 Shower Operation: Make sure water pumpison (see ‘control panel’) Operateslike anormal shower.Youwill onlygethotwater,if the boilerhasbeenturnedon.Thiswill take approximately 20-30 minutestoheatup,(see hotwatercontrol). It isadvisable toplace the showerheadintray andensure showerscreenistiedbackwhenmotorhome is intransit. Sink Operation: Make sure waterpumpis on(see ‘control panel’) Operateslike anormal mixertap. You will onlygethotwater,if the boilerhasbeenturnedon.
- 26. 26 Door handles / Cupboards: Please be careful whenopeningthe cupboarddoors especiallyoverheadcupboards.Make sure youuse yourotherhandto stop itemsi.e.glass/cupsfallingoutas itemsdislodge whenthe vehiclemoves. Make sure all cupboardsare closedwhilstvehicleismoving. To openthe overheadcupboards pull the handle downandpull the doorupwards. For the pop upstyle buttons, pressthe greybuttonto openandpull on the releasedcatchtoopen.Pressback inensuringflushwith the casingtolockwhenfinished.
- 27. 27 Pre-start checks: Before settingoff itemsneedtobe stowedawaysafelyandchecksmade. Whenyoucollectedyourmotorhome these wouldhave alreadybeendone foryou,itisessentialthatyourunthroughthese checkseverytime youset off to avoidanydamage. From outside to in: Turn the gas off. Bike rack secured. Mains cable,hose pipe,ladder, levellingrampsandoutdoorfurniture stowedaway. Externallylockers,lockedsecurely. TV bracketlocked. Fridge,setto12v batteryand door latched. All cupboardsanddrawersshutand locked. Roof ventclosedandlockeddown. Gas hob liddown,mattinginplace. Work surfacesclear. Windowsclosedandlocked. Showerheadintray and doorlatched. Toiletcassette emptied andinclosedposition. Waste water level checked,emptyif required. Remember,take care whendriving,runslowandwide oncornersandconsiderthe extraheight!
- 28. 28 Frequently Asked Questions? No Electric or Power: Checkthe hookup cable connectionatbothends. Checkpowerisswitchedon.Some site powerpointshave tobe switchedonfirst. Some campsitesmaynotinclude powerasstandard,checkwiththemdirectly.Youmayhave to pay forit to be switchedon. Checkthe RCD in the motorhome hasn’ttripped(seenotesonRCD). If it’san individual appliance notworkingtrya differentone oruse anothersocket. No Water: Checkthe waterlevel onthe control panel,if emptyfill. If tank has water,checkthe pump ison at the control panel.(turnoff whennotinuse,pumpcouldburn out) It’s Dark, No Light: Checkthe lightswitchcontrol panel isswitchedon Checkthe leisure batteryischarged. Hookup tothe sitesmainspowertorecharge the battery
- 29. 29 Fridge not working: Displaydoesn’tlightupwhenonbuttonispressed. Checkthe charge onthe leisure batteryonthe control panel.Connectthe motorhome tomainselectriconsite tocharge the battery,itwill alsocharge whilstdriving. Checkthe hookup mainsconnectionandon the control panel. Is the fridge onthe correct setting?Selectthe plugsymbol formainsconnection. No mainshookup,selectbatterysymbol.Note the engine hastobe runningtowork. Gas, checkthe bottle isinthe ON position,selectthe flame symbol.Isthere enoughgas inthe bottle?Check. Checkthe isolationtapisinthe ON position(underthe kitchencupboard,snowflakesymbol). Checkhob andovenare working,thiswill determinewhetherthe issue isthe gasor the fridge. Fridge not cooling: Are you onlevel ground?Unevengroundaffectsthe efficientrunningof the fridge,use chockstolevel motorhome.Itcan take 2-3 hoursfor the fridge tocool,it can alsotake time tosettle afterbeendrivenaround. NOTE: puttingchilledfoodincanhelpthe fridge cool quicker. Outside temperature exceeds30 degrees,if the temperature getsover30degreesitcan affectthe efficiencyof the fridge. Water coming from underneath the Motorhome: The frostprotectionswitchmayhave tripped,this shouldonlyhappenwhenthe temperature inthe motorhomeisbelow4degrees.
- 30. 30 Boiler not Working: Checkthe gas bottle valve isopen. Is there enoughgasinthe bottle? Checkthe windowabove the boilerflueisshut,the windowhasasafetyswitchthe boilerwon’tworkwhenthe windowisopen. Do the boilercontrolscome on?No,check leisure batterycharge oncontrol panel andhookupto mainssite supplytorecharge the battery. Yes,couldbe an airblockin the system,turnon andoff the boilerafewtimestoflushthe system Please note itcantake upto 20 minutesforthe systemtowarmup. Hob Not Working: Checkthe gas bottle valve isopen. Is there enoughgasinthe bottle? Checkthe isolationtapisinthe ON position(underthe kitchencupboard, boiler/tapsymbol). Toilet Cassette Stuck: If it won’tslide outeasilycheckthe blade isclosed,itwon’trelease withthe blade open. Toclose the blade,use the greyleveronthe side of the toilet.Ensure youliftthe yellowleveronthe cassette beforepullingitout, carefully.
- 31. 31 Tottington Motor Company TMC Motorhomes Eton Business Park, Bury Road, Radcliffe. Manchester. M26 2ZS 01204 882211 enquiries@tottingtonmotorcompany.co.uk www.tottingtonmotorcompany.co.uk