1. YX012 Grounding Kit
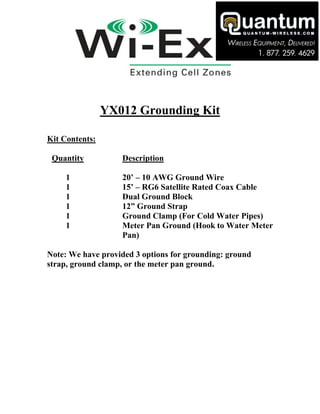
Kit Contents:
Quantity Description
1 20’ – 10 AWG Ground Wire
1 15’ – RG6 Satellite Rated Coax Cable
1 Dual Ground Block
1 12” Ground Strap
1 Ground Clamp (For Cold Water Pipes)
1 Meter Pan Ground (Hook to Water Meter
Pan)
Note: We have provided 3 options for grounding: ground
strap, ground clamp, or the meter pan ground.
2. Grounding The Outside Antenna for your Wireless Extender Installation
NOTICE: YOU ARE RESPONSIBLE FOR COMPLIANCE WITH ALL APPLICABLE CODES, LAWS, AND REGULATIONS.
OUR AGGREGATE LIABILITY TO YOU FOR ALL CLAIMS ARISING OUT OF OR IN CONNECTION WITH THE USE OF
THESE MATERIALS OR PROCEDURES IS LIMITED TO THE VALUE OF THE MATERIAL CONTAINED WITHIN THIS
KIT. NEITHER WIRELESS EXTENDERS NOR ANY OTHER PARTY INVOLVED IN CREATING, PRODUCING, OR
DELIVERING THIS KIT SHALL BE LIABLE FOR ANY INCIDENTAL, SPECIAL, CONSEQUENTIAL OR INDIRECT
DAMAGES RESULTING FROM YOUR USE OF MATERIALS OR THESE ASSOCIATED USE PROCEDURES, WHETHER
BASED ON WARRANTY, CONTRACT, TORT (INCLUDING NEGLIGENCE) OR ANY OTHER LEGAL THEORY, AND
WHETHER OR NOT WE KNOW OF THE POSSIBILITY OF SUCH DAMAGE. YOU ACKNOWLEDGE THAT WITHOUT
THESE LIMITATIONS, WE COULD NOT PROVIDE THESE MATERIALS OR PROCEDURES. BECAUSE SOME
JURISDICTIONS DO NOT ALLOW THE EXCLUSION OR LIMITATION OF LIABILITY FOR CONSEQUENTIAL OR
INCIDENTIAL DAMAGES, THE ABOVE LIMITATION OR EXCLUSION MAY NOT APPLY TO YOU.
BY PROCEEDING WITH THE USE OF THE ABOVE DESCRIBED HARDWARE AND INSTALLATION PROCEDURES,
YOU ARE AGREEING TO THESE TERMS AND CONDITIONS. IF YOU DO NOT AGREE TO THESE TERMS OF USE,
DO NOT PROCEED.
Grounding is “people protection.” An antenna ground serves two primary purposes:
First, during an instance of “stray electrical charge” (like an electrical short or a nearby lightning strike)
the antenna ground provides a lower resistance path to a safe discharge point. (This works because, like
water, electricity always takes the path of least resistance.)
Second, Most areas of the country are bombarded with all types of radio signals. The antenna is designed
to only receive PCS/Cellular signal but your lead in wire shield can pick up other electrical noise that can
be “drained off” the cable at the electrical ground connection, leaving a cleaner signal arriving at your
Wireless Extender’s inside unit.
SAFETY NOTE: There are no steps in this process that require you to open any electrical
power access, remove any electrical cover or attach any connector or wire to power. Do
not attempt to access any closed electrical box; to do so puts you at serious risk of
electrical shock! STAY OUT OF ALL ELECTRICAL BOXES, SWITCHES OR OUTLETS.
Planning is critical to making your outside antenna installation easy. Following those recommendations
will provide you a safe, reliable and long lasting outside antenna installation for your Wireless Extender
product.
The steps...
1. First, read your complete Wireless Extender’s Installation Guide.
2. Armed with that understanding, complete a “survey”, with your cell phone in hand, to determine
where your strongest signal is available outside your home. During your survey, locate your
potential ground sources. A ground “source” is the point you will connect (bond) your new
Wireless Extender’s antenna lead-in cable to the household’s common electrical ground system.
Appropriate “bonding” points to your existing household ground system are:
• The electrical service ground rod (should be a 5/8”; normally only one per home)
• The grounding conductor wire (#6 copper, slightly smaller than a #2 pencil) attached to the
ground rod
• The power service cut-off or breaker box enclosures (that’s OUTSIDE the metal box)
-1-
3. • Metallic conduit (NOT the plastic stuff) attached directly to power service cut-off or
breaker box enclosures
• The grounded interior metal cold water piping
system, within 1.52 m (5 ft) from its point of
entrance to your home
CAUTION! Never... Never... Never, drill into any of these
devices (this includes use of self drill/tapping screws). Use
only UL listed hardware to bond (attach) to these ground
access locations. (Several designs are included in this kit)
Do NOT use an existing screw (like the ones that hold the cover on the box) to bond your ground wire to
the approved ground point. Use only UL listed hardware, made for the application, to bond to your
selected ground source.
Do NOT use an existing ground connection (ie. telephone or cable company’s ground) to attach your new
Wireless Extenders antenna grounding wire; this can create an unsafe condition. Your Wireless Extender
antenna must carry its own connection to the common household ground.
To be fully effective, the wire connecting the ground block to the ground source should be limited to 20
feet. (Remember, that run must be the low resistance electrical path, the longer the wire, the higher the
resistance)
Be sure, after you’ve found a suitable location to “bond” (attach) to ground, and remember to re-check
your PCS/Cellular signal at that area of the home. Don’t overlook the fact; at any point around your home
your signal may be much better at or above your roof line than on the ground.
3. After locating your ground point options, choose the one that is closest to where you need to
mount your Wireless Extenders outside antenna. At a location near where the cable will be
entering the home, attach the ground block to the side of the outside wall. (The ground block may
also be located immediately inside the home if necessary.) The ground source and ground block
must be located within 20 cable feet.
4. Complete your Wireless Extenders outside antenna installation according to the Installation Guide.
Before getting off the ladder, attach one end of the supplied coax cable to you antenna.
NOTE: The following steps direct you to attach the coax cable to the ground block. To
provide longer life to your installation, when the ground block is installed in a weather
exposed area, be sure to make “Drip Loops” on each side of the ground block.
This allows accumulated water on the cable to drip away from the connections.
Over time this makes a difference in the performance in your Wireless Extenders
effectiveness. Also, be sure to do the same just before the coax goes into the home,
both for wall penetration or window entry cable use; doing so helps protect your
home from rain water being guided into the structure. ALL BENDS IN RG-6
CABLE MUST BE NO LESS THAN 4”. The
inside of the loops should be no
less than 4” across. Bending
coax cable in any tighter bend,
anywhere, will eventually prevent the
Wireless Extender signal from passing
through the cable.
-2-
4. 5. Neatly route the coax cable from the new outdoor antenna to the ground block location. Secure the
cable every 1 ½ to 2 feet (cable attachment clips not included). (Do NOT use electrical staples;
they can change the shape of the coax and dramatically decrease signal). Attach the other end of the
coax cable already attached to the Wireless Extenders outside
antenna to either side of the ground block.
Ground Block
6. On the other side of the ground block,
attach the second piece of coaxial cable
and route it through the wall to the inside
wall plate or Wireless Extenders base
unit. (Wall plates are readily available and
provide a very professional installation Window Entry Cable Wall Plate
when properly installed... but their use is
discouraged unless you are familiar with residential construction). Walls contain pipes and wires;
so be careful or consult a professional before drilling. A flexible “Window Entry Cable” will
allow you to pass the signal through a window frame (sold separately).
7. Select the appropriate device, (ground strap is supplied in this kit) to
connect to your surveyed ground source. Attach the device to the
ground source. Be sure you have a bright metallic connection. This
may require cleaning the attachment point with a wire brush or
sandpaper prior to installing the ground connection device.
Ground Strap
8. Locate the ground wire from your grounding kit hardware and strip
about 1 inch of insulation from one end of the wire. Attach that bare wire to your ground
attachment device (see illustration of proper wire connections).
-3-
5. 9. Neatly route the ground wire to your ground block. The wire run should be as straight as possible.
(Sharp bends in the ground wire will burn up when the ground circuit is needed most) Where
bends are necessary, they must be gradual.
Tightly wrap the wire ¼ of the way around a
soup can to achieve a proper bend radius.
10. Measure the wire till it reaches 1 to 1 ½”
beyond the ground block. Strip about 1” of
insulation from the end of the ground wire and
push the bare wire in the small hole adjacent to
the coax connector. Being careful not to strip
out the screw head or threads, tighten the screw
firmly against the ground wire.
11. Complete the inside wire hook up according to
the Wireless Extenders Installation Guide.
12. Plug in the power supply to the 110v outlet.
Wire Wrap - Correct
Wire Wrap - Incorrect
-4-