SlideShare a Scribd company logo
1 of 21
Download to read offline
Commander Global 7x50
Bedienungsanleitung WELTWEIT-KOMPASS
Handbook WORLDWIDE COMPASS
Notice COMPAS GLOBAL
Istruzioni BUSSOLA GLOBAL
Manual BRújULA GLOBAL
Инструкция для GLOBAL COMPASS
Commander Global 7x50Commander Global 7x50
Bedienungsanleitung WELTWEIT-KOMPASSBedienungsanleitung WELTWEIT-KOMPASS
Handbook WORLDWIDE COMPASS
Istruzioni BUSSOLA GLOBAL
Commander Global 7x50Commander Global 7x50Commander Global 7x50Commander Global 7x50Commander Global 7x50
Commander Global 7x50
Bedienungsanleitung WELTWEIT-KOMPASS....................4
Handbook WORLDWIDE COMPASS..............................10
Notice COMPAS GLOBAL.............................................16
Istruzioni BUSSOLA GLOBAL.........................................22
Manual BRújULA GLOBAL............................................28
Инструкция для GLOBAL COMPASS...........................34
32
5
Deutsch
4
GrundlagenzurBedienung
Lieber Fernglas-Freund,
wir beglückwünschen Sie zum Erwerb des Commander
Global Marinefernglases und danken Ihnen für das in uns
gesetzte Vertrauen! Sie haben mit dem Kauf dieses
Fernglases ein STEINER-Produkt erworben, welches für
höchste Innovationsfreude, unerreichte Qualität und
kompromisslose Robustheit steht. Wir wünschen Ihnen ein-
zigartige Seh-Erlebnisse mit Ihrem neuen Commander Global!
1. Einsetzen der Batterie (CR 2):
Bitte verwenden Sie Batterien mit der Typbezeich-
nung CR 2
Um die elektronischen Kompassmes-
sungen durchführen zu können, ist das
Fernglas mit Batterien ausgestattet.
Diese sind im Lieferumfang enthalten,
jedoch im Auslieferungszustand noch
nicht eingebaut, um vorzeitige Entladung zu vermeiden.
Zum Einsetzen der Batterie gehen Sie wie folgt vor:
Öffnen Sie die Batterieabdeckung des Fernglases (Fig. 1).
Hierzu sind keine Hilfsmittel erforderlich. Einfaches Drehen
der Abdeckung gegen den Uhrzeigersinn
genügt. Nun können Sie die Batterie
einsetzen. Beachten Sie hierbei, dass der
Minuspol sichtbar sein muss (Fig. 2),
wenn Sie den Deckel wieder aufsetzen
und durch Drehen im Uhrzeigersinn das Batteriefach wasser-
dicht verschließen. Die Lebensdauer eines Batteriesatzes
liegt bei > 1.000 Messungen unter Normalbedingungen.
Zur Schonung der Batterie schaltet sich die Kompassanzeige
nach 10 Sek. Inaktivität ab.
2. Grundlegendes zum WELTWEIT-KOMPASS:
Der neue WELTWEIT-KOMPASS verfügt über eine
integrierte elektronische Magnetfeldmessung und sorgt
dadurch überall auf der Welt für eine absolut präzise
Peilung, von Alaska bis Fiji. Selbst die Neigung des
Fernglases ist unerheblich, da sie durch einen Sensor
kompensiert wird.
2.2 Erläuterung der einzelnen Kompass-Funktionen:
Einschalten des Kompasses:
Dies erfolgt ausschließlich durch Drücken der -Taste.
Durchführung einer Peilung:
Nach dem Drücken der -Taste geht das Fernglas
automatisch in den Messmodus. Wenn Sie nun durch das
Fernglas blicken, wird die animierte, sich drehende
Kompass-Skala angezeigt.
Aktuell angezeigten Messwert merken:
Drücken Sie während der Messung 1x kurz die -Taste,
um den Wert festzuhalten. Um die Messung fortzu-
setzen, ist lediglich ein erneutes Drücken der
-Taste erforderlich.
2.1 Die Kompass-Funktionstasten:
Den WELTWEIT-KOMPASS bedienen Sie
über zwei Funktionstasten, die sich
direkt neben dem Kompass-Gehäuse
befinden:
		
	
	 Taste 1:	 Taste 2:
	 an/aus (T1)	 Pause (T2)
Mit Hilfe dieser beiden Tasten können Sie:
■	 Den Kompass an- und ausschalten
■	 Peilungen durchführen
■	 Den gewonnenen Wert vorübergehend speichern
■	 Die Deklination manuell einstellen
■	 Die Darstellung der Kompassanzeige wählen:
		 ■ 360-Grad
		 ■ 6400-mil
1
2
T1
T2
76
GrundlagenzurBedienung Deutsch
2.3 Individuelles Kompass-Einstellungsmenü
Über dieses Menü können Sie bequem folgende Einstel-
lungen am Kompass vornehmen:
■	 Die Deklinations-Korrektur (Mißweisung)
■	 Festlegung der Darstellung der Kompass-Skala
	 auf "360 Grad" oder "6400 mil"
2.3.1 Aktivieren des Kompass-Einstellungsmenüs
Halten Sie hierzu die -Taste und die - Taste zeit-
gleich für 3 Sekunden gedrückt, um das Einstellungs-
menü zu aktivieren.
Nun können Sie mit Hilfe der - und -Taste
die gewünschten Einstellungen vornehmen. Be-
trachten Sie hierzu die nebenstehende Struktur
des Kompass-Einstellungsmenüs.
2.4 Strukturübersicht des Einstellungsmenüs
Aktivierung des Menüs: Beide Tasten 3 Sek. drücken.
1. Option:
Deklinations-Korrektur
Für 2. Option:
-Taste drücken
Submenü: -Taste drücken
Wählen: -Taste drücken
Wählen: -Taste drücken Wählen: -Taste drücken
Wählen: -Taste drücken
-Taste drücken-Taste drücken
wechseln mit: -Taste
wechseln mit: -Taste2. Option:
Graduation
Aktivierung des Magnetischen Nordens
Eingabe mit der -Taste bestätigen,
dann wird Menü beendet
Eingabe mit der -Taste bestätigen,
dann wird Menü beendet
Eingabe mit der -Taste bestätigen,
dann wird Menü beendet
Aktivierung der
360-Grad-Ansicht
Aktivierung der
6400 mil-Ansicht
Manuelle Eingabe
Nach 3 Sek. Inaktivität wird Eingabe
übernommen und Menü beendet
+ 1 Grad - 1 Grad
Aktivierung der Manuellen Deklinations-Korrektur
98
GrundlagenzurBedienung Deutsch
2.5 Kompassanzeige
UnterhalbderStrichplatte
sehen Sie die Kompass-
anzeige, die neben dem
Peilwert weitere Infor-
mationen enthält: den
aktuellen Batteriestand
(Fig. 1) und die eingestellte
Deklinations-Korrektur
(Fig. 2). Die umstellung der Kompassanzeige
von tag- auf Nachtmodus erfolgt automatisch,
abhängig vom umgebungslicht.
3. Gurtanbindung und schwimmtragegurt
Das ClicLoc-System des Commander
Global (Fig. 3) ermöglicht ein sehr
einfaches und schnelles Anbringen
des Tragegurts. Das Raststück lässt
sich komfortabel in die ClicLoc Hal-
terung einschieben und rastet in der
Endpositon spürbar ein. Die ergono-
misch optimierten Auslösemulden verhin-
dern zuverlässig ein unbeabsichtigtes
Lösen der Raststücke. Durch kurzes
Drücken auf die Vertiefungen kann der Gurt schnell und
äußerst komfortabel wieder gelöst werden (Fig. 4).
Der Schwimmtragegurt verhindert ein Untergehen des
Fernglases. Der Gurt ist mit reflektierenden 3M Elementen
bestückt, was das Auffinden des Fernglases, selbst bei
schlechten Lichtverhältnissen, erleichtert.
Die Polsterung ist weich und ermöglicht ein ermüdungs-
freies Tragen.
Weitere Informationen über STEINER-Ferngläser finden Sie
auf unserer Website www.steiner.de
1 2
Tagmodus Nachtmodus
3
4
1110
englishPrinciplesofoperation
Dear Binocular Enthusiast,
We congratulate you on your purchase of the Commander
Global marine binoculars and thank you for the trust you
have placed in us. In buying these binoculars, you have
purchased a STEINER product that represents the highest
degree of innovative spirit, unprecedented quality and
no-compromise ruggedness. We wish you many unique
viewing experiences with your new Commander Global!
1. Inserting the battery (3pcs):
Only use type CR 2 batteries
In order to be able to carry out elec-
tronic compass measurements, the
binoculars are equipped with batteries.
These are included in the scope of
delivery, but are not installed when
delivered, to prevent premature discharging.
To install the batteries, proceed as follows: Open
the battery compartment cover of the binoculars (Fig. 1).
No tools are required to do so. Simply turning the cover in
an anticlockwise direction is sufficient.
You can now insert the batteries. Take
care when doing this that the negative
pole is visible (Fig. 2) when you replace
the cover, and close until watertight by
turning the cover clockwise. The life of a set of batteries is
more than 1000 measurements under normal conditions.
In order to conserve the battery, the compass display
switches off after 10 seconds of inactivity.
2. Basic information concerning the WORLDWIDE-
COMPASS:
The new WORLDWIDE-COMPASS has integrated electronic
magnetic field measurement and thus ensures absolutely
correct bearings anywhere in the world, from Alaska to
Fiji. Even the declination of the binoculars is unimportant,
since it is compensated for by a sensor.
2.2 Explanation of the individual compass functions:
Switching on the compass:
This can only be done by pressing the button.
Finding bearings:
After pressing the button, the binoculars automatically
go into measurement mode. When you now look through
the binoculars, the animated rotating compass scale is
displayed.
Noting currently displayed measurement value:
During measurement, press the button once briefly to
retain the value. To continue measuring, it is only
necessary to press the button again.
2.1 The compass function buttons:
You operate the WORLDWIDE-COMPASS
by means of two function pushbuttons
that are located directly next to the
compass housing:
		
	
	 Pushbutton 1:	 Pushbutton 2:
	 On/Off (T1)	 Pause (T2)
With the help of these two pushbuttons you can:
■	 Switch the compass on and off
■	 Find your bearings
■	 Temporarily store the value obtained
■	Set the declination manually
■	Select the representation of the compass:
		 ■ 360 degrees
		 ■ 6400 mil
1
T1
T2
2
1312
Principlesofoperation
2.3 Individual compass settings menu
With this menu you can conveniently make the following
settings for the compass:
■	 Declination correction (magnetic variation)
■	Set the compass scale representation to "360
	 degrees" or "6400 mil"
2.3.1 Activating the compass settings menu
To do so, press the button and the button
simultaneously for 3 seconds to activate the settings menu.
You can now make the desired settings with the
help of the and the button. For this, study
the structure of the compass settings menu on the
adjacent page.
2.4 Overview of structure of the settings menu
Activating the menu Press both buttons for 3 seconds.
1st
option::
Declination correction
For 2nd option:
Press button
Sub-menu: Press button
Select: Press button
Select: Press button Select: Press button
Select: Press button
Press buttonPress button
Change with: -button
Change with: -button2nd
option:
Graduation
Activation of magnetic north
Activation of
360-degree view
Activation of
6400-mil view
Manual input
After 3 seconds inactivity, the entry is
accepted and the menu ended.
+ 1 degree - 1 degree
Activation of manual
declination correction
The menu is ended ofter selection
The menu is ended ofter selection The menu is ended ofter selection
english
1514
Principlesofoperation
2.5 compass display
Under the reticule plate
you will see the compass
display, which, as well as
the bearings value, gives
you further information:
The current battery
status (Fig. 1) and the set
declination offset (Fig. 2).
switch-over of the compass display from day to
night mode is done automatically, and depends on
ambient light conditions.
3. strap attachment and floating strap
The ClicLoc system of the Commander
Global (Fig. 3) allows the carrying strap
to be connected very quickly and ea-
sily. The lock clip slides easily into the
ClicLoc holder and clicks noticeably
into the end position. The ergono-
mically optimised trigger depressions
reliably prevent accidental release of the
lock clips. The strap can be quickly and
extremely conveniently released by
briefly pressing down on the depressions (Fig. 4).
The floating strap prevents the binoculars sinking. The
strap is fitted with reflecting elements from 3M that aid in
finding the binoculars even in bad light conditions.
The padding is soft and permits fatigue-free carrying.
Further information about STEINER binoculars can be
found on our website www.steiner.de
Day mode Night mode
3
4
1 2
eNGLIsh
1716
FrançaisPrincipesd’utilisation
Cher amateur de jumelles,
Nous vous félicitons pour l’acquisition des jumelles pour
la marine Commander Global et vous remercions pour
votre confiance ! En achetant ces jumelles, vous avez
acquis un produit STEINER synonyme de grande capa-
cité d’innovation, de qualité inégalée et de robustesse
sans compromis. Nous vous souhaitons des moments
exceptionnels avec vos nouvelles Commander Global !
1. Mise en place de la pile (CR 2) :
prière d’utiliser des piles portant la désignation
CR 2
Pour pouvoir effectuer les mesures
électroniques relatives au compas,
les jumelles sont équipées de piles.
Celles-ci sont fournies d’origine mais
pas encore installées, de manière à
prévenir une décharge prématurée. Pour mettre
en place les piles, procédez comme suit : ouvrez
le couvercle du logement à piles des jumelles (Fig. 1).
Aucun outil n’est nécessaire pour ce faire. Il suffit de tourner
le couvercle dans le sens inverse des
aiguilles d’une montre. Vous pouvez
à présent insérer les piles. Attention,
le pôle minus doit être visible (Fig. 2)
lorsque vous remettez en place le
couvercle et fermez hermétiquement le logement à piles
en le tournant dans le sens des aiguilles d’une montre.
La durée de vie d’un jeu de piles est supérieure à 1 000
mesures effectuées dans des conditions normales.
Pour ménager la pile, l'affichage du compas s'éteint au
bout de 10 secondes d'inactivité.
2. Généralités sur le COMPAS GLOBAL :
Le nouveau COMPAS GLOBAL intègre un système électro-
nique de mesure du champ magnétique qui garantit un re-
lèvement d’une parfaite précision dans le monde entier, de
l’Alaska aux îles Fidji. Même l’inclinaison des jumelles n’a
aucune importance car elle est compensée par un capteur.
2.2 Explication des différentes fonctions du compas :
Mise en marche du compas :
Appuyez uniquement sur la touche .
Réalisation d’un relèvement :
Après une pression sur la touche ,les jumelles se mettent
automatiquement dans le mode mesure. En regardant dans
les jumelles, vous voyez le cadran animé, rotatif, du compas.
Noter la valeur mesurée actuellement affichée :
Pendant la mesure, appuyez 1x brièvement sur la touche
pour mémoriser la valeur. Pour poursuivre la mesure, il
suffit d’appuyer à nouveau sur la touche .
2.1 Les touches de fonction du compas :
L'utilisation du COMPAS GLOBAL fait
appel à deux touches de fonction
situées directement à côté du boîtier
du compas :
		
	
	 Touche 1:	 Touche 2:
	 marche/arrêt (T1)	 pause (T2)
A l’aide de ces deux touches, vous pouvez :
■	 Mettre le compas en marche et à l’arrêt
■	Effectuer des relèvements
■	 Mémoriser temporairement la valeur obtenue
■	 Régler manuellement la déclinaison
■	Sélectionner l’affichage du compas :
		 ■ 360 degrés
		 ■ 6400 mil
2
1
T1
T2
1918
Principesd’utilisation Français
2.3 Menu de réglage personnalisé du compas
Ce menu vous permet d’effectuer facilement les réglages
suivants sur le compas :
■	Correction de la déclinaison (variation)
■	Sélection de la représentation du cadran du
	 compas, « 360 degrés » ou « 6400 mil »
2.3.1 Activation du menu de réglage du compas
Pour activer le menu de réglage, maintenez enfoncées la
touche et la touche simultanément pendant 3
secondes.
Vous pouvez à présent effectuer les réglages
souhaités à l’aide de la touche et de la touche
. Pour ce faire, voyez la structure ci-contre, qui
représente le menu de réglage du compas.
2.4 Vue d’ensemble de la structure du menu de réglage
Activation du menu :
appuyer sur les deux touches pendant 3 secondes.
1ère option :
correction de la déclinaison
Pour la 2ème option :
appuyer sur la touche
Sous-menu :
appuyer sur la touche
Sous-menu :
appuyer sur la touche
Sélectionner : appuyer sur la touche
Sélectionner : appuyer sur la touche Sélectionner : appuyer sur la touche
appuyer sur la touche
Appuyer sur
la touche
Appuyer sur
la touche
Changer avec : touche
2ème option :
graduation
Activation du nord
magnétique
Activation de la
correction manuelle
de la déclinaison
Confirmer l'entrée avec la touche
puis le menu est quitté
Confirmer l'entrée avec la touche
puis le menu est quitté
Confirmer l'entrée avec la touche
puis le menu est quitté
Activation de la
vue 360 degrés
Activation de la
vue 6400 mil
Entrée manuelle
Au bout de 3 secondes d’inactivité,
l’entrée est prise en compte et le
menu est quitté.
+ 1 degré - 1 degré
2120
FRANçAIsFRANçAIsPrincipesd’utilisation
2.5 Affichage du compas
Sous le réticule, vous vo-
yez l’affichage du com-
pas qui indique la valeur
de relèvement ainsi que
d’autres informations :
l’état actuel des piles
(Fig. 1) et l’offset de dé-
clinaison réglé (Fig. 2).
L’affichage du compas bascule automatiquement
sur le mode jour ou le mode nuit en fonction de la
lumière ambiante.
3. Fixation de bandoulière et bandoulière flottante
Grâce au système ClicLoc des Com-
mander Global (Fig. 3), la fixation de
la bandoulière est très simple et rapide.
La pièce encliquetable s’insère ais-
ément dans la fixation ClicLoc et
s’enclenche de façon perceptible en
position finale. Les renfoncements de
déclenchement ont une forme ergo-
nomique optimisée et empêchent
l’ouverture fortuite des pièces encli-
quetables. Une brève pression sur les renfoncements per-
met de libérer à nouveau la bandoulière de façon rapide et
extrêmement aisée (Fig. 4).
La bandoulière flottante empêche les jumelles de couler.
La bandoulière est munie d'éléments réfléchissants 3M, ce
qui permet de trouver plus facilement les jumelles même
par conditions d’éclairage défavorables.
Le capitonnage est doux et rend le port non fatigant.
Vous trouverez davantage d'informations sur les jumelles
STEINER sur notre site web www.steiner.de
Mode jour Mode nuit
3
4
1 2
2322
ItalianoPrincipidiutilizzo
Caro amico dei binocoli,
congratulazioni per aver acquistato il binocolo marino
Commander Global e grazie per la fiducia accordataci!
Con l'acquisto di questo binocolo è entrato in possesso
di un prodotto STEINER, sinonimo di massima in-
novazione, qualità irraggiungibile e resistenza senza
compromessi. Le auguriamo un'esperienza visiva
unica con il suo nuovo Commander Global!
Inserimento della batteria (CR 2):
Utilizzare batterie con la denominazione CR 2
Per le misurazioni elettroniche con
la bussola, il binocolo è dotato
di batterie. Queste sono incluse
nella fornitura, tuttavia non sono
inserite al fine di evitare che si sca-
richino prematuramente. Per inserire le batterie
procedere come indicato di seguito: aprire il
coperchio del vano batterie del binocolo (fig. 1).
A tale scopo non sono necessari strumenti, basta ruotare
il coperchio in senso antiorario. Ora è
possibile inserire le batterie. Accertarsi
che il polo negativo sia visibile (fig. 2)
quando si riapplica il coperchio e chi-
udere a tenuta stagna il vano batterie
ruotando il coperchio in senso orario. La durata di un set
di batterie ammonta, in condizioni normali, a più di 1000
misurazioni. Per preservare la batteria l'indicatore della
bussola si disattiva dopo 10 secondi di inattività.
2. Informazioni fondamentali su BUSSOLA GLOBAL :
La nuova BUSSOLA GLOBAL dispone di una misu-
razione elettronica integrata del campo magnetico,
garantendo ovunque un rilevamento di assoluta precisione,
dall'Alaska alle Fiji. Persino l'inclinazione del binocolo è
irrilevante, in quanto viene compensata da un sensore.
2.2 Spiegazione delle singole funzioni della bussola:
Accensione della bussola:
Ciò avviene esclusivamente premendo il tasto .
Esecuzione di un rilevamento:
Dopo aver premuto il tasto , il binocolo passa automati-
camente in modalità di misura. Se si guarda ora dal binocolo,
viene visualizzata la scala della bussola animata e rotante.
Annotazione del valore di misura attualmente
visualizzato:
Durante la misurazione premere una volta brevemente il tasto
per mantenere il valore. Per proseguire la misura-
zione, è necessario premere di nuovo il tasto .
2.1 Tasti funzione della bussola
La bussola BUSSOLA GLOBAL si
utilizza tramite due tasti funzione
che si trovano direttamente vicino
all'alloggiamento della bussola:
		
	
	 Tasto 1:	 Tasto 2:
	 on/off (T1)	 Pausa (T2)
Grazie a questi due tasti è possibile:
■	 accendere e spegnere la bussola
■	 eseguire i rilevamenti
■	 memorizzare temporaneamente il valore rilevato
■	 regolare manualmente la declinazione
■	 selezionare la rappresentazione dell'indicatore
	 della bussola:
		 ■ 360 gradi
		 ■ 6400 mil
1
T1
T2
2
2524
Principidiutilizzo Italiano
2.3 Menu d'impostazione personalizzato della bussola
Tramite questo menu è possibile effettuare le seguenti
impostazioni comodamente dalla bussola:
■	 correzione della declinazione
■	 definizione della rappresentazione della scala
	 della bussola a "360 gradi" o "6400 mil"
2.3.1 Attivazione del menu d'impostazione della bussola
Tenere premuti il tasto e il tasto contemporanea-
mente per 3 secondi per attivare il menu d'impostazione.
Ora è possibile effettuare le impostazioni
desiderate con l'ausilio dei tasti e .
Osservare a tale scopo la struttura del menu
d'impostazione della bussola a lato.
2.4 Panoramica della struttura del menu d'impostazione
Attivazione del menu:
tenere premuti entrambi i tasti per 3 secondi.
1a opzione:
Correzione della declinazione
Per la 2a opzione:
premere il tasto
Sottomenu:
premere il tasto
Sottomenu:
premere il tasto
Selezionare: premere il tasto
Selezionare: premere il tasto Selezionare: premere il tasto
Selezionare: premere il tasto
Premere il tasto Premere il tasto
Cambiare con: tasto
Cambiare con: tasto
2a opzione:
graduazione
Attivazione del
nord magnetico
Confermare l'inserimento con il
tasto . Il menu viene quindi chiuso.
Confermare l'inserimento con il
tasto . Il menu viene quindi chiuso.
Confermare l'inserimento con il
tasto . Il menu viene quindi chiuso.
Attivazione della
visualizzazione
a 360 gradi
Attivazione della
visualizzazione a
6400 mil
Inserimento manuale
Dopo 3 sec. di inattività, l'inserimento
viene acquisito e il menu chiuso.
+ 1 grado - 1 grado
Attivazione della correzione
manuale della declinazione
2726
ItALIANOPrincipidiutilizzo
2.5 Indicatore della bussola
Al di sotto del reticolo
è presente l'indicatore
della bussola, il quale,
oltre al valore rilevato,
fornisce ulteriori infor-
mazioni: lo stato attua-
le delle batterie (fig. 1)
el’offset di declinazione
impostato (fig. 2. Il passaggio dell'indicatore della bussola
dalla modalità diurna a quella notturna avviene
automaticamente, in funzione della luce ambientale.
3. Attacchi tracolla e cinghia galleggiante
IlsistemaClicLocdelCommanderGlobal
(fig. 3) consente un attacco estrema-
mente semplice e rapido della cinghia.
Il dispositivo di arresto si inserisce
facilmente nel supporto ClicLoc, innest-
andosi in modo percepibile nella po-
sizione finale. Le cavità ergonomiche
previste come meccanismo di apertu-
ra impediscono in modo affidabile un
possibile allentamento accidentale dei
dispositivi di arresto. Premendo brevemente sulle incava-
ture è possibile estrarre la cinghia rapidamente e in modo
estremamente confortevole (fig. 4).
La cinghia galleggiante impedisce che il binocolo affondi.
La cinghia è dotata di elementi riflettenti 3M che facilitano
l'individuazione del binocolo, anche in pessime condizioni
di luce.
L'imbottitura è morbida e consente di indossare il binocolo
senza affaticamenti.
Per maggiori informazioni sui binocoli STEINER visitate il
nostro sito Web: www.steiner.de
Modalità diurnar Modalità notturna
3
4
1 2
2928
EspañolInformaciónparaelmanejo
Apreciado amante de los prismáticos:
Le felicitamos por haber adquirido unos prismáticos marinos
Commander Global y le agradecemos la confianza que ha
mostrado en nosotros. Con la adquisición de estos prismáti-
cos ha adquirido un producto STEINER, que es sinónimo de
la más avanzada innovación, calidad inigualable y robustez
sin compromisos. ¡Le deseamos que disfrute de una expe-
riencia visual única con sus nuevos Commander Global!
1. Colocación de la pila (CR2):
Utilice pilas de botón del tipo CR 2
Para poder llevar a cabo las mediciones
electrónicas con la brújula los prismá-
ticos tienen que llevar las pilas puestas.
Las pilas forman parte de los compo-
nentes que se incluyen en el suministro
pero no van colocadas en los prismáticos para evitar que
se descarguen antes de tiempo. Proceda de la siguiente
forma para colocar las pilas: Abra la tapa del comparti-
mento de las pilas en los prismáticos (Fig. 1). Para ello no es
necesario ninguna herramienta adicional. Sólo tiene que girar
la tapa en sentido contrario a las agujas del reloj . Ahora ya
puede colocar las pilas. Preste atención
a que la polaridad sea la correcta, el polo
negativo tiene que estar visible (Fig. 2),
cuando se vuelva a colocar la tapa y se
gire en el sentido de las agujas del reloj
para cerrar el compartimento de las pilas de forma que quede
cerrado estanco e impermeable. La duración de un juego
de pilas de botón es de aproximadamente > 1.000 medi-
ciones en condiciones normales. Para conservar la pila, la
indicación de la brújula se desconecta después de 10 seg.
de inactividad.
2. Información básica sobre el Brújula GLOBAL:
El nuevo Brújula GLOBAL cuenta con una medición elec-
trónica del campo magnético integrada que le permite ori-
entarse con total precisión en cualquier lugar del mundo,
desde Alaska hasta las islas Fiji. Incluso la inclinación de los
prismáticos es irrelevante, ya que se compensa por medio de
un sensor.
2.2 Explicación de las diferentes funciones de la
brújula: Encendido de la brújula:
Sólo se puede llevar a cabo presionando la tecla .
Orientarse determinando la dirección:
Al presionar la tecla en los prismáticos se ajusta automá-
ticamente el modo de medición. Cuando mire a través de
los prismáticos se le mostrará la escala giratoria de la brújula
animada.
Registro de los valores de medición actuales mostrados:
Durante la medición presione 1 vez brevemente la tecla
para conservar el valor. Para continuar la medición es
necesario presionar de nuevo la tecla .
2.1 Teclas de función de la brújula:
Brújula GLOBAL se maneja por
medio de dos teclas de función ubicadas
justo al lado de la carcasa de la brújula:
	 	
	
	 Tecla 1:	 Tecla 2:
	 encendido/	 Pausa (T2)
	 apagado (T1)	
Con ayuda de estas dos teclas se puede:
■	 Conectar y desconectar la brújula
■	Orientarse
■	 Almacenar temporalmente el valor registrado
■	 Ajustar manualmente la declinación
■	Seleccionar la visualización de la indicación de la
	brújula:
		 ■ 360 grados
		 ■ 6400 milésimas
1
T1
T2
2
3130
Informaciónparaelmanejo Español
2.3 Menú de ajuste individualizado de la brújula
Por medio de este menú puede realizar los siguientes
ajustes en la brújula con total comodidad:
■	 Corrección de la declinación (declinación magnética)
■	 Fijar la visualización de la escala de la brújula en
	 "360 grados" o "6400 milésimas"
2.3.1 Activación del menú de ajuste de la brújula
Para ello mantenga presionadas la tecla y la tecla
al mismo tiempo durante 3 segundos para activar el
menú de ajustes.
Ahora ya puede, con ayuda de las teclas y
, llevar a cabo los ajustes que desee. Para ello
tenga en cuenta la siguiente estructura del menú
de ajuste de la brújula.
2.4 Esquema de la estructura del menú de ajuste
Activación del menú:
Presione ambas teclas durante 3 seg.
1ª opción:
Corrección de la declinación
Para la 2ª opción:
Presionar la tecla II
Submenú: Presionar la tecla
Seleccionar: Presionar la tecla
Seleccionar: Presionar la tecla Seleccionar: Presionar la tecla
Seleccionar: Presionar la tecla
Presionar la tecla Presionar la tecla
cambiar con: tecla
cambiar con: tecla
2ª opción:
Graduación de brújula
Activación del
Norte magnético
Confirmar la selección con la tecla
, despúes se finaliza el menú
Confirmar la selección con la tecla
, despúes se finaliza el menú
Confirmar la selección con la tecla
, despúes se finaliza el menú
Activación de la
vista de 360 grados
Activación de la
vista 6400 mil
Introducción manual
Después de 3 seg. de inactividad, se
adopta la entrada y se finaliza el menú
+ 1 grado - 1 grado
Activación de la corrección
manual de declinaciónde
la declinación
3332
Informaciónparaelmanejo esPAñOL
2.5 Indicación de la brújula
Debajo de la placa reti-
culada se encuentra la
indicación de la brújula
que ofrece, junto con el
valor de dirección, más
información: el estado
actual de las pilas (Fig. 1)
y el offset de declinación
ajustado (Fig. 2). el cambio de la indicación de la
brújula entre día y noche se realiza automática-
mente, en función de la luz ambiental.
3. enganche para cinturón y correa de transporte
salvavidas
El sistema ClicLoc del Commander
Global (Fig. 3) permite un enganche
muy sencillo y rápido de la correa
de transporte. El pasador de bloqueo
se puede deslizar de forma cómoda
en el soporte ClicLoc y bloquearlo
en la posición final de forma audible.
Las depresiones ergonómicas de de-
senganche optimizadas impiden que
los pasadores de bloqueo se puedan
soltar de forma involuntaria. Presionando brevemente en
la depresión la correa se puede volver a soltar de forma
rápida y cómoda (Fig. 4).
La correa de transporte salvavidas evita que los prismáticos
se puedan hundir. La correa está provista de elementos
reflectantes 3M, lo que permite localizar los prismáticos,
incluso en condiciones difíciles de visibilidad.
El acolchado es suave y permite un cómodo transporte.
Podrá encontrar más información sobre los prismáticos
STEINER en nuestra página web: www.steiner.de
Modo día Modo noche
3
4
1 2
3534
Русский Основныеинструкциипоприменению
Дорогой пользователь бинокля!
Мы поздравляем вас с приобретением морского
бинокля Commander Global и благодарим за
оказанное нам доверие! Приобретя этот бинокль, вы
стали владельцем изделия фирмы STEINER самого
современного технического уровня с несравненно
высоким качеством и уникальной прочностью. Мы
желаем вам уникальных наблюдений с помощью
вашего нового бинокля Commander Global!
Установка батареи (CR2):
Используйте батареи типа CR 2.
Для выполнения электронных
компасных измерений бинокль
оснащен батареями. Они входят
в комплект поставки, но не
установлены в прибор, чтобы
избежать преждевременной разрядки. Чтобы 
вставить батареи, выполните следующее.
Откройте крышку батарейного отсека бинокля (рис. 1).
Для этого вспомогательные средства не требуются.
Достаточно просто повернуть крышку
против часовой стрелки. Теперь можно
вставить батарею. При этом имейте
в виду, что отрицательный полюс
должен быть виден (рис. 2) перед тем,
как вы установите на место крышку и плотно закроете
батарейный отсек, обеспечив водонепроницаемость.
Срок службы комплекта батарей при нормальных
условиях работы составляет более 1000 измерений.
Чтобы сэкономить заряд батареи, после 10 сек.
бездействия индикация компаса выключается.
2. Основные сведения о компасе GLOBAL COMPASS 
Новый компас GLOBAL COMPASS оборудован
встроенной электронной системой измерения магнитного
поля и за счет этого обеспечивает абсолютно точную
пеленгацию по всему миру – от Аляски до островов
Фиджи. Даже наклон бинокля не оказывает никакого
влияния, так как компенсируется датчиком.
2.2 Описание отдельных функций компаса
Включение компаса
Это выполняется только нажатием кнопки .
Пеленгация:
После нажатия кнопки бинокль автоматически
переходит в режим измерения. Если теперь посмотреть
в бинокль, вы увидите анимационное изображение
вращающейся шкалы компаса.
Запоминание отображаемого измеренного значения
Нажмите в процессе измерения 1 раз кратковременно
клавишу чтобы сохранить значение .
Чтобы продолжить измерение, требуется лишь
повторно нажать клавишу        .
2.1 Функциональные кнопки компаса
Управление компасом GLOBAL
COMPASS осуществляется двумя
функциональными кнопками,
расположенными непосредственно
рядом с корпусом компаса.
		
	 Кнопка 1:	 Кнопка 2:
	 вкл./выкл. (T1)	 пауза (T2)
С помощью этих двух кнопок можно:
■	 включить и выключить компас
■	 выполнить пеленгацию
■	 временно сохранить в памяти полученное значени
■	 настроить вручную склонение
■	 выбрать изображение индикации компаса:
		 ■  360 градусов
		 ■  6400 делений
1
T1
T2
2
3736
Основныеинструкциипоприменению Русский 
2.3 Меню индивидуальных настроек компаса
Это меню позволяет удобно выполнить следующие
настройки компаса:
■	 коррекция склонения (магнитное склонение)
■	 выбор изображения шкалы компаса "360
	 градусов" или "6400 делений"
2.3.1 Вход в меню настроек компаса
Для этого держите кнопку -и кнопку одновременно
нажатыми в течение 3 секунд для входа в меню
настроек.
После этого можно кнопкой       и       выполнить
нужные настройки. Для этого здесь представлена
структура меню настроек компаса.
2.4 Структура меню настроек
Вход в меню: нажать обе кнопки в течение 3 сек.
Опция 1:
Коррекция склонения
Для опции 2: нажать кнопку
Подменю: нажать кнопку
Выбор: нажать кнопку
Выбор: нажать кнопку Выбор: нажать кнопку
Выбор: нажать кнопку
Нажать кнопку Нажать кнопку
Переход кнопкой
Переход кнопкой
Опция 2:
Градация
Настройка на северный
магнитный полюс
Подтвердить ввод клавишей
, меню закрывается
Подтвердить ввод клавишей
, меню закрывается
Подтвердить ввод клавишей
, меню закрывается
Включение индикации
360 градусов
Включение изображения с
6400 делениями
Ручной ввод
Спустя 3 сек. бездействия
введенное значение принимается
и меню закрывается.
+ 1 градус - 1 градус
Включение ручной  
коррекции склонения
3938
Основные инструкции по применению Русский 
1 2
2.5 индикация компаса 
Под пластинкой с де-
лениями показана ин-
дикация компаса, ко-
торая кроме значения
пеленга содержит до-
полнительную инфор-
мацию: текущий уро-
вень зарядки батарей
(рис. 1) и установленное смещение склонения (рис. 2).
  Переключение  индикации  компаса  с  дневного 
на  ночной  режим  происходит  автоматически  в 
зависимости от окружающего освещения.
3.  крепление  ремня  и  нетонущий  ремень  для 
переноски
Система ClicLoc бинокля Commander
Global (рис. 3) позволяет очень
просто и быстро надеть ремень
для переноски. Фиксатор удобно
вставляется в держатель ClicLoc
и вы почувствуете, когда произойдет
фиксация в конечном положении.
Эргономичные и оптимизированные
по форме углубления надежно
предотвращают разблокировку фиксаторов.
Кратковременно нажав на углубления, можно
быстро и очень удобно снова освободить ремень (рис. 4).
Нетонущий ремень для переноски не дает биноклю
утонуть. Ремень оснащен отражательными элементами
3M, что облегчает поиск бинокля даже при плохой
освещенности.
Благодаря мягкой набивке ремня при ношении
бинокля не чувствуется усталости.
Дополнительная информация о биноклях STEINER
приведена на нашем интернет-сайте www.steiner.deприведена на нашем интернет-сайте www.steiner.de
Дневной режим Ночной режим
3
4
STEINER-OPTIK GmbH
Dr.-Hans-Frisch-Str. 9
D-95448 Bayreuth · Germany
Customer Service:
Telephone	 +49-(0)921/7879-851
Telefax	 +49-(0)921/7879-89
e-mail: Customer-service@steiner.de
www.steiner.de
STEINER is a Beretta Holding company
10/2012•Art.Nr.:V0000276•©STEINEROptik•Photos:KlausAndrews,KMC

More Related Content

What's hot

Instructions Leica Tempus Red Dot Sight Optics Trade
Instructions Leica Tempus Red Dot Sight Optics TradeInstructions Leica Tempus Red Dot Sight Optics Trade
Instructions Leica Tempus Red Dot Sight Optics TradeOptics-Trade
 
Instructions YUKON Extend LRS-1000 Laser Rangefinder | Optics Trade
Instructions YUKON Extend LRS-1000 Laser Rangefinder | Optics TradeInstructions YUKON Extend LRS-1000 Laser Rangefinder | Optics Trade
Instructions YUKON Extend LRS-1000 Laser Rangefinder | Optics TradeOptics-Trade
 
Instruction Manual PULSAR DFA Rifle Scope Attachment | Optics Trade
Instruction Manual PULSAR DFA Rifle Scope Attachment | Optics TradeInstruction Manual PULSAR DFA Rifle Scope Attachment | Optics Trade
Instruction Manual PULSAR DFA Rifle Scope Attachment | Optics TradeOptics-Trade
 
Instruction manual | Aimpoint Micro H-2 & T-2 | Optics Trade
Instruction manual | Aimpoint Micro H-2 & T-2 | Optics TradeInstruction manual | Aimpoint Micro H-2 & T-2 | Optics Trade
Instruction manual | Aimpoint Micro H-2 & T-2 | Optics TradeOptics-Trade
 
Instructions LEICA Rangemaster CRF 1000-R | Optics Trade
Instructions LEICA Rangemaster CRF 1000-R | Optics TradeInstructions LEICA Rangemaster CRF 1000-R | Optics Trade
Instructions LEICA Rangemaster CRF 1000-R | Optics TradeOptics-Trade
 
Instructions KAHLES BA Helia5, K16i | Optics Trade
Instructions KAHLES BA Helia5, K16i | Optics TradeInstructions KAHLES BA Helia5, K16i | Optics Trade
Instructions KAHLES BA Helia5, K16i | Optics TradeOptics-Trade
 
Instruction manual | Noblex Inception Rifle Scopes | Optics Trade
Instruction manual | Noblex Inception Rifle Scopes | Optics TradeInstruction manual | Noblex Inception Rifle Scopes | Optics Trade
Instruction manual | Noblex Inception Rifle Scopes | Optics TradeOptics-Trade
 
Yukon Sightline S Instruction Manual | Optics Trade
Yukon Sightline S Instruction Manual | Optics TradeYukon Sightline S Instruction Manual | Optics Trade
Yukon Sightline S Instruction Manual | Optics TradeOptics-Trade
 
Instructions STEINER Nighthunter Extreme Rifle Scope | Optics Trade
Instructions STEINER Nighthunter Extreme Rifle Scope | Optics TradeInstructions STEINER Nighthunter Extreme Rifle Scope | Optics Trade
Instructions STEINER Nighthunter Extreme Rifle Scope | Optics TradeOptics-Trade
 
Instruction manual | Noblex Inception Binoculars | Optics Trade
Instruction manual | Noblex Inception Binoculars | Optics TradeInstruction manual | Noblex Inception Binoculars | Optics Trade
Instruction manual | Noblex Inception Binoculars | Optics TradeOptics-Trade
 
Instruction manual LEICA ERi 2,5-10x42, 3-12x50 | Optics Trade
Instruction manual LEICA ERi 2,5-10x42, 3-12x50 | Optics TradeInstruction manual LEICA ERi 2,5-10x42, 3-12x50 | Optics Trade
Instruction manual LEICA ERi 2,5-10x42, 3-12x50 | Optics TradeOptics-Trade
 

What's hot (11)

Instructions Leica Tempus Red Dot Sight Optics Trade
Instructions Leica Tempus Red Dot Sight Optics TradeInstructions Leica Tempus Red Dot Sight Optics Trade
Instructions Leica Tempus Red Dot Sight Optics Trade
 
Instructions YUKON Extend LRS-1000 Laser Rangefinder | Optics Trade
Instructions YUKON Extend LRS-1000 Laser Rangefinder | Optics TradeInstructions YUKON Extend LRS-1000 Laser Rangefinder | Optics Trade
Instructions YUKON Extend LRS-1000 Laser Rangefinder | Optics Trade
 
Instruction Manual PULSAR DFA Rifle Scope Attachment | Optics Trade
Instruction Manual PULSAR DFA Rifle Scope Attachment | Optics TradeInstruction Manual PULSAR DFA Rifle Scope Attachment | Optics Trade
Instruction Manual PULSAR DFA Rifle Scope Attachment | Optics Trade
 
Instruction manual | Aimpoint Micro H-2 & T-2 | Optics Trade
Instruction manual | Aimpoint Micro H-2 & T-2 | Optics TradeInstruction manual | Aimpoint Micro H-2 & T-2 | Optics Trade
Instruction manual | Aimpoint Micro H-2 & T-2 | Optics Trade
 
Instructions LEICA Rangemaster CRF 1000-R | Optics Trade
Instructions LEICA Rangemaster CRF 1000-R | Optics TradeInstructions LEICA Rangemaster CRF 1000-R | Optics Trade
Instructions LEICA Rangemaster CRF 1000-R | Optics Trade
 
Instructions KAHLES BA Helia5, K16i | Optics Trade
Instructions KAHLES BA Helia5, K16i | Optics TradeInstructions KAHLES BA Helia5, K16i | Optics Trade
Instructions KAHLES BA Helia5, K16i | Optics Trade
 
Instruction manual | Noblex Inception Rifle Scopes | Optics Trade
Instruction manual | Noblex Inception Rifle Scopes | Optics TradeInstruction manual | Noblex Inception Rifle Scopes | Optics Trade
Instruction manual | Noblex Inception Rifle Scopes | Optics Trade
 
Yukon Sightline S Instruction Manual | Optics Trade
Yukon Sightline S Instruction Manual | Optics TradeYukon Sightline S Instruction Manual | Optics Trade
Yukon Sightline S Instruction Manual | Optics Trade
 
Instructions STEINER Nighthunter Extreme Rifle Scope | Optics Trade
Instructions STEINER Nighthunter Extreme Rifle Scope | Optics TradeInstructions STEINER Nighthunter Extreme Rifle Scope | Optics Trade
Instructions STEINER Nighthunter Extreme Rifle Scope | Optics Trade
 
Instruction manual | Noblex Inception Binoculars | Optics Trade
Instruction manual | Noblex Inception Binoculars | Optics TradeInstruction manual | Noblex Inception Binoculars | Optics Trade
Instruction manual | Noblex Inception Binoculars | Optics Trade
 
Instruction manual LEICA ERi 2,5-10x42, 3-12x50 | Optics Trade
Instruction manual LEICA ERi 2,5-10x42, 3-12x50 | Optics TradeInstruction manual LEICA ERi 2,5-10x42, 3-12x50 | Optics Trade
Instruction manual LEICA ERi 2,5-10x42, 3-12x50 | Optics Trade
 

More from Optics-Trade

Technical Data | ThermTec Wild 650L | Optics Trade
Technical Data | ThermTec Wild 650L | Optics TradeTechnical Data | ThermTec Wild 650L | Optics Trade
Technical Data | ThermTec Wild 650L | Optics TradeOptics-Trade
 
Technical Data | ThermTec Wild 635L | Optics Trade
Technical Data | ThermTec Wild 635L | Optics TradeTechnical Data | ThermTec Wild 635L | Optics Trade
Technical Data | ThermTec Wild 635L | Optics TradeOptics-Trade
 
Technical Data | ThermTec Wild 650 | Optics Trade
Technical Data | ThermTec Wild 650 | Optics TradeTechnical Data | ThermTec Wild 650 | Optics Trade
Technical Data | ThermTec Wild 650 | Optics TradeOptics-Trade
 
Technical Data | ThermTec Wild 635 | Optics Trade
Technical Data | ThermTec Wild 635 | Optics TradeTechnical Data | ThermTec Wild 635 | Optics Trade
Technical Data | ThermTec Wild 635 | Optics TradeOptics-Trade
 
Technical Data | ThermTec Wild 335 | Optics Trade
Technical Data | ThermTec Wild 335 | Optics TradeTechnical Data | ThermTec Wild 335 | Optics Trade
Technical Data | ThermTec Wild 335 | Optics TradeOptics-Trade
 
Technical Data | ThermTec Wild 325 | Optics Trade
Technical Data | ThermTec Wild 325 | Optics TradeTechnical Data | ThermTec Wild 325 | Optics Trade
Technical Data | ThermTec Wild 325 | Optics TradeOptics-Trade
 
Instruction Manual | ThermTec Wild Thermal Monoculars | Optics Trade
Instruction Manual | ThermTec Wild Thermal Monoculars | Optics TradeInstruction Manual | ThermTec Wild Thermal Monoculars | Optics Trade
Instruction Manual | ThermTec Wild Thermal Monoculars | Optics TradeOptics-Trade
 
Technical Data | ThermTec Hunt 335 | Optics Trade
Technical Data | ThermTec Hunt 335 | Optics TradeTechnical Data | ThermTec Hunt 335 | Optics Trade
Technical Data | ThermTec Hunt 335 | Optics TradeOptics-Trade
 
Instruction Manual | ThermTec Hunt Thermal Clip-On Series | Optics Trade
Instruction Manual | ThermTec Hunt Thermal Clip-On Series | Optics TradeInstruction Manual | ThermTec Hunt Thermal Clip-On Series | Optics Trade
Instruction Manual | ThermTec Hunt Thermal Clip-On Series | Optics TradeOptics-Trade
 
Instruction Manual | Steiner eRanger LRF 10x42 | Optics Trade
Instruction Manual | Steiner eRanger LRF 10x42 | Optics TradeInstruction Manual | Steiner eRanger LRF 10x42 | Optics Trade
Instruction Manual | Steiner eRanger LRF 10x42 | Optics TradeOptics-Trade
 
Flyer | Guide DN Series Handheld Digital Binoculars | Optics Trade
Flyer | Guide DN Series Handheld Digital Binoculars | Optics TradeFlyer | Guide DN Series Handheld Digital Binoculars | Optics Trade
Flyer | Guide DN Series Handheld Digital Binoculars | Optics TradeOptics-Trade
 
Quick Start Guide | Guide TB Series | Optics Trade
Quick Start Guide | Guide TB Series | Optics TradeQuick Start Guide | Guide TB Series | Optics Trade
Quick Start Guide | Guide TB Series | Optics TradeOptics-Trade
 
Instruction Manual | Pard FD1 Digital NV Front Attachment | Optics Trade
Instruction Manual | Pard FD1 Digital NV Front Attachment | Optics TradeInstruction Manual | Pard FD1 Digital NV Front Attachment | Optics Trade
Instruction Manual | Pard FD1 Digital NV Front Attachment | Optics TradeOptics-Trade
 
Instruction Manual | EOTech Vudu X 2-12x40 | Optics Trade
Instruction Manual | EOTech Vudu X 2-12x40 | Optics TradeInstruction Manual | EOTech Vudu X 2-12x40 | Optics Trade
Instruction Manual | EOTech Vudu X 2-12x40 | Optics TradeOptics-Trade
 
Instruction Manual | EOTech Vudu X 1-6x24 | Optics Trade
Instruction Manual | EOTech Vudu X 1-6x24 | Optics TradeInstruction Manual | EOTech Vudu X 1-6x24 | Optics Trade
Instruction Manual | EOTech Vudu X 1-6x24 | Optics TradeOptics-Trade
 
Instruction Manual | Nightforce CFS 6-36x50 F1 | Optics Trade
Instruction Manual | Nightforce CFS 6-36x50 F1 | Optics TradeInstruction Manual | Nightforce CFS 6-36x50 F1 | Optics Trade
Instruction Manual | Nightforce CFS 6-36x50 F1 | Optics TradeOptics-Trade
 
Instruction Manual | Athlon Cronus Tactical G2 ED 7-42x60 | Optics Trade
Instruction Manual | Athlon Cronus Tactical G2 ED 7-42x60 | Optics TradeInstruction Manual | Athlon Cronus Tactical G2 ED 7-42x60 | Optics Trade
Instruction Manual | Athlon Cronus Tactical G2 ED 7-42x60 | Optics TradeOptics-Trade
 
Insrtuction Manual | Swarovski CL Companion Habicht | Optics Trade
Insrtuction Manual | Swarovski CL Companion Habicht | Optics TradeInsrtuction Manual | Swarovski CL Companion Habicht | Optics Trade
Insrtuction Manual | Swarovski CL Companion Habicht | Optics TradeOptics-Trade
 
Technical Data | Swarovski CL Companion Habicht | Optics Trade
Technical Data | Swarovski CL Companion Habicht | Optics TradeTechnical Data | Swarovski CL Companion Habicht | Optics Trade
Technical Data | Swarovski CL Companion Habicht | Optics TradeOptics-Trade
 
Instruction Manual | Athlon Midas G2 UHD PRO | Optics Trade
Instruction Manual | Athlon Midas G2 UHD PRO | Optics TradeInstruction Manual | Athlon Midas G2 UHD PRO | Optics Trade
Instruction Manual | Athlon Midas G2 UHD PRO | Optics TradeOptics-Trade
 

More from Optics-Trade (20)

Technical Data | ThermTec Wild 650L | Optics Trade
Technical Data | ThermTec Wild 650L | Optics TradeTechnical Data | ThermTec Wild 650L | Optics Trade
Technical Data | ThermTec Wild 650L | Optics Trade
 
Technical Data | ThermTec Wild 635L | Optics Trade
Technical Data | ThermTec Wild 635L | Optics TradeTechnical Data | ThermTec Wild 635L | Optics Trade
Technical Data | ThermTec Wild 635L | Optics Trade
 
Technical Data | ThermTec Wild 650 | Optics Trade
Technical Data | ThermTec Wild 650 | Optics TradeTechnical Data | ThermTec Wild 650 | Optics Trade
Technical Data | ThermTec Wild 650 | Optics Trade
 
Technical Data | ThermTec Wild 635 | Optics Trade
Technical Data | ThermTec Wild 635 | Optics TradeTechnical Data | ThermTec Wild 635 | Optics Trade
Technical Data | ThermTec Wild 635 | Optics Trade
 
Technical Data | ThermTec Wild 335 | Optics Trade
Technical Data | ThermTec Wild 335 | Optics TradeTechnical Data | ThermTec Wild 335 | Optics Trade
Technical Data | ThermTec Wild 335 | Optics Trade
 
Technical Data | ThermTec Wild 325 | Optics Trade
Technical Data | ThermTec Wild 325 | Optics TradeTechnical Data | ThermTec Wild 325 | Optics Trade
Technical Data | ThermTec Wild 325 | Optics Trade
 
Instruction Manual | ThermTec Wild Thermal Monoculars | Optics Trade
Instruction Manual | ThermTec Wild Thermal Monoculars | Optics TradeInstruction Manual | ThermTec Wild Thermal Monoculars | Optics Trade
Instruction Manual | ThermTec Wild Thermal Monoculars | Optics Trade
 
Technical Data | ThermTec Hunt 335 | Optics Trade
Technical Data | ThermTec Hunt 335 | Optics TradeTechnical Data | ThermTec Hunt 335 | Optics Trade
Technical Data | ThermTec Hunt 335 | Optics Trade
 
Instruction Manual | ThermTec Hunt Thermal Clip-On Series | Optics Trade
Instruction Manual | ThermTec Hunt Thermal Clip-On Series | Optics TradeInstruction Manual | ThermTec Hunt Thermal Clip-On Series | Optics Trade
Instruction Manual | ThermTec Hunt Thermal Clip-On Series | Optics Trade
 
Instruction Manual | Steiner eRanger LRF 10x42 | Optics Trade
Instruction Manual | Steiner eRanger LRF 10x42 | Optics TradeInstruction Manual | Steiner eRanger LRF 10x42 | Optics Trade
Instruction Manual | Steiner eRanger LRF 10x42 | Optics Trade
 
Flyer | Guide DN Series Handheld Digital Binoculars | Optics Trade
Flyer | Guide DN Series Handheld Digital Binoculars | Optics TradeFlyer | Guide DN Series Handheld Digital Binoculars | Optics Trade
Flyer | Guide DN Series Handheld Digital Binoculars | Optics Trade
 
Quick Start Guide | Guide TB Series | Optics Trade
Quick Start Guide | Guide TB Series | Optics TradeQuick Start Guide | Guide TB Series | Optics Trade
Quick Start Guide | Guide TB Series | Optics Trade
 
Instruction Manual | Pard FD1 Digital NV Front Attachment | Optics Trade
Instruction Manual | Pard FD1 Digital NV Front Attachment | Optics TradeInstruction Manual | Pard FD1 Digital NV Front Attachment | Optics Trade
Instruction Manual | Pard FD1 Digital NV Front Attachment | Optics Trade
 
Instruction Manual | EOTech Vudu X 2-12x40 | Optics Trade
Instruction Manual | EOTech Vudu X 2-12x40 | Optics TradeInstruction Manual | EOTech Vudu X 2-12x40 | Optics Trade
Instruction Manual | EOTech Vudu X 2-12x40 | Optics Trade
 
Instruction Manual | EOTech Vudu X 1-6x24 | Optics Trade
Instruction Manual | EOTech Vudu X 1-6x24 | Optics TradeInstruction Manual | EOTech Vudu X 1-6x24 | Optics Trade
Instruction Manual | EOTech Vudu X 1-6x24 | Optics Trade
 
Instruction Manual | Nightforce CFS 6-36x50 F1 | Optics Trade
Instruction Manual | Nightforce CFS 6-36x50 F1 | Optics TradeInstruction Manual | Nightforce CFS 6-36x50 F1 | Optics Trade
Instruction Manual | Nightforce CFS 6-36x50 F1 | Optics Trade
 
Instruction Manual | Athlon Cronus Tactical G2 ED 7-42x60 | Optics Trade
Instruction Manual | Athlon Cronus Tactical G2 ED 7-42x60 | Optics TradeInstruction Manual | Athlon Cronus Tactical G2 ED 7-42x60 | Optics Trade
Instruction Manual | Athlon Cronus Tactical G2 ED 7-42x60 | Optics Trade
 
Insrtuction Manual | Swarovski CL Companion Habicht | Optics Trade
Insrtuction Manual | Swarovski CL Companion Habicht | Optics TradeInsrtuction Manual | Swarovski CL Companion Habicht | Optics Trade
Insrtuction Manual | Swarovski CL Companion Habicht | Optics Trade
 
Technical Data | Swarovski CL Companion Habicht | Optics Trade
Technical Data | Swarovski CL Companion Habicht | Optics TradeTechnical Data | Swarovski CL Companion Habicht | Optics Trade
Technical Data | Swarovski CL Companion Habicht | Optics Trade
 
Instruction Manual | Athlon Midas G2 UHD PRO | Optics Trade
Instruction Manual | Athlon Midas G2 UHD PRO | Optics TradeInstruction Manual | Athlon Midas G2 UHD PRO | Optics Trade
Instruction Manual | Athlon Midas G2 UHD PRO | Optics Trade
 

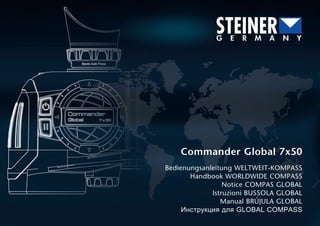
Instructions STEINER Commander Global 7x50 | Optics Trade

  • 1. Commander Global 7x50 Bedienungsanleitung WELTWEIT-KOMPASS Handbook WORLDWIDE COMPASS Notice COMPAS GLOBAL Istruzioni BUSSOLA GLOBAL Manual BRújULA GLOBAL Инструкция для GLOBAL COMPASS Commander Global 7x50Commander Global 7x50 Bedienungsanleitung WELTWEIT-KOMPASSBedienungsanleitung WELTWEIT-KOMPASS Handbook WORLDWIDE COMPASS Istruzioni BUSSOLA GLOBAL Commander Global 7x50Commander Global 7x50Commander Global 7x50Commander Global 7x50Commander Global 7x50
  • 2. Commander Global 7x50 Bedienungsanleitung WELTWEIT-KOMPASS....................4 Handbook WORLDWIDE COMPASS..............................10 Notice COMPAS GLOBAL.............................................16 Istruzioni BUSSOLA GLOBAL.........................................22 Manual BRújULA GLOBAL............................................28 Инструкция для GLOBAL COMPASS...........................34 32
  • 3. 5 Deutsch 4 GrundlagenzurBedienung Lieber Fernglas-Freund, wir beglückwünschen Sie zum Erwerb des Commander Global Marinefernglases und danken Ihnen für das in uns gesetzte Vertrauen! Sie haben mit dem Kauf dieses Fernglases ein STEINER-Produkt erworben, welches für höchste Innovationsfreude, unerreichte Qualität und kompromisslose Robustheit steht. Wir wünschen Ihnen ein- zigartige Seh-Erlebnisse mit Ihrem neuen Commander Global! 1. Einsetzen der Batterie (CR 2): Bitte verwenden Sie Batterien mit der Typbezeich- nung CR 2 Um die elektronischen Kompassmes- sungen durchführen zu können, ist das Fernglas mit Batterien ausgestattet. Diese sind im Lieferumfang enthalten, jedoch im Auslieferungszustand noch nicht eingebaut, um vorzeitige Entladung zu vermeiden. Zum Einsetzen der Batterie gehen Sie wie folgt vor: Öffnen Sie die Batterieabdeckung des Fernglases (Fig. 1). Hierzu sind keine Hilfsmittel erforderlich. Einfaches Drehen der Abdeckung gegen den Uhrzeigersinn genügt. Nun können Sie die Batterie einsetzen. Beachten Sie hierbei, dass der Minuspol sichtbar sein muss (Fig. 2), wenn Sie den Deckel wieder aufsetzen und durch Drehen im Uhrzeigersinn das Batteriefach wasser- dicht verschließen. Die Lebensdauer eines Batteriesatzes liegt bei > 1.000 Messungen unter Normalbedingungen. Zur Schonung der Batterie schaltet sich die Kompassanzeige nach 10 Sek. Inaktivität ab. 2. Grundlegendes zum WELTWEIT-KOMPASS: Der neue WELTWEIT-KOMPASS verfügt über eine integrierte elektronische Magnetfeldmessung und sorgt dadurch überall auf der Welt für eine absolut präzise Peilung, von Alaska bis Fiji. Selbst die Neigung des Fernglases ist unerheblich, da sie durch einen Sensor kompensiert wird. 2.2 Erläuterung der einzelnen Kompass-Funktionen: Einschalten des Kompasses: Dies erfolgt ausschließlich durch Drücken der -Taste. Durchführung einer Peilung: Nach dem Drücken der -Taste geht das Fernglas automatisch in den Messmodus. Wenn Sie nun durch das Fernglas blicken, wird die animierte, sich drehende Kompass-Skala angezeigt. Aktuell angezeigten Messwert merken: Drücken Sie während der Messung 1x kurz die -Taste, um den Wert festzuhalten. Um die Messung fortzu- setzen, ist lediglich ein erneutes Drücken der -Taste erforderlich. 2.1 Die Kompass-Funktionstasten: Den WELTWEIT-KOMPASS bedienen Sie über zwei Funktionstasten, die sich direkt neben dem Kompass-Gehäuse befinden: Taste 1: Taste 2: an/aus (T1) Pause (T2) Mit Hilfe dieser beiden Tasten können Sie: ■ Den Kompass an- und ausschalten ■ Peilungen durchführen ■ Den gewonnenen Wert vorübergehend speichern ■ Die Deklination manuell einstellen ■ Die Darstellung der Kompassanzeige wählen: ■ 360-Grad ■ 6400-mil 1 2 T1 T2
  • 4. 76 GrundlagenzurBedienung Deutsch 2.3 Individuelles Kompass-Einstellungsmenü Über dieses Menü können Sie bequem folgende Einstel- lungen am Kompass vornehmen: ■ Die Deklinations-Korrektur (Mißweisung) ■ Festlegung der Darstellung der Kompass-Skala auf "360 Grad" oder "6400 mil" 2.3.1 Aktivieren des Kompass-Einstellungsmenüs Halten Sie hierzu die -Taste und die - Taste zeit- gleich für 3 Sekunden gedrückt, um das Einstellungs- menü zu aktivieren. Nun können Sie mit Hilfe der - und -Taste die gewünschten Einstellungen vornehmen. Be- trachten Sie hierzu die nebenstehende Struktur des Kompass-Einstellungsmenüs. 2.4 Strukturübersicht des Einstellungsmenüs Aktivierung des Menüs: Beide Tasten 3 Sek. drücken. 1. Option: Deklinations-Korrektur Für 2. Option: -Taste drücken Submenü: -Taste drücken Submenü: -Taste drücken Wählen: -Taste drücken Wählen: -Taste drücken Wählen: -Taste drücken Wählen: -Taste drücken -Taste drücken-Taste drücken wechseln mit: -Taste wechseln mit: -Taste2. Option: Graduation Aktivierung des Magnetischen Nordens Eingabe mit der -Taste bestätigen, dann wird Menü beendet Eingabe mit der -Taste bestätigen, dann wird Menü beendet Eingabe mit der -Taste bestätigen, dann wird Menü beendet Aktivierung der 360-Grad-Ansicht Aktivierung der 6400 mil-Ansicht Manuelle Eingabe Nach 3 Sek. Inaktivität wird Eingabe übernommen und Menü beendet + 1 Grad - 1 Grad Aktivierung der Manuellen Deklinations-Korrektur
  • 5. 98 GrundlagenzurBedienung Deutsch 2.5 Kompassanzeige UnterhalbderStrichplatte sehen Sie die Kompass- anzeige, die neben dem Peilwert weitere Infor- mationen enthält: den aktuellen Batteriestand (Fig. 1) und die eingestellte Deklinations-Korrektur (Fig. 2). Die umstellung der Kompassanzeige von tag- auf Nachtmodus erfolgt automatisch, abhängig vom umgebungslicht. 3. Gurtanbindung und schwimmtragegurt Das ClicLoc-System des Commander Global (Fig. 3) ermöglicht ein sehr einfaches und schnelles Anbringen des Tragegurts. Das Raststück lässt sich komfortabel in die ClicLoc Hal- terung einschieben und rastet in der Endpositon spürbar ein. Die ergono- misch optimierten Auslösemulden verhin- dern zuverlässig ein unbeabsichtigtes Lösen der Raststücke. Durch kurzes Drücken auf die Vertiefungen kann der Gurt schnell und äußerst komfortabel wieder gelöst werden (Fig. 4). Der Schwimmtragegurt verhindert ein Untergehen des Fernglases. Der Gurt ist mit reflektierenden 3M Elementen bestückt, was das Auffinden des Fernglases, selbst bei schlechten Lichtverhältnissen, erleichtert. Die Polsterung ist weich und ermöglicht ein ermüdungs- freies Tragen. Weitere Informationen über STEINER-Ferngläser finden Sie auf unserer Website www.steiner.de 1 2 Tagmodus Nachtmodus 3 4
  • 6. 1110 englishPrinciplesofoperation Dear Binocular Enthusiast, We congratulate you on your purchase of the Commander Global marine binoculars and thank you for the trust you have placed in us. In buying these binoculars, you have purchased a STEINER product that represents the highest degree of innovative spirit, unprecedented quality and no-compromise ruggedness. We wish you many unique viewing experiences with your new Commander Global! 1. Inserting the battery (3pcs): Only use type CR 2 batteries In order to be able to carry out elec- tronic compass measurements, the binoculars are equipped with batteries. These are included in the scope of delivery, but are not installed when delivered, to prevent premature discharging. To install the batteries, proceed as follows: Open the battery compartment cover of the binoculars (Fig. 1). No tools are required to do so. Simply turning the cover in an anticlockwise direction is sufficient. You can now insert the batteries. Take care when doing this that the negative pole is visible (Fig. 2) when you replace the cover, and close until watertight by turning the cover clockwise. The life of a set of batteries is more than 1000 measurements under normal conditions. In order to conserve the battery, the compass display switches off after 10 seconds of inactivity. 2. Basic information concerning the WORLDWIDE- COMPASS: The new WORLDWIDE-COMPASS has integrated electronic magnetic field measurement and thus ensures absolutely correct bearings anywhere in the world, from Alaska to Fiji. Even the declination of the binoculars is unimportant, since it is compensated for by a sensor. 2.2 Explanation of the individual compass functions: Switching on the compass: This can only be done by pressing the button. Finding bearings: After pressing the button, the binoculars automatically go into measurement mode. When you now look through the binoculars, the animated rotating compass scale is displayed. Noting currently displayed measurement value: During measurement, press the button once briefly to retain the value. To continue measuring, it is only necessary to press the button again. 2.1 The compass function buttons: You operate the WORLDWIDE-COMPASS by means of two function pushbuttons that are located directly next to the compass housing: Pushbutton 1: Pushbutton 2: On/Off (T1) Pause (T2) With the help of these two pushbuttons you can: ■ Switch the compass on and off ■ Find your bearings ■ Temporarily store the value obtained ■ Set the declination manually ■ Select the representation of the compass: ■ 360 degrees ■ 6400 mil 1 T1 T2 2
  • 7. 1312 Principlesofoperation 2.3 Individual compass settings menu With this menu you can conveniently make the following settings for the compass: ■ Declination correction (magnetic variation) ■ Set the compass scale representation to "360 degrees" or "6400 mil" 2.3.1 Activating the compass settings menu To do so, press the button and the button simultaneously for 3 seconds to activate the settings menu. You can now make the desired settings with the help of the and the button. For this, study the structure of the compass settings menu on the adjacent page. 2.4 Overview of structure of the settings menu Activating the menu Press both buttons for 3 seconds. 1st option:: Declination correction For 2nd option: Press button Sub-menu: Press button Sub-menu: Press button Select: Press button Select: Press button Select: Press button Select: Press button Press buttonPress button Change with: -button Change with: -button2nd option: Graduation Activation of magnetic north Activation of 360-degree view Activation of 6400-mil view Manual input After 3 seconds inactivity, the entry is accepted and the menu ended. + 1 degree - 1 degree Activation of manual declination correction The menu is ended ofter selection The menu is ended ofter selection The menu is ended ofter selection english
  • 8. 1514 Principlesofoperation 2.5 compass display Under the reticule plate you will see the compass display, which, as well as the bearings value, gives you further information: The current battery status (Fig. 1) and the set declination offset (Fig. 2). switch-over of the compass display from day to night mode is done automatically, and depends on ambient light conditions. 3. strap attachment and floating strap The ClicLoc system of the Commander Global (Fig. 3) allows the carrying strap to be connected very quickly and ea- sily. The lock clip slides easily into the ClicLoc holder and clicks noticeably into the end position. The ergono- mically optimised trigger depressions reliably prevent accidental release of the lock clips. The strap can be quickly and extremely conveniently released by briefly pressing down on the depressions (Fig. 4). The floating strap prevents the binoculars sinking. The strap is fitted with reflecting elements from 3M that aid in finding the binoculars even in bad light conditions. The padding is soft and permits fatigue-free carrying. Further information about STEINER binoculars can be found on our website www.steiner.de Day mode Night mode 3 4 1 2 eNGLIsh
  • 9. 1716 FrançaisPrincipesd’utilisation Cher amateur de jumelles, Nous vous félicitons pour l’acquisition des jumelles pour la marine Commander Global et vous remercions pour votre confiance ! En achetant ces jumelles, vous avez acquis un produit STEINER synonyme de grande capa- cité d’innovation, de qualité inégalée et de robustesse sans compromis. Nous vous souhaitons des moments exceptionnels avec vos nouvelles Commander Global ! 1. Mise en place de la pile (CR 2) : prière d’utiliser des piles portant la désignation CR 2 Pour pouvoir effectuer les mesures électroniques relatives au compas, les jumelles sont équipées de piles. Celles-ci sont fournies d’origine mais pas encore installées, de manière à prévenir une décharge prématurée. Pour mettre en place les piles, procédez comme suit : ouvrez le couvercle du logement à piles des jumelles (Fig. 1). Aucun outil n’est nécessaire pour ce faire. Il suffit de tourner le couvercle dans le sens inverse des aiguilles d’une montre. Vous pouvez à présent insérer les piles. Attention, le pôle minus doit être visible (Fig. 2) lorsque vous remettez en place le couvercle et fermez hermétiquement le logement à piles en le tournant dans le sens des aiguilles d’une montre. La durée de vie d’un jeu de piles est supérieure à 1 000 mesures effectuées dans des conditions normales. Pour ménager la pile, l'affichage du compas s'éteint au bout de 10 secondes d'inactivité. 2. Généralités sur le COMPAS GLOBAL : Le nouveau COMPAS GLOBAL intègre un système électro- nique de mesure du champ magnétique qui garantit un re- lèvement d’une parfaite précision dans le monde entier, de l’Alaska aux îles Fidji. Même l’inclinaison des jumelles n’a aucune importance car elle est compensée par un capteur. 2.2 Explication des différentes fonctions du compas : Mise en marche du compas : Appuyez uniquement sur la touche . Réalisation d’un relèvement : Après une pression sur la touche ,les jumelles se mettent automatiquement dans le mode mesure. En regardant dans les jumelles, vous voyez le cadran animé, rotatif, du compas. Noter la valeur mesurée actuellement affichée : Pendant la mesure, appuyez 1x brièvement sur la touche pour mémoriser la valeur. Pour poursuivre la mesure, il suffit d’appuyer à nouveau sur la touche . 2.1 Les touches de fonction du compas : L'utilisation du COMPAS GLOBAL fait appel à deux touches de fonction situées directement à côté du boîtier du compas : Touche 1: Touche 2: marche/arrêt (T1) pause (T2) A l’aide de ces deux touches, vous pouvez : ■ Mettre le compas en marche et à l’arrêt ■ Effectuer des relèvements ■ Mémoriser temporairement la valeur obtenue ■ Régler manuellement la déclinaison ■ Sélectionner l’affichage du compas : ■ 360 degrés ■ 6400 mil 2 1 T1 T2
  • 10. 1918 Principesd’utilisation Français 2.3 Menu de réglage personnalisé du compas Ce menu vous permet d’effectuer facilement les réglages suivants sur le compas : ■ Correction de la déclinaison (variation) ■ Sélection de la représentation du cadran du compas, « 360 degrés » ou « 6400 mil » 2.3.1 Activation du menu de réglage du compas Pour activer le menu de réglage, maintenez enfoncées la touche et la touche simultanément pendant 3 secondes. Vous pouvez à présent effectuer les réglages souhaités à l’aide de la touche et de la touche . Pour ce faire, voyez la structure ci-contre, qui représente le menu de réglage du compas. 2.4 Vue d’ensemble de la structure du menu de réglage Activation du menu : appuyer sur les deux touches pendant 3 secondes. 1ère option : correction de la déclinaison Pour la 2ème option : appuyer sur la touche Sous-menu : appuyer sur la touche Sous-menu : appuyer sur la touche Sélectionner : appuyer sur la touche Sélectionner : appuyer sur la touche Sélectionner : appuyer sur la touche appuyer sur la touche Appuyer sur la touche Appuyer sur la touche Changer avec : touche Changer avec : touche 2ème option : graduation Activation du nord magnétique Activation de la correction manuelle de la déclinaison Confirmer l'entrée avec la touche puis le menu est quitté Confirmer l'entrée avec la touche puis le menu est quitté Confirmer l'entrée avec la touche puis le menu est quitté Activation de la vue 360 degrés Activation de la vue 6400 mil Entrée manuelle Au bout de 3 secondes d’inactivité, l’entrée est prise en compte et le menu est quitté. + 1 degré - 1 degré
  • 11. 2120 FRANçAIsFRANçAIsPrincipesd’utilisation 2.5 Affichage du compas Sous le réticule, vous vo- yez l’affichage du com- pas qui indique la valeur de relèvement ainsi que d’autres informations : l’état actuel des piles (Fig. 1) et l’offset de dé- clinaison réglé (Fig. 2). L’affichage du compas bascule automatiquement sur le mode jour ou le mode nuit en fonction de la lumière ambiante. 3. Fixation de bandoulière et bandoulière flottante Grâce au système ClicLoc des Com- mander Global (Fig. 3), la fixation de la bandoulière est très simple et rapide. La pièce encliquetable s’insère ais- ément dans la fixation ClicLoc et s’enclenche de façon perceptible en position finale. Les renfoncements de déclenchement ont une forme ergo- nomique optimisée et empêchent l’ouverture fortuite des pièces encli- quetables. Une brève pression sur les renfoncements per- met de libérer à nouveau la bandoulière de façon rapide et extrêmement aisée (Fig. 4). La bandoulière flottante empêche les jumelles de couler. La bandoulière est munie d'éléments réfléchissants 3M, ce qui permet de trouver plus facilement les jumelles même par conditions d’éclairage défavorables. Le capitonnage est doux et rend le port non fatigant. Vous trouverez davantage d'informations sur les jumelles STEINER sur notre site web www.steiner.de Mode jour Mode nuit 3 4 1 2
  • 12. 2322 ItalianoPrincipidiutilizzo Caro amico dei binocoli, congratulazioni per aver acquistato il binocolo marino Commander Global e grazie per la fiducia accordataci! Con l'acquisto di questo binocolo è entrato in possesso di un prodotto STEINER, sinonimo di massima in- novazione, qualità irraggiungibile e resistenza senza compromessi. Le auguriamo un'esperienza visiva unica con il suo nuovo Commander Global! Inserimento della batteria (CR 2): Utilizzare batterie con la denominazione CR 2 Per le misurazioni elettroniche con la bussola, il binocolo è dotato di batterie. Queste sono incluse nella fornitura, tuttavia non sono inserite al fine di evitare che si sca- richino prematuramente. Per inserire le batterie procedere come indicato di seguito: aprire il coperchio del vano batterie del binocolo (fig. 1). A tale scopo non sono necessari strumenti, basta ruotare il coperchio in senso antiorario. Ora è possibile inserire le batterie. Accertarsi che il polo negativo sia visibile (fig. 2) quando si riapplica il coperchio e chi- udere a tenuta stagna il vano batterie ruotando il coperchio in senso orario. La durata di un set di batterie ammonta, in condizioni normali, a più di 1000 misurazioni. Per preservare la batteria l'indicatore della bussola si disattiva dopo 10 secondi di inattività. 2. Informazioni fondamentali su BUSSOLA GLOBAL : La nuova BUSSOLA GLOBAL dispone di una misu- razione elettronica integrata del campo magnetico, garantendo ovunque un rilevamento di assoluta precisione, dall'Alaska alle Fiji. Persino l'inclinazione del binocolo è irrilevante, in quanto viene compensata da un sensore. 2.2 Spiegazione delle singole funzioni della bussola: Accensione della bussola: Ciò avviene esclusivamente premendo il tasto . Esecuzione di un rilevamento: Dopo aver premuto il tasto , il binocolo passa automati- camente in modalità di misura. Se si guarda ora dal binocolo, viene visualizzata la scala della bussola animata e rotante. Annotazione del valore di misura attualmente visualizzato: Durante la misurazione premere una volta brevemente il tasto per mantenere il valore. Per proseguire la misura- zione, è necessario premere di nuovo il tasto . 2.1 Tasti funzione della bussola La bussola BUSSOLA GLOBAL si utilizza tramite due tasti funzione che si trovano direttamente vicino all'alloggiamento della bussola: Tasto 1: Tasto 2: on/off (T1) Pausa (T2) Grazie a questi due tasti è possibile: ■ accendere e spegnere la bussola ■ eseguire i rilevamenti ■ memorizzare temporaneamente il valore rilevato ■ regolare manualmente la declinazione ■ selezionare la rappresentazione dell'indicatore della bussola: ■ 360 gradi ■ 6400 mil 1 T1 T2 2
  • 13. 2524 Principidiutilizzo Italiano 2.3 Menu d'impostazione personalizzato della bussola Tramite questo menu è possibile effettuare le seguenti impostazioni comodamente dalla bussola: ■ correzione della declinazione ■ definizione della rappresentazione della scala della bussola a "360 gradi" o "6400 mil" 2.3.1 Attivazione del menu d'impostazione della bussola Tenere premuti il tasto e il tasto contemporanea- mente per 3 secondi per attivare il menu d'impostazione. Ora è possibile effettuare le impostazioni desiderate con l'ausilio dei tasti e . Osservare a tale scopo la struttura del menu d'impostazione della bussola a lato. 2.4 Panoramica della struttura del menu d'impostazione Attivazione del menu: tenere premuti entrambi i tasti per 3 secondi. 1a opzione: Correzione della declinazione Per la 2a opzione: premere il tasto Sottomenu: premere il tasto Sottomenu: premere il tasto Selezionare: premere il tasto Selezionare: premere il tasto Selezionare: premere il tasto Selezionare: premere il tasto Premere il tasto Premere il tasto Cambiare con: tasto Cambiare con: tasto 2a opzione: graduazione Attivazione del nord magnetico Confermare l'inserimento con il tasto . Il menu viene quindi chiuso. Confermare l'inserimento con il tasto . Il menu viene quindi chiuso. Confermare l'inserimento con il tasto . Il menu viene quindi chiuso. Attivazione della visualizzazione a 360 gradi Attivazione della visualizzazione a 6400 mil Inserimento manuale Dopo 3 sec. di inattività, l'inserimento viene acquisito e il menu chiuso. + 1 grado - 1 grado Attivazione della correzione manuale della declinazione
  • 14. 2726 ItALIANOPrincipidiutilizzo 2.5 Indicatore della bussola Al di sotto del reticolo è presente l'indicatore della bussola, il quale, oltre al valore rilevato, fornisce ulteriori infor- mazioni: lo stato attua- le delle batterie (fig. 1) el’offset di declinazione impostato (fig. 2. Il passaggio dell'indicatore della bussola dalla modalità diurna a quella notturna avviene automaticamente, in funzione della luce ambientale. 3. Attacchi tracolla e cinghia galleggiante IlsistemaClicLocdelCommanderGlobal (fig. 3) consente un attacco estrema- mente semplice e rapido della cinghia. Il dispositivo di arresto si inserisce facilmente nel supporto ClicLoc, innest- andosi in modo percepibile nella po- sizione finale. Le cavità ergonomiche previste come meccanismo di apertu- ra impediscono in modo affidabile un possibile allentamento accidentale dei dispositivi di arresto. Premendo brevemente sulle incava- ture è possibile estrarre la cinghia rapidamente e in modo estremamente confortevole (fig. 4). La cinghia galleggiante impedisce che il binocolo affondi. La cinghia è dotata di elementi riflettenti 3M che facilitano l'individuazione del binocolo, anche in pessime condizioni di luce. L'imbottitura è morbida e consente di indossare il binocolo senza affaticamenti. Per maggiori informazioni sui binocoli STEINER visitate il nostro sito Web: www.steiner.de Modalità diurnar Modalità notturna 3 4 1 2
  • 15. 2928 EspañolInformaciónparaelmanejo Apreciado amante de los prismáticos: Le felicitamos por haber adquirido unos prismáticos marinos Commander Global y le agradecemos la confianza que ha mostrado en nosotros. Con la adquisición de estos prismáti- cos ha adquirido un producto STEINER, que es sinónimo de la más avanzada innovación, calidad inigualable y robustez sin compromisos. ¡Le deseamos que disfrute de una expe- riencia visual única con sus nuevos Commander Global! 1. Colocación de la pila (CR2): Utilice pilas de botón del tipo CR 2 Para poder llevar a cabo las mediciones electrónicas con la brújula los prismá- ticos tienen que llevar las pilas puestas. Las pilas forman parte de los compo- nentes que se incluyen en el suministro pero no van colocadas en los prismáticos para evitar que se descarguen antes de tiempo. Proceda de la siguiente forma para colocar las pilas: Abra la tapa del comparti- mento de las pilas en los prismáticos (Fig. 1). Para ello no es necesario ninguna herramienta adicional. Sólo tiene que girar la tapa en sentido contrario a las agujas del reloj . Ahora ya puede colocar las pilas. Preste atención a que la polaridad sea la correcta, el polo negativo tiene que estar visible (Fig. 2), cuando se vuelva a colocar la tapa y se gire en el sentido de las agujas del reloj para cerrar el compartimento de las pilas de forma que quede cerrado estanco e impermeable. La duración de un juego de pilas de botón es de aproximadamente > 1.000 medi- ciones en condiciones normales. Para conservar la pila, la indicación de la brújula se desconecta después de 10 seg. de inactividad. 2. Información básica sobre el Brújula GLOBAL: El nuevo Brújula GLOBAL cuenta con una medición elec- trónica del campo magnético integrada que le permite ori- entarse con total precisión en cualquier lugar del mundo, desde Alaska hasta las islas Fiji. Incluso la inclinación de los prismáticos es irrelevante, ya que se compensa por medio de un sensor. 2.2 Explicación de las diferentes funciones de la brújula: Encendido de la brújula: Sólo se puede llevar a cabo presionando la tecla . Orientarse determinando la dirección: Al presionar la tecla en los prismáticos se ajusta automá- ticamente el modo de medición. Cuando mire a través de los prismáticos se le mostrará la escala giratoria de la brújula animada. Registro de los valores de medición actuales mostrados: Durante la medición presione 1 vez brevemente la tecla para conservar el valor. Para continuar la medición es necesario presionar de nuevo la tecla . 2.1 Teclas de función de la brújula: Brújula GLOBAL se maneja por medio de dos teclas de función ubicadas justo al lado de la carcasa de la brújula: Tecla 1: Tecla 2: encendido/ Pausa (T2) apagado (T1) Con ayuda de estas dos teclas se puede: ■ Conectar y desconectar la brújula ■ Orientarse ■ Almacenar temporalmente el valor registrado ■ Ajustar manualmente la declinación ■ Seleccionar la visualización de la indicación de la brújula: ■ 360 grados ■ 6400 milésimas 1 T1 T2 2
  • 16. 3130 Informaciónparaelmanejo Español 2.3 Menú de ajuste individualizado de la brújula Por medio de este menú puede realizar los siguientes ajustes en la brújula con total comodidad: ■ Corrección de la declinación (declinación magnética) ■ Fijar la visualización de la escala de la brújula en "360 grados" o "6400 milésimas" 2.3.1 Activación del menú de ajuste de la brújula Para ello mantenga presionadas la tecla y la tecla al mismo tiempo durante 3 segundos para activar el menú de ajustes. Ahora ya puede, con ayuda de las teclas y , llevar a cabo los ajustes que desee. Para ello tenga en cuenta la siguiente estructura del menú de ajuste de la brújula. 2.4 Esquema de la estructura del menú de ajuste Activación del menú: Presione ambas teclas durante 3 seg. 1ª opción: Corrección de la declinación Para la 2ª opción: Presionar la tecla II Submenú: Presionar la tecla Submenú: Presionar la tecla Seleccionar: Presionar la tecla Seleccionar: Presionar la tecla Seleccionar: Presionar la tecla Seleccionar: Presionar la tecla Presionar la tecla Presionar la tecla cambiar con: tecla cambiar con: tecla 2ª opción: Graduación de brújula Activación del Norte magnético Confirmar la selección con la tecla , despúes se finaliza el menú Confirmar la selección con la tecla , despúes se finaliza el menú Confirmar la selección con la tecla , despúes se finaliza el menú Activación de la vista de 360 grados Activación de la vista 6400 mil Introducción manual Después de 3 seg. de inactividad, se adopta la entrada y se finaliza el menú + 1 grado - 1 grado Activación de la corrección manual de declinaciónde la declinación
  • 17. 3332 Informaciónparaelmanejo esPAñOL 2.5 Indicación de la brújula Debajo de la placa reti- culada se encuentra la indicación de la brújula que ofrece, junto con el valor de dirección, más información: el estado actual de las pilas (Fig. 1) y el offset de declinación ajustado (Fig. 2). el cambio de la indicación de la brújula entre día y noche se realiza automática- mente, en función de la luz ambiental. 3. enganche para cinturón y correa de transporte salvavidas El sistema ClicLoc del Commander Global (Fig. 3) permite un enganche muy sencillo y rápido de la correa de transporte. El pasador de bloqueo se puede deslizar de forma cómoda en el soporte ClicLoc y bloquearlo en la posición final de forma audible. Las depresiones ergonómicas de de- senganche optimizadas impiden que los pasadores de bloqueo se puedan soltar de forma involuntaria. Presionando brevemente en la depresión la correa se puede volver a soltar de forma rápida y cómoda (Fig. 4). La correa de transporte salvavidas evita que los prismáticos se puedan hundir. La correa está provista de elementos reflectantes 3M, lo que permite localizar los prismáticos, incluso en condiciones difíciles de visibilidad. El acolchado es suave y permite un cómodo transporte. Podrá encontrar más información sobre los prismáticos STEINER en nuestra página web: www.steiner.de Modo día Modo noche 3 4 1 2
  • 18. 3534 Русский Основныеинструкциипоприменению Дорогой пользователь бинокля! Мы поздравляем вас с приобретением морского бинокля Commander Global и благодарим за оказанное нам доверие! Приобретя этот бинокль, вы стали владельцем изделия фирмы STEINER самого современного технического уровня с несравненно высоким качеством и уникальной прочностью. Мы желаем вам уникальных наблюдений с помощью вашего нового бинокля Commander Global! Установка батареи (CR2): Используйте батареи типа CR 2. Для выполнения электронных компасных измерений бинокль оснащен батареями. Они входят в комплект поставки, но не установлены в прибор, чтобы избежать преждевременной разрядки. Чтобы  вставить батареи, выполните следующее. Откройте крышку батарейного отсека бинокля (рис. 1). Для этого вспомогательные средства не требуются. Достаточно просто повернуть крышку против часовой стрелки. Теперь можно вставить батарею. При этом имейте в виду, что отрицательный полюс должен быть виден (рис. 2) перед тем, как вы установите на место крышку и плотно закроете батарейный отсек, обеспечив водонепроницаемость. Срок службы комплекта батарей при нормальных условиях работы составляет более 1000 измерений. Чтобы сэкономить заряд батареи, после 10 сек. бездействия индикация компаса выключается. 2. Основные сведения о компасе GLOBAL COMPASS  Новый компас GLOBAL COMPASS оборудован встроенной электронной системой измерения магнитного поля и за счет этого обеспечивает абсолютно точную пеленгацию по всему миру – от Аляски до островов Фиджи. Даже наклон бинокля не оказывает никакого влияния, так как компенсируется датчиком. 2.2 Описание отдельных функций компаса Включение компаса Это выполняется только нажатием кнопки . Пеленгация: После нажатия кнопки бинокль автоматически переходит в режим измерения. Если теперь посмотреть в бинокль, вы увидите анимационное изображение вращающейся шкалы компаса. Запоминание отображаемого измеренного значения Нажмите в процессе измерения 1 раз кратковременно клавишу чтобы сохранить значение . Чтобы продолжить измерение, требуется лишь повторно нажать клавишу . 2.1 Функциональные кнопки компаса Управление компасом GLOBAL COMPASS осуществляется двумя функциональными кнопками, расположенными непосредственно рядом с корпусом компаса. Кнопка 1: Кнопка 2: вкл./выкл. (T1) пауза (T2) С помощью этих двух кнопок можно: ■ включить и выключить компас ■ выполнить пеленгацию ■ временно сохранить в памяти полученное значени ■ настроить вручную склонение ■ выбрать изображение индикации компаса: ■ 360 градусов ■ 6400 делений 1 T1 T2 2
  • 19. 3736 Основныеинструкциипоприменению Русский  2.3 Меню индивидуальных настроек компаса Это меню позволяет удобно выполнить следующие настройки компаса: ■ коррекция склонения (магнитное склонение) ■ выбор изображения шкалы компаса "360 градусов" или "6400 делений" 2.3.1 Вход в меню настроек компаса Для этого держите кнопку -и кнопку одновременно нажатыми в течение 3 секунд для входа в меню настроек. После этого можно кнопкой и выполнить нужные настройки. Для этого здесь представлена структура меню настроек компаса. 2.4 Структура меню настроек Вход в меню: нажать обе кнопки в течение 3 сек. Опция 1: Коррекция склонения Для опции 2: нажать кнопку Подменю: нажать кнопку Подменю: нажать кнопку Выбор: нажать кнопку Выбор: нажать кнопку Выбор: нажать кнопку Выбор: нажать кнопку Нажать кнопку Нажать кнопку Переход кнопкой Переход кнопкой Опция 2: Градация Настройка на северный магнитный полюс Подтвердить ввод клавишей , меню закрывается Подтвердить ввод клавишей , меню закрывается Подтвердить ввод клавишей , меню закрывается Включение индикации 360 градусов Включение изображения с 6400 делениями Ручной ввод Спустя 3 сек. бездействия введенное значение принимается и меню закрывается. + 1 градус - 1 градус Включение ручной   коррекции склонения
  • 20. 3938 Основные инструкции по применению Русский  1 2 2.5 индикация компаса  Под пластинкой с де- лениями показана ин- дикация компаса, ко- торая кроме значения пеленга содержит до- полнительную инфор- мацию: текущий уро- вень зарядки батарей (рис. 1) и установленное смещение склонения (рис. 2).   Переключение  индикации  компаса  с  дневного  на  ночной  режим  происходит  автоматически  в  зависимости от окружающего освещения. 3.  крепление  ремня  и  нетонущий  ремень  для  переноски Система ClicLoc бинокля Commander Global (рис. 3) позволяет очень просто и быстро надеть ремень для переноски. Фиксатор удобно вставляется в держатель ClicLoc и вы почувствуете, когда произойдет фиксация в конечном положении. Эргономичные и оптимизированные по форме углубления надежно предотвращают разблокировку фиксаторов. Кратковременно нажав на углубления, можно быстро и очень удобно снова освободить ремень (рис. 4). Нетонущий ремень для переноски не дает биноклю утонуть. Ремень оснащен отражательными элементами 3M, что облегчает поиск бинокля даже при плохой освещенности. Благодаря мягкой набивке ремня при ношении бинокля не чувствуется усталости. Дополнительная информация о биноклях STEINER приведена на нашем интернет-сайте www.steiner.deприведена на нашем интернет-сайте www.steiner.de Дневной режим Ночной режим 3 4
  • 21. STEINER-OPTIK GmbH Dr.-Hans-Frisch-Str. 9 D-95448 Bayreuth · Germany Customer Service: Telephone +49-(0)921/7879-851 Telefax +49-(0)921/7879-89 e-mail: Customer-service@steiner.de www.steiner.de STEINER is a Beretta Holding company 10/2012•Art.Nr.:V0000276•©STEINEROptik•Photos:KlausAndrews,KMC