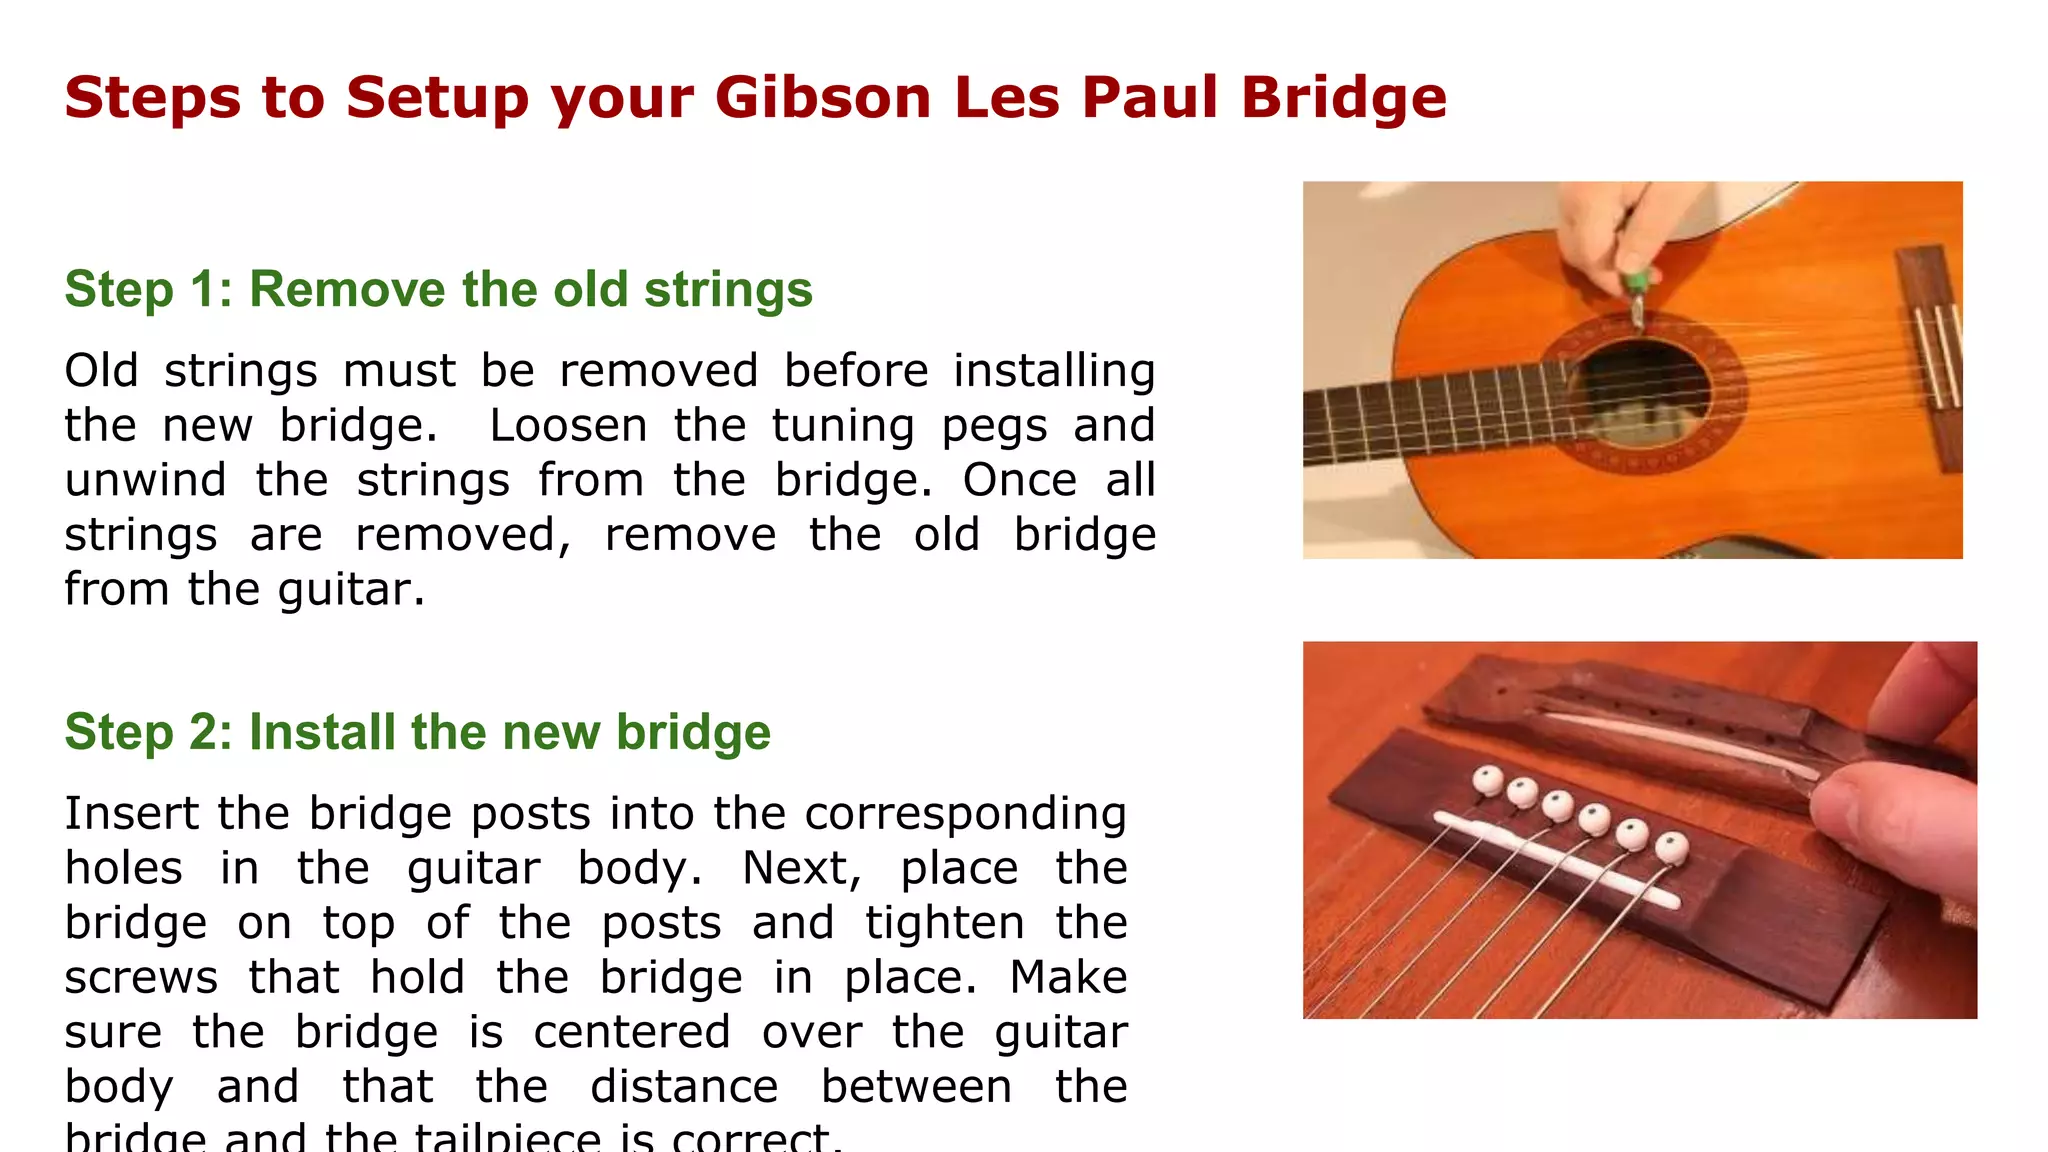
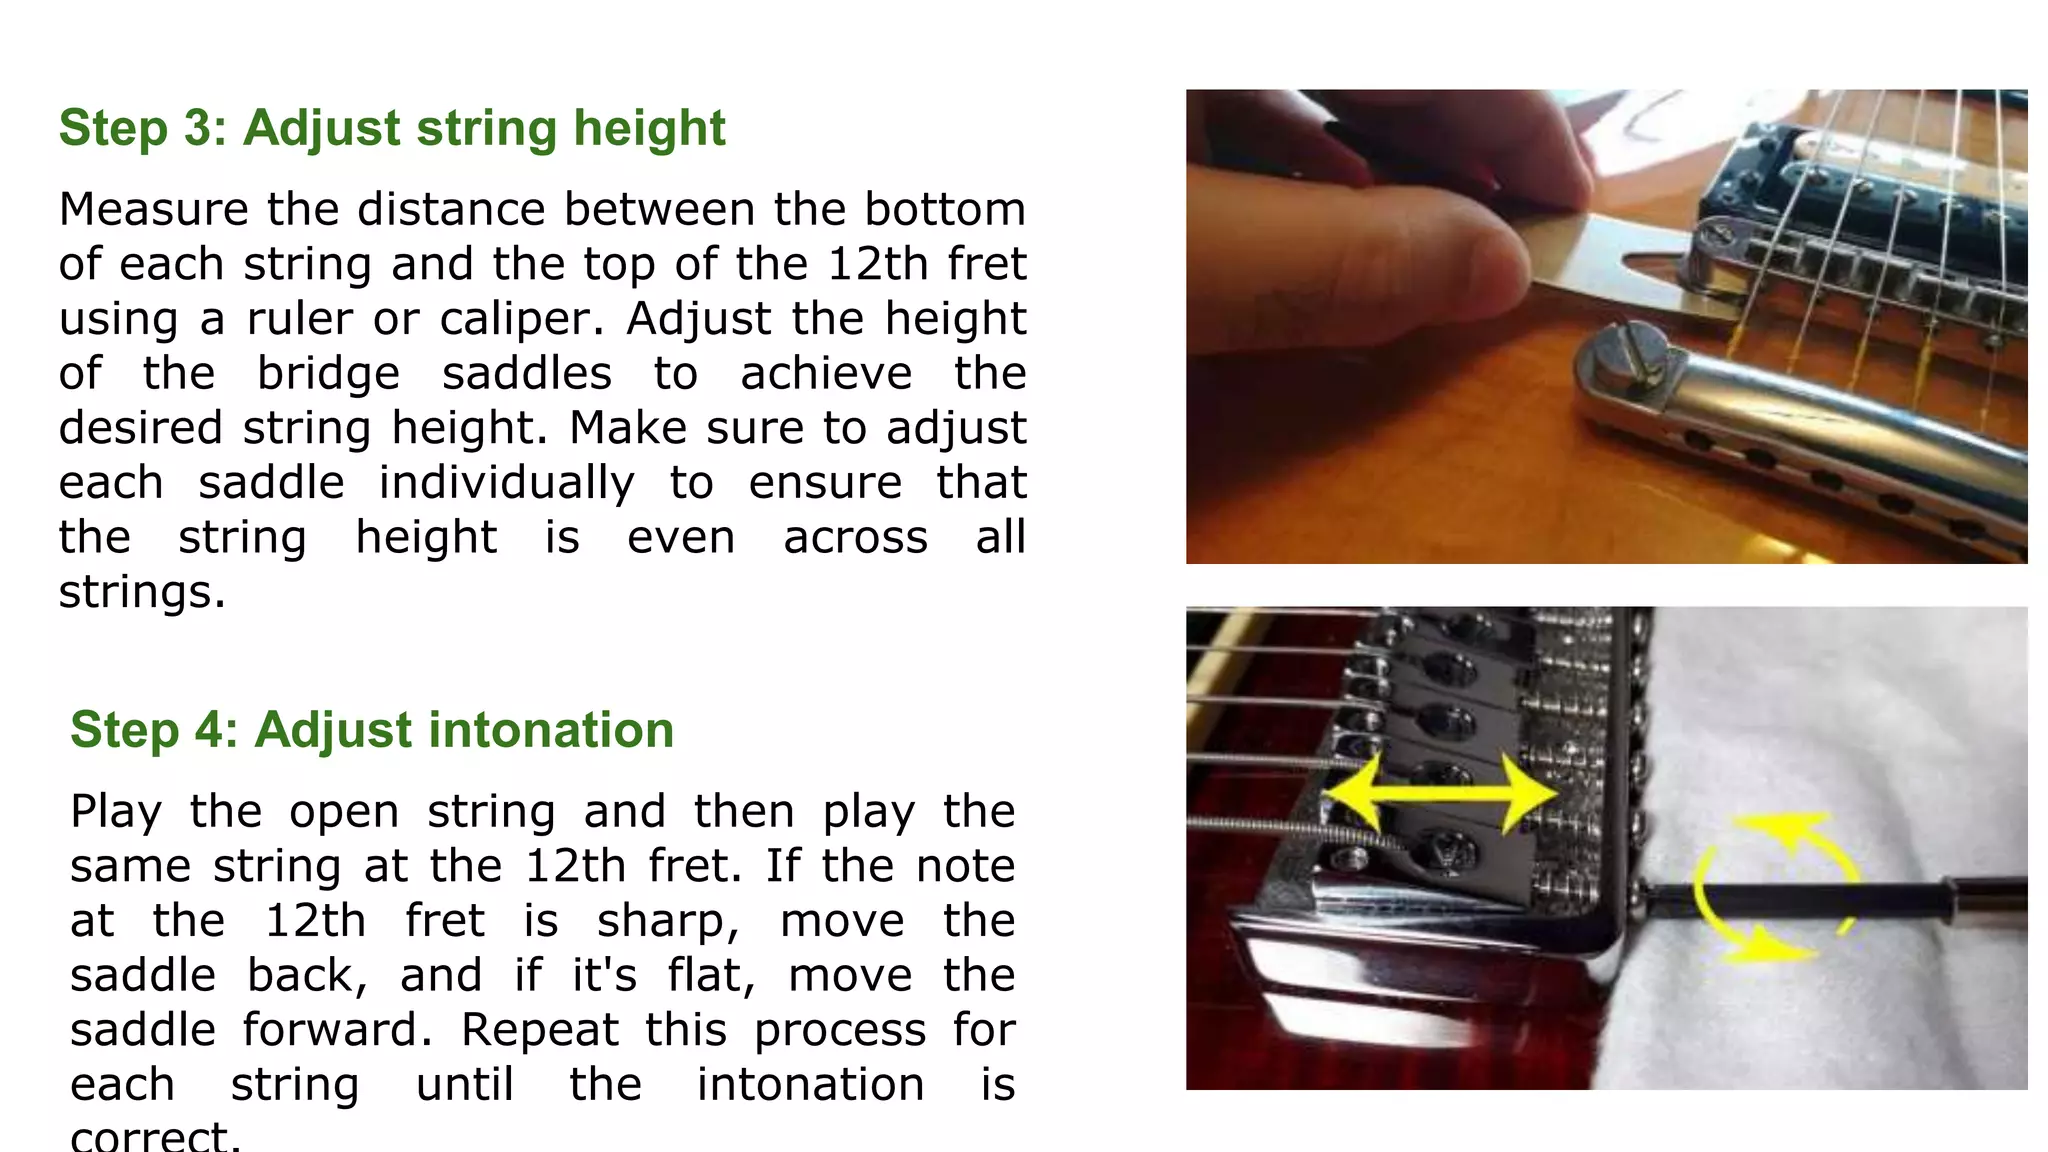
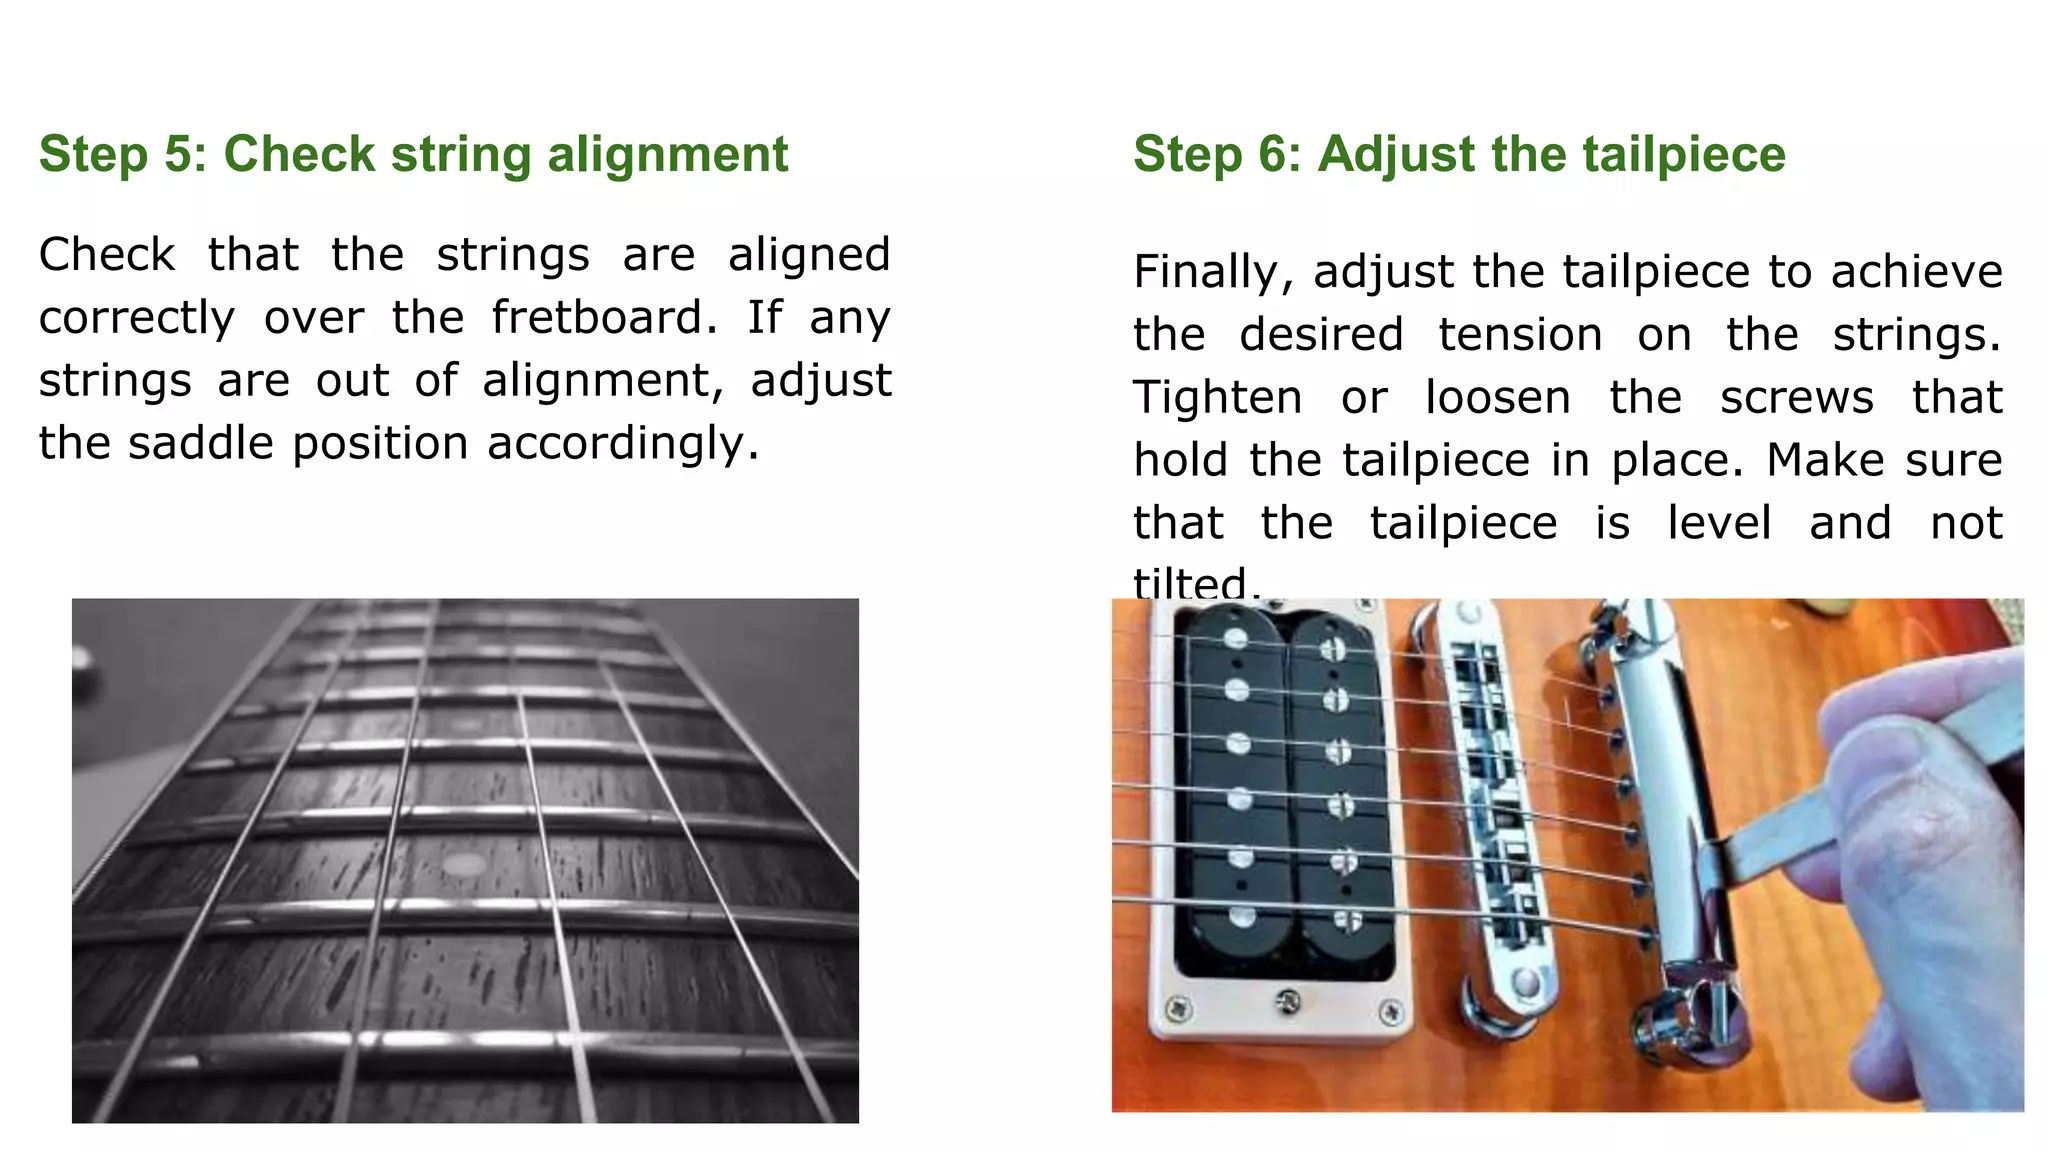
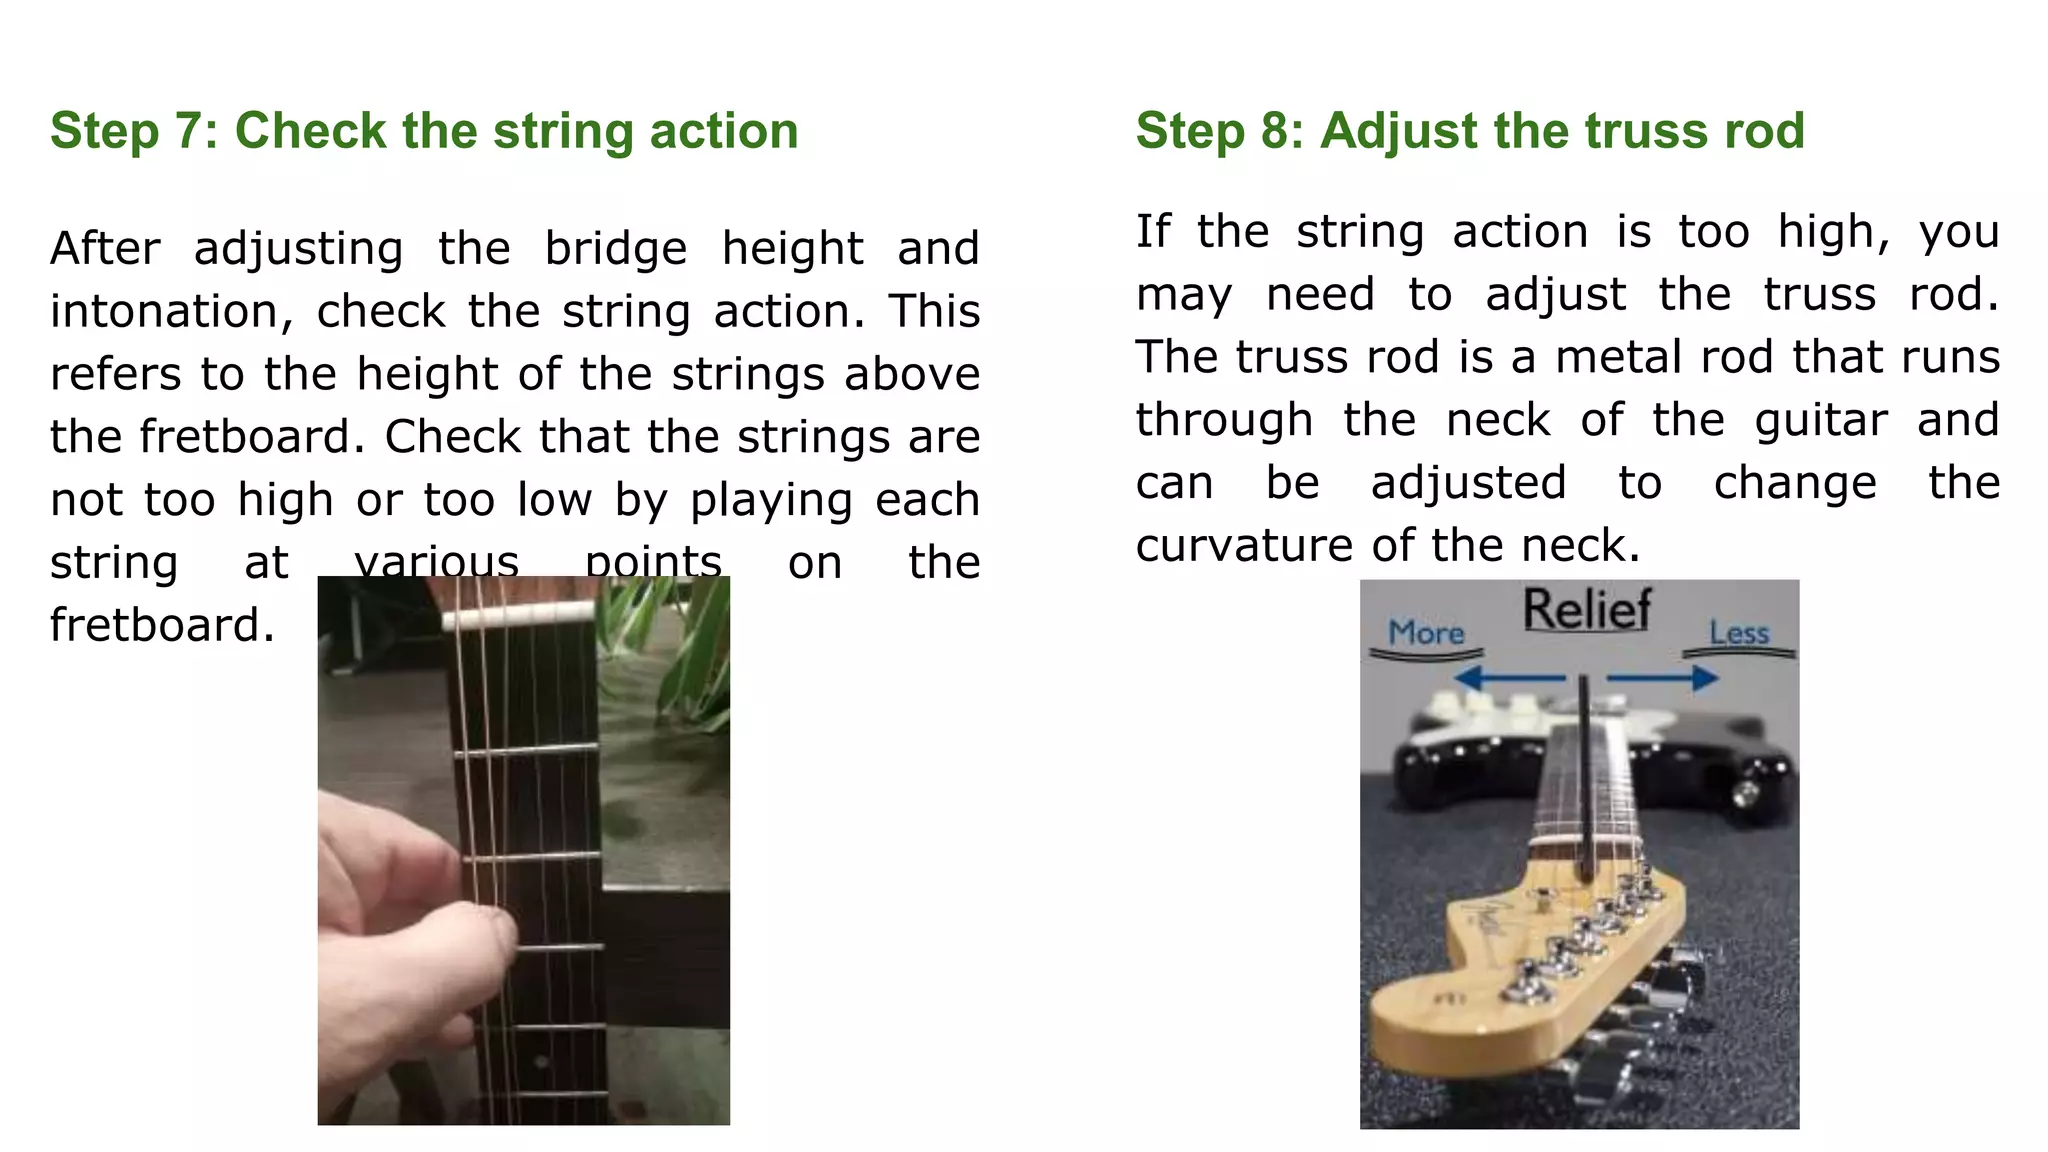
Installation Guide For Les Paul
Bridge Setup
Introducing Gibson Les Paul
The Les Paul Guitar
● First mass produced solid
body electric guitar.
● Created by Les Paul and
manufactured by Gibson
Guitar Corporation.
● Millions of Les Paul guitars
have been sold since the
1950’s.
Gibson Brands, Inc. (formerly Gibson
Guitar Corporation) is an American
manufacturer of guitars, other musical
instruments, and professional audio
equipment based in Nashville,
Tennessee. Gibson was established in
the late eighteen hundreds.
Lester William Polsfuss, better known
as Les Paul, was born in 1915 in
Wisconsin. Paul is credited with many
recording innovations. At the age of 26
he made the first electric body guitar,
called ‘The Log’.
Parts of a Les Paul Bridge Guitar
The Les Paul Bridge consists of several
components, including the bridge itself,
bridge posts, bridge studs, guitar bridge
saddles, and the guitar tailpiece.
The bridge posts and studs are
responsible for holding the bridge in
place and allowing for height
adjustments.
The bridge saddles, located on top of the
bridge, are the parts that the strings sit
on and are responsible for intonation
adjustments.
The tailpiece is located behind the bridge
and anchors the strings to the guitar
Steps to Setup your Gibson Les Paul Bridge
Step 1: Remove the old strings
Old strings must be removed before installing
the new bridge. Loosen the tuning pegs and
unwind the strings from the bridge. Once all
strings are removed, remove the old bridge
from the guitar.
Step 2: Install the new bridge
Insert the bridge posts into the corresponding
holes in the guitar body. Next, place the
bridge on top of the posts and tighten the
screws that hold the bridge in place. Make
sure the bridge is centered over the guitar
body and that the distance between the
Step 3: Adjust string height
Measure the distance between the bottom
of each string and the top of the 12th fret
using a ruler or caliper. Adjust the height
of the bridge saddles to achieve the
desired string height. Make sure to adjust
each saddle individually to ensure that
the string height is even across all
strings.
Step 4: Adjust intonation
Play the open string and then play the
same string at the 12th fret. If the note
at the 12th fret is sharp, move the
saddle back, and if it's flat, move the
saddle forward. Repeat this process for
each string until the intonation is
Step 5: Check string alignment
Check that the strings are aligned
correctly over the fretboard. If any
strings are out of alignment, adjust
the saddle position accordingly.
Step 6: Adjust the tailpiece
Finally, adjust the tailpiece to achieve
the desired tension on the strings.
Tighten or loosen the screws that
hold the tailpiece in place. Make sure
that the tailpiece is level and not
tilted.
Step 7: Check the string action
After adjusting the bridge height and
intonation, check the string action. This
refers to the height of the strings above
the fretboard. Check that the strings are
not too high or too low by playing each
string at various points on the
fretboard.
Step 8: Adjust the truss rod
If the string action is too high, you
may need to adjust the truss rod.
The truss rod is a metal rod that runs
through the neck of the guitar and
can be adjusted to change the
curvature of the neck.
Bottom Line
A properly set up Gibson Les Paul Bridge can ensure
that your guitar sounds and plays its best. By
following the steps outlined in this presentation,
you can set up your Les Paul Bridge with confidence
and achieve the desired result.

Setting up the Bridge on a Gibson Les Paul Guitar_Installation Guide

  • 1.
    Installation Guide ForLes Paul Bridge Setup
  • 2.
    Introducing Gibson LesPaul The Les Paul Guitar ● First mass produced solid body electric guitar. ● Created by Les Paul and manufactured by Gibson Guitar Corporation. ● Millions of Les Paul guitars have been sold since the 1950’s. Gibson Brands, Inc. (formerly Gibson Guitar Corporation) is an American manufacturer of guitars, other musical instruments, and professional audio equipment based in Nashville, Tennessee. Gibson was established in the late eighteen hundreds. Lester William Polsfuss, better known as Les Paul, was born in 1915 in Wisconsin. Paul is credited with many recording innovations. At the age of 26 he made the first electric body guitar, called ‘The Log’.
  • 3.
    Parts of aLes Paul Bridge Guitar The Les Paul Bridge consists of several components, including the bridge itself, bridge posts, bridge studs, guitar bridge saddles, and the guitar tailpiece. The bridge posts and studs are responsible for holding the bridge in place and allowing for height adjustments. The bridge saddles, located on top of the bridge, are the parts that the strings sit on and are responsible for intonation adjustments. The tailpiece is located behind the bridge and anchors the strings to the guitar
  • 4.
    Steps to Setupyour Gibson Les Paul Bridge Step 1: Remove the old strings Old strings must be removed before installing the new bridge. Loosen the tuning pegs and unwind the strings from the bridge. Once all strings are removed, remove the old bridge from the guitar. Step 2: Install the new bridge Insert the bridge posts into the corresponding holes in the guitar body. Next, place the bridge on top of the posts and tighten the screws that hold the bridge in place. Make sure the bridge is centered over the guitar body and that the distance between the
  • 5.
    Step 3: Adjuststring height Measure the distance between the bottom of each string and the top of the 12th fret using a ruler or caliper. Adjust the height of the bridge saddles to achieve the desired string height. Make sure to adjust each saddle individually to ensure that the string height is even across all strings. Step 4: Adjust intonation Play the open string and then play the same string at the 12th fret. If the note at the 12th fret is sharp, move the saddle back, and if it's flat, move the saddle forward. Repeat this process for each string until the intonation is
  • 6.
    Step 5: Checkstring alignment Check that the strings are aligned correctly over the fretboard. If any strings are out of alignment, adjust the saddle position accordingly. Step 6: Adjust the tailpiece Finally, adjust the tailpiece to achieve the desired tension on the strings. Tighten or loosen the screws that hold the tailpiece in place. Make sure that the tailpiece is level and not tilted.
  • 7.
    Step 7: Checkthe string action After adjusting the bridge height and intonation, check the string action. This refers to the height of the strings above the fretboard. Check that the strings are not too high or too low by playing each string at various points on the fretboard. Step 8: Adjust the truss rod If the string action is too high, you may need to adjust the truss rod. The truss rod is a metal rod that runs through the neck of the guitar and can be adjusted to change the curvature of the neck.
  • 8.
    Bottom Line A properlyset up Gibson Les Paul Bridge can ensure that your guitar sounds and plays its best. By following the steps outlined in this presentation, you can set up your Les Paul Bridge with confidence and achieve the desired result.