1. 56 AMERICAN ROSE | ROSE.ORG
Those of us who live in Con-
necticut and New England do so
because we love the changing sea-
sons. When I was a younger gar-
dener, I used to hate it when winter
rolled around because it seemed to
last forever. Over the years, though,
I have found that winter zips right
along just like the other three sea-
sons do. Our winters here can be
very severe or moderately temper-
ate, and the latter is what we always
pray for! I now look at winter as a
respite. My roses need their rest
during the winter season; I, their
caretaker, appreciate the rest too.
Spring can arrive here anywhere
from March until May. The impor-
tant thing to remember is that we
garden by our roses’ needs, not by
the date on the calendar. In Con-
necticut, we look to blooming for-
sythia as the signal to begin our
spring pruning, and by the time
that happens I just can’t wait to
get outside and get started. Spring
gardening for me is full of joy —
pulling back the winter protection
and pruning out any black or dam-
aged wood and pruning healthy
canes to an outward-facing bud.
This way, the new canes will grow
out away from the center of the
plant and help with air circulation
around the canes to hopefully keep
disease at bay. After spring prun-
ing, I seal the ends of the canes
with Elmer’s Glue. It dries clear and
prevents borers from drilling down
into the canes.
Spring is also planting time. I love
rose catalogs and study them from
early fall through the winter. I love
looking at pictures of new roses,
falling in love with the form and col-
ors and deciding where I will want
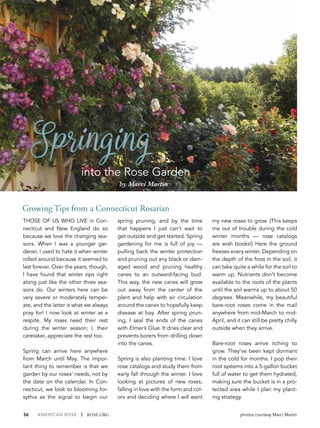
Springing
into the Rose Garden
by Marci Martin
Growing Tips from a Connecticut Rosarian
my new roses to grow. (This keeps
me out of trouble during the cold
winter months — rose catalogs
are wish books!) Here the ground
freezes every winter. Depending on
the depth of the frost in the soil, it
can take quite a while for the soil to
warm up. Nutrients don’t become
available to the roots of the plants
until the soil warms up to about 50
degrees. Meanwhile, my beautiful
bare-root roses come in the mail
anywhere from mid-March to mid-
April, and it can still be pretty chilly
outside when they arrive.
Bare-root roses arrive itching to
grow. They’ve been kept dormant
in the cold for months. I pop their
root systems into a 5-gallon bucket
full of water to get them hydrated,
making sure the bucket is in a pro-
tected area while I plan my plant-
ing strategy.
photos courtesy Marci Martin
2. MARCH/APRIL | 2016 57
I used to plant these babies directly
into the ground. As I live in a colder
area of the country, I always make
sure to plant my bud unions deeply.
This means I begin my winter pro-
tection program at planting time
when I dig a hole deep enough to
bury the bud unions 3 to 4 inches
below soil level. Whenever I plant,
I always make sure to use a lot of
compost, rotted manures and plen-
ty of water. Then would begin the
growing period, but it was always
slow because I was planting in cold
soil — that’s all I had. Roses plant-
ed in this manner in my garden in
March or April take quite a while
to get growing because it takes so
long for the soil to warm.
A number of years ago, when I be-
came the Staff Rosarian at Wood-
land Gardens in Manchester, CT,
I talked the manager into buying
quality bare-root roses that we
could pot up and grow on our-
selves. This manner gives our cus-
tomers a much better price than
reselling pre-growing roses from a
wholesale facility. That was my first
opportunity to see superior growth
in new roses early on in the spring.
I was given a plastic covered hoop
house and we started with a thou-
sand roses. As soon as the weather
warmed up, the plastic was cut
on one side of the house and the
steady breeze lifted it right off the
hoops, just like a giant kite! The
floor of my rose house was covered
with black landscape fabric, the
3-gallon containers were dark in
color, and the rich soil mix was dark,
as well. That year, in six weeks, we
were in bud and bloom. I was sold
out of roses by the middle of June.
Many years later, we still grow roses
in the same manner.
The reason this system works so
well in our area is because the
black fabric underfoot, the black
pots and the dark soil draw the
heat from the sun. The solar heat
warms the soil in the pots and stim-
ulates the roots to grow. The pots
fill in with roots really quickly, and
then there is superior top growth
as well!
Planting in this manner gives really
spectacular roses the first year. At
home, I either “cook” my new roses
in pots on my driveway (if my hus-
band allows) or on landscape fabric
in direct sun in the back yard. Five
or six weeks after potting up, I have
really large, healthy roses ready to
plant directly in the garden. While
they are in their pots, I always wa-
ter well every day. It’s essential that
there be a solid root ball when trans-
planting so no white feeder roots
are damaged. I make sure to dig a
hole large enough to bury the bud
union while transplanting and then
every day I watch my garden grow.
I am in love with my roses, and I
need to go out and check them on
a regular basis. Spring is such a treat
after the wicked winter winds and
the anticipation is always mighty.
Most years, for me, the magic lasts
all season. And after 38 years of
growing roses, I am still amazed
how our poky sticks grow the most
magnificent flowers in the world.
TOP TO BOTTOM: Prune the rose to 3 or 4 good canes and prune the roots
to fit the container. Fit the roots in the container covering them with qual-
ity soil; pack it in and water it well. Coat the freshly cut canes with Elmer’s
Glue to keep out boring insects. Place your roses in a sunny area.