Video Caption Widget Concepts
•
1 like•300 views

The document proposes three concepts for a video overlay widget that allows users to access captions and other features. Concept 1 displays language options in clusters and keeps display options like font size at the same level. Concept 2 integrates the widget more seamlessly, showing options contextually. Concept 3 uses a conventional branched menu approach with dedicated spaces for sections. All concepts aim to provide accessible captions and translations across different video sizes.

Recommended
More Related Content
Similar to Video Caption Widget Concepts
Similar to Video Caption Widget Concepts (20)
Recently uploaded
Recently uploaded (20)
Video Caption Widget Concepts
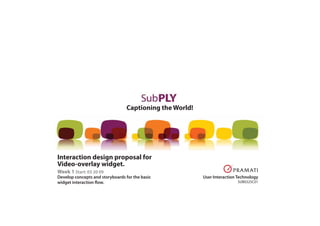
- 1. Captioning the World! Interaction design proposal for Video-overlay widget. Develop concepts and storyboards for the basic widget interaction flow. User Interaction Technology SUB0325C01 Week 1 Start: 03 20 09
- 2. Page 1 CONCEPT 1 Clusters In this interaction model, the user previews list of available caption types for all languages at once, and selects the caption/narration type. Display options such as Change Font Size and Auto Translate are kept at the same level as the main selection menu. Use of icons and typography aid users who have limited knowledge of languages, and for improved accessibility.
- 3. Page 2 Stage 1 Widget Initiation 1.1 The overlay widget loads on the video screen at bottom right. If captions are sponsored, the sponsor’s logo will appear after the initial text“captions (and narrations) brought to you by”in the designated Advt display area. 1.2 Users can collapse the Advt area. It can be expanded by clicking on the icon. Video dimension 415px X 313px 1.3 The icons and indicate captions and voice overs are available for this video. More icons can be added for future PlyMedia services. cc Captions and narrations brought to you by cc cc s cc s
- 4. Page 3 Stage 2 Accessing the language options 2.1 On hovering over the caption/voice- over icon area, the widget expands to show list of available languages, possibly with a scroll bar. Also, A fade-off has been added to the bottom and top edges of the list to indicate“more to follow”. When you open the list, the Advt area collapses to the bottom of the screen. Clicking on the“s”icon restores the Advt.
- 5. Page 4 2.2 Hovering over languages highlights each row. On delayed hover or on click, the row expands to show various captioning options available. Options not available are shown as deactivated. 2.3 User can select any one of the captioning options available in combination with the voice-over feature. 2.4 Tool-tips appear on delayed hover on the option icons. This will help users to get familiar with the icons.
- 6. Page 5 2.5 On selecting an option, the widget loads the subtitle file. A loader graphic indicates progress. Stage 3 Loading subtitles 3.1 The menu panel collapses to the state in [1.1] then the mouse cursor is moved away. The caption icon turns to green ( ). The voice-over, if exists, turns on by default. If the option is not available on the selected language, the voice-over icon is greyed out ( ).
- 7. Page 6 3.2 After a delay of 3-4 seconds, the menu panel collapses to a compact mode to allow the captions to take a wider screen area. 3.3 After few more seconds the menu panel fades out from the screen. It reappears when the mouse hovers over the caption. Hovering over the icon reactivates the language selection panel.
- 8. Page 7 Enabling Auto-Translation Users can use the Auto-translate feature available on the language selection menu to translate sub titles from one language to another. User can choose from the list of languages available for Auto-translation. Once the selection is made, the panel reflects the base language and the translated language. Other Features
- 9. Page 8 Personalization and Customization Use of minimum colors and flat tones allow for easy customization of the widget. Furthermore, at the user end, the widget menu panel can be dragged to all 4 corners of the video display area for best viewing. The widget can be embedded to the smaller video sizes with minimum modifications. Video dimension 256px X 144px
- 10. Page 10 CONCEPT 2 Contextual This option integrates the widget interaction more seamlessly with the video area. Various caption/audio options are within a few clicks and do not obstruct viewing experience greatly. A default language and voice over can be activated when the video loads (IP detection?) and let the user to switch to enhanced captions or display settings from there on. This interface may require a bit more learning as features appear just in time.
- 11. Page 11 Stage 1 Widget initiation 1.1 The overlay widget loads into video screen’s bottom edge. If the captions are sponsored, the sponsor’s logo will appear after the text“captions (and narrations) brought to you by”in the designated ad display area. Stage 2 Accessing the language options 2.1 On click over the TV icon, the list of languages in which captions are available gets displayed. If the language has an audio option also available, it is indicated with the microphone icon. The user will be able to scroll through the list by taking the mouse cursor to the top and bottom edges of the list.
- 12. Page 12 2.2 On selection of a language the list collapses and the widget starts loading the captions in that language. The default caption type that gets loaded will be the closed captions. Stage 3 Enabling the contextual options 3.1 On complete loading of captions, the TV icon changes to yellow. A contextual menu panel with available captioning options slides out from the TV icon once the captions are loaded.
- 13. Page 13 3.2 Users can change caption type. All items on the menu, except text size button, follow a toggle ON/OFF interaction. Text size can be changed for improved readability. 3.3 This panel slides in after 3 seconds if no action is taken. It can be re-initiated on hover over the TV icon again. A different language can be selected by clicking on the TV icon again.
- 14. Page 14 Stage 4 Turning the Advt panel off 4.1 On hover over the sponsor logo, option to minimize the sponsor panel appears.
- 15. Page 15 If no activity happens on the caption area, the TV icon and the sponsor logo disappears. They reappear on mouse-over. Language options can be activated on clicking the TV icon.
- 16. Page 16 Stage 5 Auto-Translate 5.1 Auto-translation option is provided as the last item in the list of languages available. 5. 2 User selects the Auto-translate option
- 17. Page 17 5. 3 Auto translate link slides to the top edge while a secondary language selection list slides down from the top 5. 4 Once the base language selection is made, another list slides down to display target languages.
- 18. Page 18 5. 5 Once the selection is made, the list panel collapses and the Auto translate panel slides down. 5. 6 Once the translation is available, the contextual panel slides in to display the options and slides back.
- 19. Page 19 The widget can be embedded to the smaller video sizes with very minimum modifications. Options for Karaoke, extended captions varied text sizes and auto translation can be excluded in the small format.
- 20. Page 20 CONCEPT 3 Branched Conventional menu approach, much similar to many portable media players lets users access various captioning options in a sequential manner. Compact yet dedicated space available for individual sections make the player more readable across all kinds of video environments.
- 21. Page 21 Stage 1 Widget initiation 1.1 The overlay widget loads into video screen’s top edge. If captions are sponsored, the sponsor’s logo will appear after the text “captions (and narrations) brought to you by”in the designated Advt display area. Stage 2 Accessing the language options 2.1 Hovering over the graphic on the top right corner displays the expanded menu with list of languages available as captions.
- 22. Page 22 Stage 3 Accessing the sub-menu structure 3.1 On selection of a language the sub level menu opens up with all the captioning and audio settings. By default closed captions are turned on and will be loaded to the bottom edge as soon as the file is loaded. The text size can be toggled between“(S) mall”,“(M)edium”and“(L)arge”. Stage 4 Loading the subtitle and showing the caption mode ON 4.1 On hovering out from the menu area, the panel collapses and the CC text on the panel glows to show that the caption is turned on. After 3 seconds the panel will be faded out. The panel appears back on hovering over the caption area at the bottom.
- 23. Page 23 Stage 5 Auto Translate 5.1 Auto translate is provided as the last option in the language selection menu screen. 5.2 Using two drop down boxes, users can choose the base language and the translation language. 5.3 Loading graphic is displayed while the Auto-Translation takes place.
- 24. Page 24 The widget can be embedded in smaller video sizes with minimum modifications.