Long Form Specification For Structural Glazed Tile
•
0 likes•7 views

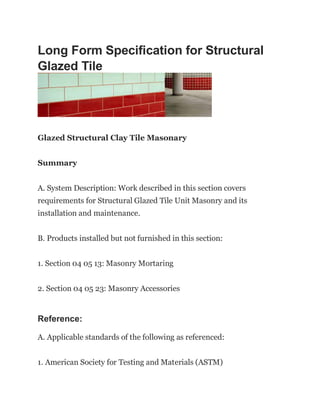
Structural Glazed Tile: SGT, extruded and manufactured clay masonry unit with a ceramic glazed face that is a structural unit which can be load bearing masonry. Work described in this section covers requirements for Structural Glazed Tile Unit Masonry and its installation and maintenance.

Recommended
Recommended
More Related Content
Similar to Long Form Specification For Structural Glazed Tile
Similar to Long Form Specification For Structural Glazed Tile (20)
Recently uploaded
Recently uploaded (20)
Long Form Specification For Structural Glazed Tile
- 1. Long Form Specification for Structural Glazed Tile Glazed Structural Clay Tile Masonary Summary A. System Description: Work described in this section covers requirements for Structural Glazed Tile Unit Masonry and its installation and maintenance. B. Products installed but not furnished in this section: 1. Section 04 05 13: Masonry Mortaring 2. Section 04 05 23: Masonry Accessories Reference: A. Applicable standards of the following as referenced: 1. American Society for Testing and Materials (ASTM)
- 2. 2. Brick Industry Association (BIA) 3. Underwriters Laboratories, Inc. (UL) 4. Ceramic Glazed Masonry Institute (CGMI) 5. Building Code Requirements for Masonry Structures (ACI 530– 05/ASCE 5–05/TMS 402–05) Definitions: A. Terms 1. Structural Glazed Tile: SGT, extruded and manufactured clay masonry unit with a ceramic glazed face that is a structural unit which can be load bearing masonry. 2. Glazed Face: Exposed ceramic glazed face(s) on SGT.
- 3. 3. Bed Joint: Horizontal mortar joint between two SGT. 4. Head Joint: Vertical mortar joint between two SGT. Submittals: A. Strap Samples: Submit three samples to indicate the approximate range of color and texture to be expected in the completed wall for each color or texture. B. Certificates: 1. Material Safety Data Sheet (MSDS) 2. Certification Letter: Submit a certified letter from manufacturer prior to delivery of SGT to jobsite for compliance of specification requirements. Quality Assurance: A. Sample Field Panel: Construct a wall panel 4’ (1.2m) wide and 4’ (1.2m) high for SGT work. Locate as directed by Architect. B. Panel to indicate quality representation of: 1. SGT color and texture range.
- 4. 2. Bonding pattern. 3. Mortar color. 4. Joint tooling. 5. Reinforcement/Ties. 6. Workmanship. C. Sample Field Panel should be erected at least 14 days prior to shipment of the SGT to the jobsite. If necessary, additional panels will be erected until Architect approval is received. D. Approved Sample Panel shall act as the standard of comparison and quality to be expected throughout the work. E. Approved Sample Panel should be maintained through job completion and not destroyed until instructed by the Architect. F. Erect separate Sample Panels for each color and texture, mortar color or combinations specified or as indicated on drawings.
- 5. Delivery, Storage and Handling: A. Deliver SGT to jobsite as packaged by manufacturer. Offload SGT packages using equipment that will not damage SGT. No SGT is allowed to be in direct contact with the ground. Do not double stack cubes of SGT. B. Cover SGT with non-staining waterproof membrane covering. Keep units dry. Allow air circulation around stacked units. Installation of wet or stained SGT is prohibited. C. Keep SGT units in the individual cardboard packaging provided by the manufacturer until the unit is ready to be laid in the wall. Never use brick tongs or “pitch” the SGT to upper levels of scaffolding. Project Conditions:
- 6. A. Environmental requirements. Use normal procedures when temperatures are between 100°F to 40°F (37.8°C to 4.4 C) (see current reference BIA Technical Note 1): 1. See Brick Industry Association Technical Note 1, Table 1 “Requirements for Masonry Construction in Hot and Cold Weather” for temperatures outside this range unless specific written approval from Architect. (Reference: BIA Technical Notes for Guide Specifications for Brick Masonry.) B. Take all precautions necessary to protect units from damage. C. Handle and store in protective cartons or trays until actual installation in the wall. D. Damaged units will not be accepted in the wall. Products: Structural glazed tile: A. Pattern or Type: B. As detailed and required (running bond or stack bond). C. Characteristics:
- 7. 1. Meet ASTM C-126 for grade (S) Select (or grade [SS] Sized Select) quality. 2. Must meet ASTM C-84 (UL723) requirements and rated zero flame spread, zero smoke developed and zero fuel contribution. Also will not release any toxic or noxious fumes when burned at 2000°F (1093°C). 3. Nominal Face stretcher dimensions standard 6T Series (Horizontal or Vertical Cell) 5–1/3” (135mm) height x 12” (304mm) length, or 4W Series (Horizontal or Vertical Cell) 8” (203mm) height x 8” (203mm) length, or 8W Series (Horizontal or Vertical Cell) 8” (203mm) height x 16” (406mm) length, as specified. All dimensions are +/- allowable tolerance. 4. Nominal Bed Depths: 2” (50mm), 4” (101mm), 6” (152mm) or 8” (203mm) thickness (limited production of 8W in 8” [203mm] bed depth). As required. 5. Shapes: Furnished as shown on the plans in accordance with manufacturers current standard production. All external corners, sills and jambs shall be bullnose (or square), unless otherwise noted. Lintels and internal corners shall be square (or bullnose), unless otherwise noted. The base course is straight (or coved [recessed or non- recessed], as required) as shown on the drawings. 6. Color(s) to be selected by Architect from Elgin Butler Company current standard color offering.
- 8. 7. Approved manufacturer: a. Elgin Butler Company, Elgin, Texas, (512) 285–3356. b. Or approved equal. Accessories: A. Mortar: As specified in mortar section. B. Joint Reinforcement: for stack bonding pattern on a bearing wall, or as required, use continuous horizontal joint reinforcement in lengths of 10 to 12‘ (3 to 4 m). Use #9 gauge wire or 3/16” (5 mm) diameter wire. Ladder-type (or Tab-type) horizontal joint reinforcement recommended. Masonry joint reinforcing as specified in Masonry Accessories section. C. Wall Ties for multi-wythe wall construction: Installed as per BIA recommendations use corrosion resistant metal ties, minimum of one 3/16” (5mm) diameter steel wall tie in every 4–1/2 ft2 (m2); for vertical-cell hollow masonry units the tie shall be rectangular or U- shaped, or for horizontal-cell, solid masonry units shall be rectangular or Z-shaped (Reference BIA Tech Note 21C). Maximum distance of 16” (406mm) vertically and 36” (913mm) horizontally. D. Lateral support, as required.
- 9. Execution: Preparation : A. Protection of work: 1. Protect the surfaces of the installed SGT. Cover freshly laid weather exposed masonry at the end of each day or the start of each shut down period, with non-staining waterproof material in such a manner which will ensure that the covering will overhang the masonry not less than 2’ (50mm) on each side of the masonry. Anchor on each side of wall. Finished walls to be covered with #15 felt paper and erect wooden barriers to protect walls at areas that are subject to large amounts of construction traffic or material movement. Protect glazed face from exposure to welding burns, stains, etc. Installation: A. Workmanship: 1. Lay only dry masonry units. 2. Lay masonry plumb, level and true to line. 3. Lay units in bonding pattern, as specified.
- 10. 4. Cut units with masonry saw using a wet diamond blade. Do not use units less than 4” in length. B. Build in work of other trades indicated to be built-in with SGT as work progresses. C. Mortar Joints: 1. Lay joints of each first course in full width bed of mortar. 2. Horizontally cored units: a. Bed Joint: Full b. Head Joint: Face shell thickness. 3. Vertically cored units: a. Bed Joint: Face shell thickness. b. Head Joint: Full 4. Remove and replace mortar with fresh mortar where adjustment must be made after mortar has started to set. 5. Keep bed and head joints uniform in width, except for minor variations required to maintain bond and locate returns.
- 11. 6. Both bed and head mortar joints standard thickness of 3/8” (10mm) except for 6T Series use 5/16” (8mm), +/- 1/16” (1.6mm) or to course out with the existing material. D. Joint Treatment: 1. Tool or strike mortar joints on exposed face when they are “thumb print” hard. 2. Tool all SGT joints concave using a non-metallic tool 1–1/4” (31mm) in diameter or larger unless otherwise noted. 3. Sanitary Epoxy Mortar, where required: a. Rake mortar joints 1/4” (6mm) to 3/8” (10mm) deep. Mix and install vertical wall, non-sag sanitary epoxy grout in strict accordance with manufacturer’s directions. E. Removal of Existing Structural Glazed Tile: 1. Cut out existing material where indicated on the drawings. Do not leave pieces of tile in the wall smaller than 4” (101mm) in length. Use care in cutting out units at the mortar joints as to not chip the existing tile. Chips larger than a 3/8” (10mm) square will require replacement of the units. Smaller chips may be repaired. Contact the manufacturer for instructions.
- 12. Application: A. Acceptable Tolerances: 1. Walls must be straight in plane. 2. Maximum variation from plumb: 1/4” (6mm) in 10’ 0” (3.05m); not exceeding 3/8” (10mm) in 20’ 0” (6.1m). 3. Maximum variation from level: 1/4” (6mm) in 20’ 0” (6.1m); not exceeding 1/2” (13mm) in 40’ 0” (12.2m) or more. 4. Maximum variation in linear building line from location indicated: 1/4” (6mm) in 20’ 0” (6.1m). Cleaning: A. It is intended that with careful adherence to this specification that extensive final cleaning will not be necessary. During construction, wipe glazed surface clean after tooling of joints or within 30 minutes after laying, with course rag. Keep wall clean as work progresses to avoid more difficult cleanup later. Use no metal scrapers, abrasive powders or unauthorized cleaning agents. Use wooden paddles or scrapers to clean away mortar residue or lumps. Wash with clean water. A mild detergent may be
- 13. used. Rinse with clean water. Wipe with clean cloths, sponges or similar item. B. In event of unexpected contaminations of SGT walls, perform any cleaning with other than a non-metallic scraper, stiff nylon or natural bristled brush or wooden paddle only after approval by Architect and necessary tests to insure against any wall damage.